Learn how to carve a replacement open-slot saddle and deal with the particular challenges of this old-school design.
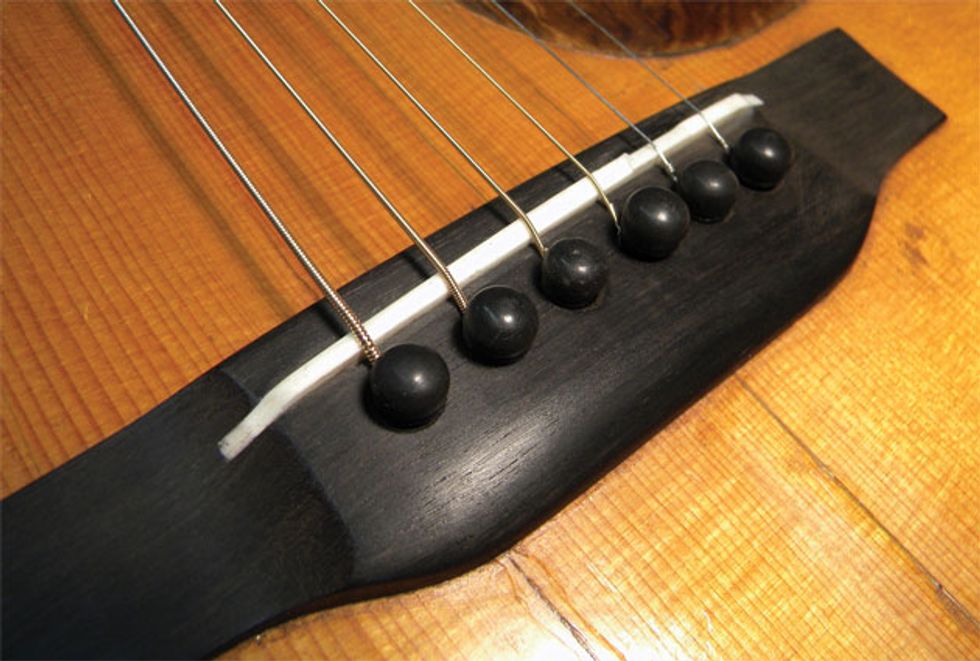
Fig. 1. This 1937 Martin 000-18 has an open-slot saddle. Notice how the saddle’s ends are exposed,
rather than enclosed in a routed slot.
Carving a new saddle for any flattop guitar takes skill and patience, but crafting an open-slot saddle—the type that’s found on vintage Martins and many other older guitars—is especially tricky. Most modern flattops have a drop-in saddle that’s housed in a slot routed into the bridge. A drop-in saddle is surrounded on its front, back, and both ends by the bridge. By contrast, the ends of an open-slot saddle are exposed and tapered to match the contour of the bridge itself (Fig. 1).
A client recently brought in a beautiful sounding 1937 Martin 000-18 that needed a new saddle because the action was too low. This guitar provides us a perfect opportunity to discuss the process and challenges of creating an open-slot saddle. The owner wanted a “compensated” saddle to make the guitar play in tune, so we’ll cover that as well.
Before starting a project like this, it’s important to take four primary measurements: neck relief, action at the 12th fret, action at the 1st fret, and intonation. Gathering this baseline information will give you a sense of what the project will entail—what’s working and what needs fixing.
Remember: Always tune to pitch before taking these measurements.
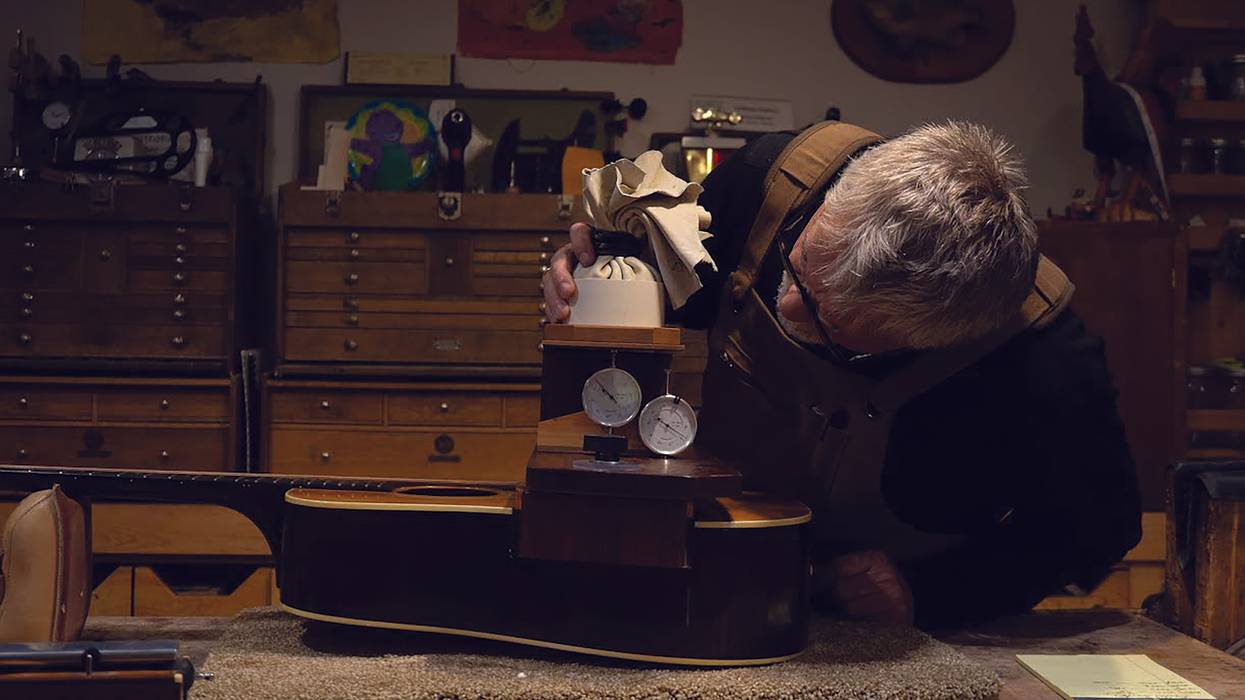
Measuring relief. Start by placing a capo directly on the 1st fret. Next, hold down the low E string at the last fret and measure the greatest distance between the top of the frets and the bottom of the string. (The largest gap typically occurs somewhere between the 7th and 10th frets.) The easiest way to do this is with a String Action Gauge—a handy tool available from stewmac.com. If you don’t have one, a 6" machinist steel ruler will also work.
This 000-18 had .010" of relief, which is acceptable, but not ideal. For flattops like this, I prefer .015" of relief, but because this lovely old Martin was made in ’37, it doesn’t have an adjustable truss rod. So we’re going to have to live with this .010" relief—no change here.
Measuring action. When you’re carving a new saddle, you have to know how much taller or shorter it needs to be compared to the one you’re replacing. You determine this by measuring the action at the 12th fret with the original saddle installed. Again, use a String Action Gauge or precision steel ruler to read the gap between the top of the 12th fret and the bottom of the two E strings.
On this vintage 000-18, the high E measured 3/64" and the low E was 4/64". This action was too low—for the guitar to play without a lot of string rattle, the saddle should be taller. An action of 4/64" on the treble, and 5/64" on the bass side is ideal.
Once I knew how much taller the new saddle would need to be, I turned to the string nut. Here the action was perfect: 1/64" on the high E and 2/64" on the low E string.
Measuring intonation. The final step of the evaluation is to check intonation with a strobe tuner. First tune each string using its 12th-fret harmonic. Next, fret each string at the 12th fret and compare the fretted note to its corresponding harmonic. Using each harmonic as a benchmark, check the fretted note against it. If there’s a difference, determine the deviation in cents (a cent is 1/100th of a semitone) and write it down.
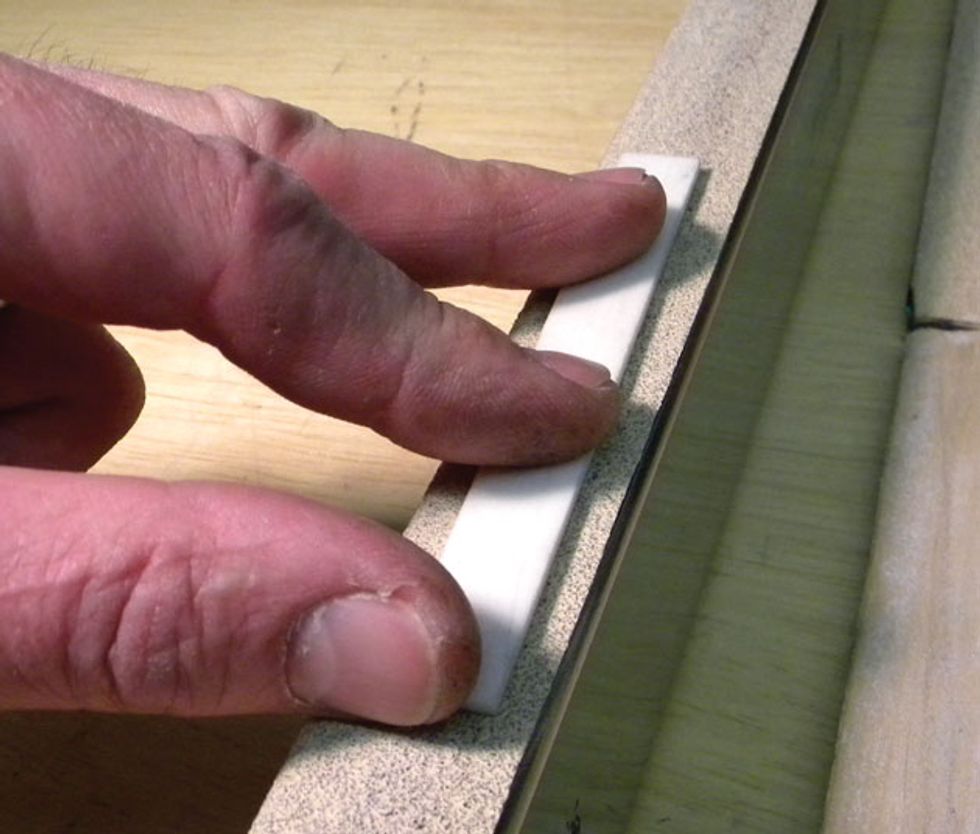
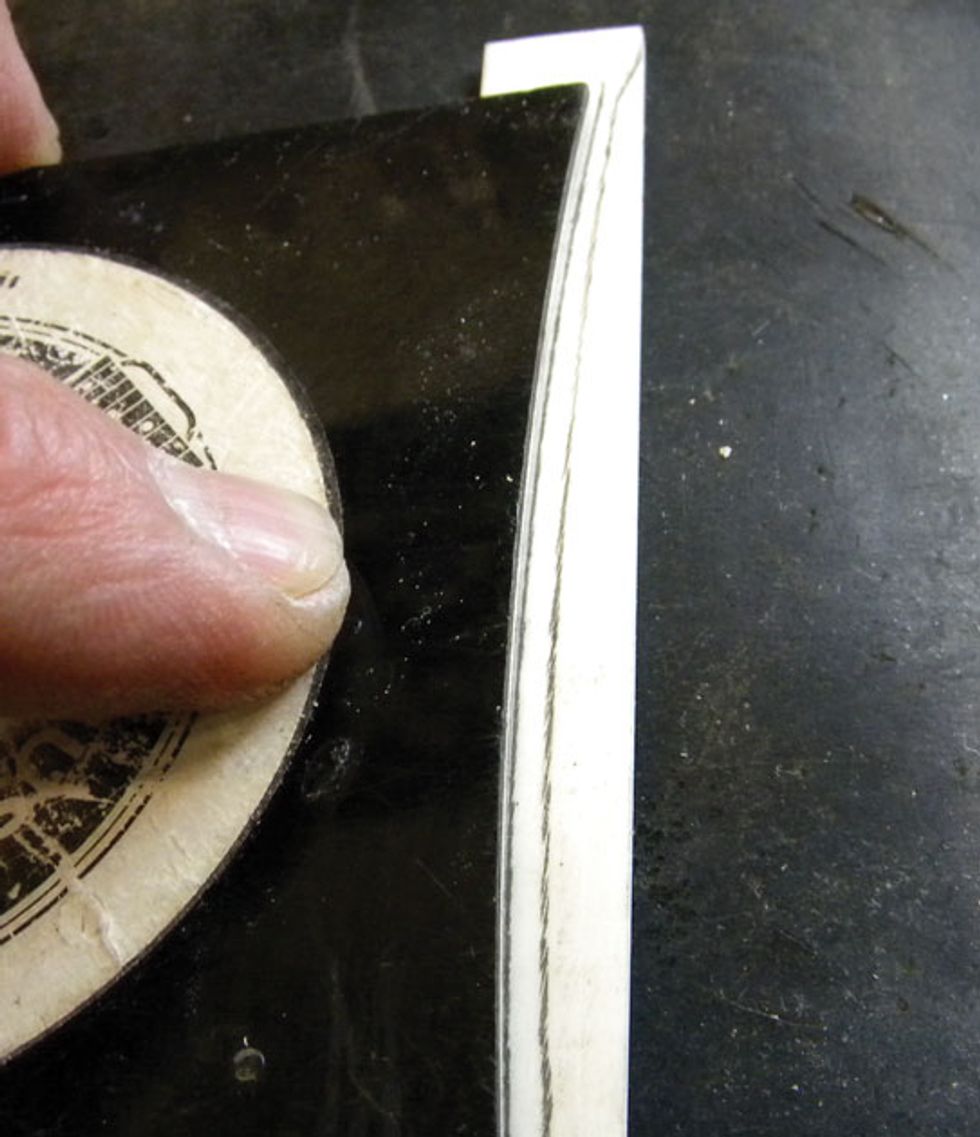
Fig. 2. Using 80-grit paper to sand the new bone saddle blank to the correct thickness.
In this case, the low E, A, and B strings were sharp and the G and D strings were flat. The good news for me was that none of the strings were off more than a few cents, so I knew setting the intonation on the new saddle wouldn’t be a problem.
Crafting the saddle. Begin by sanding the bone stock to the correct thickness of the saddle slot. I do this on a flat metal bar with 80-grit self-adhesive sandpaper (Fig. 2). Then I move to 600-grit paper to polish the saddle. If you don’t have a metal bar to mount your self-adhesive sandpaper, a 1/4" piece of glass will also work well. If you opt to use the top of your bench for this, make sure it’s dead flat, otherwise the saddle won’t fit properly.
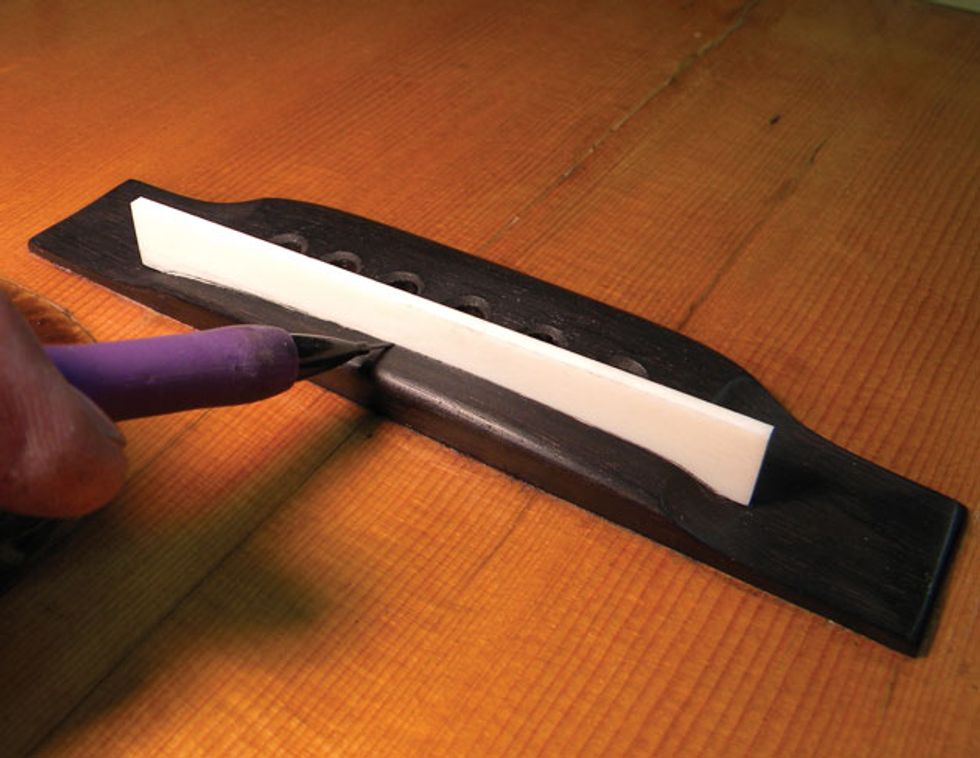
Fig. 3. Tracing the bridge’s contours onto the saddle blank.
Once you have the saddle sanded to the correct thickness, place it in the slot and trace along the top of the bridge with a mechanical pencil (Fig. 3). The resulting line will give you a template illustrating where to carve the open ends and also provide a baseline for the saddle height.
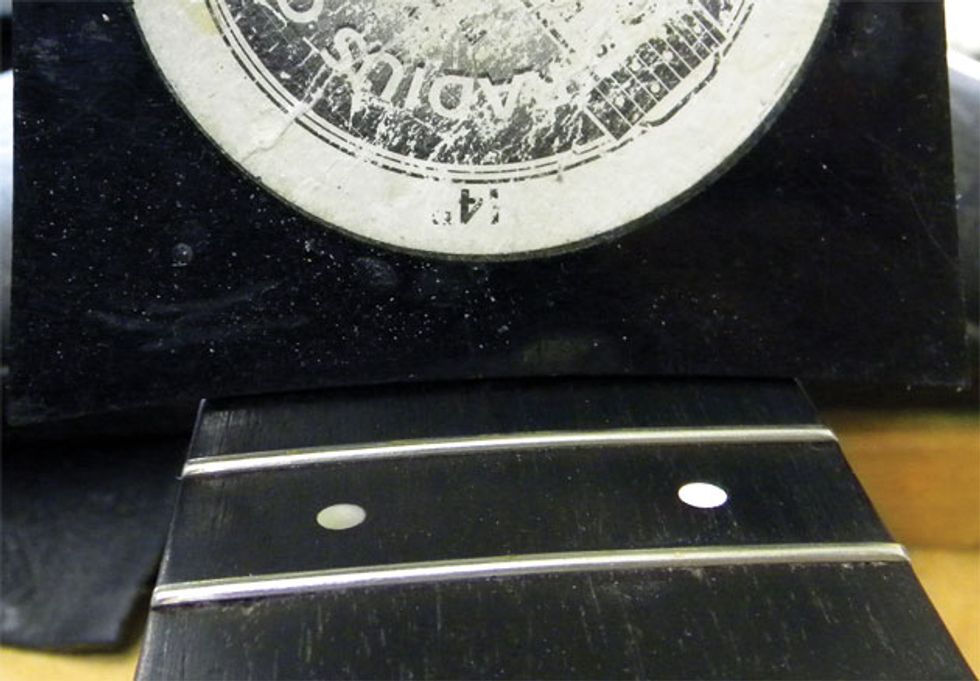
Fig. 4. Measuring fretboard radius.
The next step is to determine the fretboard’s radius. This is a critical measurement because the saddle must match this radius for the action to be correct across all six strings. You need a radius gauge to take this measurement (Fig. 4). Various types of radius gauges are available from luthier supply companies, and if you search online you’ll also find free plans for crafting your own.
Fig. 5. Transferring the fretboard radius to the saddle blank at the height required for the new action, which is calculated during the initial evaluation. In this case, the new saddle will measure 4/64" on the treble side and 5/64" on the bass side.
This Martin’s fretboard has a 14" radius. Knowing I wanted an action of 4/64" on the 1st string and 5/64" on the 6th, I added 2/64" to the height of the original saddle and then marked a 14" curve on the new blank (Fig. 5). Adding 2/64" to the original numbers gave me 1/64th" extra height to work with, a slight margin that would allow me to confidently shape and file the saddle down to my target specs.
Tip: When carving a bone saddle, it’s a good idea to add a little extra to your calculations. It’s easier to remove excess material than begin anew.
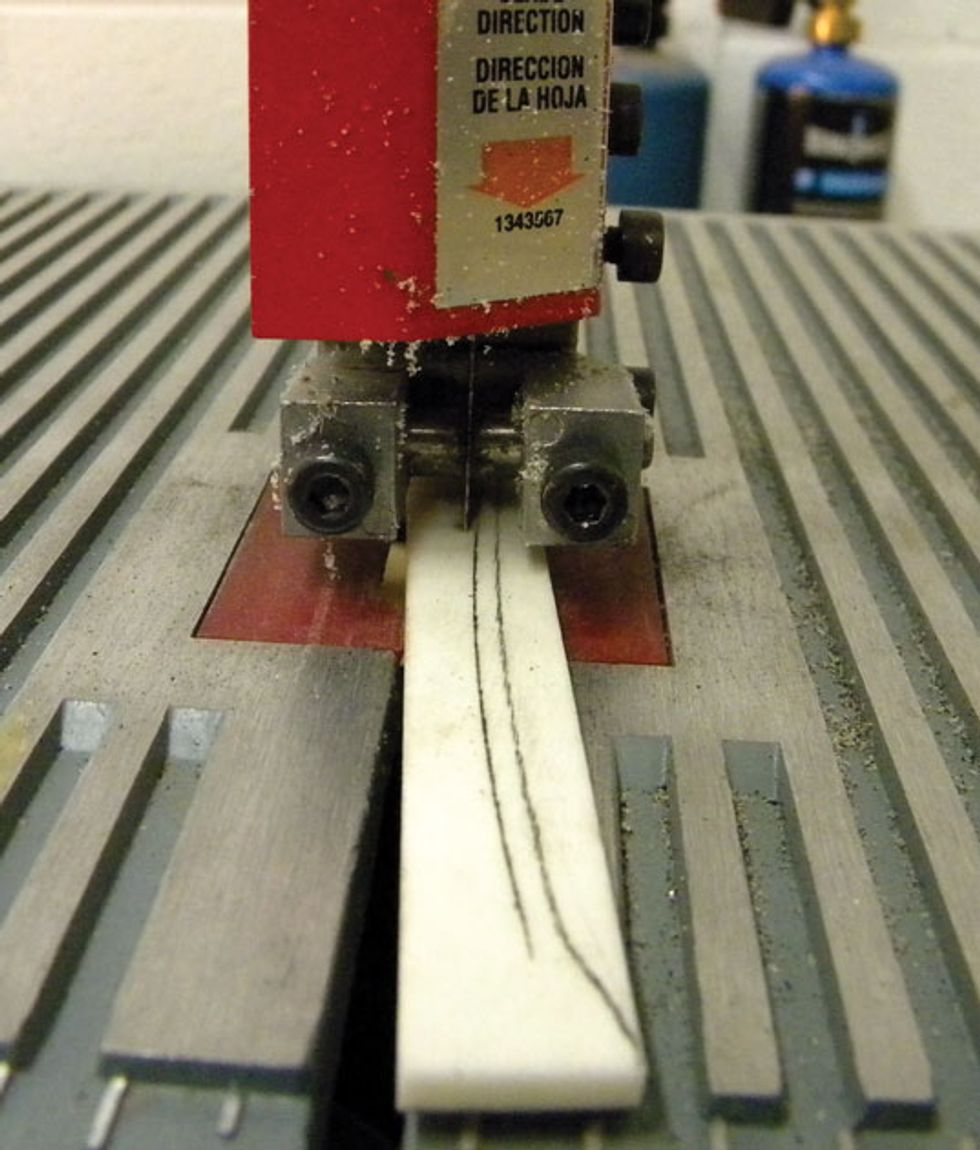
Fig. 6. Removing excess material from the saddle blank. You can do this by hand with a fine-tooth hobby saw.
Once the saddle is marked with the radius line at the desired height, you’re ready to cut down the blank. I use my shop band saw for this (Fig. 6), but you can manually trim off the excess material using a fine-tooth hobby saw.
To finish the basic shaping job, I like to flip the saddle upside down and sand the top on a 14" radius block fitted with fine self-adhesive sandpaper. This ensures a smooth surface and accurate radius. Radius blocks are available online, as are instructions to make your own, if you’re so inclined.
Once the top is shaped, slide the new saddle into its slot. Restring the guitar and check your action. Important: If the action is still too high, do not sand the bottom of the saddle. On an open-slot saddle, always remove material from the top of the saddle. Remember, the finished saddle has curved ends—which we’re about to finalize—and filing the bottom of the saddle will mean our “faded” ends will “fade away” and not match the bridge curves.
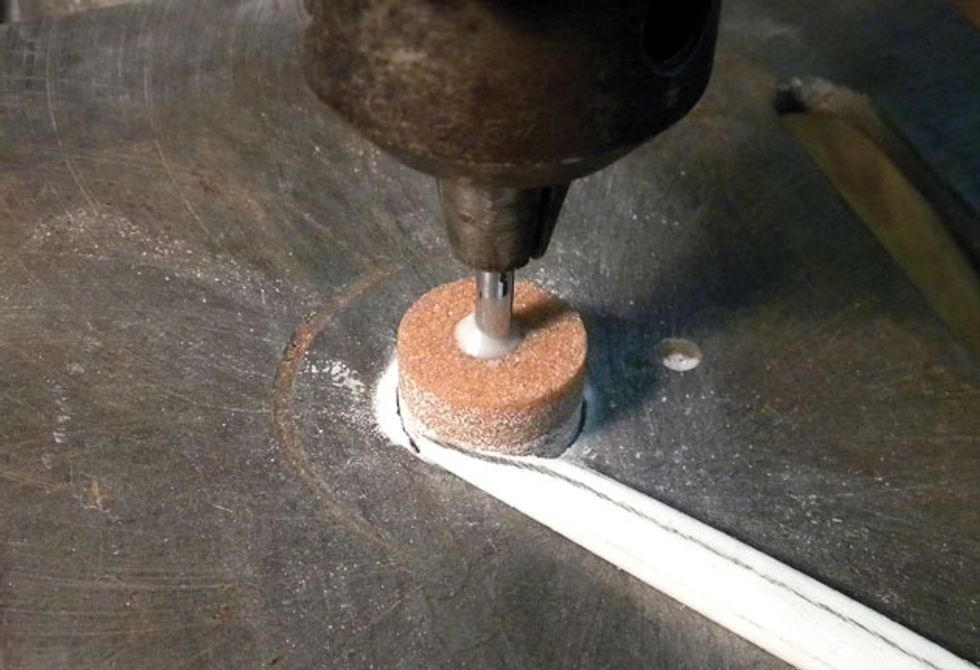
Fig. 7. Shaping the saddle ends to match the bridge contour on a drill press.
Another way to do this is with a Dremel rotary tool.
To carve those nice curves for each end of the saddle, I use a small spindle sander attached to my drill press (Fig. 7). Another option is to use a Dremel rotary tool, which also offers a high degree of control and precision. Go slowly and check your work frequently by fitting the saddle in the slot and comparing its ends to the bridge’s contours.
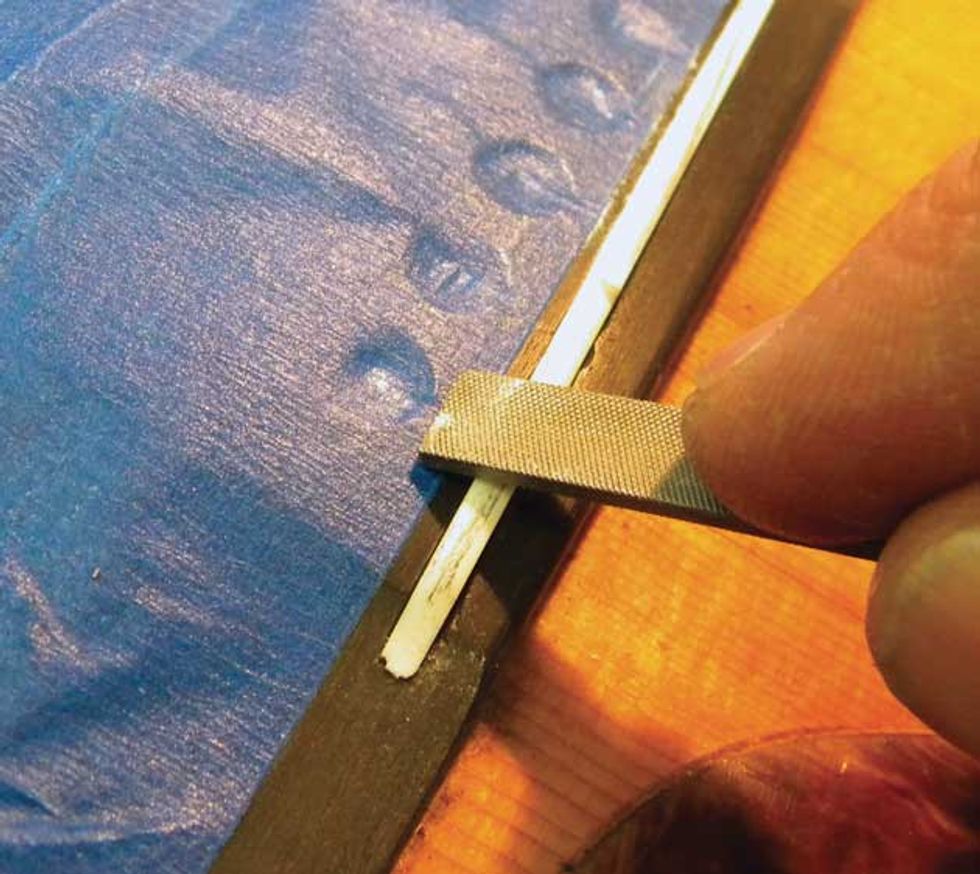
Fig. 8. Each string’s intonation point can be subtly shifted by removing material from either the front or rear of the saddle.
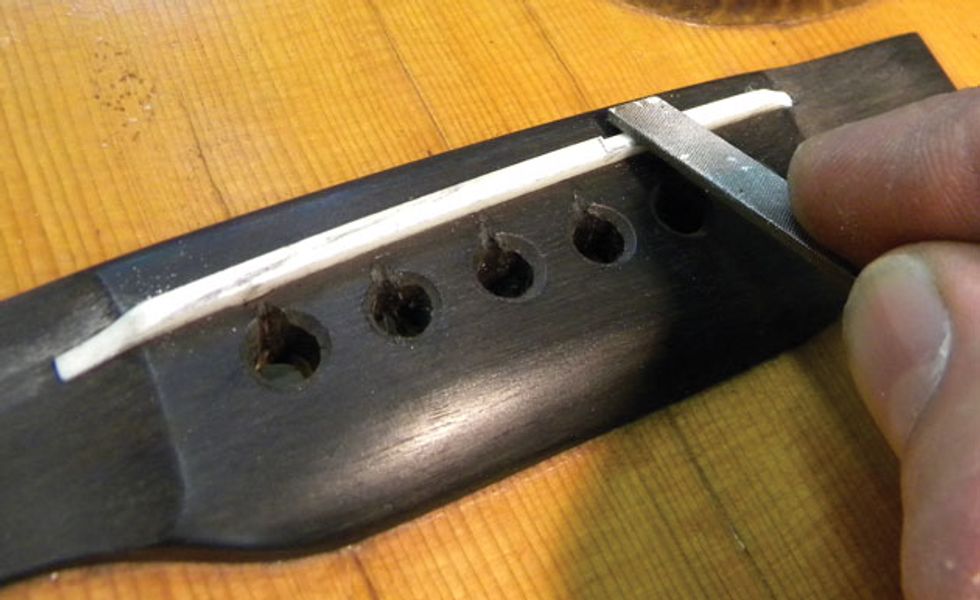
Carving new intonation points. After the saddle ends are properly contoured, it’s time to compensate the saddle. With the saddle in the slot, use a miniature flat file to carve the intonation points for each string (Fig. 8), based on the numbers you gathered earlier.
Each string typically emerges from the pin hole at a unique angle, and you want the contact point on the rear of the saddle to match this angle for every string. If the point of contact is too shallow or too steep, it can cause tuning problems and string breakage. By laying your file against both the pin hole and saddle contact point, you’ll be able to visually determine the correct angle for each string. Cover the pin holes on the bridge with a strip of painter’s tape. This way, if you slip when carving the angles, it won’t scar the bridge.
Fig. 9. Here, the B string’s intonation point is moved back toward the pin holes to extend the vibrating length of the string and slightly lower the pitch of notes fretted in the higher registers.
Earlier I mentioned the intonation was a little off on the 000-18’s original saddle. By filing the contact points forward for the flat strings and back for the sharp strings—especially the B string (Fig. 9)—I was able to improve the intonation. As you adjust the contact points, keep this simple rule in mind: When flat, move toward the neck. When sharp, move toward the pins.
To watch a video with a detailed, step-by-step explanation of how to carve the intonation points on a bone saddle, visit PG’s YouTube channel and watch “DIY: How to Set Up and Intonate an Acoustic Guitar.”
The wrap. I put new strings on the 000-18 and checked the intonation on my strobe tuner. Overall, the guitar played and intonated great, and it looked classy with its new saddle. Even if you don’t attempt work like this yourself, knowing what’s involved helps you communicate better with your local guitar tech. The more you understand about how your guitar is constructed, the easier it is to coax great sounds from it.
Stompboxtober is finally here! Enter below for your chance to WIN today's featured pedal from Diamond Pedals! Come back each day during the month of October for more chances to win!
Diamond Pedals Dark Cloud
True to the Diamond design ethos of our dBBD’s hybrid analog architecture, Dark Cloud unlocks a new frontier in delay technology which was once deemed unobtainable by standard BBD circuit.
Powered by an embedded system, the Dark Cloud seamlessly blends input and output signals, crafting Tape, Harmonic, and Reverse delays with the organic warmth of analog companding and the meticulous precision of digital control.
Where analog warmth meets digital precision, the Dark Cloud redefines delay effects to create a pedal like no other
Fuchs Audio introduces the ODH Hybrid amp, featuring a True High Voltage all-tube preamp and Ice Power module for high-powered tones in a compact size. With D-Style overdrive, Spin reverb, and versatile controls, the ODH offers exceptional tone shaping and flexibility at an affordable price point.
Fuchs Audio has introduced their latest amp the ODH © Hybrid. Assembled in USA.
Featuring an ODS-style all-tube preamp, operating at True High Voltage into a fan-cooled Ice power module, the ODH brings high-powered clean and overdrive tones to an extremely compact size and a truly affordable price point.
Like the Fuchs ODS amps, the ODH clean preamp features 3-position brite switch, amid-boost switch, an EQ switch, high, mid and low controls. The clean preamp drives theoverdrive section in D-Style fashion. The OD channel has an input gain and outputmaster with an overdrive tone control. This ensures perfect tuning of both the clean andoverdrive channels. A unique tube limiter circuit controls the Ice Power module input.Any signal clipping is (intentionally) non-linear so it responds just like a real tube amp.
The ODH includes a two-way footswitch for channels and gain boost. A 30-second mute timer ensures the tubes are warmed up before the power amp goes live. The ODH features our lush and warm Spin reverb. A subsonic filter eliminates out-of-band low frequencies which would normally waste amplifier power, which assures tons of clean headroom. The amp also features Accent and Depth controls, allowing contouring of the high and low response of the power amp section, to match speakers, cabinets andenvironments. The ODH features a front panel fully buffered series effects loop and aline out jack, allowing for home recording or feeding a slave amp. A three-position muteswitch mutes the amp, the line out or mute neither.
Built on the same solid steel chassis platform as the Fuchs FB series bass amps, the amps feature a steel chassis and aluminum front and rear panels, Alpha potentiometers, ceramic tube sockets, high-grade circuit boards and Neutrik jacks. The ICE power amp is 150 watts into 8 ohms and 300 watts into 4 ohms, and nearly 500 watts into 2.65 ohms (4 and8 ohms in parallel) and operates on universal AC voltage, so it’s fully globallycompatible. The chassis is fan-cooled to ensure hours of cool operation under any circumstances. The all-tube preamp uses dual-selected 12AX7 tubes and a 6AL5 limiter tube.
MAP: $ 1,299
For more information, please visit fuchsaudiotechnology.com.
Cort Guitars introduces the GB-Fusion Bass Series, featuring innovative design and affordable pricing.
Cort Guitars have long been synonymous with creating instruments that are innovative yet affordably priced. Cort has done it again with the GB-Fusion Bass series. The GB-Fusion builds upon Cort’s illustrious GB-Modern series and infuses it with its own distinctive style and sound.
It starts with the J-style bass design. The GB-Fusion features a solid alder body – the most balanced of all the tonewoods – providing a fantastic balance of low, mid, and high frequencies. The visually stunning Spalted maple top extends the dynamic range of the bass. A see-through pickguard allows for its spalted beauty to show through. The four-string version of the GB-Fusion is lacquered in a supreme Blue Burst stained finish to show off its natural wood grain. The five-string version features a classic Antique Brown Burst stained finish. A bolt-on Hard maple neck allows for a punchier mid-range. An Indian rosewood fretboard with white dot inlays adorns the 4-string Blue Burst version of the GB-Fusion with an overall width of 1 ½” (38mm) at the nut, while the GB-Fusion 5 Antique Brown Burst features a Birdseye Maple fretboard with black dot inlays and an overall width of 1 7/8” (47.6mm) at the nut. Both come with glow in the dark side dot position markers to help musicians see their fretboard in the dark. The headstock features Hipshot® Ultralite Tuners in classic 20:1 ratio. They are cast of zinc with aluminum string posts making them 30% lighter than regular tuners providing better balance and tuning accuracy.
Cort’s brand-new Voiced Tone VTB-ST pickups are the perfect J-style single coil with clear and robust bass sounds and classic warmth. The GB-Fusion comes with a 9-volt battery-powered active preamp to dial in the sound. With push/pull volume, blend knob, and 3-band active electronics, players can access a wide array of tones. The MetalCraft M Bridge is a solid, high-mass bridge. It provides better tone transfer and makes string changes easy. Strings can be loaded through the body or from the top giving players their choice of best string tension. The MetalCraft M4 for 4-string has a string spacing of 19mm (0.748”) while the MetalCraft M5 is 18mm (0.708”). Speaking of strings, D’Addario® EXL 165 strings complete the GB-Fusion 4. D’Addario EXL 170-5SL strings complete the GB-Fusion 5.
Cort Guitars prides itself on creating inventive instruments musicians love to play. The GB-Fusion Bass Series is the latest and greatest for musicians looking for a stellar bass guitar that is not only economical, but has the reliable robust sound needed to hold up the back end in any playing situation.
GB-Fusion 4 Street Price: $699.99
GB-Fusion 5 Street Price: $849.99
For more information, please visit cortguitars.com.
Here’s a look under the hood of the funky rhythm-guitar master’s signature 6-string.
Hello and welcome back to Mod Garage. Since we’re still celebrating the 70th birthday of the Stratocaster, this month we will have a look under the hood of the Fender Cory Wong model to see just what’s so special about it. (I can tell you—it’s special!)
Guitarist, songwriter, and producer Cory Wong is renowned for his solo work, his band Fearless Flyers (with Mark Lettieri, Joe Dart, and Nate Smith), and collaborations with artists such as Vulfpeck, Jon Batiste, and Dave Koz. His playing style is deeply rooted in funk rhythm guitar, with a heavy dose of rock and jazz. Well-known for playing a Stratocaster, his signature model was released in 2021, and it’s a unique offering. If you want to build your personal Cory Wong Strat, here is your shopping list, starting with the primary structure:
• Alder body, scaled down to slightly smaller than a regular Stratocaster, with Fender American Ultra body contours
• Maple neck with a rosewood fretboard with rolled edges, modern Fender American Ultra D neck profile, slightly larger headstock, 25.5" scale, 10" to 14" compound radius, 22 medium jumbo frets
• Locking tuners with all short posts, a bone nut, and two roller string trees
• Vintage-style 6-screw synchronized tremolo
• Hair tie around the tremolo springs (which mutes them to enhance the rhythm tone)
• .010–.046 strings (nickel-plated steel)
“While these are all interesting features, resulting in a very comfortable guitar, you don’t need to copy every detail to transform one of your Stratocasters into a Cory Wong-style Strat.”
For the physical build, as you can see, Wong and Fender created a real signature instrument to his specs and wishes. While these are all interesting features, resulting in a very comfortable guitar, you don’t need to copy every detail to transform one of your Stratocasters into a Cory Wong-style Strat. My personal favorite of these is the hair tie for muting the tremolo springs. A lot of my funk-playing customers are doing similar things on their Strats to get a dry sound, and they’re using all kinds of funny things in there, like foam, rubber bands, and pieces of cotton, as well as hair ties.
Now, let’s have a look at the electronics:
• Seymour Duncan Cory Wong Clean Machine SSS pickup set
• Standard 5-way pickup-selector switch with classic Strat switching matrix
• 250k master volume pot with a 90/10 audio taper and Fender treble-bleed circuit PCB
• 250k tone pot with a 90/10 audio taper and Fender Greasebucket tone control PCB for only the neck pickup
• 250k audio push-push tone pot with Fender Greasebucket tone control PCB for only the bridge pickup; the push-push switch overrides the 5-way switch and defaults to middle + neck pickup (in parallel) as a preset
• Middle pickup is without tone control
Let’s break this down piece-by-piece to decode it:
Pickups
The pickup set is a custom SSS set from the Seymour Duncan company with the following specs:
• Overwound hum-canceling stacked bridge pickup with a 3-conductor wire and shield in permanent hum-canceling mode (red wire taped off), bevelled alnico 5 magnets, approximately 14.5k-ohm DCR
• Overwound middle single-coil, RWRP, beveled alnico 4 magnets, approximately 7.1k-ohm DCR
• Overwound neck single-coil, bevelled alnico 4 magnets, approx. 7.0k-ohm DCR
The pickups are voiced for clear highs, which perfectly suits Wong’s funky playing style and tone. While a lot of pickup companies will have pickups in that ballpark, it will be difficult to put together a full set that really works as intended. The Duncans in the Cory Wong Strat are available as a balanced set, so if you want to get as close as possible, I think this is your best bet.
5-Way Pickup Selector Switch
Nothing special here, just the standard 5-way switch with two switching stages that is wired like a classic Stratocaster:
bridge
bridge + middle in parallel
middle
middle + neck in parallel
neck
The upper tone pot is assigned to the neck pickup, while the lower tone pot is connected to the bridge pickup, leaving the middle pickup without tone control.
Master volume pot and treble-bleed circuit.
The 250k master volume pot is a standard CTS pot with a 90/10 audio taper found in all U.S.-made Fender guitars. The volume pot has the treble-bleed circuit from the Fender American Pro series, but uses a ready-to-solder PCB from Fender instead of individual electronic parts. The PCB is available from Fender individually (part #7711092000), but I have some thoughts about it. While using a PCB makes a lot of sense for mass production, it has some downsides for us mortal human beings:
• Soldering on PCBs requires some training and also special soldering tools.
• The PCB is quite expensive, while the individual electronic parts are only a few cents.
• The PCB uses ultra-tiny surface-mount parts, so it’s very difficult to repair or mod it to your personal taste.
I don’t think we need a PCB for adding a treble-bleed circuit, so let’s do this project using conventional electronic parts. The treble-bleed PCB contains a 1200 pF capacitor with a 150k-ohm resistor in parallel, plus another 20k-ohm resistor in series. Using individual parts, it looks like this:
Courtesy of single-coil.com
In general, a treble-bleed circuit will help you to combat the “volume vs. tone problem” when using passive single-coil pickups. When you turn down the volume (even just a bit), the high end or treble loss is not proportionate. In other words, a small cut in volume creates a far greater loss in your guitar’s treble response. Using a treble-bleed circuit is an easy way to get rid of this problem, as long as it is calculated carefully.
ONLINE ONLY: If you want to find out more about treble bleed circuits please have a look here: https://www.premierguitar.com/diy/mod-garage/treble-bleed-mod
Next month, we will continue with part two of the Cory Wong Stratocaster wiring, bringing it all together, so stay tuned!
Until then ... keep on modding!