Welcome back to the restoration of this 1933 National Duolian Resonator. It’s certainly been very enjoyable breathing life back into this instrument, one step at a time. Last month, we were in the beginning stages of rebuilding the damaged bass tuner side of the slotted headstock. We dealt with the problems of the original, poor-quality repair, and removed the leftover glue before dry-assembling the headstock to get it ready to glue up properly with a slow-setting, two-part clear epoxy.
Glue and Assemble 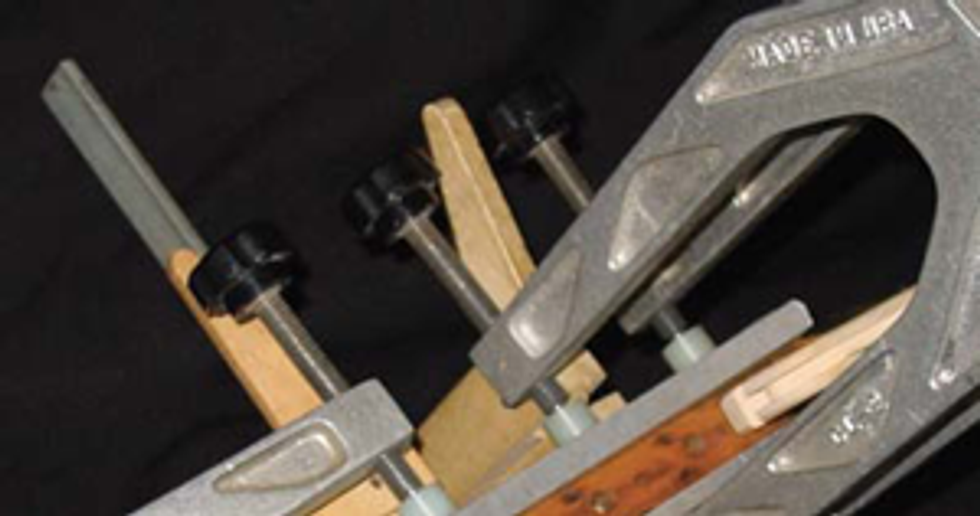 The two-part epoxy (resin and hardener) is thoroughly mixed in a mixing cup. Once the glue is evenly applied with a glue brush, it’s time to assemble the pieces with various clamps and non-stick support clamping cauls. The most important detail here is to assemble the clamps in the same sequence as in the dry-assembling stage. If I were to choose a different clamping order, the wooden sections may shift and seat themselves out of place, sliding around and creating undesirable results.
 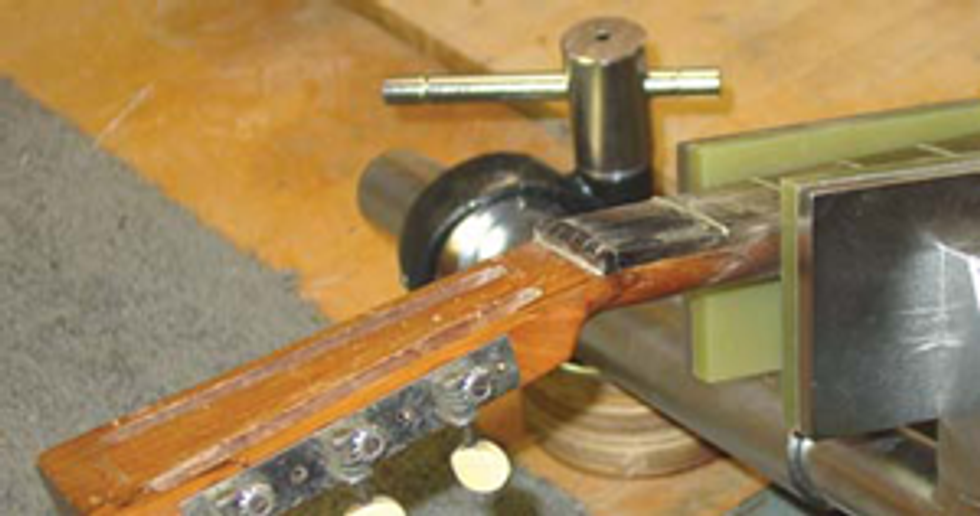 After 24 hours, the epoxy glue has thoroughly cured. Slivers of wood had been torn out of the headstock from years of moving around in the guitar case, and the resulting hairline cracks are drop-filled with thin and medium Super Glue. Drop-fill toothpicks work well for directing the glue to flow where I want it. The surface is then sprayed with accelerator to quickly cure the Super Glue.
For gripping and holding the neck in place, I’m using my favorite vise, the, three-dimensional adjustable Ultimate Vise from StewMac. Currently I only have one in the shop, but I’m excited that I’ll soon have one for each workbench. It allows me to quickly position my work at practically any angle I need.
Finishing
Once everything is sanded up to 280-grit sandpaper, the open, unfinished wood gets lightly moistened with water, raising any grain fibers so they can be gently removed with 280-grit sandpaper. Then we’re ready to apply light coats of nitrocellulose. The neck is cradled in the Ultimate Vise. The nitrocellulose is thinned out 40/60 with lacquer reducer so it can be applied with a lint-free cloth. The original finish is thin and aged, so the freshly applied nitro is thinned and tinted (using a pipette to assist) with yellow and brown stains. Getting the perfect blend of tint is rewarding; each instrument that ages over time really has its own fingerprint when it comes to finish. 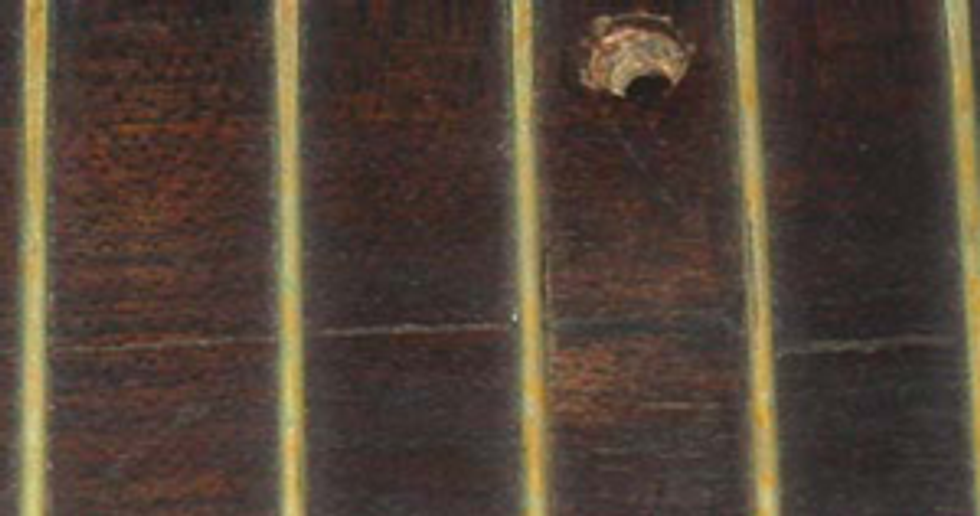 Patching Fingerboard Cracks
I’m using ebony and rosewood powdered pigment with thin Super Glue to repair the 9" fingerboard crack. This area has never had any repairs, so that’s going to make my job much easier. Since the fingerboard is ebonized maple, I want to be very gentle in the final stages of leveling. I can re-stain the wood if needed when I’m finished filling and leveling the crack, but I would prefer to let it keep its aged, natural wear.  Mixing a little rosewood to the ebony pigment gives me a more accurate color match. My dental scraper has a spoon on one end, which works well for spooning up some premixed powdered pigment. The scraper side of the tool is used for filling and burnishing the powder into the fingerboard crack. Once the crack is filled with the powdered pigment and leveled to the surface of the fingerboard, I am ready to apply thin Super Glue with a Drop-fill toothpick, followed by accelerator to harden the powdered pigment. The last step is leveling the hardened filler to the fingerboard surface with a razor blade and lightly finishing with 0000 steel wool.
For this restoration the following supplies, available at stewmac.com, were used:
#3412 Ultimate Vise
#3721 Small, 4-1/2” throat Cam Clamp
#3867 Mini Cam Clamp
#0682 Sloane Bridge Clamp
#5174 Stewart-MacDonald Slow-setting, clear (2-part) Epoxy
#0010 Thin Super Glue
#0020 Medium Super Glue
#5984 Accelerator (4-ounce bottle)
#1856 Ebony (Black) Powdered Pigment
#1858 Rosewood (Burnt Umber) Powdered Pigment
#5037 Lemon Yellow ColorTone Concentrated Liquid Stain
#5033 Medium Brown ColorTone Concentrated Liquid Stain
#1155 Pipettes
#4199 Mixing Cups
#3110 Drop-fill Toothpicks
#4167 Glue Brush
#2200 Lawrence-McFadden Nitrocellulose
#2202 Lawrence-McFadden Nitrocellulose Lacquer Thinner
John Brown
John Brown, of Brown's Guitar Factory, is the inventor of the Fretted/Less bass. He owns and operates a full guitar manufacturing and repair/restoration facility, which is staffed by a team of talented luthiers. He is also the designer of guitar making/repair tools and accessories that are used today by instrument builders throughout the world.
brownsguitarfactory.com
info@brownsguitarfactory.com