
For so many artists, the return of live shows means the return of the thrill of performing, much-needed income, and, in a way, purpose. The third definitely goes for guitarist Emily Wolfe, who, when asked about her goals, immediately responds, "I just want to play arenas every night for the rest of my life. When I go up there, something could hit me at any point—an emotion that I felt 10 years ago could come out in a bend on the low E."
As she sharpens her sound, Wolfe is helping to keep the rock genre alive—not by mimicry or séance, but by taking the grit of the past and expanding it with a broader emotional vocabulary, confidently concise guitar work, and pop-inspired arrangements.
Wolfe, who's toured and performed with Gary Clark Jr., the Toadies, Heart, and the Pretenders, doesn't get why people can be so confounded by the third descriptor. "Some of my rock friends say, 'Pop isn't relevant,' and I'm like, 'What are you talking about—it's everywhere!' It's so sticky for people, and that's really fascinating to me. I want my music to have that quality … but also the realness of a raw guitar tone."
Epiphone Exclusive | “No Man” by Emily Wolfe
What's exciting about her latest full-length release, Outlier, is how she captures exactly what she's talking about. The songs bleed like a wounded gunslinger over a silvery backdrop of deftly layered synths, tight vocal harmonies, and blended acoustic and electronic drums. Over the course of the album, she sings, "I just can't get close enough to you," ("Vermillion Park"), "I'm addicted to the broken," ("Never Gonna Learn"), and "I'll chase you 'til my lungs give out," ("My Lungs Give Out"). It's through her adept genre fusion and aching romanticism that Wolfe offers her audience something to connect with that's not just clever, but also powerful.
"An emotion that I felt 10 years ago could come out in a bend on the low E."
Stone Age Methods
Outlier was produced by Michael Shuman, bassist of Queens of the Stone Age, who Wolfe describes as "like, the coolest guy that I've ever seen in my life." It started out as a long-distance project, as she's based in Austin and Shuman is in Los Angeles. They sent demos back and forth before Wolfe went into the studio in the fall of 2020. (She was later joined by bassist Evan Nicholson and drummer Clellan Hyatt.) With Shuman's encouragement, Wolfe set aside perfectionist leanings and took a more adventurous approach to the recording process than she had in the past.
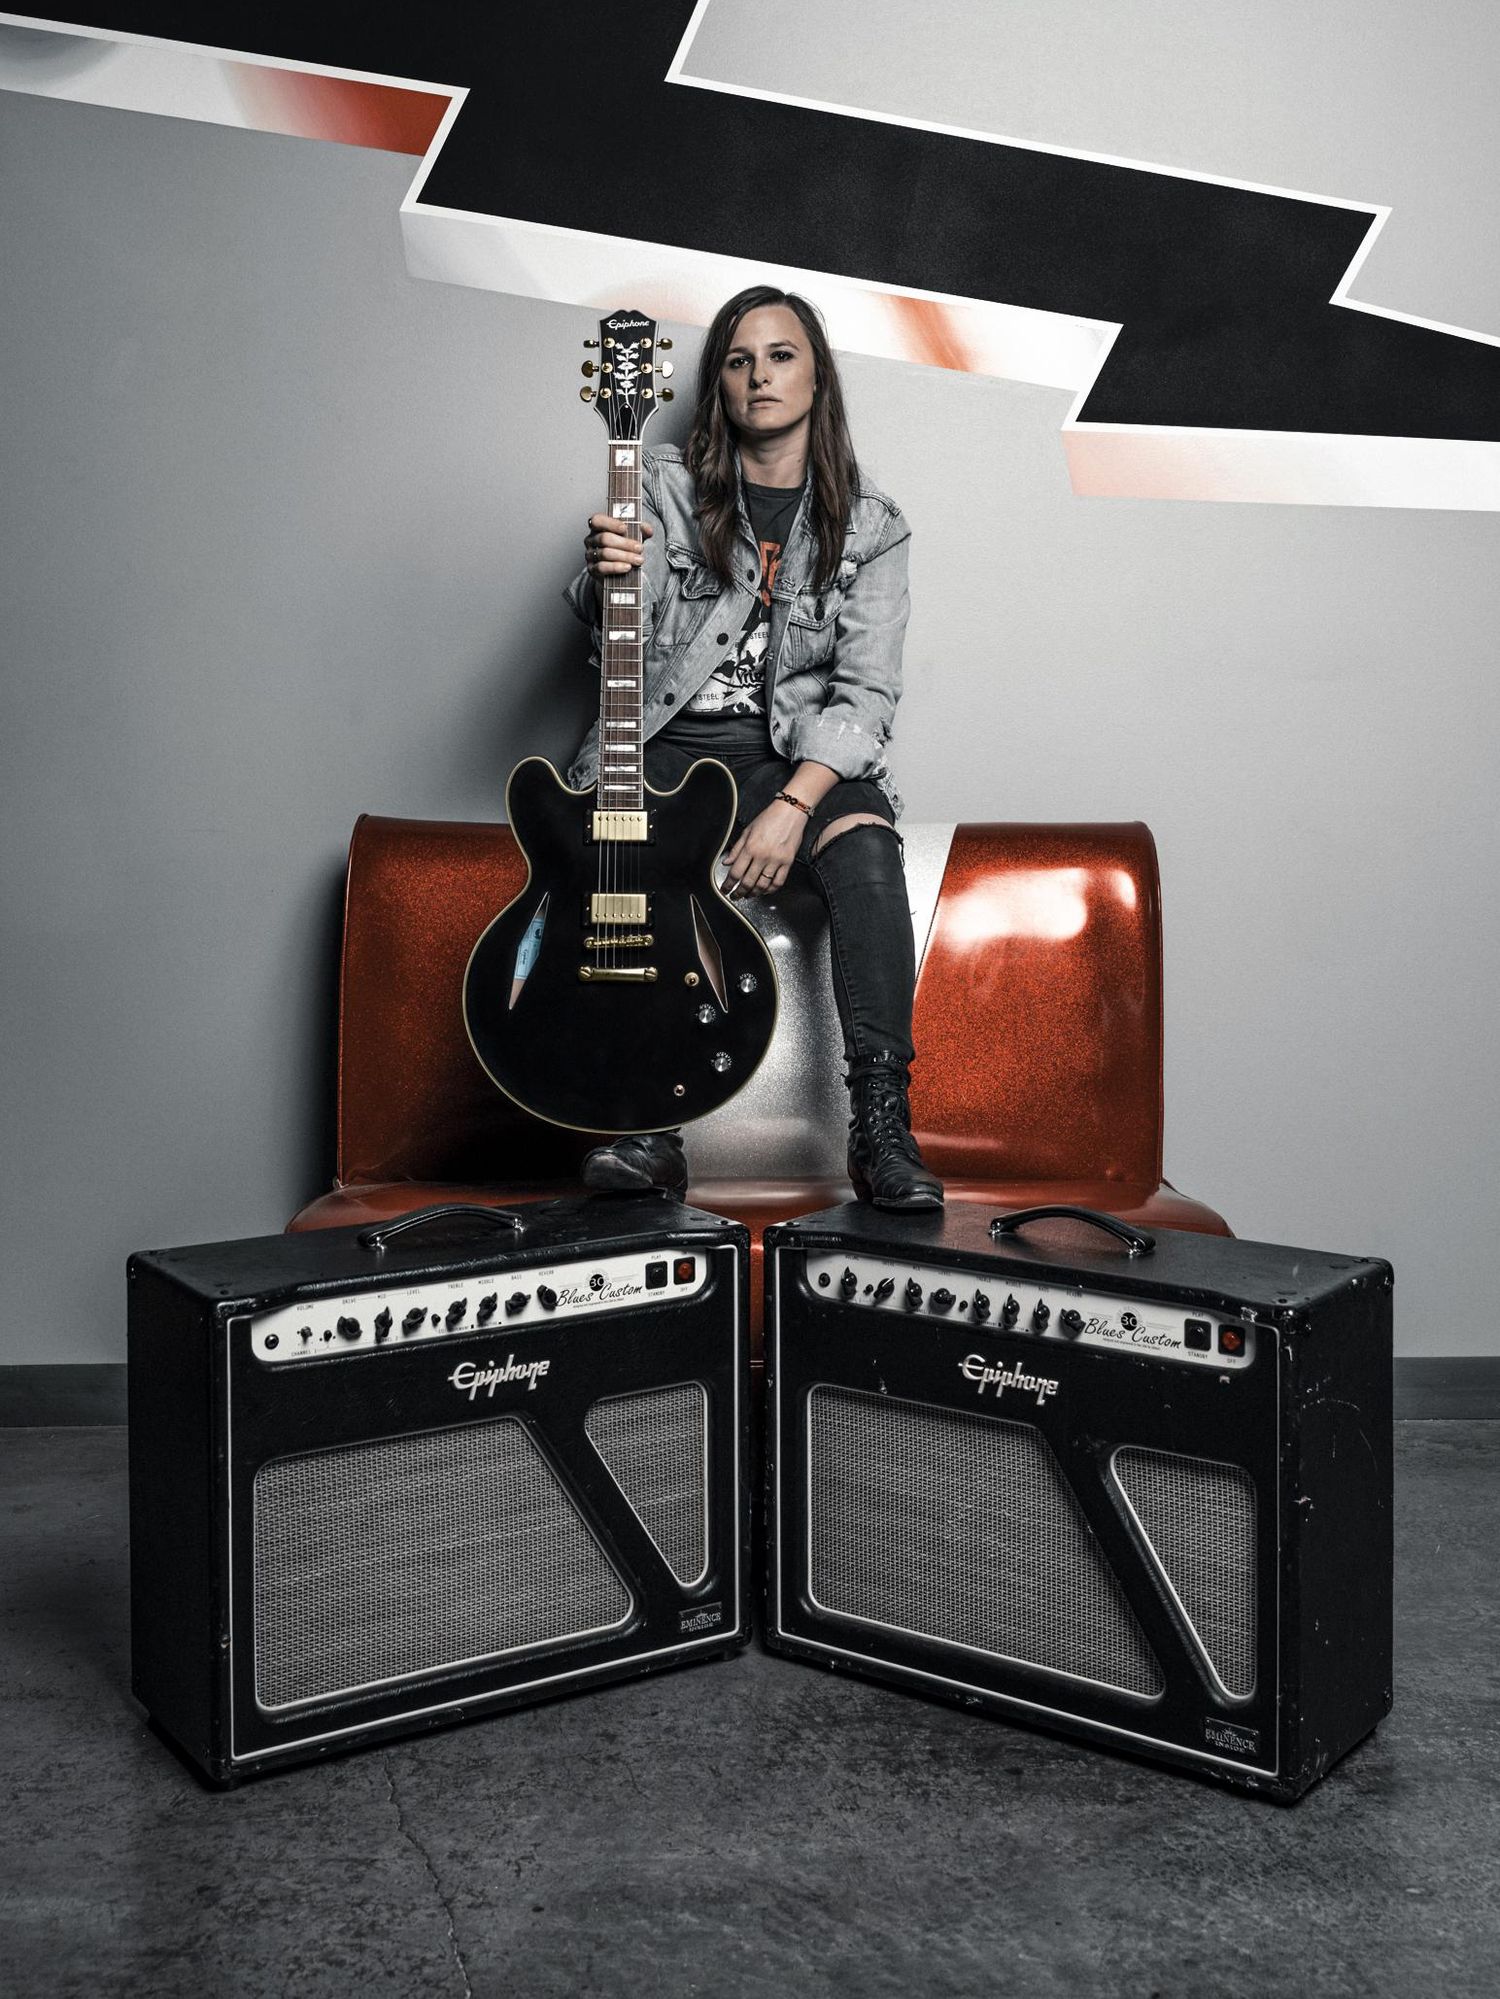
Emily Wolfe's semi-hollow Epiphone signature model, the Sheraton Stealth, is a modern take on John Lee Hooker's longtime favorite, the Sheraton. It has a layered maple body with a mahogany neck, signature inlays, a Tune-o-matic bridge, CTS pots, two volume controls and one tone control, and Epiphone's Alnico Classic PRO pickups.
Photo by Barbara FG
On her 2019 self-titled first album, Wolfe exacted every tone before entering the studio, but this time around, she allowed more room for spontaneity, which made things far more relaxed. "It was easy to get into the flow and be really present," she says. "I think I'll probably do the next record like that because it was a lot more fun." One trick she made use of with engineer Michael Harris involved an MPC (music production center) controller and a few floppy discs of drum samples. Throughout the recording process, the samples were layered on top of the acoustic drums.
But that experimentalism came with some apprehension. "I said to [Shuman], 'How am I going to replicate this sound live?'" Wolfe says. "He was like, 'It doesn't matter, dude, just make the best record you can and figure out the live stuff later.'" Shuman's attitude toward recording contributed to the flexible atmosphere that enabled Wolfe to evolve, but not without some challenges. "There was one instance when, on 'Damage Control,' I didn't have anything prepared [for the solo]," she says, "and he was like, 'Go up to my living room and write something and come back down when you have it.'"
"If I get a new piece of gear, I have to figure out every single part of it before I can really use it."
The Persistence of Pop
On Outlier, Wolfe's ambition was to create a golden blend of classic eras, drawing upon '60s Motown, '70s glam, '80s synth-pop, and '90s grunge to produce something as enduring as those styles. "If you listen to Motown, in the first minute or so, the hook is there. I wanted to bring that in, too," she relates. "There's so much rawness [to classic rock]; the edges are not perfect, but there's a magic in that. There's also the side of modern stuff where the edges are really perfect and very computerized. I wanted to mix those together and see what would happen."
Wolfe believes that modern pop stars are not given enough credit for their work ethic, daring, and conceptual talent. If you doubt that, consider Carly Rae Jepsen, who wrote 200 songs in the course of producing her albums Emotion (2015) and Dedicated (2019). And there's the prolific Ed Sheeran, who in 2015 sold out the 90,000-capacity Wembley Stadium for three nights in a row as a solo act, and Swedish writer and producer Max Martin, who's written 25 No. 1 hits (split among 10 different artists), which is five more than the Beatles have as a band. "I have a theory that Max Martin is an alien. He's in the Illuminati, I swear to God," says Wolfe, laughing.
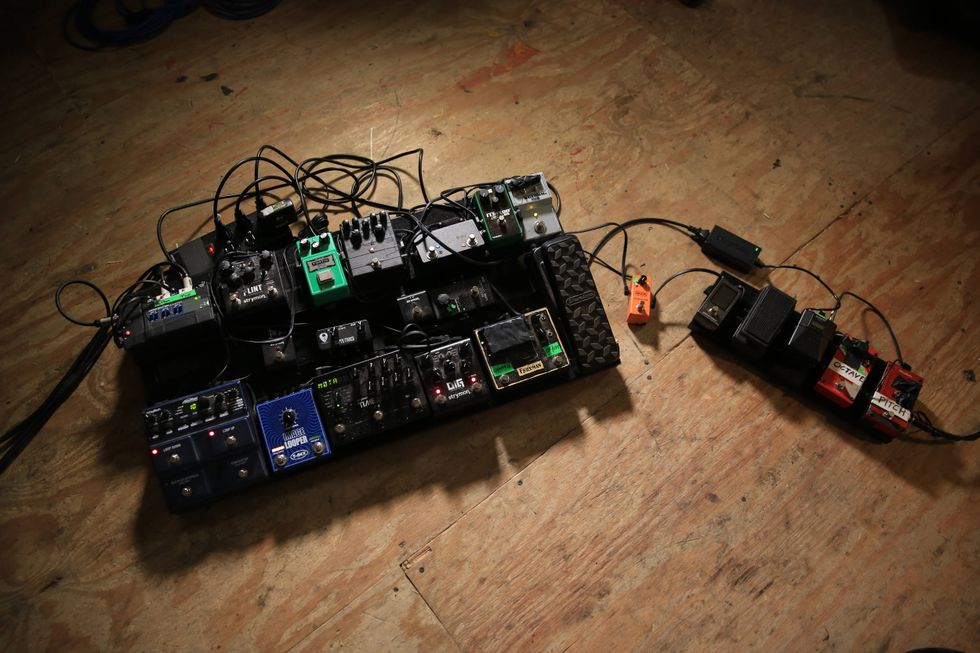
Emily Wolfe's Gear
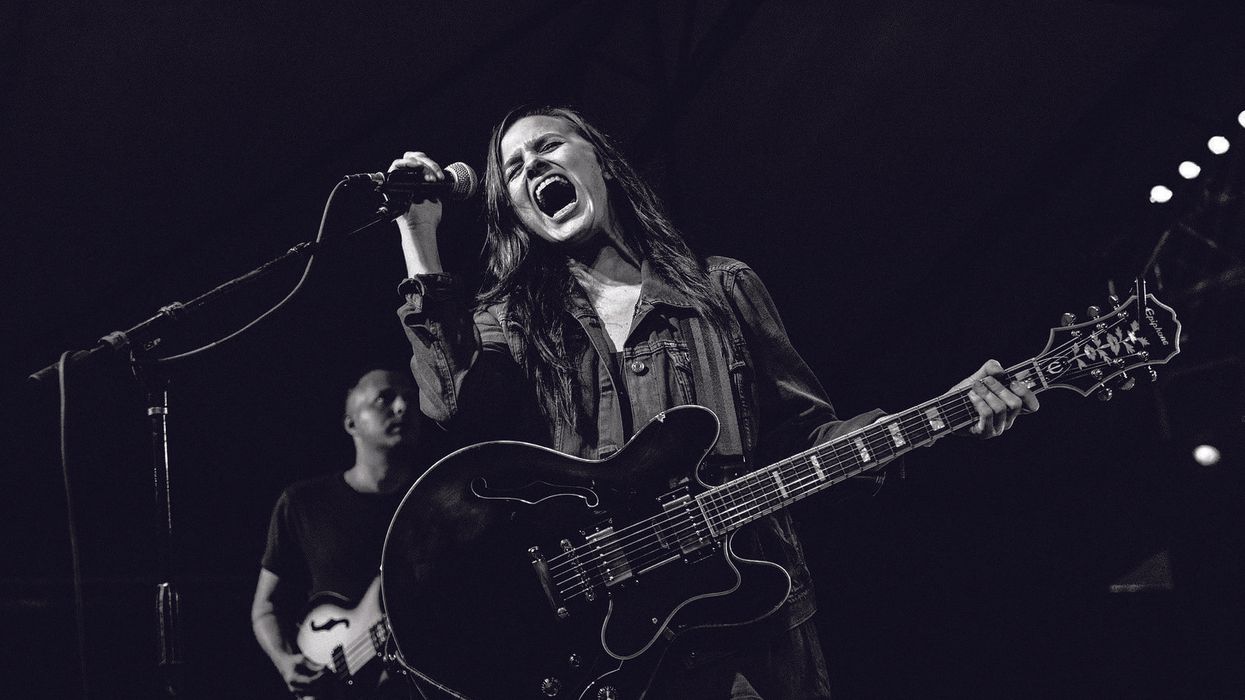
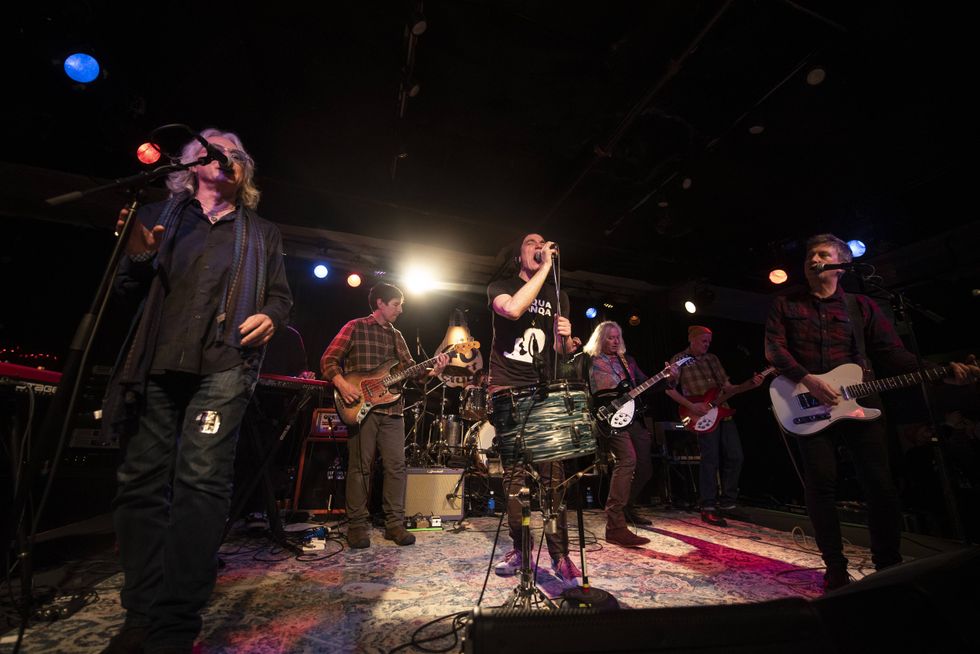
Although she has just two albums, Wolfe‚ caught here onstage at Cambridge, Massachusetts' Middle East nightclub in November 2021, released three singles and an EP before her first full-length, Emily Wolfe, arrived in 2019. Her new Outlier shows remarkable album-to-album growth.
Photo by Brent Goldman
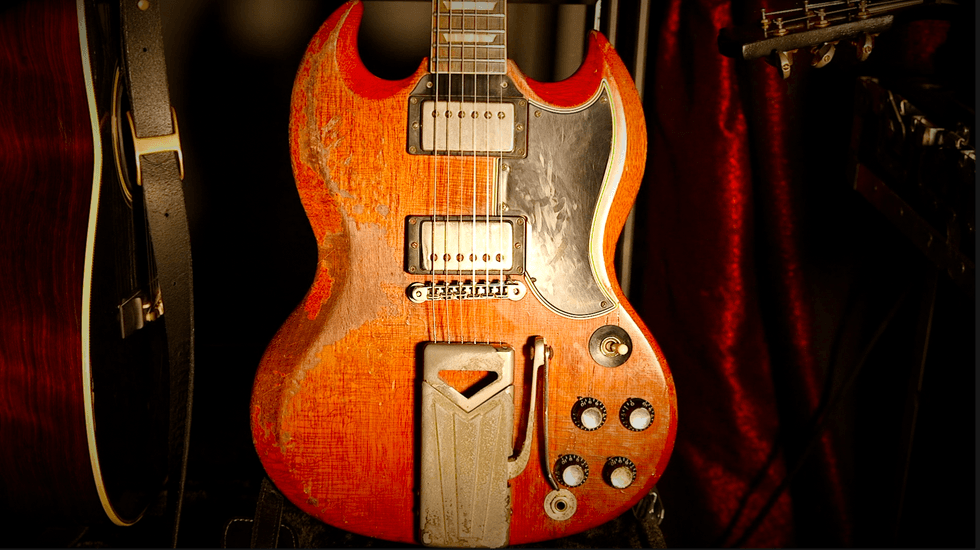
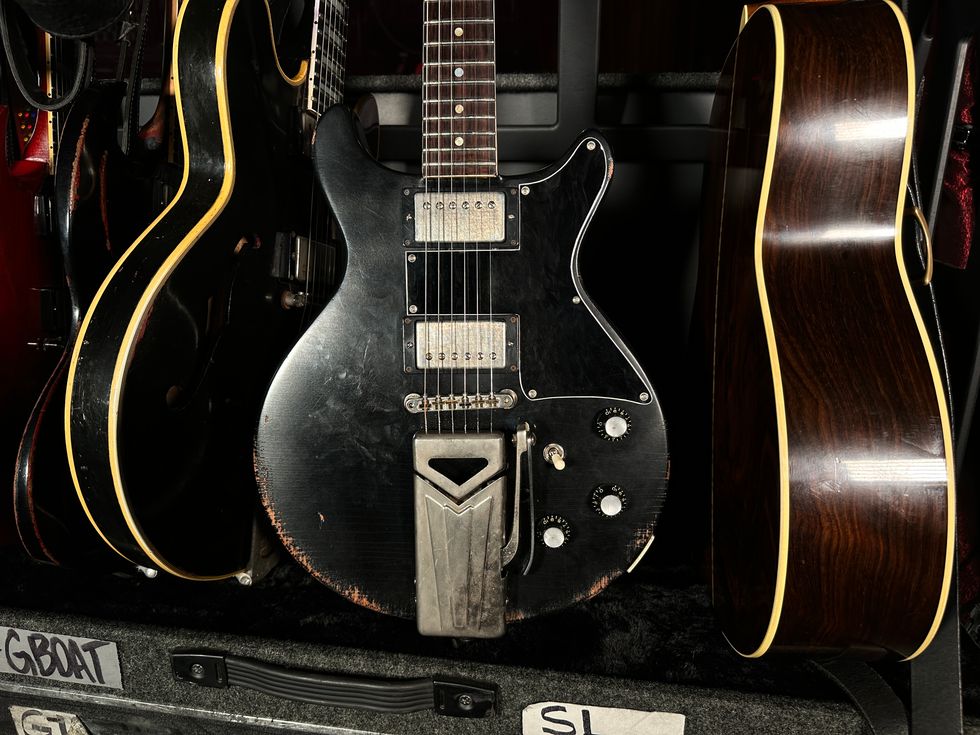
Guitars
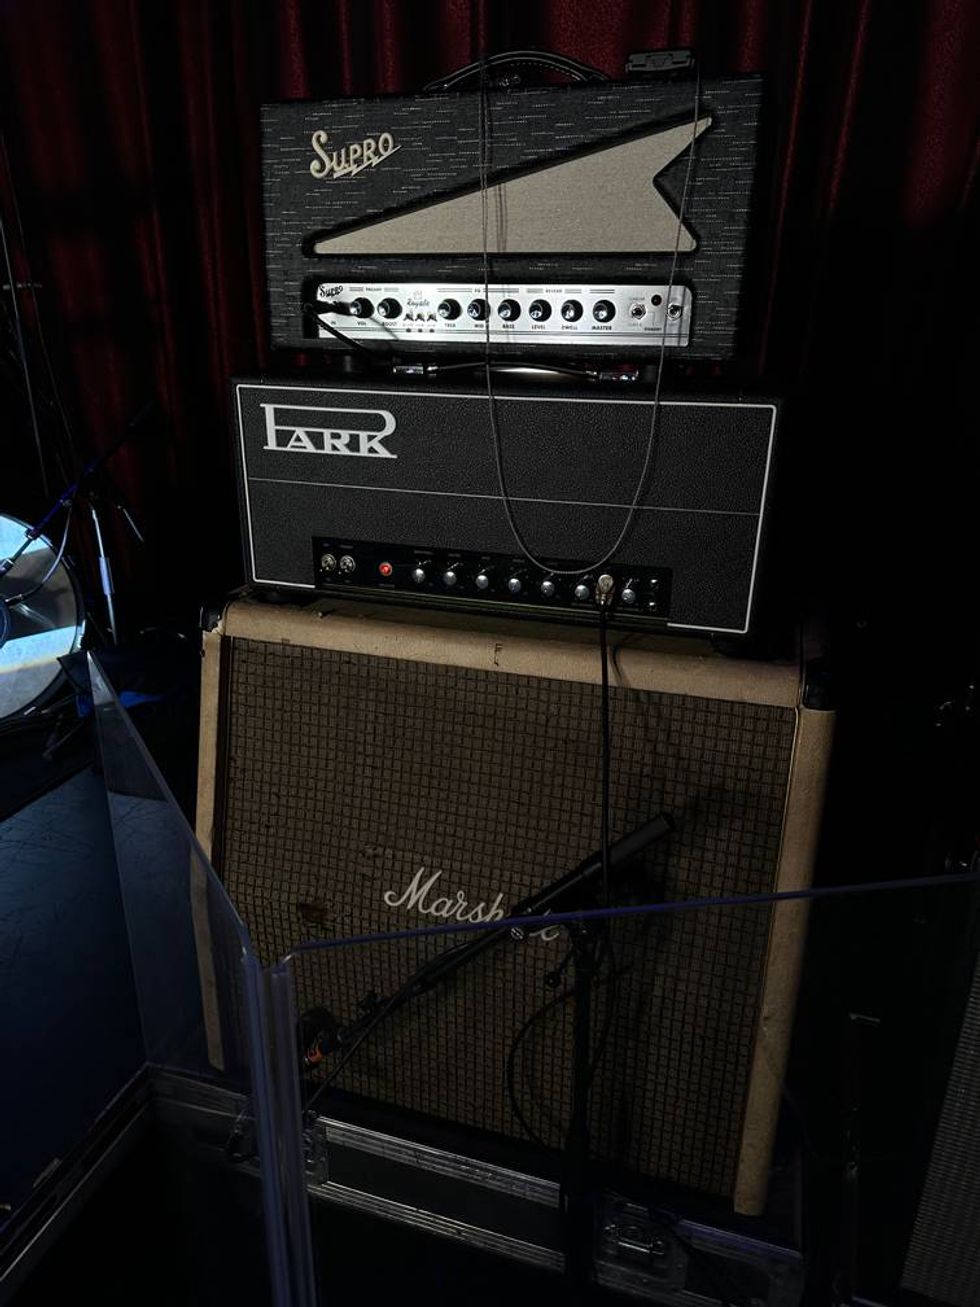
Amps
- Fender Hot Rod DeVille 4x10
String and Picks
- Ernie Ball Slinky Cobalt (.010–.046)
- Dunlop Tortex Jazz III .88 mm picks
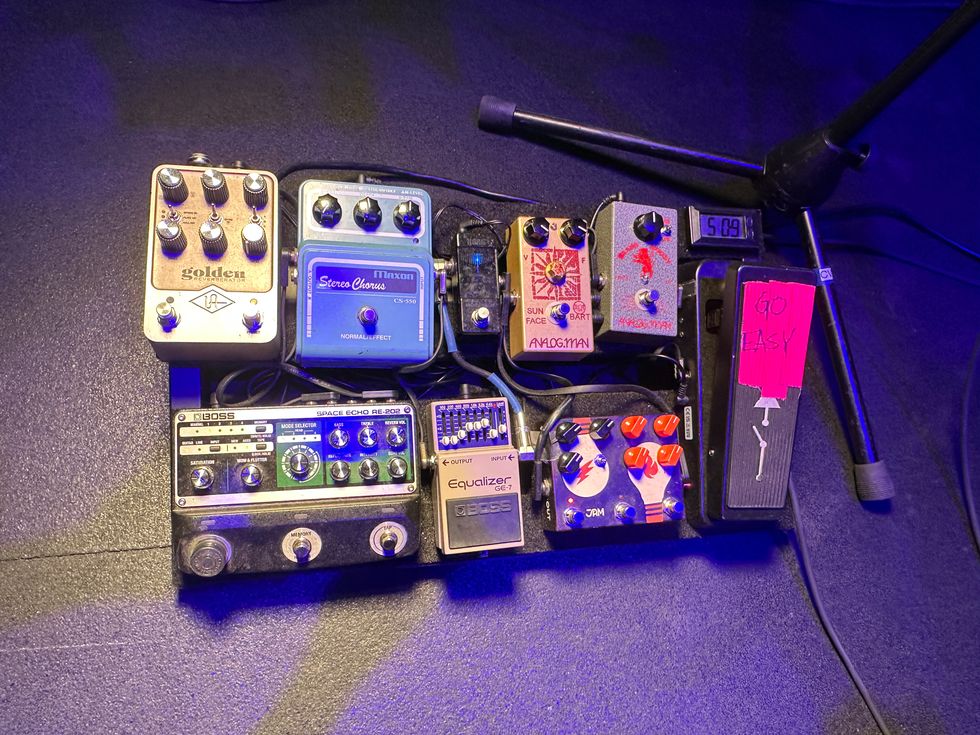
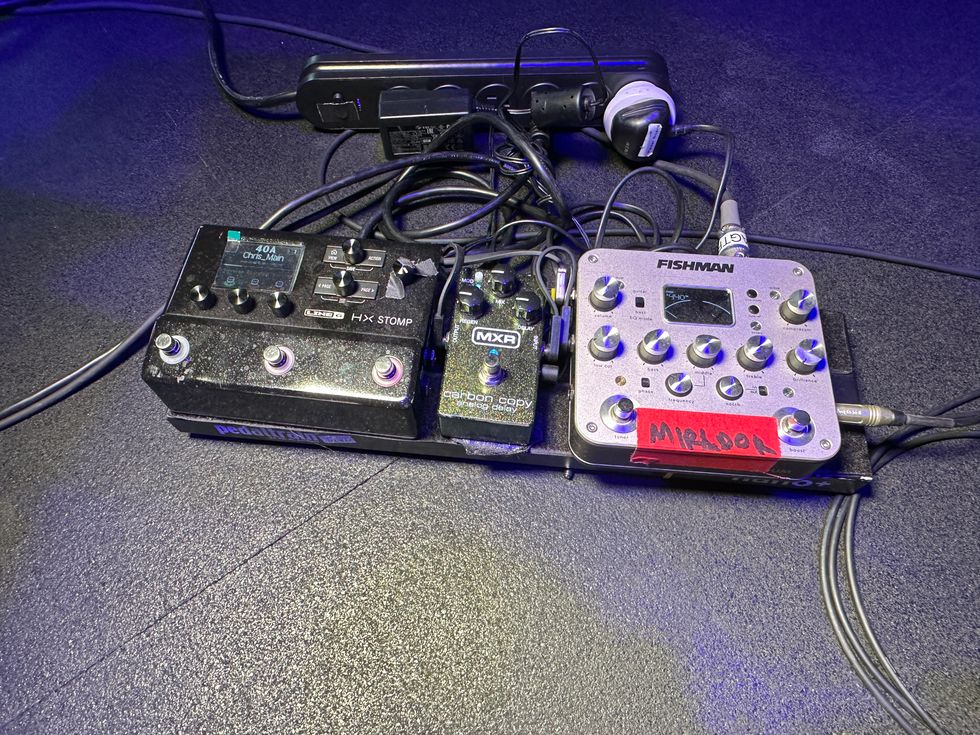
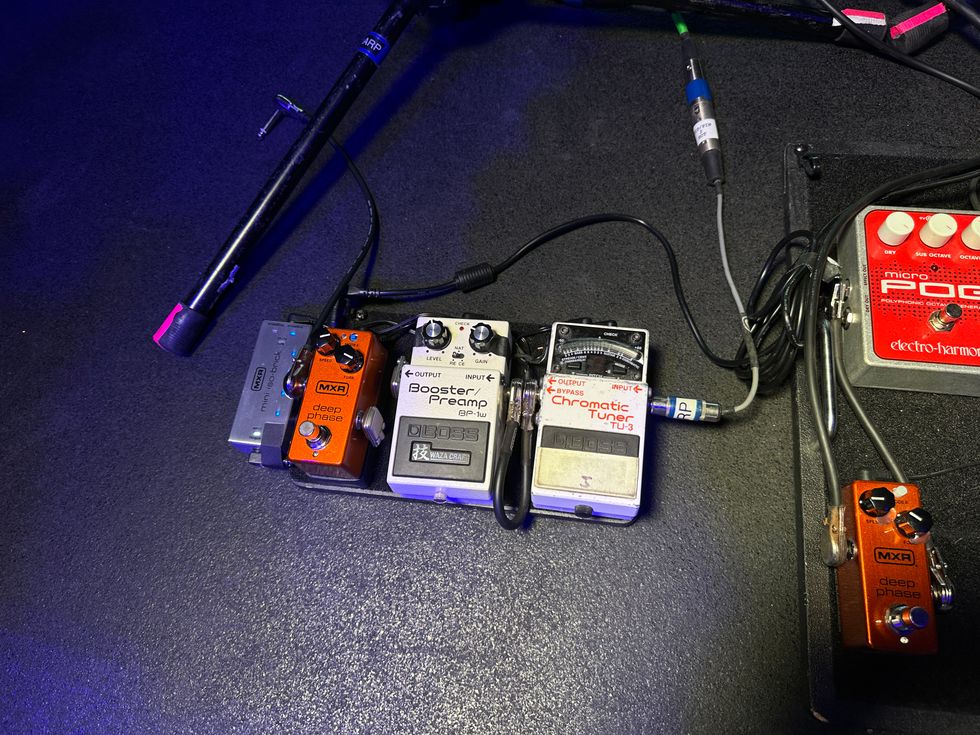
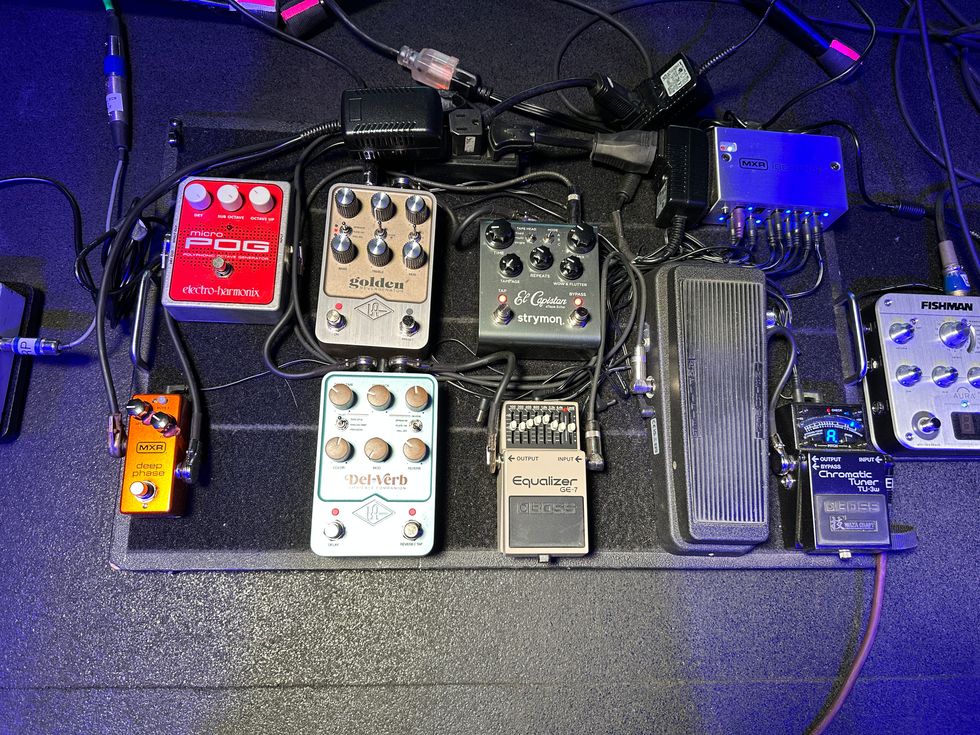
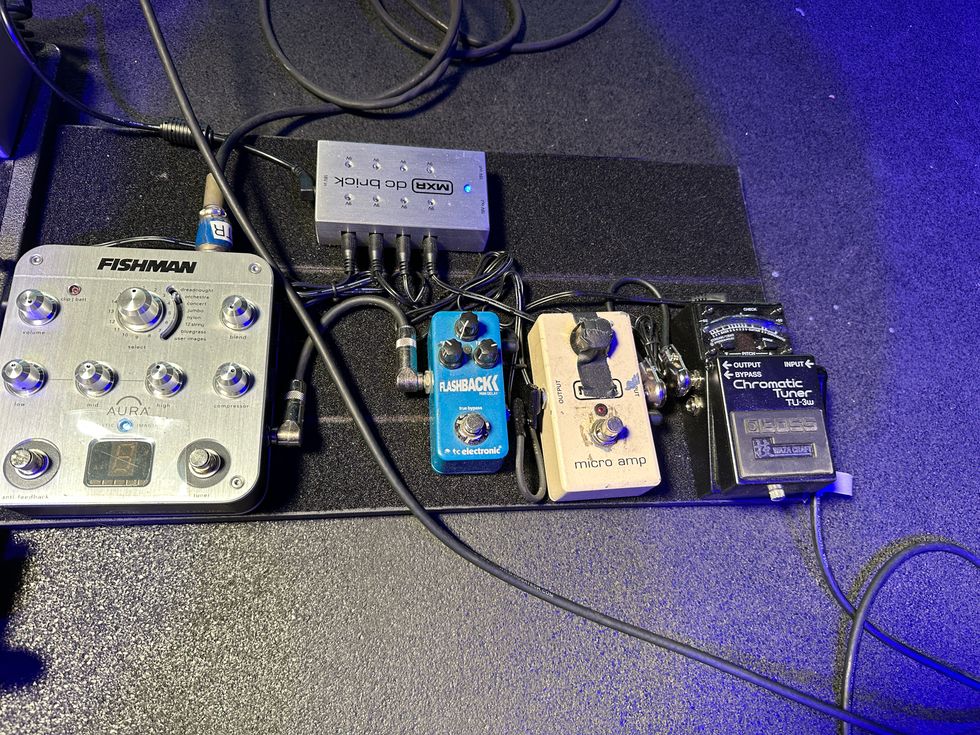
Effects
- RJM Mastermind PBC/10 switcher
- Origin Effects Cali76
- Dunlop Cry Baby Q Zone
- EarthQuaker Devices Tentacle
- EarthQuaker Devices Dirt Transmitter
- MXR Six Band EQ
- Fulltone OCD
- Klon KTR
- Walrus Audio Julia Analog Chorus
- MXR Carbon Copy
- Strymon Flint Tremolo and Reverb
- Vertex Boost
"The backbone of so much of our industry is pop," she continues, expressing her admiration for artists like Demi Lovato and Ariana Grande, and pop production as a whole. "I try to dive in and analyze: 'How did this producer make this song stick in my head immediately and live in my soul?' If it comes on in a restaurant and I know every word.… I want my music to have that."
An Ear for Overdrive
We mentioned earlier that Wolfe can be exacting when it comes to finding the right tone. She fuels those analytical tendencies with as much gear knowledge as she can imbibe, saying that she feels lost if she doesn't know something about a piece of gear in her palette. "If I get a new piece of gear, I have to figure out every single part of it before I can really use it," she says.

TIDBIT: Wolfe's latest album was produced by Michael Shuman, bassist of Queens of the Stone Age. The guitarist describes Shuman as "like, the coolest guy that I've ever seen in my life," and he encouraged her most adventurous work.
In her spare time, Wolfe explores every pedal she can get her hands on and entertains herself by searching for the perfect combination for her signature sound. She's put together a "desert island board" comprised of three pedals: the EarthQuaker Devices Tentacle analog octave-up pedal, running into a Fulltone OCD, and an MXR Six Band EQ. "That's the sound that belongs to me," she says. The sequence creates a "crazy fuzztone" from the overdrive. Then she uses the EQ to reduce some of the lows and boost the mids for a sound she says will get her guitar to cut through any mix.
She says she never really liked using chorus until she stumbled across the Walrus Audio Julia Analog Chorus/Vibrato pedal. "It's pretty inspiring. 'My Lungs Give Out' was pretty much because of that pedal," she shares. "It kind of wrote the intro for me." The song's gentle vocal and subtle use of the pedal in the intro, followed by her singing paralleled by quietly distorted guitar in the pre-chorus, calls St. Vincent to mind. That's a comparison Wolfe responds to favorably.
Rig Rundown - Emily Wolfe
On top of her signature pedal combination, Wolfe now has a signature guitar. In March, Epiphone debuted the Emily Wolfe Sheraton Stealth, a black, semi-hollowbody electric guitar with diamond-shaped soundholes and gold hardware, set up with two Alnico Classic PRO humbuckers. "The Stealth is my dream guitar and gift to the music community," says Wolfe. "Playing it is like putting on a perfectly worn-in pair of jeans. It just fits. The guitar is the perfect frequency range for my soul." And for her music—from her stinging blues-rock bedrock to the expressionist colors of her newest work. (It was first featured in our Rig Rundown above.)
Melodic Mindfulness
Wolfe was only 5 when she found herself intensely drawn to the guitar after seeing one hanging on the wall at a thrift shop. That instrument became her first. But it wasn't until she was in high school that she fell in love with it, which is also when Wolfe first got into songwriting. Her early creative process involved writing down lyrics by L.A. indie-rockers Rogue Wave, her favorite band at the time, on one side of a page, then writing her own lyrics on the other. "They obviously weren't great," she says, "but over time I sharpened that skill."
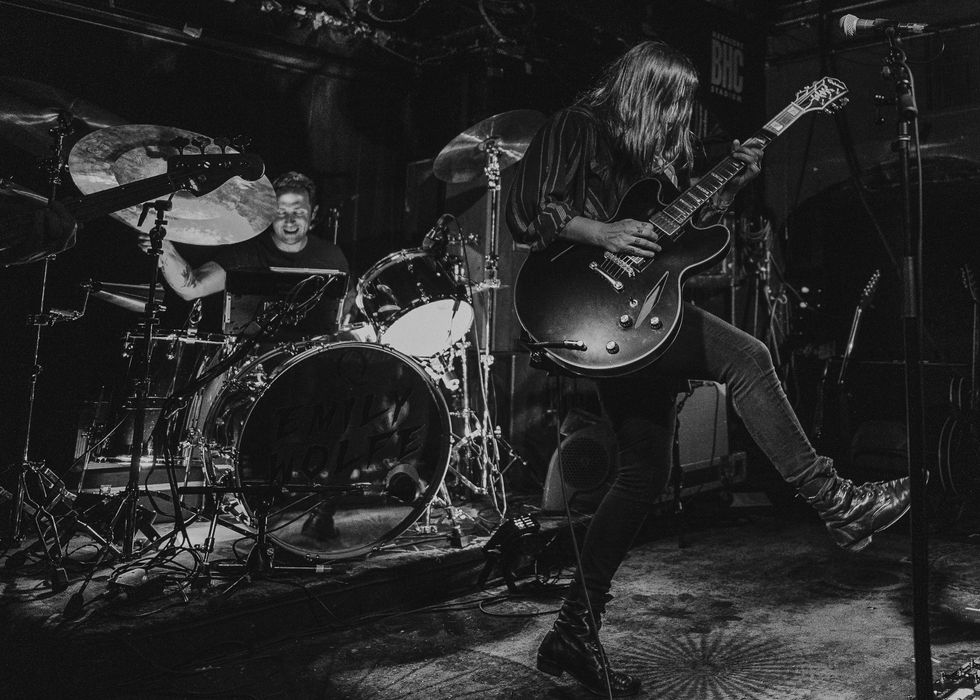
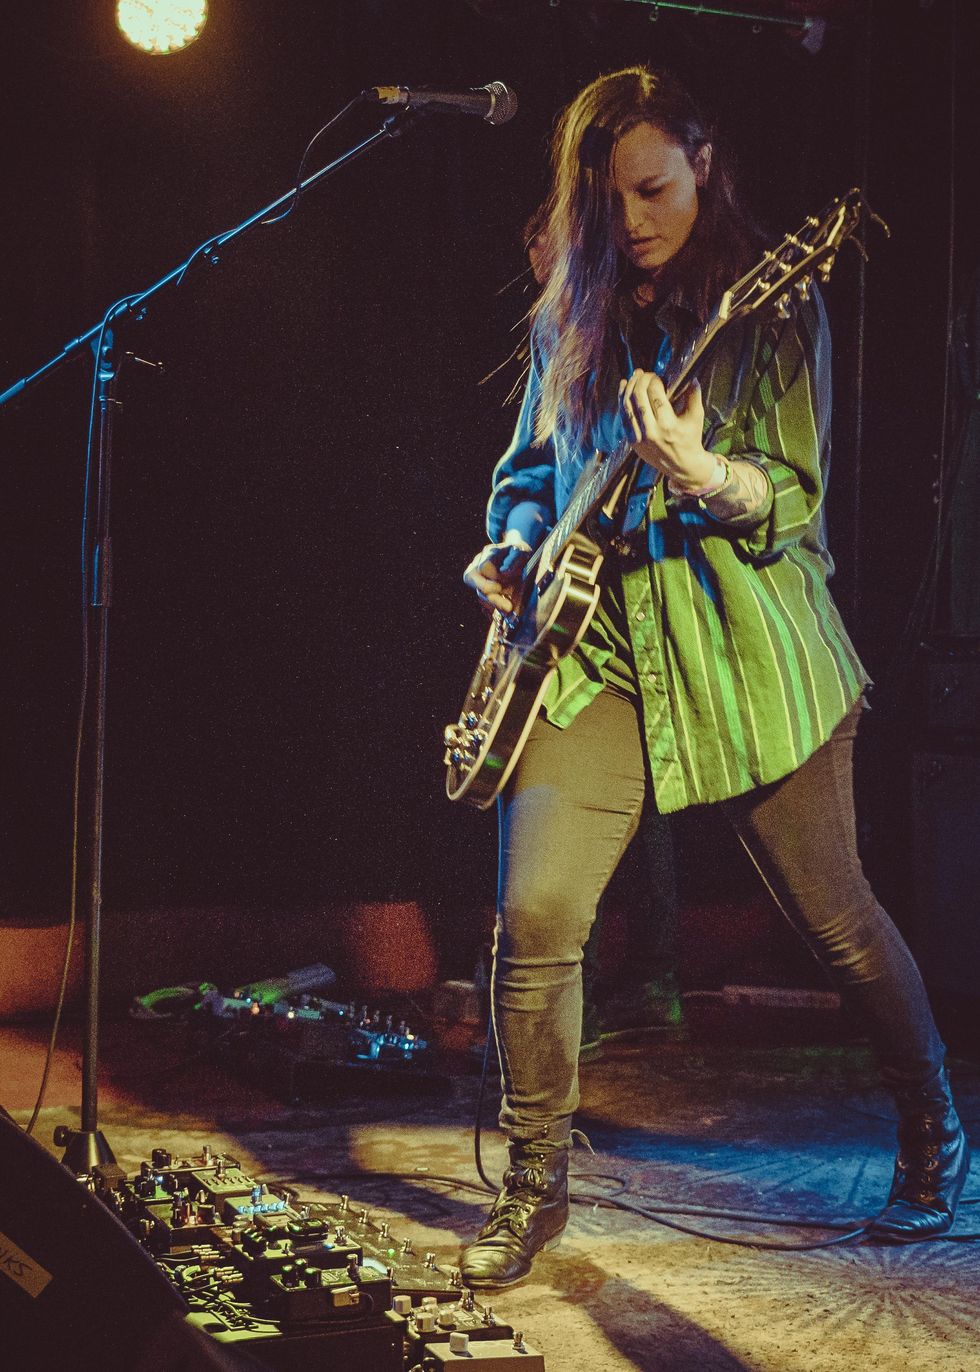
Wolfe has a reputation for high-energy shows that bring the bones of her songs and the classic rock and blues foundation of her guitar playing to the fore.
Photo by Brent Goldman
Today, she fosters a kind of spiritual connection with her music. "Whenever I get an idea, I try to nurture it and treat it like this thing that wants to be born, then listen to it and what it wants to be," she says. She remembers that someone once suggested she pray to the song she wants to write, to make sure it comes from her and no one else. This advice made a lasting impression. "I was like, 'Oh shit, okay,'" she laughs. "Sometimes I'm like, all of these artists that have passed away—where did their talent go? Where did their songs go? Maybe they're sending these songs down to other people."
In a more concrete sense, Outlier is a departure from Wolfe's first album, which was slightly more traditional and featured a guitar solo on almost every song. Switching her mental focus to hooks and arrangements breathed new life into her writing. While she still feels proud of her earlier work, Wolfe feels she's headed in the right direction. "I wanted to make something that would be classic 10, 20, 30 years from now," she says. "That was the goal, and I think we achieved it."
Emily Wolfe - Damage Control (live in the studio)
With her signature Epiphone Sheraton Stealth, Emily Wolfe sprays plenty of fat-toned fuzz over Outlier's "Damage Control," and cleans things up a bit for her solo, which kicks in at 2:30 and has a sequel 30 seconds later where you can really hear the EarthQuaker Devices Tentacle at work.


![Rig Rundown: Russian Circles’ Mike Sullivan [2025]](https://www.premierguitar.com/media-library/youtube.jpg?id=62303631&width=1245&height=700&quality=70&coordinates=0%2C0%2C0%2C0)