The jump between analog and digital gear has never been more manageable. It no longer takes a rack full of outboard gear with a six-figure price tag to help realize not only the tone you have in your head, but the expansive workflows that started to pop up in the early ’80s. We’re now about a decade into the modern era of digital modelers and profilers and it seems like the technology has finally come into its own. “This is really the first time in a while where you can have bar bands playing the exactsame gear as stadium acts,” says Cooper Carter, a Fractal Audio Systems production consultant who has done sound design and rig building for Neal Schon, James Valentine, John Petrucci, and others.
That democratization of pro-level workflows has opened new and exciting paths for guitarists to explore. Barry O’ Neal, who is the chief puzzle solver for Xact Tone Solutions in Nashville, has built rigs for some of the biggest acts in the world, including Taylor Swift, Bon Iver, and Peter Frampton. “In the beginning, all gear was pro gear, to an extent,” he says. “There is a line of demarcation between pro-grade gear and consumer gear. And there used to be a lot clustered around that line. Now, they are all either way above or way below.”
At this point, the difference between modeling technology mainly has to do with features. Do you need more inputs and outputs? Is direct recording via USB a priority? Are there certain one-off effects or sounds you need on a gig? All the top-level units have a somewhat similar set of core features, but each one also branches off into more specialized realms. Let’s dig in and discuss choosing a modeler, break down some myths that surround these units, and help novice users get just a little bit more out of their chosen processor.
Which One is For You?
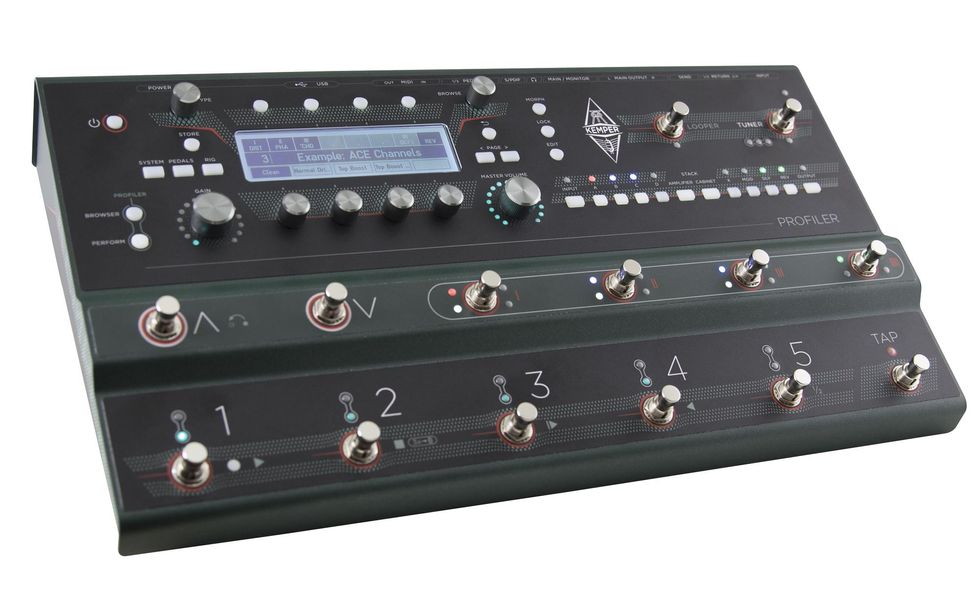
Kemper Profiler Stage
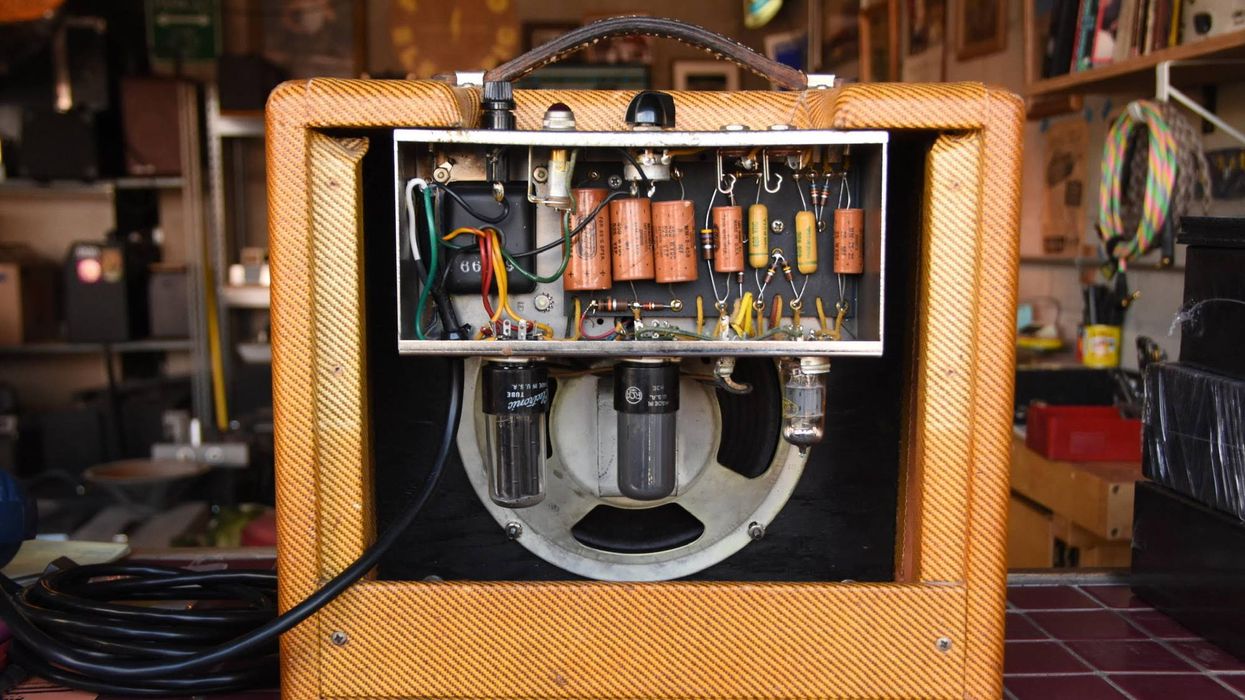
Ah, the eternal question—as a guitar journalist, this might be one of the most frequent questions I get asked. There are many ways to tackle this. One element of this puzzle that I’ll leave for others to debate is how these different units compare in terms of tone. From my perspective, you need to figure out what you’re missing in your current setup and how a digital rig would make your life easier. As we’ve seen in literally hundreds of Rig Rundowns over the years, these units have passed the test both onstage and in the studio. Even when you have Dumbles and vintage high-powered tweed Twins at your disposal, having a modeler in the rack can still be useful. (Hi, Keith Urban!) “Go online and watch videos on how you program and use the unit. If those don't make immediate and visceral sense to you, bail,” says O’Neal.
Fractal Audio FM9
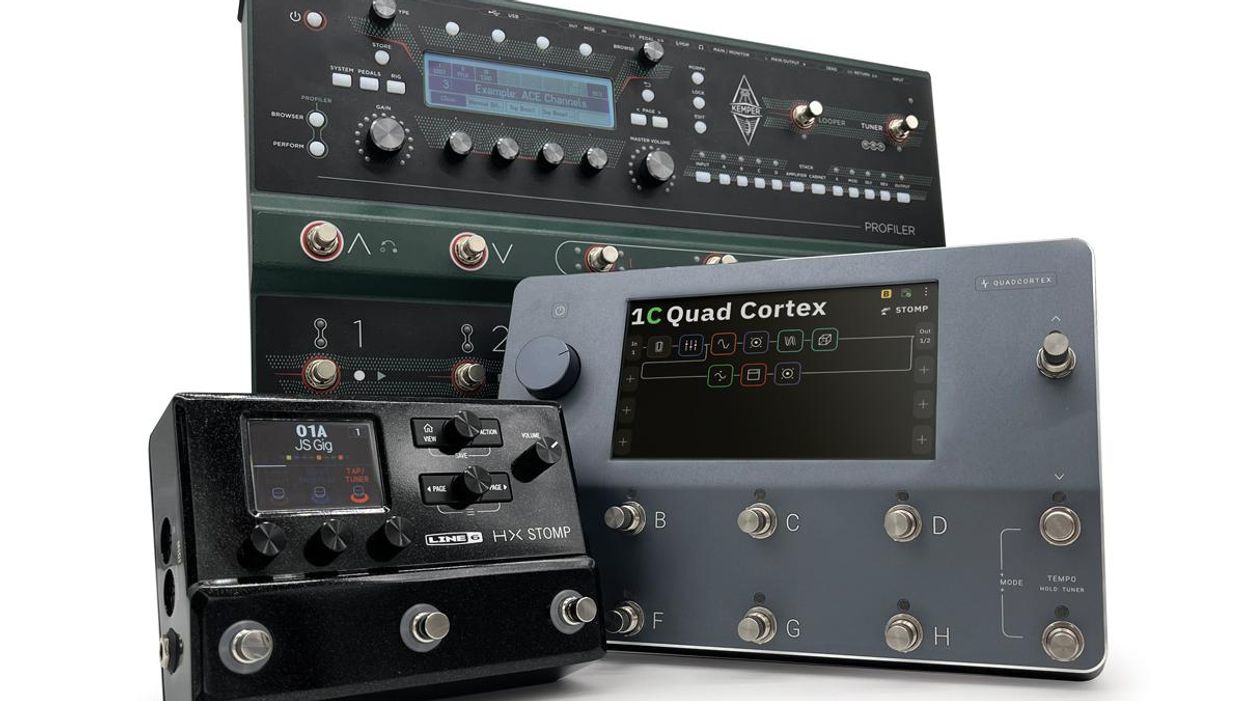
I usually point people to two different camps: the all-in-one units (Line 6 Helix, Fractal Axe-Fx, Neural DSP Quad Cortex, Kemper, etc.) or the smaller stomp-sized boxes that have a narrower focus on amp, cab, and mic emulation (Strymon Iridium, Walrus ACS1, or the Boss IR-200). This is an important fork in the road because both types of units offer their own solutions. Plus, price can vary widely. Although there will be some overlap, this article will focus mostly on the all-in-one units. However, the stomp-sized amp emulators have their place. Simply place one at the end of your board for an easy analog-digital hybrid setup or keep one within arm’s reach in case a tube goes out on the gig.
Neural DSP Quad Cortex
One of the bigger conceptual things to think about when choosing a modeler is the difference between an open ecosystem and a closed one. The Line 6 Helix and Fractal Axe-Fx units (and their various spinoffs) are what I consider closed systems, because you can’t create an entirely new amp model within their space. (The Axe-Fx III has an incredibly powerful ToneMatch feature, but that’s more based on deep customization of a pre-existing amp.) Both offer regular firmware updates with new amps, cabs, effects, and features. On the other side of things, you have Kemper and Neural’s Quad Cortex, which allow you to “profile” or“capture” digital versions of your amps and effects. This is really the defining feature of these units. With a simple recording setup, you can get extremely accurate versions of your prized—and fragile—tube amp and leave the original at home. The one caveat is that the quality of the result is only as good as your engineering skills, which is why a cottage industry of purchasable, professionally made profiles has popped up.
Start With What You Know
A piece of advice that I always recommend to anyone getting into modeling is to create your own presets. Yeah, it might take more time than just tweaking a factory or purchased preset, but in the end, you will learn much more about the features of your unit, as well as how the various elements of your signal chain interact with each other. For example, let’s say you’re a country-rock player who prefers a Vox-style amp.
With a simple recording setup, you can get extremely accurate versions your prized—and fragile—tube amp and leave the original at home.
Put aside the bells and whistles for the moment and focus on how to create a good base tone. Carter suggests a similar route: “Start simple with just an amp and cab. Get used to the interface and GUI [graphical user interface]. If you’re a Bassman player, it doesn’t make sense to just jump in and start tweaking a Mesa/Boogie.” Depending on your modeler, the various parameters for amps and effects might be different—or nonexistent—but at least you will have a point of reference before jumping into the deep end with experimentation.
Once you have the basics down, a prime place to start branching out is in routing. Gone are the days of needing a huge amount of rack gear to experiment with pre- and post-effects, parallel solutions, and MIDI. With a virtual playground, you can emulate nearly any imaginable signal flow and even design some that would be impossible in the analog realm.

Fig. 1
Most of the digital “boards” that guitarist and PG contributor Joe Gore designs are subversive, inspiring, and far from the mainstream. (He offers 13 different meticulously crafted Helix presets through the Line 6 marketplace.) Gore’s presets taught me invaluable lessons about using expression pedals when I tried to reverse-engineer them. Each scene or snapshot change has up to 60 different parameter changes, which alone is quite the feat. I would highly recommend his Blood & Pasta and Psych presets—they are simply mind-blowingly creative. In Fig. 1 you can see an example of how extensive this can get. Don’t be afraid to push the limits and reverse-engineer something from a more complicated setup.
“This is really the first time in a while where you can have bar bands playing the exact same gear as stadium acts.” —Cooper Carter
If you’re at least considering a digital unit, you likely don’t get the cold sweats when you think about learning your way around various menus and options. Each of us has our own specific tolerance of those, but in my experience the better you learn the ins and outs of your gear, the better you will sound. Although these are very, very tech-heavy units, you can get incredible results with simple setups. Going “digital” isn’t an all-or-nothing proposal. If you really dig your amp or pedals you can easily integrate those with any digital modeler. Let’s look at a few options that allow you to hold on to a bit of the analog.
4 Cables or 7?
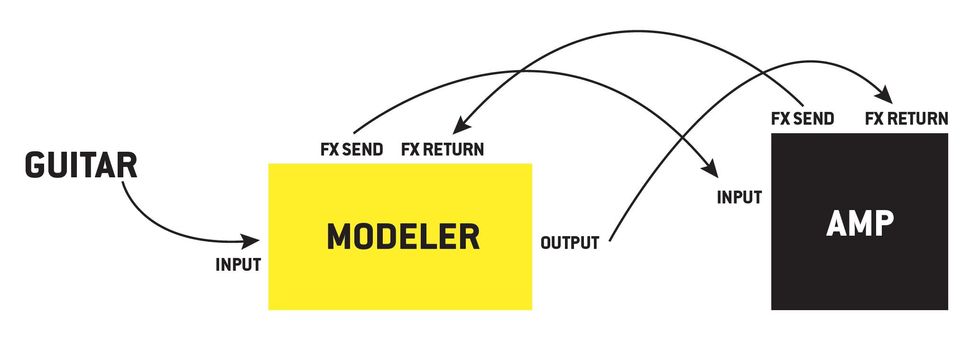
Fig. 2
The easiest way to combine digital control with analog pedals is to take advantage of the effects loop. Here’s a scenario: You want to use your modeler simply for effects alongside your trusty tube amp, but you don’t want to run everything in front. This is where the “4-Cable Method” comes in. In this arrangement, you’re able to run all your compression and drive pedals directly into the preamp and move all your modulation and time-based effects to after the preamp. In Fig. 2 you can see a diagram of how to hook everything up. Here are the steps:
- Arrange you signal chain in your modeler so that the effects loop insert is at the point where everything before it will go in front of your amp and everything after will go directly to the power amp.
- Connect your guitar to the input of your modeler (cable 1).
- Connect the effects send of your modeler to the input of your amp (cable 2).
- Connect the effects send of your amp to the effects return of your modeler (cable 3).
- Connect the output of your modeler to the effects return of your amp (cable 4).
This results in a hybrid setup that allows an incredible amount of flexibility with routing your digital effects within a traditional tube amp. (One tip: Check the global settings on your unit and make sure the effects loop is set to instrument level rather than line level.) Not sure if a certain effect works better before or after the preamp? Simply move them around in your modeler.
In Clip 1 you can hear what it sounds like with distortion, delay, and reverb running directly into the front of the amp.
And in Clip 2 I used the 4-cable method to clean things up.
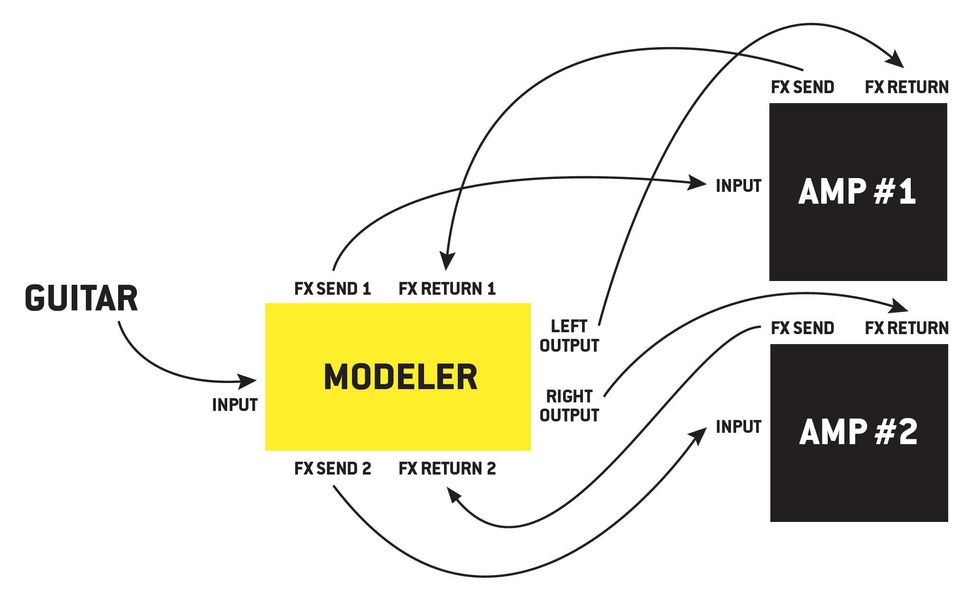
Fig. 3
But what if you’re running a stereo rig? That’s where the 7-cable method comes in. There are a few more things you’ll need (other than cables) to pull this off. First, your modeler must have two effects loops and dual outputs. Let’s pretend that the 4-cable setup described above is for amp #1 via output 1 of your modeler (Fig. 3). Now, follow the steps below for the second amp:
- Connect effects send 2 from your modeler to the input of amp #2 (cable 5).
- Connect the effects send from amp #2 to effects return 2 of the modeler (cable 6).
- Connect the main right output of the modeler to the effects return of amp #2 (cable 7).
It always helps me to sketch out how I envision everything working before diving into editing a patch.
The signal flow in the modeler will also become a bit more complicated. It always helps me to sketch out how I envision everything working before diving into editing a patch. If you think of these two as simply two parallel signal paths that come from a single source, it helps to keep everything straight.
Monitor This!
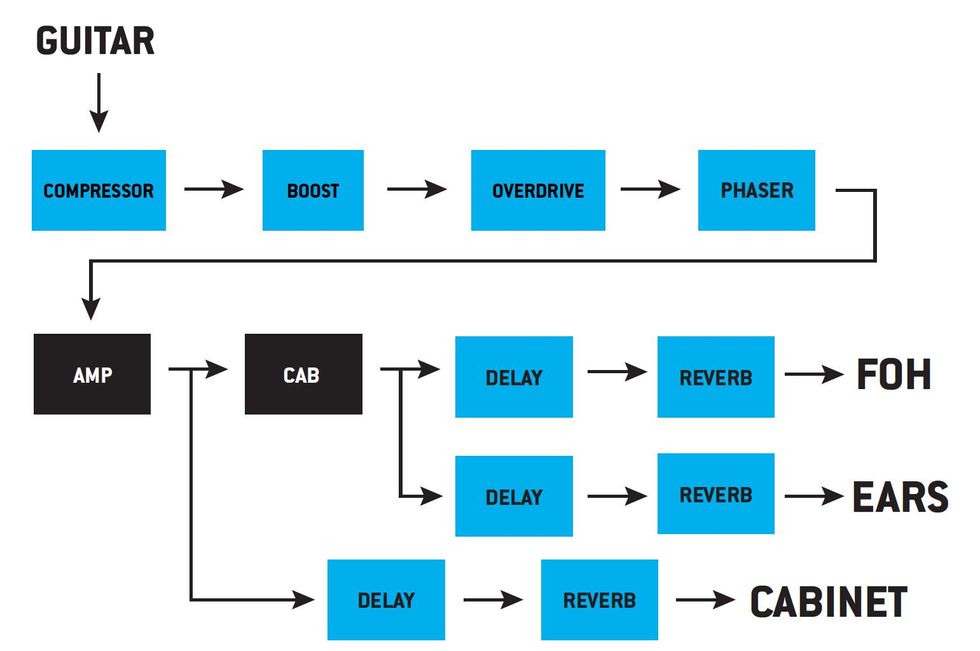
Fig. 4
On major tours, there’s an army of talented engineers that help craft the best sound possible, both onstage and out front. For most of us, that’s a real luxury. One routing setup that Carter suggests helps with both your monitor mix and getting a bit of that amp-in-the-room feel onstage. “The most practical application would be to run your fully processed signal to FOH and then a separate signal to a powered cabinet on stage,” he says. “From there, you can insert a split before the delay and reverb and feed that to your monitor or in-ears.” In Fig. 4 you can see an example of how to feed FOH, an onstage cabinet, and your in-ears. Tweaking the level of delay and reverb in your ears separately from FOH will allow you to better shape the reverb for the room without affecting what you’re hearing. “Whatever sounds best to you will make you play better,” says Carter.
Impulses Galore
One of the easiest ways to level up the realism of a preset is to use an impulse response (IR). This is where the all-in-one units and smaller stomp-sized modelers cross paths. Remember, the speaker and cab configuration in a traditional setup is basically an EQ—different cabinets and speakers treat the signal differently and therefore match better with certain amps and guitars. An impulse response is a digital version of everything after the amp, which would include the mic pre, mic, cab, and speaker. With a digital modeler, these would run in place of a cabinet block and before any time-based effects or reverbs.
Creating an impulse response isn’t too complicated. There is a wealth of tutorial videos on YouTube detailing the process, and some DAWs come with a built-in IR creator. In short, you sample ambient sound around a core tone and then the modeler uses that to treat your guitar tone.
In Clip 3 you can hear a Vox-style amp with a closed 2x12 cab IR.
And in Clip 4 you can hear that exact same tone with a larger 4x12 cab IR.
There are a host of ways to use IRs in your signal chain, but often it can be a somewhat paralyzing notion to try and wade through dozens of options to find the right one. Most IR packs come with loads of different WAV files that that can be separated by either cab, mic, or, for acoustic settings, guitar type. One way to quickly parse through them would be to set up a simple template with your preferred signal chain and then insert a split after the amp block to two separate IR blocks. Then map those IR blocks to different footswitches. This allows you to A/B a pair of IRs without taking your hands off the guitar.
Acoustic amplification can be a tougher road. Brian Wahl and Bradford Mitchell are behind Worship Tutorials, a website that offers various presets and IRs for many types of modelers including Helix, Kemper, and Axe-Fx. A few years ago, Wahl purchased a few acoustic IRs but never really connected with them. So, he decided to make his own. “One of the big myths I see is that people think you need to get an IR pack that closely matches their guitar type. That’s not true,” he says. “It’s like thinking you can’t put Telecaster pickups in a different guitar,” adds Mitchell. The purpose of the IR is to help shape the tone of your instrument in ways that EQ can’t quite reach since there’s a bit of reverb and possibly delay packed into each one. Another myth that Wahl hears is that if you have a really good pickup system, you don’t need an IR. “My response to that is we’ve found that guitars with higher-end pickup systems actually benefit more by using an IR,” he says.
“One of the big myths I see is that people think you need to get an IR pack that closely matches their guitar type. That’s not true.” —Brian Wahl
The process for Wahl and Mitchell starts with making a high-quality recording of the miked acoustic. Then, they will match the recording across six different pickup systems and 10 different mic options. Once you factor in different sample rates and WAV lengths, the process can become quite intense. “When deciding which IR is for you, I typically recommend staring with a mic you’re familiar with and cycle through the different pickup options,” says Wahl. Trust your ears at this point in the process above all else. “Most of them actually might sound bad,” he adds, “but once the correct IR clicks, you’ll know it.”
Talking with Wahl and Mitchell inspired me to dig up a few acoustic IRs and test his theory. I plugged my Córdoba Acero straight into my HX Stomp and recorded into Logic Pro X via USB.
In Clip 5 you can hear my completely unaffected signal. The Acero’s pickup system combines a piezo and under-saddle mic, so I kept the blend at noon. It’s not a bad tone, but enough of the piezo quack is coming through to warrant a better solution.
For Clip 6 I loaded up an AKG C12 dreadnought IR. The result sounds better. There’s more air around the sound, but the high end is a bit thin.
Clip 7 is an IR from the same mic, but I chose a different pickup option. It’s not as good as Clip 6, but still has that ambience that I dig.
Finally, we have Clip 8, which is a combo of a piezo pickup and a Neumann U67-style microphone. It’s kind of gross and thin but could serve a purpose in the right mix. I think recording examples like this is essential to finding the right IR match. Taking an objective listen will help you decide between options that could be quite subtle.
State of Expression
One of the most fun—and interactive—parts of using a modeler is exploring the absolutely endless options that expression pedals can offer. In most units, nearly any parameter you can think of can be assigned to an expression pedal for real-time tweaking. One player who really opened my eyes to what’s possible with expression pedals is John Nathan Cordy, a British guitarist who specializes in jazz-fusion styles and has a YouTube channel that explores most of the modern modelers. One of his favorite expression pedal tricks was inspired by the ambient pads Eric Johnson would play on the intro to live versions of “Cliffs of Dover.”
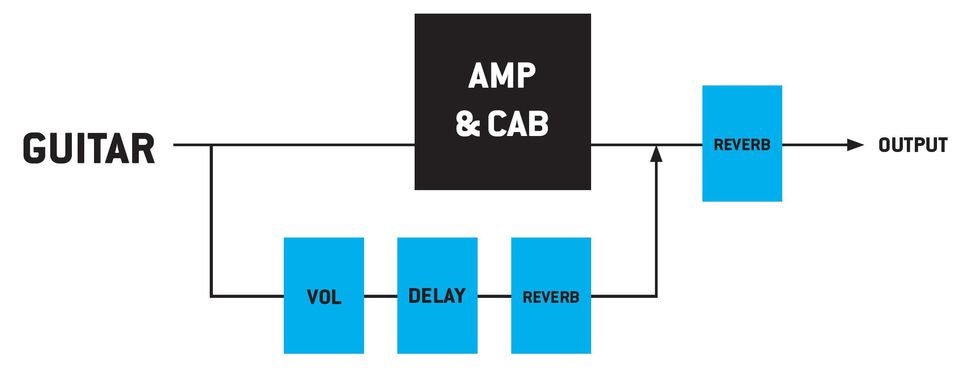
Fig. 5 shows the diagram, but here’s how you set it up:
- Arrange a basic signal path and then add a parallel path.
- Place a digital delay on the parallel path. Digital works better because with analog emulations you can dip into self-oscillation, and we don’t want that.
- Within the delay, assign your expression pedal to the feedback control so that when the heel is down you’re at about 10 percent and toe down is 100 percent.
- Put a volume pedal block before the delay and assign the expression pedal so when the toe is down it mutes the input.
- Add reverb to taste after the delay.
- Connect the parallel path back to the main path after the amp and cab block.
I’d recommend saving this as a template and then experimenting with loopers, compression, multiple outputs, and more.
Next Steps
Ultimately, the better you know any piece of gear, the better it will sound. Once you find a modeler that you connect with, invest the time to learn and explore the features and effects that you can put into practice. Understand its strengths and weaknesses and make sure those align with the goals you have for your rig. And don’t be too bashful to ask questions online—each of these units has a robust community of users, which means there’s a ton of info out there. Chances are if you run into a roadblock, someone else has too.
Finally, do what inspires you. Don’t overthink things or get distracted from the big picture, which is to enjoy making music.