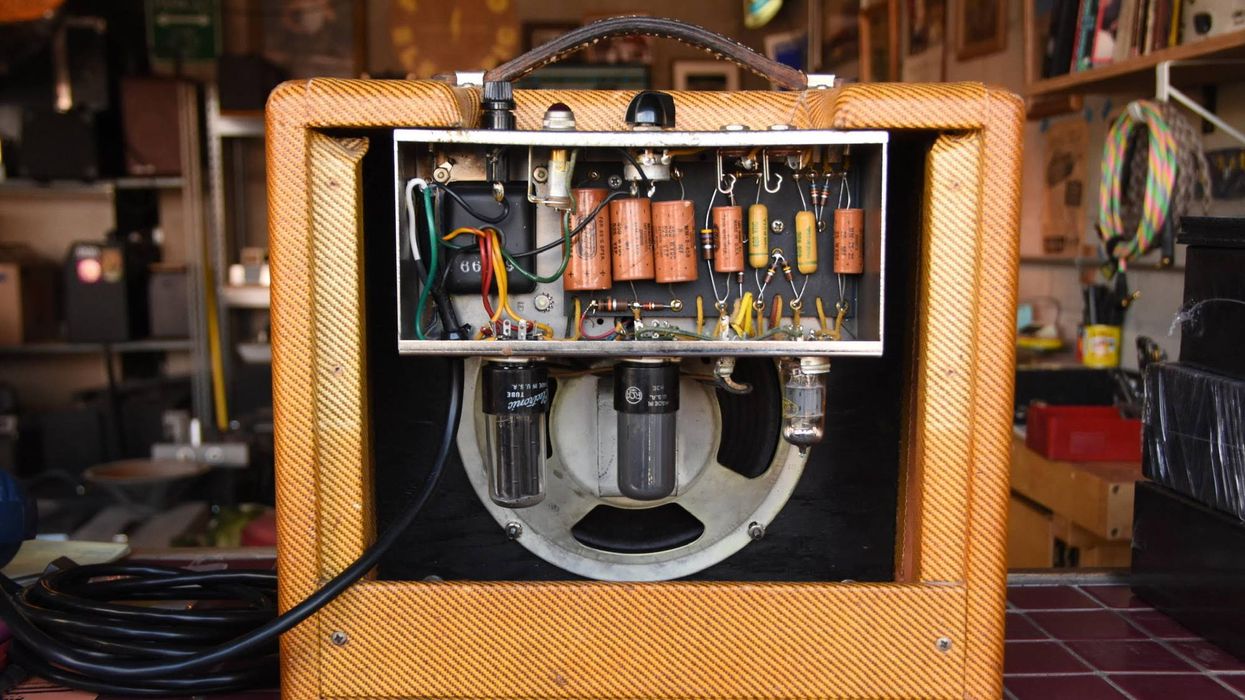

Most guitarists who habitually play tube amps understand that, to keep their rigs in optimal shape, it's vital to replace those glowing bottles on a routine basis. Fewer players, however, explore the very real sonic variations that can result from careful and considered tube swapping.
Different brands of the same kind of tube might each sound a little different, but you can achieve more dramatic results by auditioning the several different types of tubes that are compatible in the same preamp-tube sockets and circuit positions. The effects of such thoughtful tweaks reach beyond the realm of tone into the world of gain and headroom. Because those qualities are the central defining characteristics of most guitar amps, even swapping just one crucial preamp tube for a different type can entirely alter the feel and response of your favorite amplifier.
Let's investigate how several different tube types can change your amp's sound and overdrive content when swapped into preamp and phase-inverter positions. Maybe you'll discover a tweak to fine-tune your sound.
Everything to Gain
You may already be familiar with the term "gain staging," a process that controls how the different gain stages within your guitar amp (or pedalboard, in some instances) flow from one into the next. In brief, the amount of gain added to your guitar signal at any stage within the amp's circuit—and the degree to which that is further ramped up or tamped down as it is passed along from stage to stage—is arguably the most significant factor in shaping the character of any classic or modern guitar amp. (For an in-depth look at the subject, read "All the World's a Gain Stage.")
The tube types we'll discuss next can alter your amp's sound and feel because they are your amp's gain stages (albeit ones that are regulated by the circuitry surrounding them). This is where the magic happens. The gain induced by each preamp tube throughout the signal-carrying part of the circuit—along with the resistors and capacitors that enable correct tube operation, and the coupling capacitors that pass the signal from one stage to the next—determines just about every aspect of how an amp "sounds." Which is to say, how the amp translates your guitar pickups' meager electrical signal into that mighty jolt that belts out of the speaker at the other end of all that wire.
The amount of gain by which different tube types inherently increase a given guitar signal helps to lay the foundation for what we call tone: It shapes the ratio of clean to crunch, determines how saturated the signal is (or isn't) with harmonic overtones, and partly governs how hard you can play before your clear and articulate chords and lead lines fold over into delectable, singing overdrive … or possibly dirt and mush. And yes, you can reduce the gain level of any channel in your guitar amp by just turning down the first gain knob (variously labeled volume, gain, drive, etc.), but changing it up via the correct tube swap can alter the nature of that gain stage and your amp's overall dynamic response. The results of this kind of change are often heard as a more all-encompassing alteration of the amp's sonic characteristics, including the degree and onset of distortion.
Here's the cool thing: Most amps that are leaning a little too far one way or the other for your personal liking can be significantly altered by simply changing one of the original preamp tube types in the design for another compatible type. It takes no more effort than pulling out one tube and pushing in the other—plus the four-lattes-worth, about $12 to $15, of cash it costs you to acquire the replacement tube in the first place.
If you're looking to tame a first gain stage that's a little raw and hairy and needs some tightening up, the right 12AT7 might do the trick.
Change Where It Matters
With amps that have just a couple of preamp tubes, it's pretty clear that changing one or both to different types will likely make an impact on your tone. In others—amps with lots of extra tube-driven features, or even classics from the Fender blackface/silverface template with six preamp tubes—you need to know which tubes to replace to most effectively alter the amp's performance.
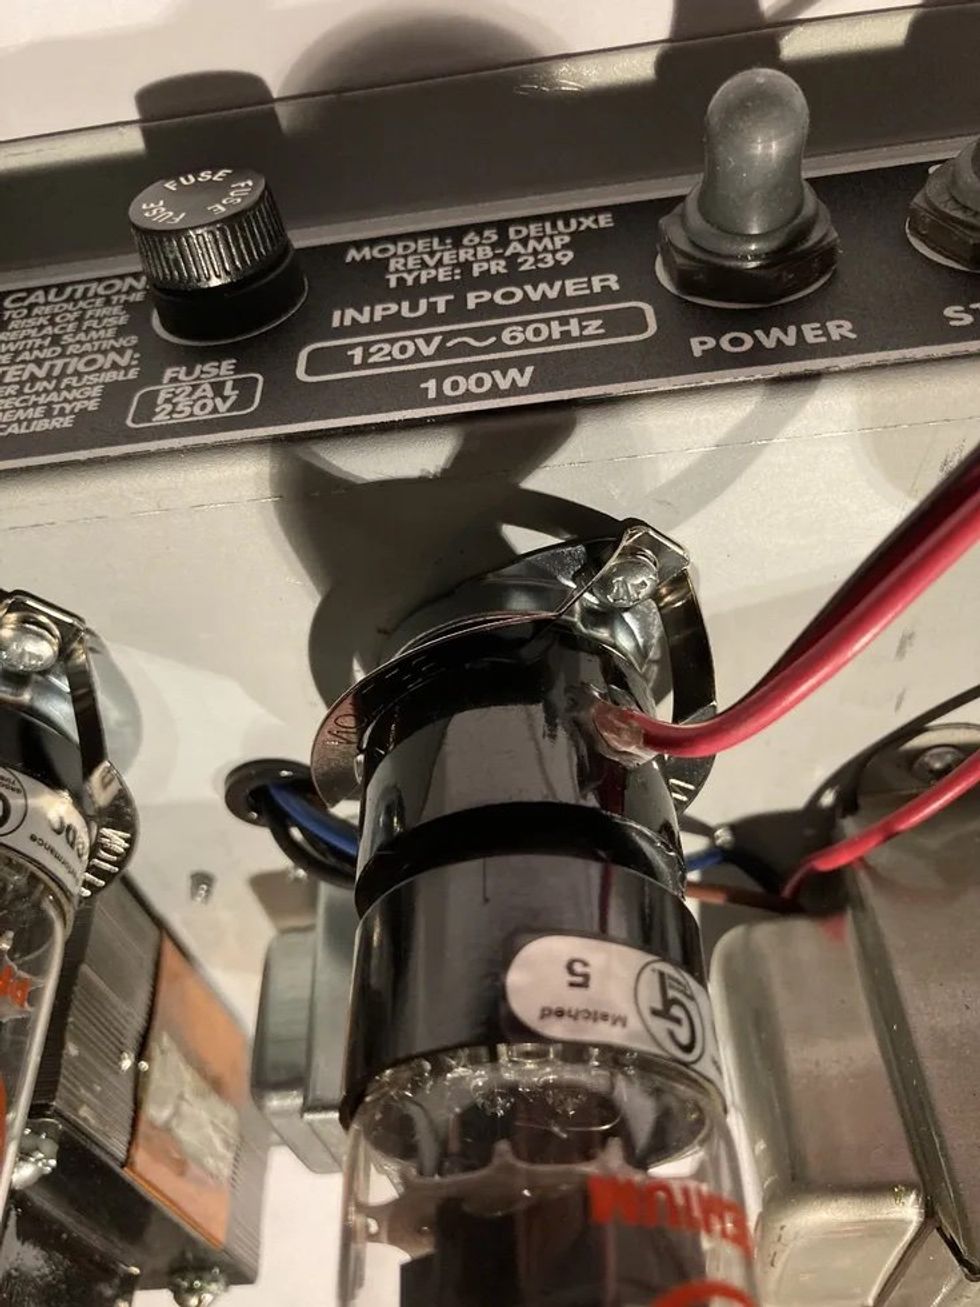
Since we're talking preamp tubes here (the smaller tubes toward the front of the circuit, rather than the big output tubes near the end of the signal chain), the first tube your guitar signal hits after entering the input jack generally has the biggest impact on the overall character of any amp's sound and playing feel. In amp circles, that's generally referred to as "V1" (for "valve number one," using the British term for "tube"), and it will usually be found hanging from the chassis in a position that is roughly in line with the location of the input jack itself.
For example, consider the typical Fender Deluxe Reverb. If you spin the amp around so you're facing the back panel with the tubes hanging beneath the chassis, V1 is the tube furthest to the right side of the back of the amp. On the other hand, if it's one of many amps based on the Marshall plexi platform—many of which have their chassis mounted tubes-up in the bottom of a head cabinet—V1 will be furthest to your left as you face the amp from behind.
To get the most out of your tube-swapping adventures, it's best to familiarize yourself with your amp's schematic or tube diagram, with reference to the job each tube performs within the circuit. In Marshall-style or Fender tweed-style amps, for example, V1 will form the first gain stage for each of the amp's two channels, so changing it will affect both simultaneously. (A nine-pin tube in the dual-triode family—the common 12AX7, for example—has two individual gain stages within it, each of which can act as an independent "tube" for pre-amplification purposes.) In amps designed on the Fender blackface/silverface template, on the other hand, V1 provides gain stages before and after the tone stage on the same channel, so V1 covers the Normal channel and V2 covers the Vibrato channel.
If you want to more dramatically alter the gain characteristics of modern high-gain amps, you might need to go further and also swap out the next tube in line, if the channel involved uses more than V1 in its gain structure. (To determine this, refer to your amp maker's tube chart or schematic, or contact the company directly.) Also, many amps that use an independent tube to drive the tone stage, or to make up lost gain after the tone stage, can be further tweaked with some attention to that tube, but the results are usually less immediately obvious than those achieved by swapping the first gain stage in the channel.
We'll mostly concentrate on the effects of changing V1 for a different tube type, because that's where most amps reveal their foundations for sound and playing feel. If you'd like to go further, you can use the same guidelines discussed below to swap other tubes, but it gets into a game of revolving variables pretty quickly if you don't go one tube at a time and take good notes along the way.
It's also worth putting some thought into the phase-inverter tube. The phase inverter is the last stage in the amp before the output tubes, and in all amps other than single-ended types with just one output tube (Fender Champ and Vox AC4, for example), this stage splits the signal into two reverse-phase strands to send on to those big bottles for final amplification. The tube in this position is still a preamp tube of the type used in the front end of most amps, but it doesn't affect the tone of the signal passing through it so much as it does the gain. That, however, can still have a significant impact on the way your amp behaves. Why? Different types of compatible phase-inverter tubes can drive the output stage harder or less hard, accordingly. We'll check out the effects of some swaps in this position after looking at the V1 position.
From Headroom to Hot Rod
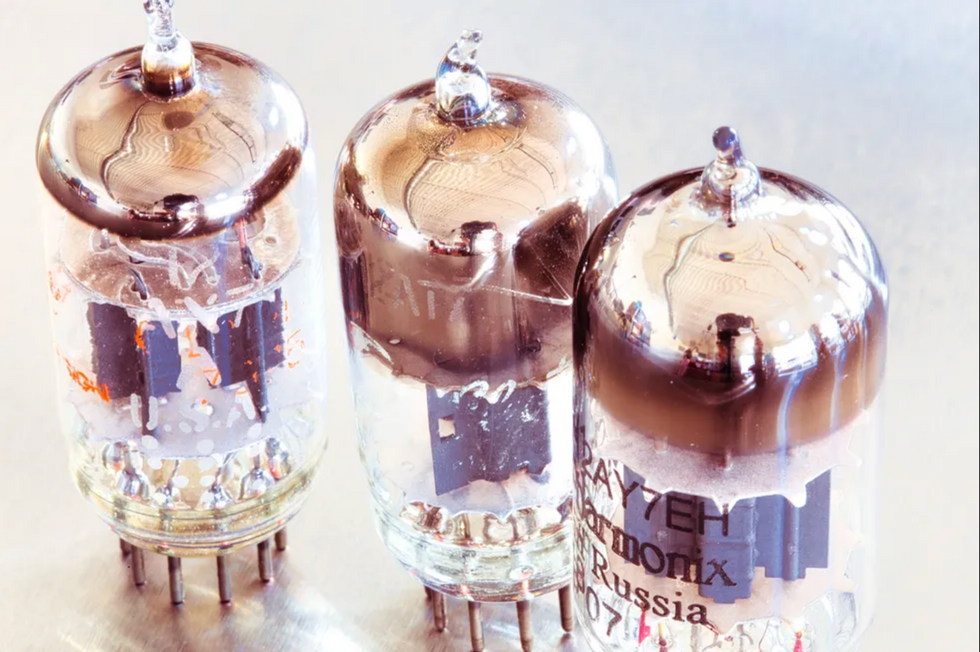
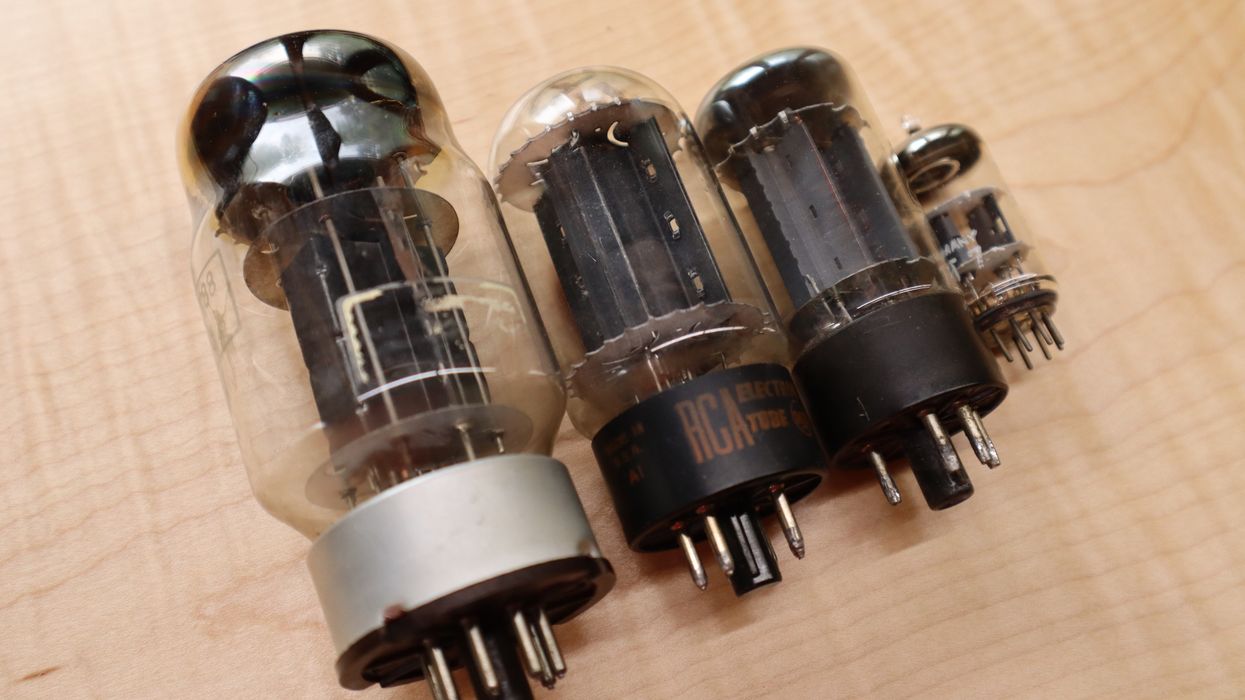
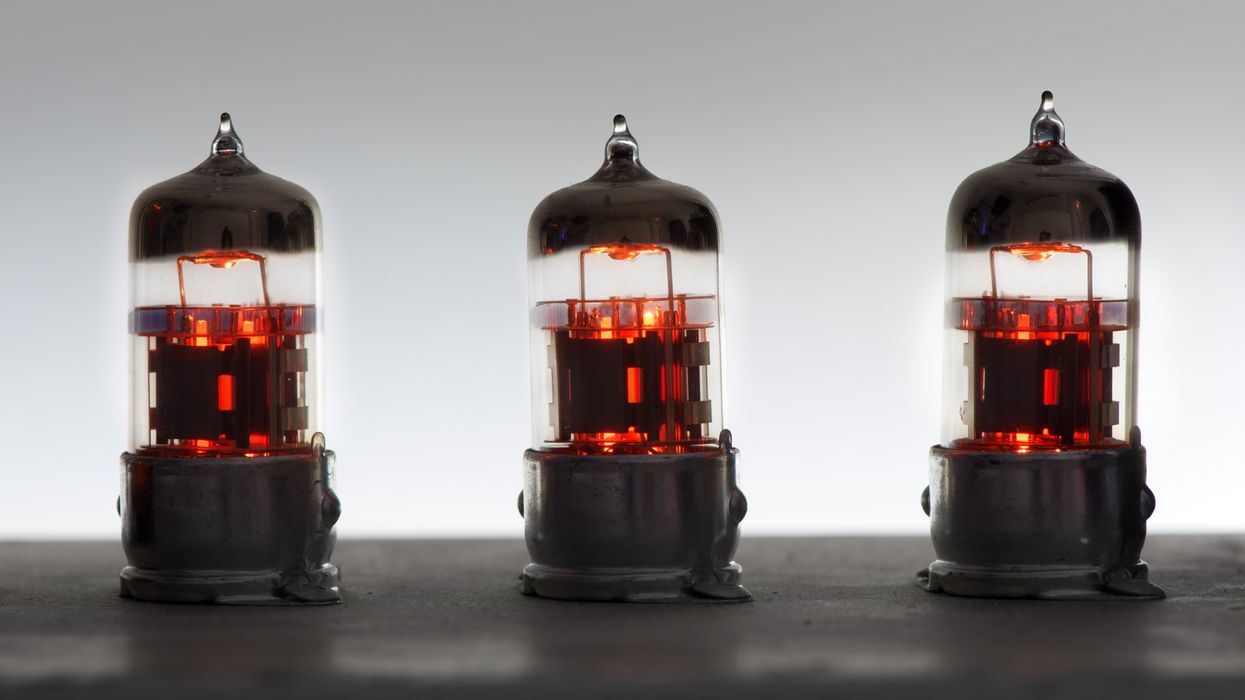
Though these "12A" preamp tubes look similar, they offer different levels of gain, which means you can substitute one for another to alter your tube amp's tone and response. From left: A 12AX7 (gain factor 100), 12AT7 (gain factor 60), and 12AY7 (gain factor 40).
Photo by Andy Ellis
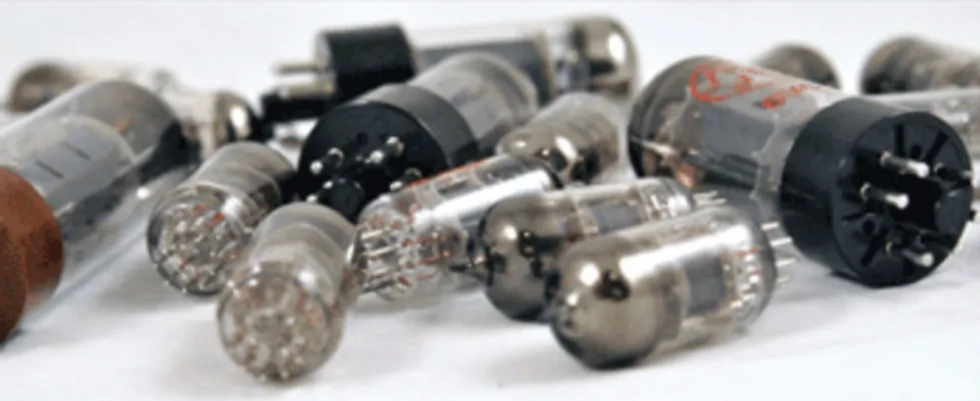
Let's take a look at what four different compatible, nine-pin, dual-triode preamp tube types can do for the sound and playing feel of your amp when you substitute one for the other. We'll take these from the lowest gain to the highest, although the latter is the tube that most players will remove to begin the swapping process—the 12AX7 (ECC83 in the U.K.). In most situations these four can be used as direct replacements for each other, but I'll mention any caveats if and when they apply.
12AY7 = Gain Factor 40
This tube's gain factor of 40 is the lowest of the bunch, and this might seem dramatic when compared to the 12AX7's gain factor of 100. As a general point of observation, however, you'll really only notice a gradual increase in volume and gain as you jump from one tube to the next, while other aspects of your amp's sound reveal themselves more prominently. Of all the tubes considered here, the 12AY7 (aka 6072) will push your amp's front end the least, but in many cases that's exactly what you want.
This was the original tube in the first gain stage of most Fender tweed amps from the mid 1950s to 1960s—which also makes it the V1 in the countless tweed-inspired amps still made today. Most fans of tweed amps agree this is exactly the tube you want in those circuits, even with higher-gain substitutes more readily available. Tweed-style amps can often sound too ragged and unhinged with a 12AX7 in that socket, with a fizziness or buzziness to the breakup that can be unappealing to some players.
Of all the tubes considered here, the 12AY7 will push your amp's front end the least, but in many cases that's exactly what you want.
Looked at from the reverse perspective—swapping a 12AY7 in place of an original 12AX7—this tube is excellent for taming a harsh preamp stage, tamping down the gain when you just don't need as much firepower as your amp wants to deliver, or removing strident harmonic artifacts from your tone. Gain aside, a good 12AY7 can still sound very full, rich, and well-balanced, and offers a great way to achieve maximum headroom and minimum early-stage fizz from many preamps in other types of amps.
Contemporary makers occasionally recommend 12AY7s in newer, non-tweed-based amps, when this type of sound and performance are desirable. Brian Gerhard of TopHat suggests it as an alternative for the V1 position in his Super Deluxe, Super 33, and the Top Boost channel of the Supreme 16. And while you might not immediately see this as a fit, I even tried one in the lead channel (channel 2) of a Mesa/Boogie Mark Five:35 head with great results, taking its Xtreme setting from heavy rock and metal down into the classic-rock, blues-rock, and garage-rock zones.
Caveat: Some techs will point out that the 12AY7 has a lower plate resistance than the 12AX7 and others in this group, and will therefore draw more plate current through the resistor that couples this tube to the amp's power supply (usually a 100k-ohm resistor). For that reason, some recommend that you should upgrade these plate resistors from the usual 1/2-watt types to larger 1-watt types, to handle the heat generated by the extra current. That said, you can almost certainly substitute a 12AY7 for a 12AX7 in the V1 position of standard guitar amps without experiencing the slightest problem.
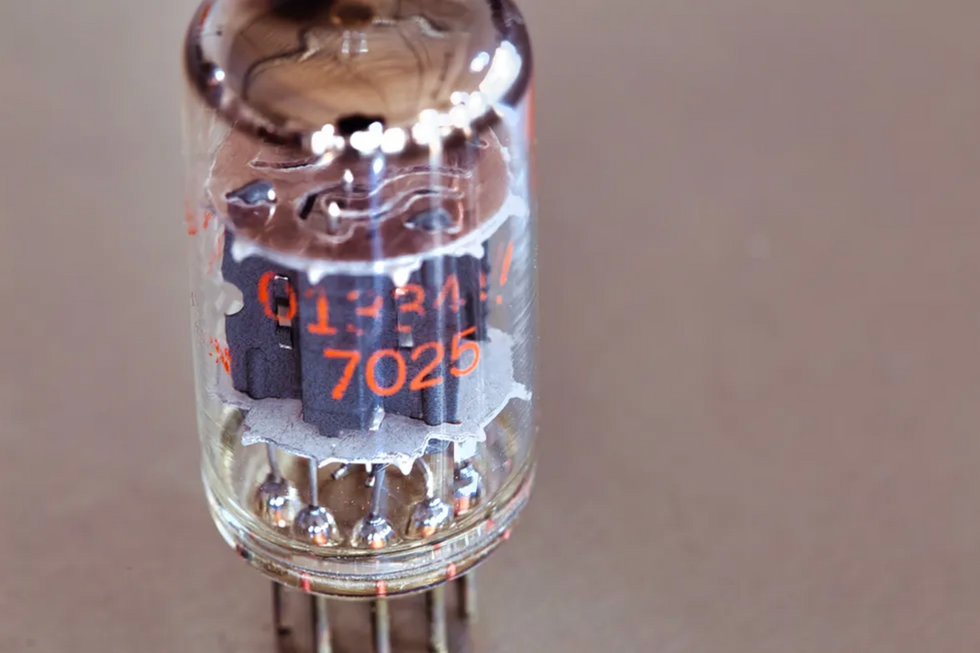
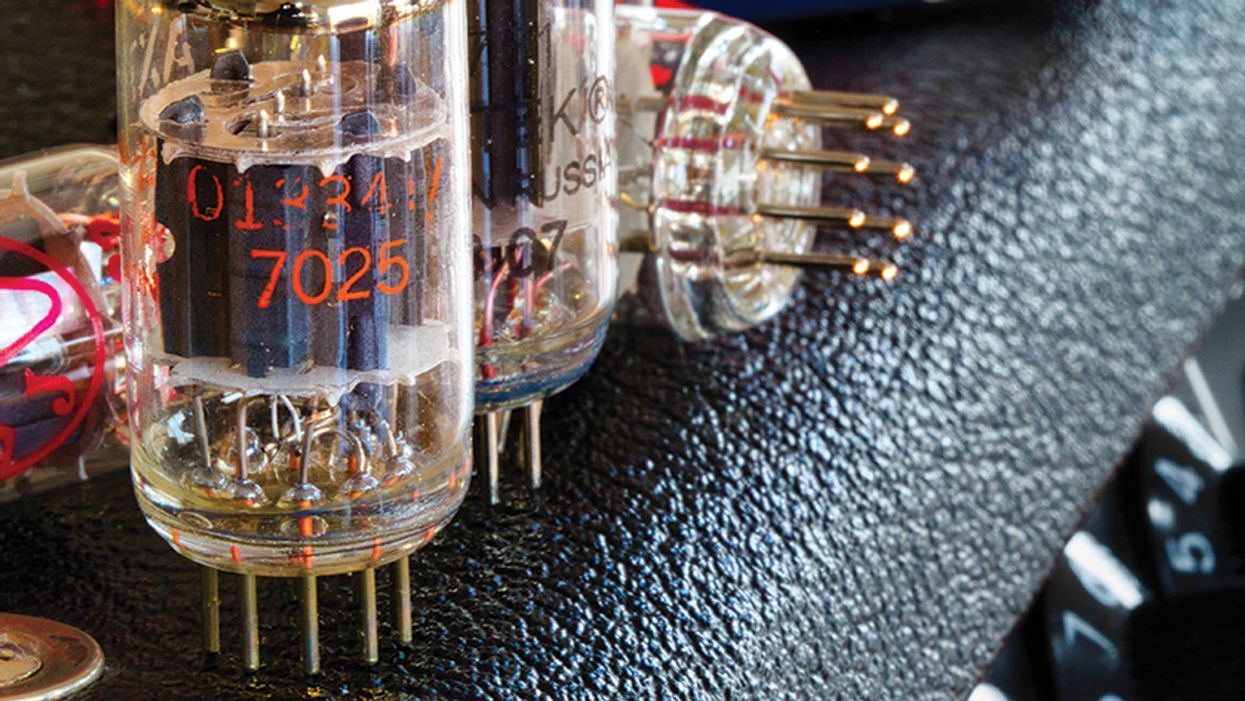
Historically, a 7025 was a military-spec version of a 12AX7, built to be more rugged and have a lower noise floor. Modern 7025 and 12AX7 preamp tubes are essentially identical, differing only in their names. Both offer a gain factor of 100.
Photo by Andy Ellis
It's worth noting that the Fender tweed amps famous for their use of these tubes had only 1/2-watt plate resistors in that position, but they also had relatively low plate voltages on their V1 tubes to begin with, so there's generally even less worry about things getting overheated in any amps inspired by the tweed or Marshall JTM45/plexi platform (although these Marshalls substituted an ECC83, the British equivalent of the 12AX7, for the 12AY7 in the first place).
12AT7 = Gain Factor 60
The 12AT7 is probably best known for its use in reverb stages or in the phase inverters of blackface and silverface Fender amps of the '60s and '70s, but it can also be used in the V1 (or equivalent) position in many amps to lower that first stage's gain and thereby achieve more headroom and a tighter overall tone.
Some players find that a 12AT7 yields a slightly dull, cold tone when used in the V1 position, but that conclusion seems to vary from amp to amp and player to player. If you're looking to tame a first gain stage that's a little raw and hairy and needs some tightening up, the right 12AT7 might do the trick. Even though its gain factor of 60 makes it appear 50 percent stronger on paper than a 12AY7, you likely won't hear anything close to "half again as much gain" when substituting an AT for an AY, although you'll notice a pretty dramatic decrease when popping in one of these in place of a hotter 12AX7.
Caveat: The 12AT7 is often set at a slightly different bias level than the other tubes discussed here, so it might not perform optimally in some circuits. But you're unlikely to harm the amp or the tube by trying it out, so if you've got a good spare 12AT7 handy, the best route is to stick it in for a while, play, and see.
5751 = Gain Factor 70
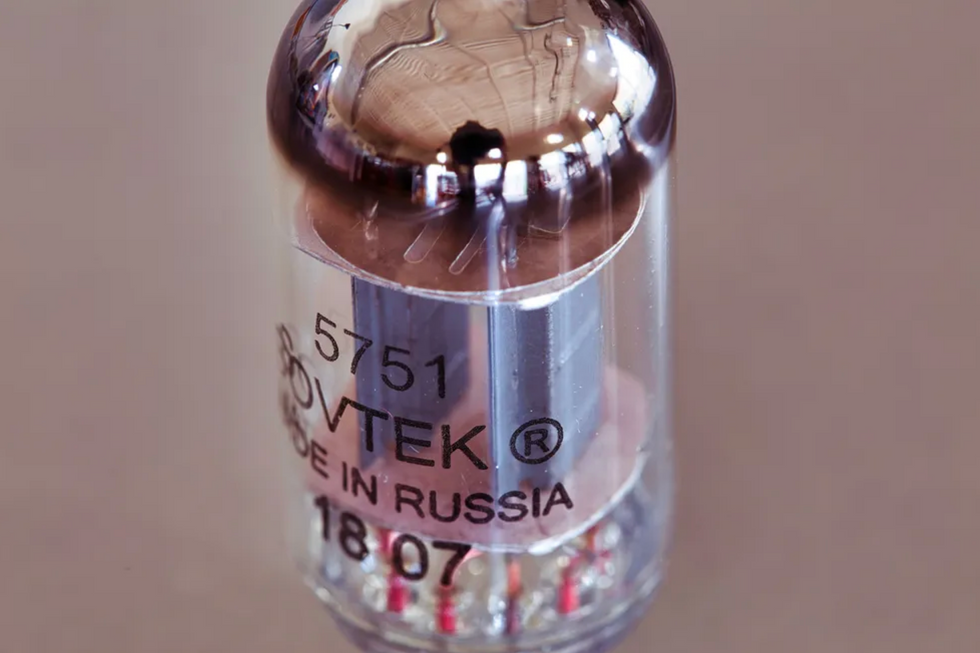
With a gain factor of 70, a 5751 is a popular replacement for a 12AX7, as it reduces the gain of the first preamp stage by around 30 percent compared to a 12AX7, the typical V1 tube. Stevie Ray Vaughan was known to use 5751 preamp tubes to coax a firmer crunch from his vintage Fender amps.
Photo by Andy Ellis
This is one of the most popular subs for the common 12AX7. A 5751 will reduce the gain of your first preamp stage by around 30 percent relative to a 12AX7 originally in that position, which can often be enough to tame a fizzy overdrive tone without sacrificing too much of the amp's overall power and muscularity. Good 5751s are also often just great-sounding tubes in many circuits, delivering so many of the family's desirable sonic characteristics, but with less of the gritty edge and ragged breakup of higher-gain preamp tubes.
This tube has been a favorite of many professional players for just this reason, and was one of the tricks Stevie Ray Vaughan often used to achieve a bolder, firmer breed of crunch from his vintage Fender amps. Dig into any discussion of preamp tube substitutions for the 12AX7, and you'll likely see the 5751 mentioned early on, and confirmed time and again as a popular choice.
Lowering the gain to achieve a better overdrive tone might seem counterintuitive, but doing so will often help you induce less distortion in the early stages of the amp, while passing along a less compressed, more frequency-rich signal to later stages. That, in turn, means you can push the output stage harder to induce a bigger, beefier crunch from those power tubes without passing along the fizziness of an already-distorted preamp tube.
Whether you're playing clean, crunchy, or heavily overdriven sounds, the sonic results of this swap will often yield tighter lows with less farting-out, a somewhat more balanced and less hyped midrange, and highs that refrain from being strident or spikey.
12AX7 = Gain Factor 100
We've now worked our way back to the 12AX7—the baseline for our exploration. Because it's the most common preamp tube type in use, particularly in contemporary guitar amps, the 12AX7 is the little bottle you're likely most familiar with. With a gain factor of 100, it's also the hottest tube in this selection, so most amps that carry one in the V1 position are coming to you at their highest potential gain level.
A 5751 will reduce the gain of your first preamp stage by around 30 percent relative to a 12AX7 originally in that position, which can often be enough to tame a fizzy overdrive tone without sacrificing too much of the amp's overall power and muscularity.
Why would you want less gain in this position? If you're going for all-out metal or shred, chances are you don't, and in such cases a good 12AX7 is likely your best bet. But if you haven't tried such swaps before, you'll probably be surprised by what a tube with a lesser gain factor will do to your amp's response, right off the bat. And even many heavy-rock styles can benefit from a less slamming tube in V1. In high-gain preamp designs, there's usually more than enough gain to be had from lower-gain preamp tubes anyway, and often this comes with the bonus of a sweeter, smoother breakup.
None of which is intended to imply that there's anything wrong with a good 12AX7, and it's the standard for good reason. This tube can sound great kicking off your amp's sonic and gain characteristics, no doubt, but in some circuit designs it can also be associated with a slightly harsh distortion characteristic when pushed hard. In such cases, this can induce a "wasps-in-a-tin-can" lead tone players describe as fizzy or fuzzy. You can ameliorate this effect by tamping down the gain a little with a different type of preamp tube.
Swapping Phase-Inverter Tubes
As mentioned earlier, the phase-inverter (PI) tube doesn't affect the tone of your guitar signal in a conventional tone-shaping manner, but its gain factor does determine how hard it drives the output stage. In addition, the degree to which the PI tube itself distorts while splitting and transferring the signal to the output tubes will contribute to the amp's overall distortion content.
With this in mind, it's not hard to extrapolate from the general preamp information above to guess what these different tube types might do when used in your PI position. Swapping tubes in this stage, however, should generally be done with a little more care and consideration for the intentions of the original design, since amp makers have usually put more thought into phase-inverter design than merely tweaking distortion characteristics. For that reason, it's probably best to pursue nuanced changes here, if at all.
One of the most obvious lessons in what different preamp tube types will do in your PI can be found by simply examining some of the characteristics of classic amps designed with these tube variations, while considering the designers' intentions in using these tubes.
Most players are familiar with the easy crunch and sweet overdrive of the Fender tweed and Marshall JTM45/plexi templates, both of which used 12AX7s (or similar 7025s) in their phase inverters. The preamps in front of these PIs are by no means high-gain, but with the volumes up pretty high, hitting this higher-gain PI tube with a pretty hot signal, these stages are able to work together to get the output tubes cooking pretty well. Fender's early-'60s amps with brown control panels and tan or blonde Tolex covering mostly retained the 12AX7/7025 in the PI, but when Leo and crew further refined these designs to achieve improved headroom and a cleaner overall response, they loaded this position with a more restrained 12AT7 tube instead. That change is an important part of the blackface sound, which is partly characterized by the later onset of distortion—an effect this cooler tube contributes to.
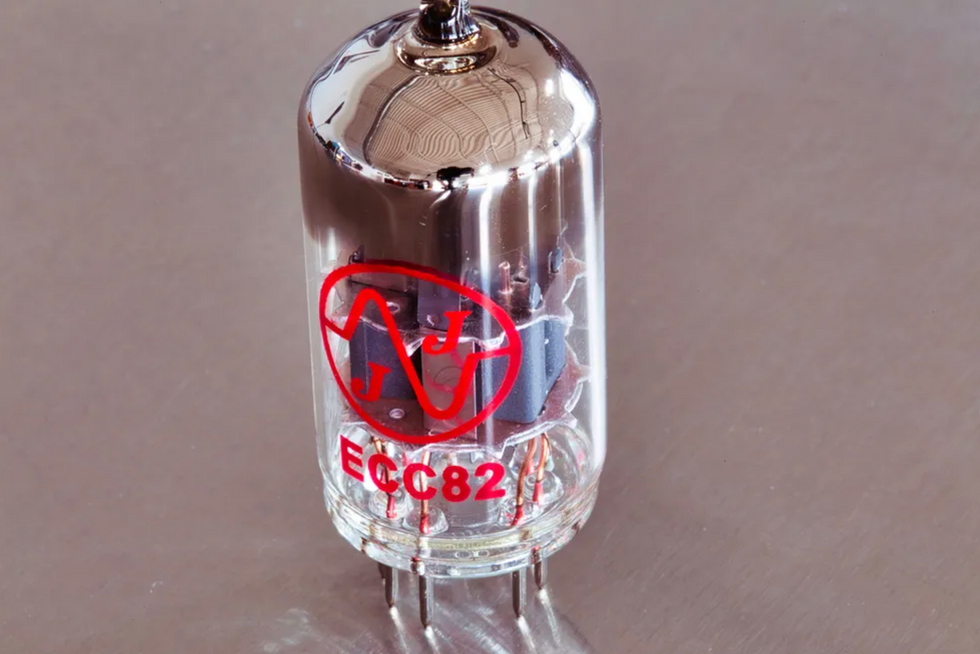
An intriguing alternative for the phase-inverter tube, the 12AU7—aka ECC82 in the U.K. and Europe—has a gain factor of only 19. The 12AU7 is extremely resistant to distortion in the PI stage, which is why, circa 1963, JMI included a 12AU7 in their new 100-watt Vox AC100. The goal was to give the Beatles enough clean power to be heard over thousands of screaming fans.
Photo by Andy Ellis
Taking things even further in this direction, when JMI wanted to create the cleanest, most powerful guitar amp imaginable in the early '60s—specifically to help the Beatles be heard over hordes of screaming fans in larger and larger venues—they used a 12AU7 in the 100-watt AC100. With an amplification factor of only 19, making it a lower-gain tube than any of the four we've discussed so far, the 12AU7 was extremely resistant to distortion in the PI stage. It also helped maintain high headroom in the four EL34s in the output stage. (Note that the 12AU7 is not a great substitute in the preamp positions in most guitar amps, even when you really want to tamp things down. It will "work" in most of the same circuits, but this tube prefers some circuit tweaks to optimize its performance, and usually just doesn't sound very good in V1.)
One challenge regarding PI swaps is that it's often difficult for the typical guitarist, and even one with some tube-swapping experience, to gauge the tonal and gain-induced sonic effects of any given PI tube. If you've already tried a 5751 or a 12AY7 in your V1 position, however, and you feel the output stage is still being driven a little too hard at your desired volume settings—which might be heard as a "splatty" or harsh response from smaller output tubes in particular, like EL84s or 6V6s—it might be worth trying a 5751 or a 12AT7 in place of the 12AX7 that was (most likely) originally there. You can go even further if this doesn't do it, by popping in a 12AY7. Note that alongside the increased headroom, you'll experience a drop in output level when swapping PIs down the gain range, so you'll likely find yourself adjusting volume controls accordingly.
This is a technique that some contemporary amp makers use as part of their overall design. For many years, Dr. Z used a 5751 in the PI in several amps—notably the Carmen Ghia model—to avoid hitting the EL84s too hard and inducing a ragged response. (Although more recently, Dr. Z has sometimes changed up that formula.)
Going in the other direction, if you play a Fender blackface or silverface amp, or one derived from that design, and would like to drive the output stage harder, try replacing its original-spec 12AT7 with a 12AX7 to hear whether that does the trick. If that takes it too far, try a 5751, which should give you something in between the two.
Technically, some of these tubes—even if they are "compatible" in the broader sense—are not designed to work optimally in PIs that were devised with another type in mind. But as with our discussions of the 12AY7 and 12AT7 in the preamp section, in most cases they will work fine, and should at least give you a taste of what such PI swaps might do for your amp's overall performance.
Hearing Is Believing
Driving the Output Stage
The first four clips demonstrate swapping V1 (the first preamp tube) in a Fender '62 Princeton Chris Stapleton Edition (a reissue of the brownface Princeton 6G2 circuit) from the original 12AX7 (Clip 1) to progressively lower-gain tubes: a 5751 (Clip 2), 12AT7 (Clip 3), and 12AY7 (Clip 4). You can hear how the gain content decreases with each swap, and if the alteration from one to the next might seem subtle, jump from the original 12AX7 to the 12AY7 to hear how dramatic the overall spread can be. Both the amp's volume and tone controls are set to 7 out of 10.
The guitar is a Gustavsson Fullerblaster—a high-quality T-style with a Wolfetone single-coil bridge pickup in a traditional Tele bridge, and a ThroBak PAF-style humbucker in the neck position. You'll hear the bridge pickup in the first segment of each soundclip; the second segment features the neck humbucker.
Preamp-Generated Overdrive
This time the same tubes—12AX7 (Clip 5), 5751 (Clip 6), 12AT7 (Clip 7), and 12AY7 (Clip 8)—are swapped in and out of the lead channel of a Marshall modded-plexi-style Friedman Small Box 50-watt head driving a 4x12 cab with Celestion Greenbacks. These soundclips demonstrate how the gain characteristics change in an amp where the overdrive is generated more in the preamp. The Friedman's gain knob is at 6 out of 10, with the master set to 4 out of 10.
The guitar is a 2016 Gibson Custom Shop Les Paul 1958 Reissue with Monty's PAF pickups. I'm using the bridge pickup on these soundclips.
Swapping the Phase Inverter
In these four soundclips, the Friedman Small Box's phase inverter is swapped from a 12AX7 (Clip 9) to a 5751 (Clip 10), 12AT7 (Clip 11), and 12AY7 (Clip 12). To help us hear how the progressive decrease in PI-tube gain eases up on the output stage, I'm using the amp's rhythm channel (gain at 4, master at 5).
The guitar is the Gustavsson Fullerblaster again, on its Tele-style bridge pickup.
Mix ’n’ Match
For Clip 13, I return to the Friedman's lead channel and Les Paul's bridge pickup. To hear the change in drive characteristics with preamp-generated gain into the lower-gain phase-inverter tube, I've used a 12AX7 in the V1 position and a 12AY7 for the PI.
[Updated 8/23/21]