One of my clients recently brought me a fascinating guitar to work on (Fig. 1). It's a 1993 Japanese custom-shop Fender Telecaster that screams “1962-Tele-meets-Nascar." This Tele is in excellent condition and plays great, but not in tune. The bridge has three vintage-style, straight-bar saddles. Unfortunately, these saddles will never intonate properly (and they never did back in the day), so I need to find a way to fix this intonation issue that doesn't involve replacing the entire bridge.
Fortunately, several vendors make "tilt-compensated" saddles that are perfect for this Tele. (Searching eBay or visiting websites for custom part-makers like Joe Barden or Callaham Guitars, or going to vendors like stewmac.com and allparts.com will yield a number of options for tilt-compensated saddles.) Let's see what's involved with retrofitting a Tele with this type of saddle.
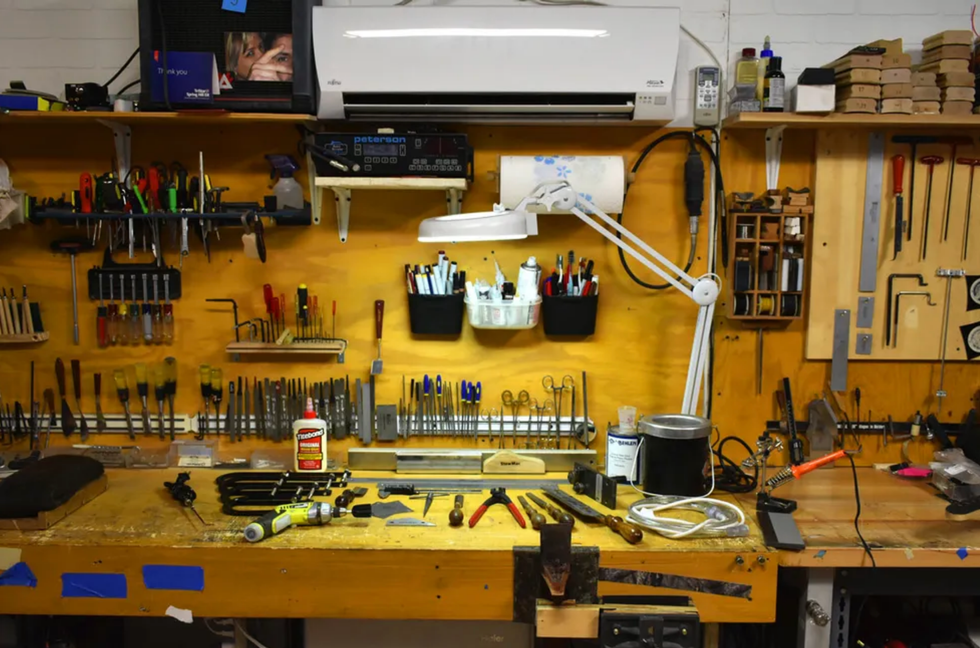
Project overview.
With its cool custom paint job, this 1962 reissue looks sharp. But by today's standards, a Tele is simply not gig-worthy if you can't intonate it.
Here's the problem:
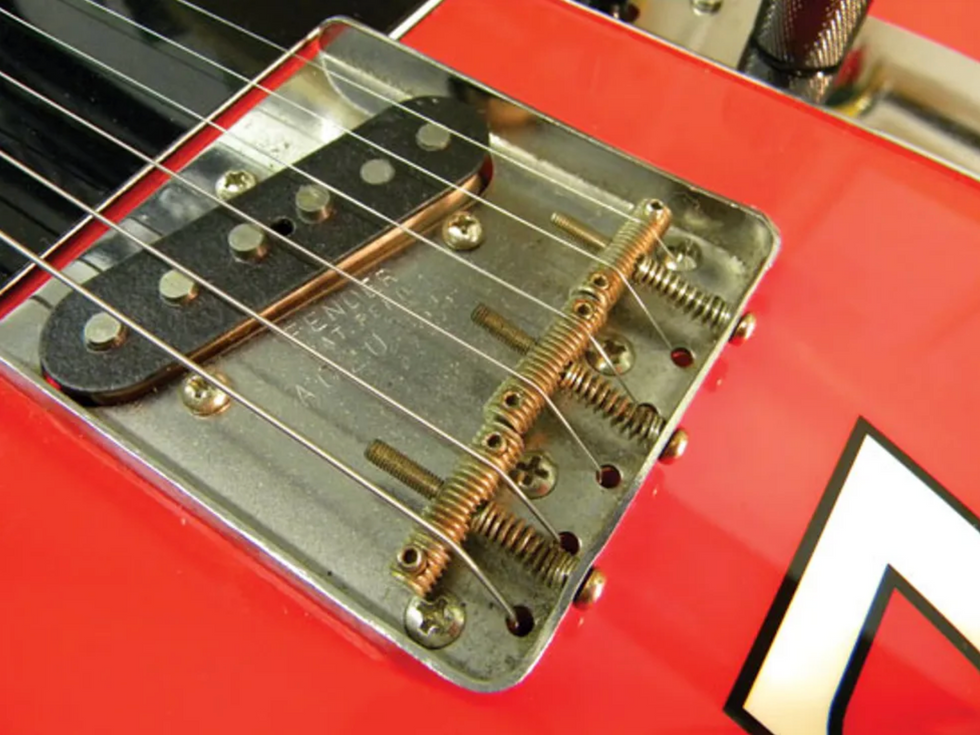
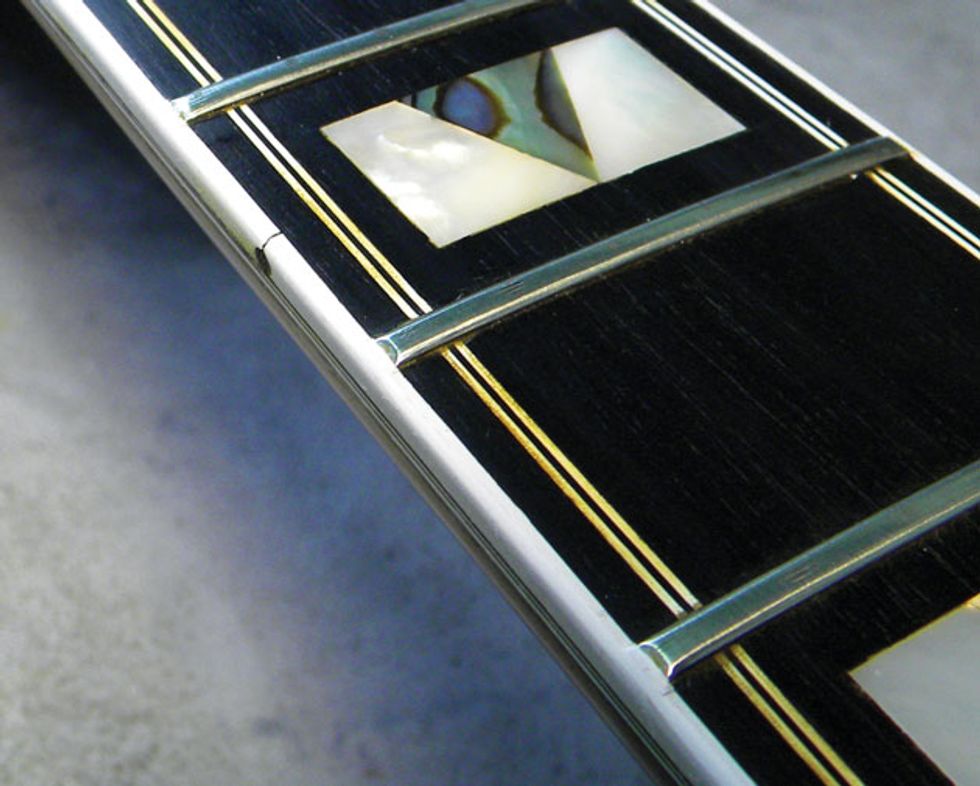
Fig. 2: This guitar came from the factory with period-correct straight-bar saddles. Unfortunately, such saddles are impossible to intonate accurately.
Two strings share each of the three straight-bar bridge saddles (Fig. 2). If you correctly intonate one of the strings in each of the pairs, this puts the other string way out of tune. The end result? Three strings are intonated and three aren't. Typically, the best-case scenario is to average the two strings on each saddle, but the strings are always more out of tune than with a correctly adjusted 6-saddle Tele bridge.
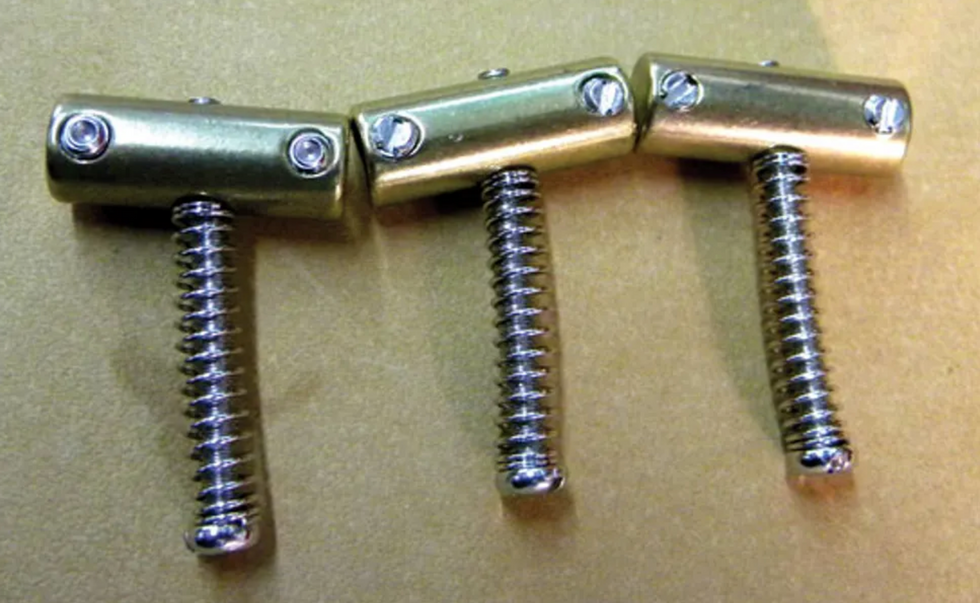
Fig. 3: These brass "tilt-compensated" saddles offer improved intonation while preserving the characteristic tone of a three-saddle Tele.
But many Tele freaks prefer the tone of a classic 3-saddle bridge (why it sounds different from the 6-saddle bridge is another discussion), so rather than replace the entire assembly, enterprising players developed the tilt-compensated scheme (Fig. 3). This allows for accurate intonation without losing the snap and twang of a classic 3-saddle bridge.
If you have a guitar with a 3-saddle bridge, you can replace the straight-bar saddles with a tilt-compensated set and have the best of both worlds. It sounds simple, right? Hey, let's just swap out a few saddles. Believe it or not, there's a lot more to it.
Getting started.
Before doing any work on a guitar, it's important to take measurements. These will help you determine if you need to make any necessary setup adjustments to the guitar you're about to modify.
After tuning the guitar to pitch, I always check three crucial things:
- The action at the 12th fret.
- The amount of relief in the neck.
- The action at the string nut.
In this case, all the measurements looked spot on. Moving from the 1st to 6th string, the 12th-fret action measured 3/64" x 4/64". The neck relief was .012" and the action at the 1st fret was 1/64" x 2/64", again moving from the 1st to 6th string. [To review the setup process for an electric guitar, see How to Set Up a Fender Stratocaster. The same basic principles apply for setting up a Telecaster.]
After taking these measurements, remove the strings and the bridge saddles. Once the saddles are off, compare them to the new tilt-compensated saddles to see if the height of the new saddles will match up.
On this Tele, the new saddles appeared to be a little taller for the two E strings—strings 1 and 6—but otherwise they matched the height of the old saddles. So I installed the new saddles and tuned the Tele to pitch, and once again took the above three measurements.

Fig. 4: With the tilt-compensated saddle, the 6th string sits too high on this guitar, even with the height-adjustment screw backed out all the way.
Overall, the action was pretty close, but the two E strings were just a little too high (about 1/64" too high), even with the height adjustment screws backed all the way out for both E strings (Fig. 4 and Fig. 5).
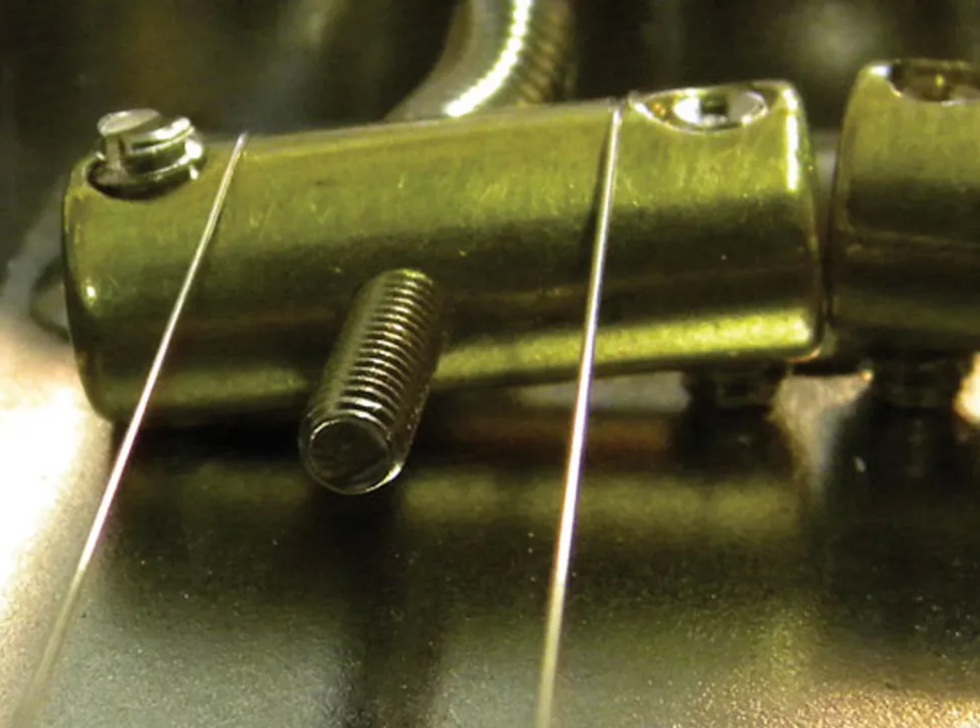
Fig. 5: Like the 6th string, the 1st string sits too high.
There is only one cure for this—remove the offending saddles and mill them down underneath.
Milling the saddles.
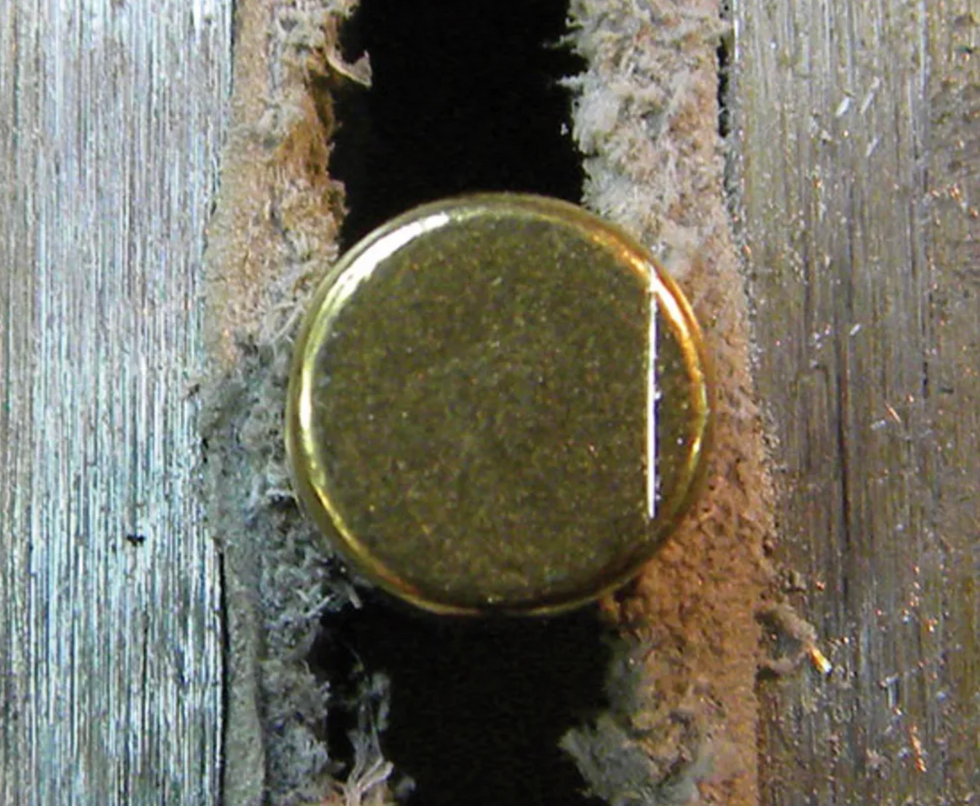
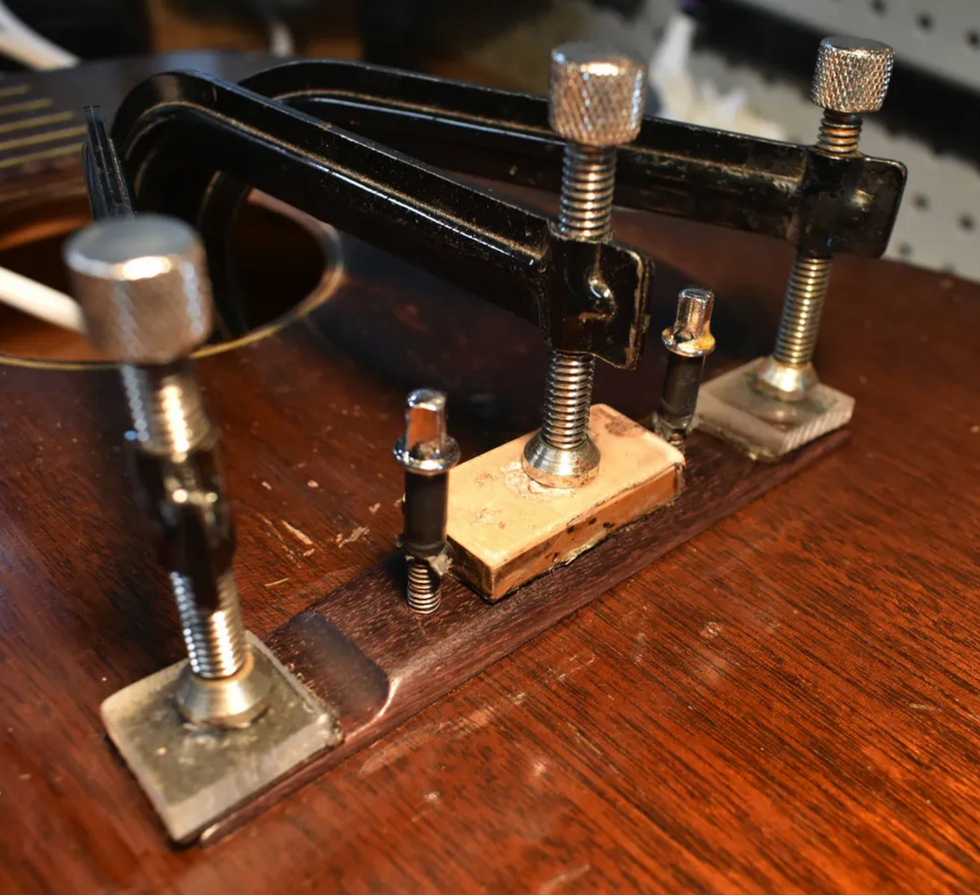
Fig. 6: When a barrel saddle sits too high in the bridge assembly, you need to remove some material from its underside. Here the saddle sits in a vise, protected by leather pads. Once it's secured, you can scribe a guideline in the end of the saddle to indicate how much brass (in this case, 1/32") needs to be milled away from the bottom.
I determined the saddles needed to be lowered 1/32" below the 1st and 6th strings. Removing this much will allow for additional adjustment in the event my client wants to lower the action more than 1/64".
I put the saddle in a vice that's equipped with leather pads on the jaws to prevent the saddle from being scratched. Then I measured 1/32" from the bottom of the saddle, and used a scribe to mark this distance. This mark tells me how far to mill the saddle (Fig. 6).
You can mill a saddle by hand on a flat surface using 80-grit sandpaper or alternatively on a belt sander or grinder. If you opt for a belt sander or a grinder, be extremely careful. All it takes is one slip and the saddle is ruined. At best, if the saddle slips out of your fingers, it will launch across the room.
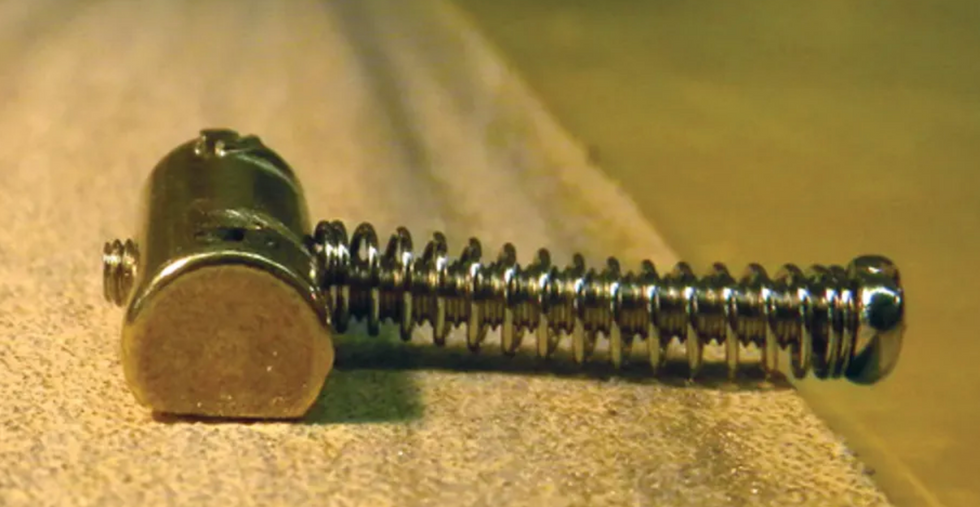
Fig. 7: A saddle in the process of being milled on a flat surface that's covered with self-adhesive, 80-grit sandpaper.
That's why I prefer to do this job by hand on a flat surface. It takes a lot longer this way, but you have much more control over the saddle, and to me, that's worth it. Fig. 7 shows the underside of a saddle in the process of being milled on a flat surface.
With saddles milled, the next step is to install them and tune the guitar to pitch. With the new saddles installed, the action looked great. Now the process of adjusting the string spacing begins.
Adjusting string spacing.
Fig. 8: Measuring the distance between the 1st string and fretboard edge.
Spacing the strings is rather tedious, but it's critical for playability. On the new tilt-compensated saddles, the strings sit on a rounded surface. To prevent the strings from sliding sideways, you need to file grooves into the saddles—one groove for each string. In addition to holding the strings securely, these grooves also ensure proper and consistent spacing.
Measure approximately 1/8" from each side of the fretboard at the last fret—this will be the starting point. Once you have the outside edges of the two E strings evenly spaced from the fretboard sides, make a small groove in the saddles to hold the strings in place.
To match the grooves to their respective string gauges, I use a string nut file. (These special gauged files are available in sets or individually from luthier supply shops.)
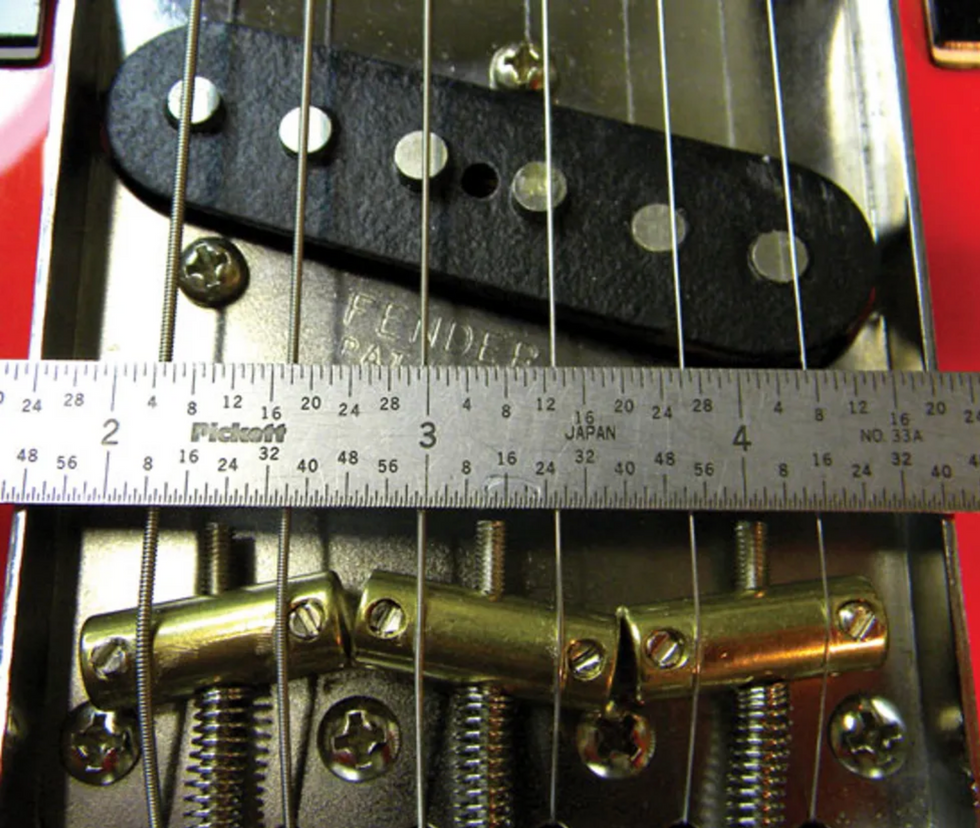
Fig. 9: Measuring string-to-string spacing.
Next, move each of the remaining four strings to their proper spacing. The goal is to have them an equal distance apart, measuring from the outside edge of each string. Use a precision metal ruler to check your spacing (Fig. 9).
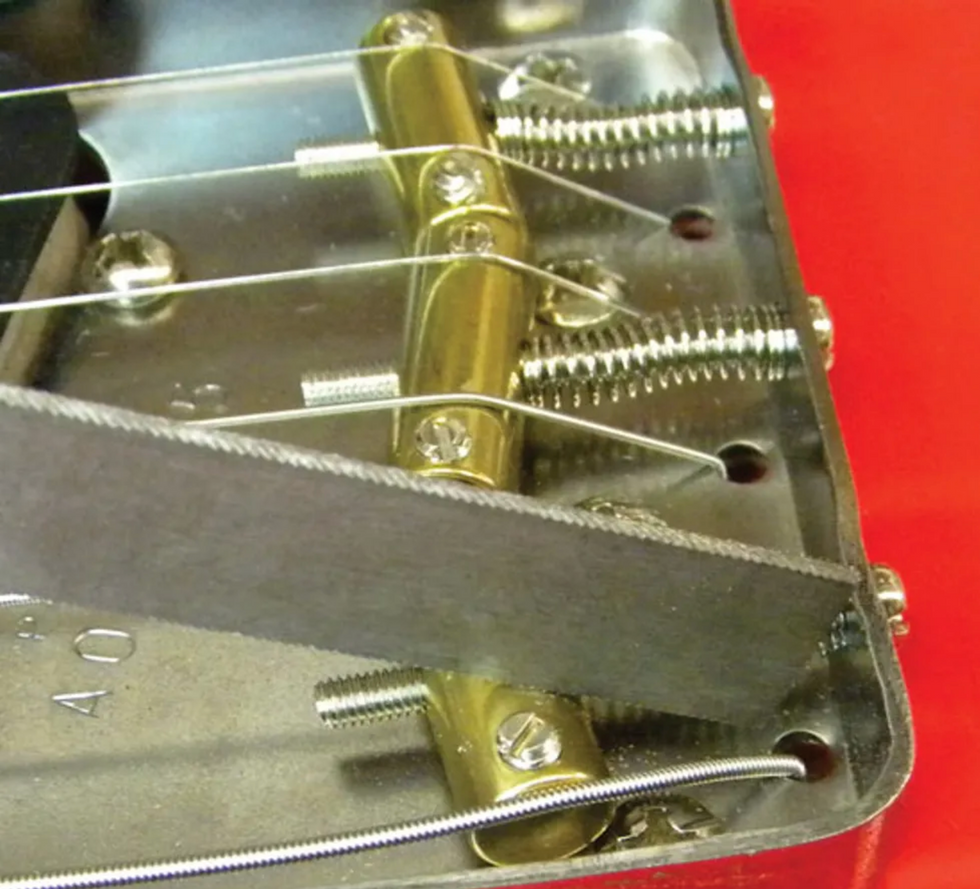
Fig. 10: Filing the string grooves with a nut-slotting file.
Once I have the spacing correctly set, I file a small groove under each string (Fig. 10). The spacing for this particular bridge is approximately 13/32" from string to string. Of course this will vary, depending on the width of your guitar's fretboard. To ensure proper spacing, always measure several times before you file the grooves.
Remember: When filing the grooves for each string, make sure you use the properly sized file. If the file is too small, the strings will bind in the grooves, causing tuning issues. But if the grooves are too large, the strings can rattle in the grooves. Also make sure each groove follows the proper angle for each string as it comes out of the bridge plate.
Adjusting the intonation.
Once the string spacing is correct and you've filed the string grooves, it's time to adjust the intonation—the point of this whole project. Adjusting intonation requires several things: a precise tuner (a strobe tuner is preferable), a screwdriver, and a lot of patience!
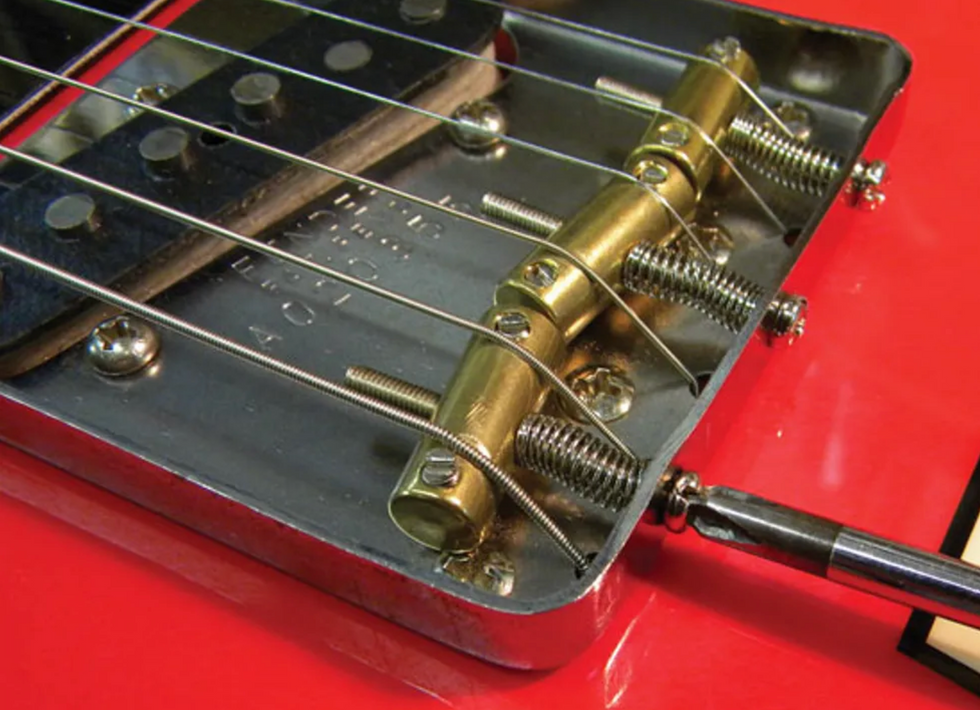
Fig. 11: Adjusting intonation takes a very accurate tuner and a lot of patience.
Start by tuning the guitar to pitch. Then, one string at a time, compare the 12th-fret harmonic to the fretted note at the 12th fret. The harmonic is your reference tone. When comparing the two, if the fretted note is sharp, tighten the intonation screw located at the back of the bridge assembly (Fig. 11). This moves the saddle backward. If the fretted note is flat, loosen the intonation screw to move the saddle forward.
Always retune after each adjustment and then check intonation for accuracy. The goal is to match these two tones so they're perfectly in tune … to a certain extent. I've found this process works great for the low E, A, D, and high E strings (the 6th, 5th, 4th, and 1st). For the G and B (3rd and 2nd) strings, I use a tempering method so those strings will sound more in tune with the rest of the strings. I intonate the B string approximately 1 cent sharp at the 12th fret and set the G string approximately 2 cents sharp at the 12th fret. The end result produces slower "beating" or oscillation between the notes when you play a chord, making the guitar sound more in tune. This temperament "fudging" can vary from one guitar to another, and many techs, luthiers, and players have developed their own particular tempering scheme.
Note: A cent is 1/100th of a semitone or half-step, so you see why a precision tuner is necessary for adjusting intonation. If you don't have an accurate strobe tuner—one that can give you a 1/100th cent reading—it's best to simply intonate each string to match the 12th-fret harmonic.
That's it for now. See you next time for another adventure in DIY guitar maintenance.
[Updated 10/22/21]