
One of my favorite projects is pickup installation. There’s something very satisfying about taking a pile of wires, coils, and potentiometers and turning them into an awesome tone machine. Recently, I had the opportunity to install a set of vintage humbuckers designed by the late, great Seth Lover. His pickups are considered to be the Holy Grail of tone. Out of thousands of pickups on the market, few can compare to those created by Seth Lover.
strong>Project Overview The guitar I was hired to retrofit was a reissue Fender ’72 Tele Thinline. My job was to remove the two ’72 reissue Wide Range humbuckers and replace them with two original Seth Lover Wide Range pickups that came from a ’72 Telecaster Deluxe the client owned in the mid-’70s. The guitar is long gone, but amazingly he’d held onto the pickups along with their harness. For almost 40 years, they’d been stored in a box and hauled back and forth across the country. The client didn’t even know if they still worked, but he wanted me to put them in his modern Thinline. The swap sounded simple enough, but every project has its challenges, and you never know what lurks beneath the control plate until you get in there. We’re about to find out what can—and did—happen.
Who Is Seth Lover?
Before we dive into the details of
pickup replacement, it’s worth
taking a moment to get some
background on Seth Lover. He
invented the original PAF (Patent
Applied For) humbucker in
1955, while working for Gibson
(Lover’s tenure spanned 1952-
1967). The PAF humbucker was
the first successful attempt at
creating a hum-canceling pickup,
and it revolutionized the electric
guitar industry. Lover’s invention
virtually eliminated the 60-cycle
hum associated with single-coil
pickups, and it allowed guitarists
to play louder and with more
dynamics. It also introduced a
new sound to the electric guitar
palette—a fatter, rounder tone
that worked equally well for mellow
jazz and cranked rock ’n’ roll.
Lover began working for Fender
in 1967, and stayed with the
company until he retired in 1975.
In 1972, Seth invented the Wide
Range humbucker for Fender.
The Original Wide
Range vs. the Reissue
As I discovered, you can’t judge a
pickup by its cover. The original
and reissue pickups look nearly
identical, but they couldn’t be
more different. In lieu of a
typical humbucker’s slugs and
adjustable pole pieces, the original
’72 Wide Range (WR) pickup
has “cunife” (copper/nickel/
ferrite) threaded rod magnets.
Additionally, it has overwound
coils (consisting of about 6,800
wraps of copper wire) and cranks
out approximately 10.6k Ω of
DC resistance. In other words,
it’s a loud and bright powerhouse
of a pickup.
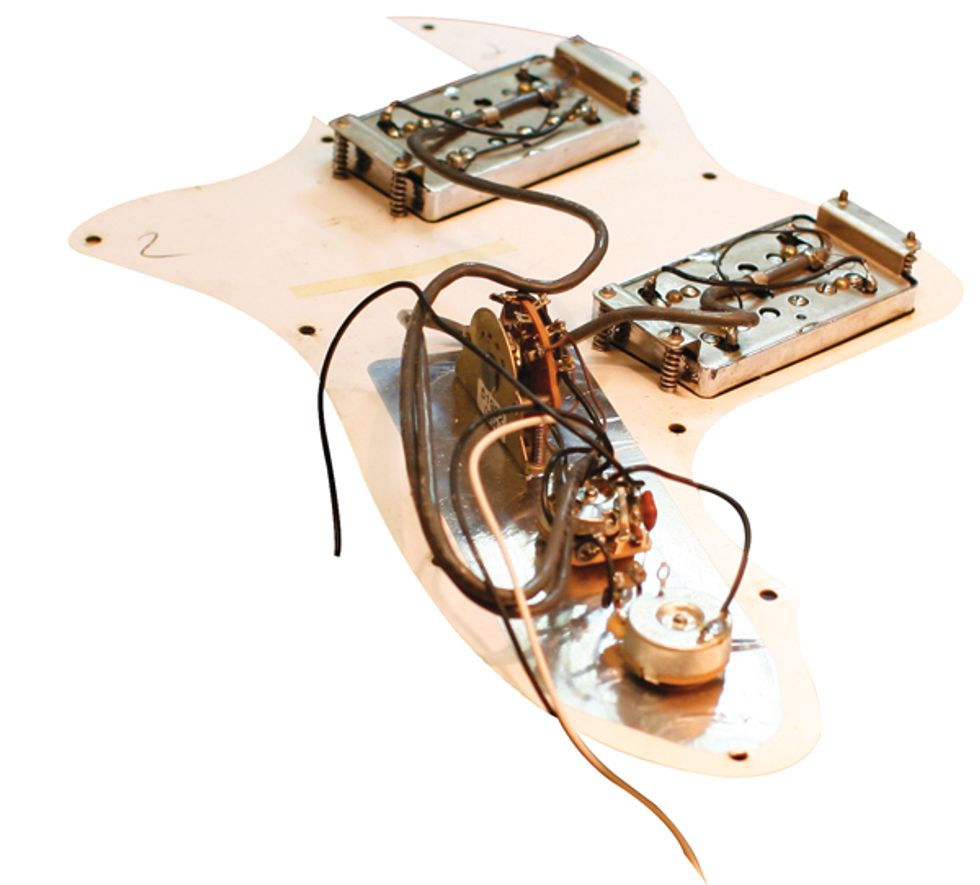
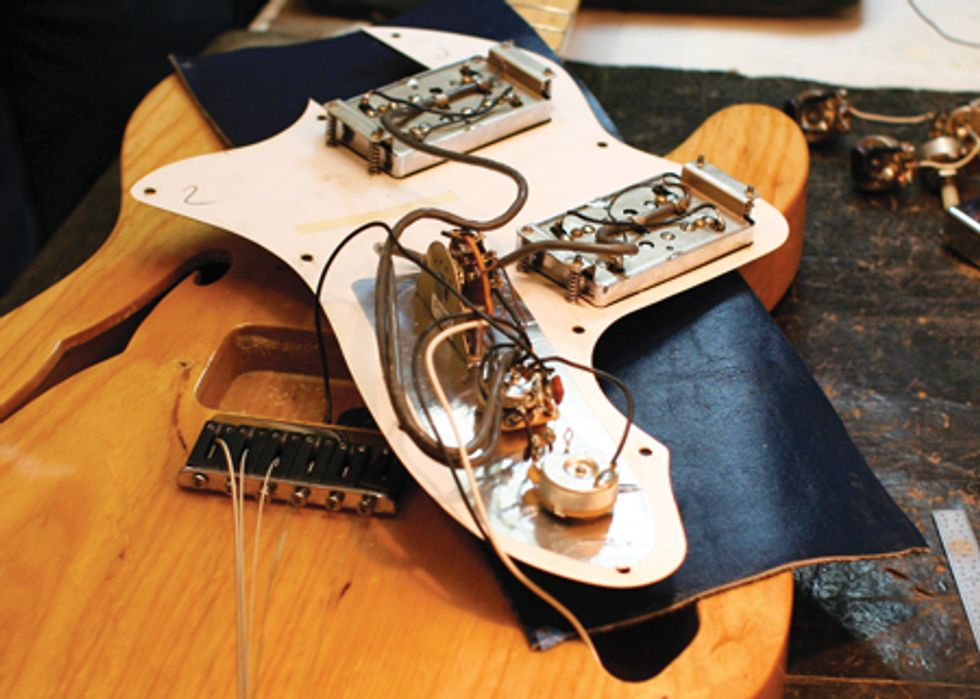
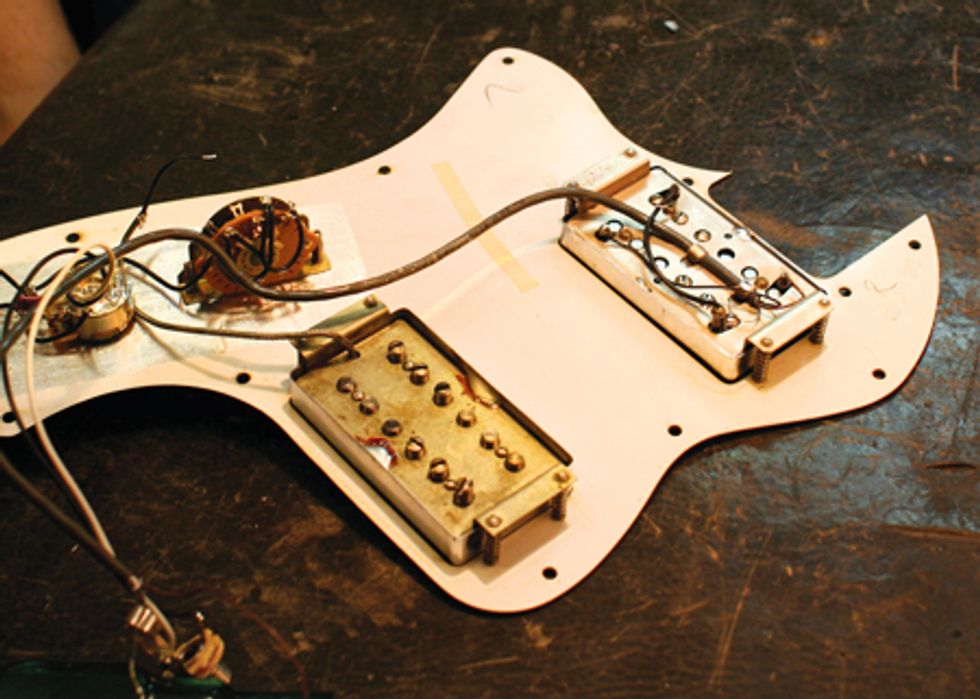
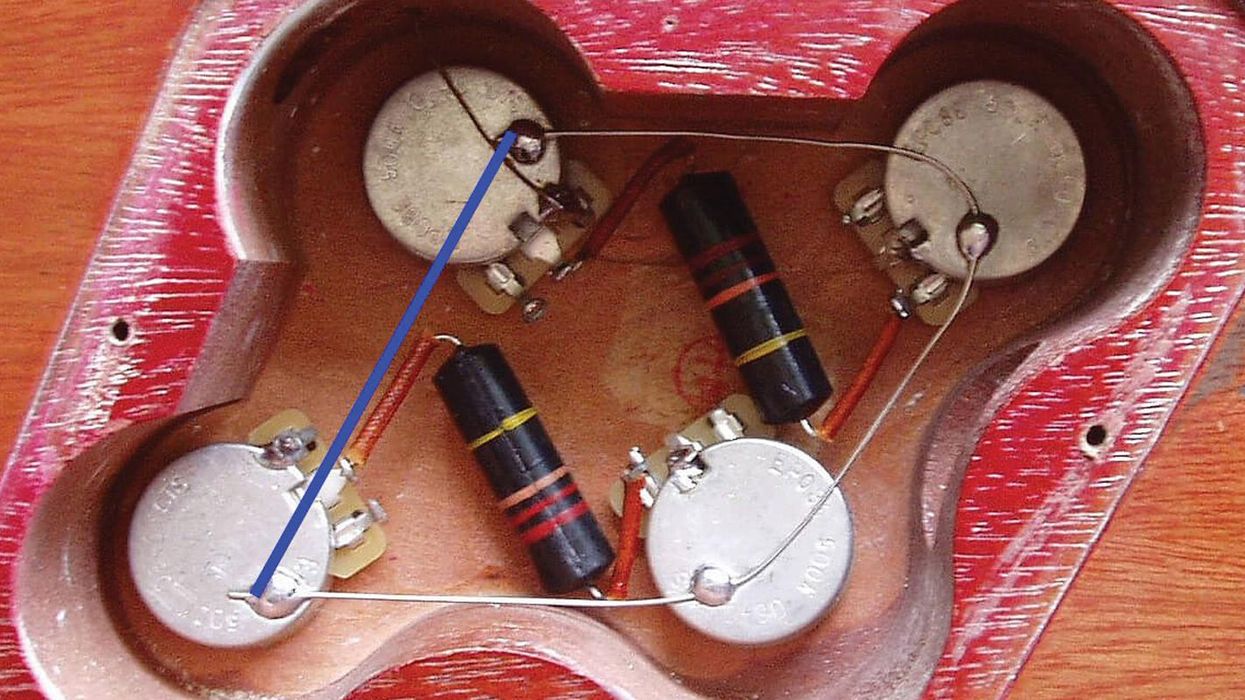
These Seth Lover Wide Range (WR) humbuckers came from a 1972 Fender Telecaster Deluxe. The pickups are unpotted and the original harness has 1 Meg Ω pots for its two Volume and two Tone controls.
The ’72 reissue WR pickup has an alnico (aluminum/nickel/ cobalt) magnetized bar placed at the bottom of the pickup, non-magnetic slugs and pole pieces, and measures at about 8k Ω of DC resistance. It’s also potted—that is, sealed with wax to fill all the voids inside the coils. The reissue is basically a darker, modern humbucker in a vintage casing.
Both are great pickups, but there is no substitute for the original.
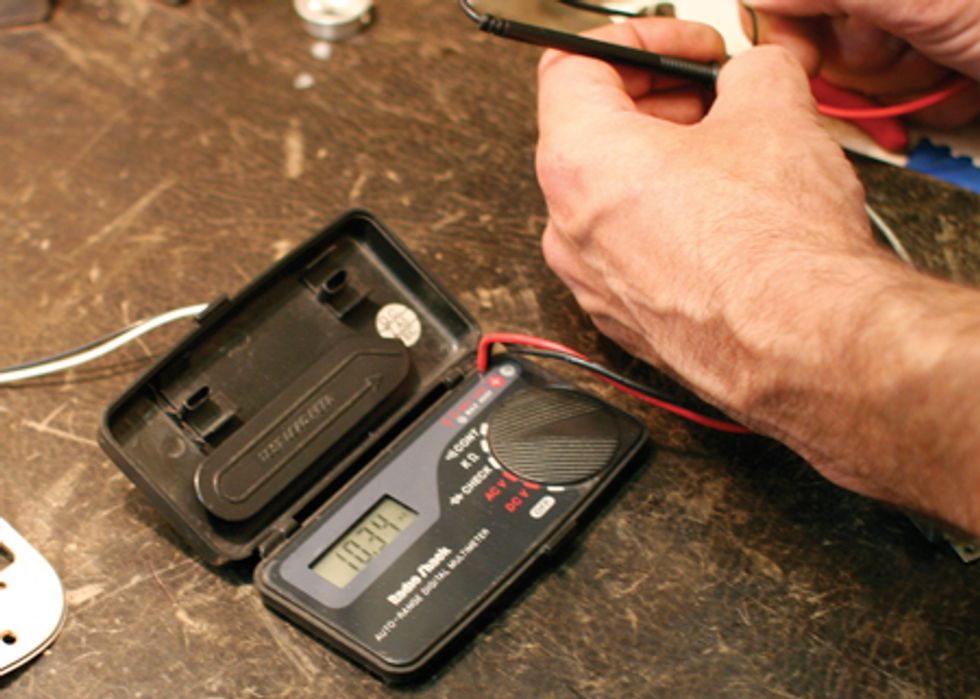
Before installing any pickups—especially used or vintage units—use a multimeter to confirm they’re working and measure their DC resistance. This vintage WR bridge pickup has a DC resistance of 10.34k Ω. That‘s hot! Testing also revealed that the vintage neck WR humbucker was almost dead.
Test Before You Solder!
Before attacking the electronics
with my soldering iron,
I needed to test the pickups
to know what I was working
with. This is where things
got interesting. I got out my
multimeter to test the original
pickups to make sure they
were still functional. The WR
neck pickup was practically
dead—this made my heart
sink! (My client wasn’t too
happy either.) Fortunately, the
vintage bridge pickup was perfect.
At this point, we decided
to leave the WR reissue pickup
in the neck position and install
the original ’72 pickup in the
bridge position. Though we
couldn’t use it for this project,
the client will get the vintage
WR neck pickup rewound by
an expert.
Vintage and Modern
Designs Collide
Of course, combining vintage
and reissue WR pickups introduced
a few new challenges.
The first question was, would
we use the 1 Meg Ω pots from
the original ’72 harness or go
with the 250k Ω pots from the
reissue Tele? The 250k pots produce
a warmer tone; 1 Meg Ω
pots make pickups sound much
brighter. After some debate, we
decided to use the 250k pots.
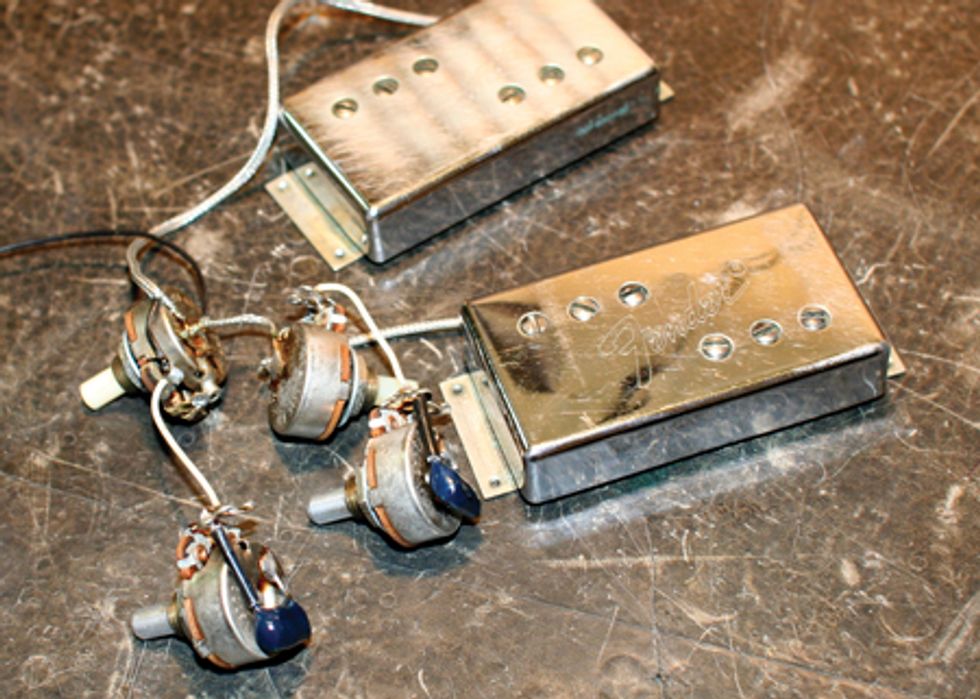
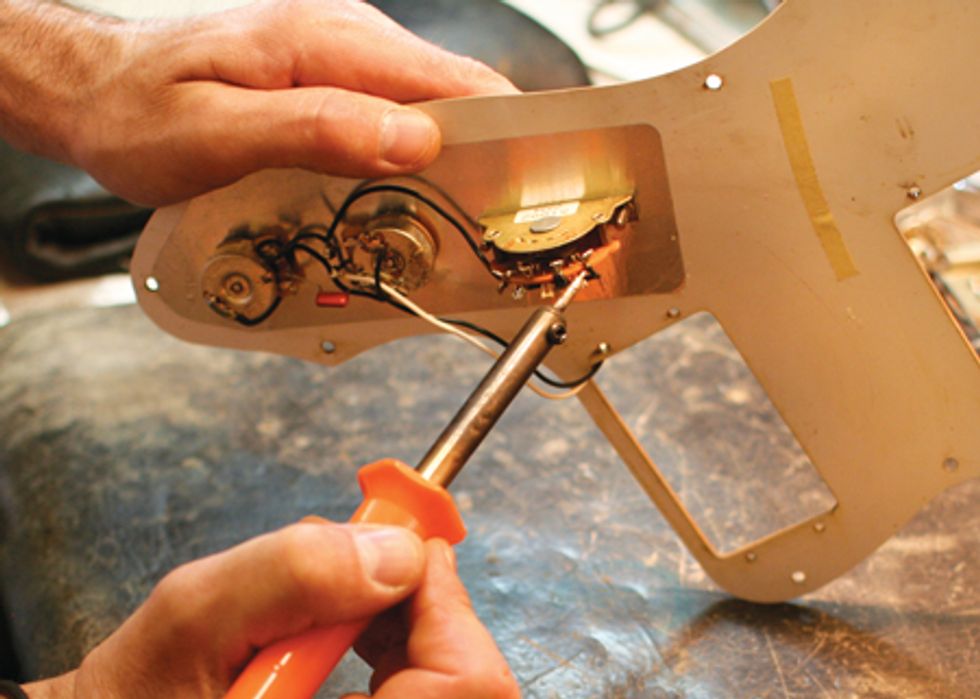
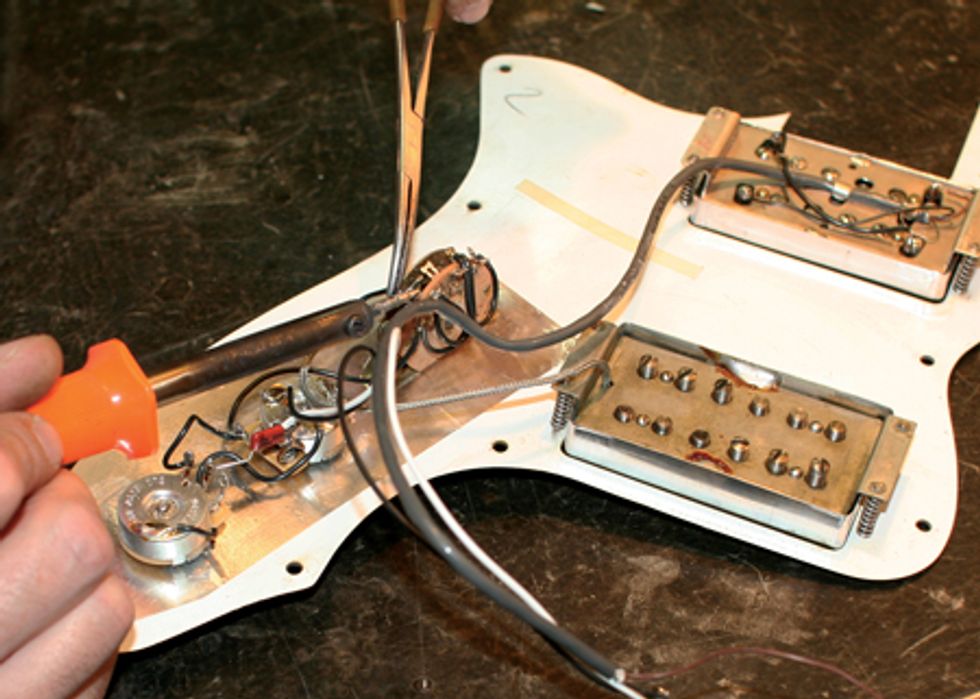
Removing the vintage bridge WR pickup from its original 1 Meg Ω harness. The pickup will be connected to 250k Ω Tone and Volume pots in the reissue Thinline Tele.
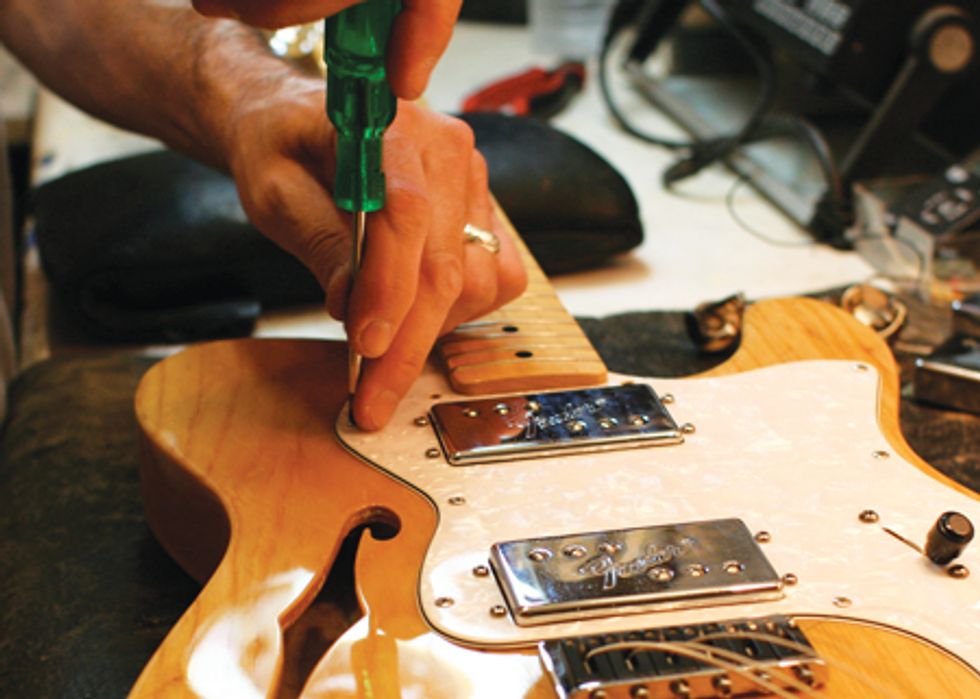
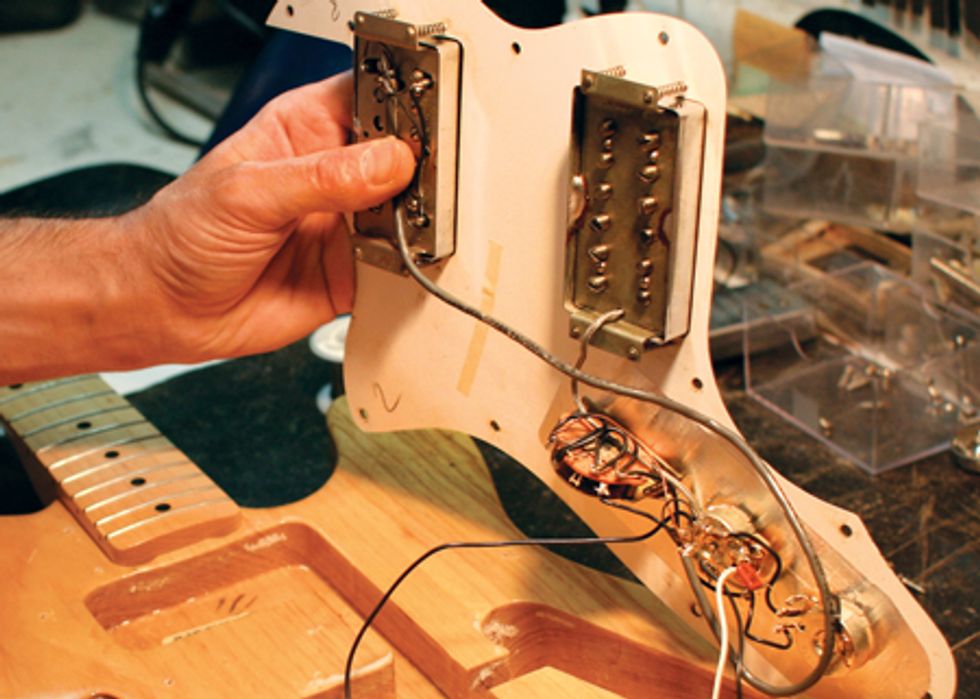
Unscrewing the reissue Tele’s pickguard. Always guide the screwdriver with your fingertips to prevent it from slipping off the screw and gouging the finish.
I removed the reissue bridge pickup and prepared to install the original ’72 in its place. The first problem I ran into was a huge glob of solder on the volume pot. In order to attach the ground and secondary lead wires from the pickup to the volume pot, this glob had to be removed.
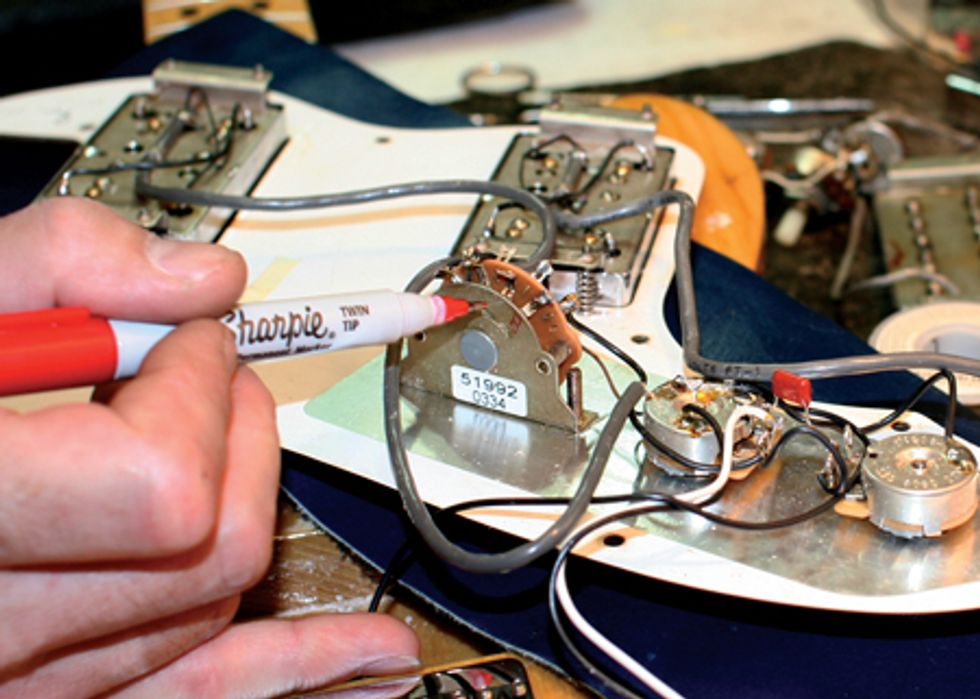
Before removing a pickup, mark where its lead wire attaches to the selector switch. This will tell you where to solder the replacement pickup’s lead.
Opening the cover of the reissue Tele reveals the underside of the modern Fender humbuckers. Notice how the guitar is protected by a leather pad. To prevent the electronics from damaging the instrument, it’s important to rest them on some sturdy material—a small towel works in a pinch.
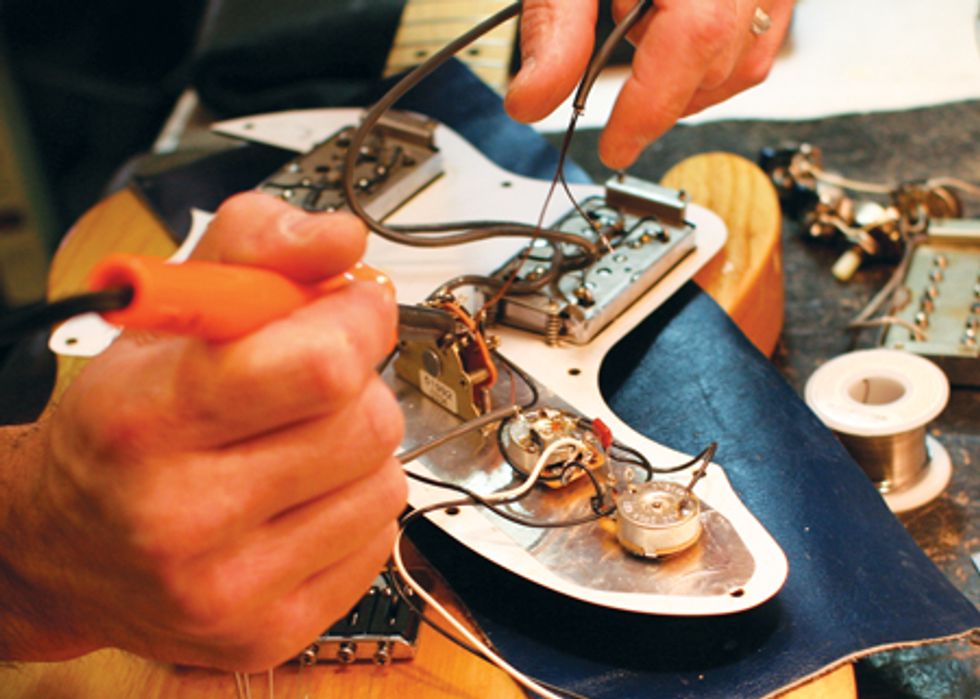
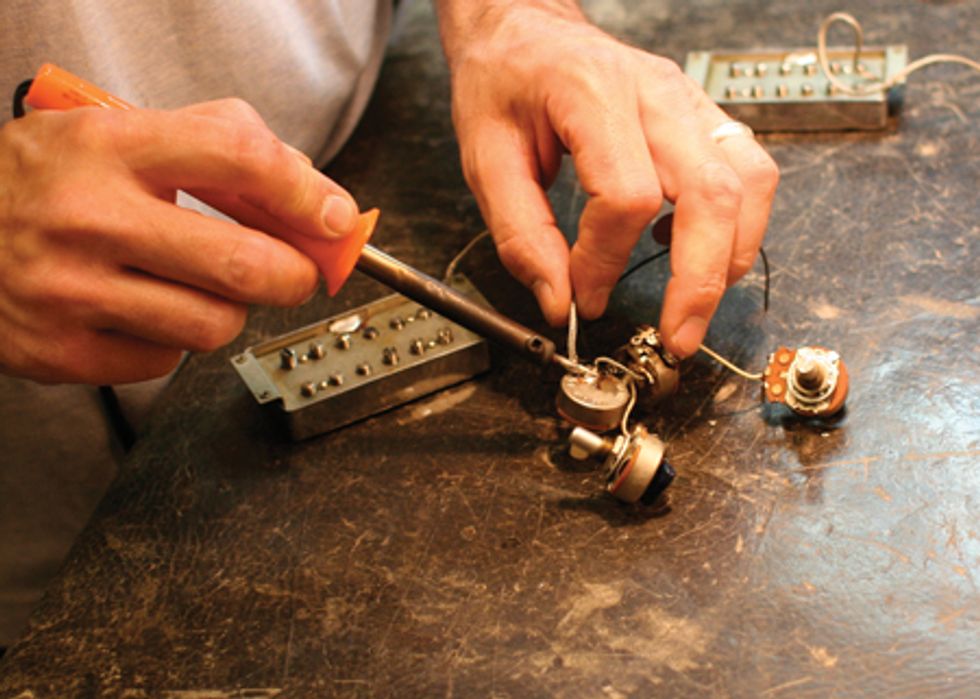
To remove a pickup lead wire, touch the soldering tip to the connection, let the solder melt, and quickly pull out the wire. Be careful not to touch other wires with the iron and remove its tip immediately once the wire comes free.
The risk in using a soldering iron for this task is you may overheat the pot and ruin it. To avoid that, I grabbed a small pair of flushcut dykes and gently crimped off the glob. With it removed, I was able to solder the ground and secondary lead wires without the risk of damaging the pot or having to use too much solder. Using too much solder can lead to a “cold weld” and create a poor connection for the wire.
After removing the wire, use the hot iron tip to clean off residual solder from the switch terminal.
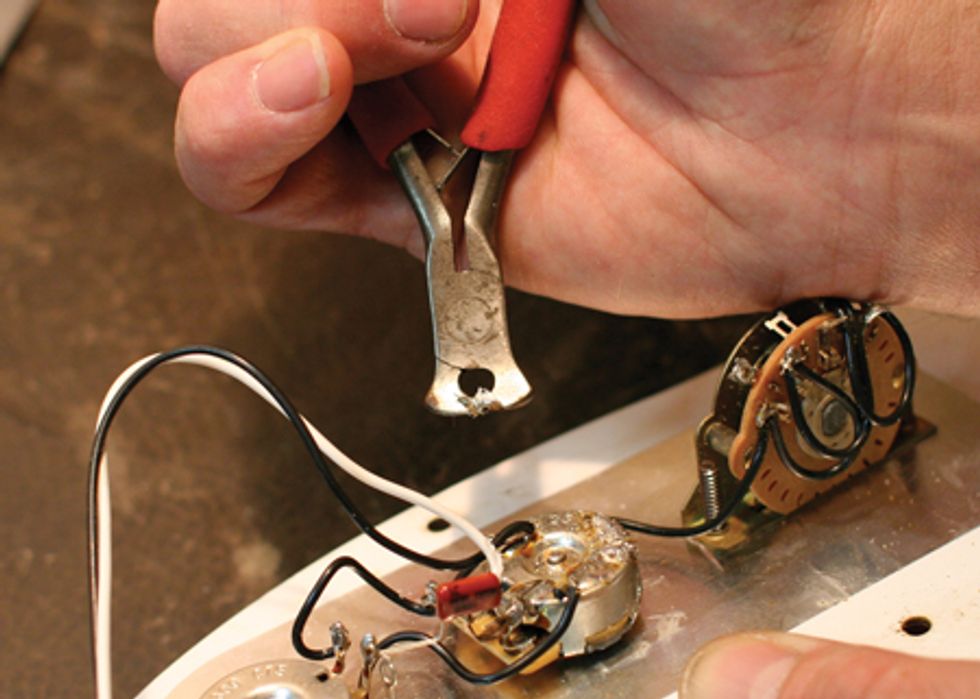
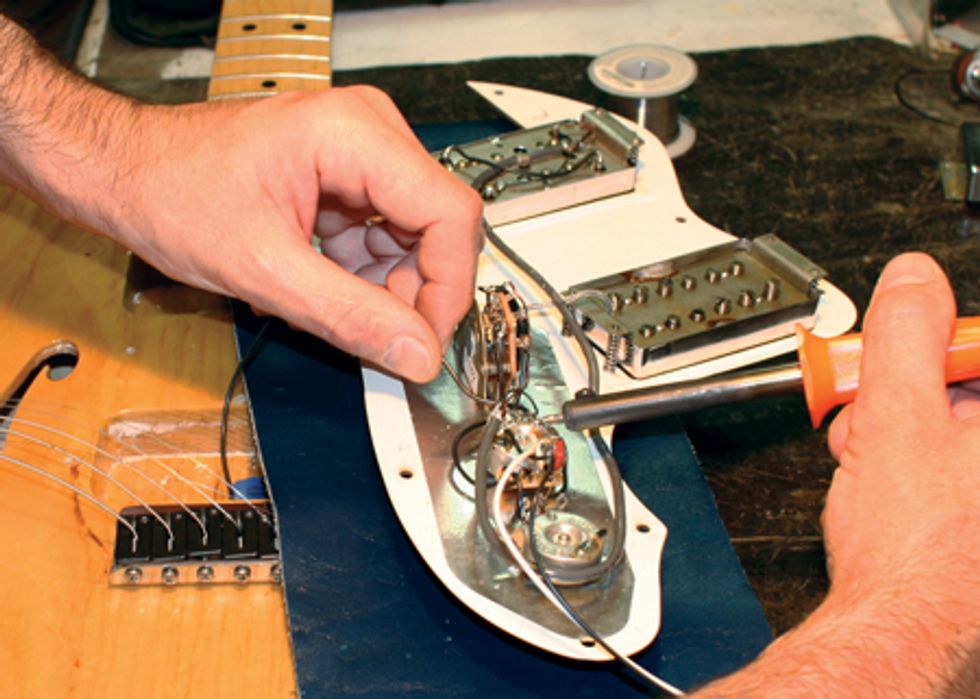
Using flush-cut dykes to remove a glob of solder before attaching the vintage WR pickup’s ground wire to the reissue Tele’s volume pot.
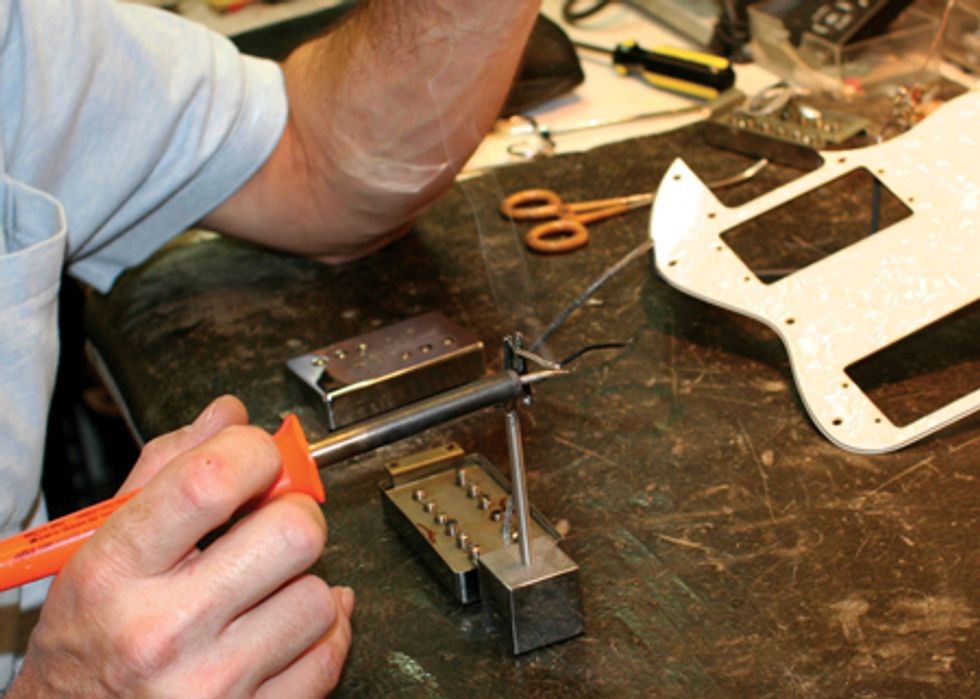
Tinning the vintage WR’s ground wire. It’s easiest to do this before you mount a pickup into a pickguard or the guitar.
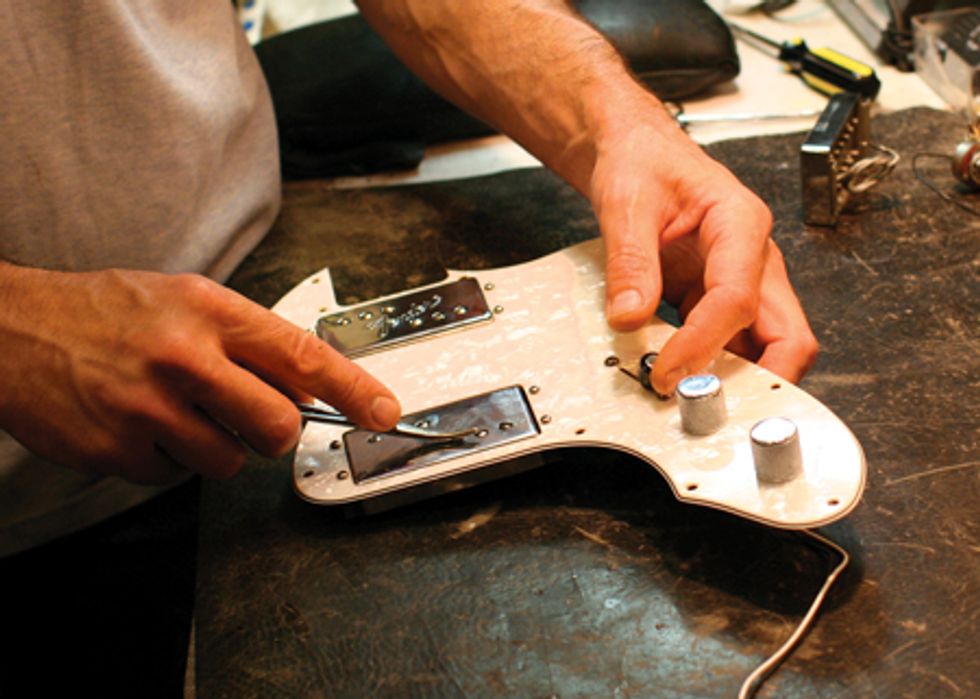
The vintage WR humbucker (left) installed in the pickguard and now ready for wiring. Notice the difference between it and the modern counterpart with its exposed coil leads.
Next, I soldered the primary lead from the vintage WR bridge pickup to the selector switch. “That should do it,” I thought, but I was too quick to judge. I reassembled the guitar, did a rough adjustment on the bridge pickup height, and then plugged in the guitar to test it.
Attaching the lead wire from the vintage WR pickup. A pair of hemostats comes in handy for getting into tight places and clamping a wire to the terminal before you solder them together.
The pickups sounded great in the neck and bridge positions, but not so good in the dual-pickup position. In fact, the combined pickups sounded like an amp with a blown speaker and no bass! Each pickup was wired correctly to the guitar, so what could cause this hideous tone?
After mounting and soldering the replacement pickup, test your work before installing the pickguard on the guitar. Gently tap each pickup as you move through the switch selections to assure that everything is wired correctly, and roll your Volume and Tone pot back and forth to make sure they’re operating, too.
It turns out the pickups were out-of-phase with each other. This goes back to how differently these two pickups were designed and constructed. Remember, the reissue WR pickup is just a basic humbucker, whereas the original ’72 WR was a completely different animal. In the process of combining these humbuckers, we discovered they’re wired oppositely from each other. My solution was to reverse the start (primary lead) and the finish (secondary lead) of the reissue pickup. Once I swapped its leads around, the reissue pickup sounded great with its vintage forebear, and switched together they yielded a beautiful, bold chime.
Don’t forget to connect the ground wire! This attaches internally to the bridge and strings.
Rule of thumb: Do not mess with the wiring of a vintage pickup. New pickups are fair game, but the originals are sacred.
With the vintage WR humbucker installed and wired up, it’s time to reassemble and test the Tele.
Fine-Tuning the Tone
Once we’d crossed that phase
hurdle, I was almost finished
with this crazy project. The last
part of any pickup-replacement
process is to adjust the height
of the pickups to balance their
individual output levels.
Normally, when I adjust the height of the neck and bridge pickups, I set the bridge pickup a little closer to the strings than its sibling. If you don’t do this, the neck pickup can sound much louder than the bridge. However, because the vintage ’72 bridge unit is hotter than the reissue neck pickup, I knew I had to compensate for this. The solution was to match the height on both pickups—an unusual but effective move.
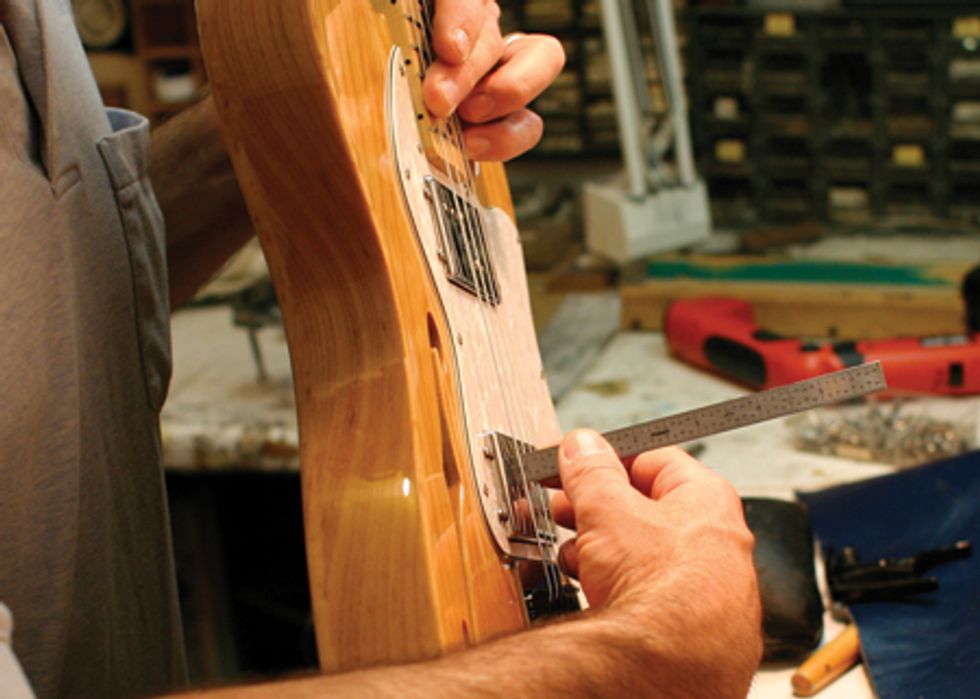
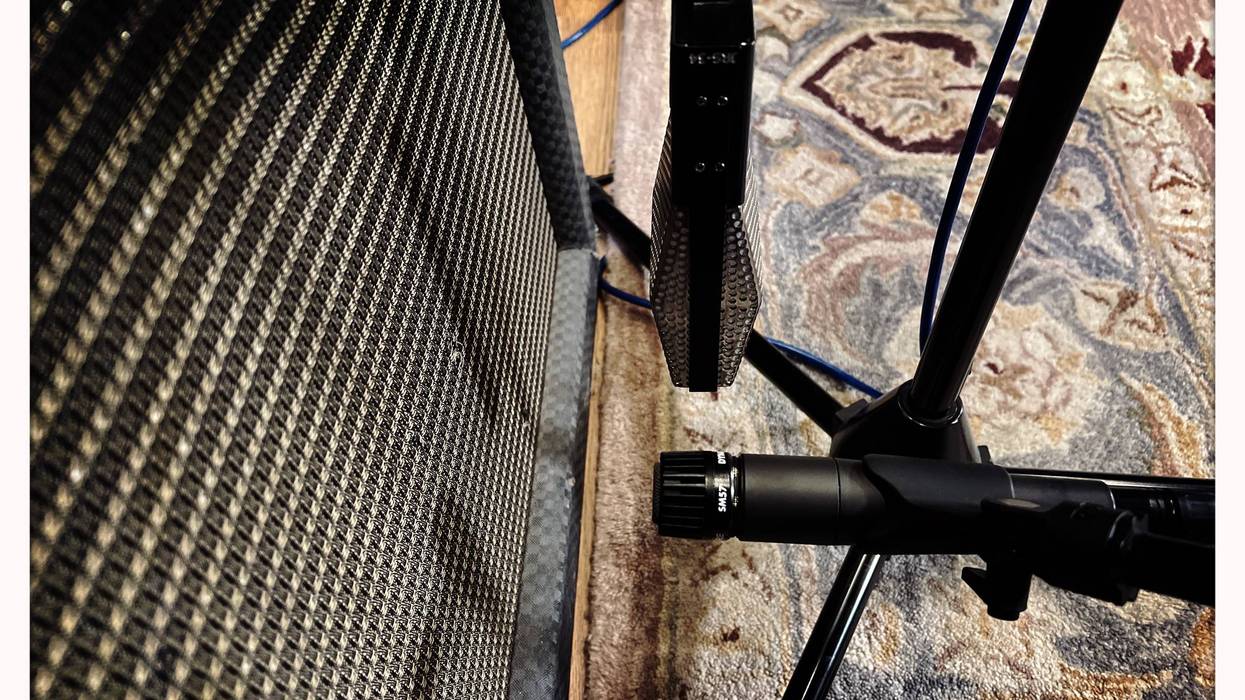
Once the guitar is strung up, it’s time to measure pickup height in order to balance the volume between the neck and bridge units. Fret the two E strings at the highest position, and then measure the gap between the bottom of each E string and the top of its pole piece.
Incidentally, if you’re ever lucky enough to find an original WR humbucker, be very careful when adjusting its threaded magnets. The cunife material is very soft and can break easily. If the pole pieces are difficult to turn, stop. The last thing you want to do is break one of these irreplaceable poles. Remember, these are magnets and without them, the pickup is useless. In fact, for this project I recommended that we not touch the vintage poles, and my client agreed to keep them at the height he’d set four decades ago.
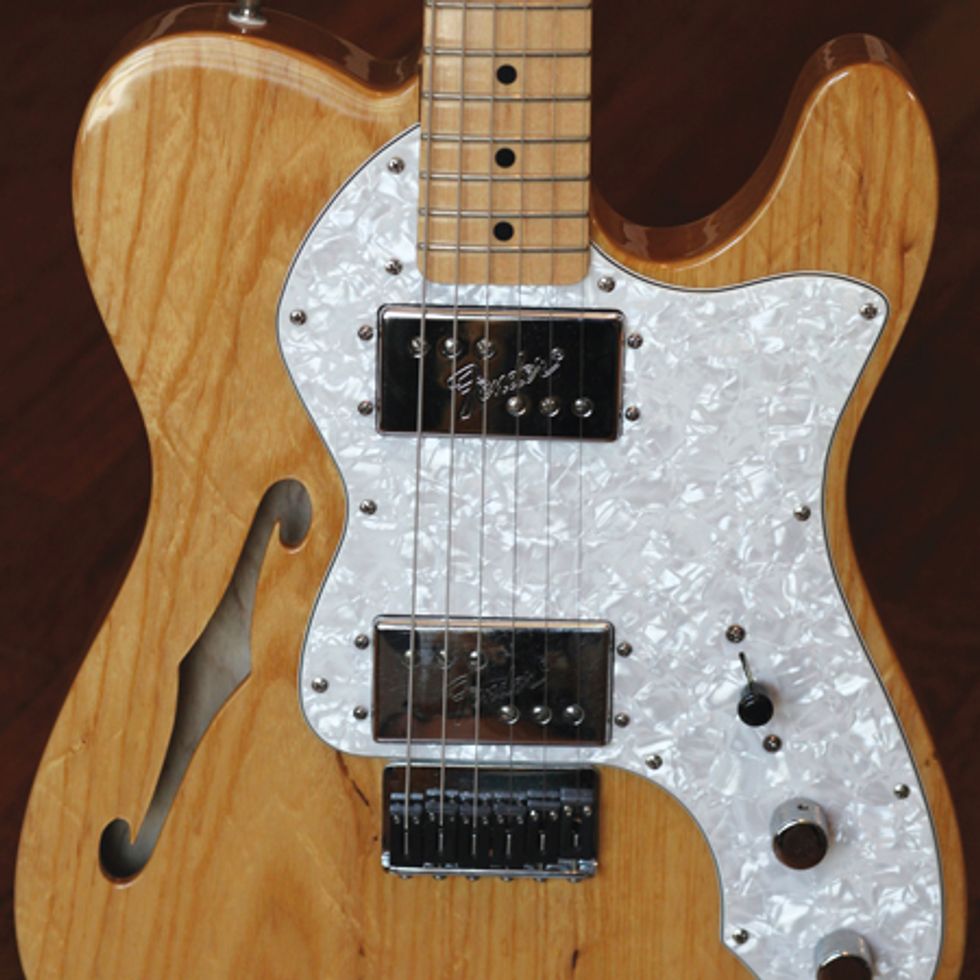
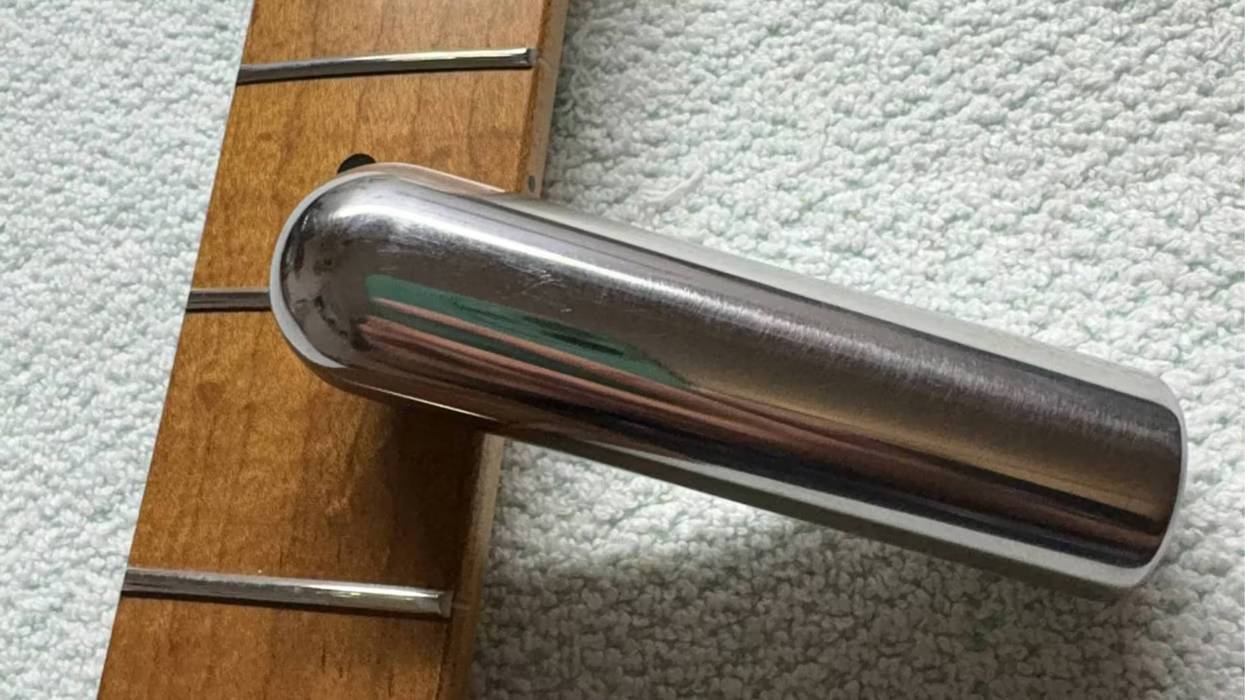
Mission accomplished! Though it’s hard to see in a photo, the two Wide Range pickups look different. Not only is the vintage bridge pickup’s cover worn from gigging, but on the modern edition the embossed Fender logo is pressed much deeper into the metal. The lettering is also much finer on the original cover, and this will help you identify a real ’72, if you ever encounter one. Photo by Ariel Ellis
Sonic Success
At first, my client was dismayed
that the vintage neck pickup
was dead. But after doing some
recording sessions and hearing
the guitar in action, he reported
that the combination of modern
neck and vintage bridge WR
humbuckers actually makes
a very musical combination.
(“Sweet, clear neck and jangly,
brash bridge tones,” is how he
described it.) So if you come
across only one of these Wide
Range Seth Lover humbuckers,
it’s still not out of the question to
mate it with a modern humbucker.
Remember, replacing pickups
on a guitar can give it a whole
new personality, so don’t be afraid
to explore the sonic possibilities.
Although projects like this one can be challenging, the final result was very satisfying. The guitar sounds great with the original ’72 WR pickup. As an added bonus, I got to install a real Seth Lover pickup and rediscover why he was such a genius!


![Rig Rundown: The Black Crowes’ Rich Robinson [2026]](https://www.premierguitar.com/media-library/youtube.jpg?id=66952027&width=1245&height=700&quality=70&coordinates=0%2C0%2C0%2C0)