Photo 1
We’re almost finished with the aging process on our project guitar. Let’s work on the fretboard, nut, and truss rod cover, and prepare the headstock for the last hurrah.
Hello and welcome back to Mod Garage. This month we’ll continue with our relic’ing project, taking a closer look at the front side of the neck and treating the fretboard and the headstock. We’ll work on the front side of the headstock in the next part, but first we must prepare it.
When we talk about a vintage Gibson fretboard from the ’50s, we’re talking about the mystic Brazilian rosewood (Dalbergia nigra) and its certain look and feel. Our Harley Benton doesn’t have a Brazilian rosewood fretboard. If it did, the fretboard material would cost more than the entire guitar because it’s so rare and limited today. Brazilian rosewood trade is restricted by CITES and almost no guitar companies use it anymore, except for some special custom shops. Other rosewoods or alternative woods are common substitutes.
Our Harley Benton fretboard is amaranth (better known as purpleheart), but sadly it was stained or painted black, giving the guitar a different look that’s closer to ebony rather than rosewood. So, there’s no way to get it brown or make it look like rosewood other than getting a new fretboard installed, which isn’t reasonable. Maybe it’s possible to get the black color out of the wood by using chemicals, but we don’t know what we’d find underneath, either. There could be another surprise waiting for us and all the work would be useless. On a budget guitar like this, we’ll have to live with this fretboard, loving it for what it is rather than hating it for what it’s not. The fretwork is surprisingly good and close to excellent, which is far from the industry standard in this price range.
The fretboard edges of well-played vintage guitars feel comfortable and round because the edges receive pressure from a player’s hand over decades.
But to show you the process of aging a fretboard, I chose a guitar with a rosewood fretboard, so you’ll know how to do this on a guitar with this type of fretboard if you want to. It’s not complicated so here we go.
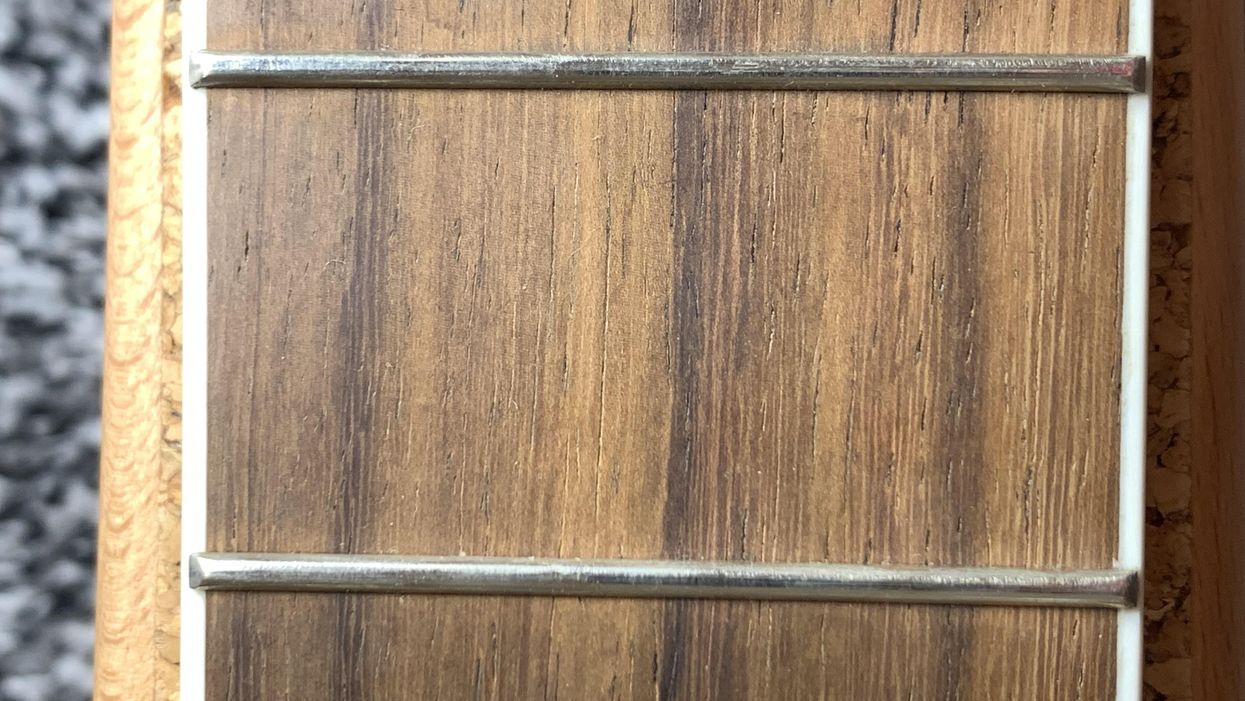
Look at the slightly pale and lifeless color of the rosewood in Photo 1. It has a nice grain but is rather dull. Brazilian rosewood has a rich chocolate brown color, which clearly shows the grain of the wood.
Let’s make it less boring:
Use some fine steel wool or sanding pads to sand the rosewood. Use a soft brush afterwards to get the dust off.
Use some naphtha or alcohol and a cotton cloth to degrease the wood and get all the fine dust and dirt out of it.
Use masking tape to protect the fretboard edges and the binding, if your neck has one. You don’t need to cover the frets. They’re easy to clean after the process. Use a Q-tip and some Vaseline to protect the fretboard dots from the dye.
You need a chocolate brown wood dye and a small soft brush to apply it.
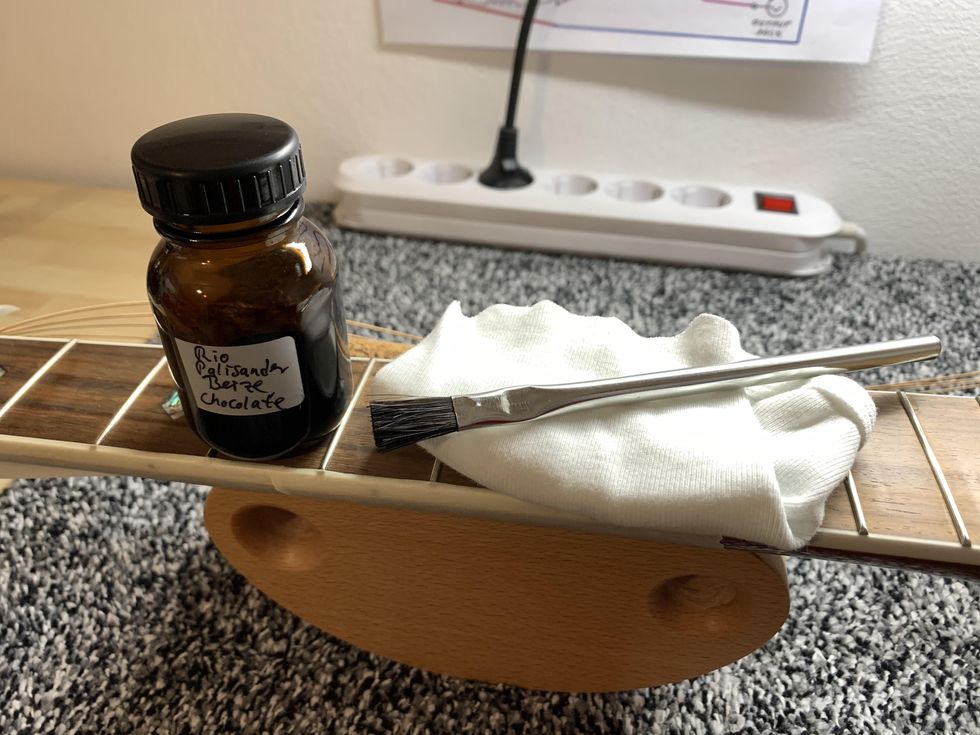
Photo 2
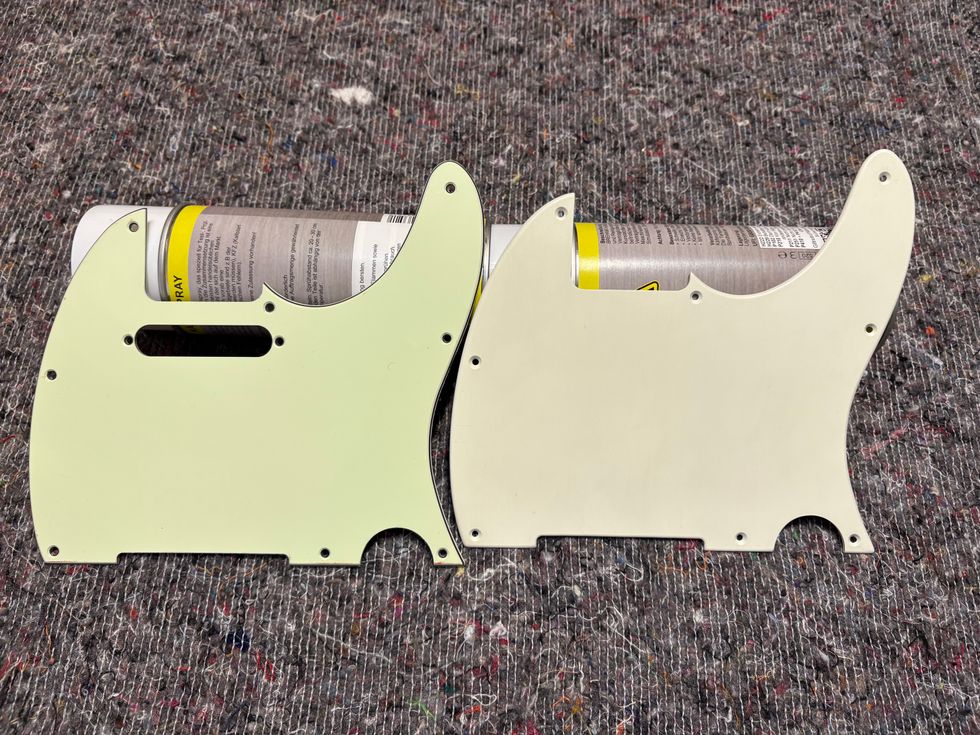
Some luthier supply stores offer special Brazilian rosewood dye in different shades of brown (Photo 2). I decided on a classic chocolate brown color on a solvent base for best results. Apply the dye thin and carefully and let it dry for some minutes.
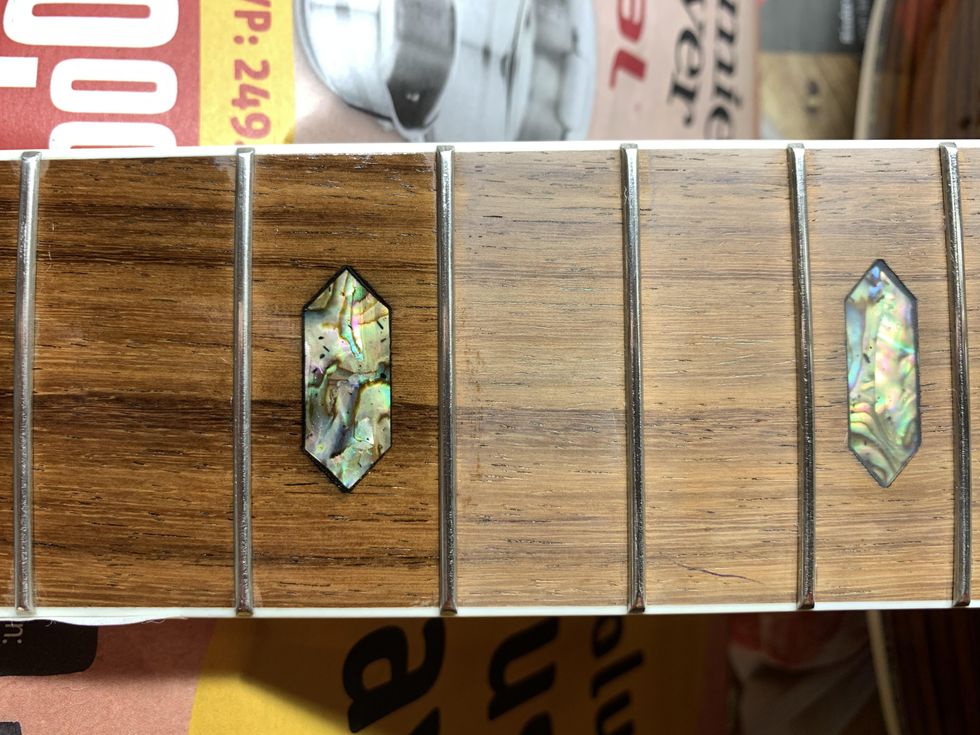
Photo 3
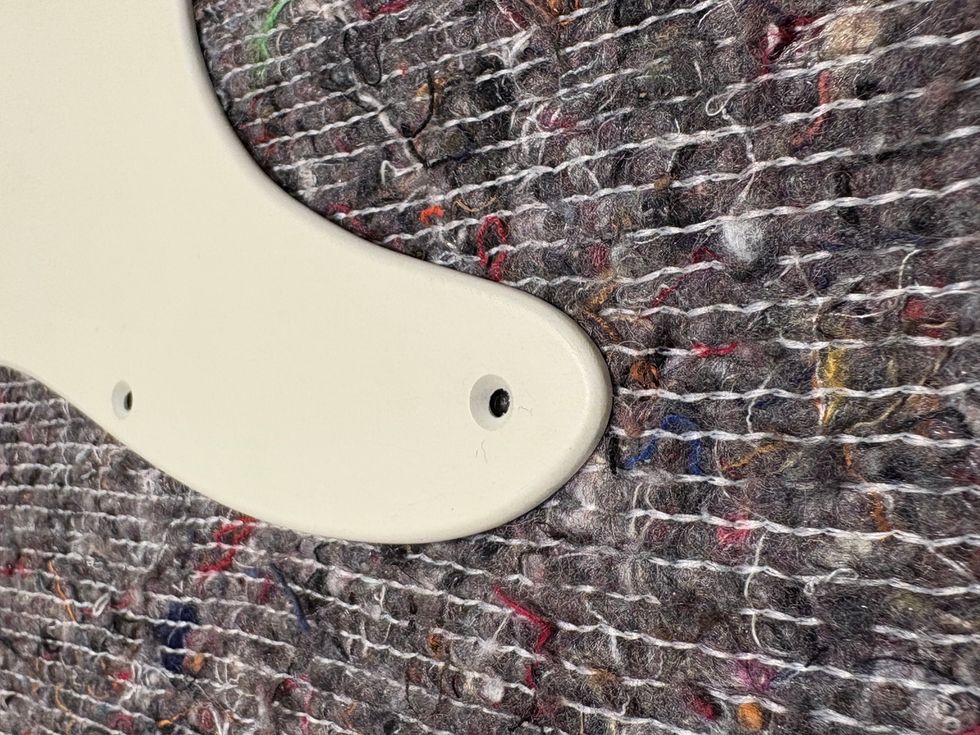
Now look at the difference in Photo 3. It’s easy to see! If you want your fretboard darker, repeat the process until you like it. Cover your workspace with old newspapers and have an old cotton rag nearby just in case. This dye will stain everything permanently and you don’t want it on your clothes or your kitchen table. Let the fretboard dry for a day and take off the masking tape.
Use some very fine steel wool to polish the fretboard and the frets, to get any dye off the fret material easily. Use a soft brush to clean the fretboard afterwards.
Use some naphtha and a Q-tip to carefully clean the fretboard dots from any Vaseline leftovers.
Then use the amber color from the last part of this series [“DIY Relic’ing: Hardware Continued”] together with a fresh Q-tip and apply the amber color to the dots until you like the shade.
Now that we’ve made this rosewood fretboard look much closer to Brazilian rosewood, it’s time to mimic the touch and feel of it. Brazilian rosewood has a certain smell and feel that can be described as greasy compared to most other rosewoods. This is because of the oil content of this wood. We can’t naturally “oil up” other woods, but we can get close to this certain feel by waxing the fretboard rather than oiling it. This is also an easy process so let’s go for it.
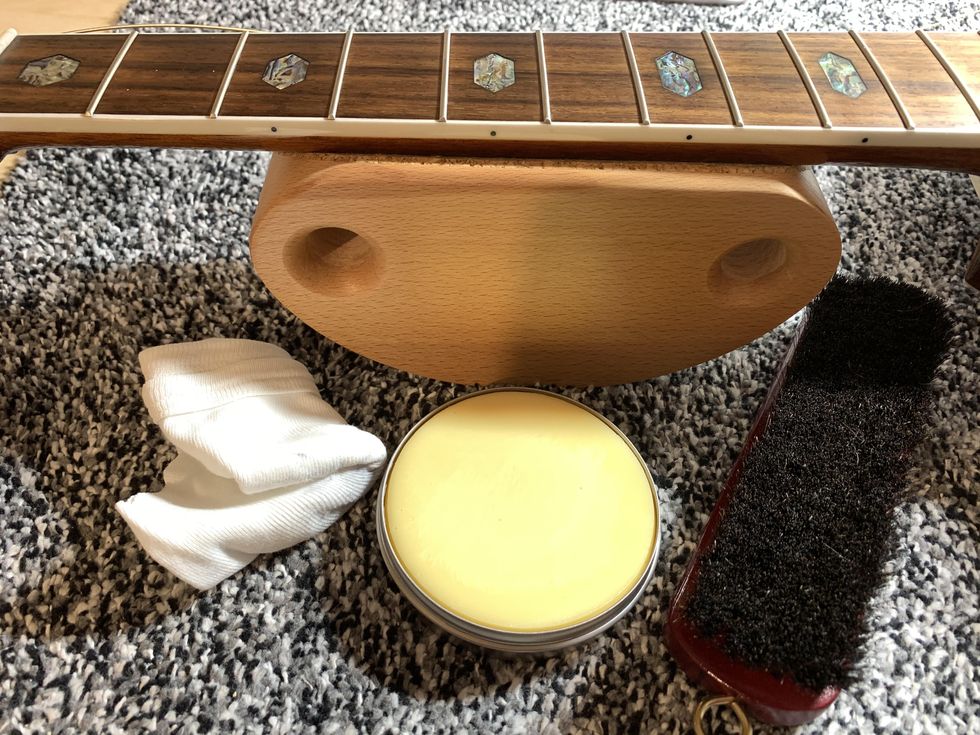
Photo 4
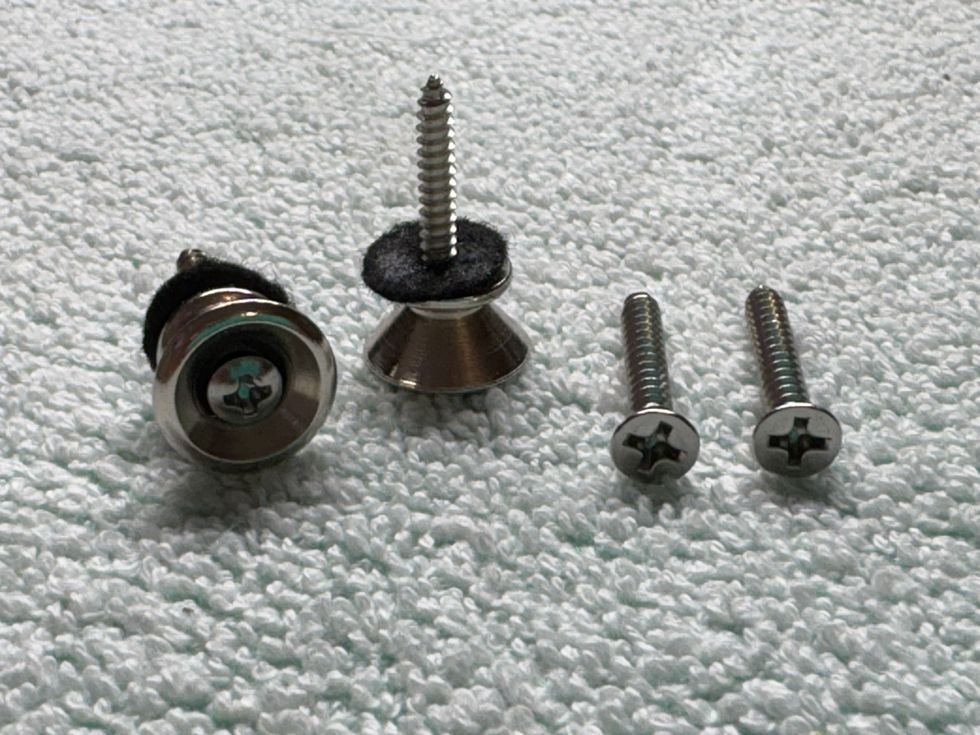
Get a clear, hard wax for fretboards and a soft polishing brush (Photo 4). Apply a thin layer of wax to the fretboard using a cotton cloth to massage it into the wood.
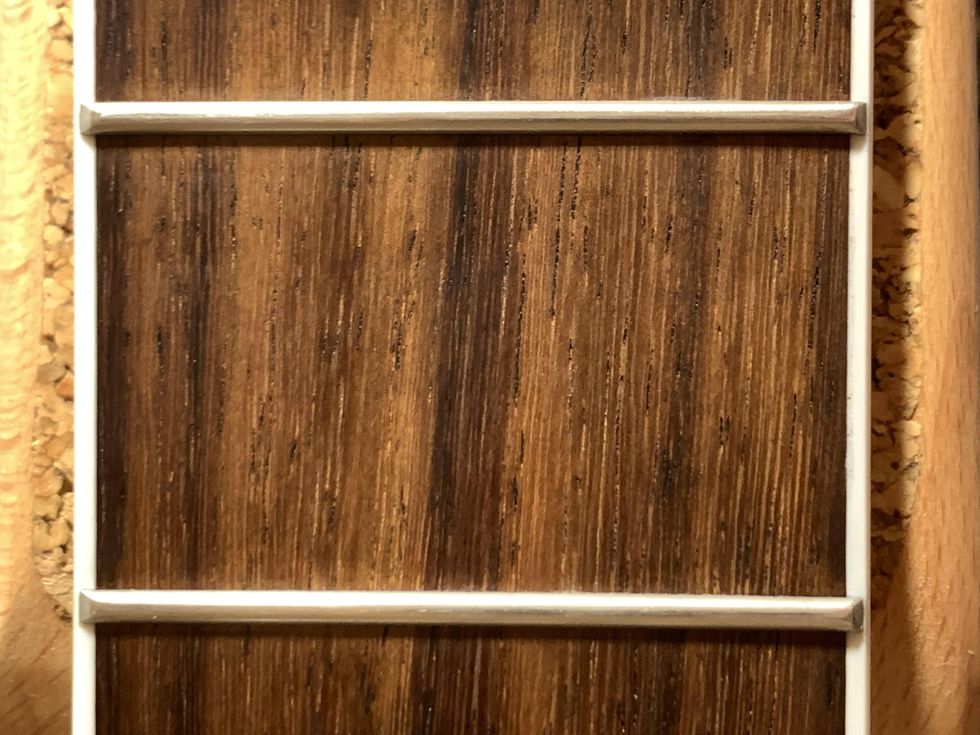
Photo 5
Let it dry for some time, then wipe off any remaining excess wax and use the soft polishing brush to get this greasy look and shine on your fretboard, as seen in Photo 5.
So far, so good. We’ve taken care of the color and the feel of the fretboard but there is another haptic thing to consider when talking about vintage necks: the broken-in feeling of the fretboard edges. The fretboard edges of well-played vintage guitars feel comfortable and round because the edges receive pressure from a player’s hand over decades. This is not what is called “rolled fretboard edge,” which is a common custom shop option, but it goes in the same direction only to a much lesser degree.
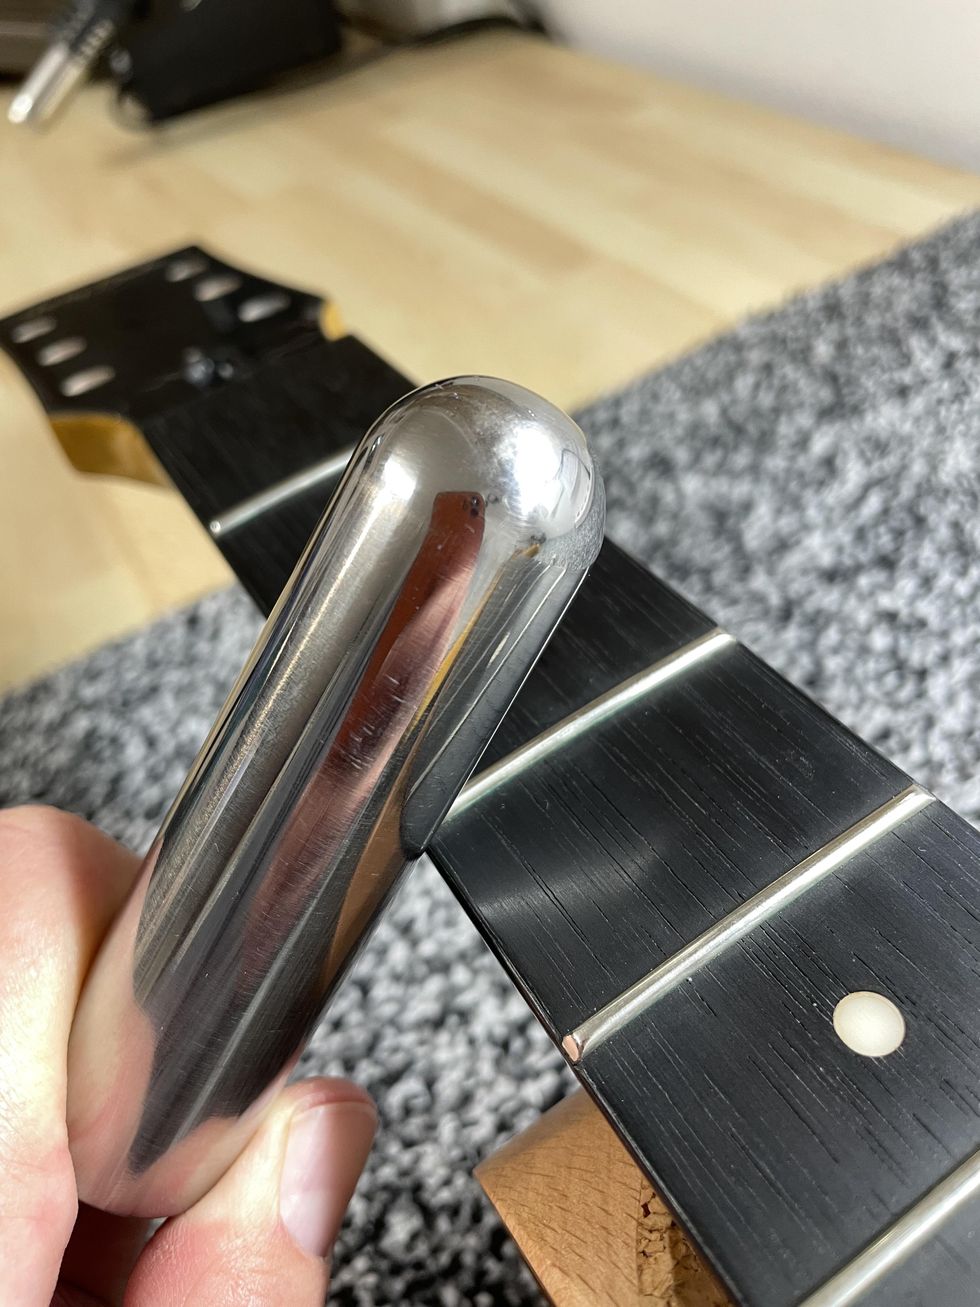
Photo 6
To bring this typical broken-in feeling to your neck, you don’t need much: just a round metal bar and some time. You can do this to any guitar neck. I prefer to use a massive metal slide for pedal-steel players, but you can also use a bigger screwdriver or something similar. If possible, clamp down your guitar and use the steel bar in a 45-degree angle to move it along the edge of the fretboard, applying pressure (Photo 6). What we’re doing with this is not making a rolled edge but compressing fibres, which is exactly the natural process over time. Repeat moving the bar while applying pressure for some time and check the result until you like it. This is not done within a minute, so take your time. With the metal slide, I usually need 10-15 minutes for each edge until I like it, but this depends a lot on how hard your fretboard material is.
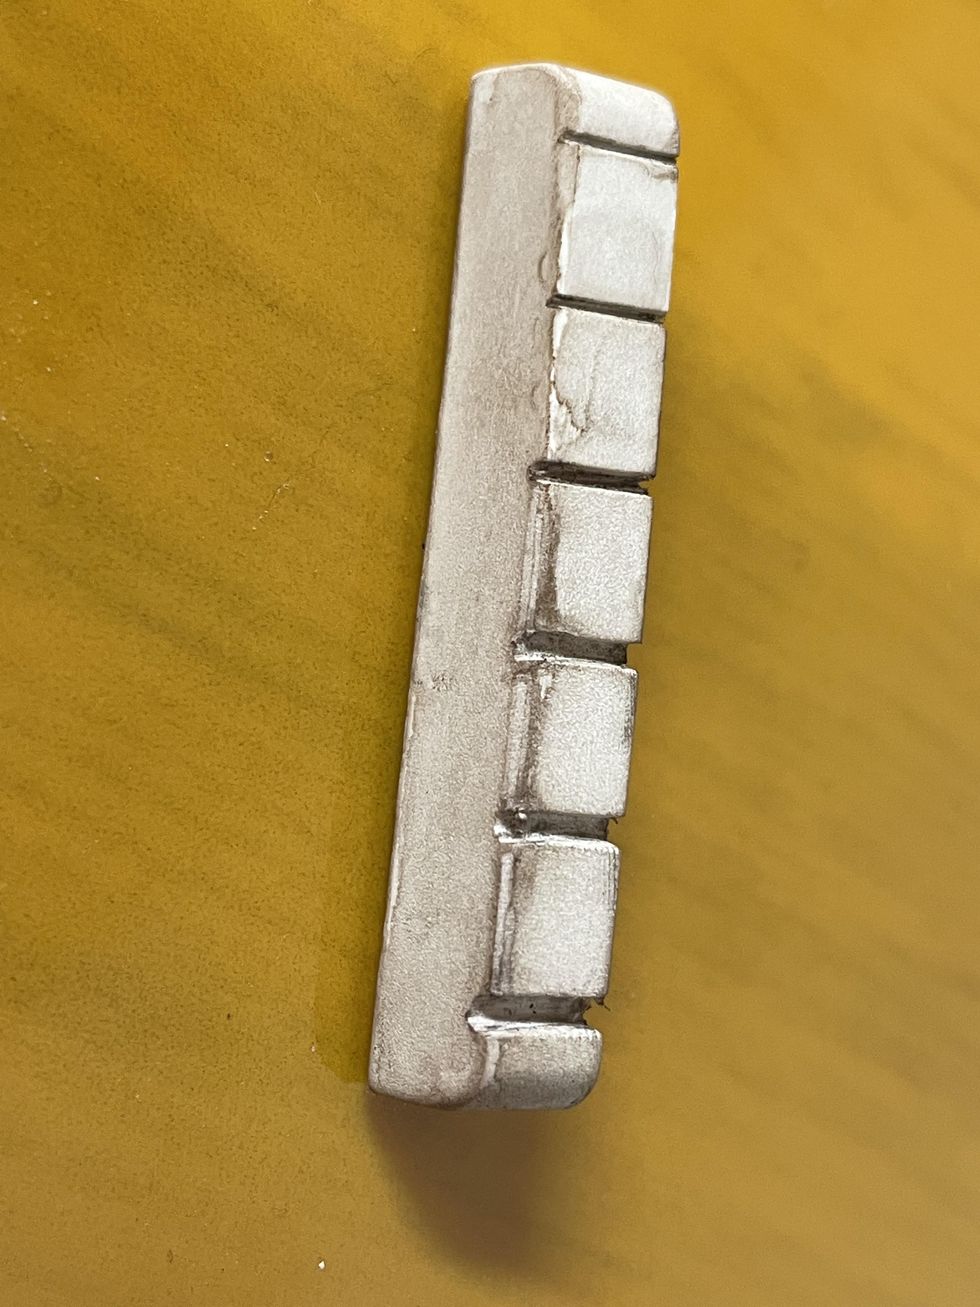
Photo 7
If you’re done with that part, excellent! You just finished your fretboard. Moving up the neck, the nut is our next task. The nut of our Harley Benton is pure white plastic, which not the best choice. If you want to keep it, you can sand it with some steel wool and apply some of the amber color with a Q-tip, followed with some of our mixture of dirt, dust, and ashes we used for the plastic buttons of the tuners [DIY Relic’ing Tuners, Part 2”]. Use your fingers to wipe on some of this mixture and you’re done. If you want to upgrade the nut, nylon is the historically correct material, and such nut blanks are available from numerous luthier supply stores. I decided to use an unbleached bone nut blank and make a new nut. Afterwards, I used some of the amber color and dust to make it look old (Photo 7).
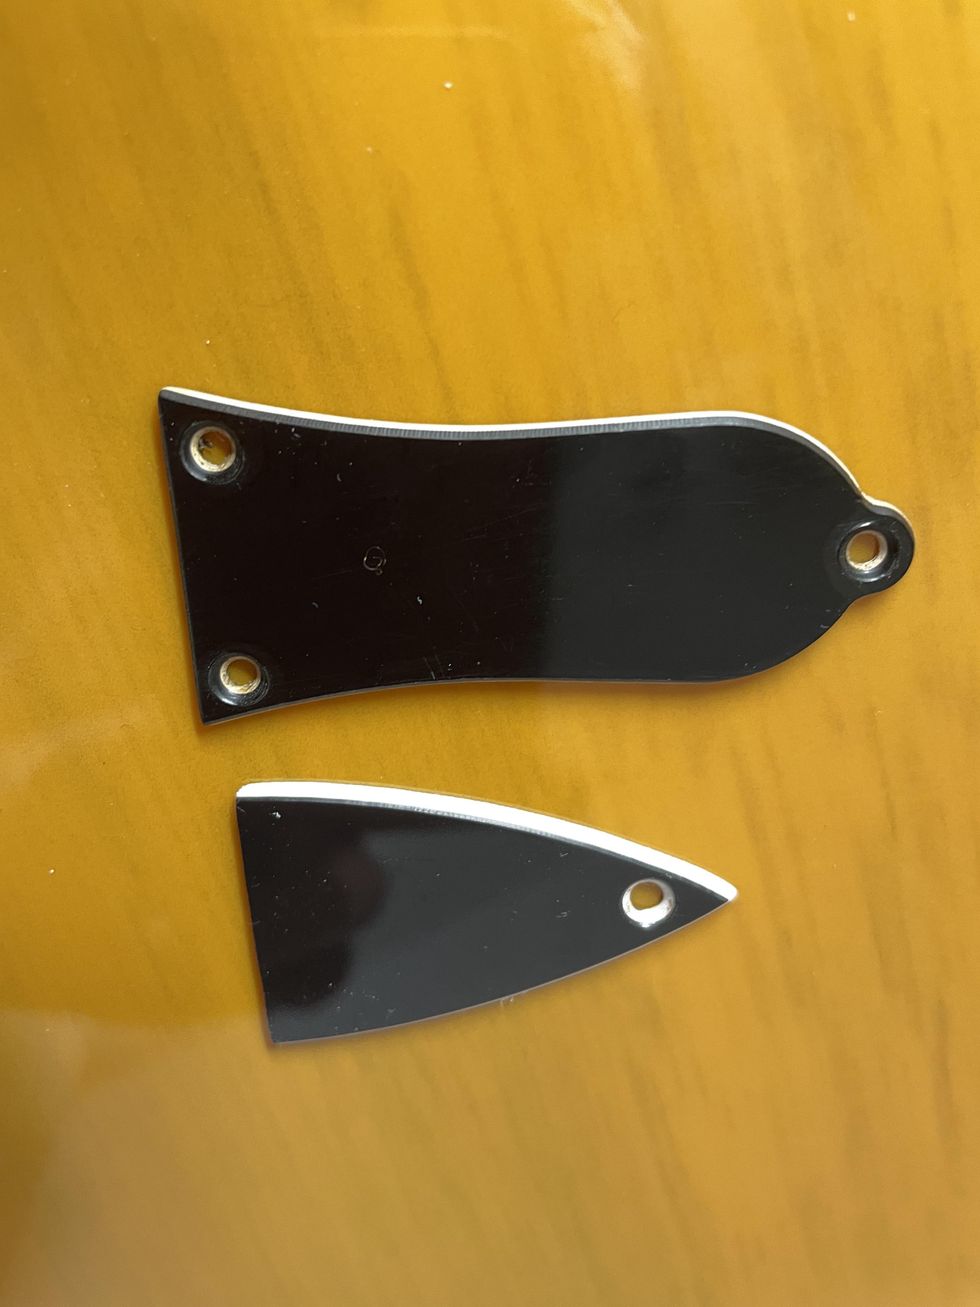
Photo 8
Further up the neck is the cover for the truss rod adjustment screw with its mounting screw. Harley Benton decided to use a modern shape for it, which doesn’t look very good to me. The typical Gibson-style covers with their bell-like shape look much different, so I decided to swap the cover for such a model, modifying it for a flat bottom so it covers the whole opening for the truss rod (Photo 8). To make it look old, you can use the exact steps we used on the jack plate: break the shine with some steel wool, add some light scratches, wipe on some amber color on the white part of the cover, and then rub in some dust and dirt. You already know how to age screws, having done it many times before in the earlier parts of this ongoing project. If you need a refresher on our aging process for screws, refer back to “DIY Relic’ing: Break the Shine” for guidance.
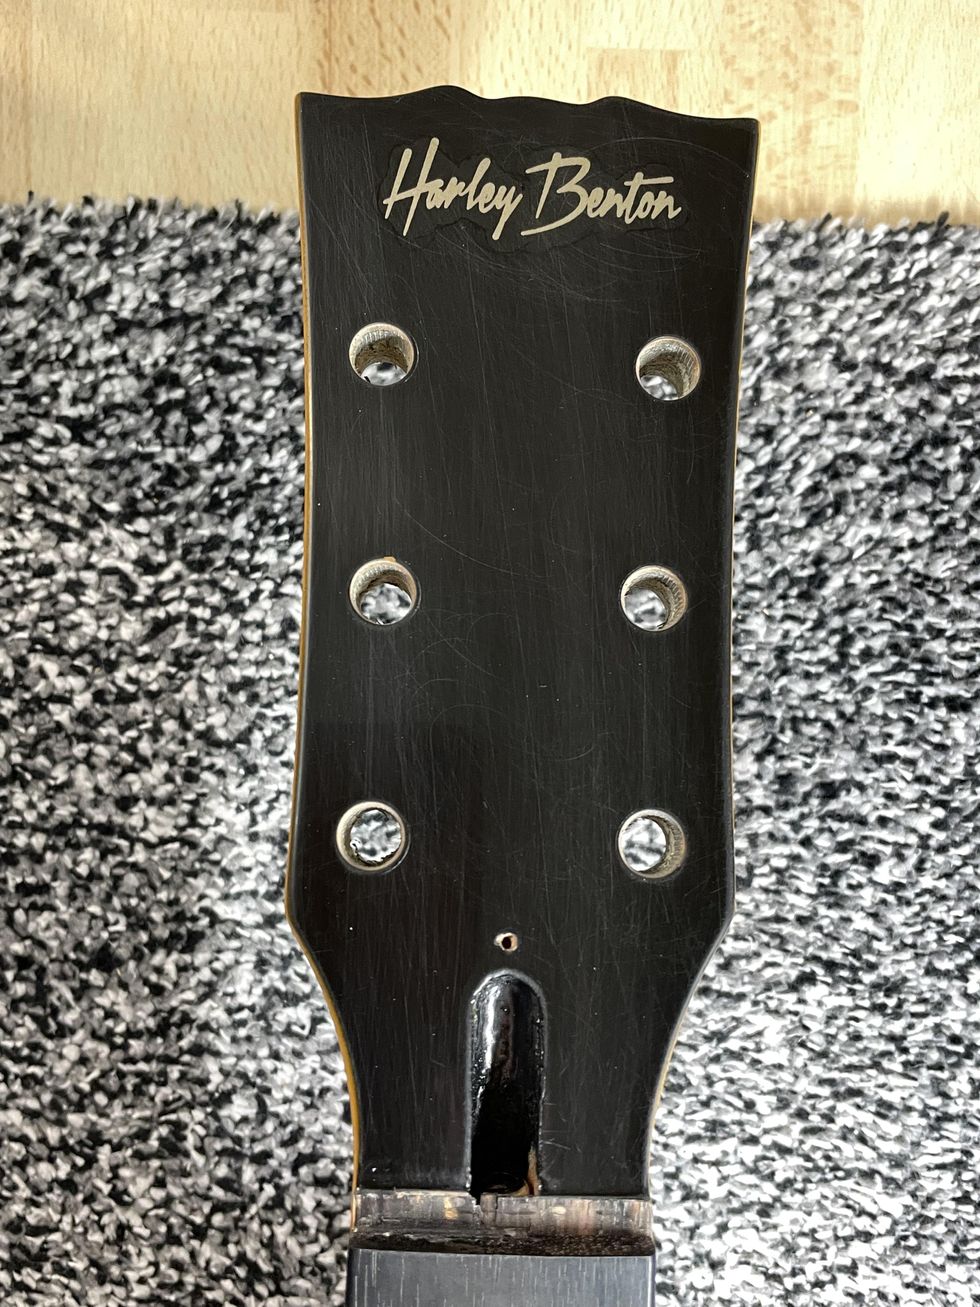
Photo 9
The last thing we’ll do today is begin to work on the headstock of the guitar, which is often a delicate task. A lot of modders try to reshape the headstock so it will look like it’s from a vintage guitar, and, even worse, replace the headstock logo with a fake logo from another company. I would never do that. This project is about aging a guitar and not about making it an exact copy of a vintage original. Personally, I really like the headstock shape of the Harley Benton. It looks at least a little bit Gibson-like, and I also think the Harley Benton logo looks cool the way it is (Photo 9). So, aging it is very easy: Break the shine with some steel wool and wipe off the dust. Use a Q-tip and apply some layers of the amber color to the logo until you like the shade. Adding dings, dongs, and scratches will come later. In the next part of this project, we’ll take care of the backside of the neck and the body by cracking the lacquer to mimic some old nitro lacquer.
That’s it for now. We’re almost finished with this relic’ing project, but before we wrap it up, we’ll return to guitar mods in the next issue. We’ll take a deeper look at putting vintage parts into new electric guitars, so stay tuned.
Until then ... keep on modding!
- Last Call: Someday You'll Regret That Relic Job - Premier Guitar ›
- Mod Garage: DIY Relic'ing—Aging a P-90 Pickup - Premier Guitar ›
- DIY Relic'ing: Break the Shine - Premier Guitar ›
- DIY Guitar Relic'ing: Let's Crack Some Lacquer Finish - Premier Guitar ›
- It’s Rosewood, But What Kind? ›
The typical controls on a compressor can be confusing and often misunderstood. At the heart of the MXR Studio Compressor is the ratio control, which offers up four levels of squish.
Compression might be the most misunderstood effect on your board—until now.
I was recently listening to three accomplished guitar players discuss the how, when, and where to use compressors in their guitar rigs. All three players had wildly different views on all aspects of compressordom, from where they should be used in a signal chain to whether they are even worth the hardware that holds them together.
Their conversation made me reflect on compressors more generally, and their standing as probably the least understood guitar pedal effect. There is a long-running joke about the guitar player who spends 30 minutes dialing in his compressor before the sudden realization that, for all the knob twisting, the pedal itself has never turned on. Most players have put on the compressor dunce cap for at least 30 seconds—if not 30 minutes.
When compared to effects like distortion and delay, compression can be as esoteric, nuanced, and arcane as a clandestine funk-guitar society’s secret handshake. In my experience, a large swath of guitar players cannot even detect compression until they are sonically beaten over the head with it. And of those who can discern the bludgeoning, many don’t know which knob to turn to achieve a more subtle effect. We guitar players should have known we were in trouble when many professional compressors came with buttons labeled “auto.” If even our know-it-all, front-of-house cousins need a crutch, what hope do we have?
Compression originated in the recording studio, where professional engineers were both its inventors and primary users, so its controls tend to be more technical than your amp’s bass, middle, and treble knobs. Let’s break down some controls in the simplest terms possible.
Introduced in 1972, the Dyna Comp had two simple controls: output and sensitivity. It’s far from transparent, but added a musical coloration that made fans out of Bonnie Raitt and Lowell George.
Threshold: This setting determines what gets squished and what doesn’t. Everything below the threshold passes through unchanged. Everything above the threshold gets squished. This is often labeled “sustain” on many guitar pedals. Sometimes, as the sustain is turned up, the compressor’s threshold point goes down, lowering the bar for what gets compressed, and more effect gets applied to your dry signal.
Ratio: How much compression is applied to signals above the threshold. A 1:1 ratio would mean no compression. At 2:1, for every 2 dB over the threshold, the compressor will only let 1 dB through. Some classic compressors have a ratio around 30:1. This means that above the threshold, you can increase the input signal significantly but receive only a small increase in output. Boom, you’re chickin’ pickin’.
Attack: This adjusts how fast it takes the compressor to get to work. A shorter attack means the clamping action happens immediately, while a longer attack time lets a brief burst of signal through before they start applying the aforementioned compression ratio.
Release: After the signal drops below the threshold, the compressor takes a certain amount of time to stop compressing or release. A longer release lazily hangs on and stops compressing when it gets around to it. Shorter releases get out of the way faster, and the next transient can get through uncompressed before being re-attacked.
Makeup Gain (or Output Level): The compression process naturally limits gain. To match the energy level of your uncompressed signal, you may need to boost the compressor’s output. Compression evens out the peaks, and makeup gain can compensate for any perceived differences in level.
Threshold and ratio are the heart of the compressor’s function. Threshold decides what gets compressed and ratio determines how much it’s compressed. Attack and release are about how fast compression is applied and how quickly it stops being applied. By controlling these, you are controlling how quickly transients are attacked and how slowly transients are released. Every guitar compressor has an attack and release time, but many designs hide these controls via internal, fixed component values. The designer has benevolently dictated what setting you should use. Output level lets you make up for all that crushing by adding level to compensate.
This is just the beginning of compression. We’ve got the knobs, we know the function, and next time we’ll discuss how we can use this dynamic darling
By refining an already amazing homage to low-wattage 1960s Fenders, Carr flirts with perfection—and adds a Hiwatt-flavored twist.
Killer low end for a low-wattage amp. Mid and presence controls extend range beyond Princeton or tweed tone templates. Hiwatt-styled voice expands vocabulary. Built like heirloom furniture.
Two-hundred-eighty-two bucks per watt.
$3,390
Carr Skylark Special
carramps.com
Steve Carr could probably build fantastic Fender amp clones while cooking up a crème brulee. But the beauty of Carr Amps is that they are never simply a copy of something else. Carr has a knack for taking Fender tone and circuit design elements—and, to a lesser extent, highlights from the Vox and Marshall playbook—and reimagining them as something new.
Those that playedCarr’s dazzling original Skylark know it didn’t go begging for much in the way of improvement. But Carr tends to tinker to very constructive ends. In the case of the Skylark Special, the headline news is the addition of the Hiwatt-inspired tone section from theCarr Bel-Ray, a switch from a solid-state rectifier to an EZ81 tube rectifier that enhances the amp’s sense of touch and dynamics, and an even deeper reverb.
Spanning Space Ages
With high-profile siblings like the Deluxe, Bassman, Tremolux, and Twin, Fender’s original Harvard is, comparatively, a footnote in Fender’s wide-panel tweed era (the inclusion of Steve Cropper’s Harvard in the Smithsonian notwithstanding). But the Harvard is somewhat distinctive among tweed Fenders for using fixed bias, which, given its power, makes it a bridge that links in both circuit and sound to the Princeton Reverb. The Skylark Special’s similar capacity for straddling tweed and black-panel touch and tone is fundamental to its magic.
Like the Harvard and the Princeton, the Skylark Special’s engine runs on two 6V6 power tubes and a single 12AX7 in the preamp section. A 12AX7 and 12AT7 drive the reverb and the reverb recovery section, respectively, and a second 12AT7 is assigned to the phase inverter. (The little EZ81 between the two 6V6 power tubes is dedicated to the rectifier). Apart from the power tubes and the 12AX7 in the preamp, however, the Skylark Special deviates from Harvard and Princeton reverb templates in many important ways. Instead of a 10" Jensen or Oxford, it uses a 50-watt 12" Celestion A-Type ceramic speaker, and it includes midrange and presence controls that a Harvard or Princeton do not. It also features a boost switch that manages to lend body and brawn without obliterating the core tone. There is also, as is Carr’s style, a very useful attenuator that spans zero to 1.2 watts. Alas, there is no tremolo.
“I’d wager the Skylark Special will be around every bit as long as a tweed Harvard when most of your printed-circuit amps have shoved off for the recycler.”
It goes without saying, perhaps, that the North Carolina-built Skylark Special is made to standards of craft that befit its $3K-plus price. Even still, Carr upgraded nine of the coupling capacitors to U.S.-made Jupiters. They also managed to shave six pounds from the Baltic birch cabinet weight—reducing total weight to 35 pounds and, in Steve Carr’s estimation, improving resonance. Say what you will about the high price, but I’d wager the Skylark Special will be around every bit as long as a tweed Harvard when most of your printed-circuit amps have shoved off for the recycler.
Sweet Soulful Bird
Fundamentally, the Skylark Special launches from a Fender space. But this is a very refined Fender space. The bass is rich, deep, and massive in ways you won’t encounter in many 12-watt combos, and the warm contours at the tone’s edges lend ballast and attitude to both clean tones and the ultra-smooth distorted ones at the volume’s higher reaches. All of these sounds dovetail with the clear top end you imagine when you close your eyes and picture quintessential black-panel Fender-ness. The presence and midrange controls, along with the 50-watt speaker, lend a lot in terms of scalpel-sharp tone shaping—providing a dimension beyond classical Fender-ness—especially when you bump the midrange and turn up your guitar volume.
The tube rectifier, meanwhile, shifts the Skylark Special’s touch dynamics from the super-immediate reactivity of a solid-state rectifier to a softer, more-compressed, more sunset-hued kind of tactile sensitivity. But don’t let that lead you to worry about the amp’s more explosive capabilities. There is more than enough high-midrange and treble to make the Skylark Special go bang.
Anglo and Attenuated Alter Egos
The Hiwatt-inspired setting is still dynamic, but it’s a little tighter than the Fullerton-voiced setting. There’s air and mass enough for power jangling or weighty leads. The differences in the Bel-Ray’s tube selection (EL84 power tubes as well as an EF86 in the preamp) means the Skylark Special’s version of the Hiwatt-style voice is—like the amp in general—warm and round in the low-mid zone and softer around the edges, where the Bel-Ray version has more high-end ceiling and less mellow glow in the bass. It definitely gives the Skylark Special a transatlantic reach that enhances its vocabulary and utility.
Attenuated settings are not just practical for suiting the amps to circumstances and size of space you’re in; they also offer an extra range of colors. The maximum 1.2 watt attenuated setting still churns up thick, filthy overdrive that rings with harmonics.
The Skylark Special’s richness and variation means you’ll spend a lot of time with guitar and amp alone. Anything more often feels like an intrusion. But the Skylark Special is a friend to effects. Strength in the low-end and speaker means it humors the gnarliest fuzzes with grace. And with as many shades of clean-to-just-dirty tones as there are here, the personalities of gain devices and other effects shine.
The Verdict
Skylark Special. It’s fun to say—in a hep-cat kind of way. The name is très cool, but the amp itself sounds fabulous, creating a sort of dream union of the Princeton’s and Harvard’s low-volume character, a black-panel Deluxe’s more stage-suited loudness and mass, and a zingier, more focused English cousin. It can be sweet, subdued, surfy, rowdy, and massive. And it works happily with pedals—most notably with fuzzes that can make lesser low-mid-wattage amps cough up hairballs. The price tag smarts. But this is a 12-watt combo that goes, sonically speaking, where few such amps will, and represents a first-class specimen of design and craft.
The author dials in one of his 20-watt Sonzera amps, with an extension cabinet.
Knowing how guitar amplifiers were developed and have evolved is important to understanding why they sound the way they do when you’re plugged in.
Let’s talk about guitar amp history. I think it’s important for guitar players to have a general overview of amplifiers, so the sound makes more sense when they plug in. As far as I can figure out, guitar amps originally came from radios—although I’ve never had the opportunity to interview the inventors of the original amps. Early tube amps looked like radio boxes, and once there was an AM signal, it needed to be amplified through a speaker so you could hear it. I’m reasonably certain that other people know more about this than I do.
For me, the story of guitar amps picks up with early Fenders and Marshalls. If you look at the schematics, amplifier input, and tone control layout of an early tweed Fender Bassman, it’s clear that’s where the original Marshall JTM45 amps came from. Also, I’ve heard secondhand that the early Marshall cabinets were 8x12s, and the roadies requested that Marshall cut them in half so they became 4x12s. Similarly, 8x10 SVT cabinets were cut in half to make the now-industry-standard 4x10 bass cabinets. Our amp designer Doug Sewell and I understand that, for the early Fender amps we love, the design directed the guitar signal into half a tube, into a tone stack, into another half a tube, and the reverb would join it with another half a tube, and then there would be a phase splitter and output tubes and a transformer. (All 12AX7 tubes are really two tubes in one, so when I say a half-tube, I’m saying we’re using only the first half.) The tone stack and layout of these amps is an industry standard and have a beautiful, clean way of removing low midrange to clear up the sound of the guitar. I believe all but the first Marshalls came from a high-powered tweed Twin preamp (which was a 80-watt combo amp) and a Bassman power amp. The schematic was a little different. It was one half-tube into a full-tube cathode follower, into a more midrange-y tone stack, into the phase splitter and power tubes and output transformer. Both of these circuits have different kinds of sounds. What’s interesting is Marshall kept modifying their amps for less bass, more high midrange and treble, and more gain. In addition, master volume controls started being added by Fender and Marshall around 1976. The goal was to give more gain at less volume. Understanding these circuits has been a lifelong event for Doug and me.
Then, another designer came along by the name of Alexander Dumble. He modified the tone stack in Fender amps so you could get more bass and a different kind of midrange. Then, after the preamp, he put in a distortion circuit in a switchable in and out “loop.” In this arrangement, the distortion was like putting a distortion pedal in a loop after the tone controls. In a Fender amp, most of the distortion comes from the output section, so turning the tone controls changes the sound of the guitar, not the distortion. In a Marshall, the distortion comes before the tone controls, so when you turn the tone controls, the distortion changes. The way these amps compress and add harmonics as you turn up the gain is the game. All of these designs have real merit and are the basis of our modern tube–and then modeling—amplifiers.
Everything in these amps makes a difference. The circuits, the capacitor values and types, the resistor values and types, the power and output transformers, and the power supplies—including all those capacitor values and capacitor manufacturers.
I give you this truncated, general history to let you know that the amp business is just as complicated as the guitar business. I didn’t even mention the speakers or speaker cabinets and the artform behind those. But what’s most important is: When you plug into the amp, do you like it? And how much do you like it? Most guitar players have not played through a real Dumble or even a real blackface Deluxe Reverb or a 1966 Marshall plexi head. In a way, you’re trusting the amp designers to understand all the highly complex variations from this history, and then make a product that you love playing through. It’s daunting, but I love it. There is a complicated, deep, and rich history that has influenced and shaped how amps are made today.
Tobias bass guitars, beloved by bass players for nearly half a century, are back with the all-new Tobias Original Collection.
Built for unrivaled articulation, low-end punch, and exceptional ergonomics, the all-new Tobias Original Collection comprises an array of six four and five-string bass models all offered in both right and left-handed orientations. The Tobias range features Classic, Killer B, and Growler models, and each is equipped with high-quality hardware from Babicz and Gotoh, active electronics from Bartolini, and the iconic Tobias asymmetrical neck design. Crafted from the finest tonewoods, Tobias Original Collection bass guitars are now available worldwide on Gibson.com, at the Gibson Garage locations, and at authorized Gibson dealers.
The bass world has been clamoring for the return of the authentic, high-end Tobias basses, and now, Tobias has returned. Combining the look and tone of the finest exotic tonewoods, such as quilted maple, royal paulownia, purpleheart, sapele, walnut, ebony, and wenge, with the feel of the famous Tobias Asym asymmetrical neck and the eye-catching shapes of the perfectly balanced contoured bodies, Tobias basses are attractive in look and exceptional in playing feel. However, their sonic versatility is what makes them so well suited to the needs of modern bassists. The superior tone from the exotic hardwoods, premium hardware, and active Bartolini® pickups and preamps results in basses with the tonal flexibility that today’s players require. Don’t settle for less than a bass that delivers everything you want and need –the look, the feel, and the sound, Tobias.
“I’m thrilled to release Tobias basses, emphasizing the use of exotic woods, ergonomics, and authenticity to the original Tobias basses,” says Aljon Go, Product Development Manager for Tobias, Epiphone, and Kramer. “This revival is a dream come true, blending modern craftsmanship with the timeless essence of Tobias.”
“It’s amazing to see this icon of the bass world return,” adds Andrew Ladner, Brand Manager for Epiphone and Kramer. “These models are truly a bass player’s bass, and true to the DNA that makes Tobias world-class—the ace up the sleeve of bass players around the globe since 1978. Today’s players can find that unique voice and feel that only Tobias can offer.”
For more information, please visit gibson.com.