Chops: Intermediate
Theory: Beginner
Lesson Overview:
• Learn major and minor triad shapes on the top four strings.
• Use smooth voice-leading to connect the triad shapes over a chord progression.
• Construct a melody using the triad shapes over the chord progression.
Click here to download a printable PDF of this lesson\u2019s notation.
Great guitar solos, and especially the most memorable ones, are much more than a bunch of licks strung together. In fact, the memorable parts of these solos tend to be melodic and singable—easy for any listener to remember. In this lesson we’ll learn how to start playing stronger melodic solos by using triads shapes as a guide.
In the simplest terms, solos—and melodies in general—consist of chord tones and non-chord tones. As the song moves along and the chords change, notes that were once chord tones might now be non-chord tones and vice versa. You’ve probably noticed this when improvising over a chord progression: Sometimes a note feels right, but four beats later it can sound dissonant.
The first step in learning to play better, more memorable solos is learning how to hit chord tones. Lucky for us, we can use chord shapes up and down the neck to find those chord tones.
Fig. 1 and Fig. 2 show three shapes for major triads on the top four strings. You may recognize these as the higher part of a chord voicing you already know—a common barre chord, for example. Most guitarists tend to learn chords from the low strings up, usually because the bass note is the root. For this lesson, and soloing in general, start thinking about chords from the top down.
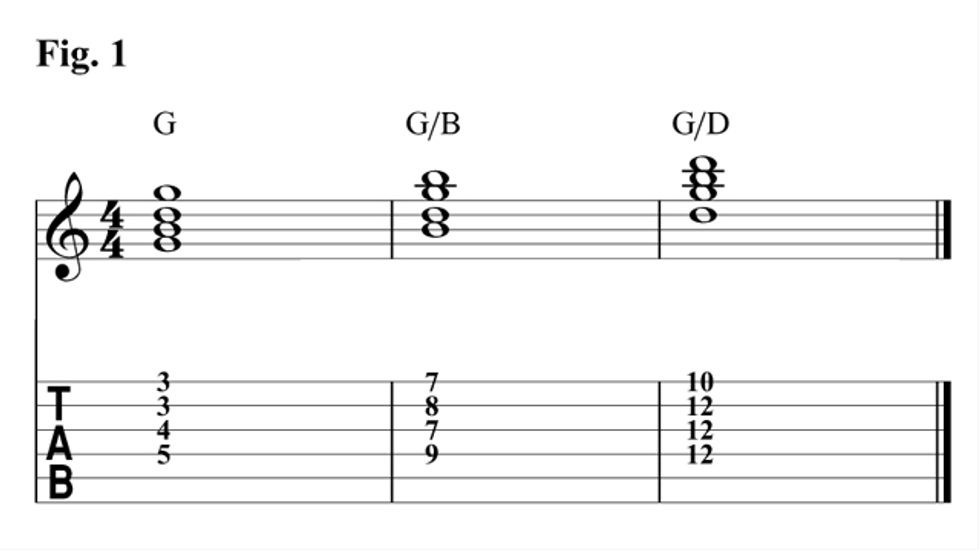
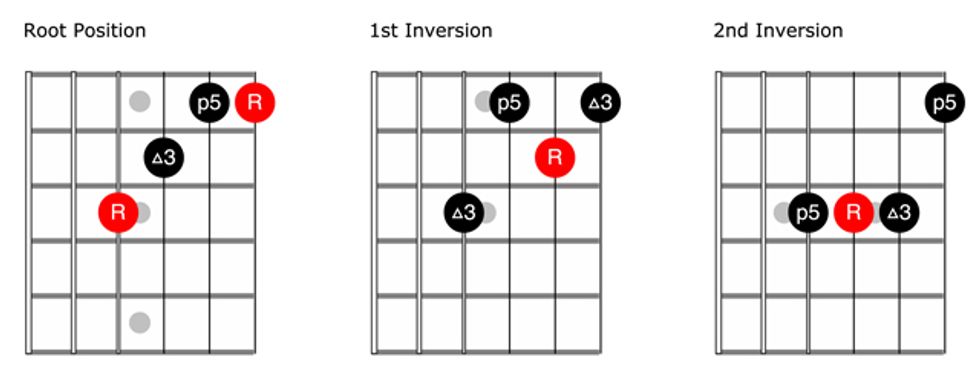
I like to think of these four note voicings as a choir with a soprano, alto, tenor, and bass part. Each voice gets it’s own string. You’ll notice that the bass and soprano are always the same note an octave apart. This means that in root position, the first voicing in Fig. 2, the root will be on the 4th and 1st strings. In 1st inversion, the second voicing in Fig. 2, the third of the chord is on the 4th and 1st strings. And in 2nd inversion, the fifth of the chord is on the 4th and 1st strings.
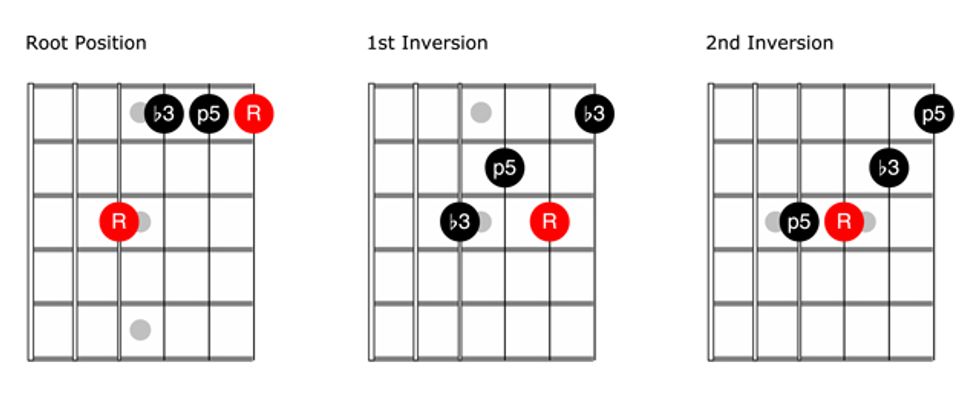
In Fig. 3 and Fig. 4, we have the same series of triad voicings, but for minor chords. Keep in mind you can move these shapes up and down the strings to get different chords, but the space between any two voicings of the same chord will always be the same.

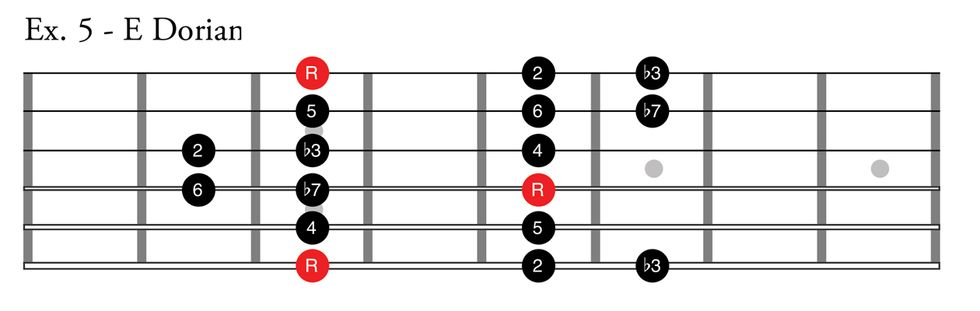
Now let’s apply these shapes to a chord progression. Using a popular I-V-VIm-IV progression in G major, Fig. 5 includes all of these shapes to create smooth voice-leading. Voice-leading is a trick used by composers and arrangers to make sure no voice jumps too far from note to note when a chord changes. For example, play just the alto part, which are the notes on the 2nd string. Notice how they either stay the same from one chord to the next, or move only one step? It’s only every four measures that they move more than a step, and even then it’s no more than a third.
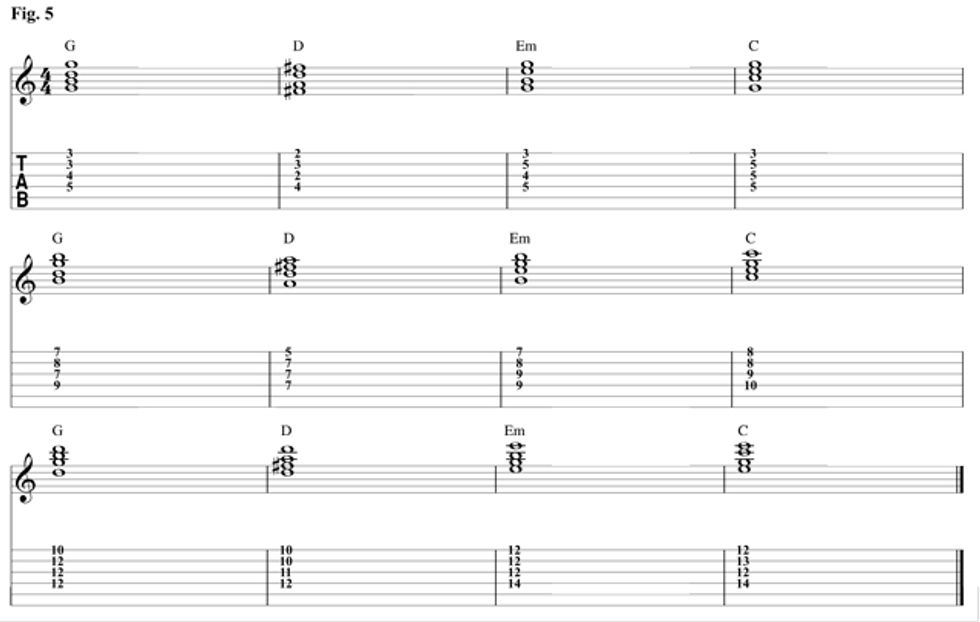
As you play the progression, you’ll also hear the soprano part playing a simple melody because you never play the progression the same way twice. The chords are also voiced higher with each pass—an easy way to add interest to a repetitive progression.
Fig. 6 is a solo I composed using the chord shapes in Figure 5. This solo uses only chord tones exclusively!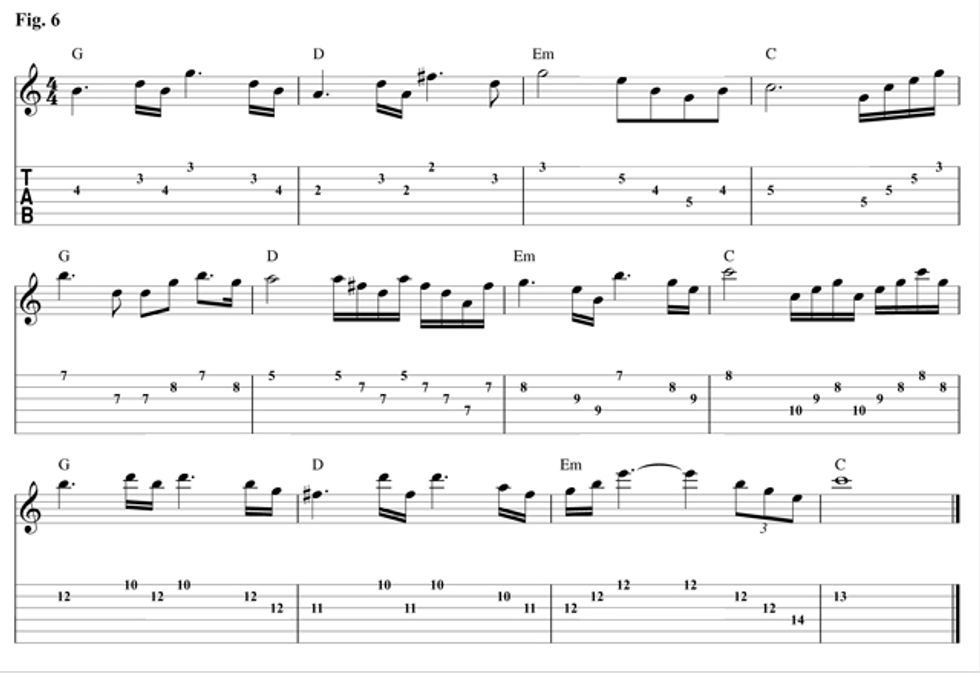
Chord tones alone do not make the most interesting solos. However, restricting yourself to just those notes as an exercise will make it easier to target them as you do add non-chord tones, which we’ll cover in another lesson. Meanwhile, learn this solo and practice your own over the rhythm track as it continues to play.


![Rig Rundown: Russian Circles’ Mike Sullivan [2025]](https://www.premierguitar.com/media-library/youtube.jpg?id=62303631&width=1245&height=700&quality=70&coordinates=0%2C0%2C0%2C0)