
Last time we covered the basic gear needed to record guitar on your computer or tablet. Now let’s talk technique!
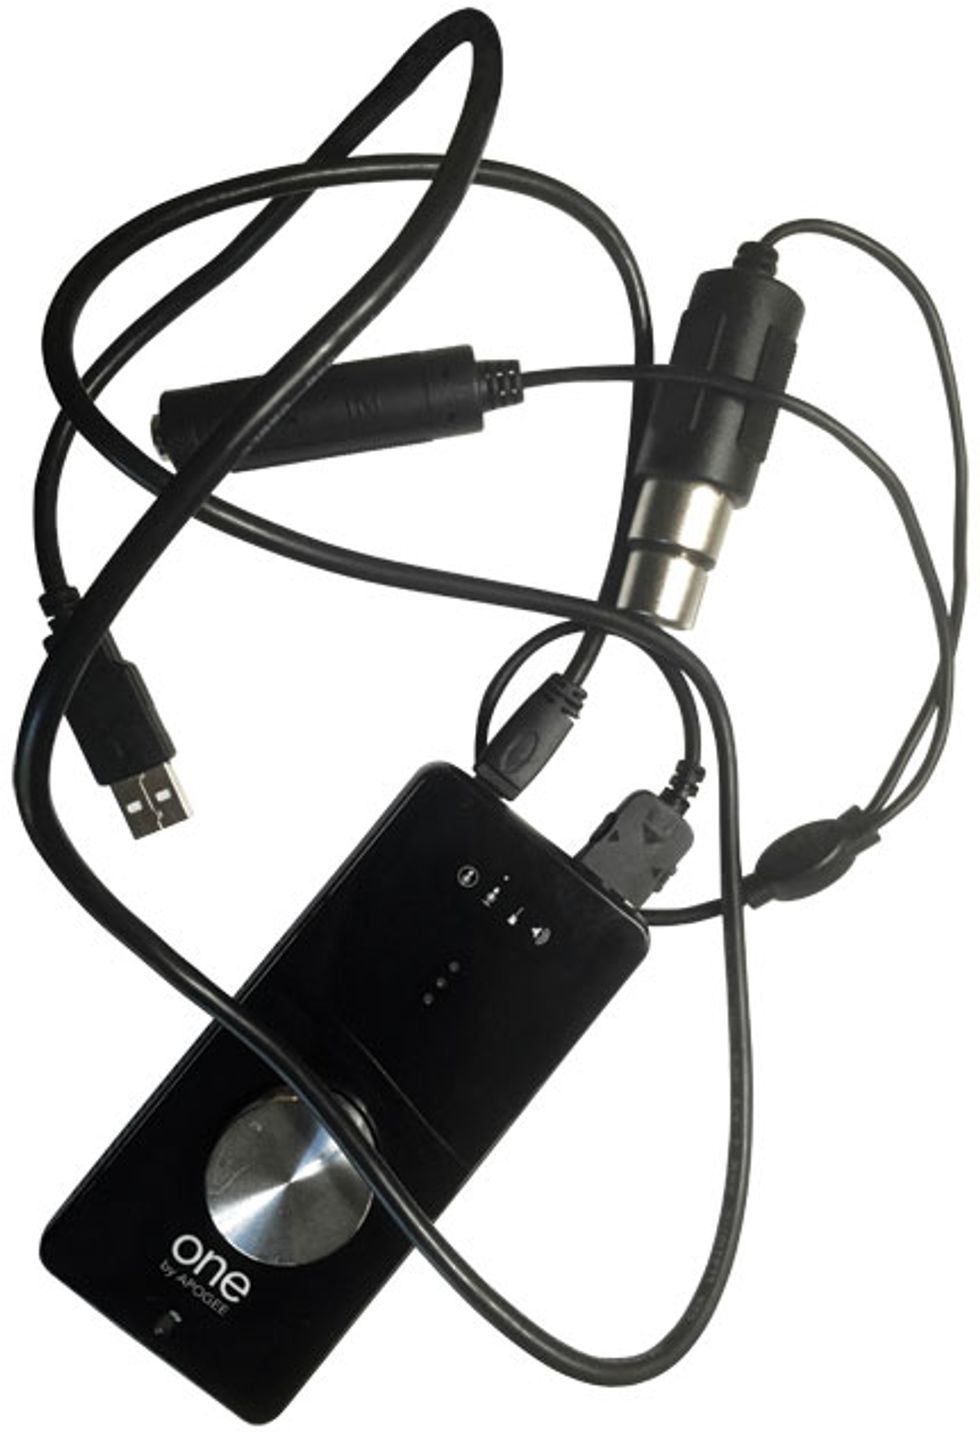
Dial in your DAW. Install your DAW of choice according to the program’s instructions. Connect your interface and plug in your guitar. (If there’s a line/instrument switch, choose instrument.) The guitar-style jack (known to audio geeks as a phono jack or 1/4" jack) might be on the interface box, or it may be on an external “breakout cable” [see Image 1].
Connect headphones or ear buds to your interface’s headphone jack. If you get serious about recording, you’ll eventually acquire a set a special speakers to monitor your recordings. But until then, you’ll get better-sounding and more accurate results using headphones rather than your computer’s built-in speakers. Headphones also prevent feedback when you’re recording with a microphone.
You probably need to “tell” your DAW to use the new interface rather than the computer’s built-in mic and speakers. If you’re using an Apple computer, you usually don’t need to install any special “driver” software to use your interface, though you may need to on a PC. Just Google “download [your DAW name] driver.” Don’t bother installing extra software from any DVDs included in your DAW package. Chances are there are newer versions online.
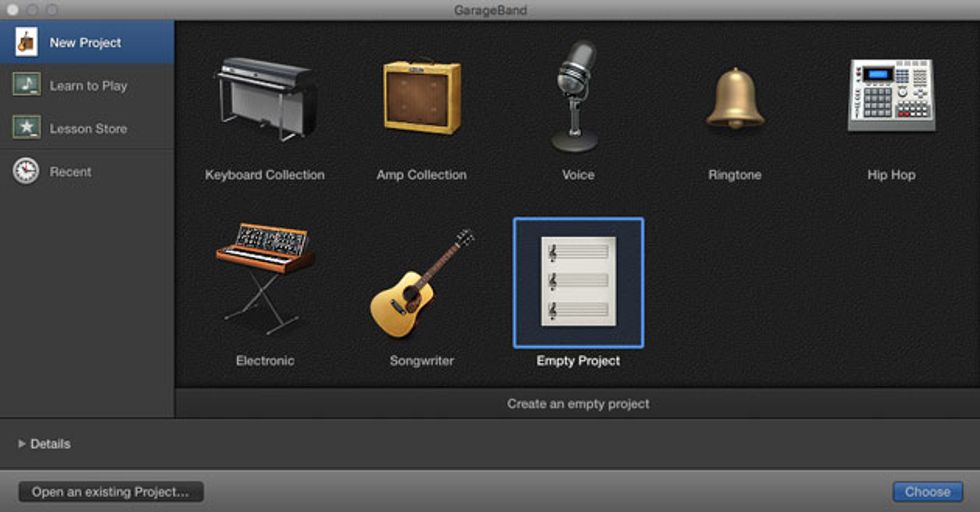
Image 2
Can you hear me now? Launch your DAW program and create a new session. I’m using Apple’s GarageBand as my demo DAW, though the upcoming procedures will be similar for other recording programs. When you open GarageBand, you get a window asking what type of recording you want to make [Image 2]. For now, don’t pick Amp Collection (which offers a smorgasbord of modeled amps); select Empty Project, just so you can try setting up a new session from scratch. In GarageBand, you get another pop-up window [Image 3] inquiring about the sort of track you want to start with. Choose “Record guitar or bass.” Other programs may offer a choice between MIDI and audio tracks. Choose audio.
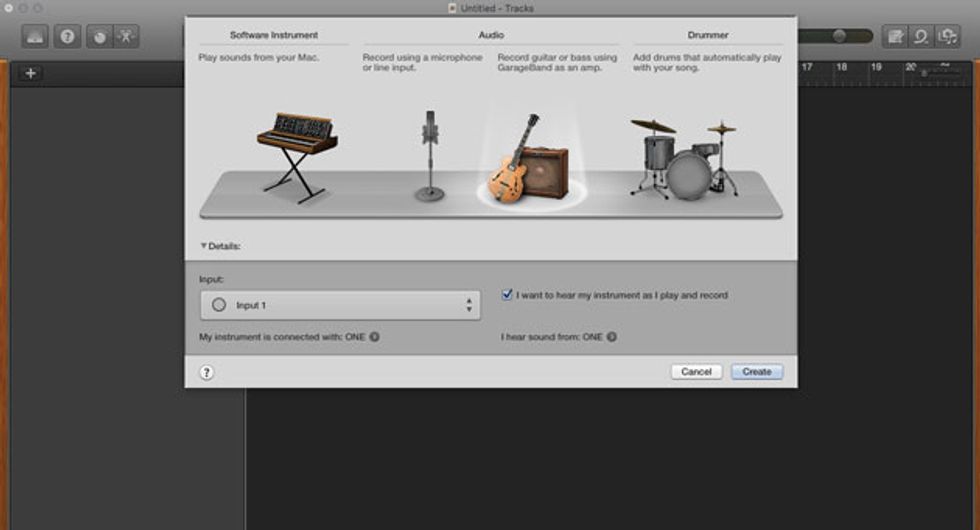
Image 3
To make sure your computer is using your interface rather than its built-in audio hardware, open the DAW’s preferences via one of the pull-down menus at the top of the screen, and look for an “audio” tab. You should see something like Image 4. (Here, the word ONE refers to my Apogee One interface.) Select your device as both the input and output.
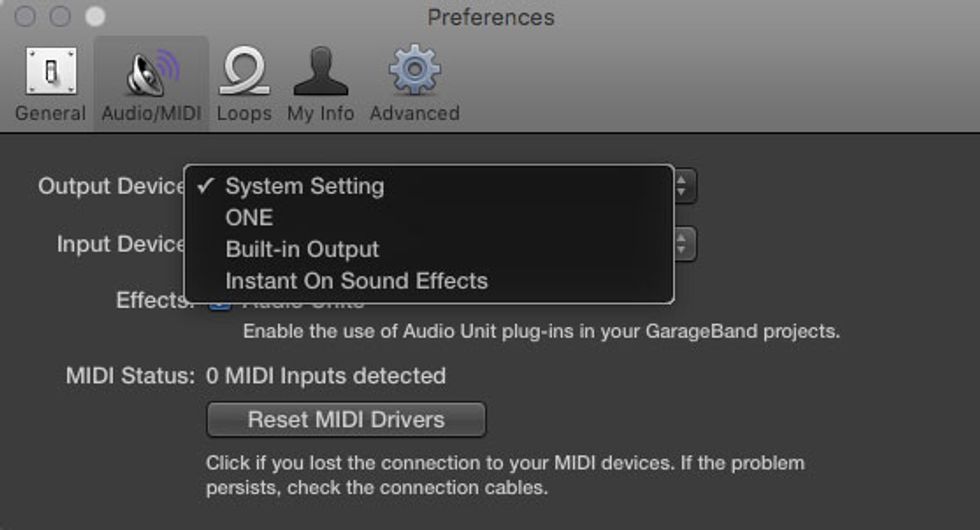
Image 4
Alternately, you can tell your computer to always use your interface for audio in and out (or “I/O” in geek-speak). That’s handy if, say, you keep your computer connected to nice desktop speakers and want to enjoy the interface’s superior audio quality when listening to music. (On the other hand, it may be preferable to only use the interface when your DAW is running to avoid situations like receiving a Skype call and hearing no audio because it’s being routed to your interface and you’re not wearing headphones.) Either way, there’s no need to reset things when you disconnect your interface; the computer just goes back to using the internal mic and speakers. But you’ll probably need to reset the I/O next time you connect the interface.
Can you see me now? Next, create a track for your guitar. (Later you’ll be able to create more tracks to record additional parts while listening back to the first performance.)
Play a bit while watching the level indicator lights on your interface. Chances are your initial level will be fine. If your interface has an input level control, set it so the indicator falls just short of the “peak” warning (usually a red LED) when you play loudest. (A heavily strummed open E chord on your bridge pickup with the guitar’s volume and tone controls at maximum is a good level check.)
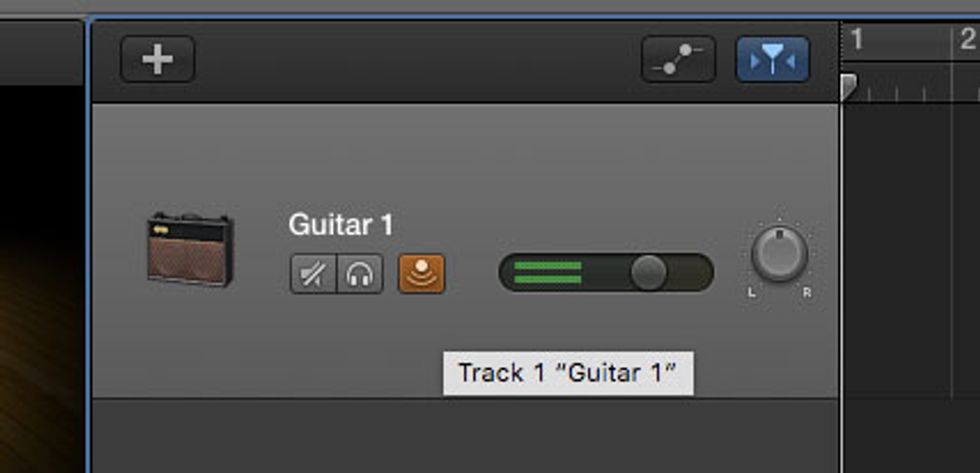
Image 5
Now, look at the DAW track you created. You should see its level indicator respond as you play. You might not hear anything yet—you must first “arm” the track so that it passes the sound of your recording in progress though your headphones. In GarageBand, click the little soundwave button on the track header to enable this “input monitoring” [Image 5]. (“Header” refers to the info panel attached to each track.)
You should now hear and see your guitar’s sound. The input level should be the same as displayed on your interface, so there’s usually no need to adjust it within the DAW. However, the DAW meter is probably more detailed than the one on your interface, and you may see more level-peaking than expected. If so, dial back the interface level. For digital recording, you never want the meter in the red zone.
Latent tendencies? Does the sound of your guitar appear in your headphones at the instant you play, or is there an audible delay? This unwanted delay is called latency—the time it takes for your computer to process the incoming audio and send it back to your interface and headphones. There’s always some latency, but it should be so brief that you don’t notice it. If you encounter latency on a recent-model computer, you may need to adjust the buffer size in your DAW’s audio preferences. (Image 6 shows the relevant panel in Logic.)

Image 6
The lower the number, the less latency. Most guitarists have no problem playing with a setting of 128, 256, or perhaps even 512, but 1,024 is too slow for most musicians. How low you can go depends on your computer’s speed. Try the lowest possible setting. If you hear clicks and pops as you play, step up to the next lowest option. Repeat as necessary till the noise vanishes.
Quiet, please … recording!
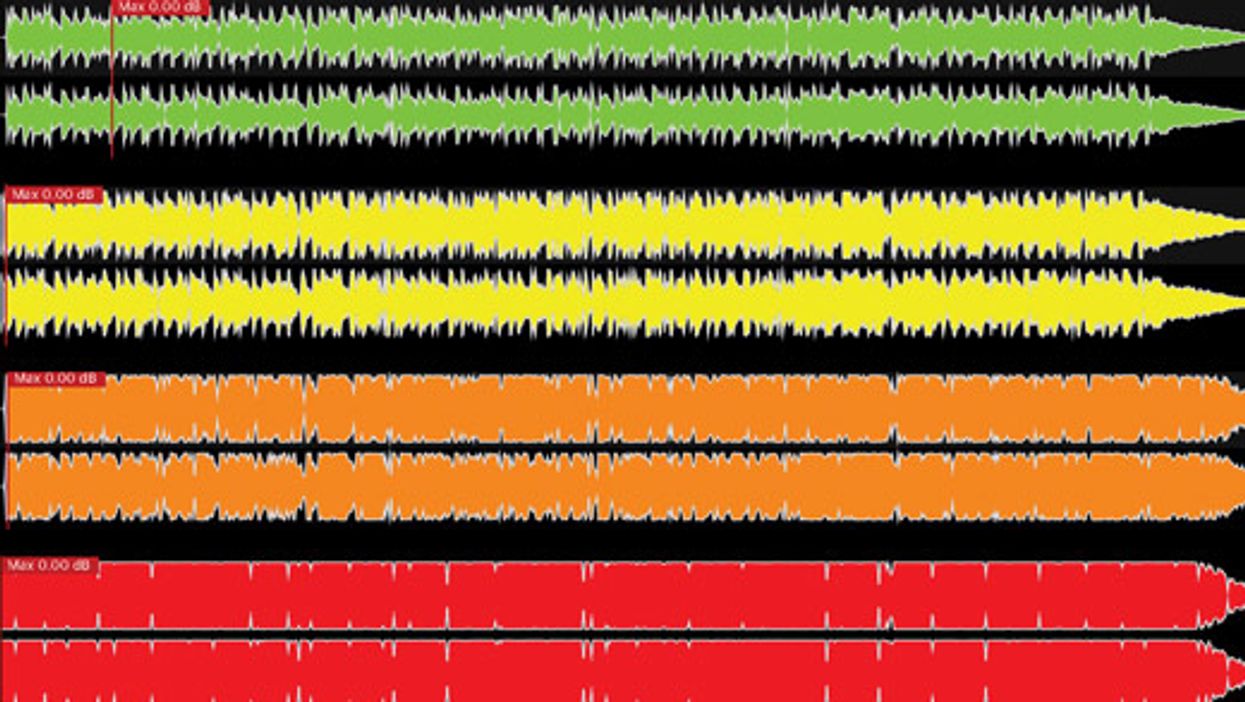
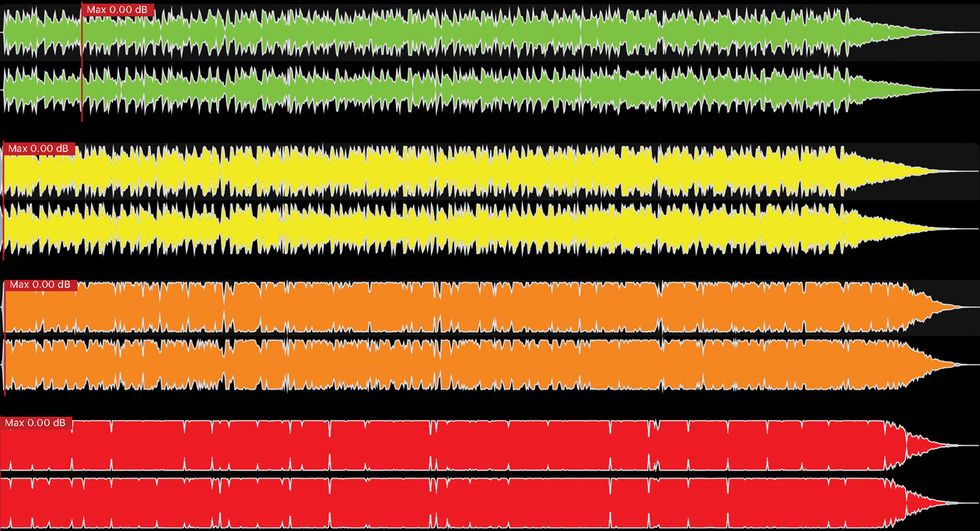
Take a deep breath and press the red record button. The DAW’s cursor scrolls from left to right, and a visual representation of your performance —a “waveform”—appears onscreen as you play [Image 7]. When you’re done, press stop.
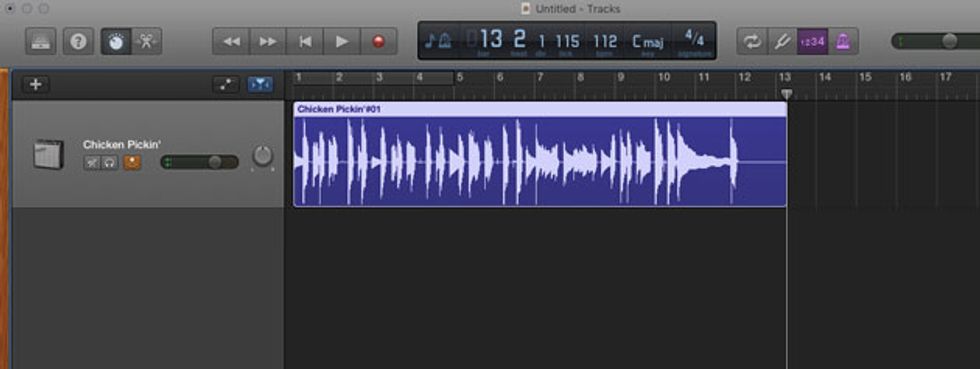
Image 7
When you create a guitar-type track in GarageBand, the program automatically adds an amp modeler to mimic the sound of a physical amp, but in other DAWs you may have to add the effect manually. (If your DAW doesn’t come with modelers, see last month’s column for links to free modeling plug-ins.) If you’ve never heard your guitar plugged in without an amp, the bright, dry sound may shock you. Clip 1 is a brief recording through a GarageBand amp model.
Clip 2 is the same performance with no modeling. Some classic recordings were made with dry sounds like these, but usually players prefer something closer to the sound of a real amp.
One cool thing about modelers is the fact that you can change amp tones after you record. Clip 3 features the same short performance, but heard through four different combinations of modeled amps and effects.
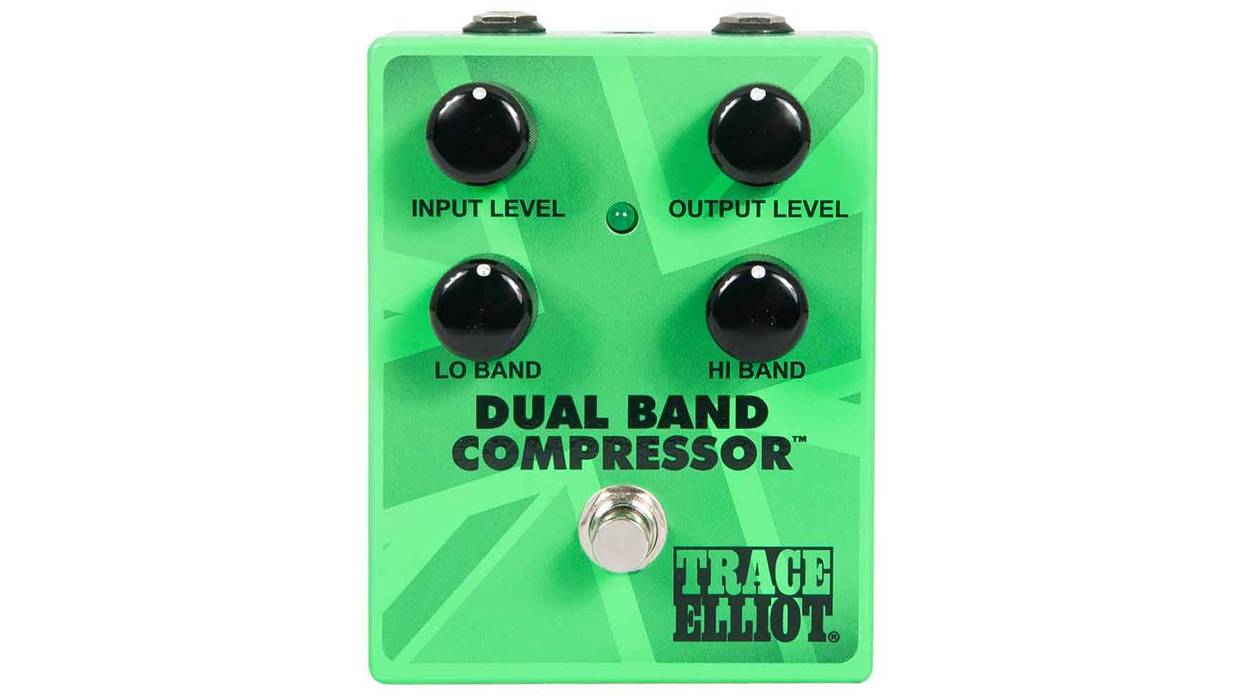
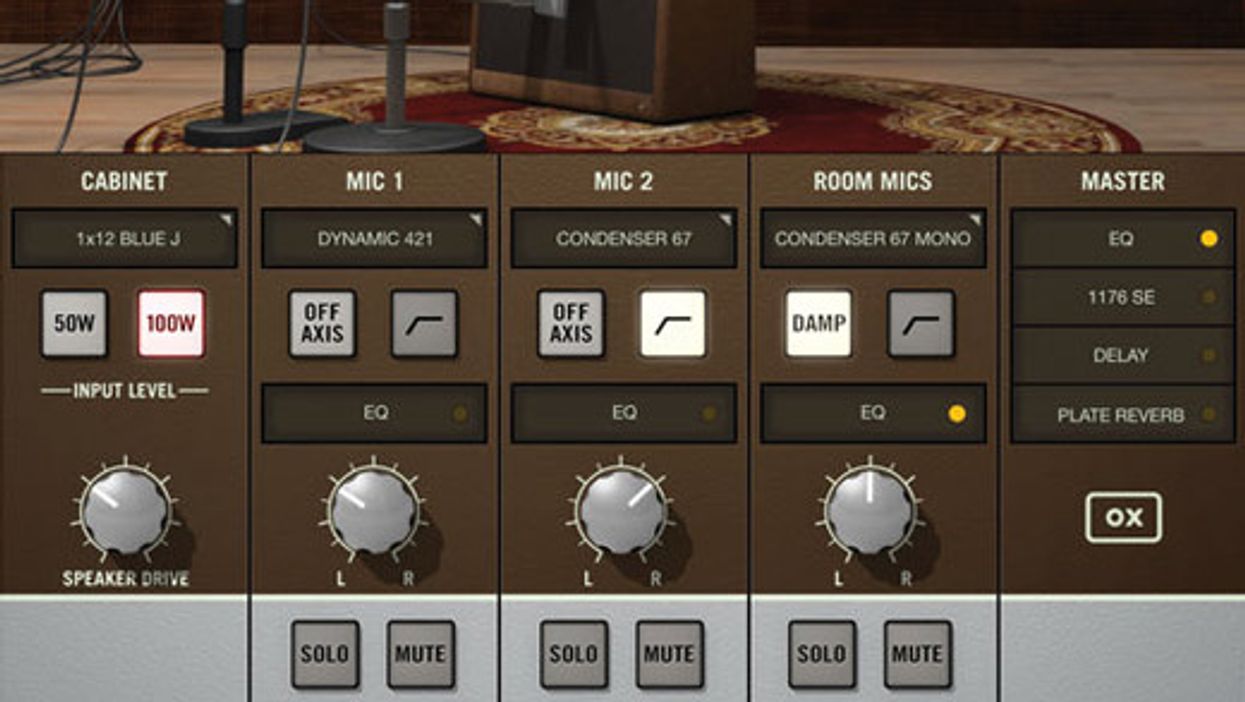
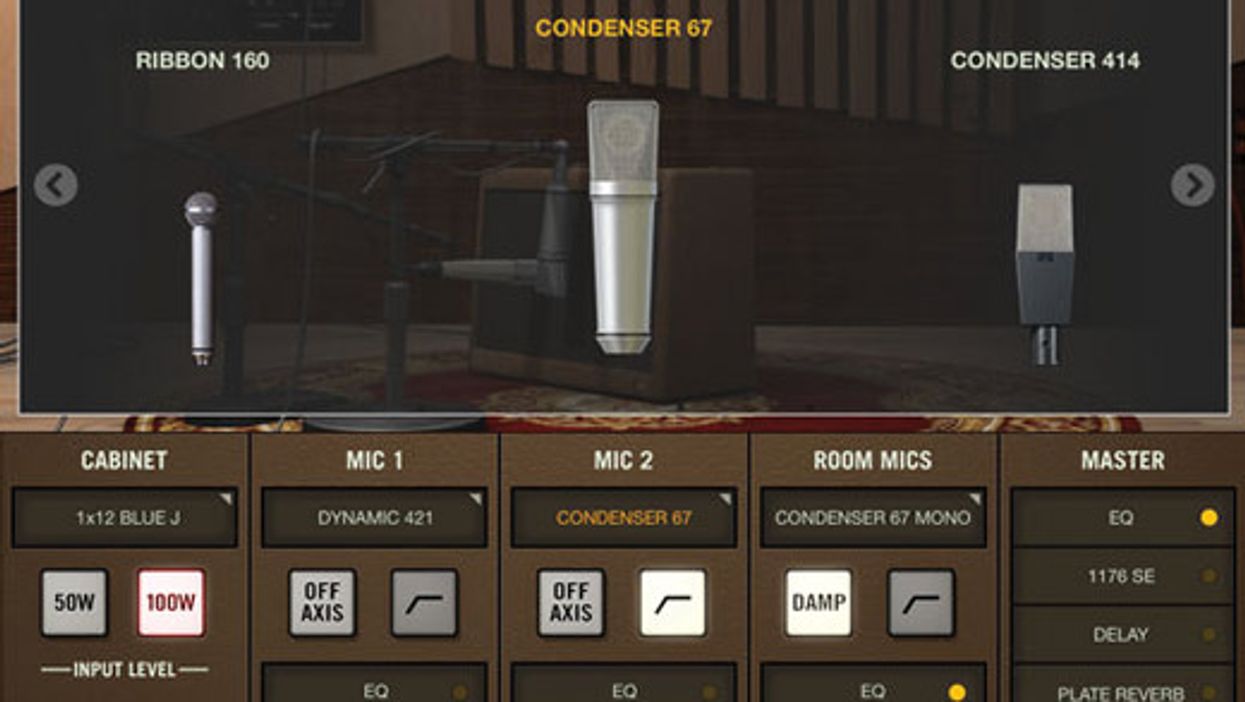
We’ll look at working with modelers in more depth in an upcoming column. For now, just try auditioning virtual amps and stompboxes. The amps probably have control panels much like a physical amp’s (Image 8 shows a GarageBand amp interface) and perhaps some sort of virtual pedalboard (Image 9). If you’re on GarageBand band, try creating a session using the aforementioned Amp Collection option.
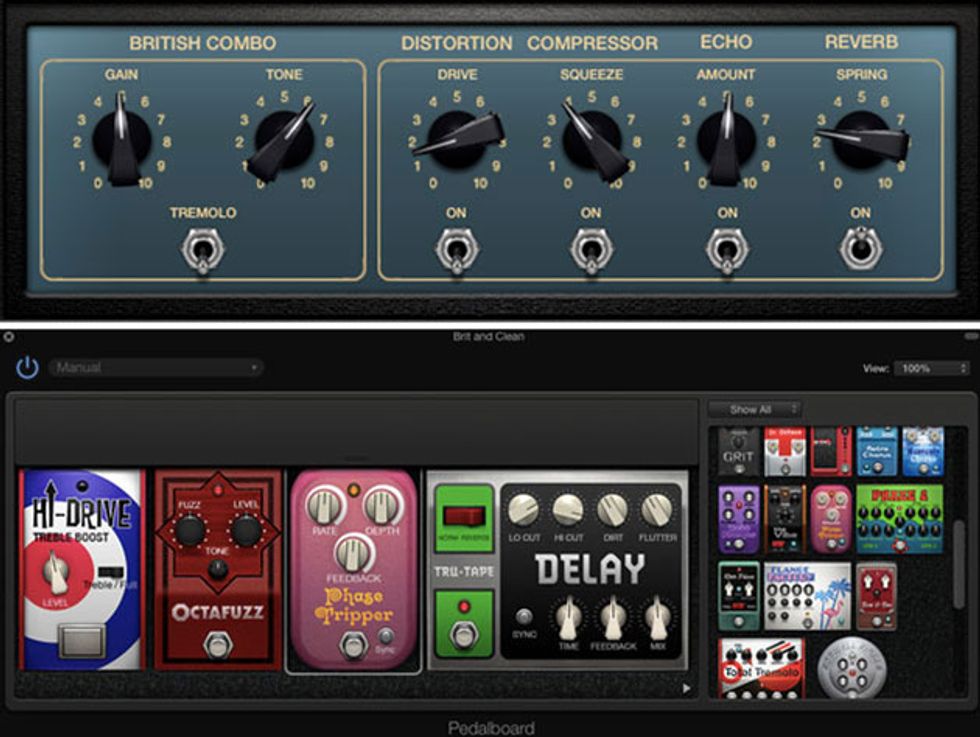
Image 8 (top) and Image 9 (bottom)
But wait, there’s more. We’ve only scratched the surface, but hopefully it’s a deep and lasting scratch. If you encounter problems (and who doesn’t?) please post them to comments. I can’t troubleshoot every interface and DAW out there, but chances are there’s a reader who can.
Have fun, and maintain a good sense of humor. These procedures can be perplexing at first, but they’ll soon be second nature.