
In a previous Mod Garage column, we learned how to make a budget electrolysis tool that works as well as any store-bought device [“Make a DIY Electrolysis Bath," August 2019]. Now it's time to put it to the test.
For starters, let's review what this device does: It lets you use electricity to remove rust and corrosion from metal guitar parts. The process is simple and effective, yet it won't affect that patina we admire so much on vintage hardware. Your parts will still look aged, but will be restored to full functionality.
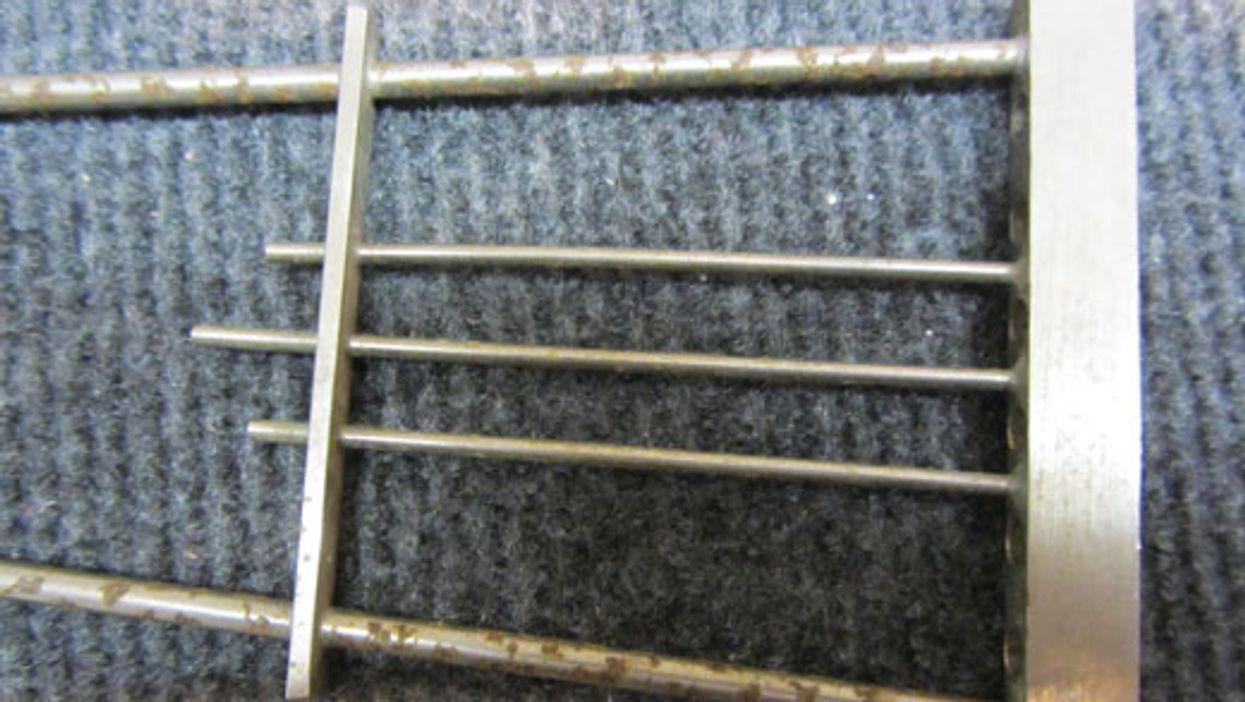
To illustrate the process, I've chosen an old metal tailpiece from a '50s archtop guitar, which, as you can see in Photo 1 and Photo 2, has a lot of corrosion.
Before you treat the part you want to restore with an electrolysis bath, put it under warm, running water and use an old, soft toothbrush and some dish soap to remove any loose debris. After rinsing off all the dish soap, carefully dry the hardware part with an old cotton towel.
After this initial cleaning, put the hardware part into an ultrasonic bath for a few minutes. Use warm water with the special cleaner recommended for ultrasonic baths. If you don't have access to an ultrasonic bath, for a small fee your local eyewear store or jewelry store may be able to do this for you. You'll get the best result from your electrolysis bath when you perform these two preliminary steps. In most cases, a good deal of dirt and rust will have now disappeared and you can now use your electrolysis bath to remove the rest of it.
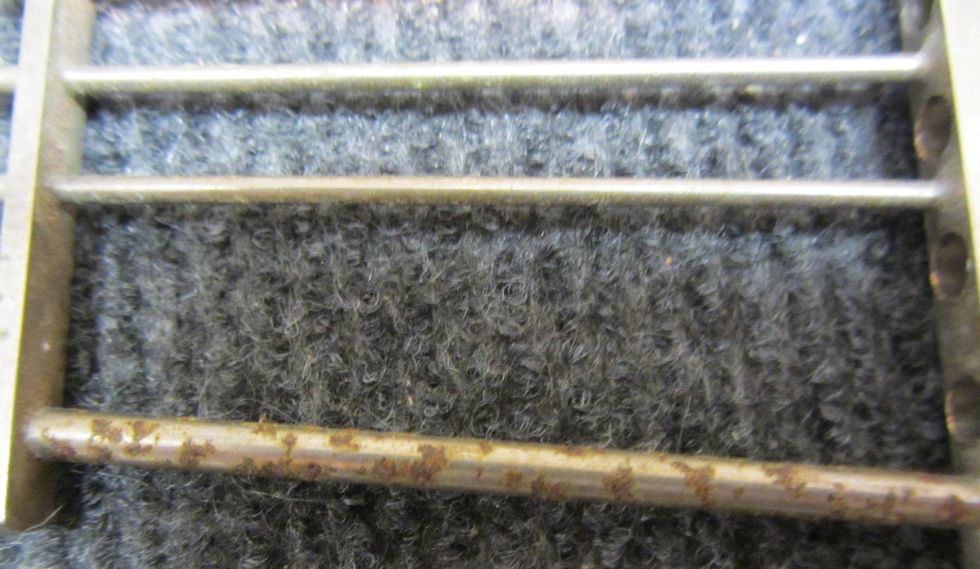
Photo 2 — Photo courtesy singlecoil.com
Before we take this next step, a word of caution: This procedure produces gases, so only work with the electrolysis tool in a well-ventilated room or outdoors. Always wear rubber gloves, goggles, and an old shirt or shop apron.
Now wrap the hardware part with a piece of bare wire, as shown in Photo 3. The more this wire contacts the part, the better the outcome.
Next fill your glass or plastic dish with enough hot water to cover the hardware part you want to clean, and add baking soda to the water to make it more conductive. How much? Keep adding baking soda until it stops dissolving. Warning: Don't use salt for this. Doing so will create chloric gas—something you don't want to inhale—when the electrolysis is in progress.
Connect one end of the wire you wrapped around the hardware part to the alligator clip on the power supply's negative wire. (Remember, these components are all described in “Make a DIY Electrolysis Bath.") Now put the hardware part into the electrolysis bath, making sure it's completely submerged in the baking soda solution.
Next connect the bigger alligator clip that's attached to the power supply's positive wire to the piece of steel you want to use as an anode for the electrolysis process, and put the steel piece in the water, too. It doesn't need to be covered completely with the solution. Leave at least several inches between the hardware part and the piece of steel. Be sure these parts don't make contact with each other!
Plug in the power supply. You'll immediately notice that little bubbles will start to emerge from the hardware part and rise to the surface of the solution, which will start to darken. Depending on what you're treating, you'll see colors—yellow, brown, black, and everything in between. Leave the hardware part in the solution for a few hours. Cleaning doesn't require as much time as removing rust or corrosion.
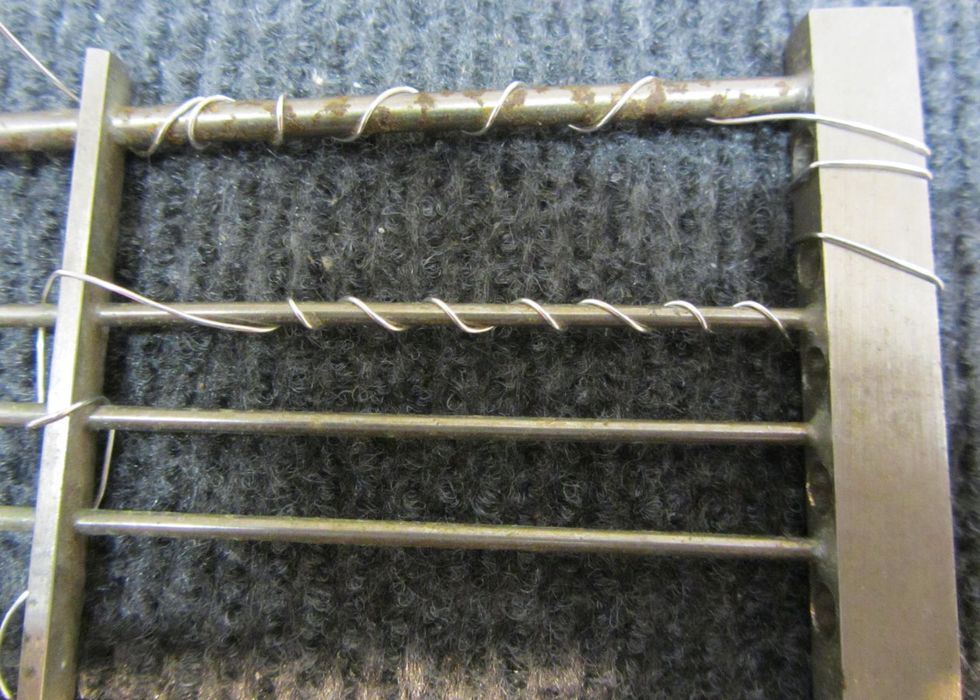
Photo 3 — Photo courtesy singlecoil.com
Although it's safe to put your fingers inside the electrolysis bath during the process, I don't see any reason to do so. To assess the condition of your hardware part, simply lift it out of the bath by pulling out on the wire it's connected to. If you want to remove more corrosion, return the piece to the bath. When it looks good to you, unplug the power supply.
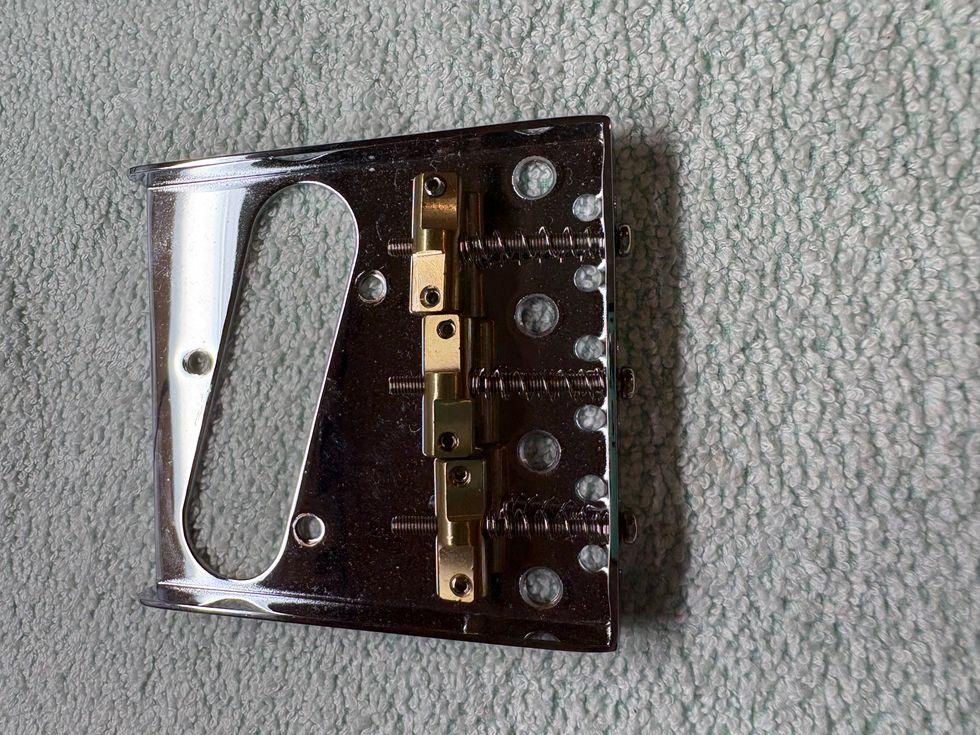
Unwrap the wire and clean the part with warm, running water, and then dry it off with a paper or cotton towel. For hardware pieces with lots of nooks and crannies, such as a Tune-o-matic-style bridge, finish the job with a hairdryer. Voilà—your hardware part will be free of corrosion and rust (Photo 4), and ready to be put back into service.
A few words about the power supply: Anything from 6 up to 24 volts will work, but the more electric voltage in the electrolysis bath, the faster the process. The current of your power supply will also influence the process. A great power supply for this is a 12/24 volt battery charger with 2 amperes or higher—that's what we use in the shop. Set it to 12 or 24 volts (if available)—this will speed up the process considerably.
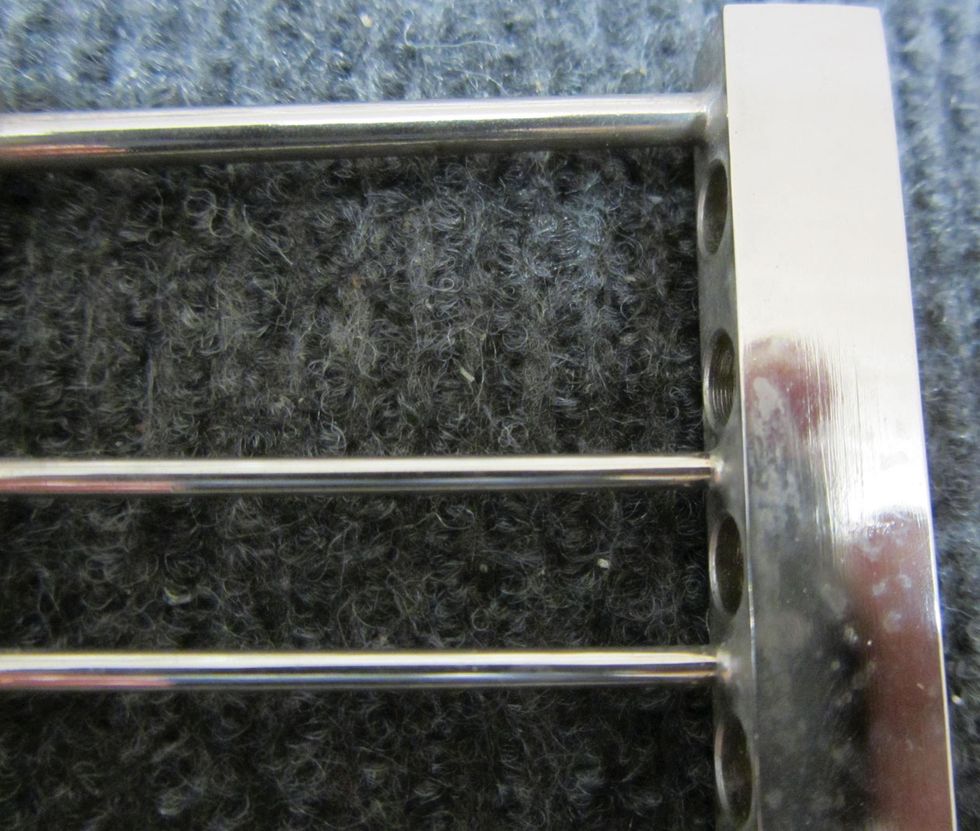
Photo 4 — Photo courtesy singlecoil.com
Depending on the electric voltage, current, and size (mass) of the hardware part, this process can last from several days to only a few hours. You don't have to dispose of the solution after cleaning a part—you can reuse it for this electrolysis process several times, even if it doesn't look very appealing.
By the way, this will also work for restoring rusty metal tools of all kinds.
So isn't this cool? There's no longer any grime, corrosion, or rust, but the part retains its patina, and the little flaws and surface scratches are still there, adding character. This technique is especially useful for bridges: They become fully functional again after you process them and will look as if they were stored in the closet for 50 years. What more could you ask for?
We'll tackle another guitar project next month. Until then ... keep on modding!