
How to get more drive with a simple mod.
Hello Ask Amp Man fans. Well, this month I thought I'd do something a bit different. Instead of answering a reader question, I thought I'd make one up myself! I mean, why not? I write and read my column as well, so that makes me a reader, too! Here's my question to me.
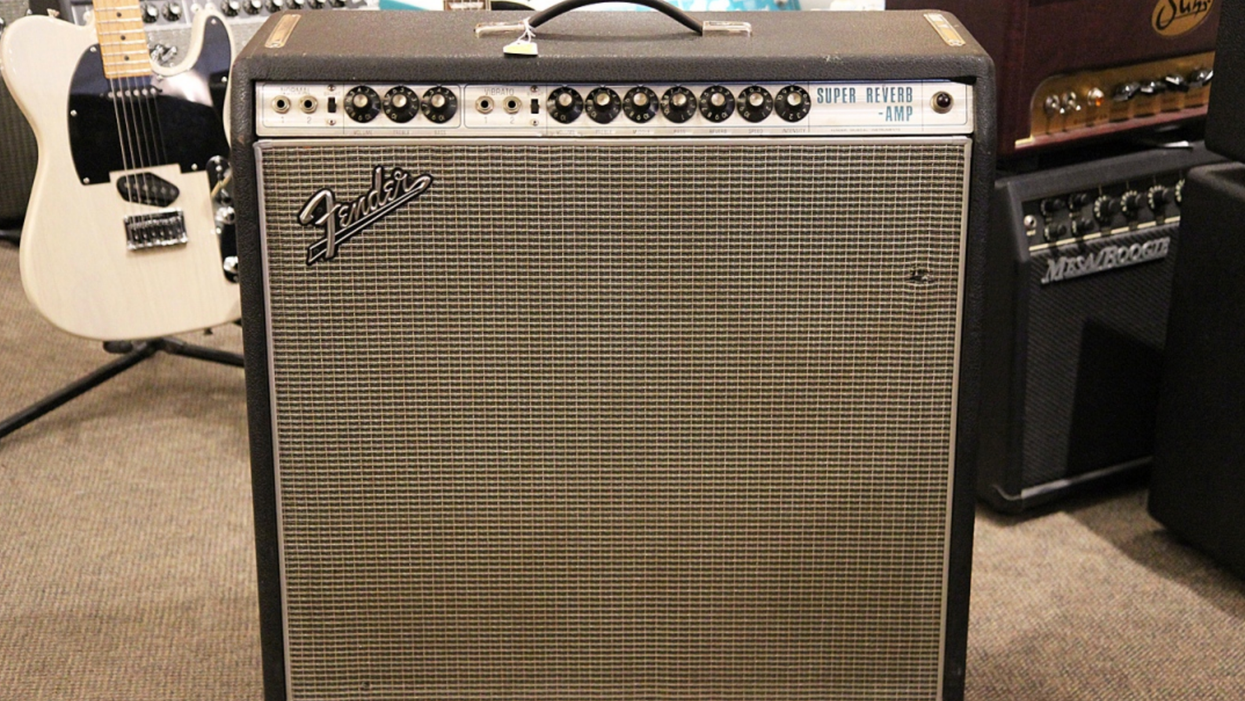
Hello Amp Man. I have two '70s Fender Super Reverb amps, and while I don't want to do anything crazy to them, I'd like to know if there's a quick mod I can do to one of them to make it different from the other. Maybe get a bit more gain or drive? I don't like a lot of hyper-gain or scooped mids and am more of an old-school rock 'n' roll kinda player, so what can I do?
Sincerely,
Jeff
Hi Jeff, and thanks for writing. Okay—something old-school and simple. I have just the thing. I actually did this as an experiment the other day to see what would happen, so I'll pass along the results. I wanted to see if there was a really down-and-dirty way to cascade the two channels of a Super Reverb to get more front-end gain from an amp that really doesn't have much, so let's see what happens.
Warning:
All tube amplifiers contain lethal voltages. The most dangerous voltages are stored in electrolytic capacitors, even after the amp has been unplugged from the wall. Before you touch anything inside the amp chassis, it's imperative that these capacitors are discharged. If you are unsure of this procedure, consult your local amp tech.
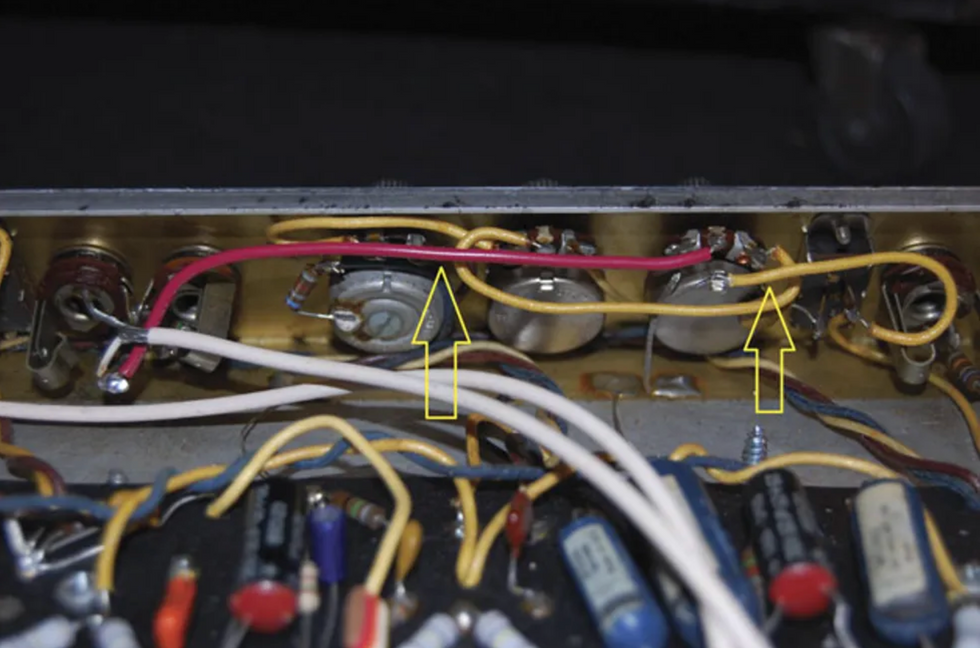
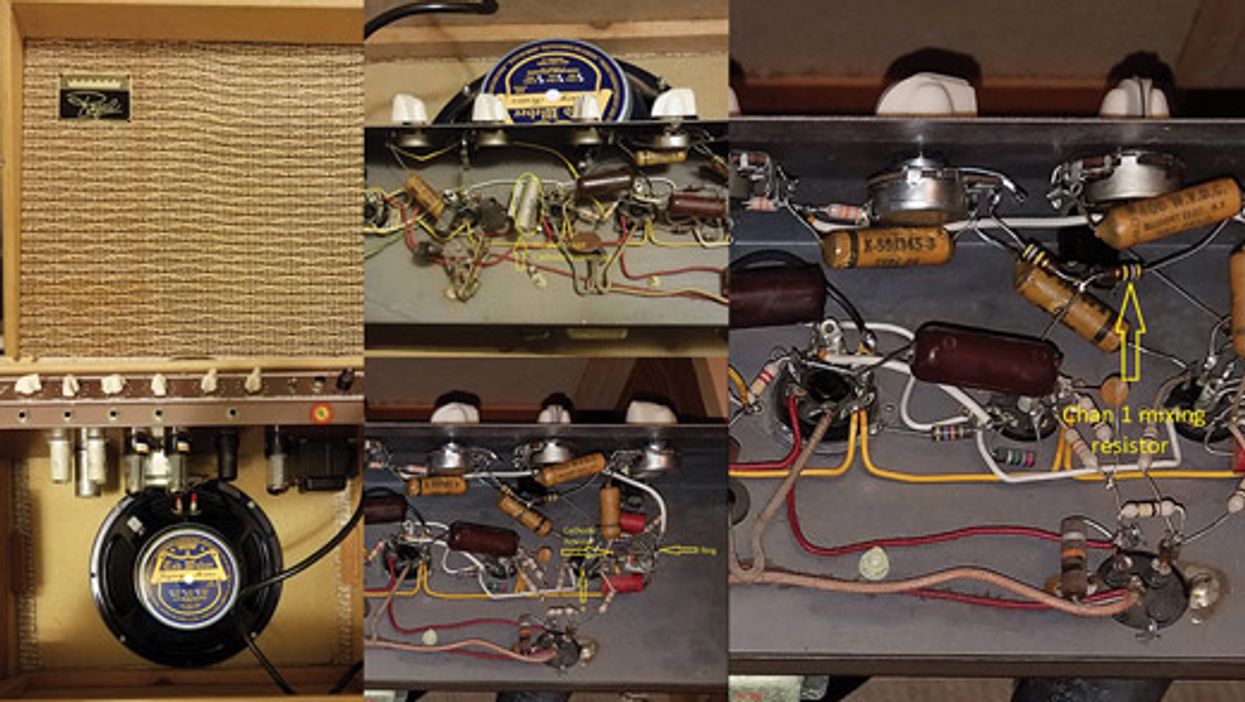
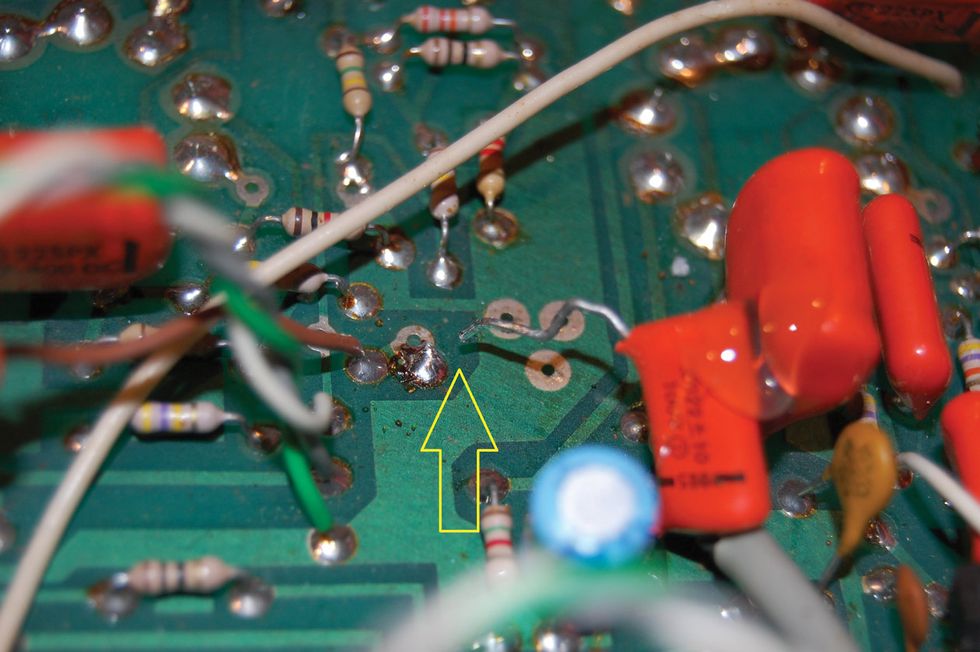
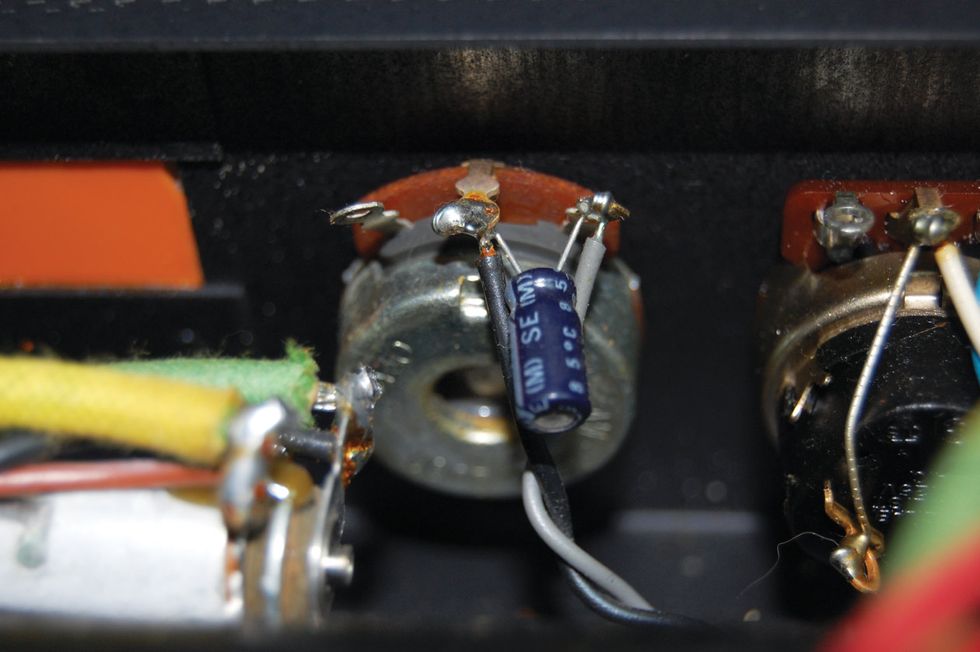
Fig. 1 — Once the wire from the wiper of the volume pot (middle terminal) in the normal channel is disconnected, a new wire is connected from there to the input of the vibrato channel at the junction of the input resistors.
The initial modification I tried was to take the output of the first gain stage in the normal channel and feed it to the input of the vibrato channel. The easiest way to do this was to disconnect the wire from the wiper of the volume pot (middle terminal) in the normal channel and connect a new wire from there to the input of the vibrato channel at the junction of the input resistors, which are attached to the input jacks (Fig. 1). Okay, let's see what happens. Turn the amp on, set the tone controls on both channels to the mid-point, plug a guitar into the normal channel, and bring up both volume controls slowly. The volume of the normal channel is now the "pre-amp" control.
The result? A bit more drive in the front end, but not as much as I would've expected. But wait, the signal is being loaded down by the input resistors, which—with nothing plugged into the vibrato input jacks—are connected to ground. Quick solution: Plug a blank 1/4" plug (no cable connected, just a raw plug) into the #1 input. This will open the switching contact and remove the resistive load to ground. The result is definitely a bump in gain, but let's see if we can do something different and get more gain.
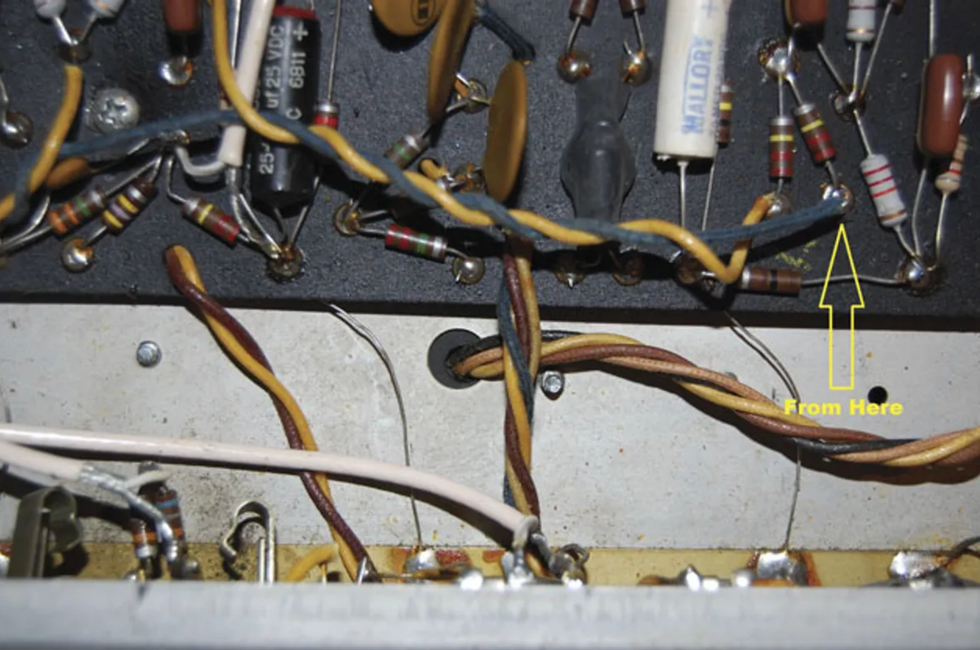
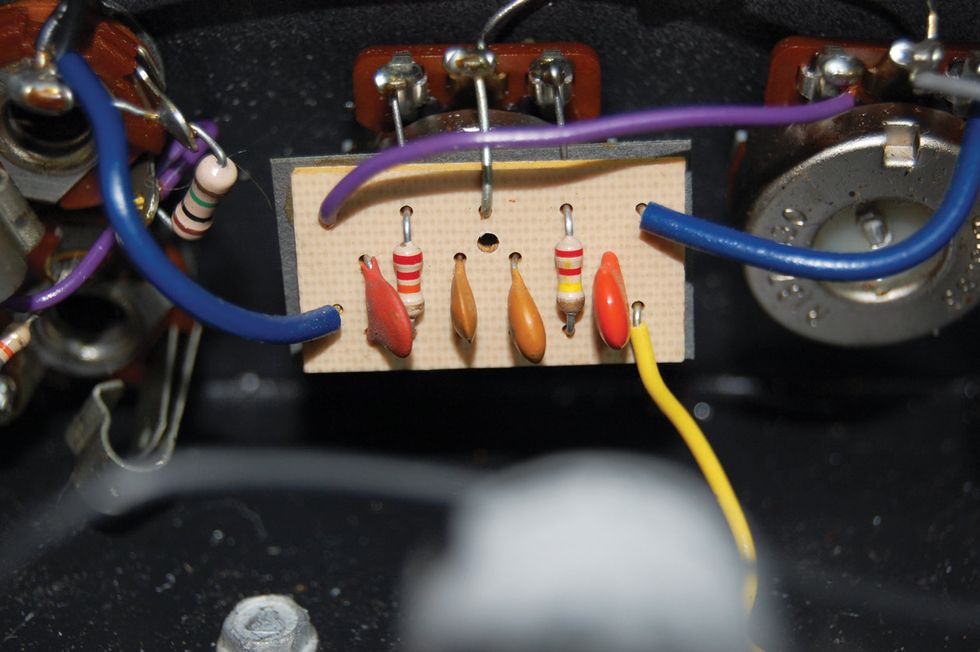
Fig. 2a — The first step of accessing the output of both stages of the normal channel before it enters the phase inverter and output section of the amp is finding the blue wire indicated and disconnecting it from the resistor.
The next attempt will use both gain stages of the normal channel. This starts with removing the new wire we installed and reconnecting the volume wiper to its original connection. Next, we'll access the output of both stages of the normal channel before it enters the phase inverter and output section of the amp. This is quite easy because the wire is handily accessible and long enough to use to complete the mod. Find the blue wire indicated (Fig. 2a) and disconnect it from the resistor. Next, connect it to the same pair of resistors in the previous modification (Fig. 2b). Now let's see what we have.
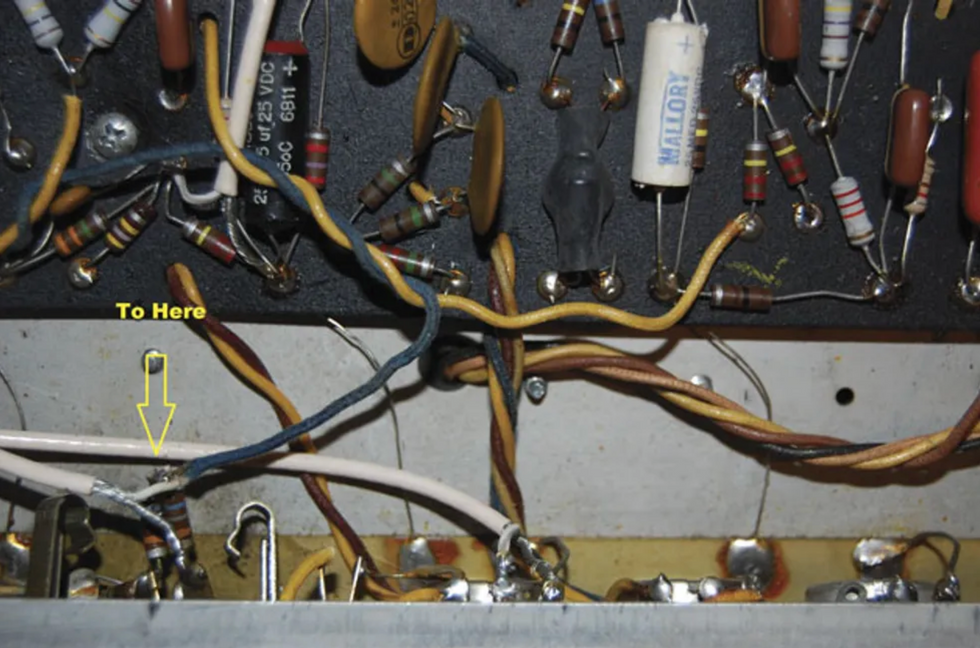
Fig. 2b — The next step is connecting it to the same pair of resistors in the previous modification.
With the same settings as before, there is substantially more gain. Enough to put it into metal territory? Far from it. Is it a great-sounding overdrive? Not really, but after twisting knobs for a few minutes (Fig. 3) with my P-90 equipped Tele plugged in, I found myself playing early Santana licks, because it actually sounded very similar to the early Carlos tone. Unless I was in a Santana tribute band, it's not something I would use all night, but it was a fun little experiment.
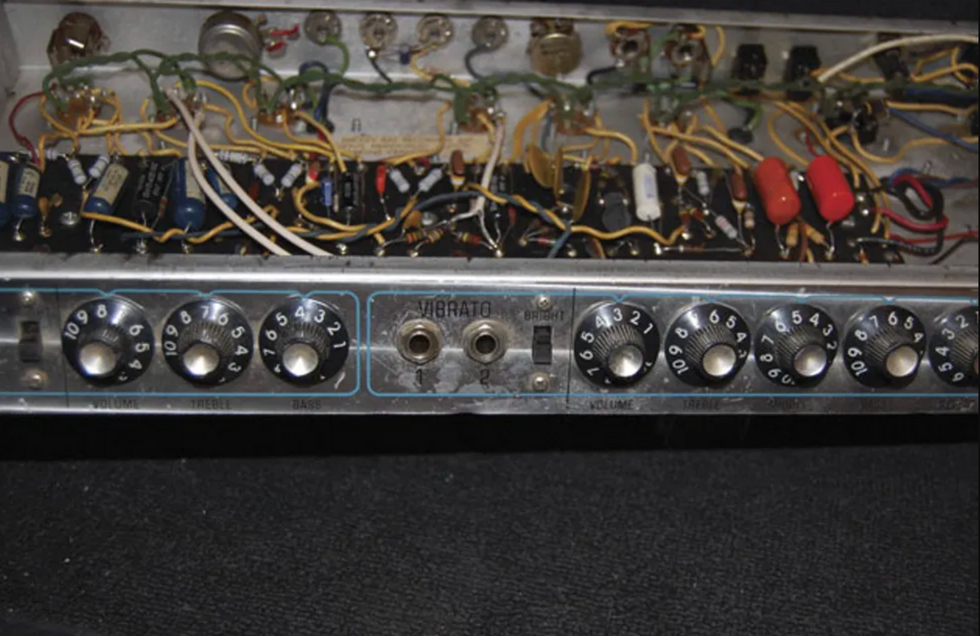
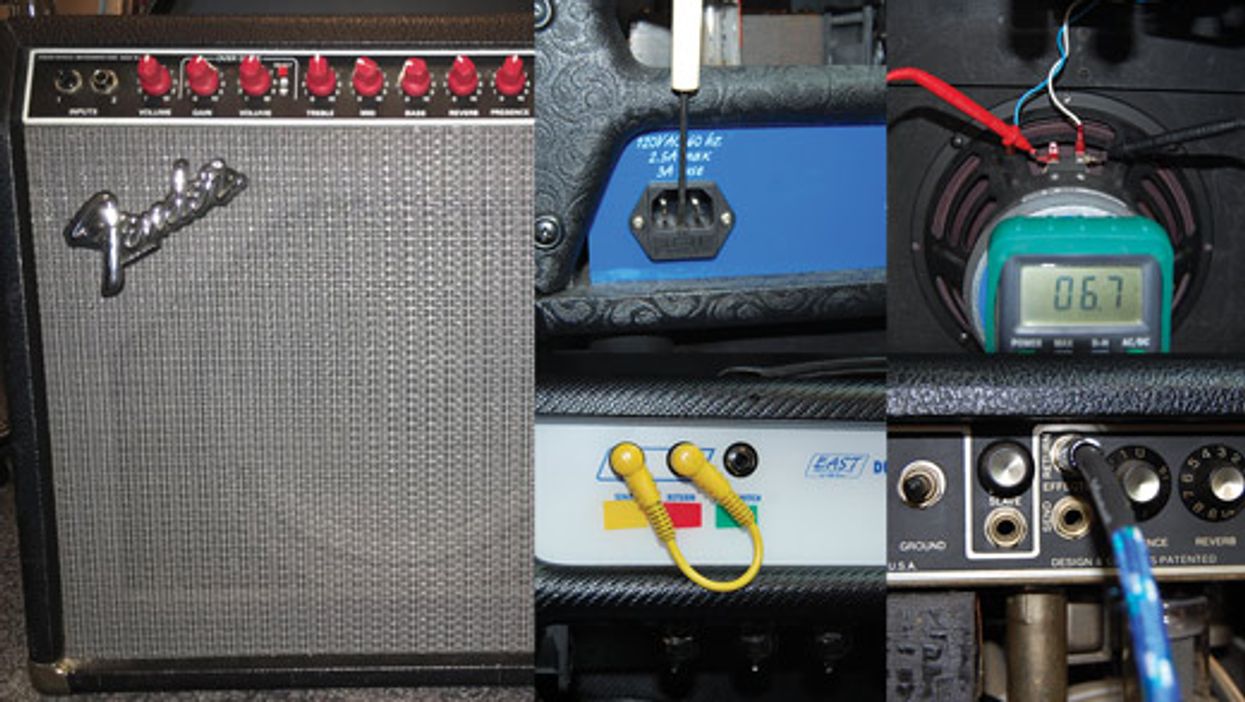
Fig. 3 — Before closing the amp, test your work. After twisting knobs for a few minutes with a P-90 equipped Tele plugged in, the author was able to conjure up an early Carlos Santana tone.
You could even make this switchable if you like. Simply install a SPDT (single pole double throw) switch in the amp somewhere and connect the signal wire from channel 1 to the center terminal. Next, connect a wire to one of the remaining terminals and attach the other end to the two input resistors. Connect a wire to the last terminal on the switch and attach it to the original location of the normal channel signal wire.
There you have it. Stock when you want it to be, with the option of a raunchy-yet-cool overdrive if you need it. Personally I prefer it to the push-pull master volume boost feature that showed up on Twin Reverbs and the like in the late '70s. And you get a few more benefits. For one, you have two sets of tone controls: one that controls the tone in the early stages and one set for the later stages. And, if you have a single-button footswitch, you can connect it to the #1 input of the vibrato channel and, as before, with the plain jack lift the signal loading from the input resistors for a gain/volume boost. Just make sure the wire on the footswitch is shielded. Pretty cool, and while it's not for everyone, hopefully it will make an amp that's just sitting around or needs a bump a bit more interesting. Enjoy!
[Updated 8/17/21]
- Meet My 1965 Super Reverb—The Greatest Amp I've Ever Played ... ›
- Fender Unveils the Tone Master Super Reverb - Premier Guitar ›
- All the World’s a Gain Stage - Premier Guitar ›
- Meet My 1965 Super Reverb—The Greatest Amp I've Ever Played - Premier Guitar ›
- Must Know Amp First-Aid - Premier Guitar ›
- Adventures in Nashville: Gimme Back My Amp! - Premier Guitar ›
We chat with Molly about Sister Rosetta’s “immediately impressive” playing, which blends jazz, gospel, chromaticism, and blues into an early rock ‘n’ roll style that was not only way ahead of its time but was also truly rockin’.
In the early ’60s, some of the British guitarists who would shape the direction of our instrument for decades to come all found themselves at a concert by Sister Rosetta Tharpe. What they heard from Tharpe and what made her performances so special—her sound, her energy—must have resonated. Back at home in the U.S., she was a captivating presence, wowing audiences going back to her early days in church through performing the first stadium rock ‘n’ roll concert—which was also one of her weddings—and beyond. Her guitar playing was incendiary, energetic, and a force to be reckoned with.
On this episode of 100 Guitarists, we’re joined by guitarist Molly Miller, who in addition to being a fantastic guitarist, educator, bandleader, and performing with Jason Mraz, is a bit of a Sister Rosetta scholar. We chat with Molly about Sister Rosetta’s “immediately impressive” playing, which blends jazz, gospel, chromaticism, and blues into an early rock ‘n’ roll style that was not only way ahead of its time but was also truly rockin’.
Featuring the SansAmp section, Reverb/Delay/Roto effects, and OMG overdrive, with new additions like a switchable Pre/Post Boost and Effect Loop. Pre-configured for the RK Killer Wail wah, this pedal offers versatile tones and unmatched flexibility.
Since the debut of the original RK5 in 2014, Richie’s needs have changed, both on and off the road. The RK5 v3 retains the same SansAmp section, Reverb/Delay/Roto section, and Richie’sSignature OMG overdrive. New features include a switchable Pre/Post Boost to beef up drive and distortion or increase the overall volume to punch up fills and solos, along with the addition of an Effect Loop. It has also been pre-configured to provide phantom power for Richie’s Tech21 Signature RK Killer Wail wah.
The all-analog SansAmp section of the RK5 focuses on clean tones within the tube amplifier sound spectrum. It includes 3-band active EQ, and Level and Drive controls. To dirty things up, you have the flexibility of using the Drive control, and the Boost function, or you can add overdrive from the OMG section. Or all three. Each method achieves different tones. The OMG section is based upon the Richie Kotzen Signature OMG pedal, which provides a wide range of overdrive, from clean to aggressive. You can add personality to a clean amp or use it for extra punch with a dirty amp tone. Controls include Drive for the overall amount of gain and overdrive and Tone with specialized voicing for adjusting the high-end and mid-range. A Fuzz switch changes the character and attack of the overdrive to a fuzz-style tone, making it thicker and woolier.
Other features include an independent foot-switchable Reverb witha choice of large and small“room sizes;” Tap Tempo Delay, which can be transformed into a rotating speaker effect; included Tech 21 Model #DC9 universal self-adjusting 9V DC power supply, with interchangeable international prong assemblies for use anywhere in the world. Anticipated availability: January 2025
For more information, please visit tech21nyc.com.
OM-balance and comfort suited for the fingerstylist on a budget.
Comfortably, agreeably playable. Balanced dimensions. Nice fretwork.
Lighter mahogany top looks less classically mahogany-like. Some compressed sounds in heavy-strumming settings.
$299
Guild OM-320
guildguitars.com
The Premier Guitar crew is spoiled when it comes to hanging out with nice flattops. But while those too-brief encounters with acoustics we can’t afford teach us a lot about the flattop at its most refined, they also underscore a disconnect between the cost and the acoustic guitar’s status as a true folk instrument of the people.
Guild’s OM-320, from the company’s new 300 series, sells for $299, which isn’t much more than a good-quality, entry-level flattop cost in the 1980s. Strikingly, there’s a lot of competition in this price class. Even so, the OM-320’s nice build quality and pretty tone in fingerpicking applications stand out in a very crowded price segment.
The United Guild of Deal-Seeking Pickers
Though Guild, in all its incarnations, has always made accessible guitars a part of their offerings, a $300 instrument with the company’s logo might give pause to players familiar with guitars from their various U.S. factories. Quality can be hit-or-miss on any guitar from any brand at the entry level. What’s more, a lot of guitars with different brand names come from just a few OEM facilities—lending a certain sameness on top of irregular quality. But the recent acquisition of Guild by Yamaha, who has a reputation for solid entry-level instruments, inspires confidence as far as these concerns go.
So, too, does the integrity of the OM-320 at the nuts-and-bolts level. I couldn’t find any overt lapses in quality control. And in many spots where that really counts, like the fretwork, the execution is especially good. Little details like the Guild logo overlay (rather than a simple decal) add a soupçon of luxury. So do the Guild-branded, Grover Sta-Tite-style butterbean tuners, which look stylish and feel sensitive and accurate.
“The neck inhabits a comfortable zone between C and D shapes that’s super agreeable and, at least in my case, a nice antidote for hand fatigue.”
Though the body is built from layered mahogany on the back and sides and a solid mahogany top, the latter is much lighter and amber- or honey-toned than the rich cocoa-hued mahogany tops you’d associate with a vintage Guild M-20, or, for that matter, theM-120 from the company’s contemporary Westerly line. As a result, you see a little more contrast in the grain and a little dimpling in certain sections of the wood. The lighter wood isn’t unattractive, it just looks less trad, if you’re chasing Nick Drake’s Bryter Layter style. If that’s important, you should adjust the “design/build” score appropriately.
Sit and Stay Awhile
Barring being covered in porcupine spines, almost any OM or 000 will qualify as a pure-comfort title finalist. It’s not too thick, too wide, nor too petite—a size and profile that also pays unique, civilized sonic dividends. Here, the OM body is complimented by a neck that feels like an especially natural match. I don’t have a bunch of inexpensive OMs on hand to compare, and there isn’t anything wildly unique about the shape, but the neck profile feels very proportionate to the body. It also, depending on your own sense of such things, inhabits a comfortable zone between C and D shapes that’s super agreeable and, at least in my case, a nice antidote for hand fatigue. The neck is not classically OM-like in terms of nut width. The M-320’s nut measures 1 13/16", which is typical of a 000, rather than the 1 3/4" associated with OMs. The extra width, of course, would make the guitar more appealing to some fingerstylists that need the space. At no point, however, did I feel anything close to cramped; it’s just very comfortable.
The combination of layered back and sides, OM/000 dimensions, and mahogany mean the OM-320 feels and sounds less than super-widescreen in terms of tone spectrum and power. Nevertheless, it sounds balanced and pretty—particularly with a droning, dropped 6th string and other more-elastic tunings where the guitar can exercise the lower extremes of its voice. Tuning to standard has the effect of highlighting midrange emphasis, which can get boxy and render the 3rd and 4th strings a bit less potent and present. That said, it’s still balanced and almost never collapses into a distorted harmonic blur. The bottom end maintains an appealing growl and, as long as you use a gentler picking approach, you can use the highest four strings in very dynamic ways. Using a capo emphasizes other cool, high-mid-focused voices in the guitar that coexist well with most strumming approaches.
The Verdict
Inexpensive guitars that feel great can make up for a lot of shortcomings in tone. But the OM-320’s deficiencies in the latter regard are few, and some perceived limitations, like midrange emphasis, are intrinsic to guitars with OM dimensions. So, while forceful strumming is not the OM-320’s strength, the comfortable playability might just lead you to those places anyway. And if you compensate accordingly with touch dynamics, you can conjure many sweetly chiming tones that might sound extra sweet given the bargain price
Featuring vintage tremolos, modern slicer effects, and stereo auto-panners, the update includes clever Rate and Tempo controls for seamless syncing and morphing.
Today Kemper announces the immediate availability PROFILER OS 12.0 including the highly anticipated collection of advanced Tremolo and Slicer FX for the entire range of KEMPER PROFILER guitar amps.
The Collection features three vintage tremolos, two modern slicer effects, and two stereo auto-panners, that have been derived from the slicer effects. They all feature a clever Rate and Tempo control system, that allows for syncing the tremolo to the song tempo, retriggering the timing by simply hitting the TAP switch, and changing or morphing the tremolo rate to different note values,
The new Advanced Tremolo Modules in Detail
- The Tube Bias Tremolo is the familiar Tremolo in the Kemper Profilers. Formally named "Tremolo“ and available in the PROFILERs since day one, it is a reproduction of the famous Fender Amp tremolos from the 50‘s. Placed in front of the amp it beautifully interacts with the amp distortion.
- The Photocell Tremolo dates back to the 60‘s and features a steeper pulse slope, and its width varies with the intensity.
- The Harmonic Tremolo also dates back to the 60‘s and was introduced by Fender. The low and high frequencies alternate with the tremolo rate.
- The Pulse Slicer is a modern slizer or stutter effect that will continuously transition from the smoothest sine wave to the sharpest square wave, using the "Edge“ parameter. The "Skew“ parameter changes the timing of the high level versus the low level, sometimes also called pulse width or duty cycle.
- The Saw Slicer creates a ramp like a saw wave. The saw wave has a falling ramp when "Edge“ is at full position, and a rising edge at zero position. Towards the middle position a rising and falling ramp are forming a triangle wave. The „Skew“ parameter changes the slope of the rising and falling ramp from a linear trajectory to a more convex or concave shape.
- The Pulse Autopanner and the Saw Autopanner are derivates from their respective Slicers, they spread their signals in the stereo panorama. The "Stereo“-control parameter is included in many effects of the PROFILER. Here, it introduces a novel "super-stereo" effect that lets the Autopanner send the signal well outside the regular stereo image. This effect works best if you are well positioned in the correct stereo triangle of your speakers. When you move the “Stereo” soft knob beyond the +/-100% setting, the super-stereo effect comes into place, reaching its maximum impact at +/-200%.
- A single press on the TAP button at the beginning of the bar will bring the rhythmic modulation effects, such as Tremolo or Slicer, back into sync with the music without changing the tempo. The sync will happen smoothly and almost unnoticeable, which is a unique feature. Of course, tapping the tempo is possible as well.
- Modulation Rate - The “Rate” control available in many modulation effects is based on a special philosophy that allows continuous control over the speed of the modulation and continuous Morphing, even when linked to the current tempo via the To Tempo option. The fine Rate resolution shines when seamlessly morphing from, e.g., 1/8 notes to 1/16 notes or triplets without a glitch and without losing the timing of the music.