Learning how to safely use a router is the key to this easy DIY project that you can do in an afternoon, yielding a different menu of tones.
The barrier between “I'll do it myself” and “my repair person will deal with this” often seems to lie at the point where power tools get involved—specifically one: the dreaded router. Since I enjoy encouraging those so inclined to challenge themselves, I believe that the router is a tool to be respected and not feared, and that, yes, you can actually do the pickup replacement we’re discussing here yourself.
Replacing a Bridge P-90 Pickup With a Humbucker in Epiphone Les Paul Special — Routing 101 | DIY
I’ll demonstrate by converting part of a new guitar into sawdust and noise, then transforming the instrument by installing a totally new pickup in the bridge position—so we can retain the natural flavor of the P-90 in the neck, but goose up the bridge position with a humbucker. And to make things even easier, there is a video of me doing this mod online at premierguitar.com, which I highly recommend watching. In it, I explain every step in great detail.
The guitar is a brand-new Epiphone Les Paul Special finished in glossy TV yellow—in my opinion, the best furniture finish ever commandeered for broadcast purposes—loaded with two P-90 pickups, black plastics, and chrome hardware. The pickup going into this guitar is a Parsons Street Humbucker by StewMac. Designed to emulate a popular variation of the traditional PAF-style humbucker, this medium-output pickup should retain plenty of treble clarity. It will mount to the guitar with a classic black humbucker mounting ring.
What You’ll Need for This Mod
Besides a guitar, a small bandsaw for cutting the pickguard, and painter’s tape, you can pick up everything you need for this modification project online at StewMac.com.
• Bosch Colt 1 HP Variable-Speed Palm Router
• Bosch Plunge Base for Palm Router
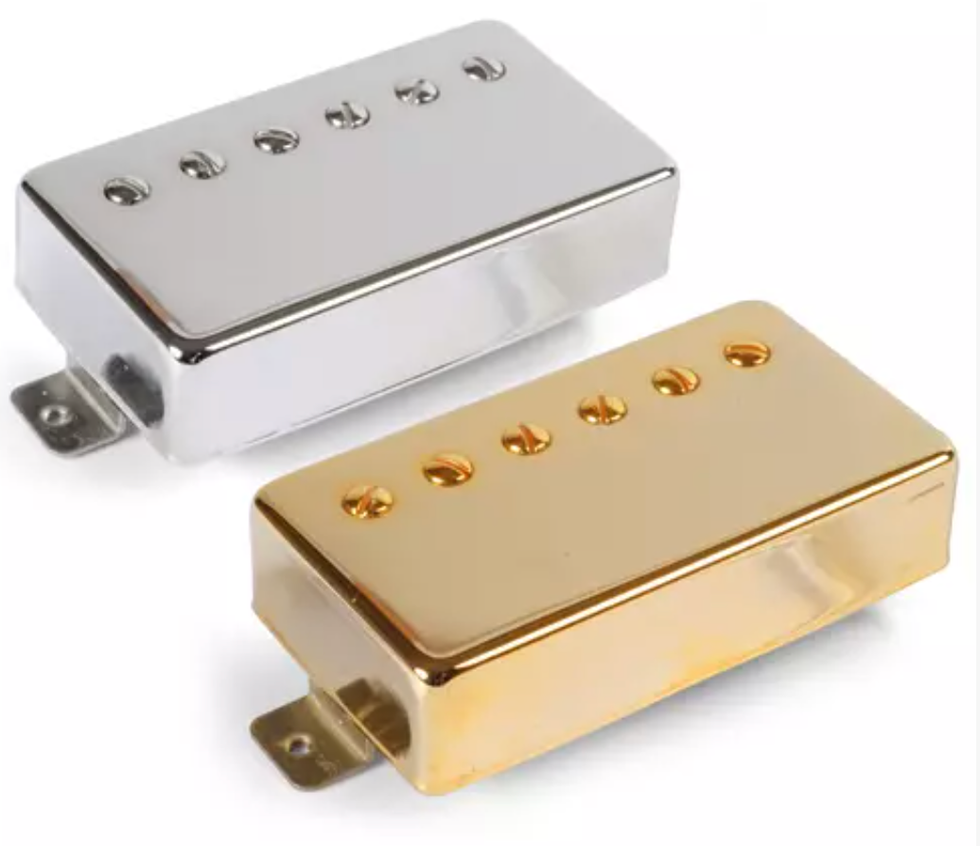
• Parsons Street Humbucker
• Fisch Wave Cutter Bit 5/8"
• Amana Tool Carbide Tipper Router Bit 1/4"
• Humbucker Pickup Routing Template
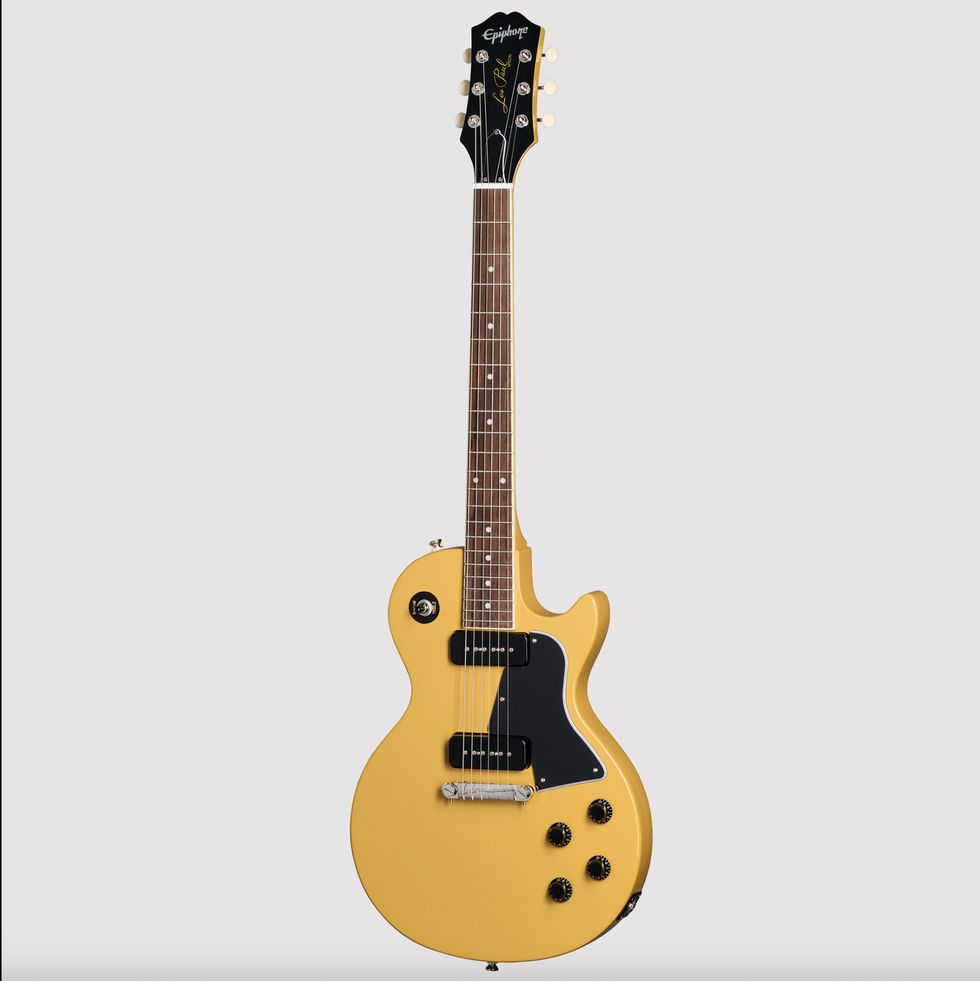
This is what our project guitar looked like before it hit the workbench.
Since we are on the topic of pickups, I’d like to note that the acronym PAF does not define a specific sound or a strict recipe for pickup making. It is simply a description of a design—Patent Applied For. Both P-90s and PAF-style humbuckers actually have a lot in common. If you examine their construction, it seems the goal for PAFs wasn’t necessarily a different-sounding pickup, just one that didn’t hum like its single-coil predecessors.
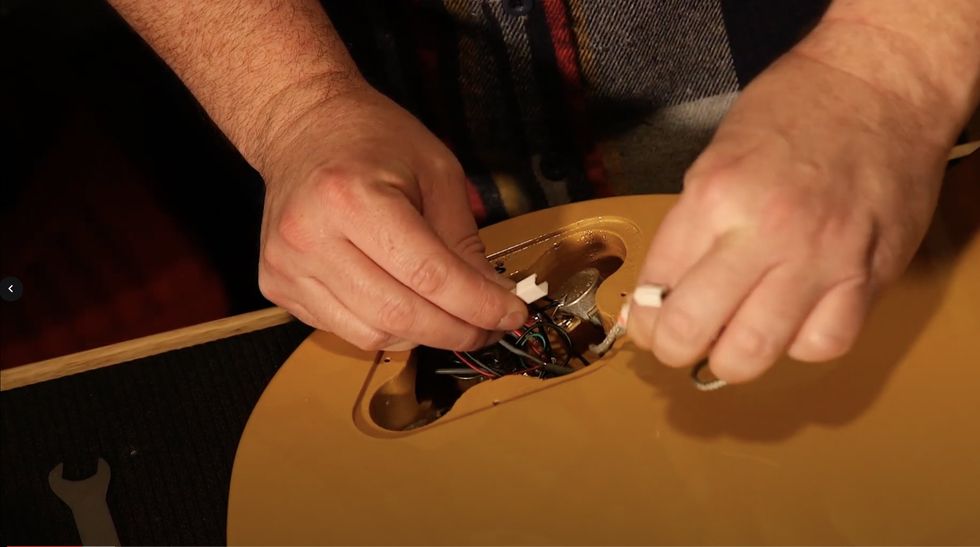
The OEM pickups in this Epiphone Les Paul Special are quick-connect, which makes for easy disassembling, but will require trimming the connectors and soldering as part of the humbucker’s installation.
As a result, a lot of the early Gibson ’buckers and P-90s have comparable output and not entirely dissimilar frequency response, depending on their magnets and how the coils were wound. These factors varied quite a bit for the first few years of production and produced some very different sounding pickups.
But, back to the bench, focusing on the task at hand.
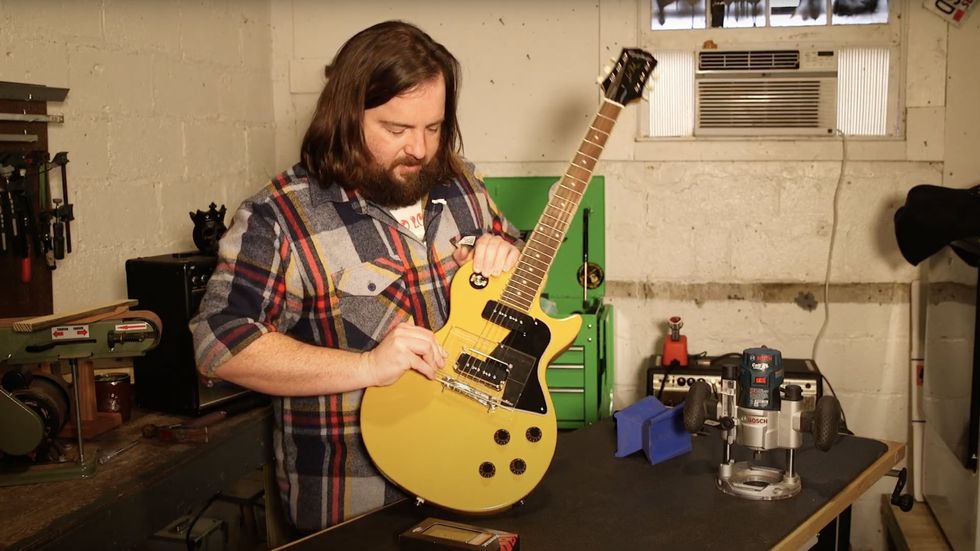
Our author holds a StewMac humbucker-sized routing template over the pickup to be replaced.
This guitar is a good candidate for this kind of pickup swap for a few reasons: One, we only have to modify an existing pickup cavity; two, a medium-output bridge humbucker such as our Parsons Street should complement the sound of the neck P-90 nicely; and three, while the modification will be obvious, this new pickup will also complement the classic looks of the guitar.
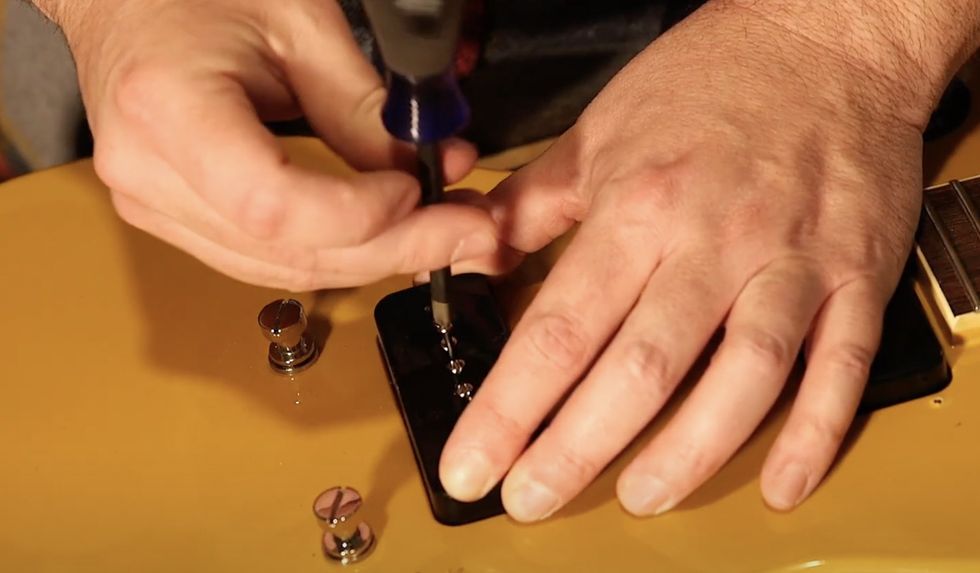
The pickups are mounted to the body via two easy-to-remove screws.
You may be here looking for inspiration as much as information—thinking about trying this modification yourself, but still not sure. Although it’s ultimately your decision, I can at least equip you with some arguments for and against.
Try the mod if:
• You are curious about how different pickups sound and you recognize the benefit of using the same guitar as a control in your experiment.
• You love everything about your guitar, but want a little more punch from the bridge pickup. This is common with single-coil pickers, Telecaster aficionados excluded.
• You might deem the guitar cooler this way. After all, it’s an uncommon but highly effective treatment for this model—which could make you want to play it more.
Don’t try this mod if:
• You have a more valuable, historic, or rare instrument.
• The resale value of the guitar matters to you.
• It’s not your guitar (LOL).
• Safety and preparation are not priorities.
Don’t Fear the Router
The part of this modification that scares most people off is working with a router. It’s an intimidating device and fear of it is understandable, considering what it can do to a guitar, or fingers, but learning about how it works and how to use it should, hopefully, alleviate your fear.
A router is a powered chisel that does what a standard chisel can do, good or bad … only faster. Positive or negative results depend entirely on the operator, just like any hand tool. And good results come from developing good technique and practice, which is one of the skills this mod aims at developing.
There is a wealth of information available about technique and a limit to the length of this article, so I’m only going to focus on a few basic tips that will help you get started safely:
• Only power the router on or off when the bit is able to turn freely, not in contact with any material.
• Do not move the router while the bit is accelerating or decelerating.
• Multiple shallow cuts are better than one deep cut.
• Pay attention to the router bit’s direction of rotation when planning the direction of the cut.
• Use PPE—at the very least, safety glasses.
Now we can get started with the project. However, there are several things to do before we can begin making sawdust and noise.
If you’re just too excited about firing up the router and can’t wait, I understand, but please read through these steps first. Afterwards, feel free to practice some small shallow cuts on the edges of scrap wood before jumping into the project, using large enough pieces that can be secured to your work surface. This will give you a good idea of how the router feels and sounds when making a cut.
Step 1: First, all electronics and hardware should be removed from the guitar, to make sure we have plenty of room to operate the router without any obstacles. Take photos and draw diagrams now if you’re unfamiliar with guitar wiring, since you will probably have to disconnect the pickups and switch wires, and will definitely be connecting the new pickup. [Marshall provides instructions on this step in the video companion to this story on premierguitar.com, and StewMac has detailed wiring instructions on its website.]
Note that on this guitar, although the pickup selector switch is not in the way, I suggest removing the switch to keep the wires away from the router bit.
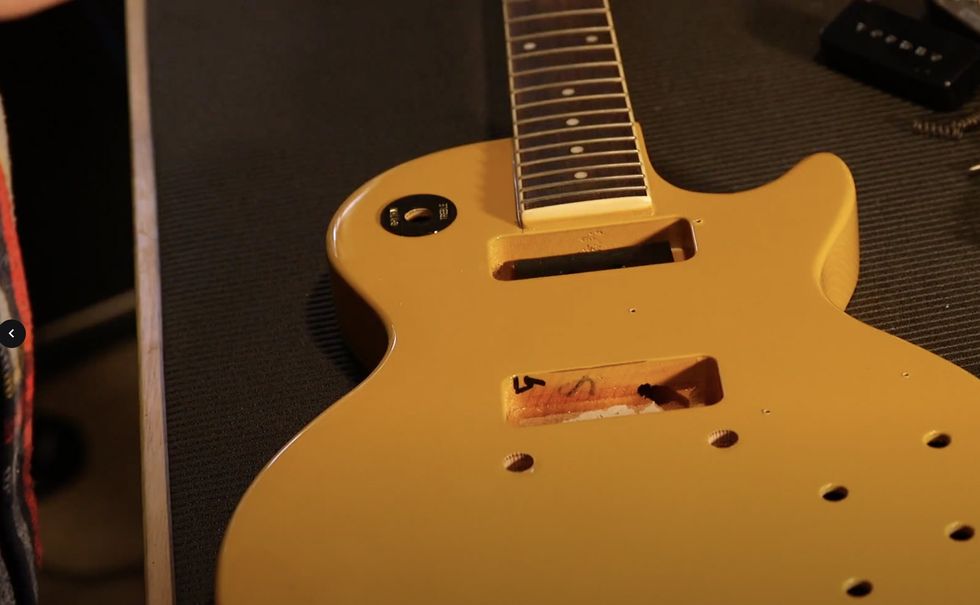
Step 2: Next, make sure the new pickup fits inside the template for the new pickup cavity. Make sure you have enough clearance to move the pickup through the template. It shouldn’t catch or rub on any part of the template.
Line up the template on the guitar body to determine where the new cavity will be. There are several techniques you could use here. Some might locate and mark the guitar’s center line, then line up the template that way, but since we are modifying an existing cavity we know is more or less centered, I suggest using that cavity as a guide and eyeballing it. Carefully.
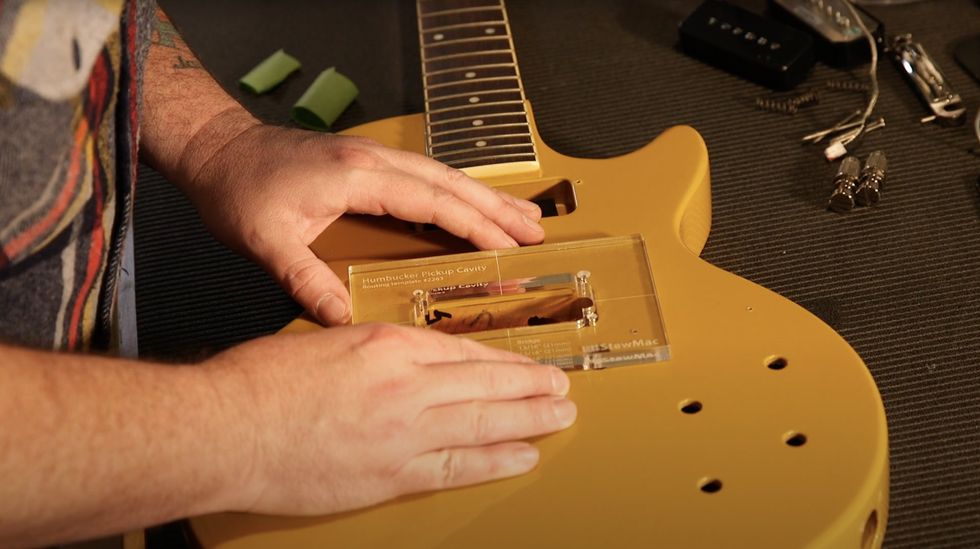
Since the StewMac template has a center line and other measures on its face, it’s easy to position over the cavity for the OEM pickup and decide which of its zones need routing.
Step 3: Now that you know where the template goes, attach the template to the guitar. I prefer using rolled up painter’s tape on the bottom side of the template because it holds fairly well (as long as you don’t use too much force with the router), it’s easy to remove, and relatively safe for modern finishes. Stronger double-sided adhesives work well but run the risk of damaging either the guitar or the template on removal.
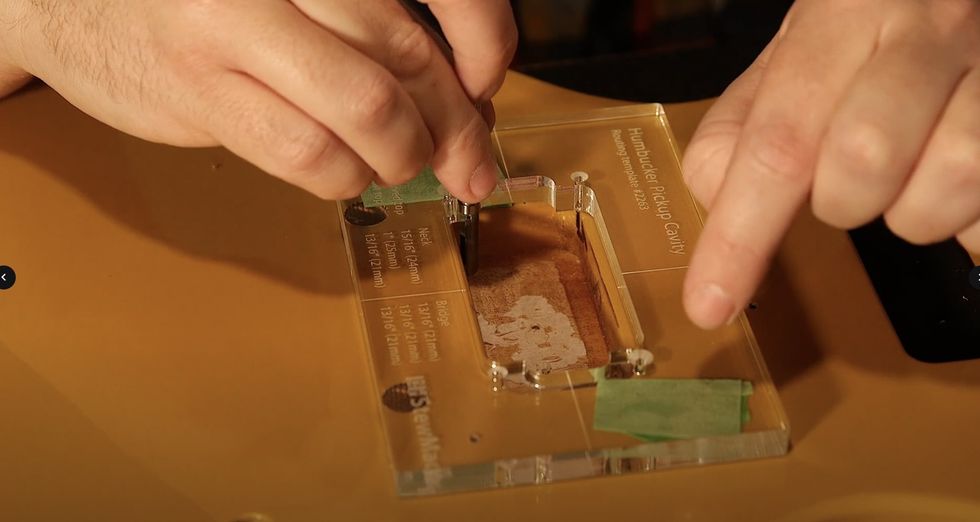
After taping the template in place, Marshall uses the router bit to trace the path he’ll use, and to gauge the depth of the pickup cavity versus the location of the bit’s bearing.
Step 4: The template determines the shape of the new cavity, but the router itself determines the depth of the cut. Start by setting the depth so that the tip of the router bit is just barely touching the bottom of the cavity when the router is sitting on the template. Once the cut is made, we can double-check to make sure this depth works.
With the template secured and the depth of cut adjusted, I suggest trying a “dry run” of the cut to make sure the router moves freely around the template. Keep in mind the bit’s direction of rotation and plan moves that allow the bit to cut into the wood—but don’t do it yet. Just outline your moves. Make sure that the bearing on top of the router bit can freely follow the template, too. Setting the depth too shallow risks cutting your template, ruining both it and your guitar.
This seems like an excessive amount of preparation, but trust me, an hour of planning can prevent a minute-long job from destroying your guitar.
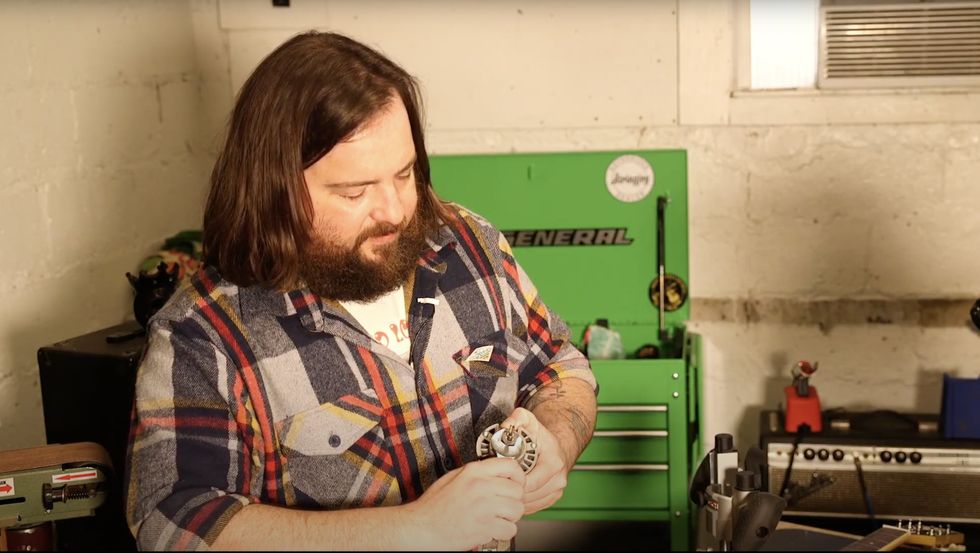
It’s almost time for the fun part. Don’t turn the router on yet. Put on your safety glasses and consider using ear protection if you are sensitive to high-pitched, loud sounds. This would also be a good time to make sure you have a shop vacuum handy, as you are about to make quite a mess.
Step 5: Now, it’s time to actually make the cut. Tilt the router slightly so that the bit is completely free before turning the router on. Keep in mind that the router should not be moved while the bit is accelerating or decelerating, so don’t make any cuts until the router is at full speed.
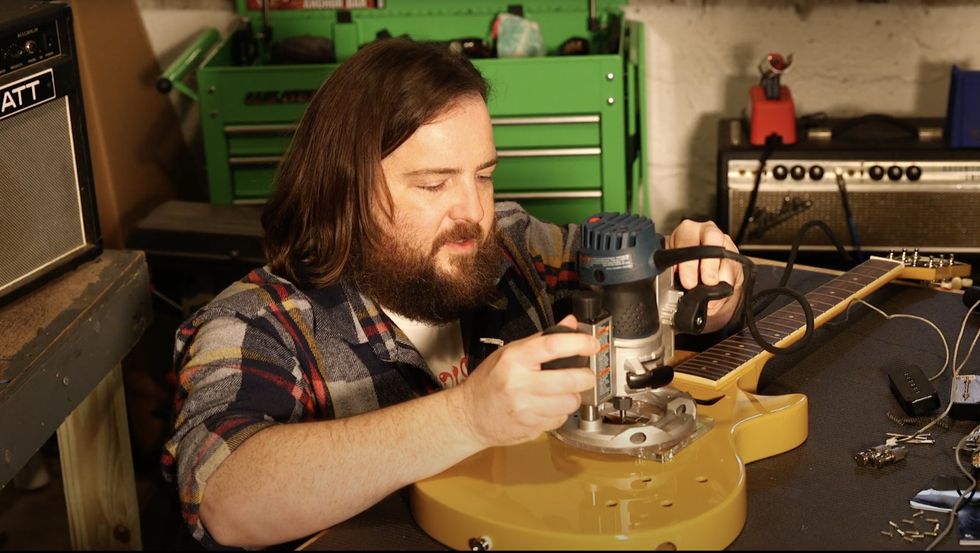
Once it’s at full speed, make the cut as practiced earlier. Take several shallow passes instead of trying to remove all the wood at once. There’s no need to force the router, you will hear and feel when the bit is cutting. Too much force may cause your template to move and ruin your cut, wreck the router bit, or potentially hurt you. And since the router spins the bit in a specific direction, be sure the cutting edge of the router is digging into the wood and that you move the router in the direction that puts the blade edge of the bit forward.
Now, you can turn the router off, but remember not to move it until the bit has completely stopped rotating. Check that the template has not been damaged, that the cut matches the template, and the pickup fits neatly inside.
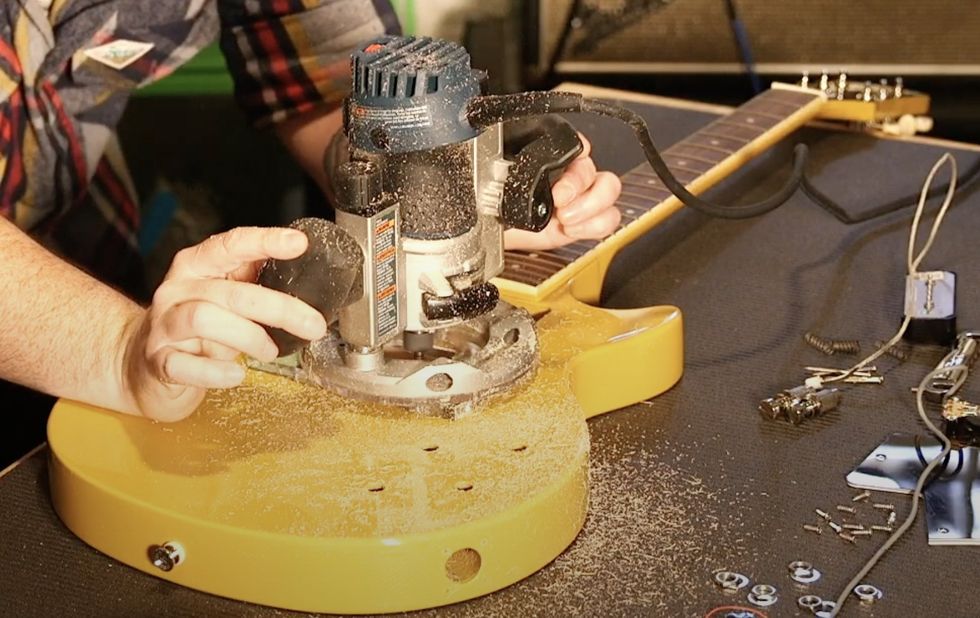
The sawdust flies as Marshall uses the router to slowly make gentle, shallow cuts, eventually reaching the cavity size required for the Parsons Street Humbucker.
Step 6: With this specific type of pickup, it turns out that we do need to make two slightly deeper cuts to accommodate the mounting screws and “ears” of the pickup base. You can do this by setting the bit to cut just a little deeper—in our case about 3/16" deeper—and cut only the areas around the pickup mounting screws. You could also do this with a hand drill or a drill press and a large spiral or Forstner bit, but I prefer the cleaner results from the router.
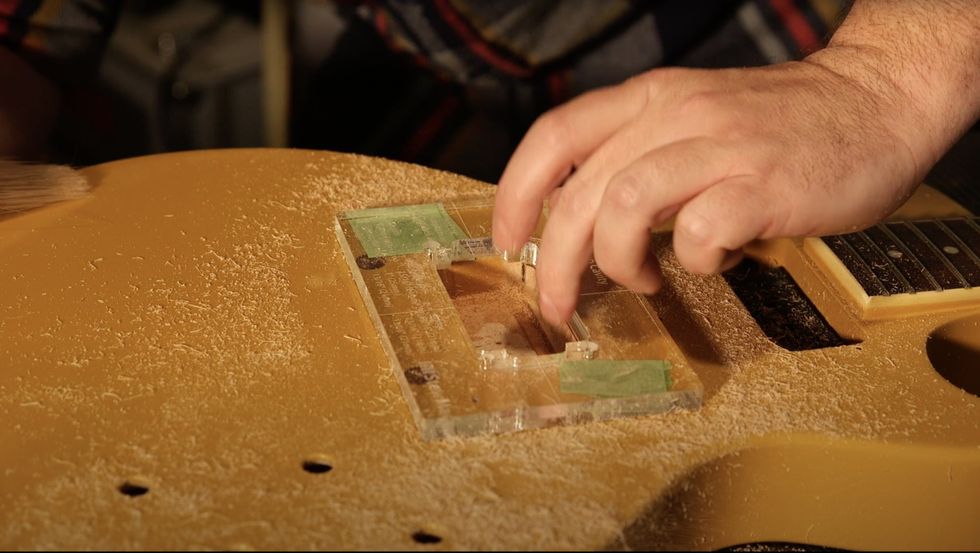
Checking the final cut to be sure there are no issues like snags or protrusions that would interfere with the fit of the pickup.
Step 7: Now, the new bridge pickup should fit. Test it by mounting the pickup in its ring and placing this assembly on the guitar. The mounting ring should sit on top of the guitar without having to force it down. If everything fits, go ahead and rewire and reassemble the guitar, then set it up to your liking. [We have a video at premierguitar.com called DIY: Easy 4-Step Guitar Setup.]
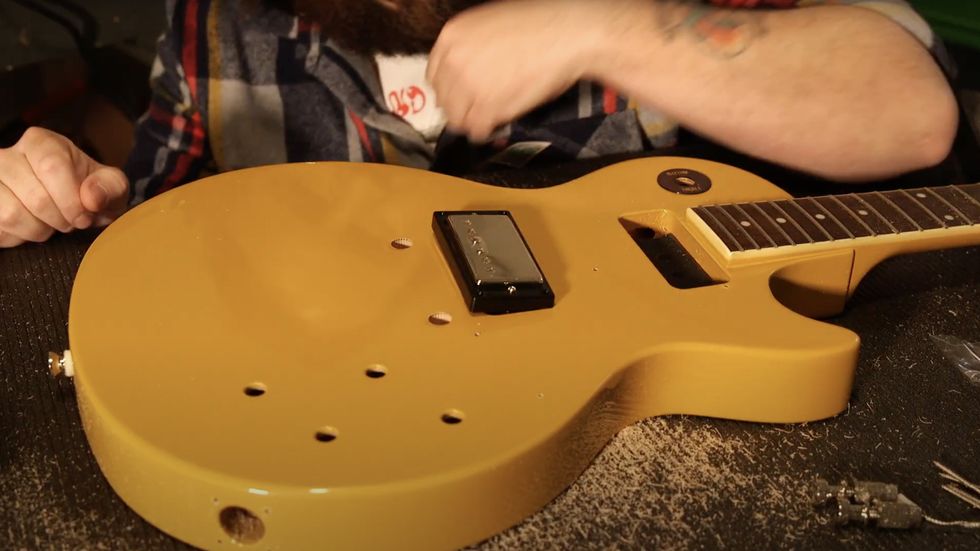
After placing the ring around the pickup, Marshall drops the humbucker and ring into place to test the fit. (As it turned out, a little bit of additional routing was required for the bottom of the cavity, to provide space for the humbucker’s left-side dog-ear mount.)
Step 8: On this Les Paul Special, since I’ve replaced the bridge P-90 with a bigger and more squared-off pickup mounting ring, the pickguard will have to be modified slightly to fit. I did this by tracing the pickguard onto a piece of paper, taping the tracing to the guitar, then marking the outline of the new pickup mounting ring. Now, I can use the tracing as a template and cut away the parts of the pickguard that I don’t need. I used a small bandsaw blade to cut away most of the material and slowly fine-tuned the edges with files and a small scraper until it fit.
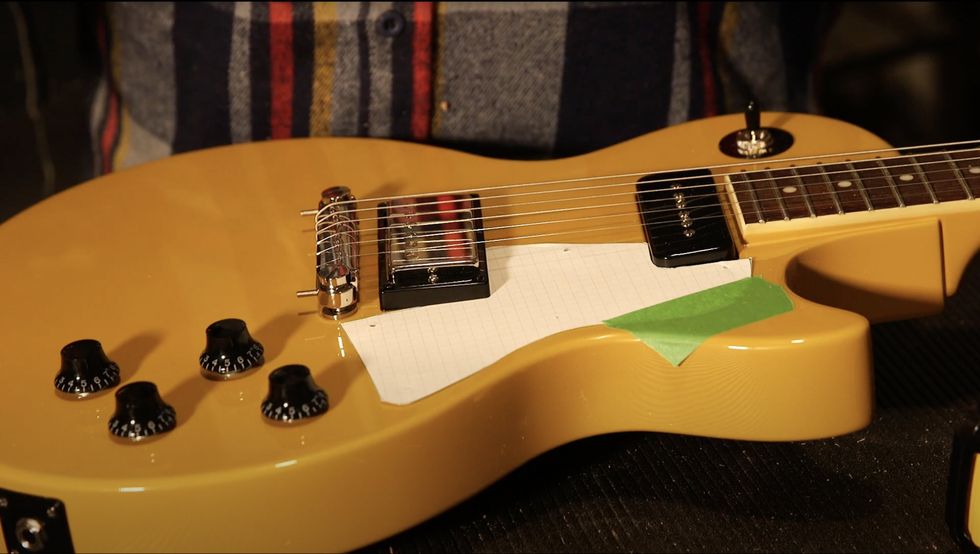
Here’s the paper template Marshall used to trace the new pickguard configuration required to accommodate the Parsons Street Humbucker. He then placed it atop the actual pickguard to make the cut.
I like to start with my bridge pickup very close to the strings, somewhere around 3/32" away from the treble strings and balancing the bass side of the pickup by ear. After that, I like to set the height of the neck pickup just by comparing the sound of each pickup, again, making sure that the output of each pickup is balanced from the bass side to the treble side.
To my ears, the humbucker we used in this guitar works very well paired with the stock P-90 in the neck position. It’s a medium output pickup, so it does have a bit more punch than the P-90 but doesn’t overpower it. Higher output humbuckers can roll off a bit of treble, depending on how they’re made, but this pickup has plenty of brightness for me. Both pickups together have abundant chime and sparkle. I really like this sound!
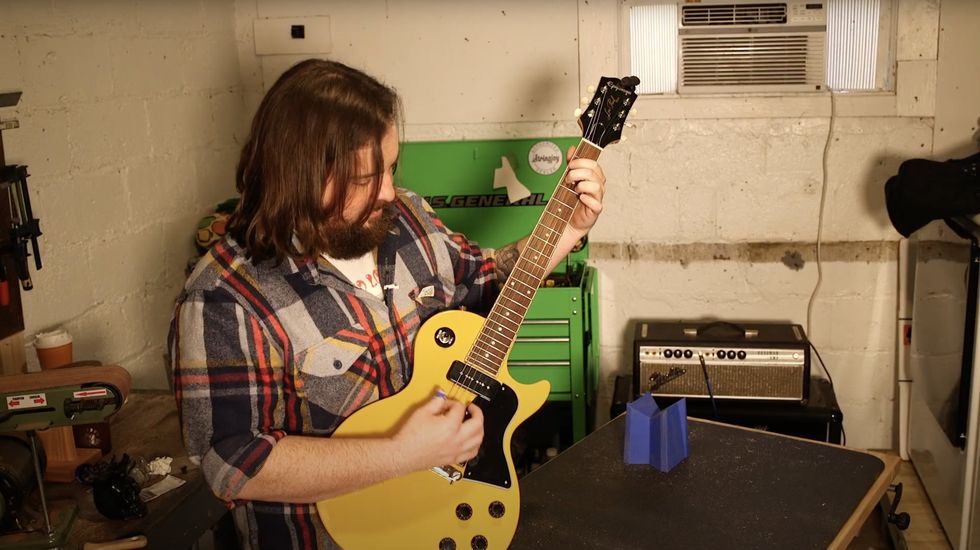
The proof is in the playing: Marshall tries out the Epiphone Les Paul Special’s new, combined humbucker-and-P-90 sound.
And on top of all that, I think this guitar looks really cool now as well. To me, that’s worth an afternoon’s work.
Learning to use a router is a great introduction to serious guitar modifications. It can be intimidating, but once you learn the basics, it opens up so many possibilities for modifications and repairs. Embrace the router!
Shop DIY tools and Supplies for your next guitar project: https://stewmac.sjv.io/qnPnag
- 10 Humbucker-Sized P-90s You Should Try ›
- Mod Garage: The Infamous Telecaster Neck Pickup ›
- Will Ray's Bottom Feeder: 2001 Epiphone Firebird VII ›
- An Easy Guide to Four Minor Guitar Repairs - Premier Guitar ›
6V6 and EL84 power sections deliver a one-two punch in a super-versatile, top-quality, low-wattage combo.
Extremely dynamic. Sounds fantastic in both EL84 and 6V6 settings. Excellent build quality.
Heavy for a 9-to-15-watt combo. Expensive.
$3,549
Divided by 13 CCC 9/15
The announcement in January 2024 that Two-Rock had acquired Divided by 13 Amplifiers (D13) was big news in the amp world. It was also good news for anyone who’d enjoyed rocking D13’s original, hand-made creations and hoped to see the brand live on. From the start of D13’s operations in the early ’90s, founder and main-man Fred Taccone did things a little differently. He eschewed existing designs, made his amps simple and tone-centric, and kept the company itself simple and small. And if that approach didn’t necessarily make him rich, it did earn him a stellar reputation for top-flight tube amps and boatloads of star endorsements.
D13’s history is not unlike Two-Rock’s. But the two companies are known for very different sounding amplifiers and very different designs. As it happens, the contrast makes the current Two-Rock company—itself purchased by long-time team members Eli Lester and Mac Skinner in 2016—a complementary new home for D13. The revived CCC 9/15 model, tested here, is from the smaller end of the reanimated range. Although, as we’ll discover, there’s little that’s truly “small” about any amp wearing the D13 badge—at least sound-wise.
Double Duty
Based on Taccone’s acclaimed dual-output-stage design, the CCC 9/15 delivers around 9 watts from a pair of 6V6GT tubes in class A mode, or 15 watts from a pair of EL84s in class AB1 mode (both configurations are cathode-biased). It’s all housed in a stylishly appointed cabinet covered in two-tone burgundy and ivory—together in perfect harmony—with the traditional D13 “widow’s peak” on a top-front panel framing an illuminated “÷13” logo plate. Measuring 22" x 211/4" x 10.5" and weighing 48 pounds, it’s chunky for a 1x12 combo of relatively diminutive wattage. But as Taccone would say, “There’s no big tone from small cabs,” and the bigging-up continues right through the rest of the design.
With a preamp stage that’s kin to the D13 CJ11, the front end of the CCC 9/15 is a little like a modified tweed Fender design. Driven by two 12AX7 twin triodes, it’s not a mile from the hallowed 5E3 Fender Deluxe, but with an EQ stage expanded to independent bass and treble knobs. Apart from those, there are volume and master volume controls with a push-pull gain/mid boost function on the former. In addition to the power and standby switches, there’s a third toggle to select between EL84 and 6V6 output, with high and low inputs at the other end of the panel. Along with two fuse sockets and an IEC power-cord receptacle, the panel on the underside of the chassis is home to four speaker-output jacks—one each for 4 ohms and 16 ohms and two for 8 ohms—plus a switch for the internal fan, acknowledging that all those output tubes can get a little toasty after a while.
“Set to 6V6 mode, the CCC 9/15 exudes ’50s-era tweed warmth and richness, with juicy compression that feels delightful under the fingertips.”
The combo cabinet is ruggedly built from Baltic birch ply and houses a Celestion G12H Creamback speaker. Construction inside is just as top notch, employing high-quality components hand-soldered into position and custom-made transformers designed to alternately handle the needs of two different sets of output tubes. In a conversation I had with Taccone several years ago discussing the original design, he noted that by supplying both sets of tubes with identical B+ levels of around 300 volts DC (courtesy of a 5AR4/GZ34 tube rectifier), the EL84s ran right in their wheelhouse—producing around 15 watts, and probably more, in cathode-biased class AB1. The 6V6s operate less efficiently, however, and can be biased hot to true class A levels, yielding just 9 to 11 watts.
Transatlantic Tone Service
Tested with a Gibson ES-355 and a Fender Telecaster, the CCC 9/15 delivers many surprises in spite of its simple controls and is toothsome and dynamic throughout its range. Between the four knobs, push-pull boost function, and 6V6/EL84 switch, the CCC 9/15 range of clean-to-grind settings is impressive regardless of volume, short of truly bedroom levels, perhaps. It also has impressive headroom and a big, robust voice for a combo that maxes out at 15 watts. Leaving the boost switch off affords the most undistorted range from the amp in either output-tube mode, though the front end will still start to push things into sweet edge-of-breakup with the volume up around 1 or 2 o’clock. Pull up that knob and kick in the boost, though, and things get thick and gutsy pretty quick.
While the power disparity between the 6V6 and EL84 settings is noticeable in the amp’s perceived output, which enhances its usefulness in different performance settings, you can also think of the function as an “era and origins” switch. Set to 6V6 mode, the CCC 9/15 exudes ’50s-era tweed warmth and richness, with juicy compression that feels delightful under the fingertips. The EL84 setting, on the other hand, ushers in ’60s-influenced voices with familiar British chime, sparkle, and a little more punch and cutting power, too.
The Verdict
If the CCC 9/15 were split into different 6V6 and EL84 amps, I’d hate to have to choose between them. Both of the amp’s tube modes offer expressive dynamics and tasty tones that make it adaptable to all kinds of venues and recording situations. From the pure, multi-dimensional tone to the surprisingly versatile and simple control set to the top-flight build quality, the CCC 9/15 is a pro-grade combo that touch-conscious players will love. It’s heavy for an amp in its power range, and certainly expensive, but the sounds and craft involved will make the cost worth it for a lot of players interested in consolidating amp collections.
Two Iconic Titans of Rock & Metal Join Forces for a Can’t-Miss North American Trek
Tickets Available Starting Wednesday, April 16 with Artist Presales
General On Sale Begins Friday, April 18 at 10AM Local on LiveNation.com
This fall, shock rock legend Alice Cooper and heavy metal trailblazers Judas Priest will share the stage for an epic co-headlining tour across North America. Produced by Live Nation, the 22-city run kicks off September 16 at Mississippi Coast Coliseum in Biloxi, MS, and stops in Toronto, Phoenix, Los Angeles, and more before wrapping October 26 at The Cynthia Woods Mitchell Pavilion in The Woodlands, TX.
Coming off the second leg of their Invincible Shield Tour and the release of their celebrated 19th studio album, Judas Priest remains a dominant force in metal. Meanwhile, Alice Cooper, the godfather of theatrical rock, wraps up his "Too Close For Comfort" tour this summer, promoting his most recent "Road" album, and will have an as-yet-unnamed all-new show for this tour. Corrosion of Conformity will join as support on select dates.
Tickets will be available starting Wednesday, April 16 at 10AM local time with Artist Presales. Additional presales will run throughout the week ahead of the general onsale beginning Friday, April 18 at 10AM local time at LiveNation.comTOUR DATES:
Tue Sep 16 – Biloxi, MS – Mississippi Coast Coliseum
Thu Sep 18 – Alpharetta, GA – Ameris Bank Amphitheatre*
Sat Sep 20 – Charlotte, NC – PNC Music Pavilion
Sun Sep 21 – Franklin, TN – FirstBank Amphitheater
Wed Sep 24 – Virginia Beach, VA – Veterans United Home Loans Amphitheater
Fri Sep 26 – Holmdel, NJ – PNC Bank Arts Center
Sat Sep 27 – Saratoga Springs, NY – Broadview Stage at SPAC
Mon Sep 29 – Toronto, ON – Budweiser Stage
Wed Oct 01 – Burgettstown, PA – The Pavilion at Star Lake
Thu Oct 02 – Clarkston, MI – Pine Knob Music Theatre
Sat Oct 04 – Cincinnati, OH – Riverbend Music Center
Sun Oct 05 – Tinley Park, IL – Credit Union 1 Amphitheatre
Fri Oct 10 – Colorado Springs, CO – Broadmoor World Arena
Sun Oct 12 – Salt Lake City, UT – Utah First Credit Union Amphitheatre
Tue Oct 14 – Mountain View, CA – Shoreline Amphitheatre
Wed Oct 15 – Wheatland, CA – Toyota Amphitheatre
Sat Oct 18 – Chula Vista, CA – North Island Credit Union Amphitheatre
Sun Oct 19 – Los Angeles, CA – Kia Forum
Wed Oct 22 – Phoenix, AZ – Talking Stick Resort Amphitheatre
Thu Oct 23 – Albuquerque, NM – Isleta Amphitheater
Sat Oct 25 – Austin, TX – Germania Insurance Amphitheater
Sun Oct 26 – Houston, TX – The Cynthia Woods Mitchell Pavilion
*Without support from Corrosion of Conformity
MT 15 and Archon 50 Classic amplifiers offer fresh tones in release alongside a doubled-in-size Archon cabinet
PRS Guitars today released the updated MT 15 and the new Archon Classic amplifiers, along with a larger Archon speaker cabinet. The 15-watt, two-channel Mark Tremonti signature amp MT 15 now features a lead channel overdrive control. An addition to the Archon series, not a replacement, the 50-watt Classic offers a fresh voice by producing retro rock “classic” tones reminiscent of sound permeating the radio four and five decades ago. Now twice the size of the first Archon cabinet, the Archon 4x12 boasts four Celestion V-Type speakers.
MT 15 Amplifier Head
Balancing aggression and articulation, this 15-watt amp supplies both heavy rhythms and clear lead tones. The MT 15 revision builds off the design of the MT 100, bringing the voice of the 100’s overdrive channel into its smaller-format sibling. Updating the model, the lead channel also features a push/pull overdrive control that removes two gain stages to produce vintage, crunchier “mid gain” tones. The clean channel still features a push/pull boost control that adds a touch of overdrive crunch. A half-power switch takes the MT to 7 watts.
“Seven years ago, we released my signature MT 15 amplifier, a compact powerhouse that quickly became a go-to for players seeking both pristine cleans and crushing high-gain tones. In 2023, we took things even further with the MT 100, delivering a full-scale amplifier that carried my signature sound to the next level. That inspired us to find a way to fit the 100's third channel into the 15's lunchbox size,” said Mark Tremonti.
“Today, I’m beyond excited to introduce the next evolution of the MT15, now featuring a push/pull overdrive control on the Lead channel and a half-power switch, giving players even more tonal flexibility to shape their sound with a compact amp. Can’t wait for you all to plug in and experience it!”
Archon Classic Amplifier Head
With a refined gain structure from the original Archon, the Archon Classic’s lead channel offers a wider range of tones colored with gain, especially in the midrange. The clean channel goes from pristine all the way to the edge of breakup. This additional Archon version was developed to be a go-to tool for playing classic rock or pushing the envelope into modern territory. The Archon Classic still features the original’s bright switch, presence and depth controls. PRS continues to stock the Archon in retailers worldwide.
“The Archon Classic is not a re-issue of the original Archon, but a newly voiced circuit with the lead channel excelling in '70s and '80s rock tones and a hotter clean channel able to go into breakup. This is the answer for those wanting an Archon with a hotrod vintage lead channel gain structure without changing preamp tube types, and a juiced- up clean channel without having to use a boost pedal, all wrapped up in a retro-inspired cabinet design,” said PRS Amp Designer Doug Sewell.
Archon 4x12 Cabinet
As in the Archon 1x12 and 2x12, the mega-sized PRS Archon 4x12 speaker cabinet features Celestion V-Type speakers and a closed-back design, delivering power, punch, and tight low end. Also like its smaller brethren, the 4x12 is wrapped in durable black vinyl and adorned with a British-style black knitted-weave grill cloth. The Archon 4x12 is only the second four-speaker cabinet in the PRS lineup, next to the HDRX 4x12.
PRS Guitars continues its schedule of launching new products each month in 2025. Stay tuned to see new gear and 40 th Anniversary limited-edition guitars throughout the year. For all of the latest news, click www.prsguitars.com/40 and follow @prsguitars on Instagram, Tik Tok, Facebook, X, and YouTube.
The Austin-based guitarist sticks with a tried-and-true combo of American guitars and British amps.
If you’ve been on the path of this spring’s Rhett Schull/Zach Person tour, you’ve been treated to one of the coolest rock ’n’ roll double bills criss-crossing North America this year. Person, who is based in Austin, put out his second full-length record, Let’s Get Loud, in March 2024, and it was packed with alt-, blues-, and psychedelic-rock anthems built around his take-no-prisoners playing.
This year, Person is road-doggin’ it around the United States as a two-piece unit with just a drummer, and PG’s Chris Kies caught up with him before he and Shull played the Eastside Bowl in Madison, Tennessee, to see what goods Person is bringing for this spring’s shows.
Brought to you by D’Addario
Customized Custom
This Gibson Jimi Hendrix 1967 Custom SG came from Gibson’s custom shop, and for Person, an SG with humbuckers is a hard combination to beat. He removed the Maestro trem system and had a tailpiece installed for tuning stability on the road, and he subjected the neck humbucker to a “Jimmy Page mod,” which entails removing the pole pieces to get closer to single-coil tones. This SG stays in standard tuning, with Ernie Ball or D’Addario strings (usually .010–.046s). Person digs Dunlop Flow Grip .88 mm picks.
Brown Sound
Person brought this 1967 Gibson SG Special back to life with a list of modifications and upgrades, including new pickups and a refinish, but its wood, neck shape, and original frets all made it worth it to him. The neck shape is narrow but chunky in Person’s hands, landing somewhere near the feel of Tyler Bryant’s 1962 Stratocaster. The pickups now are OX4 P-90s, and like the Custom, this one’s had its Maestro system amputated.
Jeannie Comes Alive
One Thanksgiving at his in-laws’ home in Dallas, Person mentioned how badly he wanted a Gibson LG-2 acoustic. As it happened, his father-in-law suspected his mother had one, which had been relegated to storage in a shed. Person and his wife’s father ventured through rain to dig it out, and sure enough, a very beat up LG-1 was withering away in its case. No local techs in Austin thought it was worth saving, except for Elaine Filion, who was used to taking on bigger restoration projects. Filion succeeded, taking the top off and installing an X-bracing system to turn the LG-1 into an LG-2-style guitar. Now, it’s got an L.R. Baggs pickup and bears the nameplate “Jeannie” on its headstock to commemorate his wife’s grandma, the original owner. Jeannie usually stays home, but Person brought her out specially for the Rundown.
Marshall Muscle
This Marshall JTM45 MkII is Person’s usual go-to. It runs just at breakup volume and gets pushed with some variation of a Pro Co RAT, his favorite dirt box.
Supro Signature
This Super Black Magick Reverb, Tyler Bryant’s signature, is along for the ride as a backup to the Marshall.
Zach Person’s Pedalboard
Person has done tours with just an overdrive pedal and nothing else, so by comparison, this two-tiered Vertex board is luxurious. Still, it’s compact and carries all he needs at the moment. The JHS Pack Rat is the core sound, set fairly heavy and dirty. The rest includes a Boss TU-3, EarthQuaker Devices Double Hoof, Vox Clyde McCoy wah, Boss BF-2, DigiTech Drop, Strymon El Capistan, and an Interstellar Audio Machines Marsling Octafuzzdrive. A TC Helicon Mic Mechanic rides along as a vocal effect so Person can keep control over his voice from night to night.