For decades, blues and rock guitarists have been laying glass or metal cylinders across their strings to add expressive riffs to their music. Unlike a Dobro or lap steel, which is played horizontally with a bar and has its strings jacked up way off the fretboard, a standard 6-string guitar can be set up for both fretting and slide work—if you know what you're doing.
Let's explore how to finesse a guitar so its strings sit high enough to keep a slide from crashing into the frets, yet remain close enough to the fretboard that you can play chords and riffs with your fingertips. Yes, you can have it all, as Duane Allman, Johnny Winter, Sonny Landreth, Ry Cooder, Derek Trucks, and many other greats have proven over the years.
It's not too hard to set up an electric guitar for dual duties, so that's what we'll focus on. It's more of a challenge with an acoustic, but with a little ingenuity, you can also adapt the following techniques to a flattop, so read on.
Project overview.
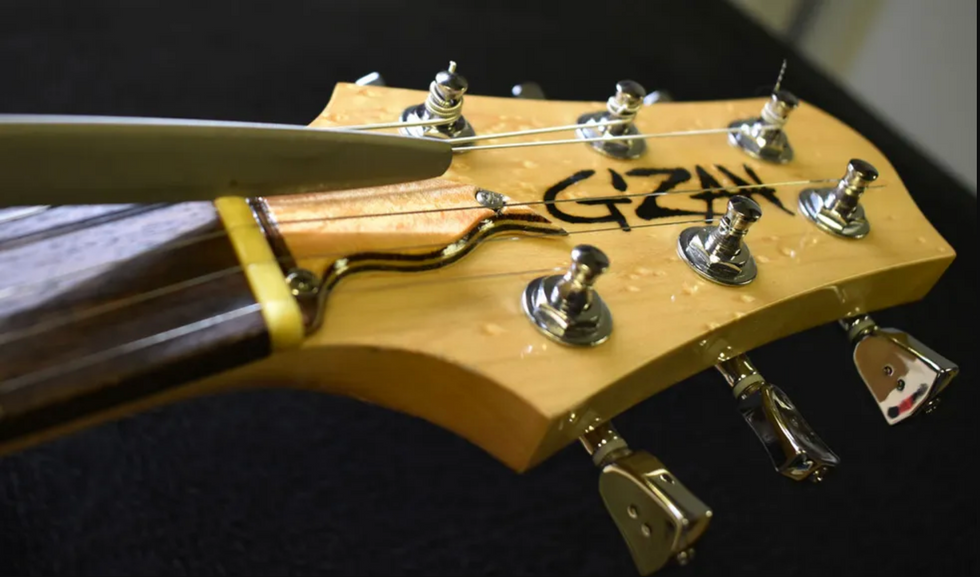
To illustrate the steps, I'll use a 2003 Gibson Les Paul Studio (Photo 1) a client brought in to have converted into a ripping slide guitar. He wanted to stick with his moderately light .010–.049 strings so he could comp and solo as usual, but he also wanted to augment his standard riffage with slide licks when the spirit moved him.
To make this happen, I suggested he use a lightweight, straight-wall glass slide—similar to Allman and Trucks—as opposed to the heavier brass or bottleneck slides that are often favored by acoustic resonator guitarists. Why? Using a lightweight slide, such as a Dunlop Derek Trucks Signature medicine bottle or the aluminum BigHeart Firecracker, makes it possible to use slinkier strings and keep the action reasonably low. Heavier slides can sound great, but they demand stouter strings and stiffer action. A light slide allows you to find that sweet spot in your setup where you can use the same guitar for two very different techniques.
Preliminary measurements.
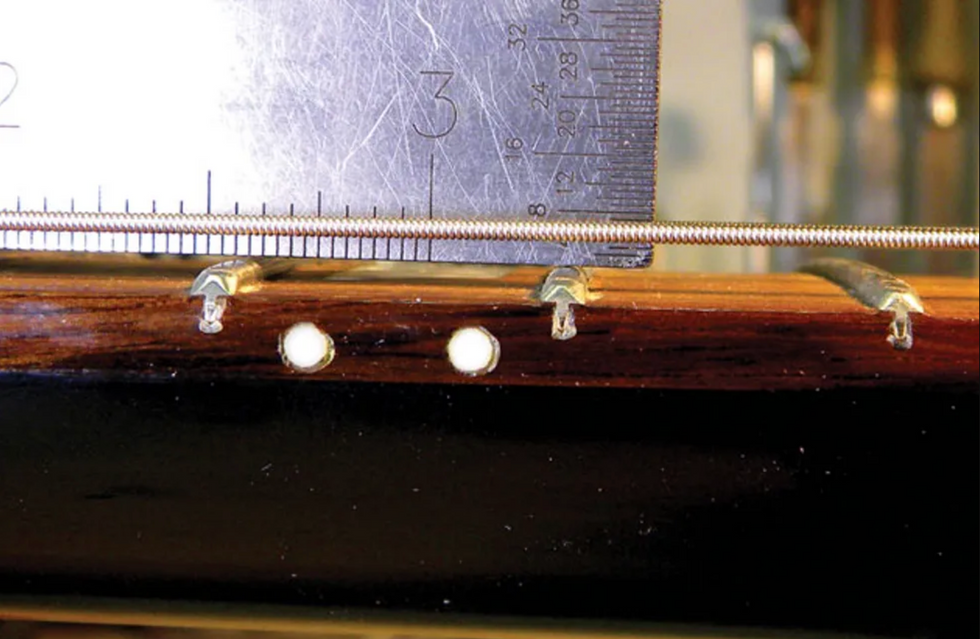
Photo 2
The first step is to measure three things: action at the 12th fret, neck relief, and string height at the 1st fret. These measurements will provide a baseline to work from.
Here's the process: To measure the action, first tune to pitch (this is crucial) and then place a capo on top of the 1st fret. Next use a precision metal ruler to measure the string height at the 12th fret. I use a String Action Gauge—a handy tool from Stewart MacDonald—(Photo 2) for this. You want to determine the distance between the top of the 12th fret and the bottom of both the 6th and 1st strings.
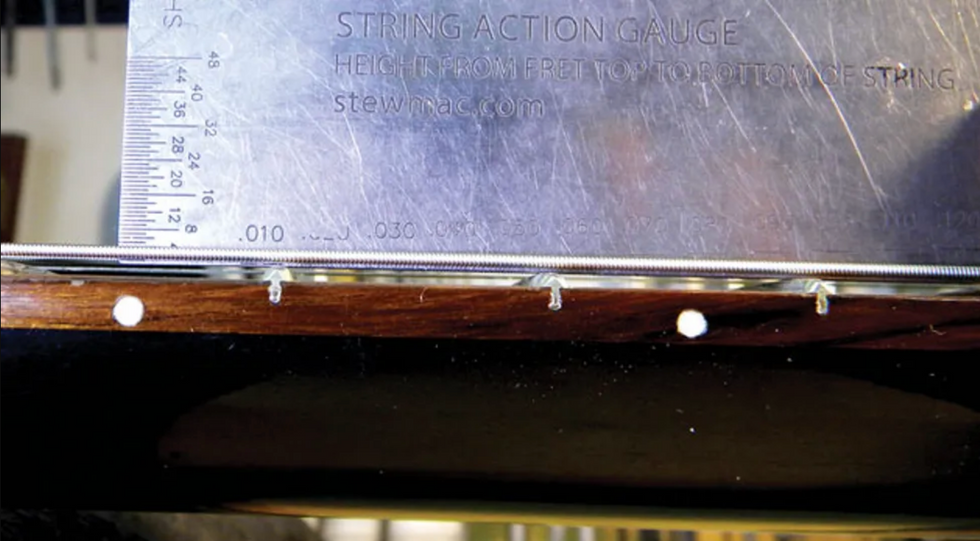
Photo 3
On this Les Paul, the gap was 3/64" for the 1st string and 4/64" for the 6th. This action is comfortable for my client, but too low for slide.
Now to measure the amount of relief. With the capo still on the 1st fret, hold down the 6th string at the last fret and measure the greatest distance between the bottom of the string and the top of the frets (Photo 3).
On my client's guitar, the relief was .012"—perfect for his current playing style and also fine for supporting a lightweight slide. If your guitar has less relief, you may need to loosen the truss rod very slightly to introduce a tad more forward bow. (Read "Time for a Neck Adjustment?" to learn more about working with a truss rod.) But before you take that route, first complete the setup I'm about to describe. It's quite possible these steps will be all you'll need to enter the slide zone.
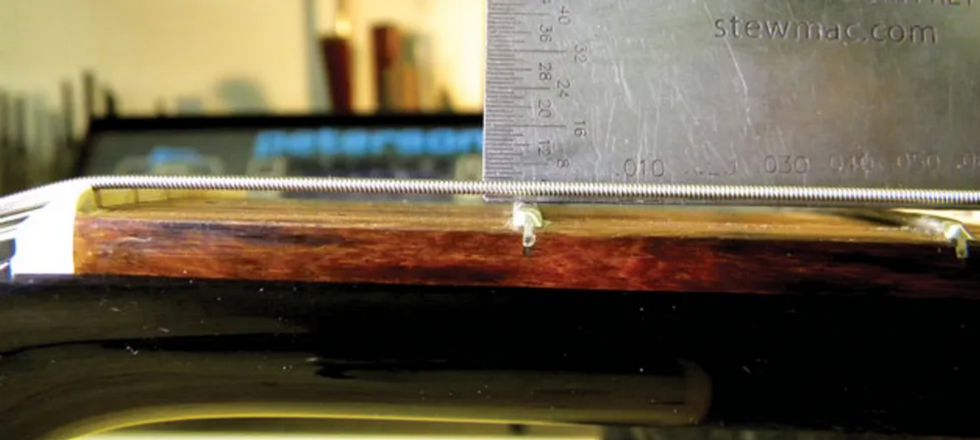
Photo 4
Next, remove the capo (it wouldn't hurt to confirm your strings are still at pitch) and measure the height of the 1st and 6th strings at the 1st fret (Photo 4).
In this case, the height was 1/64" and 2/64" for the 1st and 6th strings, respectively. While this is ideal for fretting chords and lines, it's too low for playing slide.
From these preliminary measurements, I was able to determine what would be required to give this Les Paul its new dual identity:
- Raise the action at the bridge and then adjust individual saddles.
- Raise the action at the nut by either shimming the stock nut or carving a new one.
- Adjust the pickups to balance string-to-string volume.
- Adjust the intonation.
Adjust the bridge.
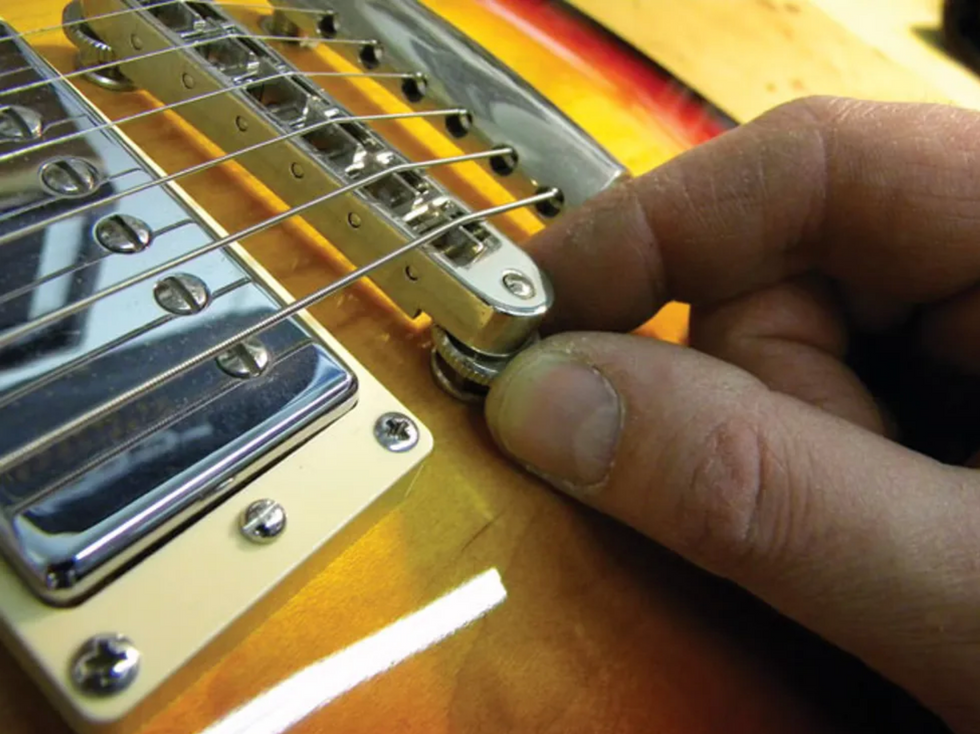
To raise the action on a Les Paul's Tune-o-matic bridge, turn the thumbwheels counter-clockwise (Photo 5). Do this in small increments, perhaps a quarter of a rotation for each thumbwheel. Retune the guitar, put a capo on the 1st fret, and then measure the action at the 12th fret again.
For starters, I suggest adjusting the action to 4/64" on both the 1st and 6th strings. Remember, you can always come back and raise the treble or bass strings a bit more if you find your slide is hitting the frets.
Adjust the saddles.
Now here's our first tricky part. Most lightweight slides (such as a glass or chrome tube, or the medicine bottle favored by Allman and Trucks) contact the strings in a straight line. However, on a guitar set up for fretting—including my client's LP—the strings follow the fretboard radius or curvature. In other words, strings 1 through 6 are subtly arched at the bridge so they sit at a consistent height above the frets.
Slide licks often incorporate two or three strings at a time. When your slide has a straight playing surface, yet the strings are arched, you'll wind up pressing some strings down more than others as you move across the fretboard. This can create subtle intonation problems within a chord or interval.
Yes, you can have it all, as Duane Allman, Johnny Winter, Sonny Landreth, Ry Cooder, Derek Trucks, and many other greats have proven over the years.
The solution is to flatten the string radius at the bridge so the strings sit in a straight line that corresponds to the slide's playing surface. On a guitar with individually adjustable saddles, like a Strat, it's easy to raise or lower each string to achieve the target 4/64" gap between the bottom of all the strings and the top of the 12th fret.
However, on a guitar with a fixed-radius bridge—such as a Les Paul with a Tune-o-matic—some saddle slots will need to be deepened slightly to create a flat line between strings 1 and 6. Typically it's the middle saddles that need attention, but your current bridge radius and string gauges will determine which slots require recutting and by how much.
Gauged nut slotting files, which are available from Allparts, Stewart-MacDonald, and other luthier suppliers, work great for this task because you can precisely size the slot to match the string. For example, knowing that my client plays a .010–.046 set, I'll use a .036 gauge nut file to deepen the notch for the .036 A string.
The process is pretty straightforward: After you've set the bridge so the 1st and 6th strings are 4/64" above the 12th fret, measure the 2nd string. If it's also 4/64" at the 12th fret, move onto the 3rd string. But if it's higher, carefully deepen the slot to bring the 2nd string down to 4/64".
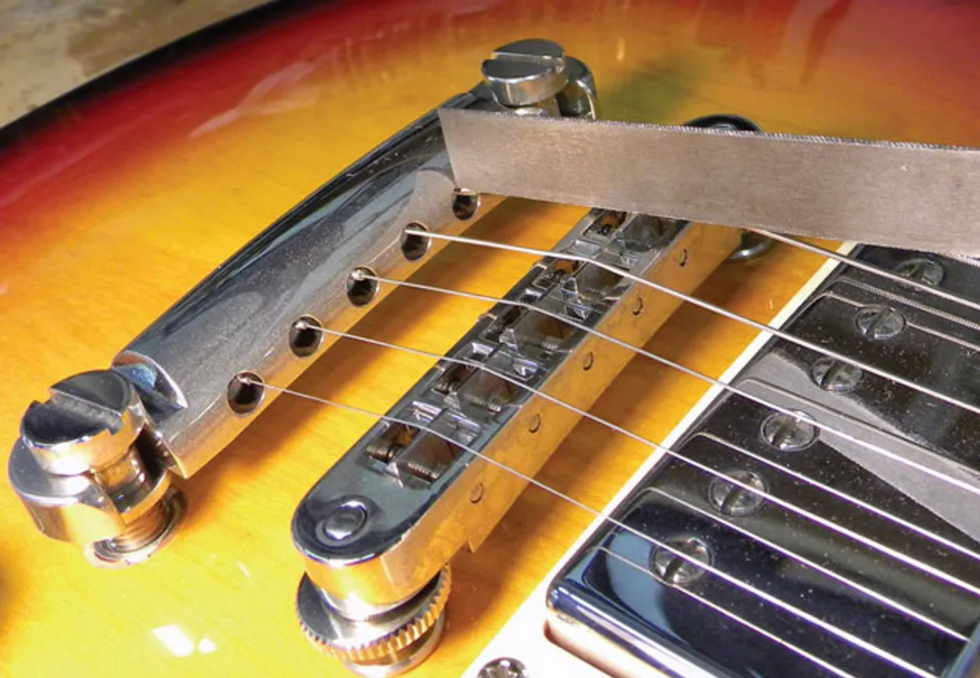
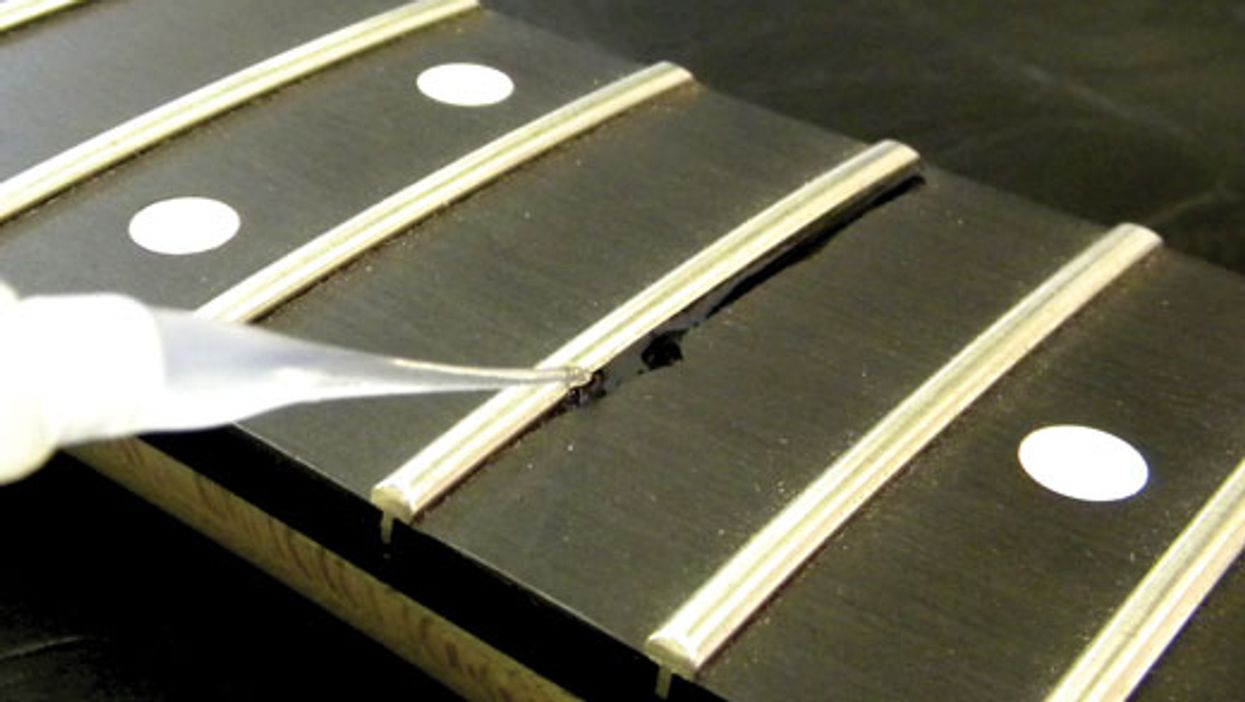
Photo 6
When re-cutting a notch, always follow the angle of the string as it emerges from the tailpiece up to the saddle (Photo 6). Go slowly, retuning and then measuring the action every few file strokes. Gently clean off any burrs on the front or back of the saddle using the nut file. This will prevent the string from getting caught up on the saddle and creating tuning issues.
Repeat the process on each inside string until you've achieved a uniformly level playing surface across all six strings. It's painstaking work, but the payoff in tone and feel will be worth the effort. Once you've flattened the radius and are satisfied with the overall action, you'll be ready to move over to the nut.
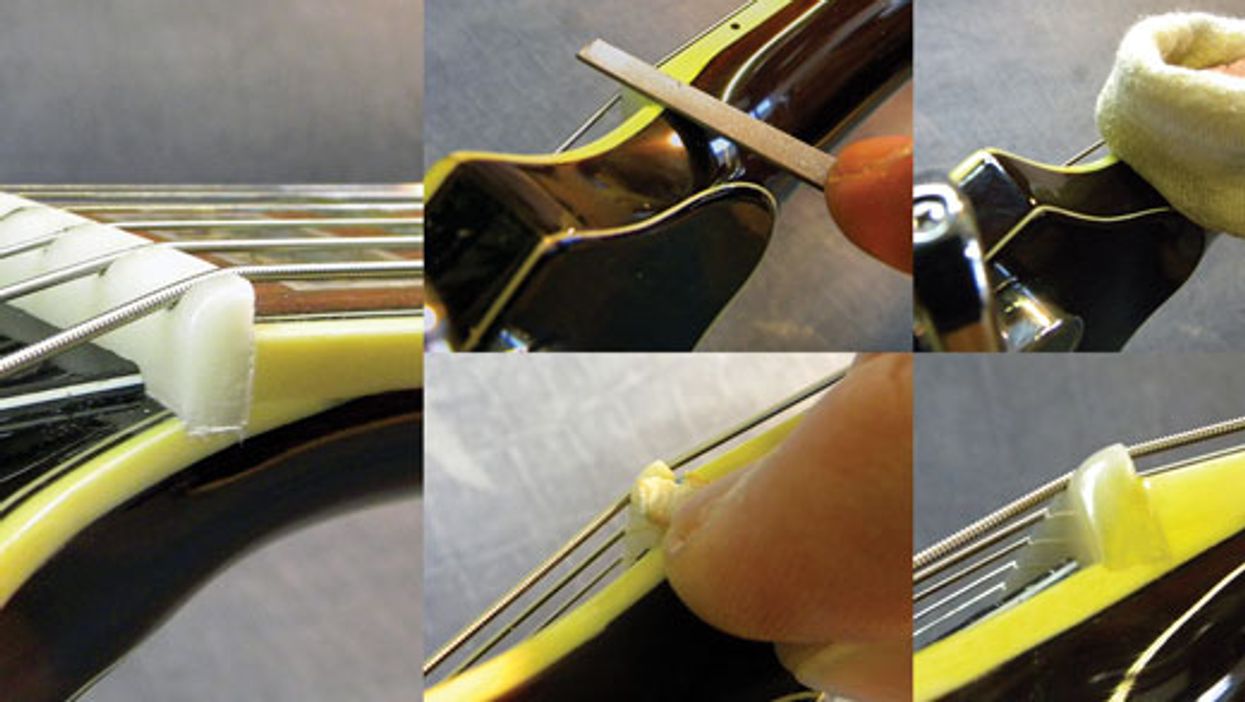
Raise the nut.
From experience, I knew that having the 1st string sit 1/64" above the 1st fret is too low for slide, so I'd need to raise the nut on this Les Paul. The trick, of course, is to get the nut high enough to accommodate slide technique, yet not make the guitar unplayable when fretting. Based on the owner's playing style, string gauges, and light glass slide, I decided on a uniform height of 2/64" for all six strings on his guitar.
There are only two ways to correctly and permanently raise the nut: You can shim it or carve a new one. The owner wanted to keep the stock Gibson nut, which was in excellent condition, so we elected to shim it.
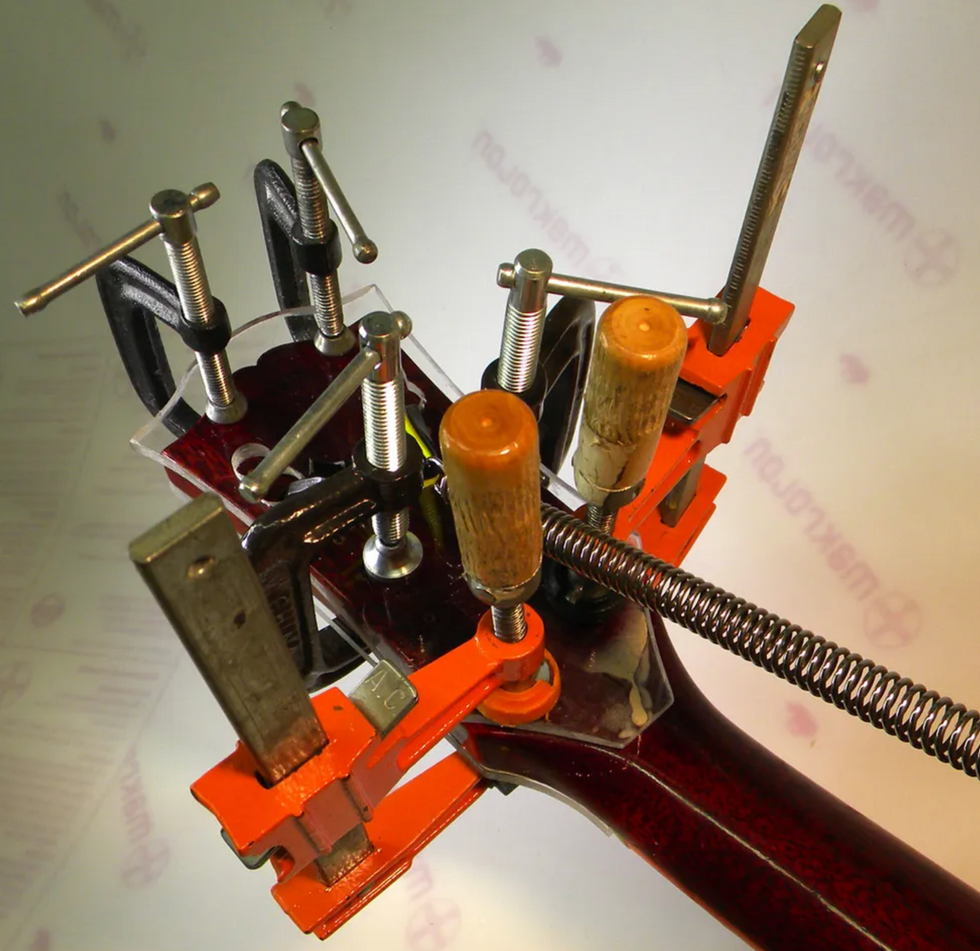
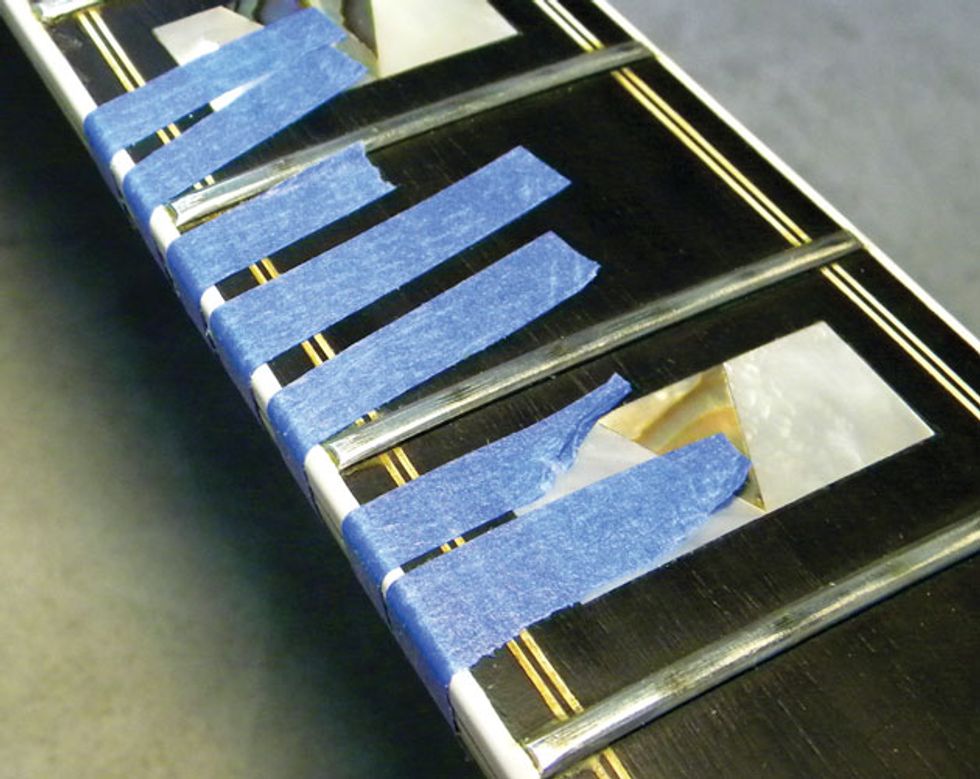
Here's how that works: First remove the nut by gently tapping it on the fretboard side with a flathead screwdriver and small hammer (Photo 7). Next, clean up the nut slot by removing the excess glue with a small chisel or razor knife, and then scrape any glue off the nut.
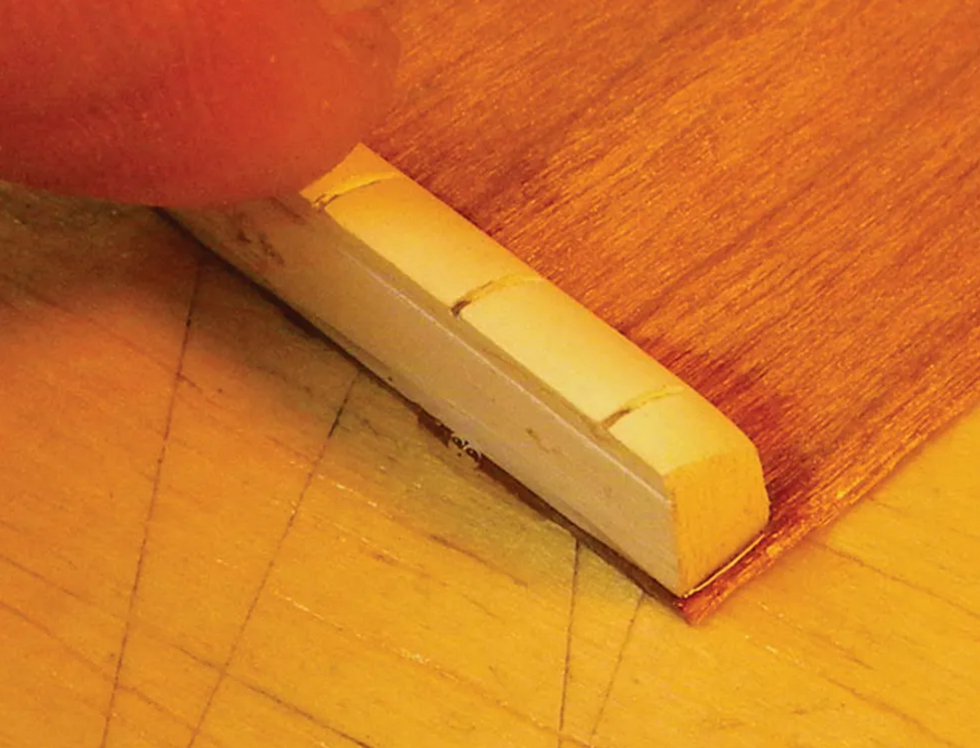
Photo 8
Now super-glue the nut onto a thin piece of mahogany (Photo 8). For this kind of shim, I use a .020" thick piece of wood.
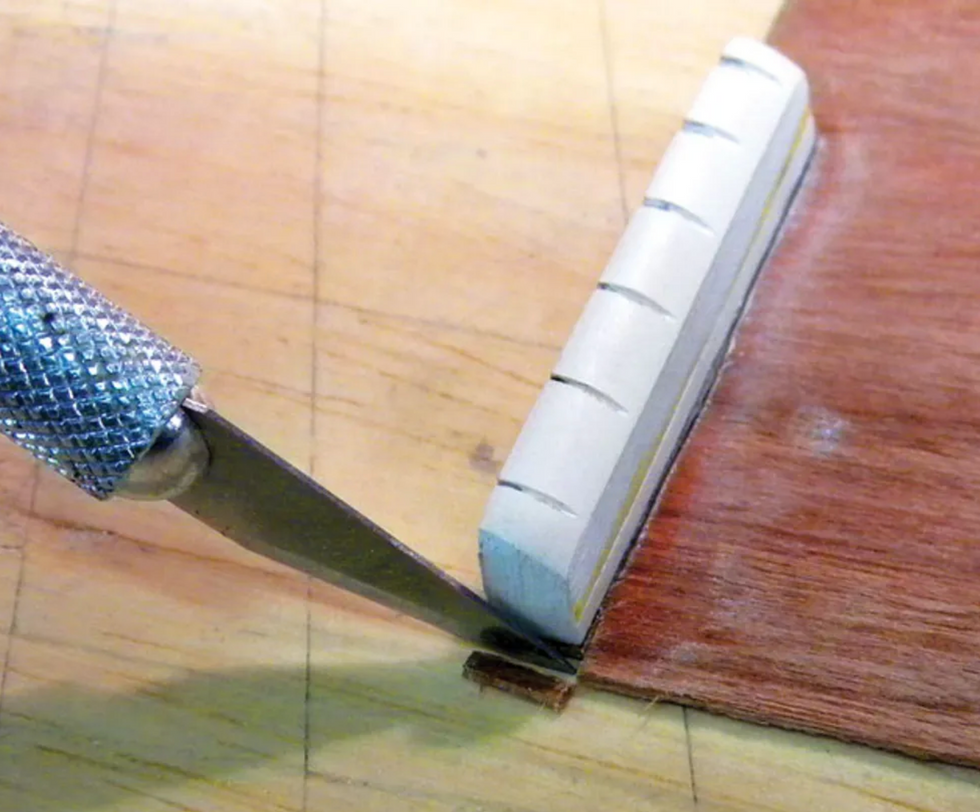
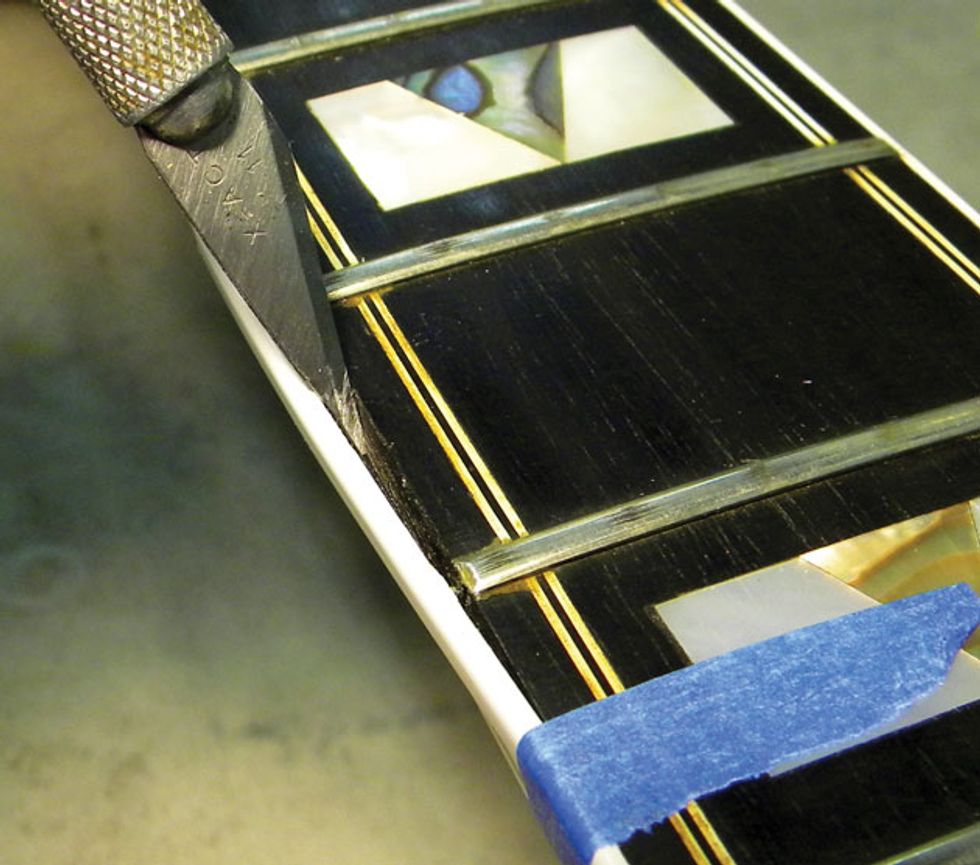
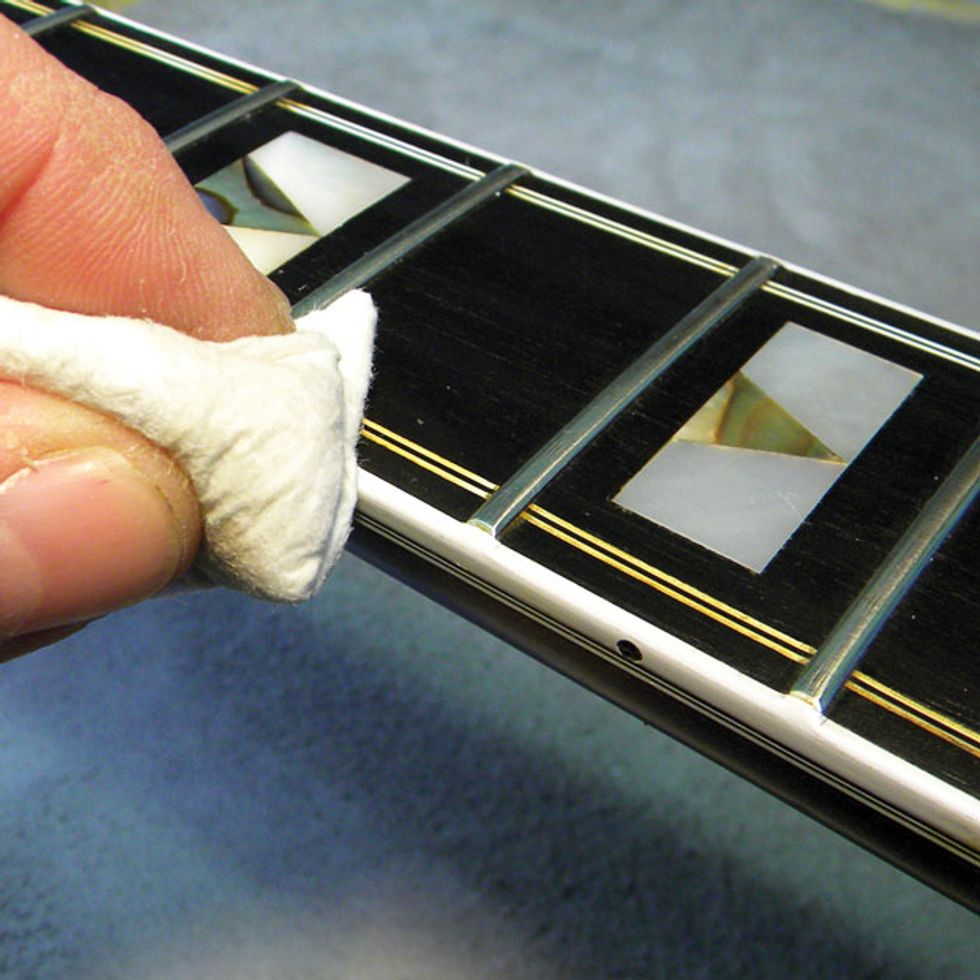
Trim off the excess wood around the string nut with a razor knife (Photo 9). Install the string nut and secure it with one drop of super glue on the face of the nut between the 4th and 3rd strings.
Adjust the pickups.
After you change the action on a guitar—especially to this degree—it's a good idea to adjust the pickups to make sure the treble-to-bass and string-to-string balance is how you want it.

First start with overall pickup height. Hold the 1st and 6th strings down at the last fret and measure the distance from the bottom of the strings to the top of the pickup. The distances in this table provide a good starting point for humbuckers.
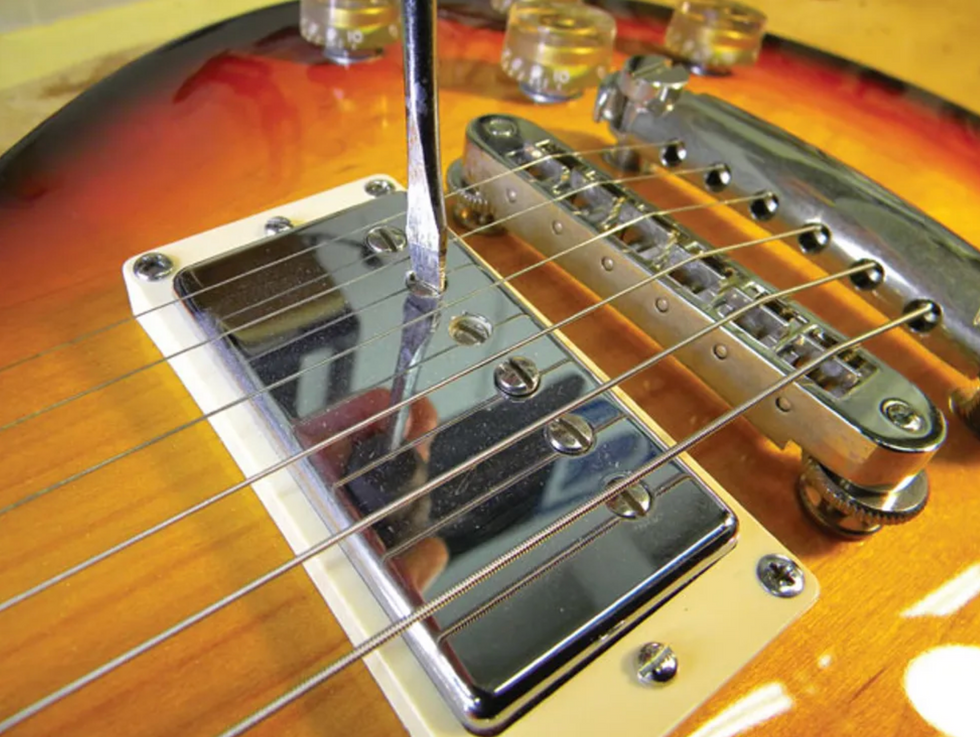
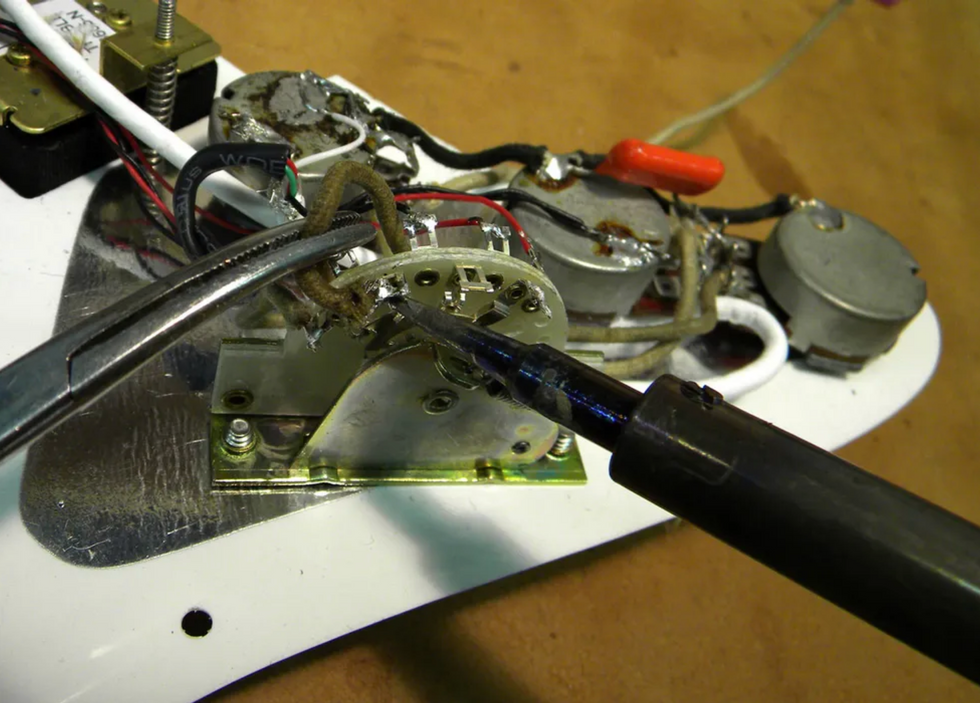
Photo 10
The next step is to adjust the individual pole pieces using a small flathead screwdriver (Photo 10). The goal here is to create an even and consistent string-to-string balance.
Begin with the 5th string pole piece and adjust it to match the volume of the 6th string. Raising the pole piece will make a string louder and vice versa. Then move to the 4th string and compare it to strings 6 and 5. Continue working across the strings, checking them relative to each other and making small tweaks as necessary. Typically, the 3rd string is the loudest, so don't be surprised if you wind up lowering it below the pickup cover to keep it in balance with the other strings.
It's a wrap.
The final step to complete the project is install a new set of strings, tune to pitch, and adjust the intonation. If you need instructions for checking and adjusting the intonation, read "How to Install a New Tune-o-matic Bridge."
With the string height and pickups adjusted for playing slide, our project Les Paul is ready to return to its owner. But before he carts it off, I'll listen to him play and see if the bridge height and pickup pole pieces are dialed in to his satisfaction. If you set up your own guitar for double duty, you may find yourself making small adjustments after playing it for a few days. That's the beauty of being your own tech, right? That said, if you're not confident you can safely work with glue, files, and other tools around your guitar, take it to your local pro.
[Updated 11/18/21]