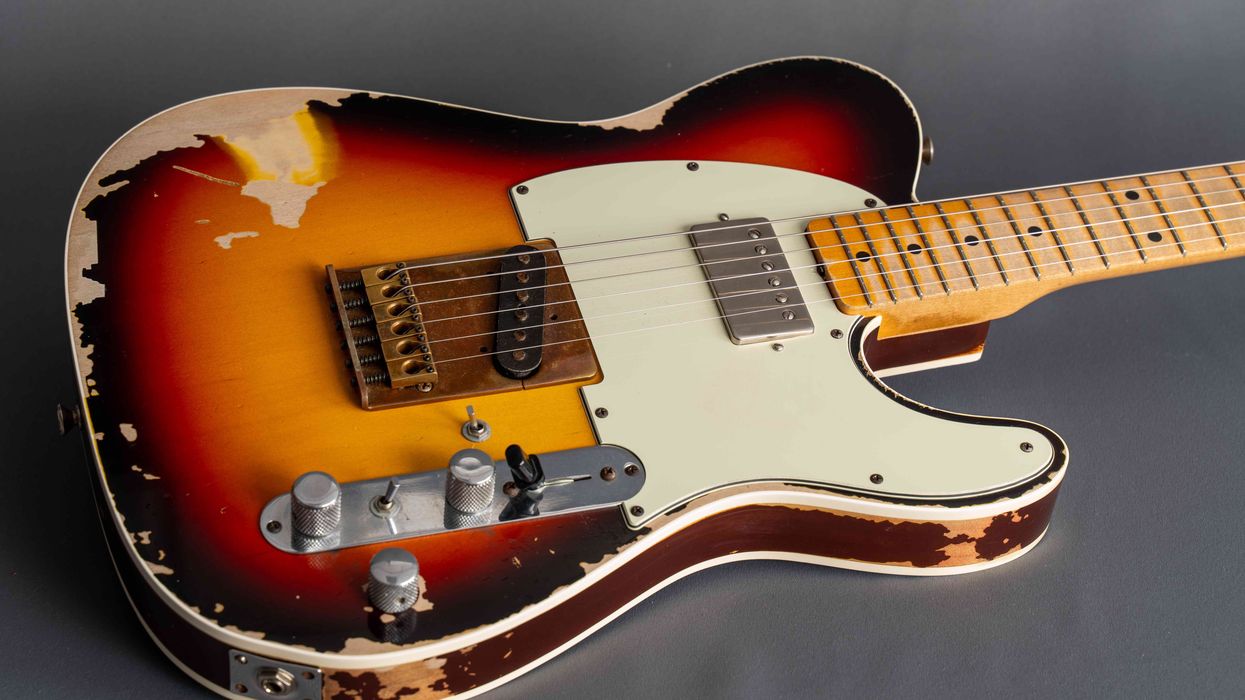
This technique works for all standard single-coil pickups, including Fender’s template design, so dive in!
It’s not difficult to replace the wiring in your pickups, but it takes some finesse. Here’s a step-by-step guide.
Hello and welcome back to Mod Garage. After numerous requests, this month we’ll have a closer look at changing wires on a single-coil pickup. As our guinea pig for this, I chose a standard Stratocaster single-coil, but it’s basically the same on all single-coil pickups and easy to transfer. It’s not complicated but it is a delicate task to not destroy your pickup during this process, and there are some things you should keep in mind.
Why would you change wires on a pickup? Here’s a list of reasons I mostly hear in the shop when someone brings in a pickup for this operation:
1. A wire is broken and needs to be replaced.
This can happen if the wire was bent too much, or it was damaged with a soldering iron, a screw split it, etc.
2. A used pickup was bought on eBay or a similar marketplace and the wires are too short for your wiring.
Maybe one of the pre-owners snipped it out of the circuit at some point, rather than desoldering it to save the full wire length. The quick-and-dirty solution in such a case will be to extend the wire by soldering another piece of wire to it. For the “Trekkies” of us, that’s the way James T. Kirk and Scotty would fix it. Jean-Luc Picard and Geordi La Forge would solder a new wire with the correct length to the pickup to replace the old one. Make it so!
3. Changing the wires as a quality update.
Often cheap pickups have thin and shoddy plastic-coated wires that will likely break soon. It’s always a good investment regarding reliability and longevity to swap them with a good quality wire.
4. Changing the wires for tonal and/or aesthetic reasons.
Changing the wire material can alter the sound of a pickup, so replacing a cheap plastic-coated wire with a good-quality cloth-covered wire will not only look more vintage but will also result in a slightly warmer tone. Or the other way around for a slightly brighter tone. Or maybe you want to upgrade your pickups with a high-quality Teflon-coated or audiophile HiFi-wire. Perhaps you like to have neon green and pink wires on your pickups, for whatever reason.
5. Changing the wires for a shielded cable to add more shielding to the pickup.
This often goes hand in hand with shielding the complete single-coil pickup and is a logical step in such cases.
6. Changing the wires with NOS wire.
Often vintage pickups are modded with a non-original wire, sometimes as part of a repair. Bringing them back to factory specs is a good investment to keep the value of a vintage pickup alive.
Let's Begin
So, you see there are some good reasons to change the wires on a pickup. This list is not complete; for sure there are others.
Now, let’s start our project by preparing the pickup for this operation. It’s first and foremost important to protect the windings of your pickup against any damage. It only takes a fraction of a second to hit the winding with the tip of the soldering iron and this is a scenario you do not want.
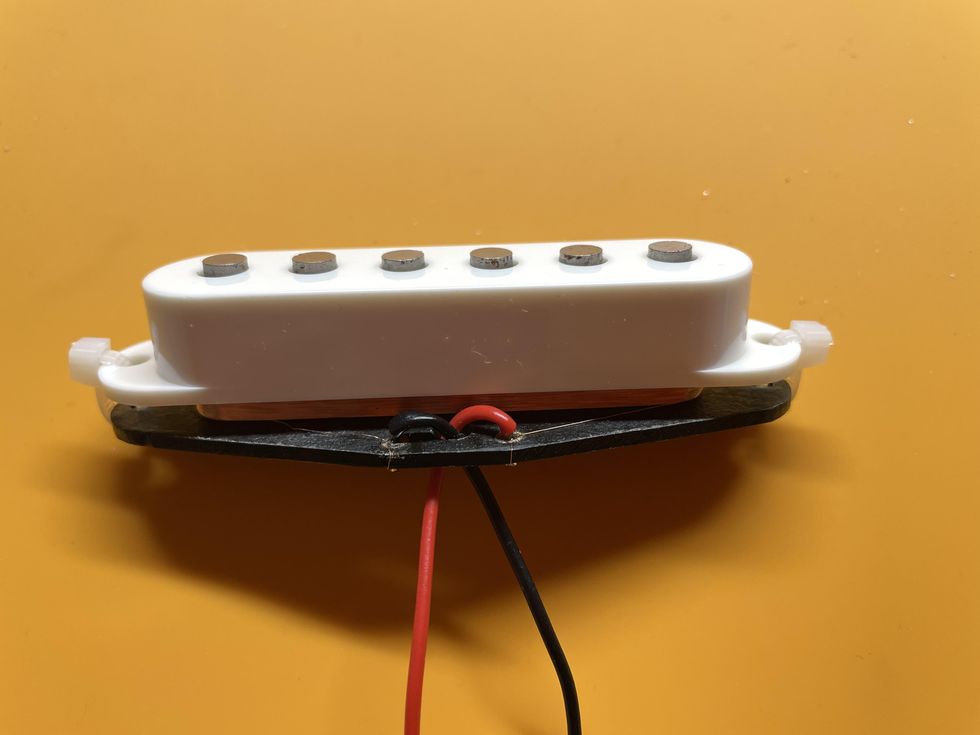
Photo 1
Courtesy of SINGLECOIL (www.singlecoil.com)
1. I simply put a standard plastic pickup cover on the pickup to protect the winding. I usually use two small zip ties to fasten the cover, but you can also use two small screws and a hex nut, a rubber band, or a piece of masking tape.
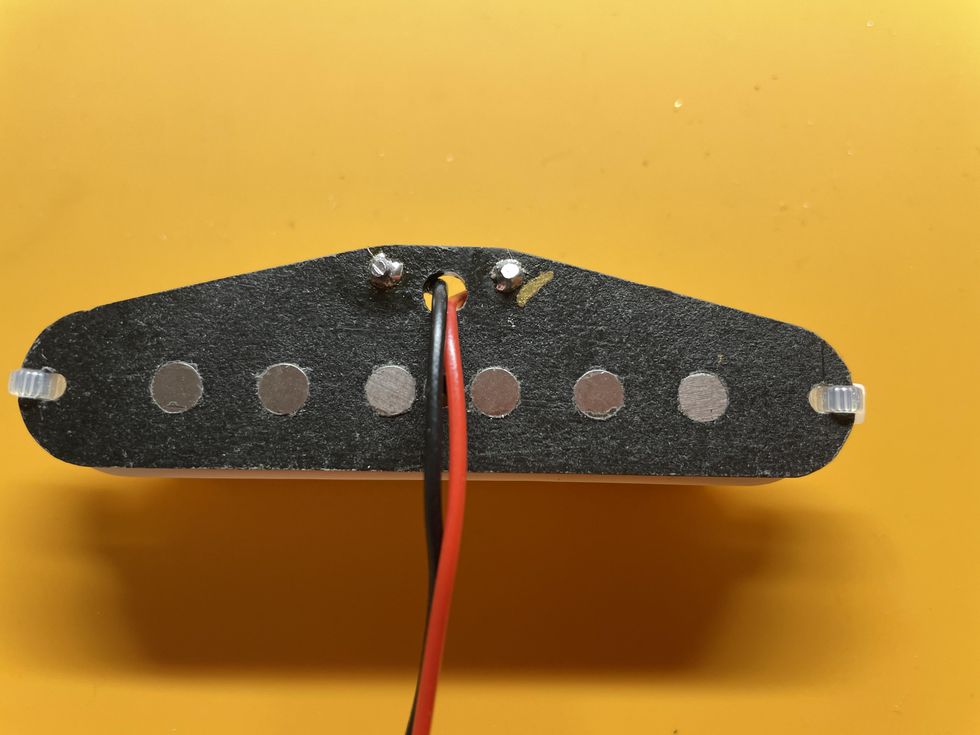
Photo 2
Courtesy of SINGLECOIL (www.singlecoil.com)
2. Have a look where the hot (usually white, yellow, or red) and the ground (usually black) wires are connected to the pickup and mark one of them. I always mark the hot connection by using a Sharpie, but you can also use a drop of nail polish, a small piece of masking tape ... be creative.
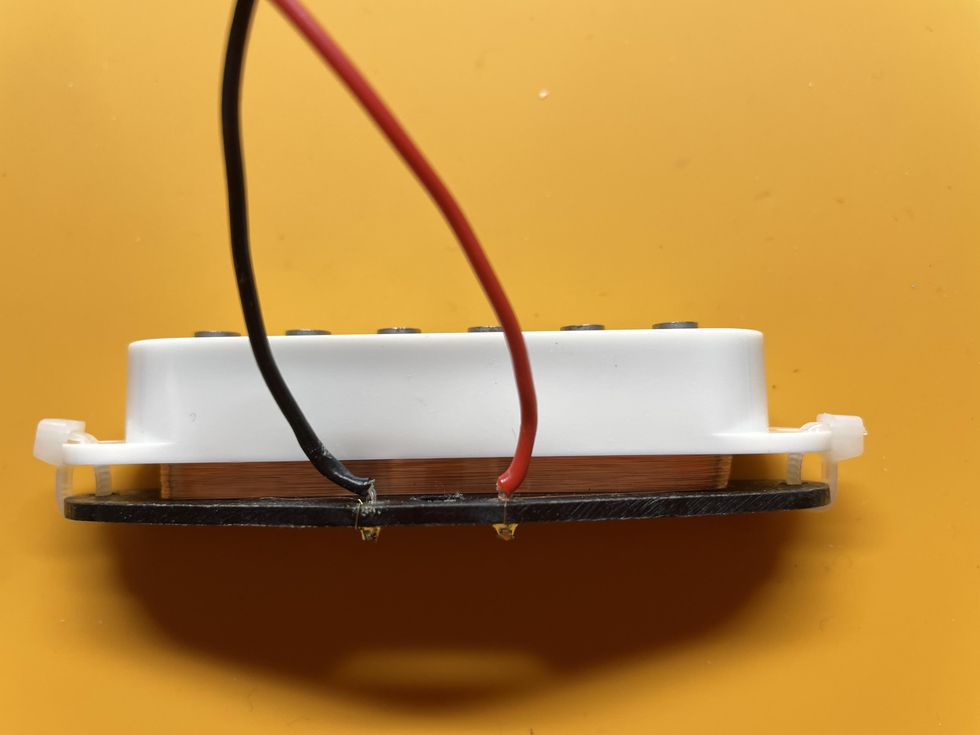
Photo 3
Courtesy of SINGLECOIL (www.singlecoil.com)
3. Measure the DCR (direct current resistance) of your pickup as a reference using your DMM (digital multimeter) and note it. After this is done, push the wires you want to replace upwards through the hole and pull them out, as shown in Photo 1, Photo 2, and Photo 3.
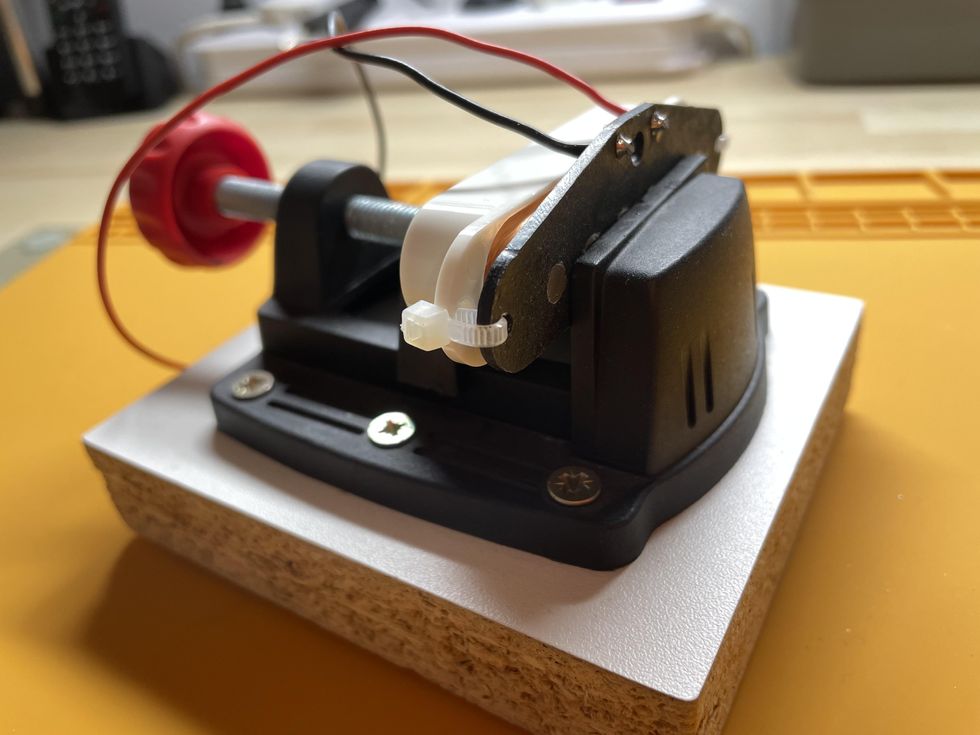
Photo 4
Courtesy of SINGLECOIL (www.singlecoil.com)
Now put the prepared pickup into a small vise and orient it so that you can look at the soldering terminals the two wires are connected to (Photo 4). Take care to not apply too much pressure with the vise: We only want to fasten the pickup, not break it.
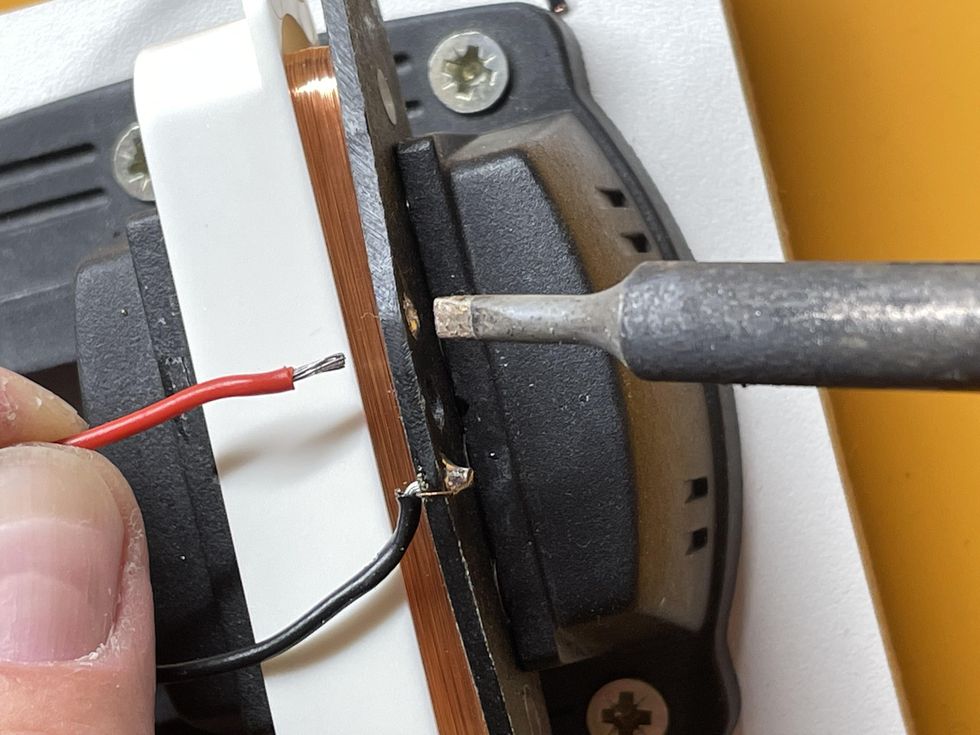
Photo 5
Courtesy of SINGLECOIL (www.singlecoil.com)
Pre-tin the tip of your soldering iron and heat up the soldering spot while gently pulling on the wire until it comes out (Photo 5). This should not take longer than 2 to 3 seconds. A small chisel-shaped soldering tip is my weapon of choice. Warning: Don’t touch the bobbin of the pickup with the soldering iron—it will melt. Repeat this procedure with the second wire.
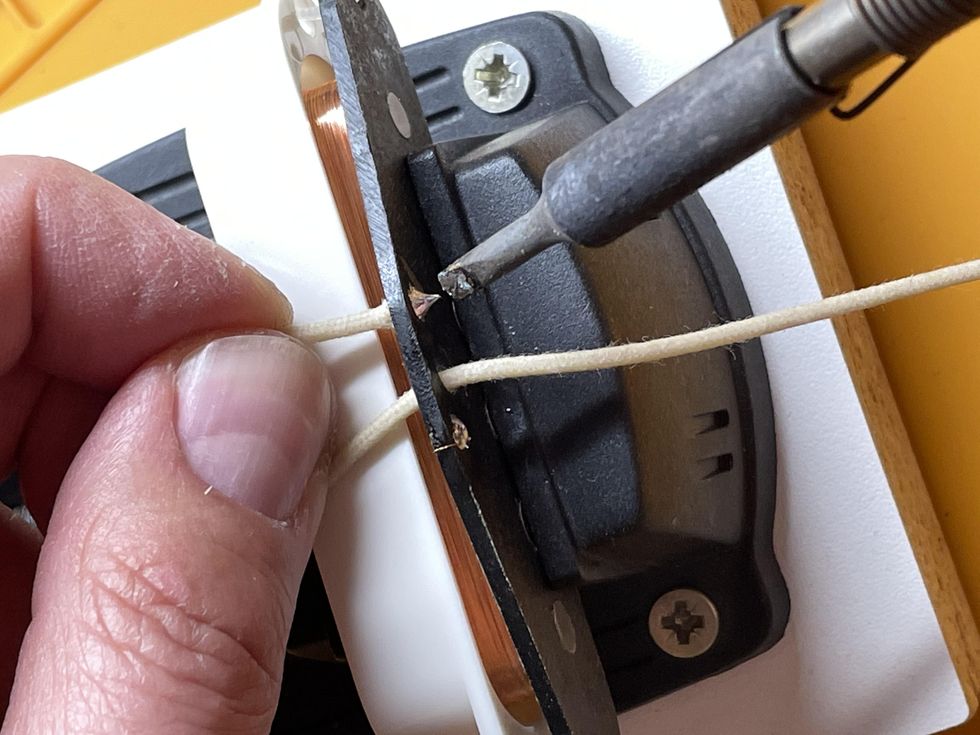
Photo 6
Courtesy of SINGLECOIL (www.singlecoil.com)
Strip the new wire, pre-tin it, pull it through the hole, and bend it so the stripped part will touch the soldering spot (Photo 6). I prefer to guide the wire with my hands, but you can also use tweezers for this. Now pre-tin the tip of your soldering iron and heat up the soldering spot while gently pushing the wire until it is in. This should not take longer than 2 to 3 seconds to perform. Repeat this procedure with the second wire. Cut off the excess wire with a small side cutter.
To check your work, measure the DCR of the pickup and compare it to the value you measured before. Small differences are okay and can be caused by the higher temperature directly after soldering to the pickup, or the new wires can be a different type and might have a different length. If you read zero or infinite, there is something wrong and you should check your soldering spots.
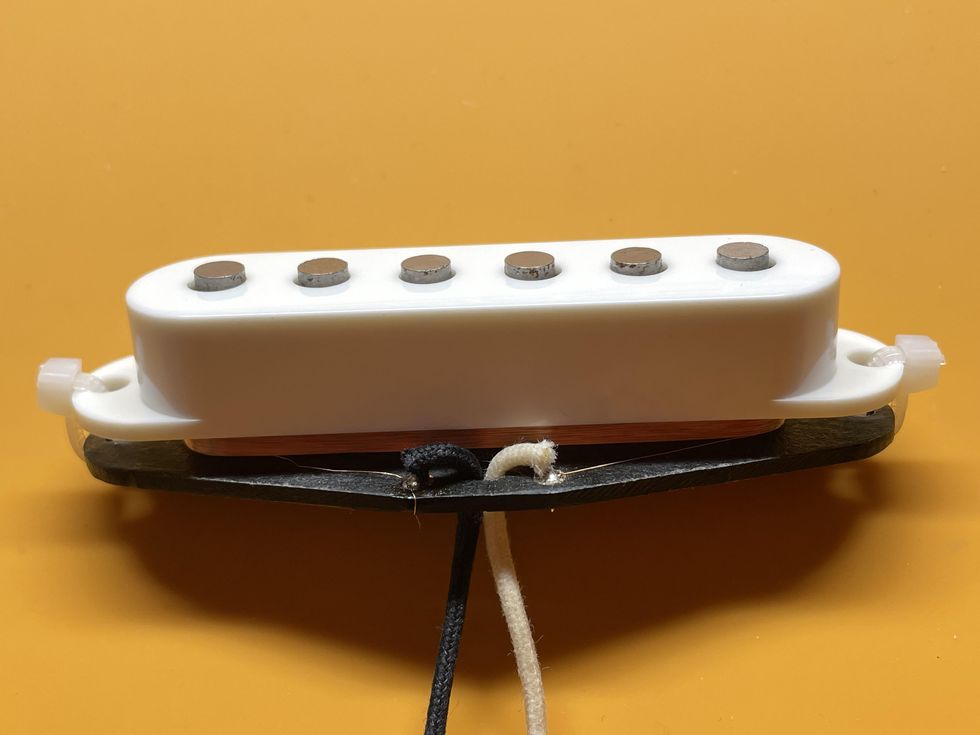
Photo 7
Courtesy of SINGLECOIL (www.singlecoil.com)
Take off the pickup cover you put on the pickup to protect the winding, and you are done (Photo 7). Congratulations! If you’re doing this regularly, you’ll become better and faster over time, so don’t worry if it takes longer than expected the first time.
Bonus: Staggering Pickup Wires
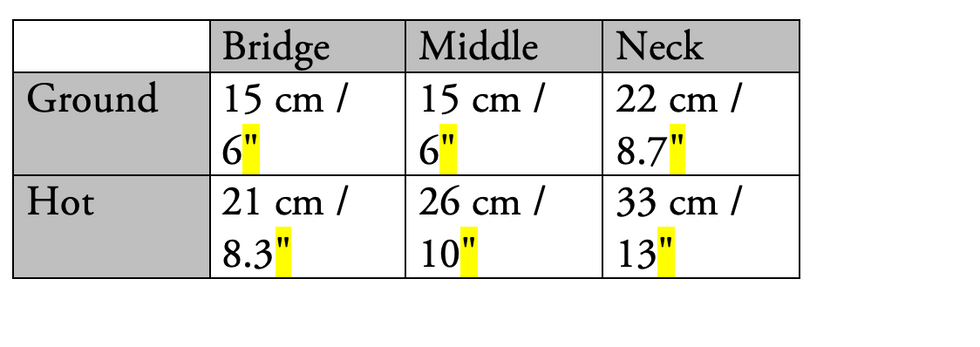
Staggering pickup wires is a neat trick to not waste any wire, which can be a real issue when using expensive audiophile wires. Pickup manufacturers usually apply the same wire length to all pickups, no matter if it’s a bridge, middle, or neck pickup. And they’re usually way too long, resulting in a good portion of obsolete, snipped off wires. To avoid this, you can add only the length of new wire you really need. Here are the values I use in the shop for a standard Stratocaster:
That’s it for this month. Next, we’ll continue with our guitar relic’ing project, so stay tuned. Until then ... keep on modding!
- Three Must-Try Guitar Wiring Mods - Premier Guitar ›
- Mod Garage: Four Ways to Configure a 4-Conductor Humbucker ... ›
- Mod Garage: Telecaster Series Wiring - Premier Guitar ›
-
Crank the heat! PG's John Bohlinger plugs into the boutique-built Sterling Vermin, a modern twist on the iconic Rat distortion. Hear it rip through Strats, Teles, and a Les Paul with classic snarl and smooth silicon/BAT41 clipping.
Sterling Vermin RAT
The Sterling Vermin was born from a desire for something different — something refined, with the soul of a traditional RAT pedal, but with a voice all its own.
Built in small batches and hand-soldered in ACT’s Jackson, Missouri headquarters, the Sterling Vermin is a work of pure beauty that honors the brand legacy while taking a bold step forward for creativity.
The Sterling Vermin features the LM741 Op-Amp and a pair of selectable clipping diodes. Players can toggle between the traditional RAT silicon diode configuration for a punchy, mid-range bite, or the BAT41 option for a smoother, more balanced response. The result is a pedal that’s equally at home delivering snarling distortion or articulate, low-gain overdrive, with a wide, usable tonal range throughout the entire gain spectrum.
The pedal also features CTS pots and oversized knobs for even, responsive control that affords a satisfying smoothness to the rotation, with just the right amount of tension. Additionally, the polished stainless-steel enclosure with laser-annealed graphics showcases the merging of the pedal’s vintage flavor and striking design.
From low-gain tones reminiscent of a Klon or Bluesbreaker, to high-gain settings that flirt with Big Muff territory — yet stay tight and controlled — the Sterling Vermin is a masterclass in dynamic distortion. With premium components, deliberate design and a focus on feel, the Sterling Vermin is more than a pedal, it’s a new chapter for RAT.
The Sunset is a fully analog, zero latency bass amplifier simulator. It features a ¼” input, XLR and ¼” outputs, gain and volume controls and extensive equalization. It’s intended to replace your bass amp both live and in the studio.
If you need a full sounding amp simulator with a lot of EQ, the Sunset is for you. It features a five band equalizer with Treble, Bass, Parametric Midrange (with frequency and level controls), Resonance (for ultra lows), and Presence (for ultra highs). All are carefully tuned for bass guitar. But don’t let that hold you back if you’re a keyboard player. Pianos and synthesizers sound great with the Sunset!
The Sunset includes Gain and master Volume controls which allow you to add compression and classic tube amp growl. It has both ¼” phone and balanced XLR outputs - which lets you use it as a high quality active direct box. Finally, the Sunset features zero latency all analog circuitry – important for the instrument most responsible for the band’s groove.
Introducing the Sunset Bass Amp Simulator
- Zero Latency bass amp simulator.
- Go direct into the PA or DAW.
- Five Band EQ:
- Treble and Bass controls.
- Parametric midrange with level and frequency controls.
- Presence control for extreme highs.
- Resonance control for extreme lows.
- Gain control to add compression and harmonics.
- Master Volume.
- XLR and 1/4" outputs.
- Full bypass.
- 9VDC, 200mA.
Artwork by Aaron Cheney
MAP price: $210 USD ($299 CAD).
PG contributor Tom Butwin reveals his favorite songwriting secret weapon: the partial capo. Watch how the Shubb C7 and C8 can simulate alternate tunings without retuning your guitar—and spark fresh creative ideas instantly.
Shubb C8b Partial Capo for Drop-D Tuning - Brass
The C8 covers five of the six strings, leaving either the low E or high E string open, depending on how it's positioned.
- Standard setup: Placed on the 2nd fret while leaving the low E string open, it simulates Drop D-style sounds—except you're still in standard tuning (key of E). You get that big, droning bass feel without retuning.
- Reverse setup: Flipping the capo allows the high E string to ring, giving you shimmering drones and new melodic options across familiar chord shapes.
- A flexible tool that lets you simulate alternate tunings and create rich sonic textures—all while keeping your guitar in standard tuning.
Shubb C7b Partial Capo for DADGAD Tuning - Brass
The C7 covers three of the six strings—either D, G, and B or A, D, and G—depending on how it's flipped.
- Typical setup (D, G, B): Creates an open A chord shape at the 2nd fret without needing your fingers. This frees you up for new voicings and droning notes in the key of A.
- Reversed setup (A, D, G): Gets you close to a DADGAD-style tuning vibe, but still keeps you in standard tuning—great for modal, spacious textures often found in folk or cinematic guitar parts.
Use it alone or stack it with the C8 for wild, layered effects and truly out-of-the-box inspiration.
PRS Guitars celebrates 40 years with the limited edition McCarty SC56. Featuring vintage-inspired design and modern innovations, this single-cutaway guitar pays tribute to Ted McCarty and his impact on the industry. With only 400 pieces available, this instrument is a must-have for collectors and performers alike.
PRS Guitars today announced the 40th Anniversary McCarty SC56 Limited Edition. With a classic PRS single-cutaway body shape and carefully chosen specifications, the McCarty SC56 is both a tribute to tradition and a reliable tool for the modern performer. Only 400 pieces will be made.
“The SC56, signifying Singlecut and 1956, model is our most recent tribute to my late mentor Ted McCarty and his impact on the guitar industry. We started with our take on a classic late ‘50s singlecut body. 1956 marks the year that Ted first had guitars made with his newly coined 'humbucker' pickups. It also happens to be the year I was born. Bringing vintage design into the modern era, we loaded this model with our McCarty III pickups, meticulously designed to deliver warm, clear, vintage tone with exceptional note separation and dynamics,” said PRS Guitars Founder & Managing General Partner, Paul Reed Smith.
Anchored by a maple top and mahogany back, the 24.594” scale length and 22-fret Pattern Vintage neck work with Phase III non-locking tuners and PRS two-piece bridge to promote its musical sustain. The PRS McCarty III pickups are controlled by a simple layout — two volume controls, two tone controls, and a three-way toggle on the upper bout.
Single-cutaway guitars are known to be heavier than their double-cutaway counterparts. The McCarty SC56 Limited Edition design incorporates weight-relief, decreasing the weight of the guitar by about 2/3 of a pound, while maintaining several points of attachment between the guitar top and back to eliminate the “hollow” sound of the cavities and promote tone transfer.
With appointments like binding on the fretboard, classic bird inlays, and a vintage-inspired nitrocellulose finish, the 40th Anniversary McCarty SC56 Limited Edition blends heritage and innovation into a timeless instrument.
PRS Guitars continues its schedule of launching new products each month in 2025.
For more information, please visit prsguitars.com.