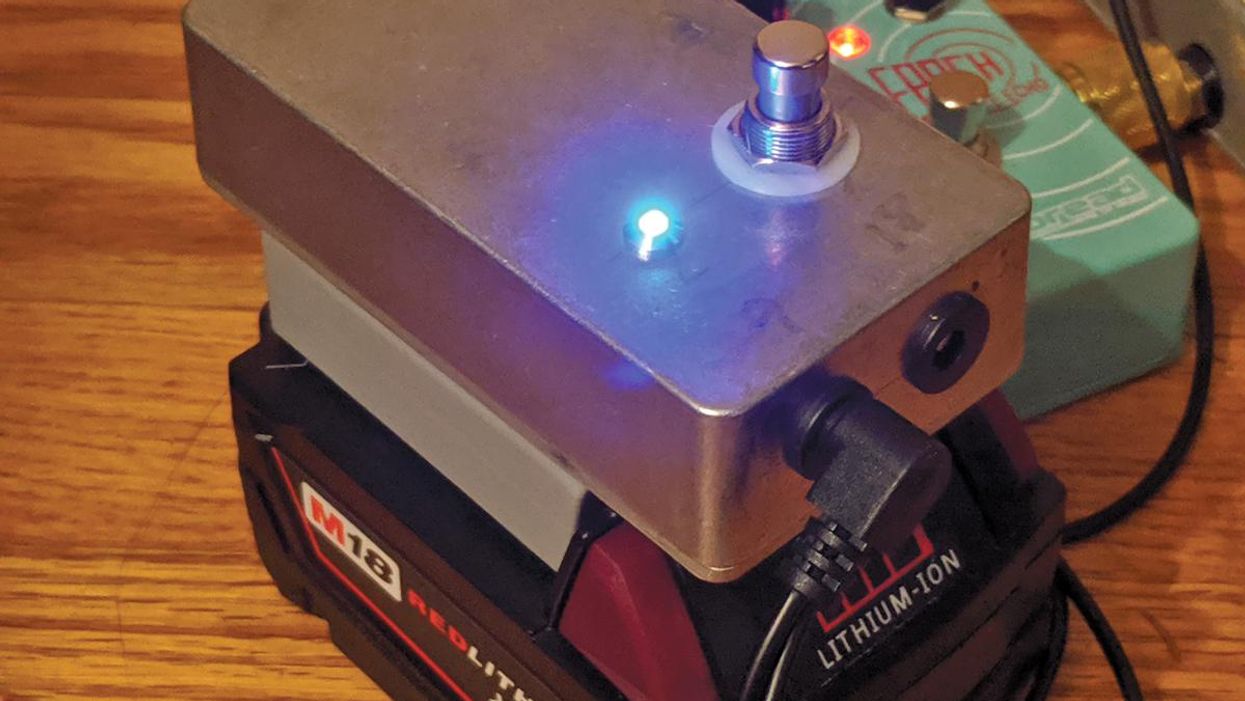
Looking for more classic growl in a simple, contemporary overdrive? CopperSound’s Alex Guaraldi explains how to swap the clipping LEDS in an ultra-affordable EarthQuaker Devices Plumes for germanium diodes, in nine easy steps.
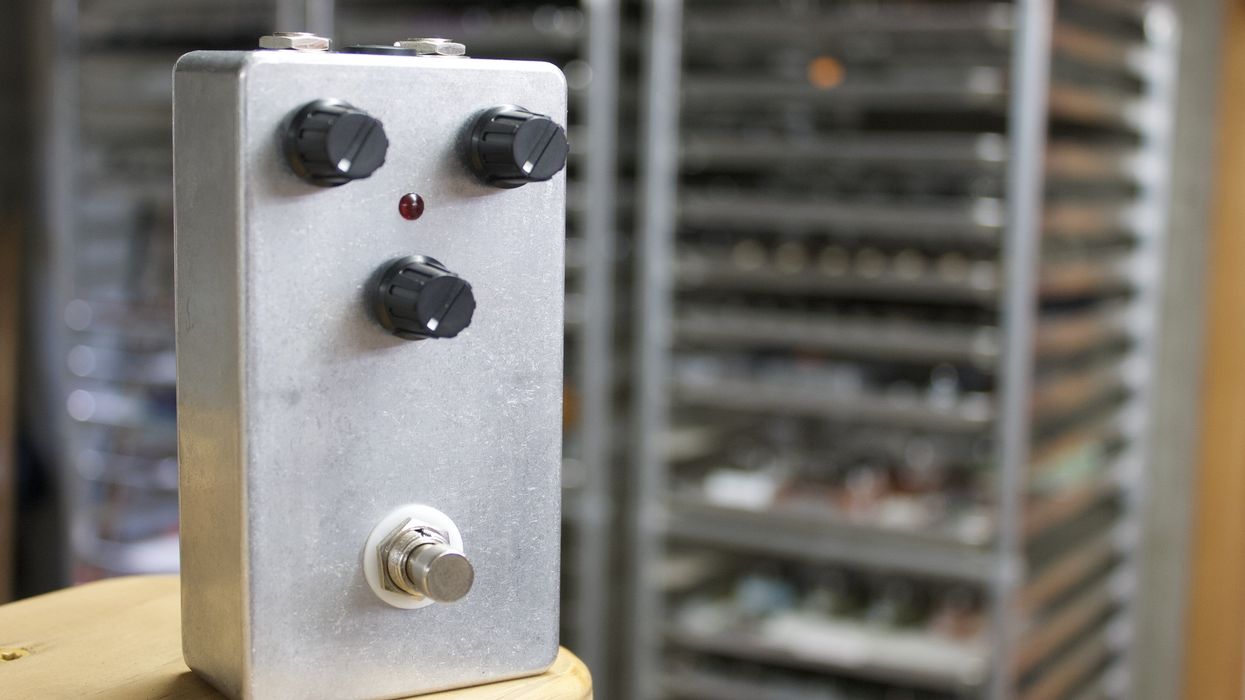
Pedals offer a lot of opportunities for DIY projects. One of the coolest and easiest is removing the LED clipping diodes in a modern overdrive pedal and replacing them with old-school-sounding germanium ones. The result will be a more raw, aggressive tone. For this project, I used the popular and affordable EarthQuaker Devices Plumes ($99 street). Whether your version is the original with through-hole-type components or the current model with surface-mount components, you’ll easily be able to perform this mod because both versions contain through-hole-type LEDs.

Tools Required
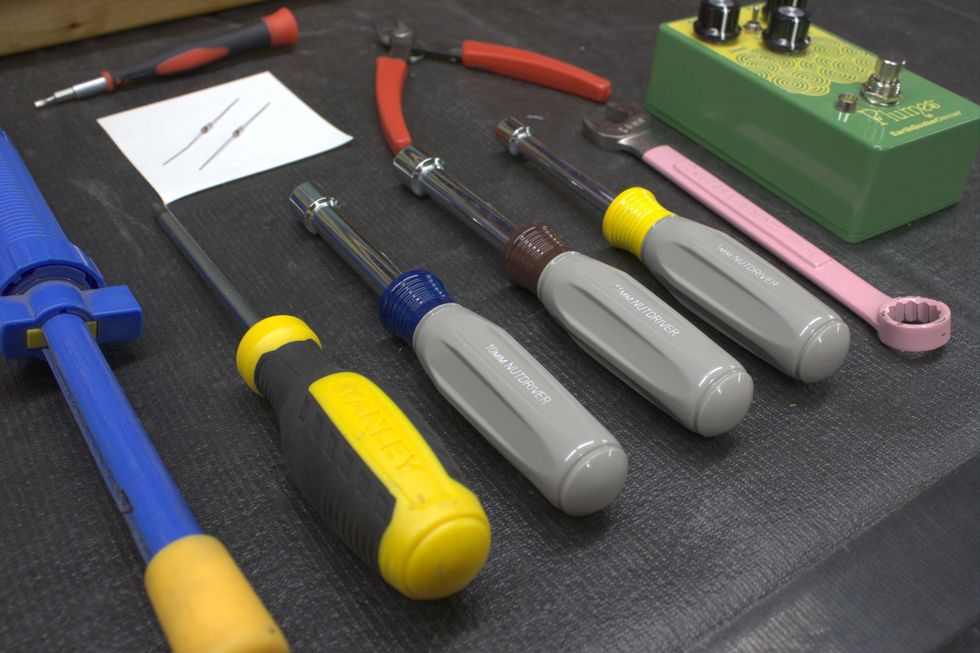
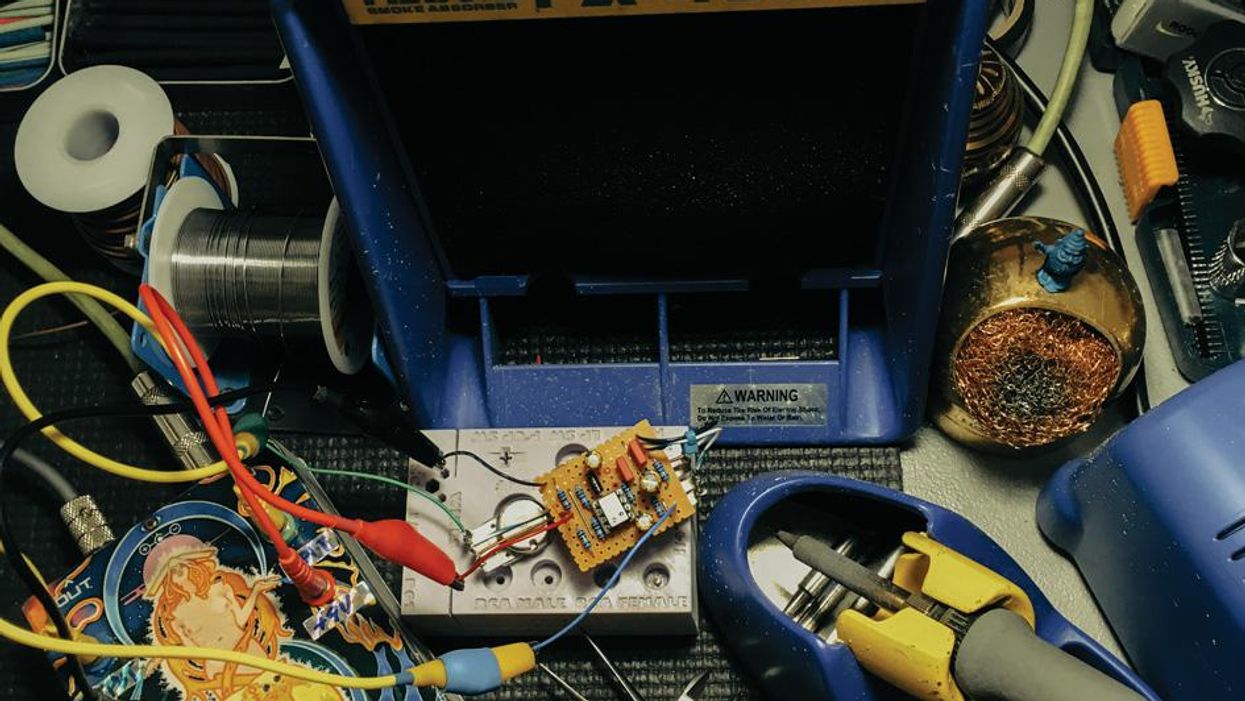
These tools and supplies are available online. StewMac, for example, sells soldering irons, a desoldering pump, and other tools for instrument work, while nut drivers and germanium diodes can be acquired via a number of sources, including Amazon.
• Soldering iron
• Solder
• Desoldering pump
• No. 2 Phillips-head screwdriver
• Small flathead screwdriver
• 8 mm (5/16") nut driver/wrench
• 10 mm (25/64") nut driver/wrench
• 11 mm (7/16") nut driver/wrench
• 14 mm(9/16") wrench
• Flush cutters
• Small needle-nose pliers
• Germanium diodes
Step 1: Remove back cover.
Using a No. 2 Phillips-head screwdriver, remove the four screws holding the back cover on.
Step 2: Remove external hardware.
The fastest way to swap diodes may be to do it from the component side, without even removing the circuit board from the enclosure. But for easier access and less difficulty, I’m going to remove the entire printed circuit board (PCB) from the enclosure. Since almost everything is mounted directly to the PCB, this should be easy.
Using a small flathead screwdriver, remove the knobs from the potentiometer shafts. Only loosen the knob set screws enough to slide the knobs off. No need to be searching the floor for tiny screws.
Next, using an 8 mm (5/16") nut driver or wrench, remove the nut from the toggle switch. Then, using a 10 mm (25/64”) nut driver or wrench, remove the three nuts and washers from the potentiometers.
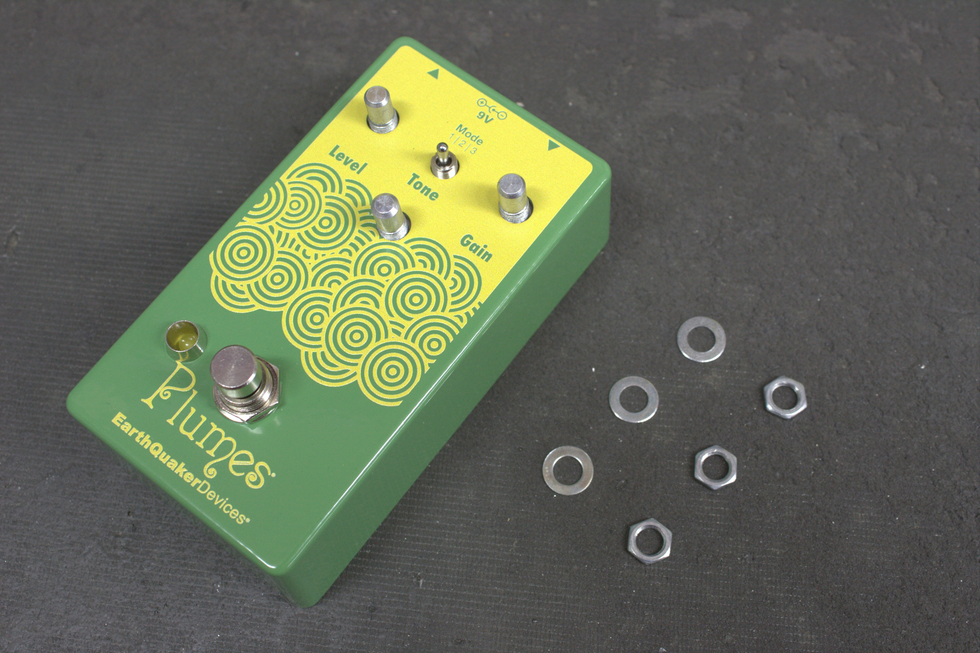
Photo 1
For the last piece of external hardware located on the face—the footswitch—we’ll actually want to go inside and disconnect its plug from the board.
On the bottom left side of the PCB, there will be a white rectangular connector. We need to unplug the female end from the male end. This is where small needle-nose pliers can help. A small screwdriver or even fingers may do the trick, too. Finesse is key. We don’t want to break the wires from the female connector.
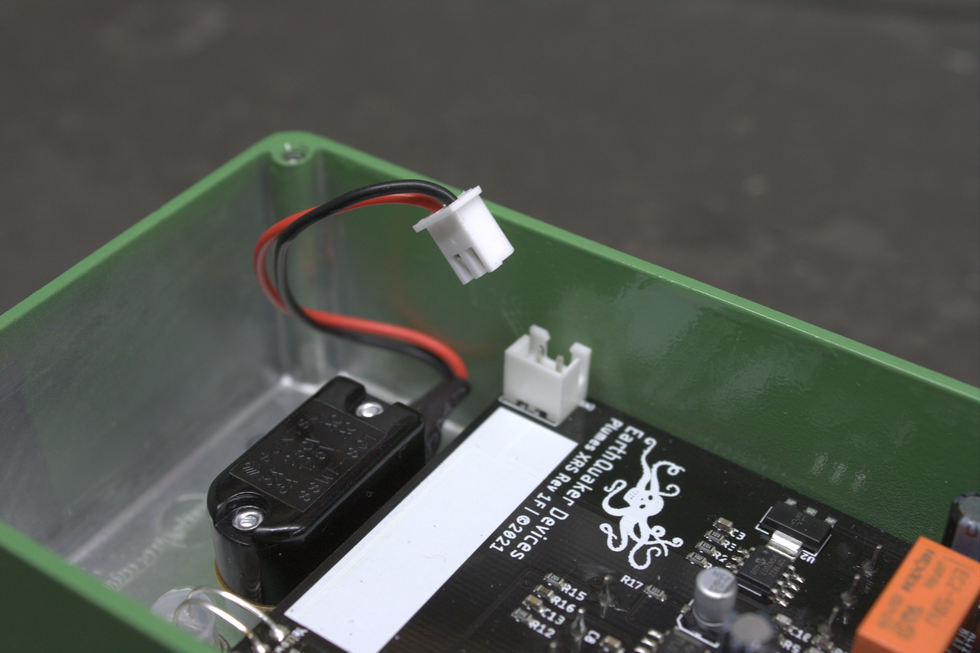
Photo 2
Once dislocated, we can go back to the face and remove the footswitch using a 14 mm (9/16") wrench.
Step 3: Remove external hardware on the back heel.
The last external hardware to remove is the audio jack bushings.
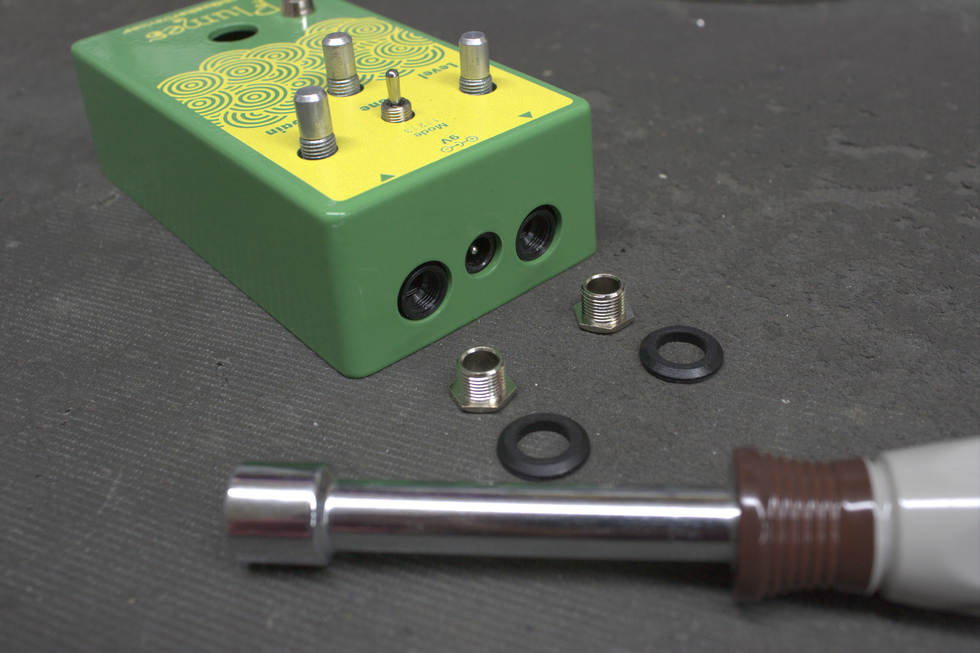
Photo 3
Removing these will allow the PCB to slide out of the enclosure. Using an 11mm (7/16") nut driver or wrench, remove the bushings and beveled washers from the audio jacks. Now, the circuit board is free to be removed from the enclosure.
Step 4: Remove the PCB from the enclosure.
The four controls and two audio jacks that interface with the enclosure may create some resistance when trying to remove the PCB. Typically, it’s from the collars of the audio jacks. Using a small screwdriver in one of the top corners and gently prying the PCB back usually does the trick.
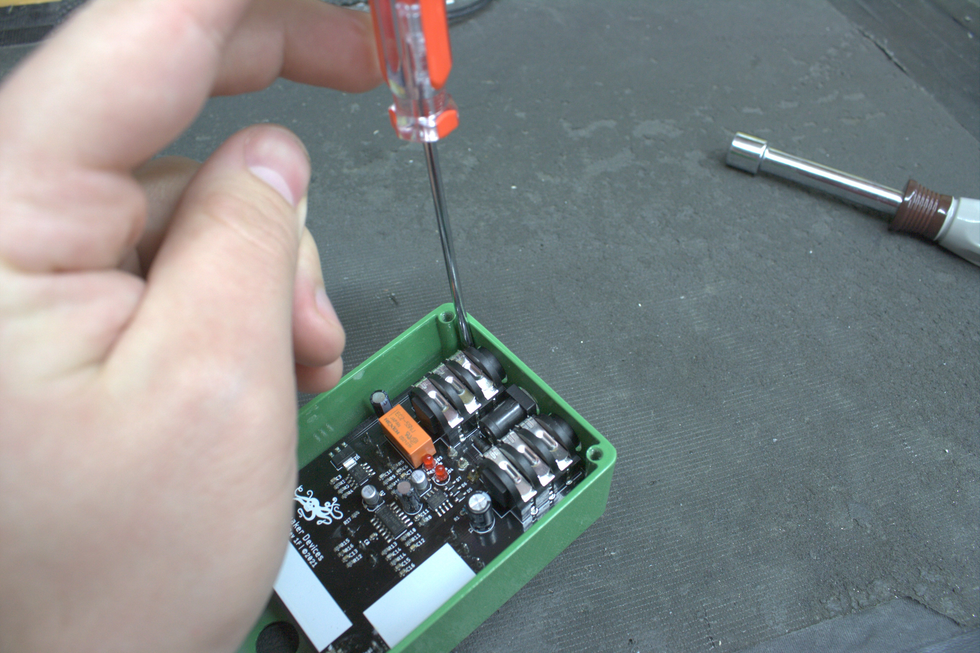
Photo 4
Step 5: Locating the clipping LEDs.
Now that the PCB is removed from the enclosure, we need to locate the clipping LEDs from the top side. They are the two small red silos at the center of the pedal.
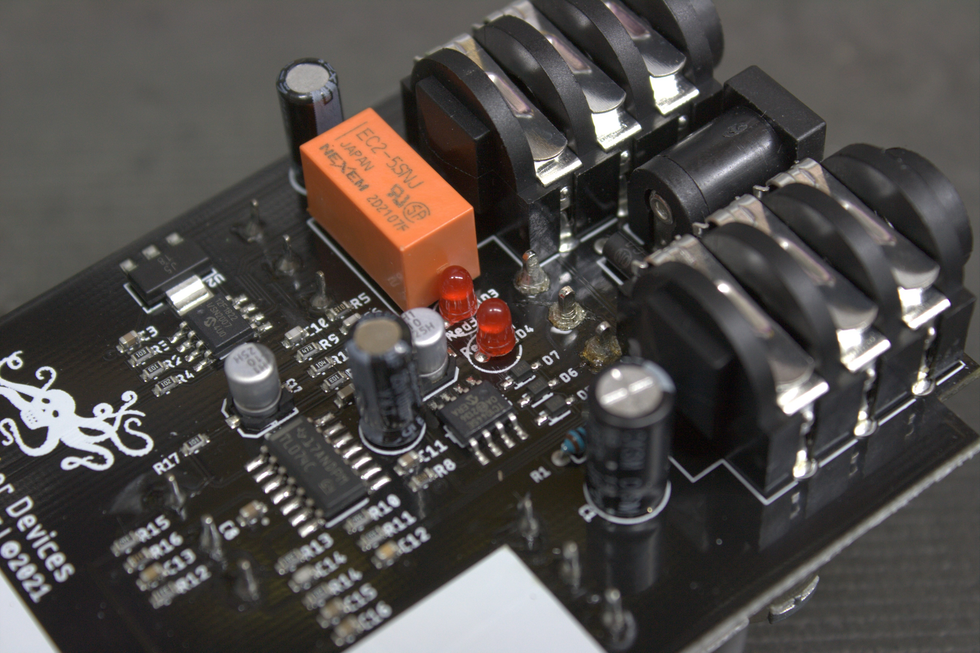
Photo 5
Then, we need to locate the pads (the exposed metal on the PCB) for them on the bottom side, and, once again, they are centrally located.
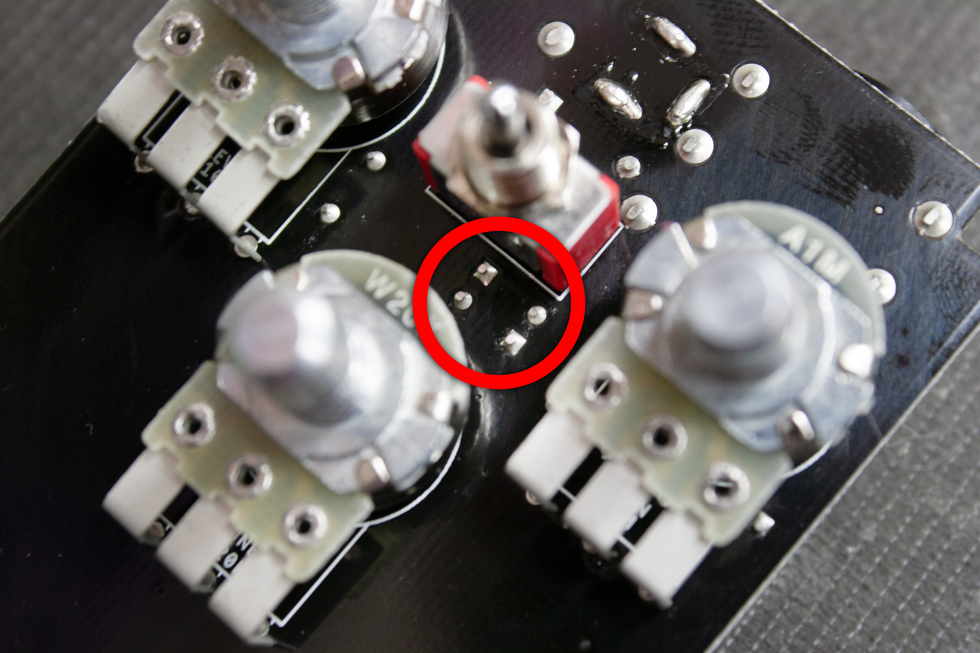
Photo 6
Step 6: Removing the clipping LEDs.
Now that we’ve located the LEDs, let’s go ahead and remove them. Quick note: The Plumes I worked on was a new unit consisting primarily of surface mount device (SMD) components. The LEDs are located between the pots and switch, so they can be difficult to access from the bottom side. The easiest way to remove the LEDs is to actually snip them from the top side, after noting how they are soldered in place.
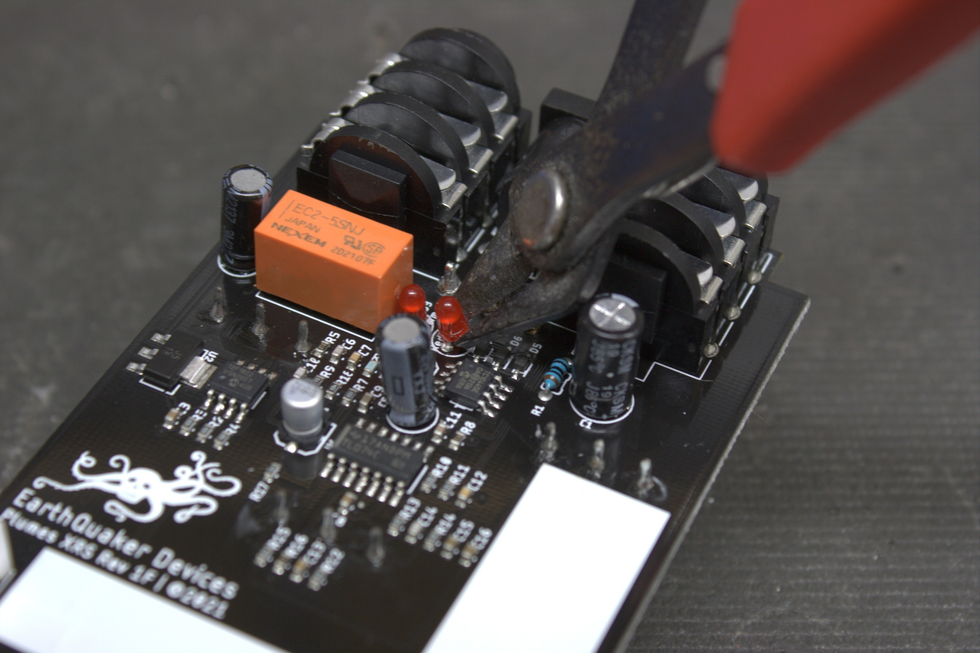
Photo 7
We’re not planning on using them, and they’re cheap enough to purchase again, so breaking them is no worry. We just need to be sure not to damage any of the nearby components. The best approach may be to break the shell/bulb of the LEDs. Doing this will expose the two leads.
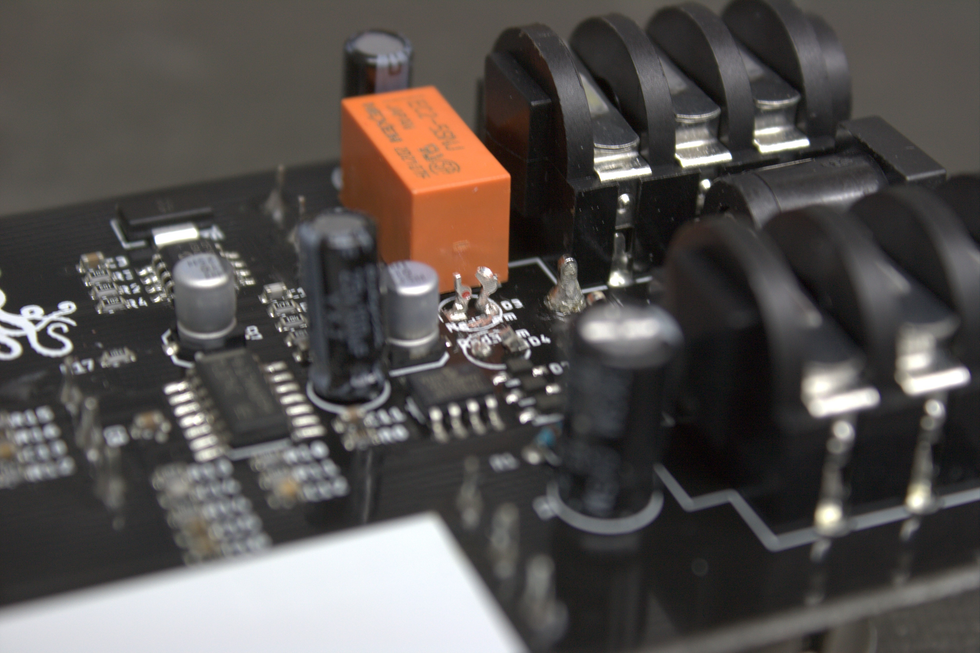
Photo 8
With these two leads exposed, we can easily remove each lead from the solder pads on the top side. Let’s apply heat to each pad and remove the leads with small needle-nose pliers. Jump to the alternate approach section in step seven if you experience solder removal difficulties. (Quick tips: Existing solder tends to flow better when a bit of fresh solder is applied to it. You’ll also want to heat the lead/pad and then grab the lead with the pliers. Grabbing the lead with the pliers first will take longer because the heat will transfer to the metal of the pliers. Don’t apply heat to a solder pad longer than needed. Doing this can compromise the pad.)
Once the leads are removed, we need to remove the remaining solder from the pads. This is where the desoldering pump (commonly referred to as a “solder sucker”) comes in. Apply a bit of fresh solder to the pads and remove it using the pump. YouTube is your friend here, for some quick desoldering pump lessons.
Step 7: Adding germanium diodes.
Check the polarity of the diode. For this mod, I chose 1n34a diodes, which are very common and available on Amazon. These diodes are polarized and have a positive and negative side. On the 1n34a, the negative lead is designated by the black band that wraps around the body of the diode (this is not the case for all germanium diodes). On PCBs, square pads denote positive. However, for the diode package that we’re adding, the square pad is negative.
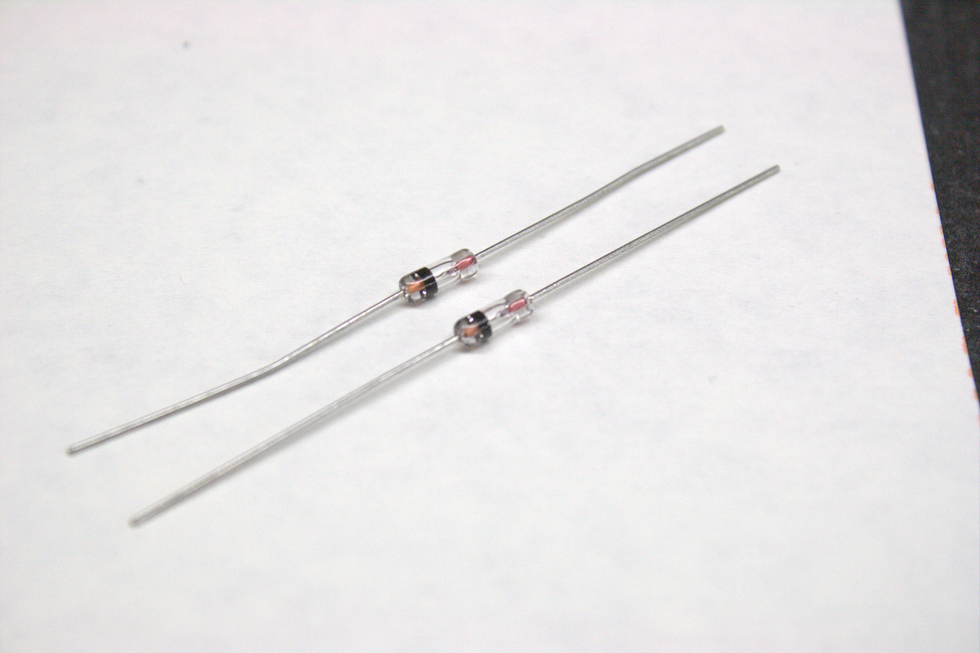
Photo 9
Using Photo 10 for reference, gently bend one of the diode legs so that it’s parallel with the body of the diode. Place the bent legs into their correct pads—the negative side of the diode will go into the square pad and the positive into the circlular pad. Solder the pads from the bottom side of the PCB and snip the excess leg length with a pair of flush cutters. The excess leg length can also be removed with needle-nose pliers by bending the legs back and forth several times.
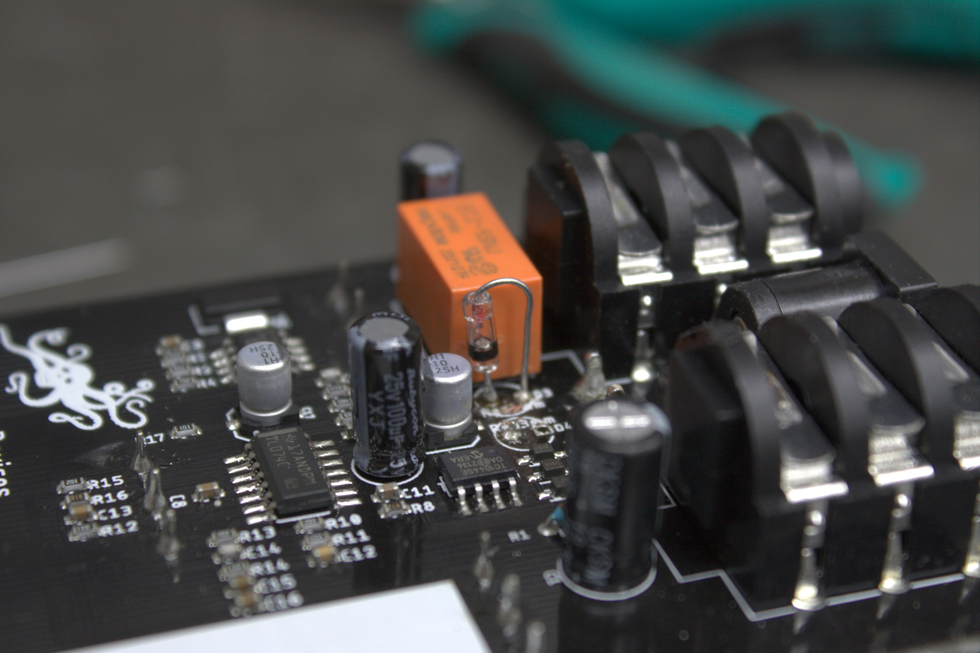
Photo 10
Alternate approach: If you’re experiencing trouble getting the remaining solder out of each pad, there’s a different approach to try. This approach may actually be helpful for this particular mod, because the pad spacing is small. If a pad connects to a ground plane (a layer of copper typically the size of the entire PCB that connects directly to the main ground pin on the DC jack) or several locations (other components in the schematic) it will require more heat because the applied heat wants to travel to all the connected areas. Typically, with clipping diodes, only one pad will experience this and give desoldering difficulties. In such a case, follow these steps:
1. Establish which pad has remaining solder. For this mod, the square pads are the positive pads, because they hosted LEDs. The diodes we’re adding want to have the negative side go into the square pad.
2. Cut the negative side of the germanium diode lead down to about 5 mm length. The negative side on the 1n34a is the lead closest to the black line indicator seen in Photo 9.
3. Heat the pad that has remaining solder in it and drop the short side lead into the solder.
4. Bend the other lead over like a horseshoe and mate it with the desoldered pad. (See Photo 10)
5. Solder the second side.
6. Repeat for the second diode, keeping in mind that the polarity of the diode needs to be opposite of the first diode that we soldered in as seen in Photo 11.
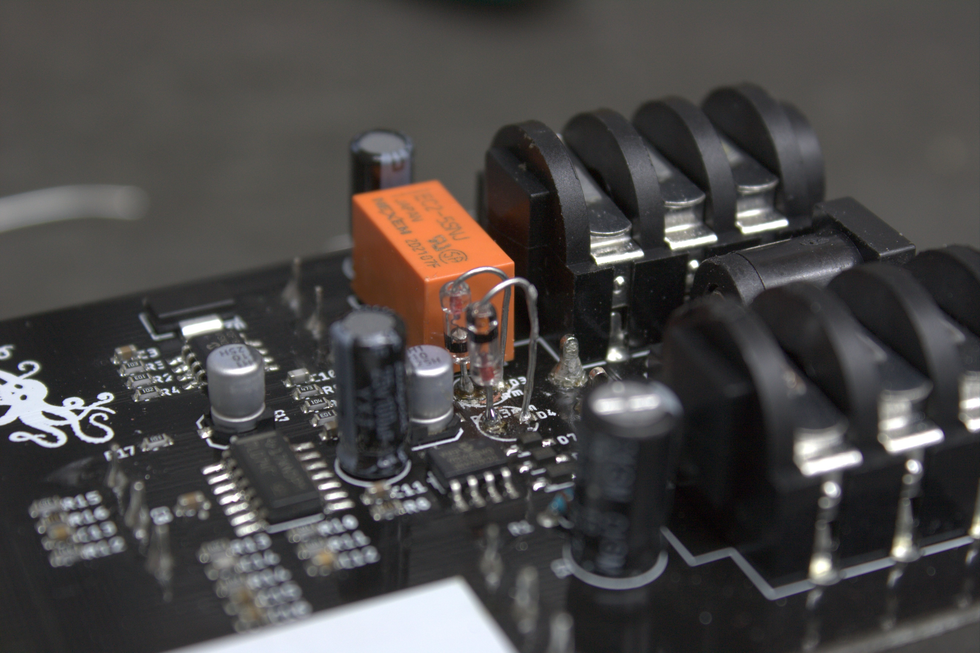
Photo 11
Step 8: Test.
Before putting everything back together, plugging the unit in as-is can be helpful. This way, if it isn’t working, we can go back and look at solder joints and any potential issues.
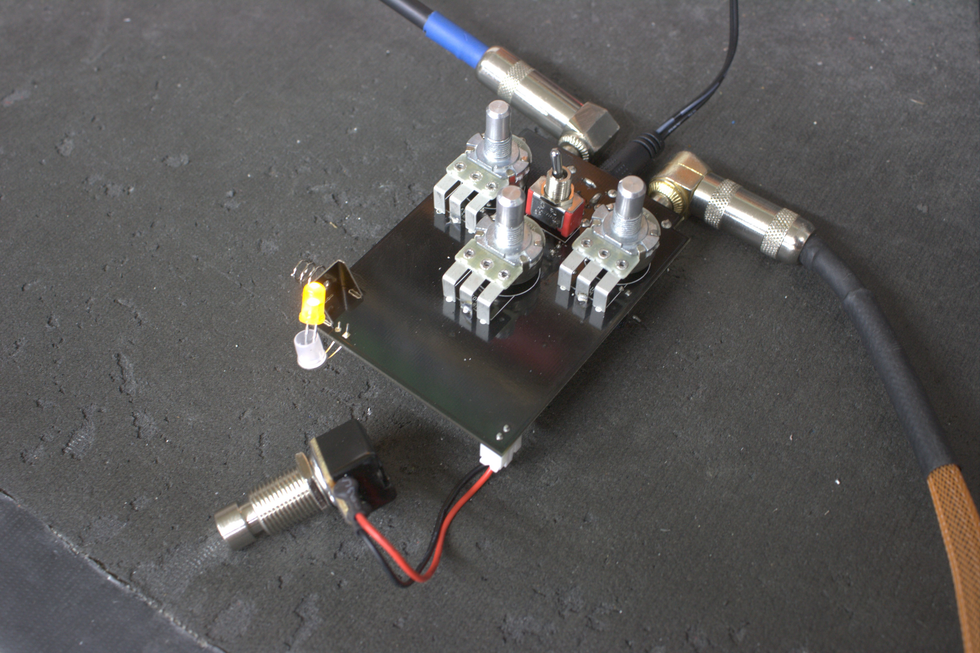
Photo 12
Step 9: Put everything back together.
Simply reverse the disassembly steps and enjoy!
A final note: If you love DIY projects or are interested in learning pedal design, my company, CopperSound, has a DIY section on its website, which also includes links to other DIY dealers. We offer integrated breadboards, component substitution boxes, adaptors for toggle switches, and even solder dispensers. For more information, please check out coppersoundpedals.com/DIYVernon Reid's signature Reverend is equipped with Korina, ebony, Railhammer Pickups, and Floyd Rose for punchy tones.
From the vivid imagination of Vernon Reid comes the Totem Series of Reverend Vernon Reid guitars. A sleek body features graphics inspired by Carl Jung's Collective Unconscious Theory, Joseph Campbell's The Hero's Journey, and artists Jean-Michel Basquiat and Romare Beardon. West African Adinkra symbols adorn the pickups and headstock, while American Hobo symbols grace the fretboard. Africana and Americana symbolism meld with profound graphics, conjuring vivid images that speak to humankind's perilous, yet necessary journeys in three different graphic designs: The Talisman, The Mystery Tramp, and The Shaman.
While visually stunning, these instruments are also refined tools of the trade. The recipe of Korina, ebony, and Railhammer Pickups, coupled with the sheer metallic mass of the Floyd Rose, serves up a tone best described as punchy. Harmonics pop, single notes sing, and chords ring with tasty overtones - delivering that knockout punch whether you're playing clean funk or heavy rock. The Reverend Vernon Reid Signature Totem Series guitars are genuinely collectible art pieces that sound and play as amazing as they look.
The Reverend Vernon Reid Signature Totem Series Guitars are now available through any Reverend Authorized Dealer.
For more information, please visit reverendguitars.com.
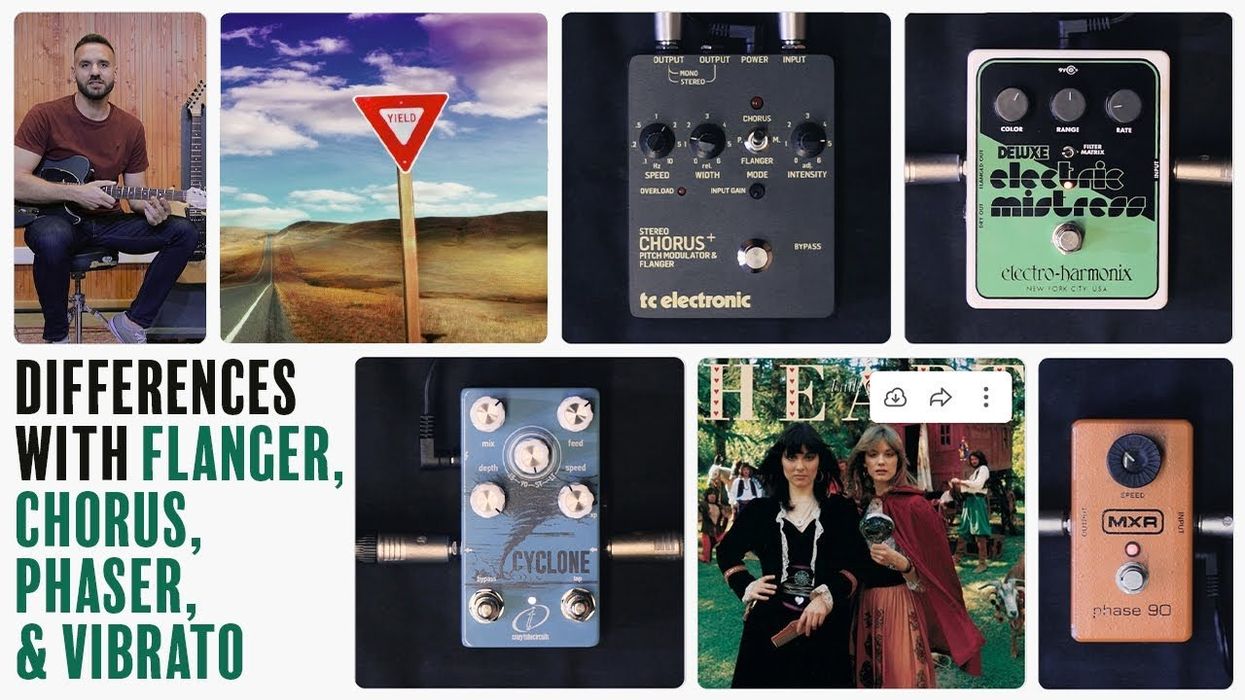
Ex-B-52s member, composer, and NYC music scene veteran Pat Irwin loves pairing EHX pedals with keyboards—and recollecting good times with his late guitar virtuoso friend.
I’ve got a thing for Electro-Harmonix effects boxes. I’ve got a Crying Tone Wah that’s the coolest, a 16 Second Digital Delay, and a Deluxe Memory Man. All have made their way onto my ambient country band SUSS’s new record, Birds & Beasts. And currently a Big Muff, two Freeze Sound Retainers, and a Mel9 Tape Replay Machine are on my pedalboard. Here’s the thing: I like using them on keyboards.
I remember spending one cold winter night recording keyboards for a track called “Home” that made it onto Promise, the third SUSS album. I was playing a Roland Juno-106 through the Deluxe Memory Man while my bandmate Bob Holmes manipulated the delay and feedback on the pedal in real time. The effect was otherworldly. You can also hear the Crying Tone on SUSS’s “No Man’s Land” and “Train,” on Bandcamp. Sure, the guitars sound great, but those keyboards wouldn’t sound the same without the extra touch of the Crying Tone. I also used it on the B-52s’ “Hallucinating Pluto,” and it went out on the road with us for a while.
One of the first musicians I met when I moved to New York City in the late ’70s was the late, great Robert Quine. Quine and I would talk for hours about guitars, guitarists, and effects. I bought my first Stratocaster from Quine, because he didn’t like the way it looked. I played it on every recording I’ve made since the first Lydia Lunch record, 1980’s Queen Of Siam, and on every show with 8 Eyed Spy, the Raybeats, the B-52s, and my current bands PI Power Trio and SUSS. It was Quine who taught me the power of a good effects pedal and I’ll never forget the sessions for Queen of Siamwith the big band. Quine played everything through his Deluxe Memory Man straight into the recording console, all in one take except for a few touch ups here and there.
Quine and I used to go to Electro-Harmonix on 23rd Street and play through the boxes on display, and they let us pick out what we wanted. It’s where we first saw the 16 Second Digital Delay. That was a life-changer. You could make loops on the fly and reverse them with the flick of a switch. This thing was magical, back then.
“Quine played everything through his Deluxe Memory Man straight into the recording console, all in one take except for a few touch ups."
When I recorded a piece I composed for the choreographer Stephen Petronio and performed it at the Dance Theatre Workshop in Manhattan, I put everything through that 16 Second Digital Delay, including my clarinet. Later, when I recorded the theme for the cartoon Rocko’s Modern Life, I played all of the keyboards through the Deluxe Memory Man. Just when things would get a little too clean, I’d add a little more of the Memory Man.
I’m pretty sure that the first time I saw Devo, Mark Mothersbaugh had some Electro-Harmonix effects boxes taped to his guitar. And I can’t even think of U2 without hearing the Edge and his Deluxe Memory Man. Or seeing Nels Cline for the first time, blowing a hole in the universe with a 16 Second Digital Delay. Bill Frisell had one, too. I remember going into the old Knitting Factory on Houston Street and passing Elliott Sharp. He had just played and I was going in to play. We were both carrying our 16 Second Delays.
Who knows, maybe someone from another generation will make the next “Satisfaction” or “Third Stone from the Sun,” inspired to change the sound of a guitar, keyboard, or even a voice beyond recognition with pedals. If you check out Birds & Beasts, you’ll hear my old—and new—boxes all over it. I know that I won’t ever make a SUSS record or play a SUSS show without them.
Things change, rents go up, records are being made on computers, and who knows how you get your music anymore? But for me, one thing stays the same: the joy of taking a sound and pushing it to a new place, and hearing it go somewhere you could never have imagined without effects pedals.
The legendary Elvis sideman was a pioneer of rockabilly guitar, and his approach to merging blues and country influenced generations of guitar pickers. Here’s how he did it.
Chops: Intermediate
Theory: Beginner
Lesson Overview:
• Craft simple blues-based phrases that lie within the CAGED system.
• Understand how double-stops are used in rockabilly music.
• Improve your Travis picking.
Click here to download a printable PDF of this lesson's notation.
In 2016 we lost one of the most influential guitarists and unsung heroes the world has ever known. The driving force behind Elvis Presley’s first recordings, Winfield Scott “Scotty” Moore III helped shape the sound of rock ’n’ roll and inspire generations of fans. Born in 1931, Scotty caught his big break in 1954 when he was called to do a session with Elvis at Sam Phillip’s Sun Studio in Memphis. History was made that day when Elvis recorded “That’s All Right,” and for about four years, Scotty provided 6-string magic for such Elvis hits as “Heartbreak Hotel,” “Hound Dog,” and “Jailhouse Rock.”
A huge Chet Atkins fan, Scotty grew up listening to country and jazz. This blend would have a dramatic impact on his sound, as he would mix Travis picking with some ear-twisting note choices based on chords, rather than using an obvious scalar approach.
I used a thumbpick on the examples in this lesson to sound as authentic as possible. Using a thumbpick on some notes makes them stand out in comparison to those plucked with the remaining fingertips. Ex. 1 is a classic Scotty-type rhythm riff in E that uses some Travis picking. Play the notes on the 6th and 4th strings with your thumb, and use your index and middle fingers for the double-stops on the 3rd and 2nd strings. This is illustrated in the notation: Attack all the up-stemmed notes with your fingers and down-stemmed notes with your thumb.
Click here for Ex. 1
The next example (Ex. 2) reveals one of the more common elements of Scotty’s lead work: double-stops. It makes sense when you consider that Scotty often performed with just a bass player and drummer, so when it came time to play a solo, he needed to create a strong sense of harmony. The first three phrases begin in the “E” shape of the CAGED system before moving down to the “A” shape and returning to the “E” shape. Those last two measures sit squarely in the “E” shape at the 12th position.
Click here for Ex. 2
Ex. 3 returns to Scotty’s Travis-picking influence by outlining an A chord before leading the idea in a new direction with double-stops. The example begins in the “C” shape and resolves in the “E” shape, though this wouldn’t have meant anything to the legendary guitarist. However, his reliance on moving the five basic chord shapes around the neck is undeniable.
In this version of “Hound Dog”—a song originally recorded by Big Mama Thornton—Moore takes a bluesy solo starting at :45.
Click here for Ex. 3
The blues was an essential part of Scotty’s style, and Ex. 4 shows something he might play over the first eight measures of a blues in E. To use the moves in any given key, it’s important to understand how intervals work within a chord. For example, over the E7, I’m approaching the root and 3 (G#) with a half-step slide. With that information, you’re able to transpose this musical shape all over the neck. Approach each double-stop with this method, and you’ll get a lot of mileage out of this rather simple lick.
Click here for Ex. 4
Ex. 5 shows some of Scotty’s single-note ideas, though the phrase still begins with a double-stop on the top two strings to grab the listener’s attention. Measures three and four use a strange collection of notes. Scotty isn’t thinking of a scale here. The phrase begins with a bluesy flourish and a melodic descent to the root. When he gets there, he moves down a half-step to the 7 (an unusual note to play on a dominant chord, but if it sounds good, it is good), and then up again to resolve to the A chord.
Click here for Ex. 5
Scotty was also a big fan of using three-note grips. In Ex. 6, you can see how these ear-grabbing sounds would work over our blues progression. It begins with an E triad in the “D” shape. It’s genuinely amazing how many great chordal licks Scotty could come up with by using just a few chord forms.
Click here for Ex. 6
Ex. 7 is a little trickier, but a great example of how to move from an A chord to an E chord using some double-stops and single notes along with position shifts and sixths. This is very much a country phrase and evidence of the genre’s importance to the rockabilly sound.
Click here for Ex. 7
The final example (Ex. 8) is a longer, 20-measure piece outlining a full progression with Scotty's superb Travis-picking ideas. While this isn’t a column specifically on Travis picking with a collection of exercises to develop that skill, here are a couple of simple tips that should help you navigate this music.
First, focus only on the bass notes. The thumb needs to be automatic. Strive to put no thought into playing the bass part. This takes time but eventually you’ll be free to concentrate on the melody. The last part to absorb is the excellent ending chord. It’s a maj6/9 with the root on top—very common in the rockabilly style.
Click here for Ex. 8
From here it’s easy to hear Scotty’s immense influence on guitardom. It would be well worth your time to go down a rabbit hole of YouTube vids from the CAAS (Chet Atkins Appreciation Society) conference. Nearly every player from that scene owes a debt to Mr. Moore.
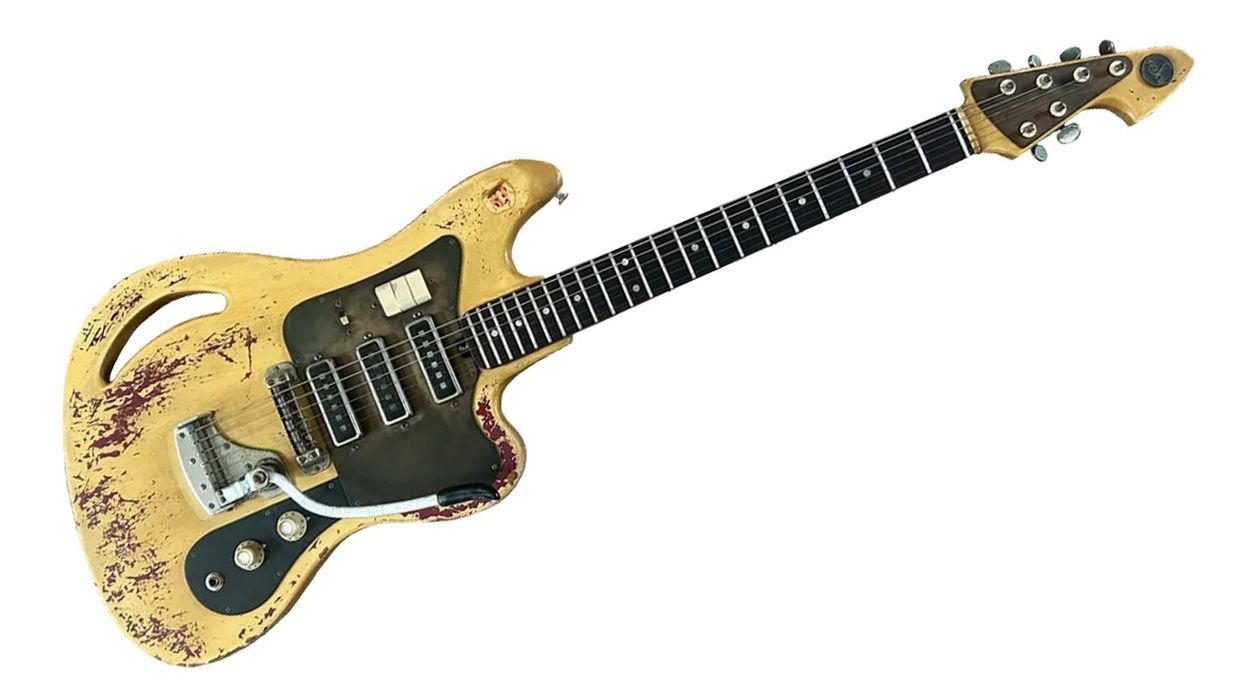
A reimagined classic S-style guitar with Fishman Greg Koch Signature pickups and a Wilkinson VS100N tremolo.
Designed to resonate with both tone and soul, this guitar boasts a slightly larger profile with a raised center section, offering superior dynamics and feel. A chamber beneath the pickguard enhances punch, while hum-free Fishman Greg Koch Signature Gristle-Tone pickups and a Wilkinson VS100N tremolo complete the package.
This marks the third signature model from Reverend Guitars for blues virtuoso Greg Koch, joining the revered Gristlemaster and Gristle-90. Each of these guitars, equipped with Fishman’s Greg Koch Signature pickups, embodies the relentless pursuit of tone, delivering inspiration to players who seek to push their own musical boundaries.
The Gristle ST has everything I need to engage in fiendish musical deeds. It has the classic sounds with a second voice to the pickups that adds more girthsome tones, a tremolo system that can take a licking and stay in tune, it’s a gorgeous looking and playing instrument that is just a little bit larger as to not look like a mandolin when played by a larger soul such as myself…I can dig it all! – Greg Koch
The Reverend Greg Koch Gristle ST is now available through any Reverend Authorized Dealer.
For more information, please visit reverendguitars.com.