Have you ever looked at the condition of a
guitar in a state of stunned disbelief and said to
yourself, “Wow, what was the owner thinking?”
That’s what happened to me as I laid my eyes
upon this 1956 Fender Telecaster for the first
time. At first glance, it looked to me like someone has been really excited about trying out
their brand new hand drill. Perhaps there was
some sort of fetish for drilling holes and then
plugging them with long sheet metal screws.
The body had multiple holes with screws threaded in, but fortunately the neck had only one hole
in the fingerboard between the 18th and 19th
fret slot. A customer found this hidden treasure
and shipped it to us for a complete restoration.
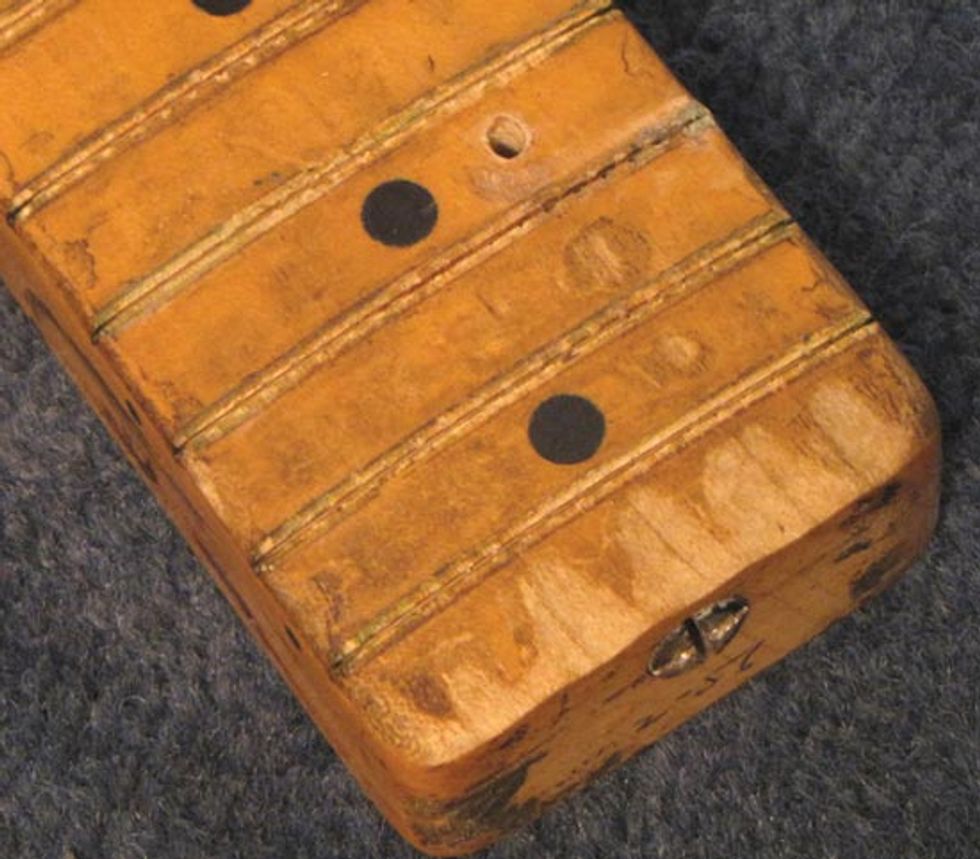
A screw hole in the fingerboard of our 1956 Telecaster, between the 18th and 19th fret.
Beauty of a ’56 Neck
This master-crafted, one-piece maple neck with a walnut filler strip on the back had a very pronounced “V” shape to it. It had that old school Fender feel with its classic 7-1/4" fingerboard radius, factory-installed low profile frets, and black dots. There was an assortment of areas showing wear extending through the finish and into the fingerboard wood. Penciled in below the Phillips truss rod adjustment nut was the month and year: “2-56.”
Hole-a-Riffic
The out-of-round hole in the fingerboard was 1/2" in length with a diameter slightly under 5/32". There were two ways for addressing this. The first was to remove a 1/4" width of top fingerboard wood with a chisel, squaring off the sides, and graft in a maple veneer starting from the edge of one fret slot and ending at the other. Our other option was to plug the hole with a maple dowel and size-to-fit a maple cap from old stock 1/16"-thick maple veneer for correct grain alignment and overall appearance.
In my opinion, either choice would not give 100 percent invisibility to the trained eye, but I decided to go with the second option, and began gathering all the tools and materials that we would need. The list included:
- 5/32" carbide drill bit
- 3/16" round hollowed out aluminum stock
- A drill press and mini-lathe
- #83322 silicone carbide circular sharpening bit by Dremel
- Maple dowel stock
- 1/16" maple veneer
- 1/4" punch and hammer
- Aged/tinted nitrocellulose lacquer
- An artist paintbrush
The neck was mounted to the drill press table and the previously drilled hole was drilled to true up the sides using a 5/32" carbide drill bit. We used our mini-lathe for making a maple plug to insert into the hole. We use the mini-lathe for an assortment of things in the shop. My favorite is making hard rock maple plugs for blown out screw holes on the neck heel. It’s a one-time procedure and you’ll never see the guitar back for that same repair again.
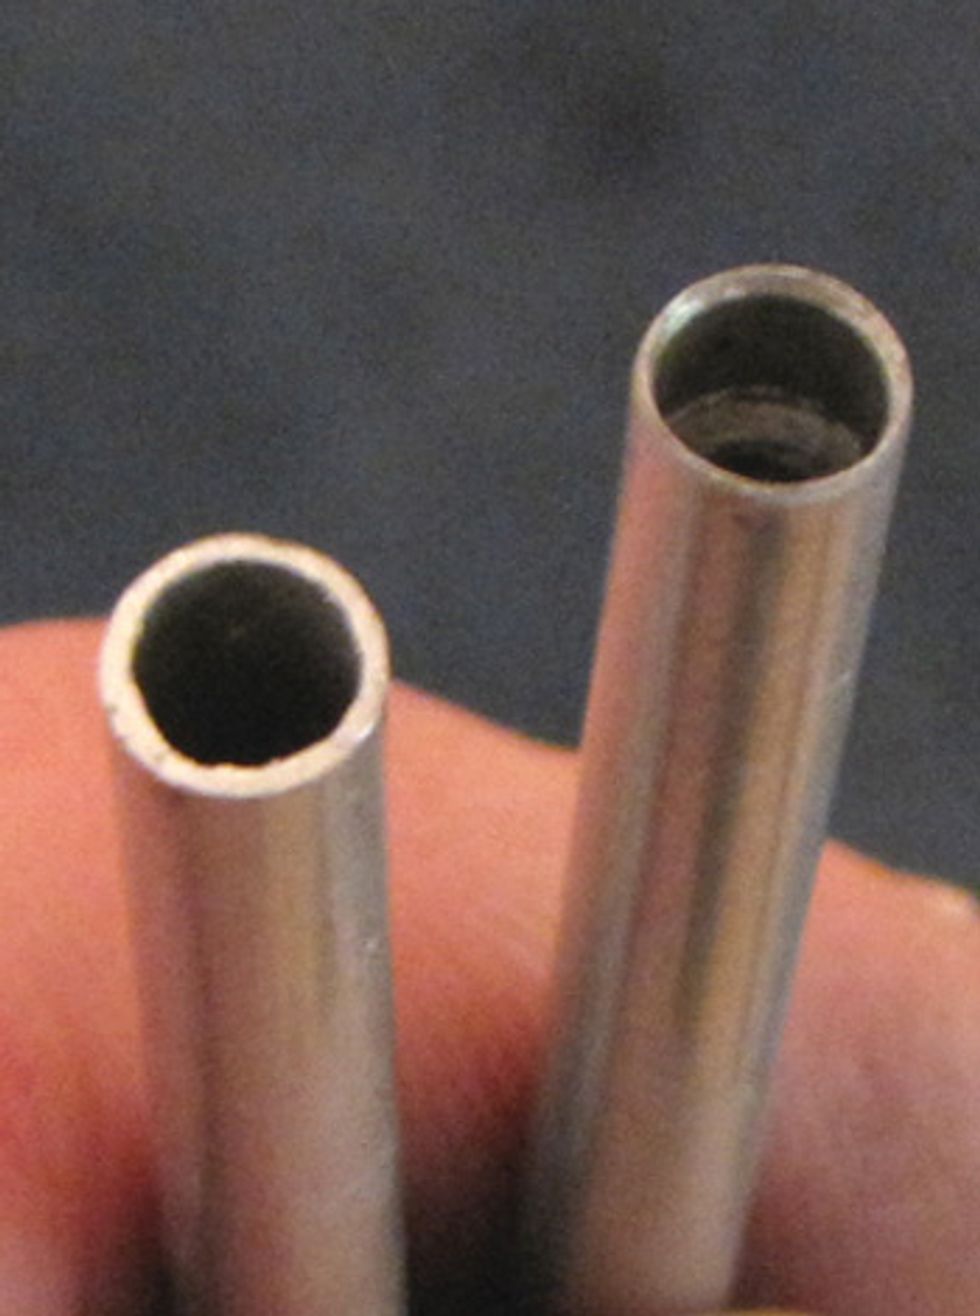
Our aluminum round stock, before (left), and after being hand-sharpened with a Dremel bit (right).
To make the maple cap, we used some 3/16" (outside diameter) round hollowed-out aluminum stock. I sharpened the inside edge using a #83322 Dremel bit, gently turning by hand. Once the 3" length aluminum stock was sharp, it was lightly clamped into the drill press chuck. The custom bit cut through the maple veneer and slightly into the soft backing mahogany reinforcement board as it finished its cut without damaging the previously sharpened edge. (Note: It’s a good idea when you’re making a specialized one-off part to make a few extras, just in case you will need one later on down the road.)
I used carpenter’s glue for gluing in the maple plug and cap. The cap was lightly pressure fit using a 1/4" punch and hammer. A damp Q-tip was used to moisten and raise the grain before we removed the micro-raised grain fibers very carefully with 400 grit production sandpaper. We applied a topcoat of finish, and then the tinted nitrocellulose lacquer finish was applied sparingly with an artist paintbrush. Very fine hairlines of wear were created with an old fill- looking shade inside those lines. For the final step, before the finish cured to 100 percent, the finish was lightly burnished with a lint-free cloth and 0000 steel wool.
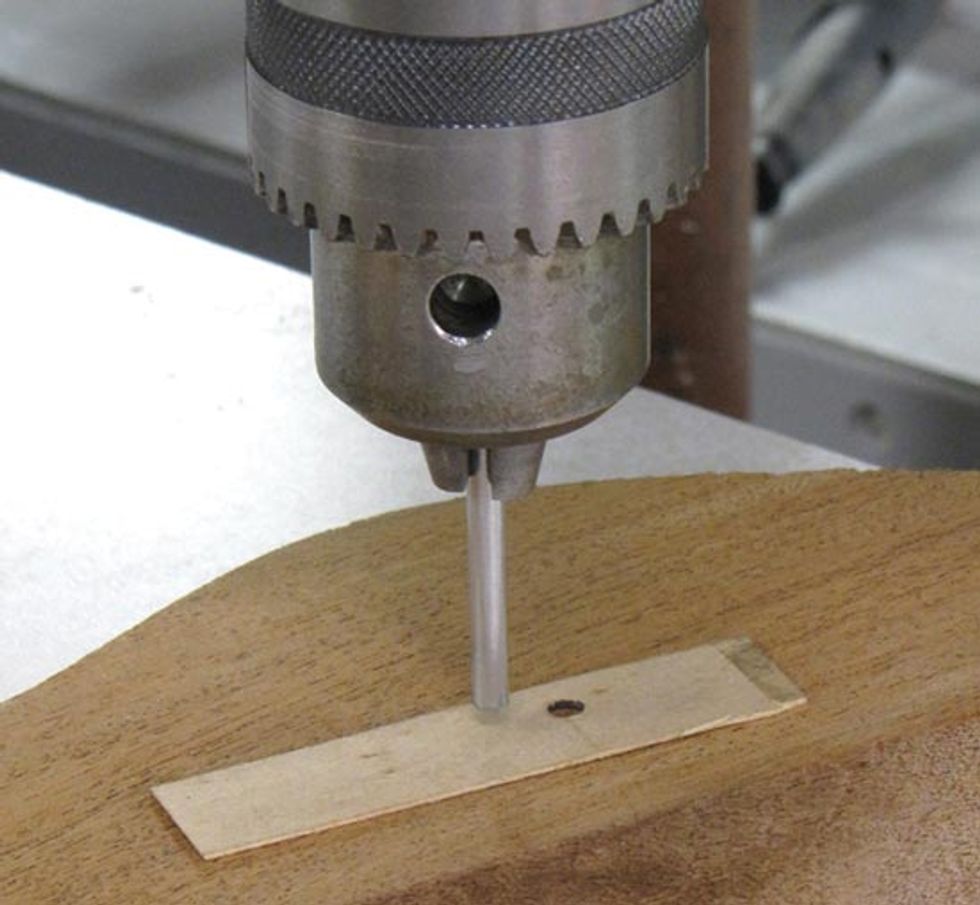
Drilling the maple cap with the modified aluminum stock.
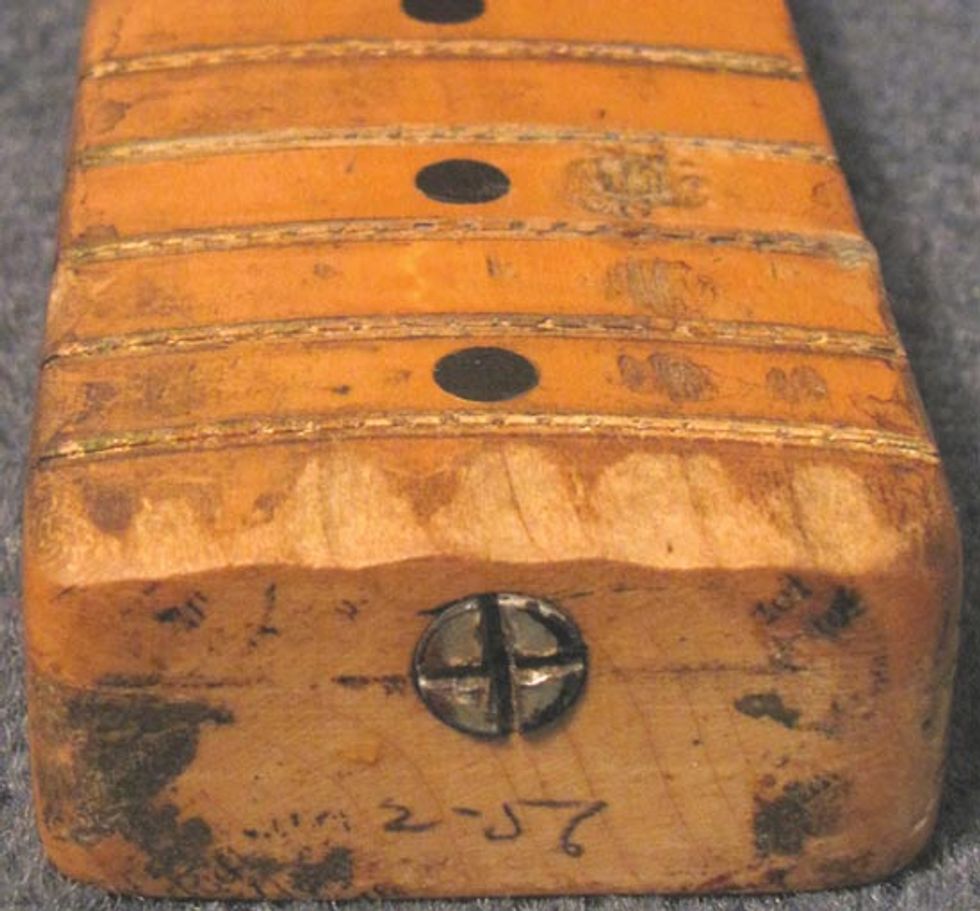
The finished fretboard.
John Brown, of Brown's Guitar Factory, is the inventor of the Fretted/Less bass. He owns and operates a full guitar manufacturing and repair/restoration facility, which is staffed by a team of talented luthiers. He is also the designer of guitar-making/repair tools and accessories that are used today by instrument builders throughout the world.
brownsguitarfactory.com
info@brownsguitarfactory.com