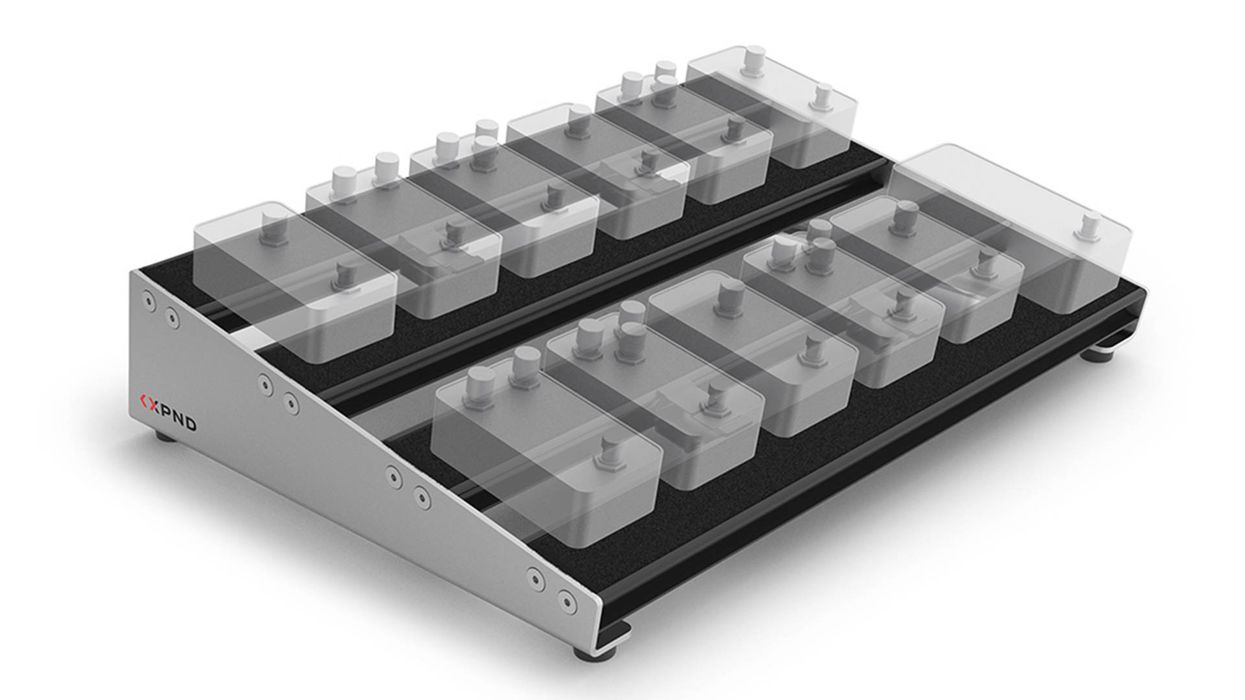
Get custom-shop options on a bargain budget by making it yourself.
After playing and collecting pedals for a while, many players decide that off-the-shelf pedalboards don't quite offer all of the options they'd prefer for organizing and getting the most out of their stompboxes. Some of us want little more than a platform with space for our effects and a power supply, while others are at the opposite end of the spectrum and can't live without various jacks and specialized connections being built right into the pedalboard.
For this DIY piece, I wanted to solve the problem I'm facing: I have a growing pedal collection, but after using some of the pre-assembled products on the market for a while I decided they weren't quite cutting it. I wanted something closer to a custom pedalboard—minus the elevated price tag. After scoping out the range of custom options offered by various companies, I decided to make something with all the features I wanted. It's a bit more involved than duct-taping everything to an IKEA shelf, but it's definitely not as involved as some of the space-age control centers on the market. I was careful to keep costs as low as possible, though. in fact, I was able to keep the price around $100.
Tools & Supplies
- Appropriate lengths of 1/2" oak and 3/4" cabinet-grade birch
- Table Saw (with taper angle attachment and 80-tooth blade)
- Mitre Saw
- Router (with 1/2" straight bit)
- Medium-sized Phillips screwdriver (or similar-sized bit for a power drill)
- (6) 1/2" self-tapping wood screws (1/8" diameter with fine threads)
- (24) 1" self-tapping wood screws (1/8" diameter with fi ne threads)
- (10) 1 1/4" self-tapping wood screws (1/8" diameter with fi ne threads)
- Kreg Jig
- Marinco 5278BL power inlet
- (2) solderless Neutrik conenctors
- 7/8" hole saw
- 1 3/4" hole saw
- Power drill
- 1/8" drill bit
- Wire strippers
- Electrical tape
- IEC power cord
- 2" industrial-strength Velcro
- 220-grit sandpaper
A couple of notes about things we're not covering here: I won't go into the theory of wiring up your board (effect order, switching options, etc.)—that's a whole other topic. Here we're covering the basics of getting a signal and power to and from your board. Also, though most players need a pedalboard case because they drag their boards all over the place, we'll refer you to the fine folks at blackbirdpedalboards.com, stompin-ground. com, nycpedalboards.com and other outlets with a multitude of sizes, options, and materials for you to choose from once you've decided on the final size and shape of your board.
All right—let's get to it!
Step 1
Lay out your pedals on the floor in ideal performing position and use a tape measure to determine what size of board will fit them. I decided on 24" x 16". I wanted my board to have an angled surface so I can comfortably reach two rows of pedals, so we'll also make the surface angle from 4" high in back down to 1 1/2" high along the front edge. This will also let me mount a power supply underneath.
Step 2
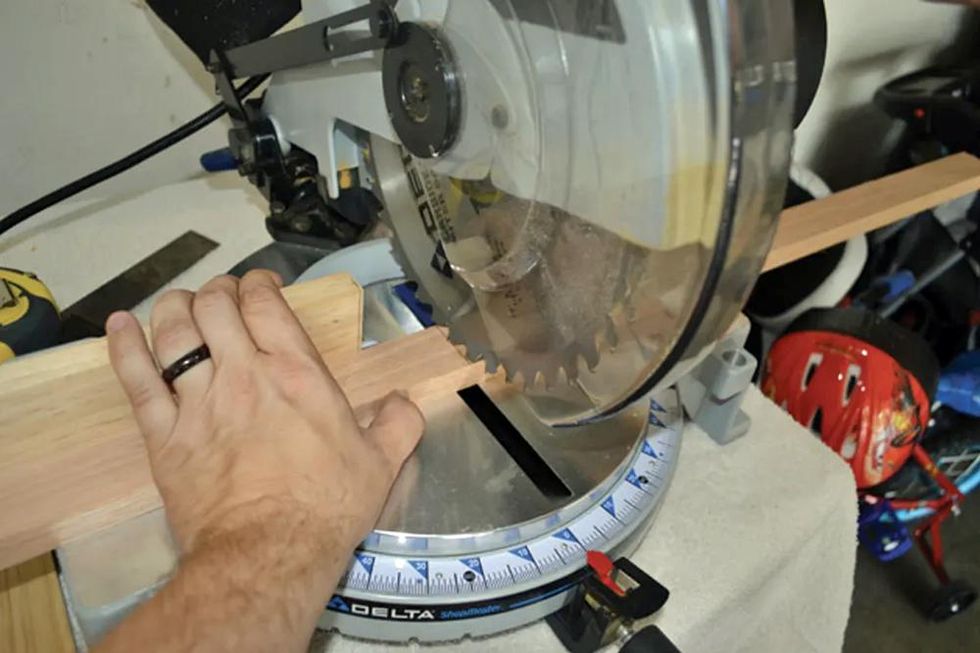
Next, we need a basic frame. I used a miter saw to cut the four sides to the appropriate lengths. I chose 1/2" oak for the sides, and 3/4" cabinet-grade birch for the top.
Step 3
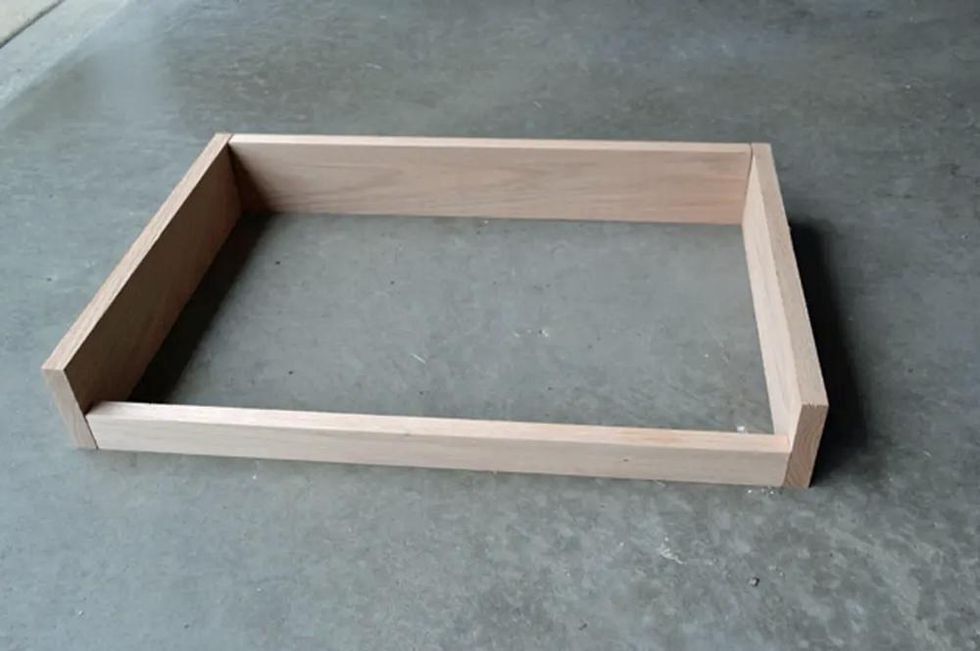
I determined that a 7-degree cut on each of the pedalboard's side pieces would provide the optimum surface incline.
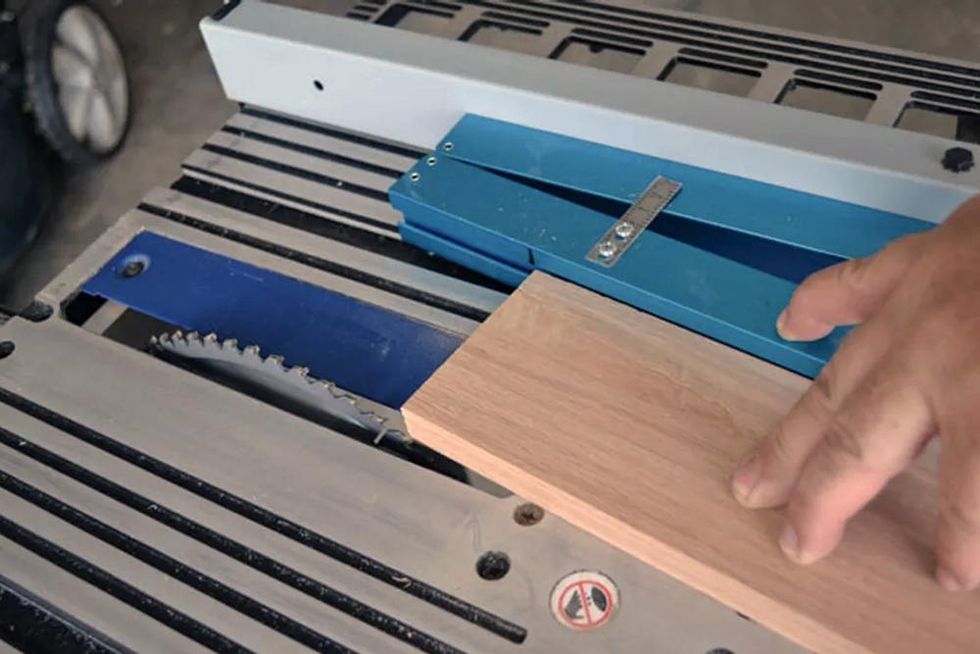
To cut the sides flat and even so they'd make complete contact with the underside of the top, I used a table saw and the blue taper-angle attachment in the top portion of this photo. A blade with a higher number of teeth reduces the chance of rough or damaged edges, so I used an 80-tooth blade.
Step 4
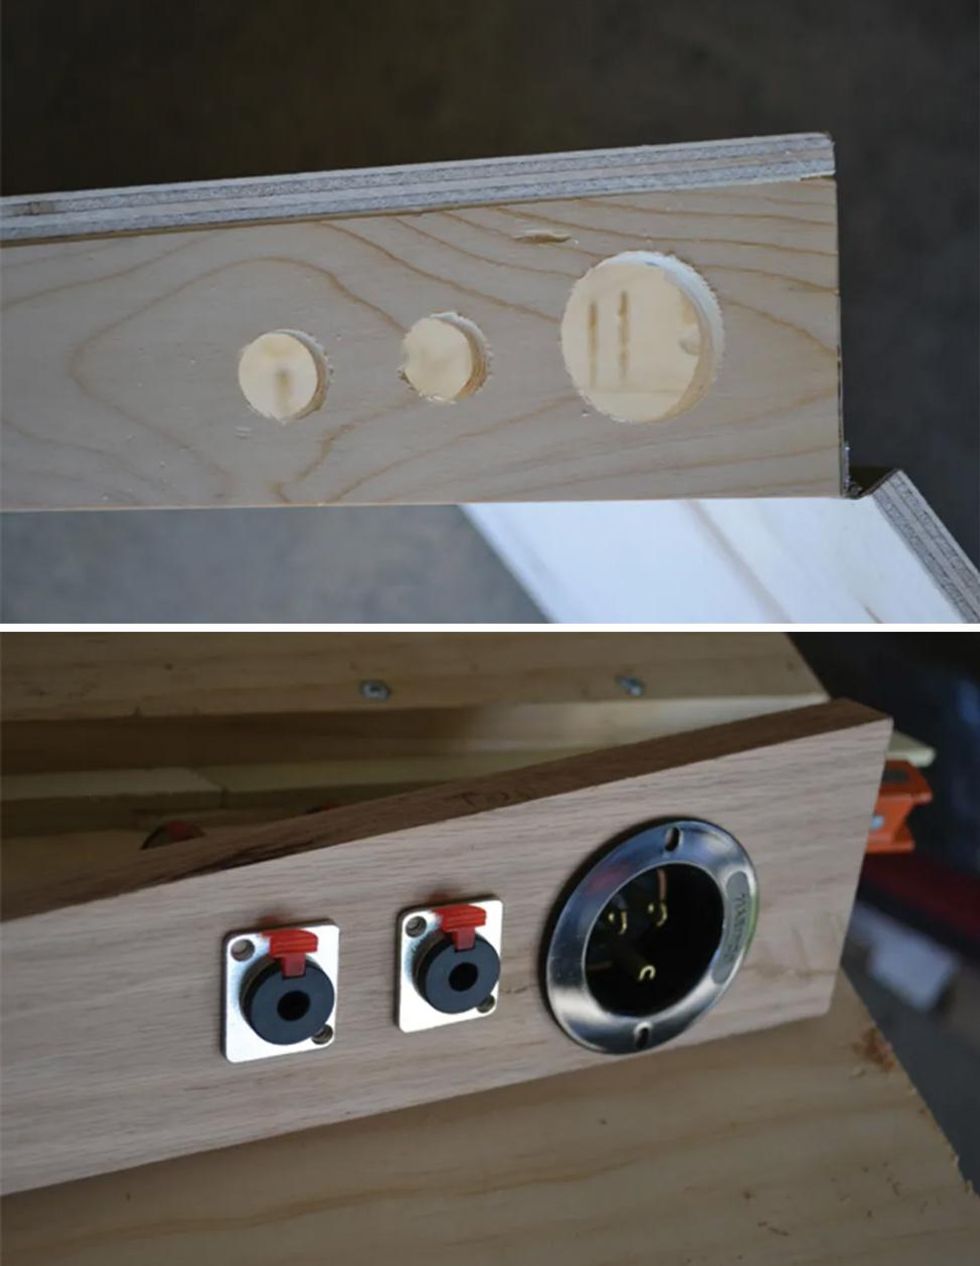
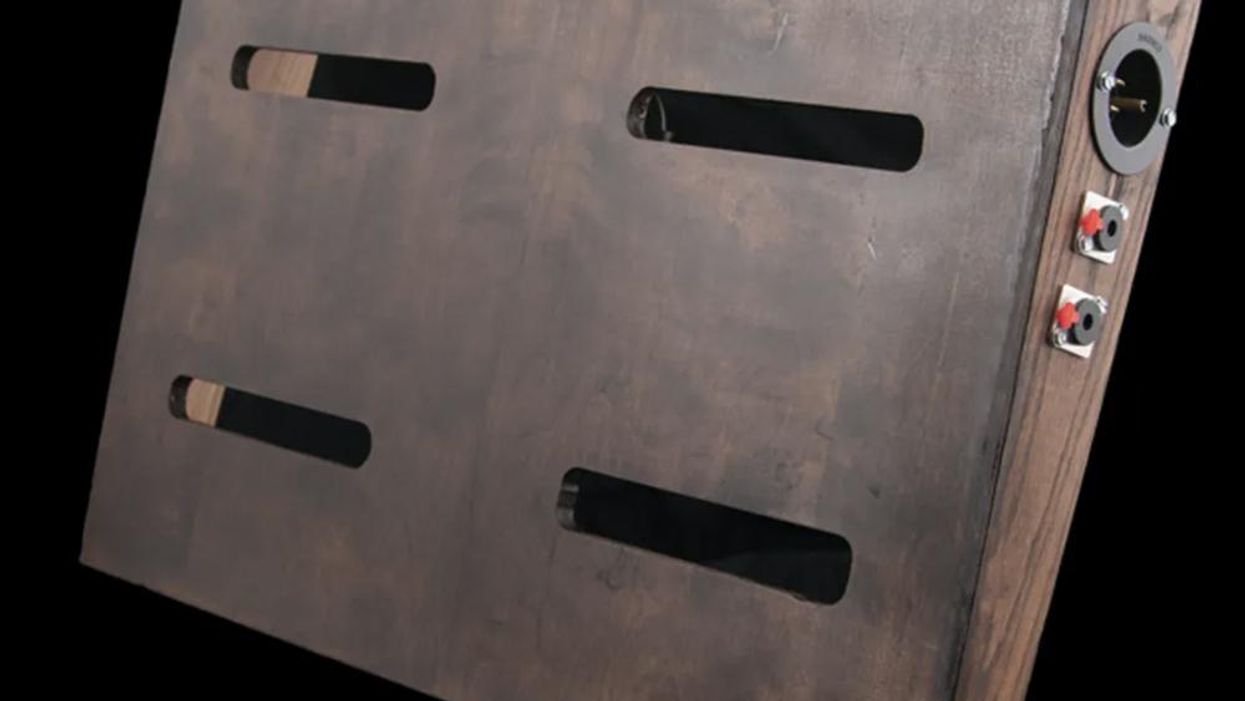
I cut the holes for the power inlet and neutrik connectors in the board's right side piece. I used a 7/8" hole saw for the smaller holes, and a 1 3/8" hole saw for the larger one. If you prefer adding more jacks for, say, an effects loop or a parallel acoustic setup, add the appropriate number of connectors using the same tools.
Step 5
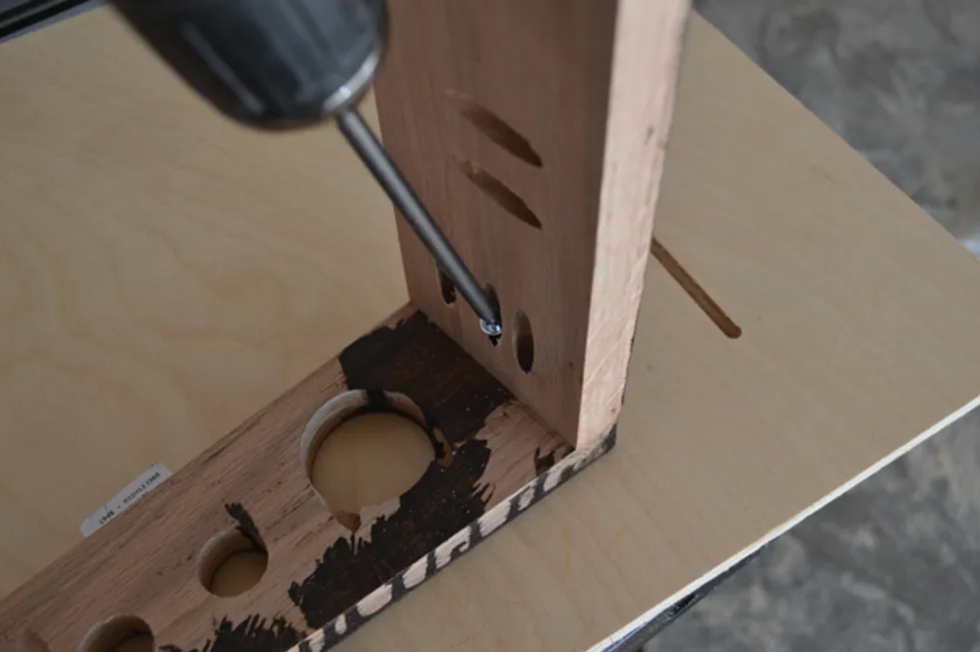
To assemble the frame, we need holes for the screws. I used a kreg jig to pre-drill all the holes with a 3/8" drill bit. for a secure fit, I used two 1 1/4" screws for the front two edges, and three for each of the back corners. be sure to use fine-threaded screws, which prevent splintering and hold things together much tighter. While you're tightening the screws, make sure everything is square and level so it won't rock back and forth during use—the last thing you need to worry about while performing is whether you're stomping too hard.
Step 6
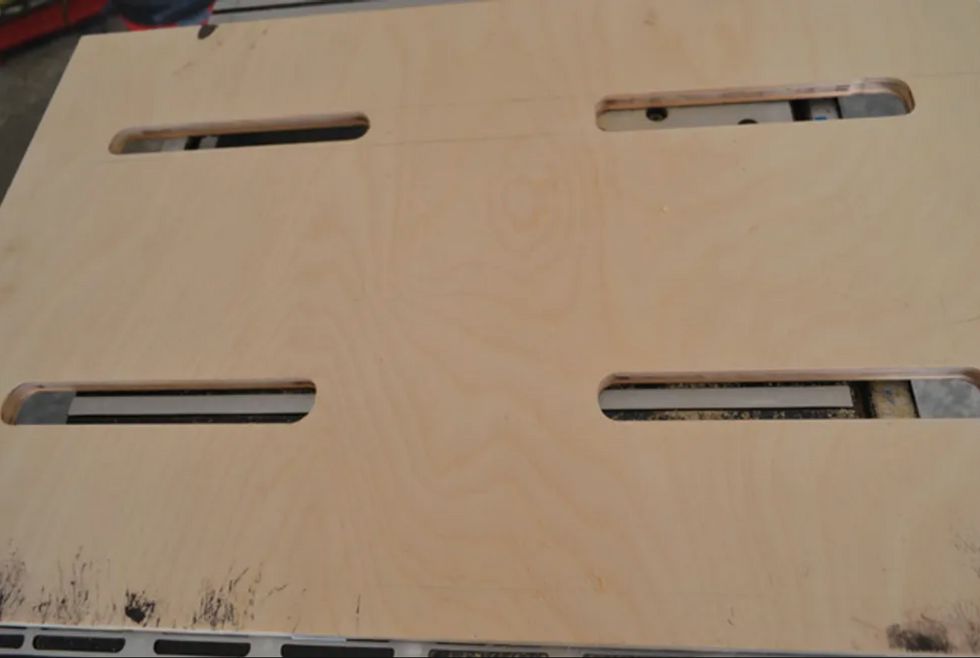
In order for the signal and power cables to pass efficiently throughout the board, I opted for a slotted pattern on the top piece. I used a 1/2" straight bit in my router to cut each channel. Each slot was 7" long, and I left 6" of wood between each pair. Be careful about placing the slots too close together—it can weaken the top of the pedalboard.
Step 7
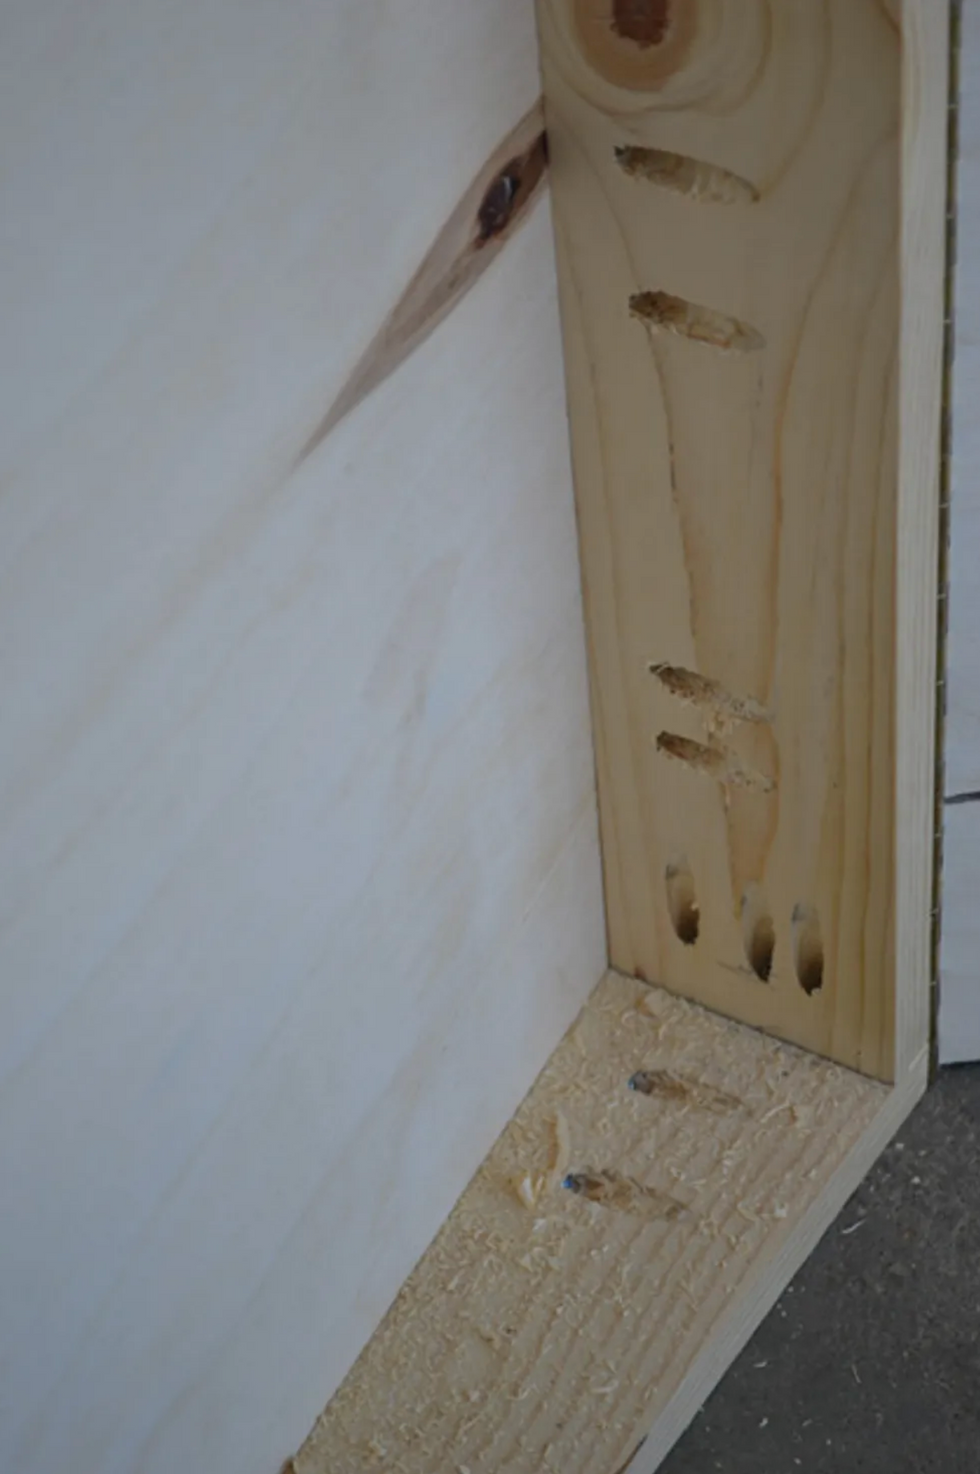
To attach the top piece, I used the Kreg jig and a 3/8" drill bit to pre-drill three pairs of holes along each surface. I spaced them 7" apart along the front and back, and 3" apart along the sides. The top of my board is 1/2" thick, so I used 1" wood screws that wouldn't puncture the top surface. Using screws rather than glue makes it so I can easily remove the top if I ever want to replace or repair anything.
Step 8
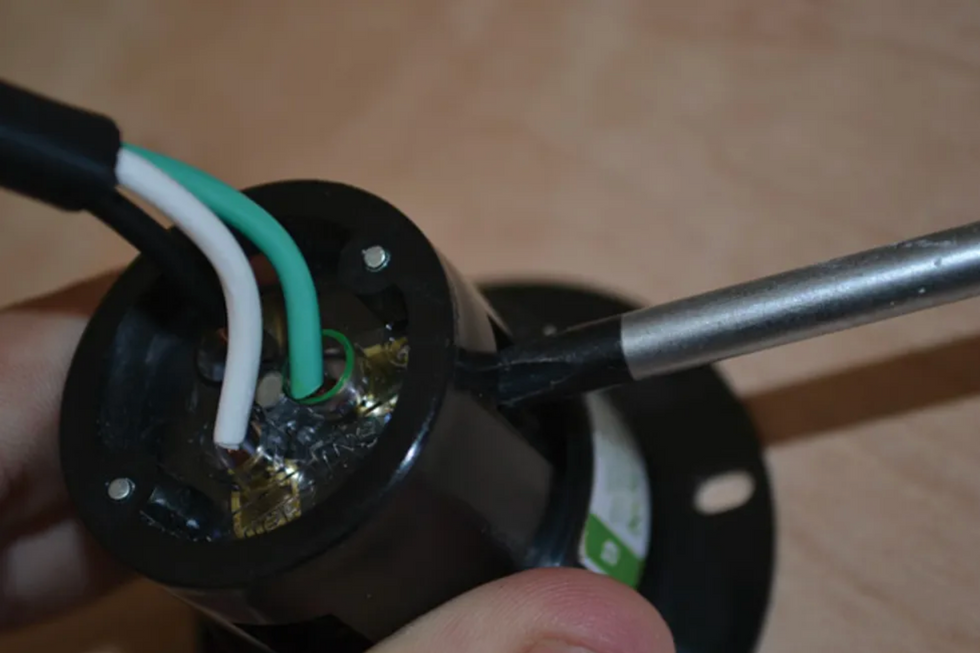
Now it's time to wire up the hardware connectors. I didn't want to risk a bad connection with the power jack, so I used a Marinco 5278BL flanged inlet, which lets you connect wires with screws rather than solder. (You can find this part, as well as the solderless connectors, at pedalboardshop.com.)
To begin, snip the male end from a regular IEC power cord. Inside you'll see three wires with black, green, and white insulation. Strip about 1/2" of the insulation from each wire, then match the wires with the corresponding inlet connectors. Finally, tighten each screw and wrap any exposed wire with electrical tape.
Step 9
Before attaching the hardware, apply whatever finish you prefer. I used a dark polyurethane stain. Don't be afraid to do a few coats to achieve the desired hue, just make sure you wipe the board thoroughly between each one. After the stain has dried, be sure to sand the top surface of your board so that whatever you use to attach the pedals—be it Velcro or a specialized product like Godlyke's Power-grip—has a nice surface to bond to.
Step 10
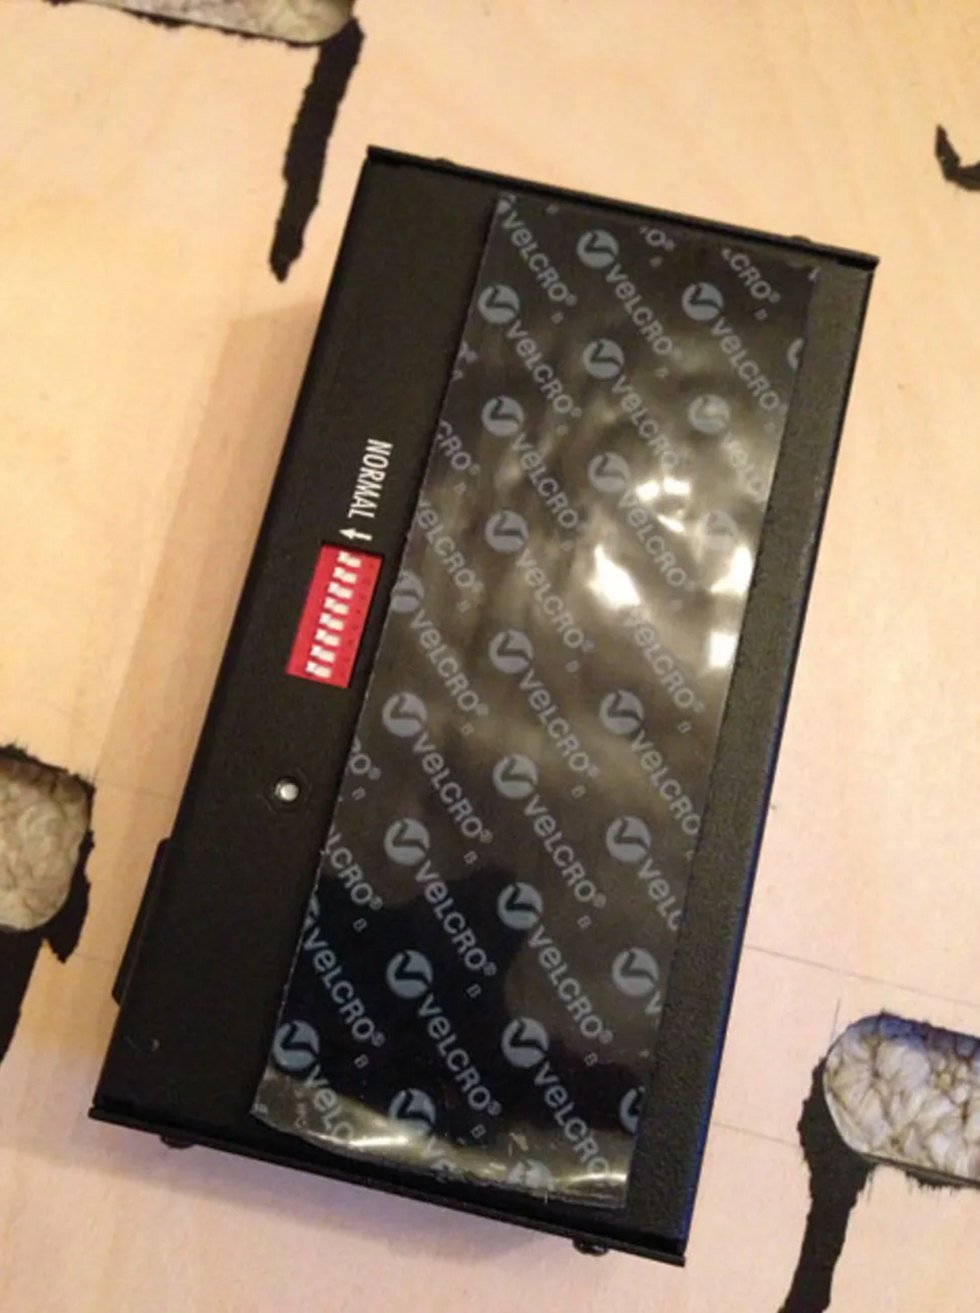
To facilitate a power supply upgrade or replacement in the future, I used a 2" strip of industrial-strength Velcro to attach the power supply to the underside of the top piece.
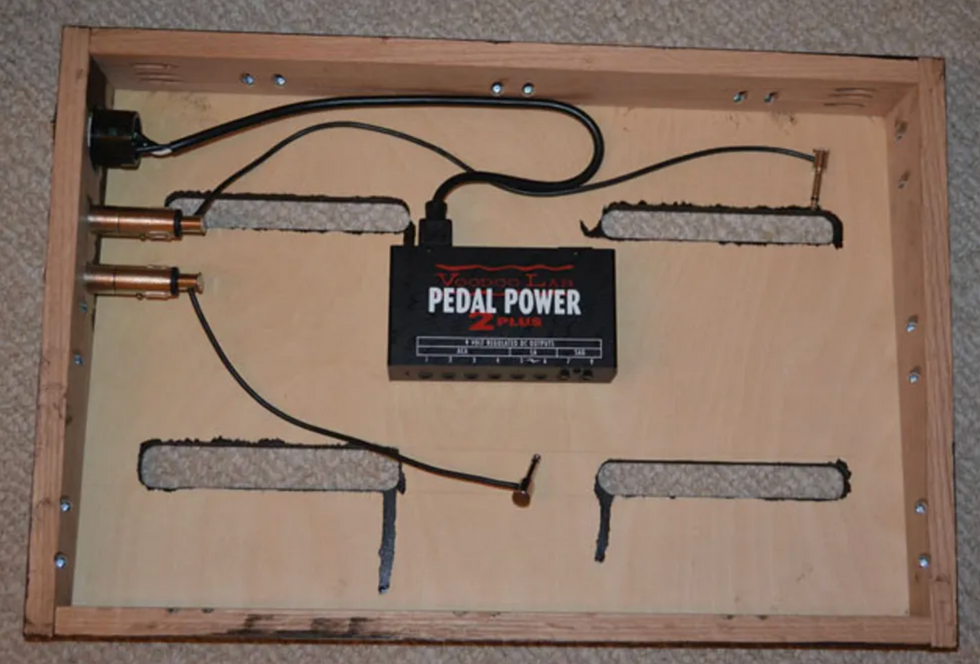
Mount the power supply and install the wired inlet and solderless connectors with 1/2" wood screws.
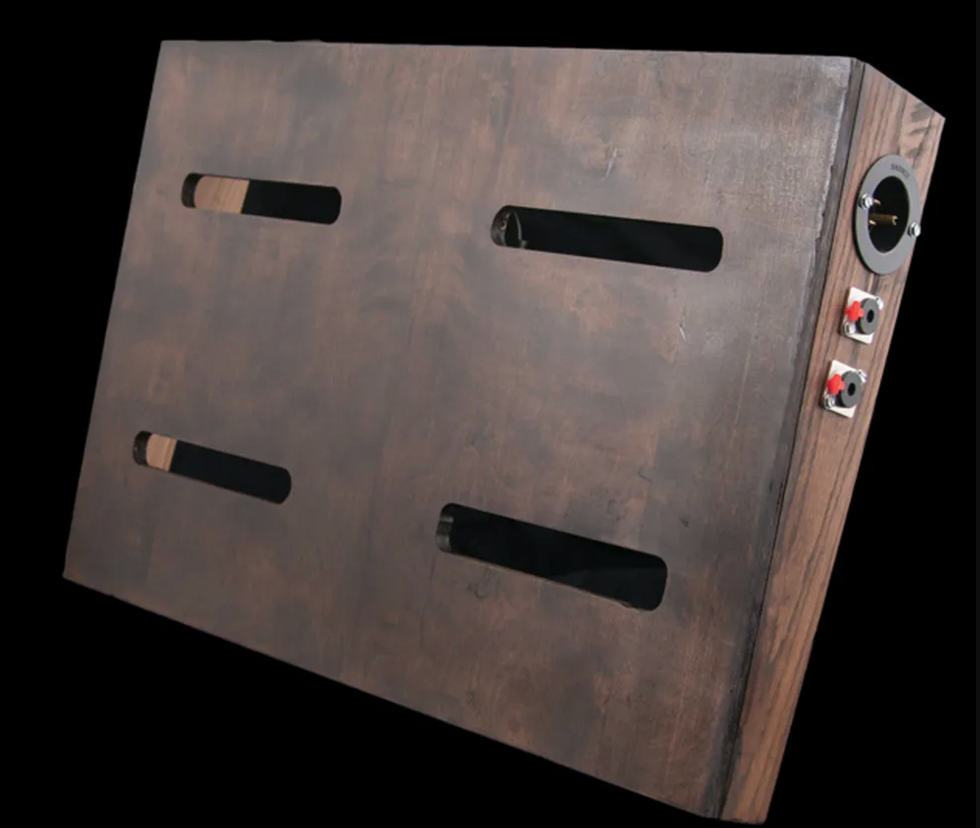
Use fine-grit (at least 220) sandpaper to sand the surface nice and smooth so the Velcro adheres sufficiently.
That's it! Once you've attached your pedals and wired up your power and signal cables, you're ready to plug in and go—enjoy!
Special thanks to Mason Marangella from Vertex Effects, David Quinones from Blackbird Pedalboards, Luke Summers from Agape Custom Shop, and Michael Helweg from Helweg Pedalboards.
[Updated 7/27/21]
- How to Build a Flight-Friendly Pedalboard - Premier Guitar ›
- DIY: How to Make a 9V Power Supply Out of a Drill Battery - Premier ... ›
- 10 DIY Patch Kits to Streamline Your Board - Premier Guitar ›
- Powering Your Board - Premier Guitar ›
- The Stompbox-Builder’s Secret Weapon - Premier Guitar ›
- DIY: How to Make a 9V Power Supply Out of a Drill Battery - Premier Guitar ›
- Reader Pedalboards 2022, Part 1 - Premier Guitar ›
- Tools for the Task: Pedalboard Power Supplies - Premier Guitar ›
- Learn How to Swap Diodes to Improve Your Overdrive - Premier Guitar ›
- DIY: How to Level, Crown & Dress Guitar Frets - Premier Guitar ›
- DIY 101: How to Build a Delay Pedal Kit - Premier Guitar ›
- Discover the Power of J. Rockett Archer Select: Review - Premier Guitar ›
- Way Huge Stone Burner Fuzz Pedal Review ›
- EarthQuaker Devices Zoar Dynamic Audio Grinder Review ›
- Are Pedals Necessary for True Guitar Freedom? ›
- JAM Pedals Harmonious Monk mk.2 Review ›
- Reader Pedalboards 2024: Fuzzy to Checkered Guitar Pedals ›
- EHX Pico Attack Decay, Oceans 3-Verb, Canyon, Deep Freeze ›
- Beetronics Nectar Guitar Pedal Review ›
- Want to Build Pedals? Here's the Ultimate Kit Roundup ›
- Mojo Hand FX Stylus Modulation Pedal ›
- Death By Audio Octave Clang V2 Review ›
Stompboxtober is finally here! Enter below for your chance to WIN today's featured pedal from Diamond Pedals! Come back each day during the month of October for more chances to win!
Diamond Pedals Dark Cloud
True to the Diamond design ethos of our dBBD’s hybrid analog architecture, Dark Cloud unlocks a new frontier in delay technology which was once deemed unobtainable by standard BBD circuit.
Powered by an embedded system, the Dark Cloud seamlessly blends input and output signals, crafting Tape, Harmonic, and Reverse delays with the organic warmth of analog companding and the meticulous precision of digital control.
Where analog warmth meets digital precision, the Dark Cloud redefines delay effects to create a pedal like no other
Many listeners and musicians can tell if a bass player is really a guitarist in disguise. Here’s how you can brush up on your bass chops.
Was bass your first instrument, or did you start out on guitar? Some of the world’s best bass players started off as guitar players, sometimes by chance. When Stuart Sutcliffe—originally a guitarist himself—left the Beatles in 1961, bass duties fell to rhythm guitarist Paul McCartney, who fully adopted the role and soon became one of the undeniable bass greats.
Since there are so many more guitarists than bassists—think of it as a supply and demand issue—odds are that if you’re a guitarist, you’ve at least dabbled in bass or have picked up the instrument to fill in or facilitate a home recording.
But there’s a difference between a guitarist who plays bass and one who becomes a bass player. Part of what’s different is how you approach the music, but part of it is attitude.
Many listeners and musicians can tell if a bass player is really a guitarist in disguise. They simply play differently than someone who spends most of their musical time embodying the low end. But if you’re really trying to put down some bass, you don’t want to sound like a bass tourist. Real bassists think differently about the rhythm, the groove, and the harmony happening in each moment.
And who knows … if you, as a guitarist, thoroughly adopt the bassist mindset, you might just find your true calling on the mightiest of instruments. Now, I’m not exactly recruiting, but if you have the interest, the aptitude, and—perhaps most of all—the necessity, here are some ways you can be less like a guitarist who plays bass, and more like a bona fide bass player.
Start by playing fewer notes. Yes, everybody can see that you’ve practiced your scales. But at least until you get locked in rhythmically, use your ears more than your fingers and get a sense of how your bass parts mesh with the other musical elements. You are the glue that holds everything together. Recognize that you’re at the intersection of rhythm and harmony, and you’ll realize foundation beats flash every time.“If Larry Graham, one of the baddest bassists there has ever been, could stick to the same note throughout Sly & the Family Stone’s ‘Everyday People,’ then you too can deliver a repetitive figure when it’s called for.”
Focus on that kick drum. Make sure you’re locked in with the drummer. That doesn’t mean you have to play a note with every kick, but there should be some synchronicity. You and the drummer should be working together to create the rhythmic drive. Laying down a solid bass line is no time for expressive rubato phrasing. Lock it up—and have fun with it.
Don’t sleep on the snare. What does it feel like to leave a perfect hole for the snare drum’s hits on two and four? What if you just leave space for half of them? Try locking the ends of your notes to the snare’s backbeat. This is just one of the ways to create a rhythmic feel together with the drummer, so you produce a pocket that everyone else can groove to.
Relish your newfound harmonic power. Move that major chord root down a third, and now you have a minor 7 chord. Play the fifth under a IV chord and you have a IV/V (“four over five,” which fancy folks sometimes call an 11 chord). The point is to realize that the bottom note defines the harmony. Sting put it like this: “It’s not a C chord until I play a C. You can change harmony very subtly but very effectively as a bass player. That’s one of the great privileges of our role and why I love playing bass. I enjoy the sound of it, I enjoy its harmonic power, and it’s a sort of subtle heroism.”
Embrace the ostinato. If the song calls for playing the same motif over and over, don’t think of it as boring. Think of it as hypnotic, tension-building, relentless, and an exercise in restraint. Countless James Brown songs bear this out, but my current favorite example is the bass line on the Pointer Sisters’ swampy cover of Allen Toussaint “Yes We Can Can,” which was played by Richard Greene of the Hoodoo Rhythm Devils, aka Dexter C. Plates. Think about it: If Larry Graham, one of the baddest bassists there has ever been, could stick to the same note throughout Sly & the Family Stone’s “Everyday People,” then you too can deliver a repetitive figure when it’s called for.
Be supportive. Though you may stretch out from time to time, your main job is to support the song and your fellow musicians. Consider how you can make your bandmates sound better using your phrasing, your dynamics, and note choices. For example, you could gradually raise the energy during guitar solos. Keep that supportive mindset when you’re offstage, too. Some guitarists have an attitude of competitiveness and even scrutiny when checking out other players, but bassists tend to offer mutual support and encouragement. Share those good vibes with enthusiasm.
And finally, give and take criticism with ease. This one’s for all musicians: Humility and a sense of helpfulness can go a long way. Ideally, everyone should be working toward the common goal of what’s good for the song. As the bass player, you might find yourself leading the way.Fuchs Audio introduces the ODH Hybrid amp, featuring a True High Voltage all-tube preamp and Ice Power module for high-powered tones in a compact size. With D-Style overdrive, Spin reverb, and versatile controls, the ODH offers exceptional tone shaping and flexibility at an affordable price point.
Fuchs Audio has introduced their latest amp the ODH © Hybrid. Assembled in USA.
Featuring an ODS-style all-tube preamp, operating at True High Voltage into a fan-cooled Ice power module, the ODH brings high-powered clean and overdrive tones to an extremely compact size and a truly affordable price point.
Like the Fuchs ODS amps, the ODH clean preamp features 3-position brite switch, amid-boost switch, an EQ switch, high, mid and low controls. The clean preamp drives theoverdrive section in D-Style fashion. The OD channel has an input gain and outputmaster with an overdrive tone control. This ensures perfect tuning of both the clean andoverdrive channels. A unique tube limiter circuit controls the Ice Power module input.Any signal clipping is (intentionally) non-linear so it responds just like a real tube amp.
The ODH includes a two-way footswitch for channels and gain boost. A 30-second mute timer ensures the tubes are warmed up before the power amp goes live. The ODH features our lush and warm Spin reverb. A subsonic filter eliminates out-of-band low frequencies which would normally waste amplifier power, which assures tons of clean headroom. The amp also features Accent and Depth controls, allowing contouring of the high and low response of the power amp section, to match speakers, cabinets andenvironments. The ODH features a front panel fully buffered series effects loop and aline out jack, allowing for home recording or feeding a slave amp. A three-position muteswitch mutes the amp, the line out or mute neither.
Built on the same solid steel chassis platform as the Fuchs FB series bass amps, the amps feature a steel chassis and aluminum front and rear panels, Alpha potentiometers, ceramic tube sockets, high-grade circuit boards and Neutrik jacks. The ICE power amp is 150 watts into 8 ohms and 300 watts into 4 ohms, and nearly 500 watts into 2.65 ohms (4 and8 ohms in parallel) and operates on universal AC voltage, so it’s fully globallycompatible. The chassis is fan-cooled to ensure hours of cool operation under any circumstances. The all-tube preamp uses dual-selected 12AX7 tubes and a 6AL5 limiter tube.
MAP: $ 1,299
For more information, please visit fuchsaudiotechnology.com.
Jackson Guitars announces its first female signature artist model, the Pro Series Signature Diamond Rowe guitar.
“I‘m so excited about this new venture with the Jackson family. This is a historic collaboration - as I am the first female in the history of Jackson with a signature guitar and the first female African American signature Jackson artist. I feel so honored to have now joined such an elite group of players that are a part of this club. Many who have inspired me along this journey to get here. It’s truly humbling.” says Diamond.
Diamond Rowe is the co-founder and lead guitarist for the metal/hard rock band Tetrarch. Since co-founding the band in high school, Tetrarch has become one of the most talked about up-and-coming bands in the world - with several press outlets such as Metal Hammer, Kerrang, Revolver, Guitar World and many others boldly naming Diamond Rowe the world’s next guitar hero. Tetrarch has connected with many fans while performing on some of the world's biggest stages garnering spots alongside several of the heavy music world’s biggest names such as Guns N’ Roses, Slipknot, Lamb of God, Disturbed, Avenged Sevenfold, Sevendust, Rob Zombie, Trivium, and many many others. The Jackson Pro Series Signature Diamond Rowe DR12MG EVTN6 is based on Jackson’s single-cut Monarkh platform and is a premium guitar designed for progressive metal players seeking precision and accuracy.
Crafted in partnership with Diamond, this model boasts a 25.5 “ scale, Monarkh-styled nyatoh body draped with a gorgeous poplar burl top, three-piece nyatoh set-neck with graphite reinforcement, and 12˝ radius bound ebony fingerboard with 24 jumbo frets. The black chrome-covered active EMG® 81/85 humbucking bridge and neck pickups, three-way toggle switch, single volume control, and tone control provide a range of tonal options. The Evertune® bridge ensures excellent tuning stability, while the Dark Rose finish with a new custom 3+3 color-matched Jackson headstock and black hardware looks simply stunning.
To showcase the Pro Plus Signature Diamond Rowe DR12MG EVTN6, Diamond shares her journey as a guitarist, delving into the inspiration behind her unique design specifications and the influential artists who shaped her sound within a captivating demo video. This video prominently features powerful performances of Tetrarch’s latest release, “Live Not Fantasize,” and “I’m Not Right” showcasing the DR12MG EVTN6’s unparalleled tonal versatility and performance capabilities.
MSRP $1699.99
For more information, please visit jacksonguitars.com.