Get custom-shop options on a bargain budget by making it yourself.
After playing and collecting pedals for a while, many players decide that off-the-shelf pedalboards don't quite offer all of the options they'd prefer for organizing and getting the most out of their stompboxes. Some of us want little more than a platform with space for our effects and a power supply, while others are at the opposite end of the spectrum and can't live without various jacks and specialized connections being built right into the pedalboard.
For this DIY piece, I wanted to solve the problem I'm facing: I have a growing pedal collection, but after using some of the pre-assembled products on the market for a while I decided they weren't quite cutting it. I wanted something closer to a custom pedalboard—minus the elevated price tag. After scoping out the range of custom options offered by various companies, I decided to make something with all the features I wanted. It's a bit more involved than duct-taping everything to an IKEA shelf, but it's definitely not as involved as some of the space-age control centers on the market. I was careful to keep costs as low as possible, though. in fact, I was able to keep the price around $100.
Tools & Supplies
- Appropriate lengths of 1/2" oak and 3/4" cabinet-grade birch
- Table Saw (with taper angle attachment and 80-tooth blade)
- Mitre Saw
- Router (with 1/2" straight bit)
- Medium-sized Phillips screwdriver (or similar-sized bit for a power drill)
- (6) 1/2" self-tapping wood screws (1/8" diameter with fine threads)
- (24) 1" self-tapping wood screws (1/8" diameter with fi ne threads)
- (10) 1 1/4" self-tapping wood screws (1/8" diameter with fi ne threads)
- Kreg Jig
- Marinco 5278BL power inlet
- (2) solderless Neutrik conenctors
- 7/8" hole saw
- 1 3/4" hole saw
- Power drill
- 1/8" drill bit
- Wire strippers
- Electrical tape
- IEC power cord
- 2" industrial-strength Velcro
- 220-grit sandpaper
A couple of notes about things we're not covering here: I won't go into the theory of wiring up your board (effect order, switching options, etc.)—that's a whole other topic. Here we're covering the basics of getting a signal and power to and from your board. Also, though most players need a pedalboard case because they drag their boards all over the place, we'll refer you to the fine folks at blackbirdpedalboards.com, stompin-ground. com, nycpedalboards.com and other outlets with a multitude of sizes, options, and materials for you to choose from once you've decided on the final size and shape of your board.
All right—let's get to it!
Step 1
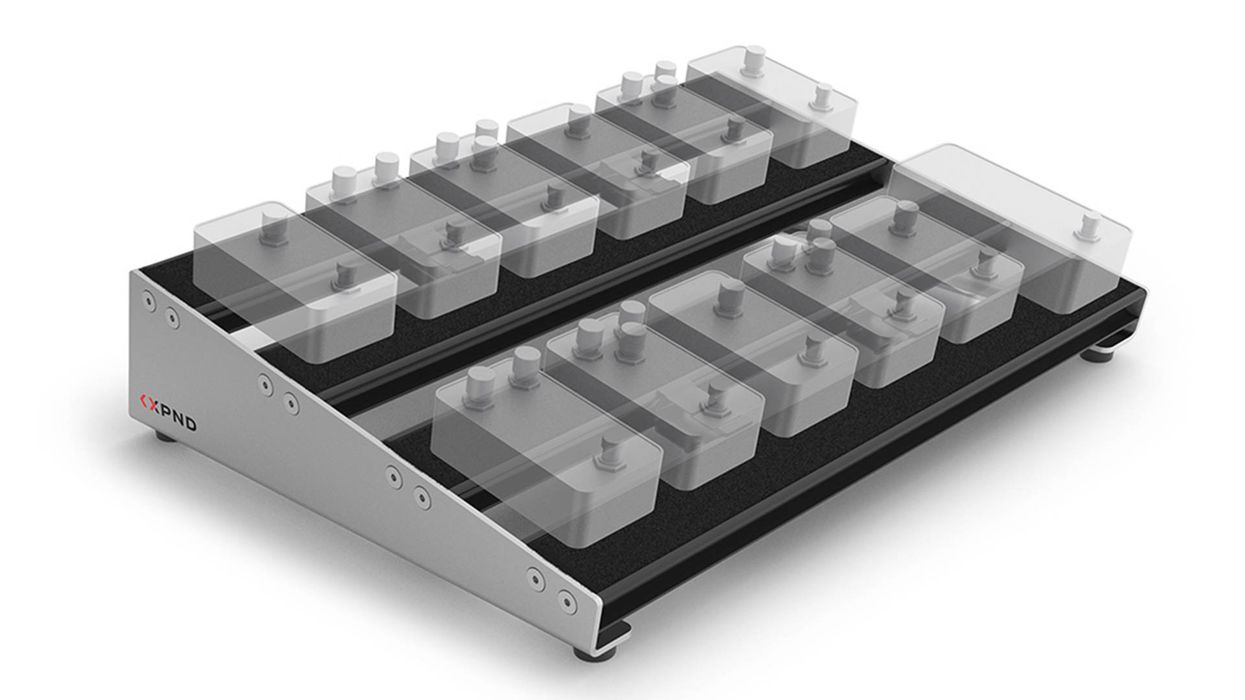
Lay out your pedals on the floor in ideal performing position and use a tape measure to determine what size of board will fit them. I decided on 24" x 16". I wanted my board to have an angled surface so I can comfortably reach two rows of pedals, so we'll also make the surface angle from 4" high in back down to 1 1/2" high along the front edge. This will also let me mount a power supply underneath.
Step 2
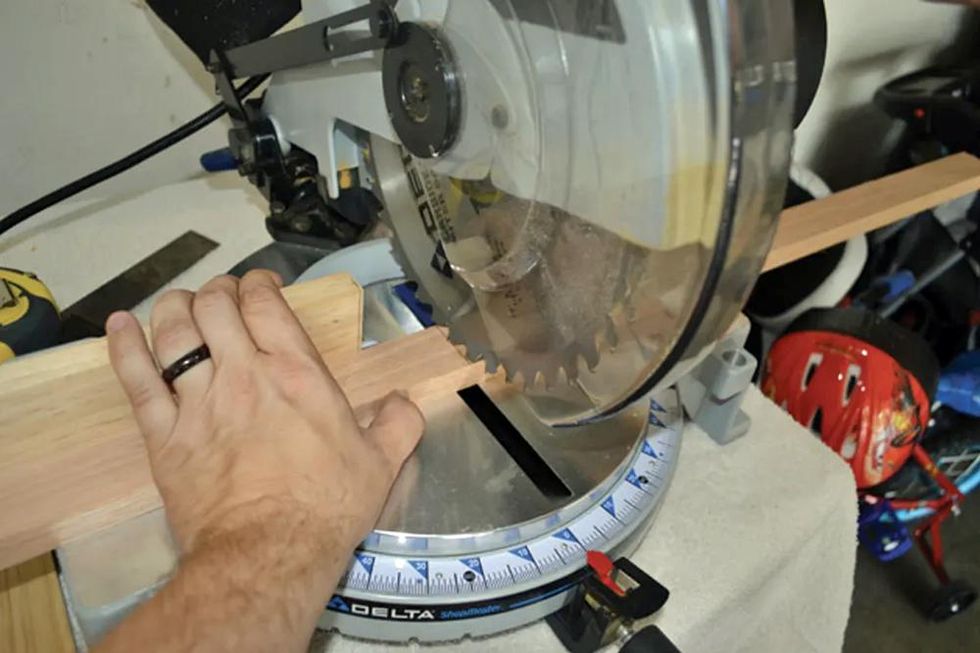
Next, we need a basic frame. I used a miter saw to cut the four sides to the appropriate lengths. I chose 1/2" oak for the sides, and 3/4" cabinet-grade birch for the top.
Step 3
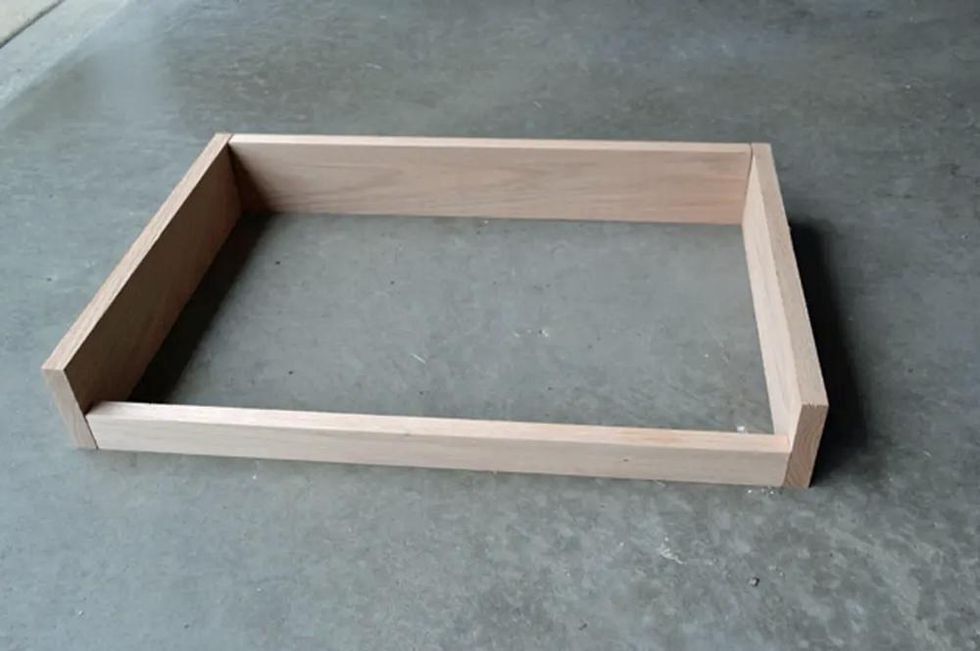
I determined that a 7-degree cut on each of the pedalboard's side pieces would provide the optimum surface incline.
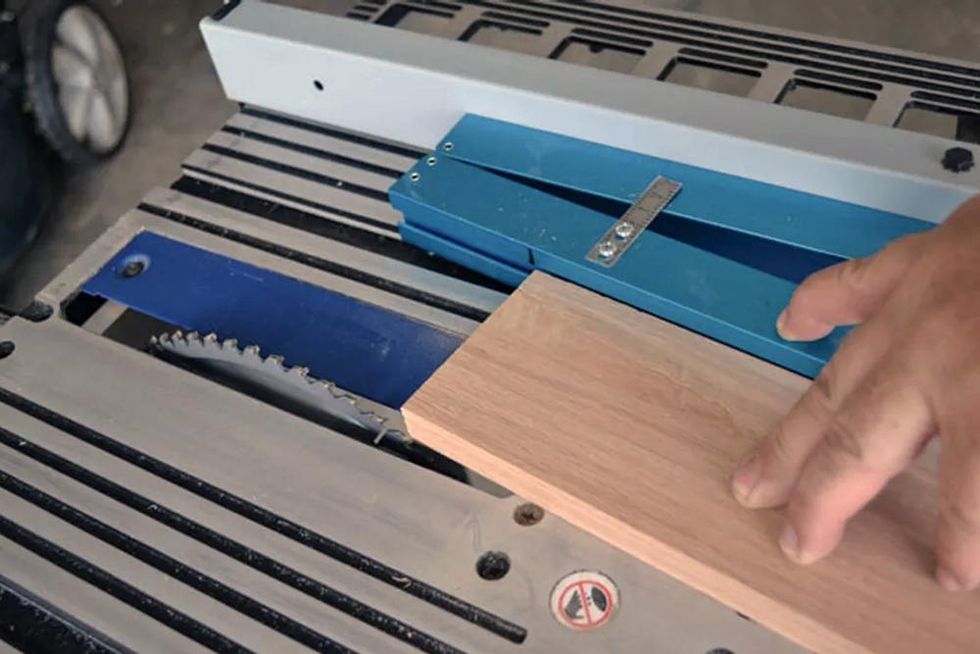
To cut the sides flat and even so they'd make complete contact with the underside of the top, I used a table saw and the blue taper-angle attachment in the top portion of this photo. A blade with a higher number of teeth reduces the chance of rough or damaged edges, so I used an 80-tooth blade.
Step 4
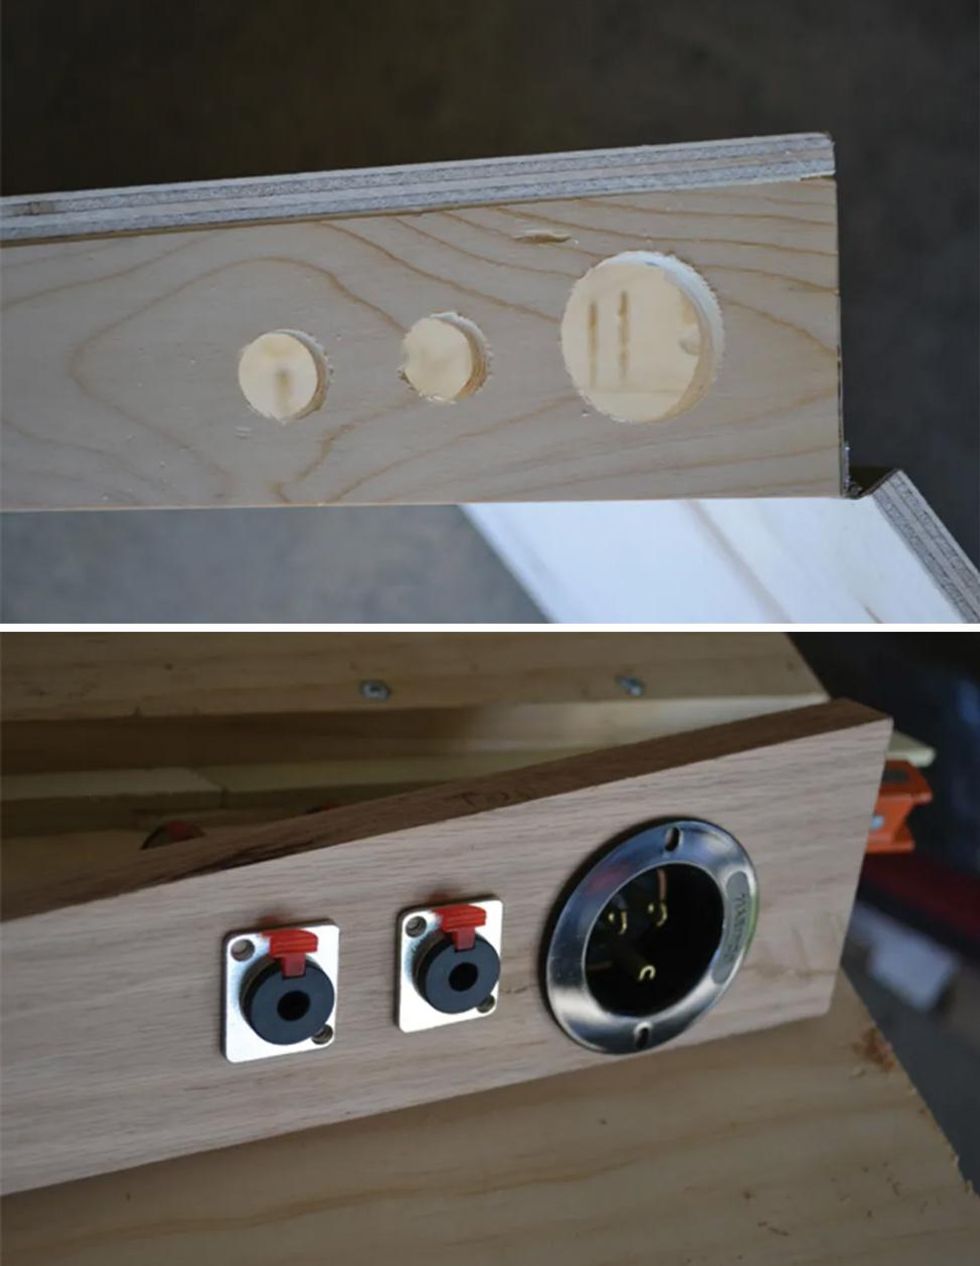
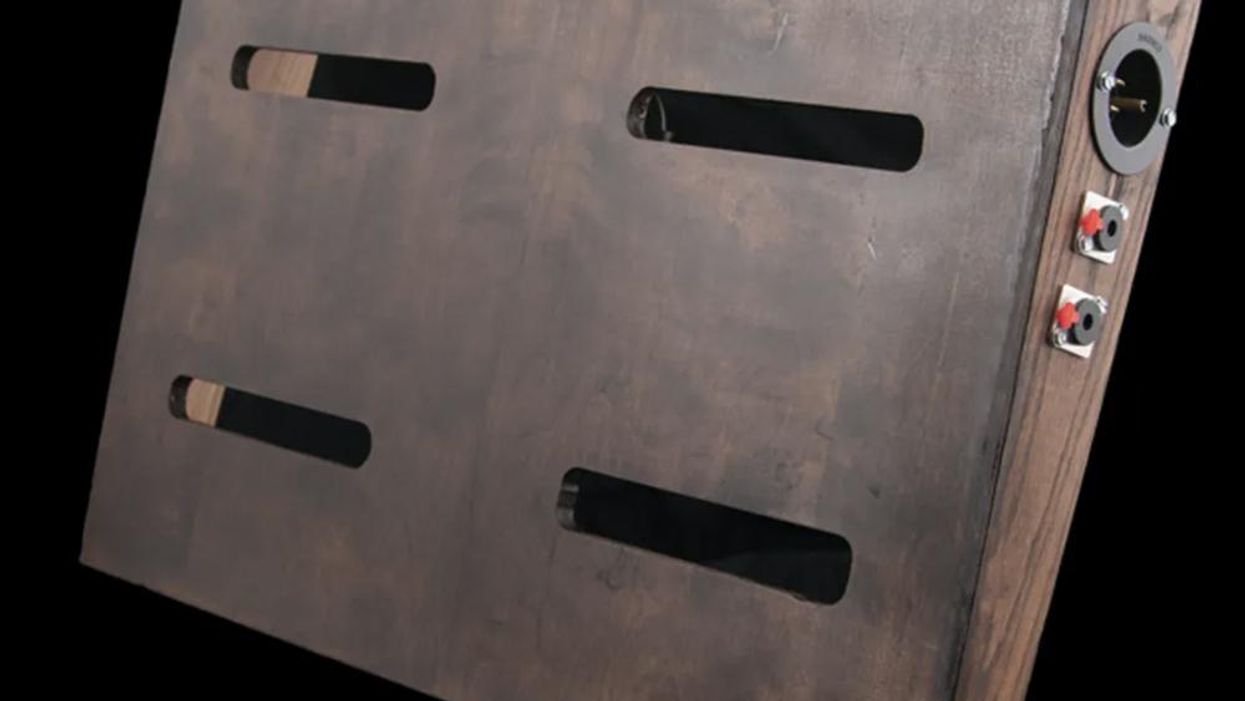
I cut the holes for the power inlet and neutrik connectors in the board's right side piece. I used a 7/8" hole saw for the smaller holes, and a 1 3/8" hole saw for the larger one. If you prefer adding more jacks for, say, an effects loop or a parallel acoustic setup, add the appropriate number of connectors using the same tools.
Step 5
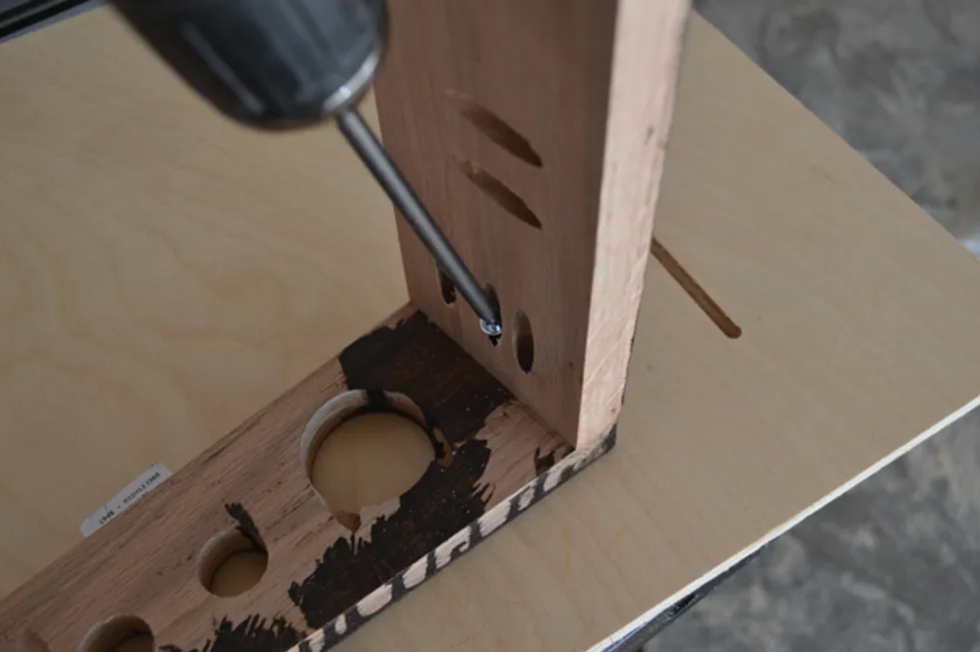
To assemble the frame, we need holes for the screws. I used a kreg jig to pre-drill all the holes with a 3/8" drill bit. for a secure fit, I used two 1 1/4" screws for the front two edges, and three for each of the back corners. be sure to use fine-threaded screws, which prevent splintering and hold things together much tighter. While you're tightening the screws, make sure everything is square and level so it won't rock back and forth during use—the last thing you need to worry about while performing is whether you're stomping too hard.
Step 6
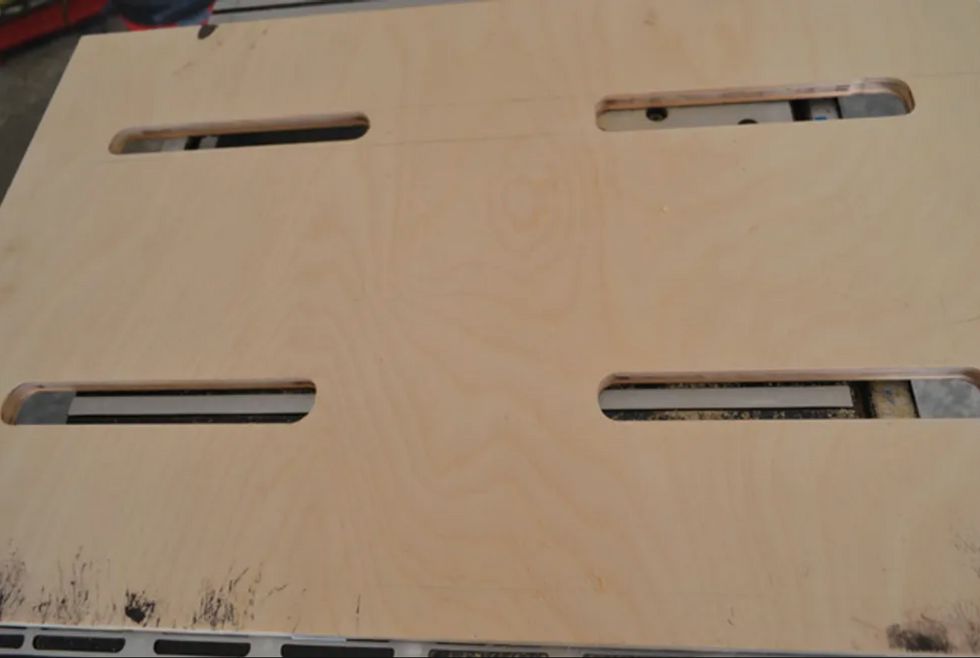
In order for the signal and power cables to pass efficiently throughout the board, I opted for a slotted pattern on the top piece. I used a 1/2" straight bit in my router to cut each channel. Each slot was 7" long, and I left 6" of wood between each pair. Be careful about placing the slots too close together—it can weaken the top of the pedalboard.
Step 7
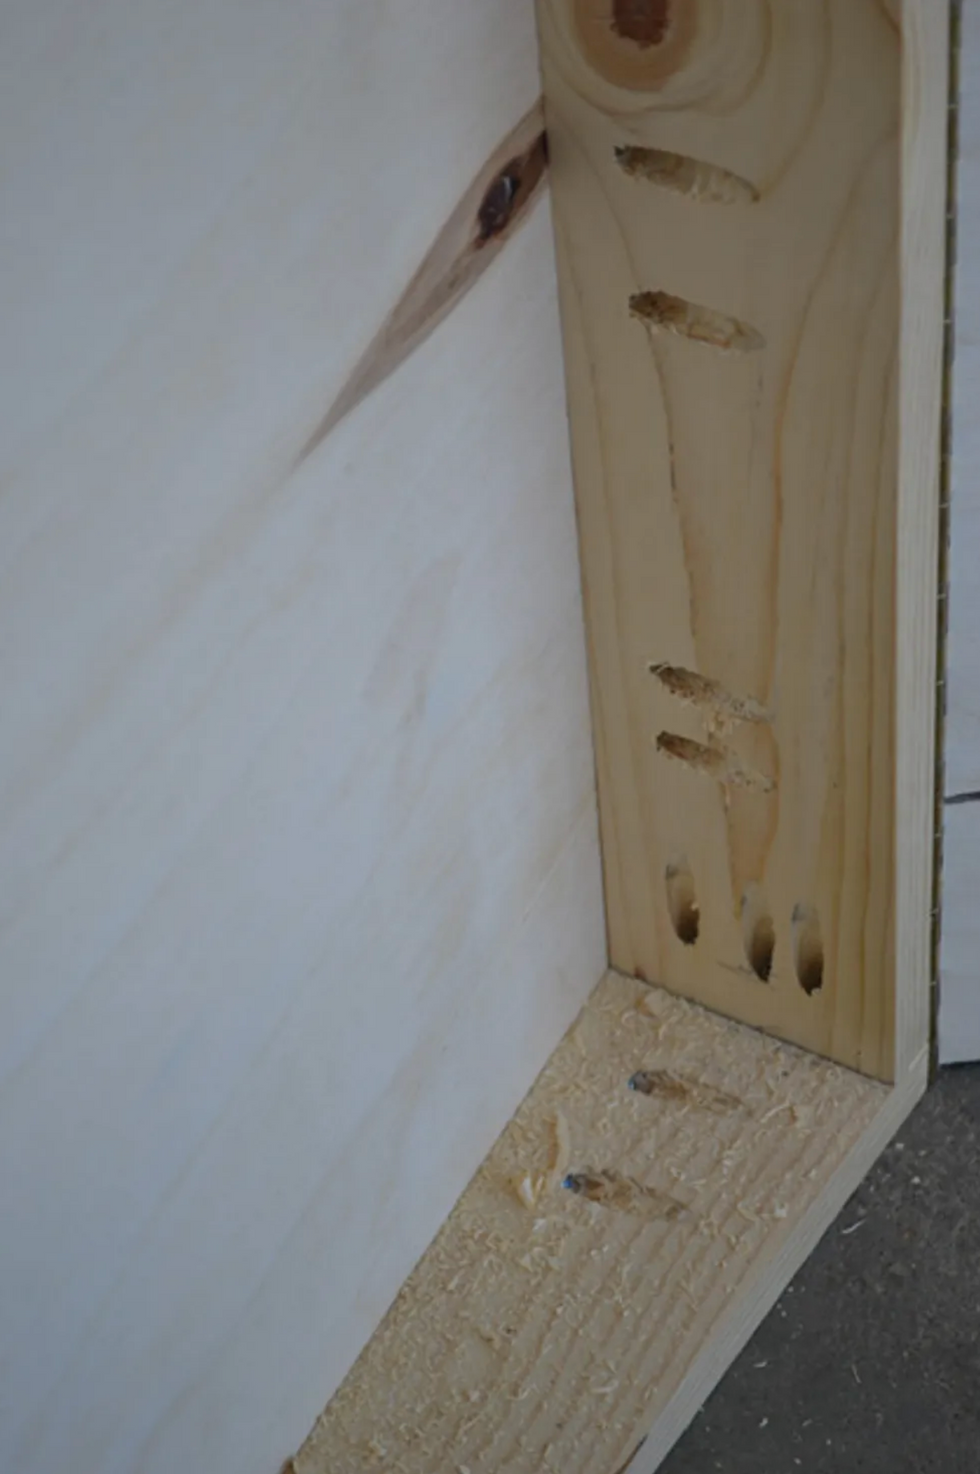
To attach the top piece, I used the Kreg jig and a 3/8" drill bit to pre-drill three pairs of holes along each surface. I spaced them 7" apart along the front and back, and 3" apart along the sides. The top of my board is 1/2" thick, so I used 1" wood screws that wouldn't puncture the top surface. Using screws rather than glue makes it so I can easily remove the top if I ever want to replace or repair anything.
Step 8
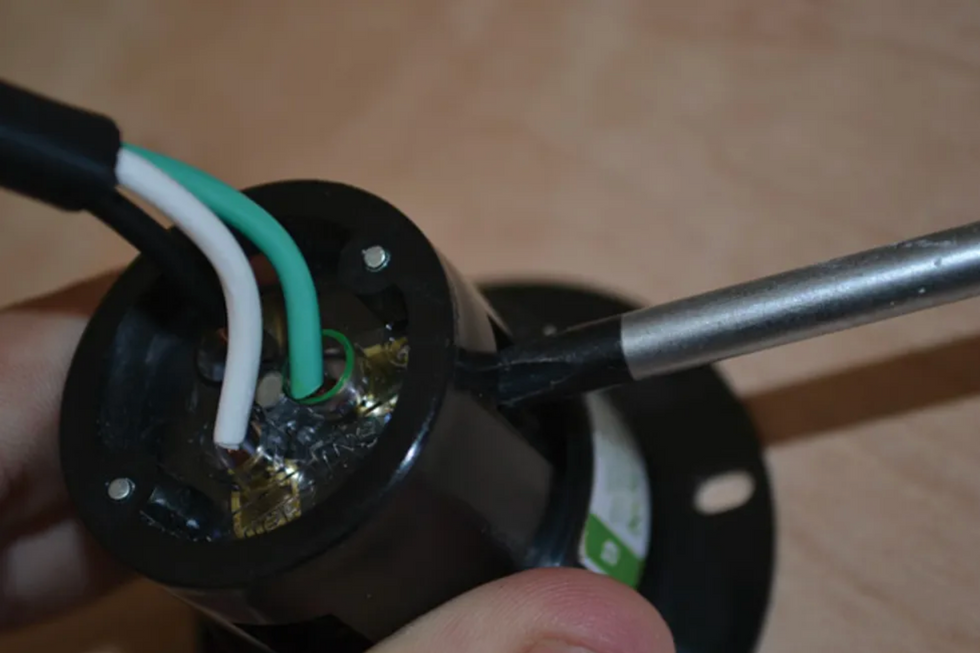
Now it's time to wire up the hardware connectors. I didn't want to risk a bad connection with the power jack, so I used a Marinco 5278BL flanged inlet, which lets you connect wires with screws rather than solder. (You can find this part, as well as the solderless connectors, at pedalboardshop.com.)
To begin, snip the male end from a regular IEC power cord. Inside you'll see three wires with black, green, and white insulation. Strip about 1/2" of the insulation from each wire, then match the wires with the corresponding inlet connectors. Finally, tighten each screw and wrap any exposed wire with electrical tape.
Step 9
Before attaching the hardware, apply whatever finish you prefer. I used a dark polyurethane stain. Don't be afraid to do a few coats to achieve the desired hue, just make sure you wipe the board thoroughly between each one. After the stain has dried, be sure to sand the top surface of your board so that whatever you use to attach the pedals—be it Velcro or a specialized product like Godlyke's Power-grip—has a nice surface to bond to.
Step 10
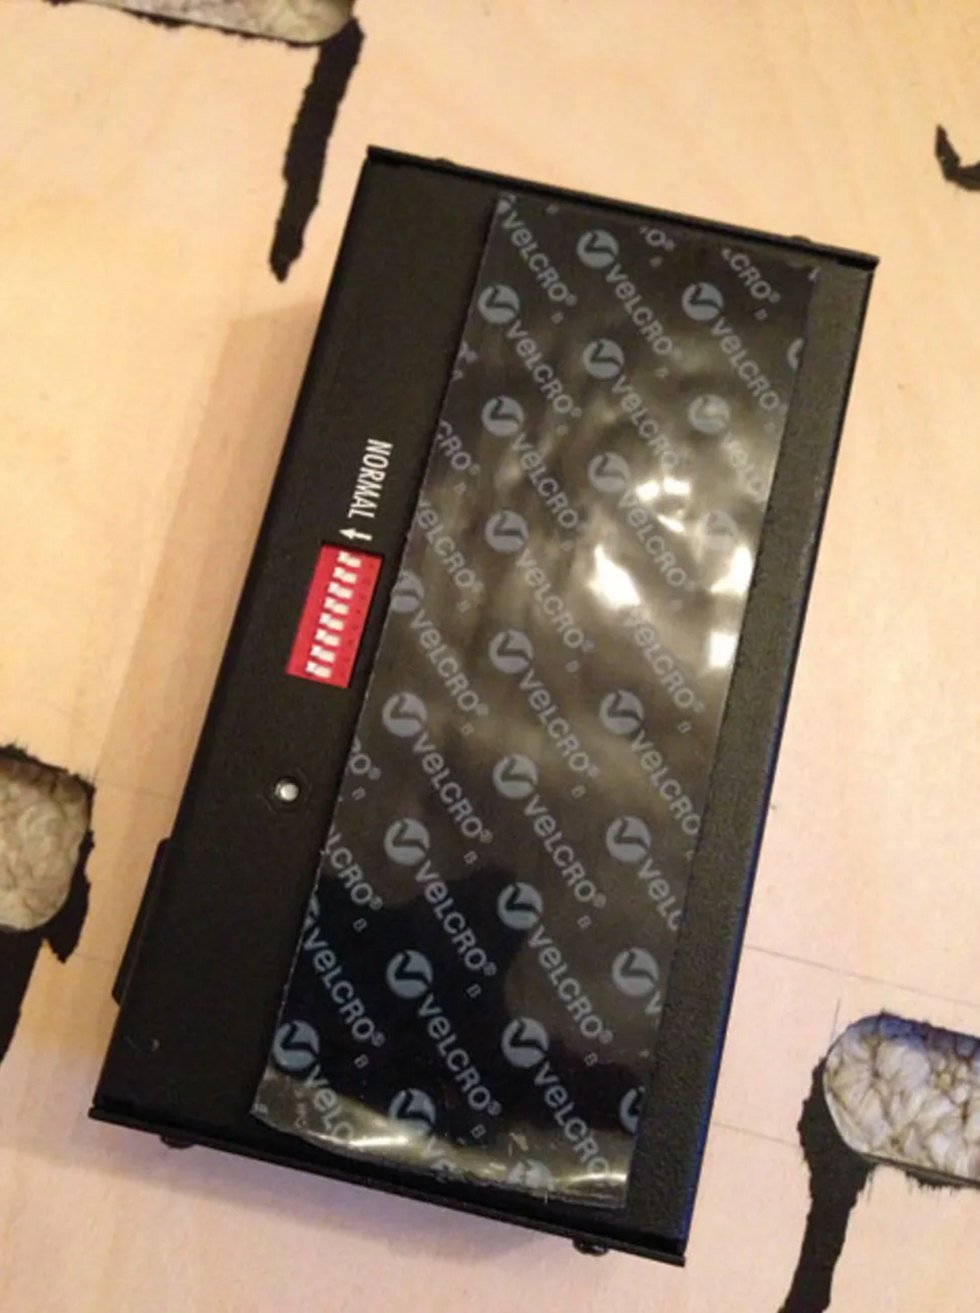
To facilitate a power supply upgrade or replacement in the future, I used a 2" strip of industrial-strength Velcro to attach the power supply to the underside of the top piece.
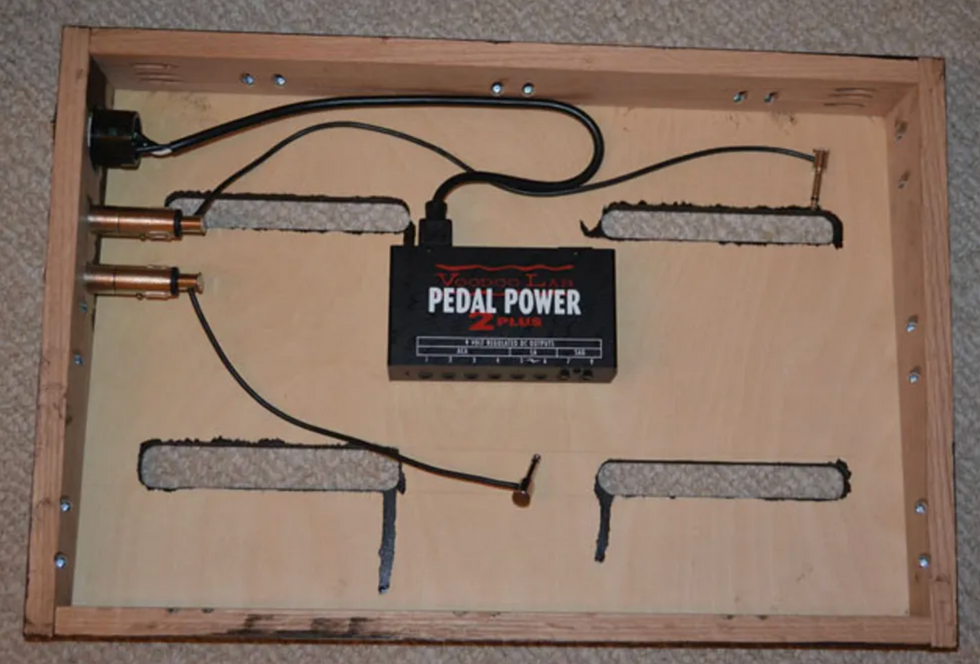
Mount the power supply and install the wired inlet and solderless connectors with 1/2" wood screws.
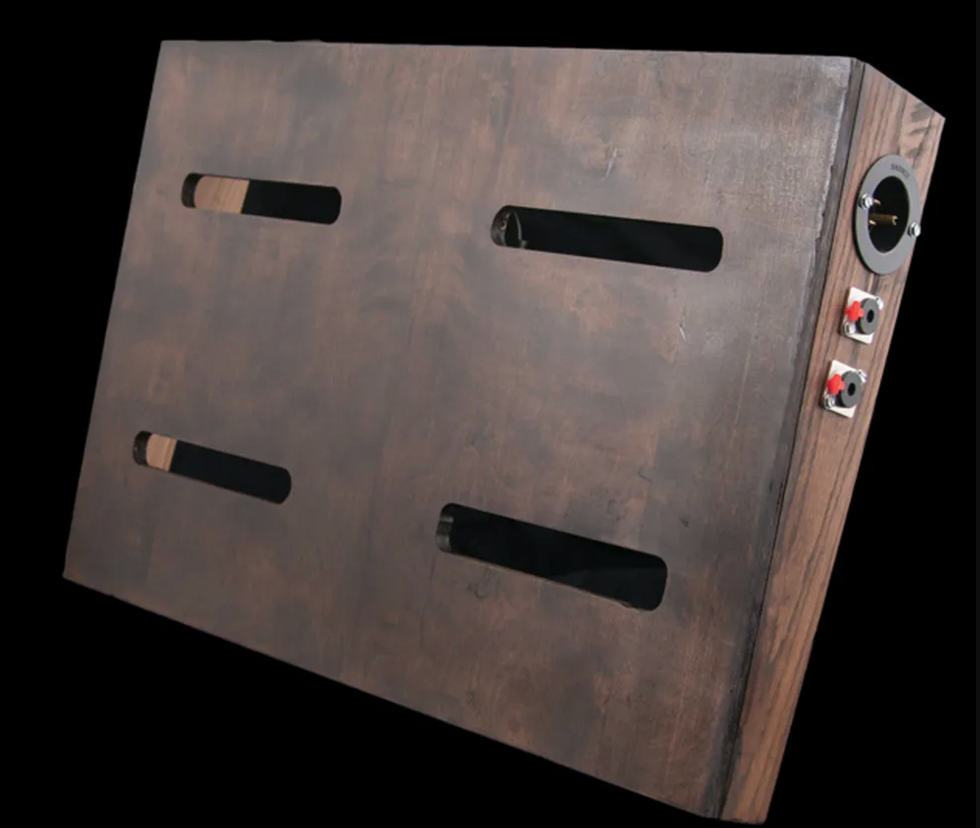
Use fine-grit (at least 220) sandpaper to sand the surface nice and smooth so the Velcro adheres sufficiently.
That's it! Once you've attached your pedals and wired up your power and signal cables, you're ready to plug in and go—enjoy!
Special thanks to Mason Marangella from Vertex Effects, David Quinones from Blackbird Pedalboards, Luke Summers from Agape Custom Shop, and Michael Helweg from Helweg Pedalboards.
[Updated 7/27/21]
- How to Build a Flight-Friendly Pedalboard - Premier Guitar ›
- DIY: How to Make a 9V Power Supply Out of a Drill Battery - Premier ... ›
- 10 DIY Patch Kits to Streamline Your Board - Premier Guitar ›
- Powering Your Board - Premier Guitar ›
- The Stompbox-Builder’s Secret Weapon - Premier Guitar ›
- DIY: How to Make a 9V Power Supply Out of a Drill Battery - Premier Guitar ›
- Reader Pedalboards 2022, Part 1 - Premier Guitar ›
- Tools for the Task: Pedalboard Power Supplies - Premier Guitar ›
- Learn How to Swap Diodes to Improve Your Overdrive - Premier Guitar ›
- DIY: How to Level, Crown & Dress Guitar Frets - Premier Guitar ›
- DIY 101: How to Build a Delay Pedal Kit - Premier Guitar ›
- Discover the Power of J. Rockett Archer Select: Review - Premier Guitar ›
- Way Huge Stone Burner Fuzz Pedal Review ›
- EarthQuaker Devices Zoar Dynamic Audio Grinder Review ›
- Are Pedals Necessary for True Guitar Freedom? ›
- JAM Pedals Harmonious Monk mk.2 Review ›
- Reader Pedalboards 2024: Fuzzy to Checkered Guitar Pedals ›
- EHX Pico Attack Decay, Oceans 3-Verb, Canyon, Deep Freeze ›
- Beetronics Nectar Guitar Pedal Review ›
- Want to Build Pedals? Here's the Ultimate Kit Roundup ›
- Mojo Hand FX Stylus Modulation Pedal ›
- Death By Audio Octave Clang V2 Review ›
Plenty of excellent musicians work day jobs to put food on the family table. So where do they go to meet their music community?
Being a full-time musician is a dream that rarely comes to pass. I’ve written about music-related jobs that keep you close to the action, and how more and more musicians are working in the music-gear industry, but that’s not for everyone. Casual players and weekend warriors love music as much as the hardcore guitarists who are bent on playing full time, but they may have obligations that require more consistent employment.
I know plenty of excellent musicians who work day jobs not to support their musical dreams, but to put food on the family table. They pay mortgages, put children through school, provide services, and contribute to their community. Music may not be their vocation, but it’s never far from their minds. So where do they go to meet their music community?
A good friend of mine has studied music extensively in L.A. and New York. He’s been mentored by the pros, and he takes his playing very seriously. Like many, he always had day jobs, often in educational situations. While pro gigs were sometimes disappointing, he found that he really enjoyed working with kids and eventually studied and achieved certification as an educator. To remain in touch with his love of music, he plays evenings and weekends with as many as three groups, including a jazz trio and a country band. Not actually worrying about having a music gig that could support him in totality has changed the way he views playing out and recording. He doesn’t have to take gigs that put him in stressful situations; he can pick and choose. He’s not fretting over “making it.” In some way, he’s actually doing what we all want, to play for the music plain and simple.
Another guy I know has played in bands since his teens. He’s toured regionally and made a few records. When the time came to raise a family, he took a corporate job that is as about as far away from the music business as you can get. But it has allowed him to remain active as a player, and he regularly releases albums he records in his home studio. His longstanding presence in the music scene keeps him in touch with some famous musicians who guest on his recordings. He’s all about music head to toe, and when he retires, I’m certain he’ll keep on playing.
“Seek out music people regularly. They’re hiding in plain sight: at work, at the park, in the grocery store. They sell you insurance, they clean your teeth.”
I could go on, and I’m sure you know people in similar situations. Maybe this even describes you. So where do we all find our musical compadres? For me, and the people I’ve mentioned, our history playing in bands and gigging while young has kept us in touch with others of the same ilk, or with those who are full-time musicians. But many come to music later in life as well. How do they find community?
Somehow, we manage to find our tribe. It could be at work or a coffee shop. Some clubs still have an open mic night that isn’t trying to be a conveyor belt to commercial success. Guitarists always go up to the stage between changes to talk shop, which can lead to more connections. I like the idea of the old-school music store. Local guitar shops and music stores are great places to meet other musicians. Many have bulletin boards where you can post or find ads looking for bandmates. When I see someone wearing a band T-shirt, I usually ask if they’re a musician. Those conversations often lead to more connections down the line. Remember, building a network of musicians often requires persistence and putting yourself out there. Don’t be afraid to initiate conversations and express your interest in collaborating with others.
Of course, I’m lucky to have worked in the music sphere since I was a teen. My path led to using my knowledge of music and guitars to involve myself in so many adventures that I can hardly count them. Still, it’s the love of music at the root of everything I do, and it’s the people that make that possible. So whether you’re a pro or a beginner, seek out music people regularly. They’re hiding in plain sight: at work, at the park, in the grocery store. They sell you insurance, they clean your teeth. Maybe they’re your kid’s teacher. Musicians are everywhere, and that’s a good thing for all of us.
Mooer's Ocean Machine II is designed to bring superior delay and reverb algorithms, nine distinct delay types, nine hi-fidelity reverb types, tap tempo functionality, a new and improved looper, customizable effect chains, MIDI connectivity, expression pedal support, and durable construction.
Similarly to the original, the Ocean Machine II offers two independent delay modules, each with nine different delay types of up to two seconds, including household names such as digital, tape, and echo delays, as well as more abstract options, such as galaxy, crystal, and rainbow. A high-fidelity reverb module complements these delays with nine reverb types, as well as a shimmer effect. Each delay and reverb effect can also be ‘frozen,’ creating static ambient drones, an effect that sounds particularly impressive considering the pedal’s DSP upgrades.
While the original Ocean Machine’s looping capabilities provided just 44 seconds of loop storage, the new addition features an impressive 120 seconds. To experiment with this feature, along with OceanMachine II’s other sonic capabilities, users can use an intuitive LCD screen along with 12 knobs (four for each delay and reverb module) to easily adjust parameters within the device’s ‘Play Mode.’ Three footswitches are also provided to facilitate independent effect toggling, tap tempo control, looper interfacing, and a preset selector.
Once the guitarist has crafted an interesting effect chain, they can save their work as a preset and enter ‘Patch Mode,’ in which they can toggle between saved settings with each of the three footswitches. In total, the Ocean Machine II provides eight preset storage banks, each of which supports up to threepresets, resulting in a total of 24 save slots.
The pedal’s versatility is further enhanced by its programmable parallel and serial effect chain hybrid, a signature element of Devin Townsend’s tone creation. This feature allows users to customize the order of effects, providing endless creative possibilities. Further programming options can be accessed through the LED screen, which impressively includes synchronizable MIDI connectivity, a feature that was absent in the original Ocean Machine.
In addition to MIDI, the pedal supports various external control systems, including expression pedal input through a TRS cable. Furthermore, the pedal is compatible with MOOER's F4 wireless footswitch, allowing for extended capabilities for mapping presets and other features. A USB-C port is also available for firmware updates, ensuring that the pedal remains up-to-date with the latest features and improvements.
Considering the experimental nature of Devin Townsend’s performances, MOOER has also gone above and beyond to facilitate the seamless integration of Ocean Machine II into any audio setup. The device features full stereo inputs and outputs, as well as adjustable global EQ settings, letting users tailor their sound to suit different environments. Guitarists can also customize their effect chains to be used with true bypass or DSP (buffered) bypass, depending on their preferences and specific use cases.
Overall, Ocean Machine II brings higher-quality delay and reverb algorithms, augmented looping support, and various updated connections to Devin Townsend’s original device. As per MOOER’s typical standard, the pedal is engineered to withstand the rigors of touring and frequent use, allowing guitars to bring their special creations and atmospheric drones to the stage.
Key Features
- Improved DSP algorithms for superior delay and reverb quality
- Nine distinct delay types that support up to 2 seconds of delay time: digital, analog, tape, echo,liquid, rainbow, crystal, low-bit, and fuzzy delays
- Nine hi-fidelity reverb types: room, hall, plate, distorted reverb, flanger reverb, filter reverb,reverse, spring, and modulated reverb
- Freeze feedback feature, supported for both delay and reverb effects
- Tap tempo footswitch functionality
- New and improved looper supporting up to 120 seconds of recording time, along withoverdubbing capabilities, half-speed, and reverse effects.
- Customizable order of effects in parallel or series chains
- Flexible bypass options supporting both true bypass and DSP bypass
- Large LCD screen, controllable through twelve easy-to-use physical knobs for real-time parameter adjustments.
- Adjustable Global EQ Settings
- Full stereo inputs and outputs
- Synchronizable and mappable MIDI In and Thru support
- USB-C port for firmware updates
- External expression pedal support via TRS cable
- Support for the MOOER F4 wireless footswitch (sold separately)
- Designed for durability and reliability in both studio and live environments.
The Ocean Machine will be available from official MOOER dealers and distributors worldwide on September 10, 2024.
For more information, please visit mooeraudio.com.
MOOER Ocean Machine II Official Demo Video - YouTube
You may know the Gibson EB-6, but what you may not know is that its first iteration looked nothing like its latest.
When many guitarists first encounter Gibson’s EB-6, a rare, vintage 6-string bass, they assume it must be a response to the Fender Bass VI. And manyEB-6 basses sport an SG-style body shape, so they do look exceedingly modern. (It’s easy to imagine a stoner-rock or doom-metal band keeping one amid an arsenal of Dunables and EGCs.) But the earliest EB-6 basses didn’t look anything like SGs, and they arrived a full year before the more famous Fender.
The Gibson EB-6 was announced in 1959 and came into the world in 1960, not with a dual-horn body but with that of an elegant ES-335. They looked stately, with a thin, semi-hollow body, f-holes, and a sunburst finish. Our pick for this Vintage Vault column is one such first-year model, in about as original condition as you’re able to find today. “Why?” you may be asking. Well, read on....
When the EB-6 was introduced, the Bass VI was still a glimmer in Leo Fender’s eye. The real competition were the Danelectro 6-string basses that seemed to have popped up out of nowhere and were suddenly being used on lots of hit records by the likes of Elvis, Patsy Cline, and other household names. Danos like the UB-2 (introduced in ’56), the Longhorn 4623 (’58), and the Shorthorn 3612 (’58) were the earliest attempts any company made at a 6-string bass in this style: not quite a standard electric bass, not quite a guitar, nor, for that matter, quite like a baritone guitar.
The only change this vintage EB-6 features is a replacement set of Kluson tuners.
Photo by Ken Lapworth
Gibson, Fender, and others during this era would in fact call these basses “baritone guitars,” to add to our confusion today. But these vintage “baritones” were all tuned one octave below a standard guitar, with scale lengths around 30", while most modern baritones are tuned B-to-B or A-to-A and have scale lengths between 26" and 30".)
At the time, those Danelectros were instrumental to what was called the “tic-tac” bass sound of Nashville records produced by Chet Atkins, or the “click-bass” tones made out west by producer Lee Hazlewood. Gibson wanted something for this market, and the EB-6 was born.
“When the EB-6 was introduced, the Bass VI was still a glimmer in Leo Fender’s eye.”
The 30.5" scale 1960 EB-6 has a single humbucking pickup, a volume knob, a tone knob, and a small, push-button “Tone Selector Switch” that engages a treble circuit for an instant tic-tac sound. (Without engaging that switch, you get a bass-heavy tone so deep that cowboy chords will sound like a muddy mess.)
The EB-6, for better or for worse, did not unseat the Danelectros, and a November 1959 price list from Gibson hints at why: The EB-6 retailed for $340, compared to Dano price tags that ranged from $85 to $150. Only a few dozen EB-6 basses were shipped in 1960, and only 67 total are known to have been built before Gibson changed the shape to the SG style in 1962.
Most players who come across an EB-6 today think it was a response to the Fender Bass VI, but the former actually beat the latter to the market by a full year.
Photo by Ken Lapworth
It’s sad that so few were built. Sure, it was a high-end model made to achieve the novelty tic-tac sound of cheaper instruments, but in its full-voiced glory, the EB-6 has a huge potential of tones. It would sound great in our contemporary guitar era where more players are exploring baritone ranges, and where so many people got back into the Bass VI after seeing the Beatles play one in the 2021 documentary, Get Back.
It’s sadder, still, how many original-era EB-6s have been parted out in the decades since. Remember earlier when I wrote that our Vintage Vaultpick was about as original as you could find? That’s because the model’s single humbucker is a PAF, its Kluson tuners are double-line, and its knobs are identical to those on Les Paul ’Bursts. So as people repaired broken ’Bursts, converted other LPs to ’Bursts, or otherwise sought to give other Gibsons a “Golden Era” sound and look ... they often stripped these forgotten EB-6 basses for parts.
This original EB-6 is up for sale now from Reverb seller Emerald City Guitars for a $16,950 asking price at the time of writing. The only thing that isn’t original about it is a replacement set of Kluson tuners, not because its originals were stolen but just to help preserve them. (They will be included in the case.)
With so few surviving 335-style EB-6 basses, Reverb doesn’t have a ton of sales data to compare prices to. Ten years ago, a lucky buyer found a nearly original 1960 EB-6 for about $7,000. But Emerald City’s $16,950 asking price is closer to more recent examples and asking prices.
Sources: Prices on Gibson Instruments, November 1, 1959, Tony Bacon’s “Danelectro’s UB-2 and the Early Days of 6-String Basses” Reverb News article, Gruhn’s Guide to Vintage Guitars, Tom Wheeler’s American Guitars: An Illustrated History, Reverb listings and Price Guide sales data.
An '80s-era cult favorite is back.
Originally released in the 1980s, the Victory has long been a cult favorite among guitarists for its distinctive double cutaway design and excellent upper-fret access. These new models feature flexible electronics, enhanced body contours, improved weight and balance, and an Explorer headstock shape.
A Cult Classic Made Modern
The new Victory features refined body contours, improved weight and balance, and an updated headstock shape based on the popular Gibson Explorer.
Effortless Playing
With a fast-playing SlimTaper neck profile and ebony fretboard with a compound radius, the Victory delivers low action without fret buzz everywhere on the fretboard.
Flexible Electronics
The two 80s Tribute humbucker pickups are wired to push/pull master volume and tone controls for coil splitting and inner/outer coil selection when the coils are split.
For more information, please visit gibson.com.