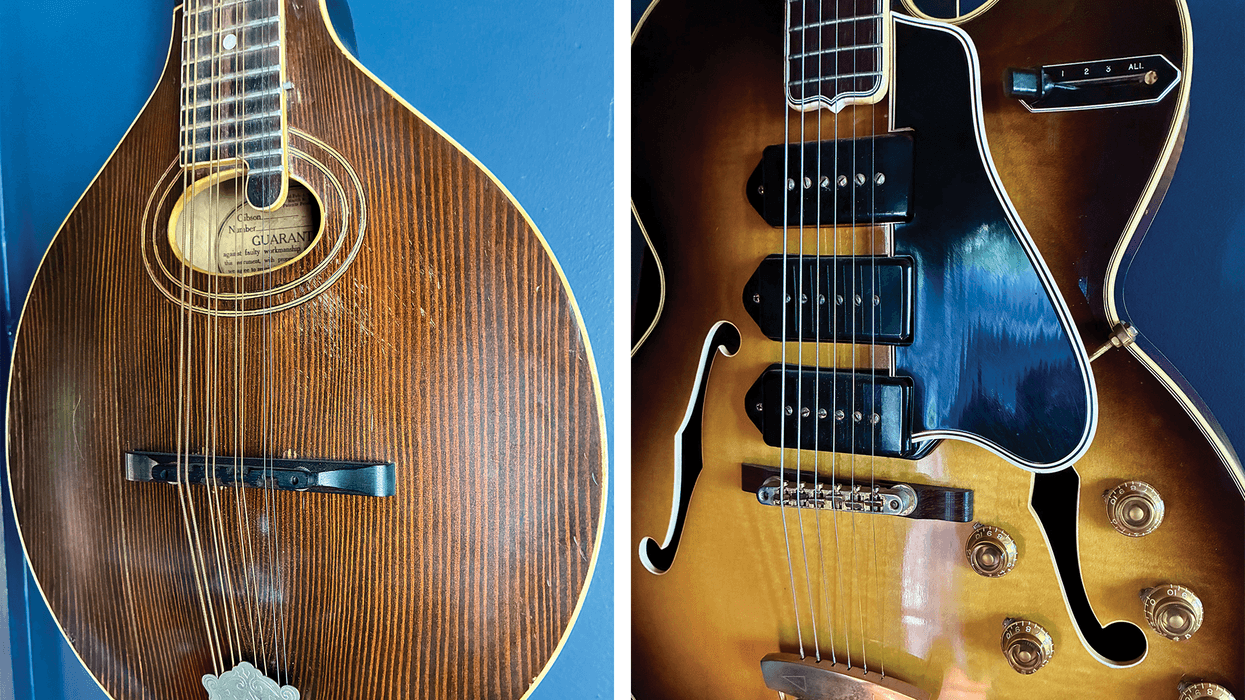
Recently, a customer brought
a ’74 Gibson flattop into
our shop for me to check out.
It was in good overall condition
and sounded good, too, with
a warm bottom end and silky
highs. But as I was examining
the guitar, my eyes were drawn
to six black bridge pins protruding
from its wafer-thin rosewood
bridge and strings that were sloping
over a rickety, bottomed-out
plastic saddle. I’ve seen my share
of wafer-thin bridges on flattops
built during this time period,
and I’m familiar with the problems
that can occur with them.
Often, the bridge develops cracks
between each bridge-pin hole
and they follow the grain lines.
Thin bridges can also bust out at
the front. This is caused by having
insufficient mass to resist the
forward pressure from the saddle.
Measuring the action, I also
determined that the strings
were low on the fretboard. You
could hear that they were getting
slightly choked off, and this was
hindering sustain and clarity. But
I knew that, with a few changes,
we could significantly improve
the guitar’s dynamic response,
overall volume, and tone. To
make this happen, however, the
flapjack bridge had to go!
Bridge Removal. Before starting any work—and especially before using tools that apply heat—the first crucial step is to protect the top of the guitar. For this, I used a thin layer of card stock with a hole cut out to allow the bridge to fit through.
To remove a flattop’s bridge, I use three tools from stewmac.com: two bridge heater and fingerboard irons (item #4607) for applying heat to the bridge, a surface thermometer (#4603) for accurately reading the temperature of these irons, and a bridge/fingerboard removal knife (#4464) to help separate the glue seam. You can get the job done with just one bridge heater, but two of these really expedite the removal process.
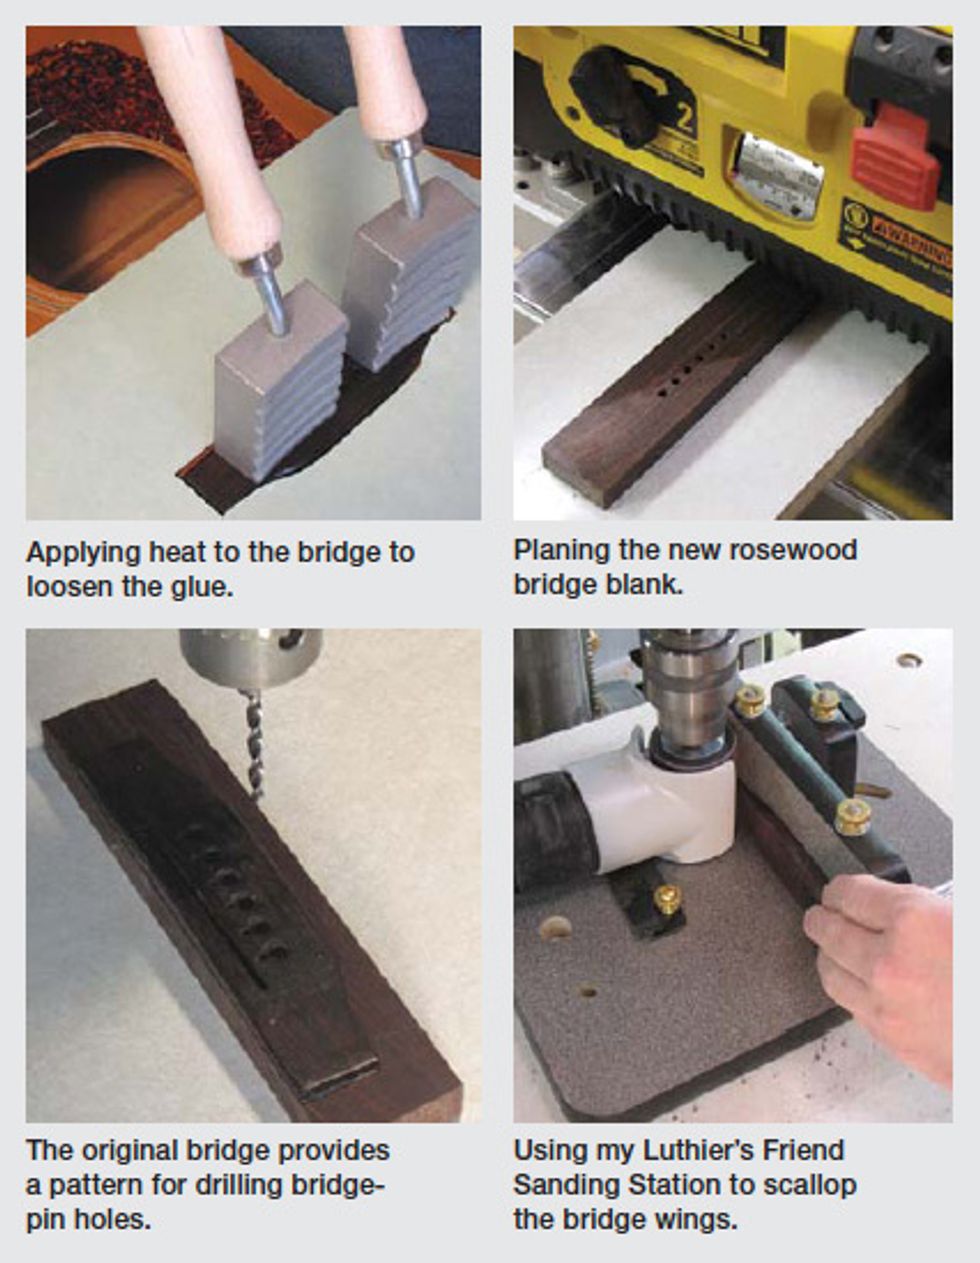
I used a hot plate to heat up the irons, and the surface thermometer to monitor their temperature. I kept my eyes on the gauge and adjusted the hot-plate setting until the irons reached that sweet spot of 250 degrees F. Once the bridge heaters were ready, I placed them on the bridge, allowing the heat to penetrate through the wood and into the glue seam.
After 10 minutes, I picked up my removal knife and applied gentle pressure to see if the glue seam was ready to separate. This is the time to be graceful and not force the knife—you don’t want to tear out the spruce top. At first, you’re simply probing to see if the glue has softened enough to allow the knife’s tapered, stainless-steel blade to penetrate the seam. With some patience and careful prying, the bridge came off like butter.
Fabrication. The next step involved making a new bridge that would add 3/16" thickness to provide more stability and increase frontal support for the new elevated saddle. To make my replacement bridge, I began with a rosewood flattop guitar bridge blank (#0160). Actually, I ordered three blanks, because I was hoping to find one with a grain pattern similar to the original. When they arrived, I found one that, for all practical purposes, matched the grain pattern of the Gibson bridge. Any of these blanks would have functioned superbly, but the client and I felt it was important to try to match the subtle details of the bridge I was replacing.
And that original bridge still had a role to play—I used it as a pattern. I carefully measured and then duplicated its footprint, pin holes, saddle slot, and lacquer line on the replacement blank.
After squaring up the two sides of the 1/2"-thick rosewood blank using my Grizzly spiral-cut jointer, I used double-sided tape to fasten the blank to a section of countertop board before running it through my DeWalt Planer. These tools make the job go quickly, but it’s worth noting that if I didn’t have a spiral-cut jointer and a planer, my Luthier’s Friend Sanding Station (#5659) would work for squaring and sizing the blank to its target 5/16" thickness. For the most part, the Sanding Station offers the ability to fabricate a complete bridge without any other tools.
With the rough thickness established, I used double-sided tape to attach the original bridge flush to the front edge of the blank, and then marked the bridge-pin holes and traced around the sides and back.
A 3/16" brad-point drill bit works well for drilling the initial bridge-pin holes. After drilling, I used a band saw with a fine-tooth blade to cut the sides and back edges of the blank to shape. Finally, I used the Sanding Station for scalloping the wings of the bridge and overall final detailing.
Next month, we’ll finish this bridge-replacement project.
 John Brown is the
inventor of the Fretted/Less
bass. He owns and operates
Brown’s Guitar Factory,
a guitar manufacturing,
repair, and restoration facility
staffed by a team of talented
luthiers. His guitar-tool and accessory designs
are used by builders all over the world. Visit
brownsguitarfactory.com or email John at
info@brownsguitarfactory.com.
John Brown is the
inventor of the Fretted/Less
bass. He owns and operates
Brown’s Guitar Factory,
a guitar manufacturing,
repair, and restoration facility
staffed by a team of talented
luthiers. His guitar-tool and accessory designs
are used by builders all over the world. Visit
brownsguitarfactory.com or email John at
info@brownsguitarfactory.com.