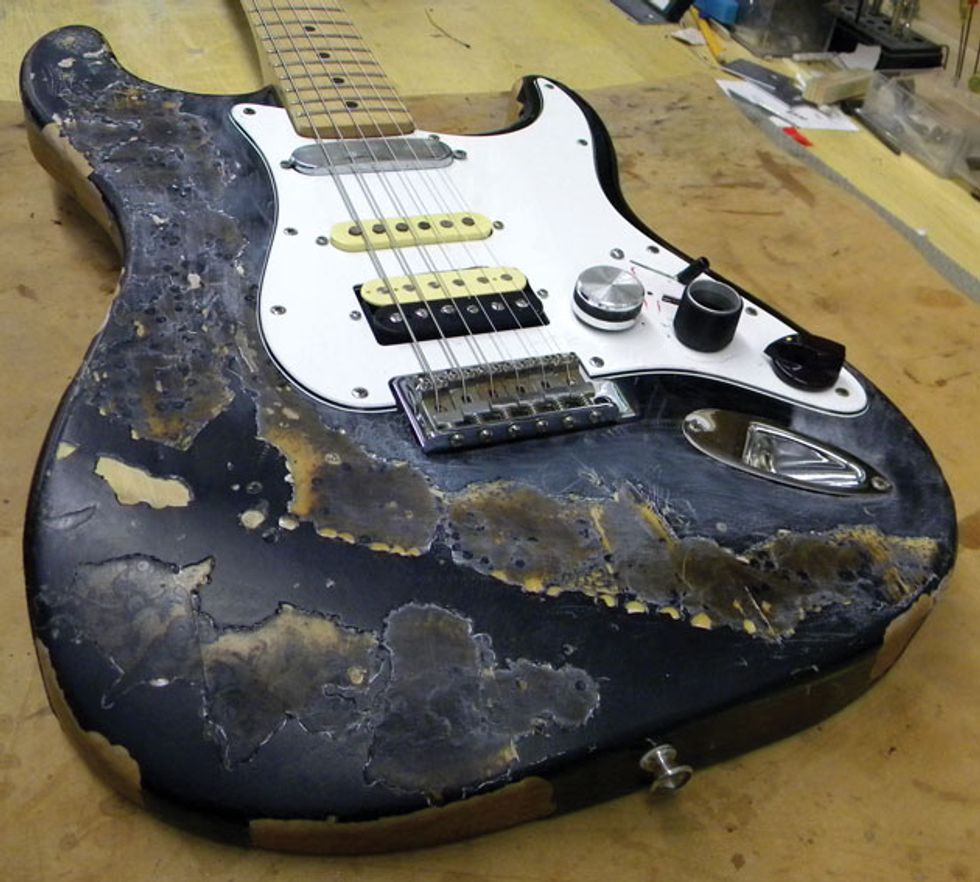
Photo 1
A client recently asked me to install an onboard buffer in his Fender Strat, which he affectionately calls “the Zombie Caster” because of its remarkably hideous finish (Photo 1). By the way, this resulted from a relic job gone awry. My friends, please don’t try to relic your guitar with a blowtorch!
Despite its looks, the guitar actually sounds pretty good. However, its owner wanted to be able to drive long cable runs in the studio without signal degradation, and perhaps more importantly, he wanted to retain all the Strat’s highs and clarity as he backed down its volume control. As we’ll see in a moment, an onboard buffer circuit lets him accomplish both goals.
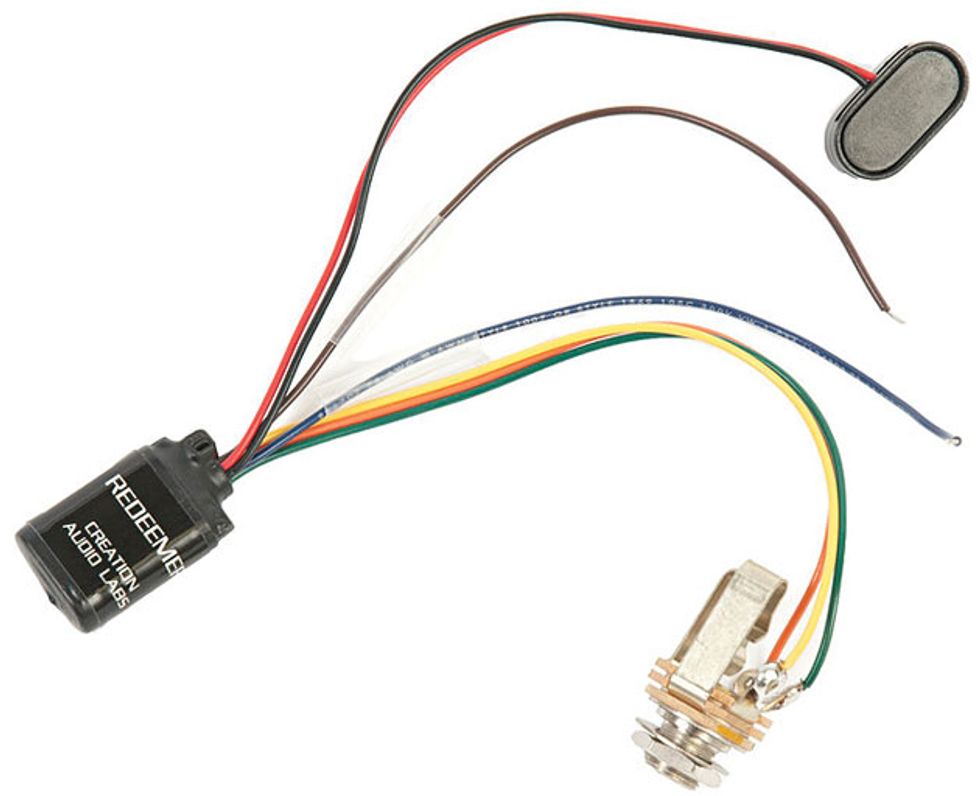
Photo 2. Photo courtesy of Creation Audio Labs.
Several companies—including CAE Sound, Bartolini, and Wald Electronics—make onboard buffer kits. Here in Nashville, a buffer called the Redeemer (Photo 2) is popular with studio and touring guitarists. After producer Michael Wagener at WireWorld Studios introduced me to the device, I was impressed enough to recommend it to my customers who want the benefits of a buffered circuit.
While it’s not the only game in town, the Redeemer offers superb specs and costs less than $50 direct from Creation Audio Labs, who manufacture the system. It even has a “dead battery” mode that lets you finish the set even if the circuit’s 9V battery is on the ropes.
Why an onboard buffer? Passive magnetic pickups generate a high-impedance signal. This signal quickly degrades as it travels out from your guitar through a cable—even expensive, high-end cables. Stompboxes can further load the signal and degrade the sound, and a high-impedance signal is susceptible to unwanted noise from lights and other electronic gear as it makes its way to the amp. Even if you plug directly into an amp with a single cable, a guitar’s high-impedance output is still subject to a significant loss of sonic detail. A buffered signal effectively eliminates these problems.
A unity-gain buffer circuit simply converts the high-impedance signal into a low-impedance signal—like that of a typical microphone. With a low-impedance signal, you can play through a 100-foot cable without losing highs, turn your volume knob down without the sound getting muddy, and even plug directly into a mixing console. Perhaps most importantly, you get to hear a sparkle from your pickups that had been previously masked. Because we’re used to the sound of a high-impedance signal, we accept it as normal, but once you buffer your pickups, you’ll be amazed at the presence and detail they’re capable of producing.
Many manufacturers sell buffer pedals, but to reach such a pedal, the signal has to travel through a cable and thus suffer the negative effects of cable capacitance before it’s buffered. Here’s the advantage of an onboard system: The pickups’ output is converted to a low-impedance signal before it leaves the guitar.
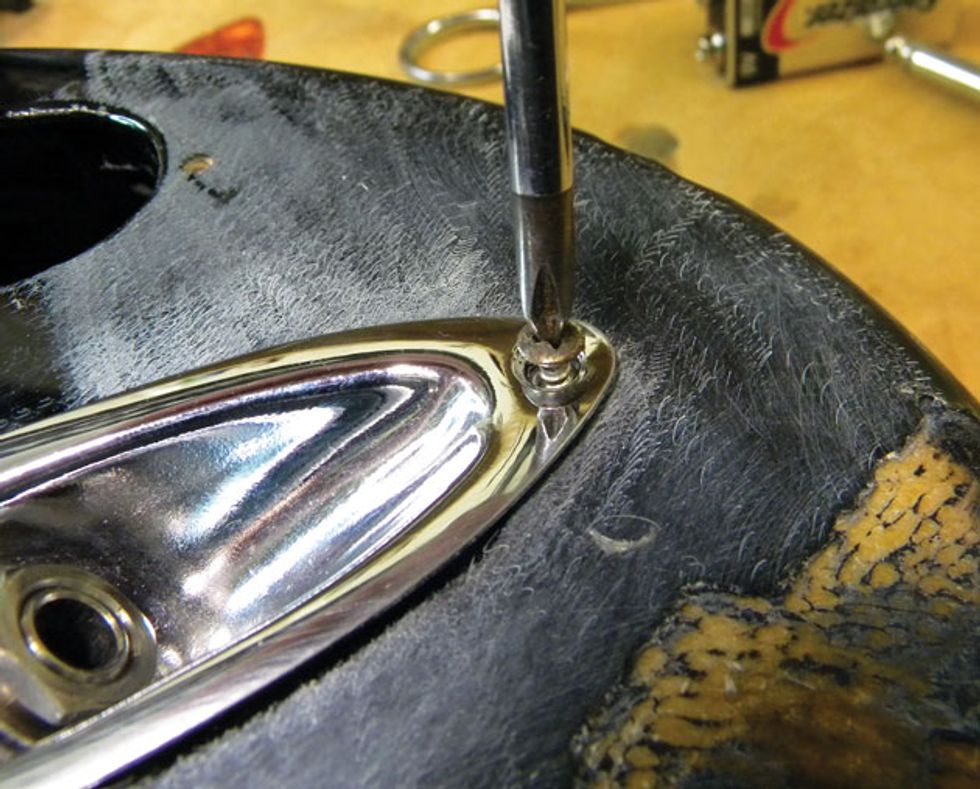
Photo 3
Jerry Garcia had an onboard preamp buffer in “Tiger”—his iconic custom Doug Irwin guitar. Fingerstyle wizard Tuck Andress is another player known to favor an onboard buffer, and Warren Haynes’ signature Gibson Les Paul comes with a factory-installed CAE Sound CB2 onboard buffer circuit.
Not all guitarists like the extended clarity provided by a buffered low-impedance signal, but having at least one guitar in your arsenal with an onboard unity-gain buffer gives you sonic options you wouldn’t otherwise have.
Although I’m using the Redeemer in this project, the instillation process will be similar for the onboard buffer systems I mentioned earlier. Incidentally, if you Google “onboard guitar buffer,” you’ll also find several DIY kits and schematics—another option if you’re so inclined.
Tools and materials. To install an onboard buffer, you’ll need a few basic tools and supplies: a 30-40 watt soldering iron with a small tip, a roll of .032" diameter 60/40 rosin core solder, 5" locking hemostats (preferably with rubber-coated handles), a 9V battery, a medium tip Phillips screwdriver, and a 1/2" nut driver.
I prefer a 40-watt soldering iron because it’s hot enough that you don’t have to hold the tip against the wire or lug very long. Anything lower than 30 watts just takes too long to heat up the components.
Wiring overview. In terms of wiring, the Redeemer is typical of most onboard buffers. There’s the circuit itself, housed in a tiny protective case, and there are seven wires sprouting from the case. Two wires (red and black) are pre-attached to a snap-on battery connector. Three wires (orange, green, and yellow) are already soldered to the included stereo jack. The remaining two wires replace the guitar’s original output and ground wires.
Installation is simple for most solidbodies, although there’s an extra step involved with a Strat, simply because of where its jack is physically located. Let’s take a closer look.
Strat installation. After removing the strings, the first step is to unscrew the jack plate (Photo 3) and pickguard. Once you can access the output jack, remove it from the jack plate using the 1/2" nut driver, and put the jack plate aside for a moment.
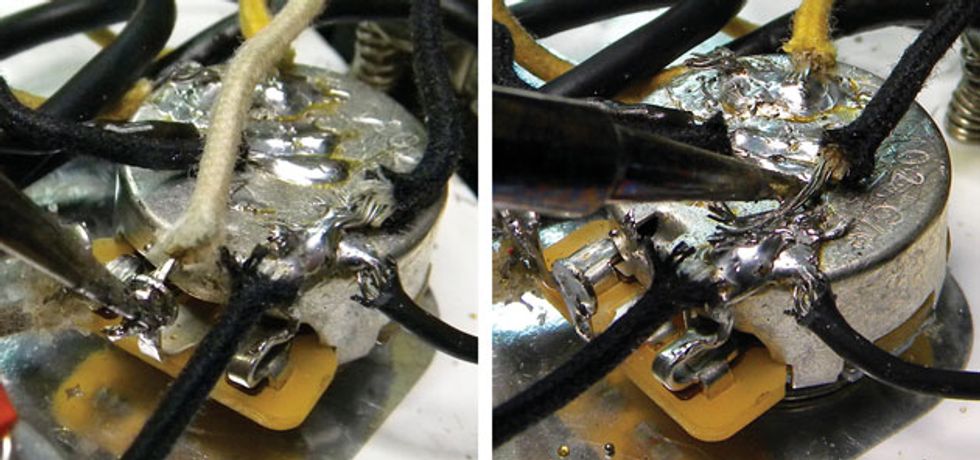
Photo 4 (left) and Photo 5 (right)
Next, unsolder two wires—output and ground—from the guitar’s volume pot. These two wires connect the original output jack to the volume pot, so they’re easy to identify. The primary lead (output) should be attached to the center (output) lug on the volume pot (Photo 4), and the ground is typically soldered to the back of the volume pot (Photo 5).
Once you’ve unsoldered these wires from the volume pot, stash the stock mono output jack with its wires in your spare parts bin—you won’t be using it anymore on this guitar.
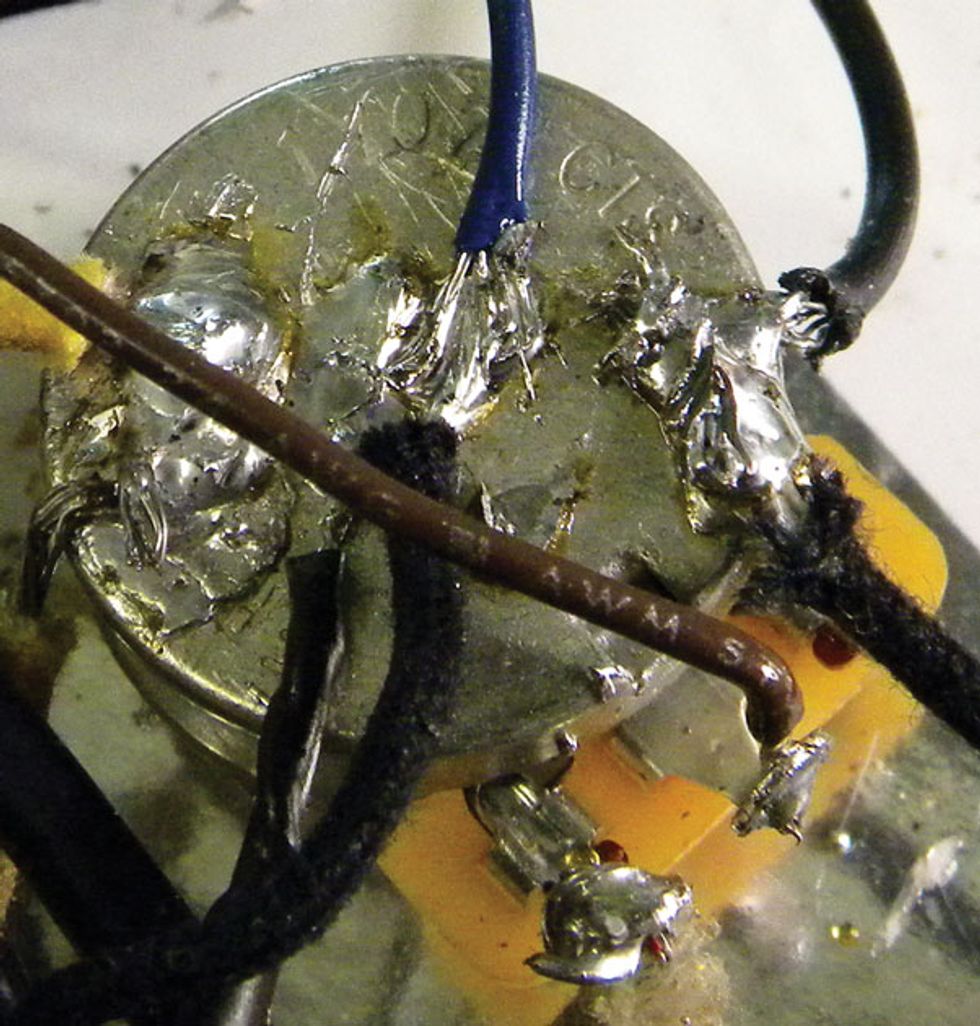
Photo 6
The Redeemer has two unsoldered wires: brown and blue. Solder the brown wire to the volume pot’s center lug, and the blue wire to the back of the volume pot, as in Photo 6.
Like most onboard buffers, the Redeemer uses a stereo (tip, ring, sleeve) output jack. The buffered signal is mono and you still use a mono guitar cable, but a stereo jack turns off the battery when you unplug the cable. Three wires (orange, green, and yellow) connect the Redeemer circuit to the stereo output jack. The orange wire is the output, which connects to the tip. The yellow wire (ring) turns the battery on and off. The green wire (sleeve) is the ground.
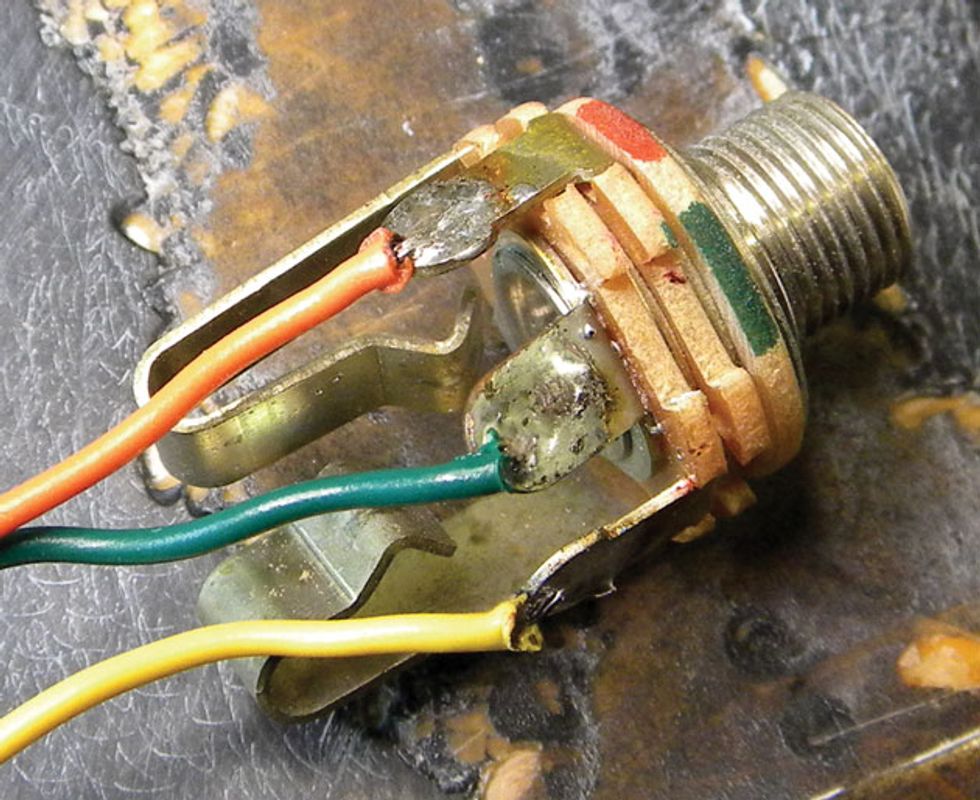
Photo 7
Because a Strat has separate cavities for the electronics and output jack, you have to unsolder the Redeemer’s stereo jack, feed the three wires through the electronics cavity into the jack cavity, and resolder those wires to the jack. But before you unsolder anything, mark the output jack with corresponding colors so you’ll know where to reconnect the wires (Photo 7). Once you’ve reconnected these wires, install the jack into the jack plate and mount it on the body.
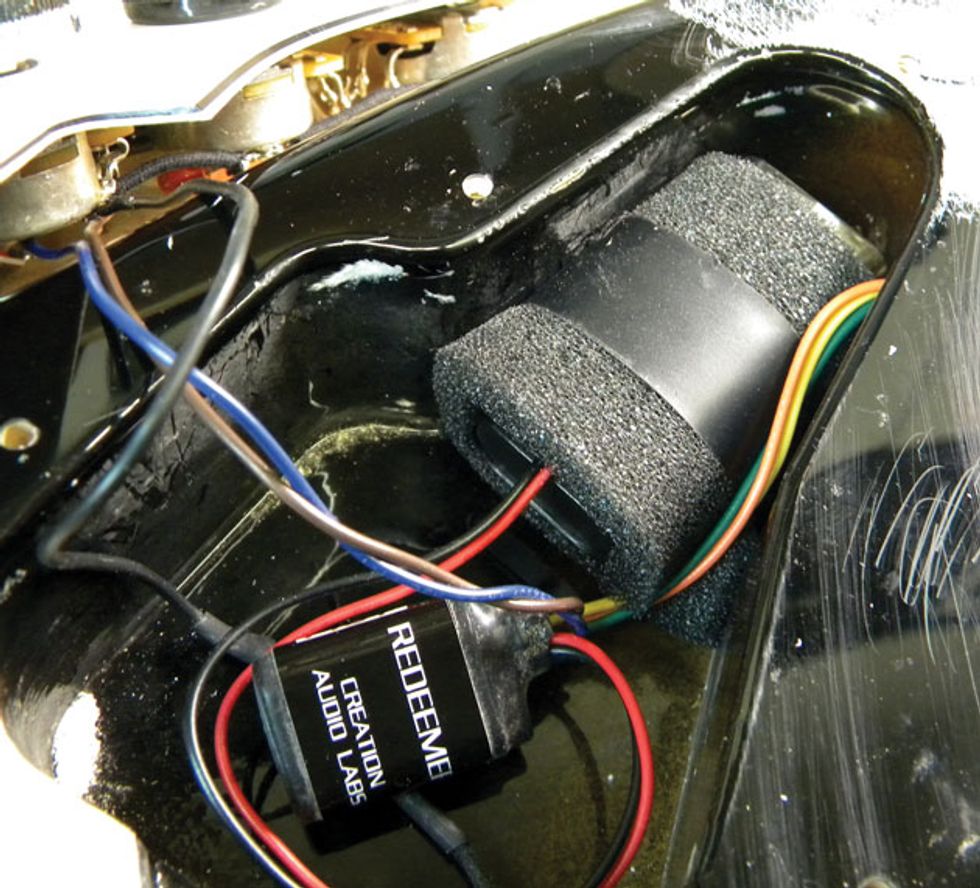
Photo 8
The techs at Creation Audio Labs recommend you wrap the battery in foam—there’s some inside the packaging—to prevent the battery from banging around inside the control cavity (Photo 8).
And that’s it! Carefully put everything into the control cavity, re-install the pickguard, restring, and you’ll be good to go.
It’s even easier to install a Redeemer system in a Tele- or Les Paul-style guitar because you don’t need to unsolder and resolder the buffer’s stereo jack. On a Tele, unscrew the stock jack and then unsolder the output and ground wires, replacing them with the brown (output) and blue (ground) Redeemer wires. Mount the Redeemer’s jack, carefully place everything inside the cavity, and close up the control plate.
Here’s an easy way to install a Redeemer in a Les Paul, SG, or similar solidbody: Simply snip the stock output and ground wires an inch or so from the original output jack, and then remove it. After sliding some heat-shrink tubing on the Redeemer’s brown and blue wires, solder them to the guitar’s original output and ground wires, respectively. Slide the tubing over your solder joints, apply enough heat to shrink the tubing around each splice, install the new output jack on your guitar, tuck the buffer and wiring into the control cavity, button everything up, and get ready to rock.