We all know the feeling: Inspiration strikes and you grab your guitar to explore some cool riff, phrase, or chord progression before it gets away. But instead of nailing the idea, you wind up wrestling with your instrument and getting sidetracked. Maybe the strings feel unexpectedly stiff, or everything sounds a bit sour and out of tune, or an annoying buzz keeps distracting you. The muse slips away and frustration sets in. Bummer.
No one says playing guitar is easy, but the condition of your axe can create additional hurdles that get between you and the music inside trying to get out. Whether you're a beginner or seasoned pro, having your guitar in optimal playing condition is essential if you want to sound your best. No amount of modding is going to transport you to sonic nirvana if the foundation—the essential physical platform—isn't adjusted and tweaked to operate correctly.
With that in mind, let's take a moment to review the key elements that govern how your guitar feels and sounds. As with any piece of sophisticated machinery, various aspects of your guitar drift out of alignment over time. Seasonal changes in temperature and humidity drive a lot of this, but so do gigging and travel.
Here's the good news: If you understand how the guitar works as a system, you can keep your beloved 6-string in primo working order—and it won't cost you much. Armed with a few simple tools and knowledge of where to invest in hardware or electronic upgrades, you can do a lot to maximize your guitar's sound and playability. And even if you choose to have all the repair, maintenance, or upgrades done by a pro, knowing how to troubleshoot and pinpoint issues when they occur will help you communicate effectively with your local tech.
In this overview, we'll explore playability, tone, intonation, tuning stability, and electronics. We could write a thick book about each category—and many authors have—but instead let's examine the 10 most critical actions you can take within these five areas. We'll also point you to related stories on premierguitar.com, in case you want to further investigate a particular subject.
Before we dive in, let's acknowledge that these primary functions and the parts that support them often have to be adjusted to suit the specific needs of each performer and musical genre. For example, the archtop-wielding jazzbo with stout flatwounds will have different needs than the shredder with ultra-light strings and a locking vibrato. That said, the fundamental physics always remain the same.
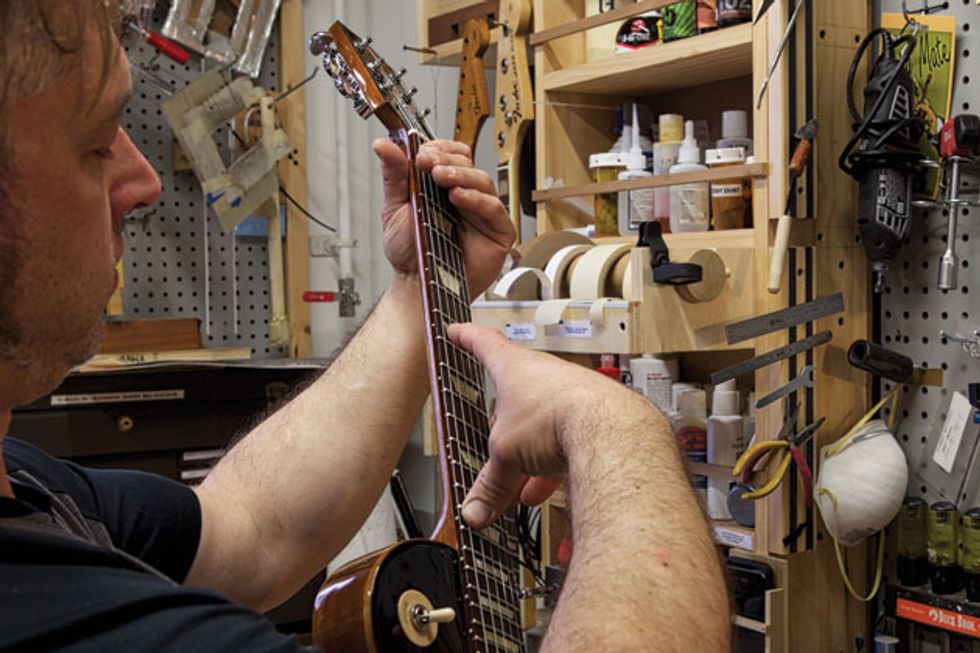
Photo 1 — Photo by Andy Ellis.
(1) Adjust the truss rod. We're listing this first because neck relief has to be set before you do any other adjustments that affect the action. Relief is best described as the small concave curvature intentionally left in the fretboard to accommodate the elliptical pattern of a plucked, vibrating string. The best way to measure this is to first tune to pitch and then use the 6th string as a straight edge. With your fretting hand, press and hold the string against the 1st fret. Next, move up the fretboard to the 15th fret—or wherever the neck joins the body—and press the 6th string down against it using your picking-hand thumb. Finally, extend your index finger over the fretboard pointing toward the nut and bounce the 6th string against the frets to make the space between the top of the frets and the bottom of the 6th string visible to your naked eye (Photo 1).
That space or gap is the amount of relief in your fretboard. Repeat this process with the 1st string to check the relief on the treble side. On guitars, it should be very slight, but present. As an average measurement, figure no more than the thickness of a business card. Different playing styles require different amounts of relief. For example, bluegrass flatpickers or rock rhythm guitarists may require more relief because their hard attack creates larger string movement, while the light touch of a fusion player or folk fingerpicker requires less.
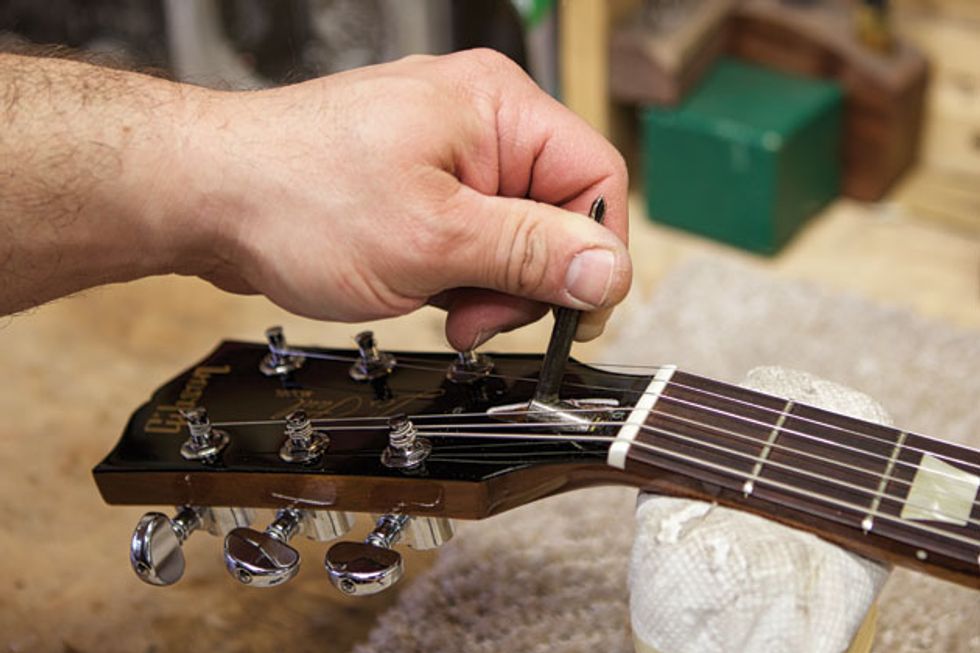
Photo 2 — Photo by Andy Ellis.
Embedded in the neck, the truss rod is designed to counteract relentless string tension. An adjustable truss rod lets you set the relief by controlling the neck's amount of resistance to string pull. Some truss rods adjust at the headstock (Photo 2), others at the base of the neck. Depending on the guitar manufacturer, the tools for this operation vary. Check out “Demystifying Truss-Rod Tools" to see some of these in action.
Whether your guitar requires a small socket wrench, an Allen wrench, flathead screwdriver, or a specialized tool (on some acoustics, for example, you access the truss rod through the soundhole with a right-angle wrench), it's essential that the fit is snug. Don't try to cut corners here—you'll risk damaging the truss rod nut or extension. Your guitar may have come from the factory with the correct tool, but if not, you can track one down online.
Many guitarists learn how to adjust the truss rods on their guitars. If you feel up to the task, read “Time for a Neck Adjustment?" for instructions. But before you attempt this, you need to research and understand how your particular instrument functions. Most nuts tighten (straightening the neck to lift the frets toward the strings) to the right as you sight down the neck from wherever the truss rod nut is situated. However, there are a few instruments (mostly electric basses) that work in the opposite direction.
Not everyone is comfortable adjusting the truss rod, and if you're not, just hike on down to your local repairman—every competent tech knows how to do this. On a well-built instrument with a stable neck, you won't have to do this very often.
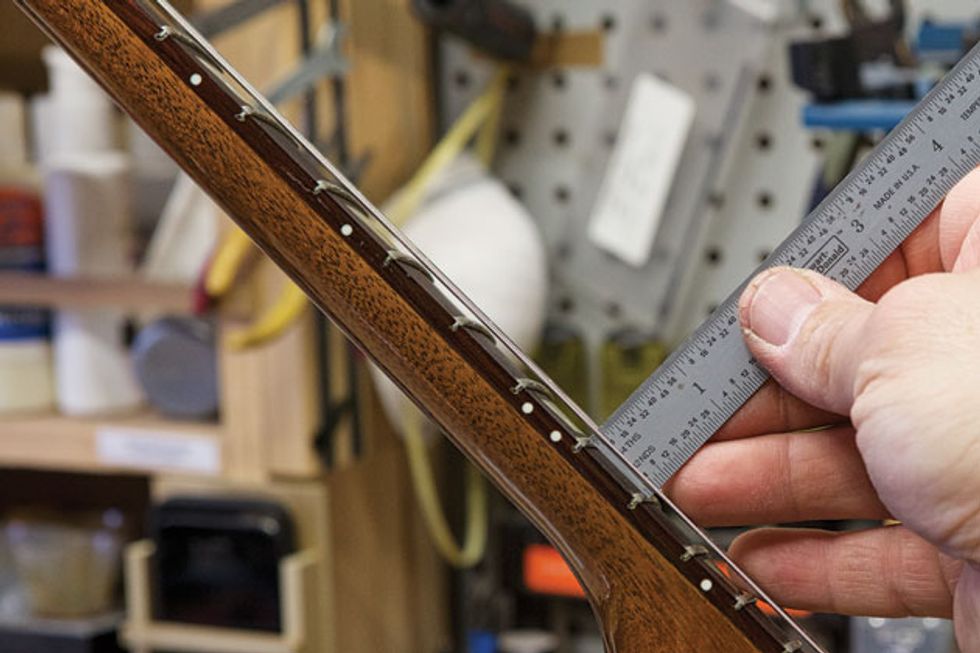
Photo 3 — Photo by Andy Ellis.
(2) Adjust the action at the bridge. Raising or lowering string height at the bridge is the most fundamental way to affect your instrument's playability. Most electric instruments have an obvious way to do this, perhaps via saddle adjustment screws (as on aStratocaster) or a pair of thumbwheels (as with a Gibson Tune-o-matic).
So what's the ideal string height? Of course, that's a personal preference, but having a place to start gives you a way to chase down your ideal setup. (Just a reminder: Adjust the string height after you've set the neck relief.)
To gauge string height, tune to pitch and then measure the gap between the bottom of each E string and the top of the 12th fret (Photo 3). Take your measurements while fretting each string at the 1st fret to remove the nut from the equation. As a starting point, some well-established norms would be 5/64" on the low E and 3/64" on the high E for electrics, and 6/64" on the low E and 4/64" on the high E for acoustics.
However, there's a catch: Once you get the outside strings at their proper heights, the radius (or curvature) of the strings between them must follow the radius of the fretboard. Matching the string arc to the fretboard is critical for producing clear tones with good sustain, bending strings that don't choke out, and overall fretting comfort. Some bridges may not allow you to control the radius by adjusting individual saddles, but even a “fixed" radius bridge—such as a Tune-o-matic or the one-piece saddle on an acoustic—can be re-radiused if necessary by a skilled luthier or tech.
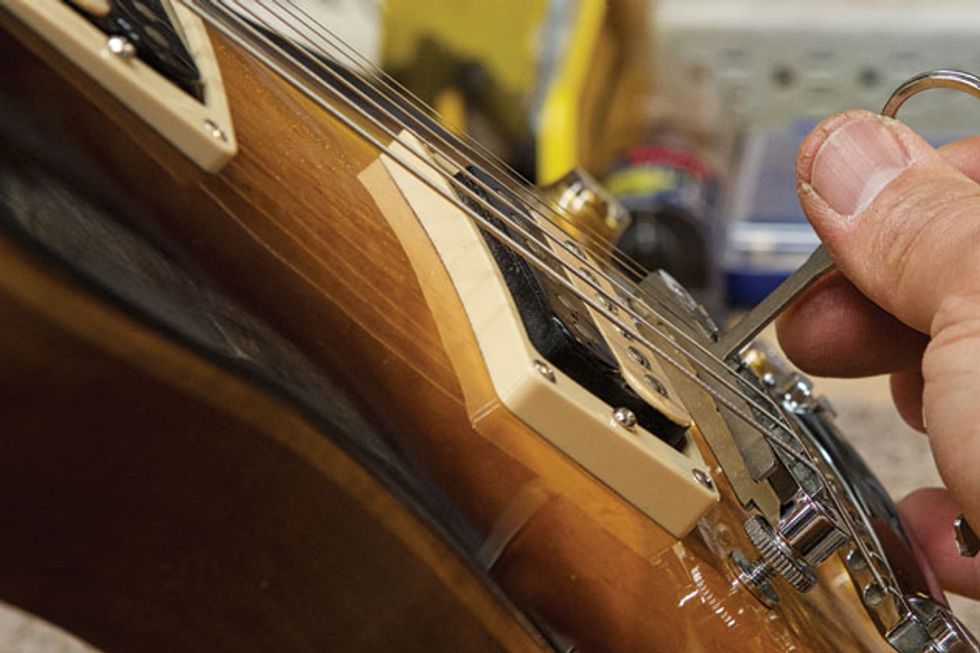
Photo 4 — Photo by Andy Ellis.
If you invest in a set of radius gauges, you can measure the string radius yourself. Select a gauge that corresponds to the fretboard radius, and position it underneath the strings (Photo 4). The strings should ride along the top of the gauge, following its curvature. If the two arcs don't match, you or your tech will need to adjust the saddles to allow all six strings to touch the tool.
Tip: To test any adjustments in neck relief or action, play the guitar as if you were performing onstage. If you've set up your guitar while playing delicately in your bedroom, those adjustments won't translate when you start digging in onstage.
(3) Check the nut. The nut is designed to hold the strings at the proper spacing and height at the end of their vibrating length, and many problems with functionality can originate here. The width and height of each string slot is critical. A slot should be just wide enough to accommodate its respective string, yet not let it shift from side to side. Proper string height is equally important: When pressed against the 3nd fret, each string should just clear the 1st fret. This keeps the strings close to the fretboard for good playability, and also keeps the open strings from rattling against the 1st fret when plucked.
The tolerance for proper string slot height is pretty small, so this adjustment starts to venture into “luthier land." Unless you have some experience, the proper tools, and some good instruction, shaping string slots is a job best left to the professionals. However, if you are a critical thinker and good with your hands, the information and tools you need are available. Gauged nut slot files are sold by such luthier suppliers as Stewart-MacDonald, and you'll find photos and a tutorial on cutting and shaping a nut in “How to Convert Your Axe to a Baritone."
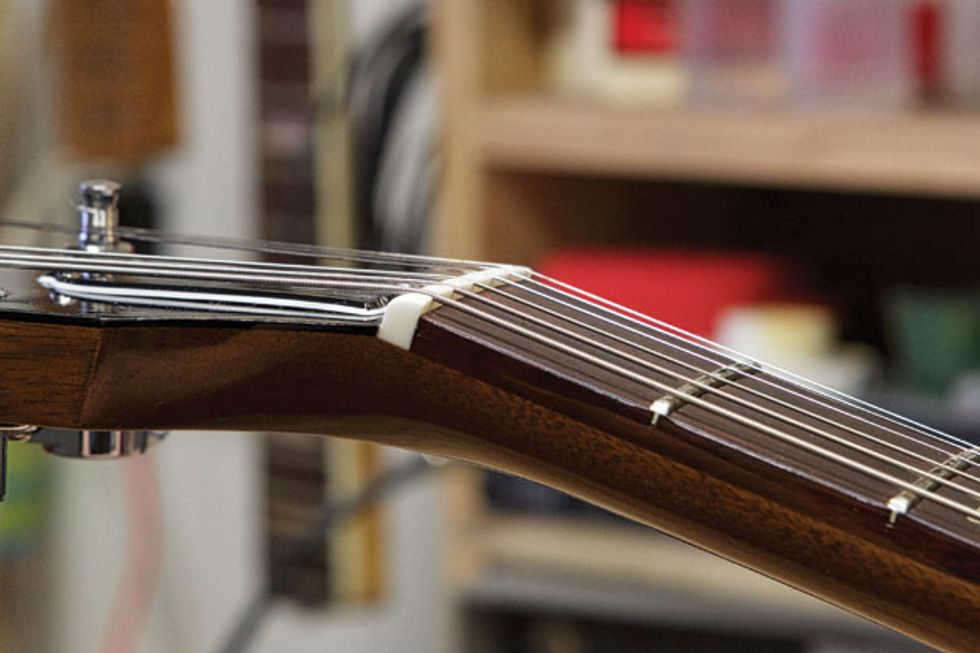
Photo 5 — Photo by Andy Ellis.
Here's how to tell if your nut is in good shape: In each slot, the vibrating section of the string must begin precisely at the side of the nut facing the bridge (Photo 5). Back behind that leading edge, the slots should gently angle down to guide the strings across the headstock toward the tuners. Each slot should be only one or two thousands (.001 or .002) of an inch larger than the string. Each string should rest firmly in the bottom of the slot, but still be able to easily slide forward and backward in its slot when you tune.
If the slots are too tight, the strings may bind. This can cause them to hang in the slot and go sharp when they're flexed by playing. Conversely, a loose slot creates a poor pitch center and unstable tuning. Also, if a slot is improperly angled from the leading edge back toward the headstock, the string may vibrate against the bottom of the slot, causing a sitar-like buzz.
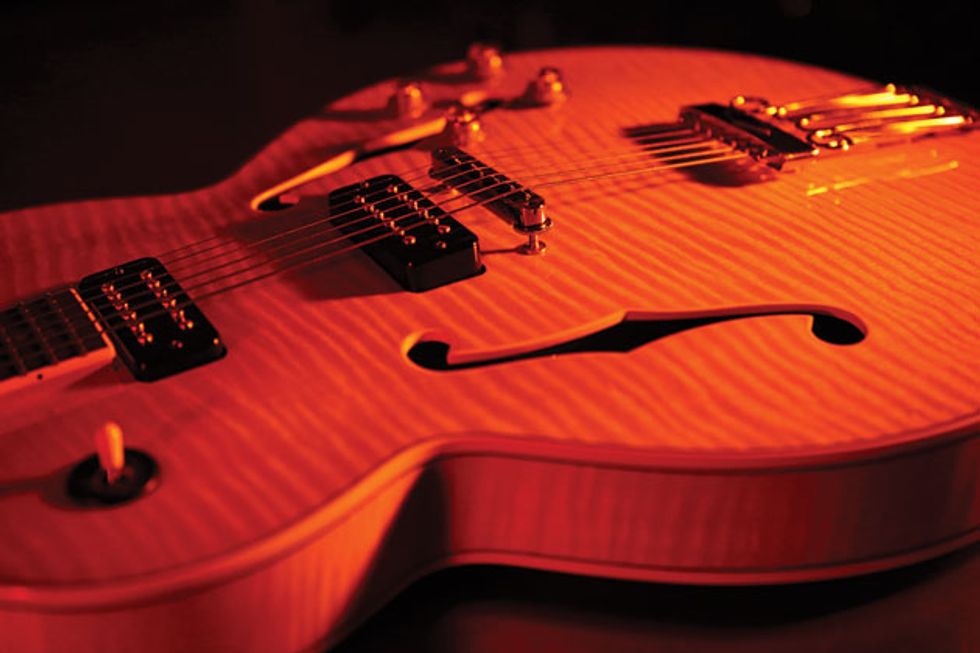
Photo by Andy Ellis.
(4) Upgrade the nut. Often a guitar—especially a budget model—will have a plastic nut. This type of nut can reduce the transmission of string vibration through the instrument or adversely affect tuning stability. It's a good idea to switch to a nut material that offers more density and mass than plastic. This optimizes string vibration and carries that vibration to the neck and the body. From a sonic standpoint, upgrading to a quality nut is as critical as any other tweak you can make to your instrument.
I prefer bone for most applications. It's strong and dense, but when the slots are polished, they provide a slippery, smooth surface that allows a string to freely travel back and forth and return to pitch after being squeezed or bent. Bone blanks for nuts and acoustic saddles come in various shapes and sizes, and they're inexpensive.
Some players like a brass nut, but I'm not a fan, because while brass is dense, it's not particularly hard. Over time the strings can carve grooves in the nut slot, and wound strings in particular can hang in these grooves and cause tuning problems.
Graphite nuts are also popular, mainly with guitarists who use vibrato tailpieces and want slippery nut slots. Although graphite nuts work well in that respect, they don't have a lot of mass and transmit vibration poorly compared to bone. Also, graphite can wear quickly. I've shimmed or replaced many graphite nuts that have been ground or worn too low to be functional.
There are other materials as well. Many vintage instruments were built with mother-of-pearl or ivory nuts. Mother of pearl is hard and dense and functions well, but it's tricky to work with. Ivory has become illegal, so that's not an option.
(5) Saddle upgrades and maintenance. As with the nut, maximizing the transmission of vibration at this point is vital to good tone and functionality. Not only should saddles be made of an appropriate material, but they must also be in proper condition for the strings to operate correctly.
Often saddles have some of the problems we just discussed with the nut. For example, wound strings can dig grooves in them over time, or in the case of a Tune-o-matic style bridge, the saddles may be so low that the strings catch on the back of the bridge. In either case, this can cause tuning problems. Ideally the saddle should have a smooth surface, and the point of departure from the saddle shouldn't create any sitar-like vibrations.
and it won't cost you much.
Sometimes it's necessary to replace parts. Replacement saddles for both Fender- and Gibson-style electrics are available in either the model's original material or in alternative synthetics such as Tusq and graphite. For acoustics, bone is again my first choice.
(6) Check intonation. Your instrument always sounds best when it's in tune with itself. And if your guitar is not in tune with itself, it will affect your popularity with your bandmates!
The guitar is based on the 12-tone equal-temperament tuning system, which involves slight, intentional compromises between intervals within an octave. It's important to realize that a fretted guitar never plays perfectly in tune everywhere on the neck. The best you can hope for is to minimize any obvious sourness so you can get on with the important business of making music.
On electric guitars with individually adjustable saddles, this is a reasonably user-friendly DIY operation that you can do with the right tools. Basically, the goal is to adjust the length of the string so that when the open string is in tune, the fretted notes also play in tune along the string. Remember, adjusting the intonation happens after you've tweaked the neck relief and action at the bridge.
It's a simple procedure: Start by tuning the open 1st string with a high-quality electronic tuner. (Some guitarists tune the string using the 12th harmonic, but unless you play solely with harmonics, I recommend using the open string.) Once the open 1st string is tuned and stable, press and pluck the octave note at the 12th fret. If the tuner reveals this fretted octave is sharper than the open string, you need to lengthen the 1st string slightly by moving the saddle back away from the nut. If the fretted note reads flatter than the open string, you need to shorten the string by moving the saddle forward toward the nut.
Tip: If you find yourself shifting the saddles very far forward or backward, you may have to touch up your string height at the bridge again.
Repeat this process for each string. To tweak the intonation even further, I also fret each string at the 15th and 17th fret and see how it reads on the tuner. If you routinely play in the higher positions—especially with chord voicings—you may want to fudge the intonation a bit between the fretted octave and these higher frets, so the latter read closer to being in tune.
Because acoustic guitars lacks individually adjustable saddles, if you're not happy with the intonation, your only options are to buy a pre-compensated replacement saddle, such as the ones made by Graph Tech, or have your existing saddle compensated by a luthier or tech so each string sits at a specific point along the top. Many modern acoustics come with pre-compensated saddles made either from synthetic material or bone that has been filed to create individual intonation points.
To learn more about working with bridges and saddles, read “12-String Setup Secrets" and “How to Intonate a Flattop Guitar."
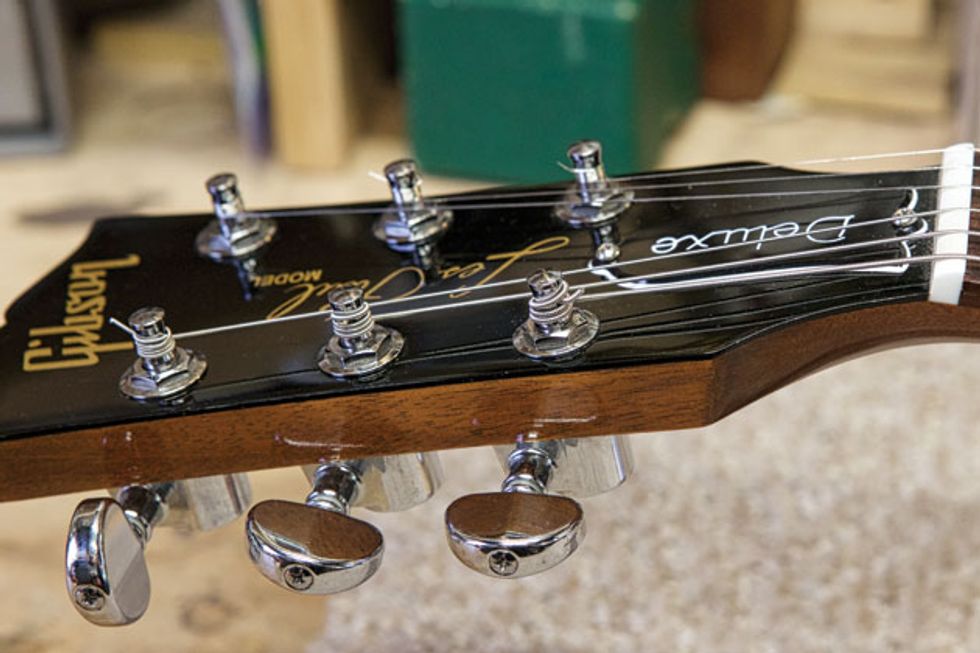
Photo 6 — Photo by Andy Ellis.
(7) Restring right! You might think I'm getting picky by explaining how to restring a guitar, but every connection between your strings and the guitar affects its sound or performance. By A/B testing various methods for winding the string around the tuner post, I've discovered the most stable method, and it works like this: Turn the post so its hole points directly at the fretboard. Thread the string through the post hole, tugging it gently to make sure you've removed any slack down at the bridge. Then hit reverse, pulling enough slack string back through the post hole to allow an appropriate number of windings. (Depending on post height, I typically pull the string back out to the first fret.) Now put a slight bend in the string in the opposite direction the string will be winding onto the post.
Put the first wind onto the post over the string as it passes through the hole. Feed the subsequent winds under that part of the string. At pitch, this “one wind above, the rest below" system locks the string between winds as it passes through the post hole. The string windings should be tight against each other so they don't allow any movement or sliding up and down the post (Photo 6). Also, you don't want any overlapping strings, because that could allow future movement if a winding eventually settles into a new position. Limit your number of windings to those that will touch the post itself.
After the string is secured, gently and evenly stretch it along its entire length. Once a string is under tension and seated in the nut and over the saddle, I like to ensure it's really secure by gently pressing it down at those critical two points where it leaves the nut and saddle to vibrate.
Another alternative: There are excellent locking tuners, such as Sperzels, that crank the string down in the post hole and eliminate windings around the post. Many players, especially those who use whammy bars, rely on locking tuners to improve tuning stability.
(8) Explore string gauges and material. This is one of the most significant ways you can control your sound and playability, and fortunately it's not too expensive. I've had countless clients play their guitar for me and say, “Do you hear that buzz? Right there." Then I play the guitar, and it won't buzz. We all have our own touch and different sonic demands, and matching the gauge and type of strings to them goes a long way toward achieving musical satisfaction.
As a general rule, the thicker the string, the fatter the tone. (Did you also know that heavier strings allow you to lower action more? That's because tension at pitch is higher and the string forms a tighter ellipse when vibrating.) Yet Billy Gibbons uses incredibly light strings, and there's no mistaking his monstrous tone. So if you haven't already settled on what feels and sounds best to you, why not experiment? Half-round and flatwound strings have different tones and feels than roundwounds, and until you've actually tried them all, you won't really know if they're right for you.
You can also fine-tune your sound with different string materials. For electric guitars, stainless steel strings sound brighter than pure nickel, with nickel-wound steel strings falling somewhere between the two. For acoustics, phosphor bronze, 80/20 bronze, and other alloys—such as aluminum bronze, brass, or monel—all have a distinctive tone, sustain, and feel. And then, of course, there are coated strings designed to help extend string life.
With strings, it's experiment, experiment, experiment. Start with the strings your favorite guitarists play and go from there. Remember, every note you play begins with the strings, so before you go wild swapping pickups, acquiring yet another pedal or amp, or replacing all your cables, take some time to explore your signal at its source.
(9) Dial in pickup height. This is a very subjective area, but if we discuss the basic principles, you'll have a place to start. Generally, moving a pickup closer to the strings gives you more volume, punch, attack, and brightness. But there's a point of diminishing returns. Obviously you don't want to raise a pickup so close to the strings that they hit it and stop vibrating. But also be aware that when some pickups (typically single-coils) are adjusted too close to the strings, the pickup magnets impede string vibration. This can affect the strings' overtones and make your guitar sound out of tune all the time. It's less of a problem with humbuckers, unless they're super-hot models equipped with more powerful magnets than classic PAF-style 'buckers. Low-impedance or active pickups, such as models fromEMG or Lace Sensor, can be adjusted closer to the strings as well.
There are other factors to consider: For example, the guitar becomes less dynamic electronically when the pickup sits in close proximity to the strings and produces higher volume. This means your picking generates a more uniform volume and tone color no matter how you play, compared to a pickup adjusted a bit further away. I know several guitarists—typically humbucker players—who adjust their pickups far away from the strings to allow for greater dynamics. As a rule of thumb, expect more volume, punch, and crispness when the pickups are close, and more dynamics, warmth, and wood when they're farther away.
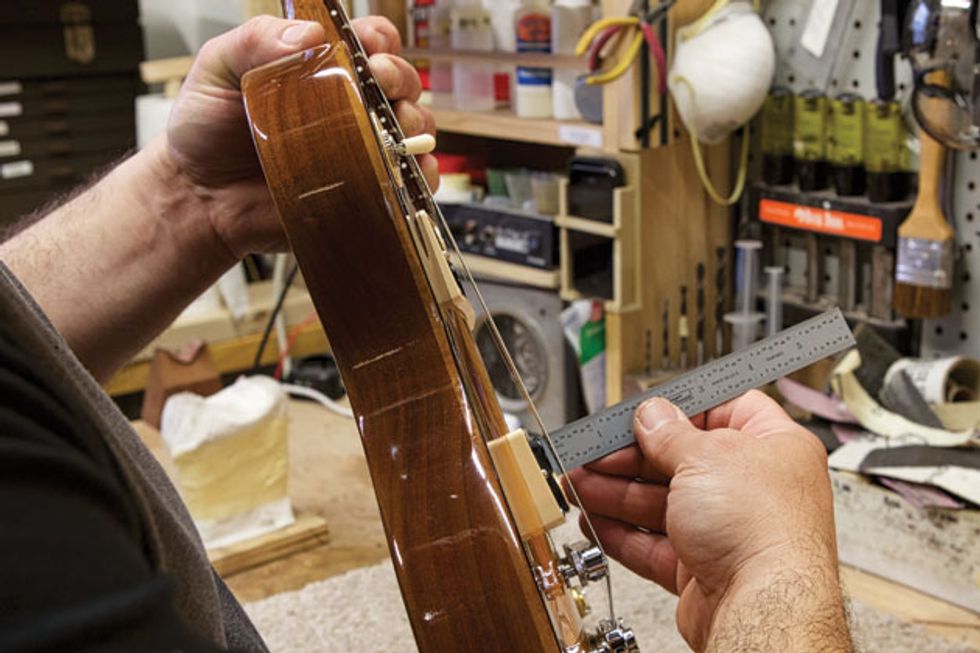
Photo 7 — Photo by Andy Ellis.
Also, remember to use the relative pickup height to adjust the balance between the pickups on your guitar, as well as the balance between the treble and bass strings. You don't want to switch to the bridge pickup for a solo and have it either sound wimpy or take everybody's head off. Understand too that wound strings are louder than plain strings, and pickup height needs to be adjusted to make all the strings sound balanced as you play across the fretboard.
As a starting point, measure the gap between the bottom of each string and the top of the pole piece with a precision metal ruler (Photo 7). Then try setting conventional pickups so the gap is about 3/32" on the 6th string and 2/32" on the 1st string. For low-impedance or active pickups, just make sure they're not hitting the strings when you pick them. After that, it's all up to taste.
For photos, and more specs and advice on how to adjust pickup height, check out these Mod Garage columns by PG's Dirk Wacker: “Humbucker Height Adjustment," “Adjusting Stratocaster Pickup Height, Pt.1," and “Adjusting Stratocaster Pickup Height, Pt. 2."
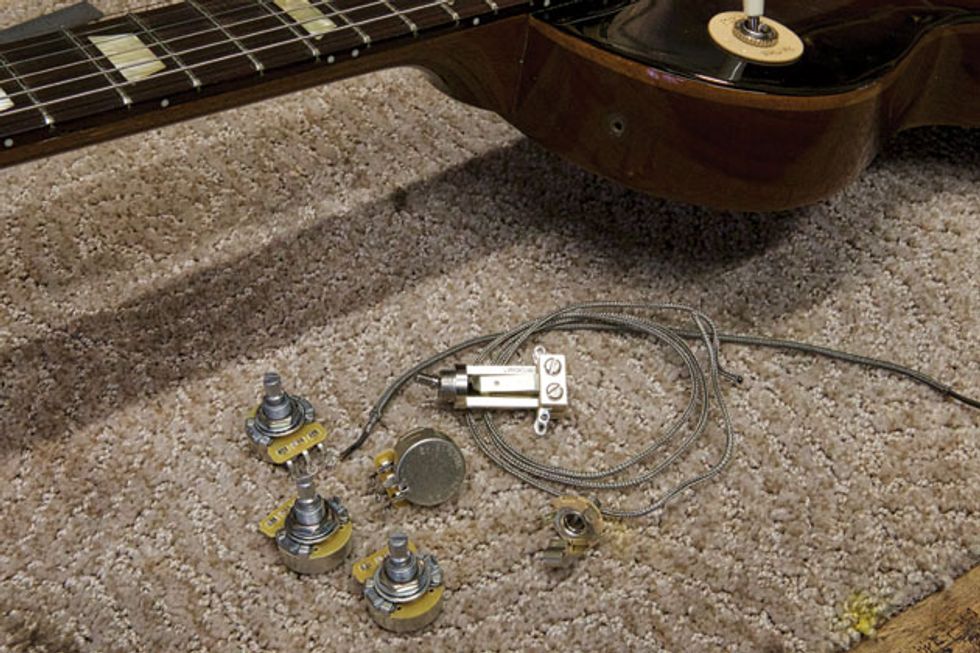
Photo 8 — Photo by Andy Ellis.
(10) Upgrade your electronics. Many imported and some domestic instruments have budget electronic components. If you have scratchy pots that don't adjust evenly or feel cheap, or switches that work only intermittently, it behooves you to replace them with quality parts (Photo 8). The output jack, pickup selector, and potentiometers are part of your signal chain and can affect your sound. Such quality brands as Switchcraft, CTS, and DiMarzio can make a noticeable difference in sound and performance.
Also, consider having a professional repairman switch out all the cheap, skinny wires that come on so many guitars. Substandard wire can cause signal loss and actually become microphonic if the strands don't rest tightly against one another. When I worked at Gibson as Warranty Repair Shop Manager, we'd often replace all the smaller 4-conductor wire that might run up to the pickup selector in the upper bout with high-quality wire wrapped with a braided shield. The gauge of the wire was larger, so there was less resistance, resulting in a more “full spectrum" sound.
And while we're talking about components, it's a good time to discuss potentiometer value. Pots are variable resistors that take your signal to ground at different levels. A volume control passes more or less of the signal depending on where you set it. A tone control works in a similar way, except it's configured to affect the highs in the signal. The higher the pot's value, the more highs come through. The lower its value, the fewer highs.
Typically, 250k pots are used with single-coil pickups so their highs don't sound brittle or brash, and 500k pots are used with humbuckers to keep them from sounding too dark or muddy. Other values can be used as well; 300k and 1M (“meg") are the most common alternatives for passive pickups. To hear the sound you want from your pickups, it's essential to wire them to volume and tone pots with an appropriate value.
Another area to explore is tone capacitor value. Here, the higher the value of the capacitor, the more highs it attenuates, and the center frequency shifts as well. Typically guitars use capacitors with a value of around .022 µf (microfarad) and basses somewhere around .047 µf.
There are many boutique and vintage-style capacitors available that can have a different effect on your sound. If you're interested in investigating this further, start by reading some of Dirk Wacker's Mod Garage columns, such as the four-part “Tone Capacitors for Stratocasters" series. But as you explore online, beware: This is one of the most hotly debated topics in guitar-land and the volume of conflicting opinions can be deafening.
In closing, before you drop big bucks on mods, make sure your guitar's fundamentals are in order. Dialing in the basics removes barriers between you, your guitar, and the music you yearn to make. And if at all possible, find and befriend a local repairman. Having access to professional consultation and repairs—especially those you can't or shouldn't do yourself—will help you keep your guitar in tip-top shape. Happy playing!
Special thanks to Gruhn Guitars for letting us take photos in their repair department.