
Does this sound familiar? As you embark on a seemingly routine mod or wiring project, you suddenly discover something you hadn't considered about the guitar you've begun to disassemble. As you pop off a Strat's pickguard, for example, you might find a few non-standard parts, or unearth a less-than-stellar repair by a previous owner. Maybe the new bridge you've purchased to upgrade your favorite Tele requires a different neck angle to work correctly. It could be dozens of things, but they all have one thing in common: You have to solve a problem. And you are on your own.
The fact is, almost every mod requires some degree of improvisation. There's more to earning the “ace modder" merit badge than simply being able to read a schematic or follow directions printed off the internet. Guitars are unique, so it's important to develop a problem-solving mindset. Knowing how to deal with unanticipated issues is part of the game.
To help you in this quest, I want to share a challenging mod I recently undertook. The guitar was an old German archtop—a Musima Record from the early '50s—that came into the shop for a complete restoration.
I think the Record is one of the most beautiful archtops ever, and if you Google it, you'll find a wealth of photos and all kinds of fascinating lore about its history. It's unlikely you'll ever see one of these guitars, but the techniques and strategies required to do this mod have applications that reach well beyond this specific instrument. Let's take a look.
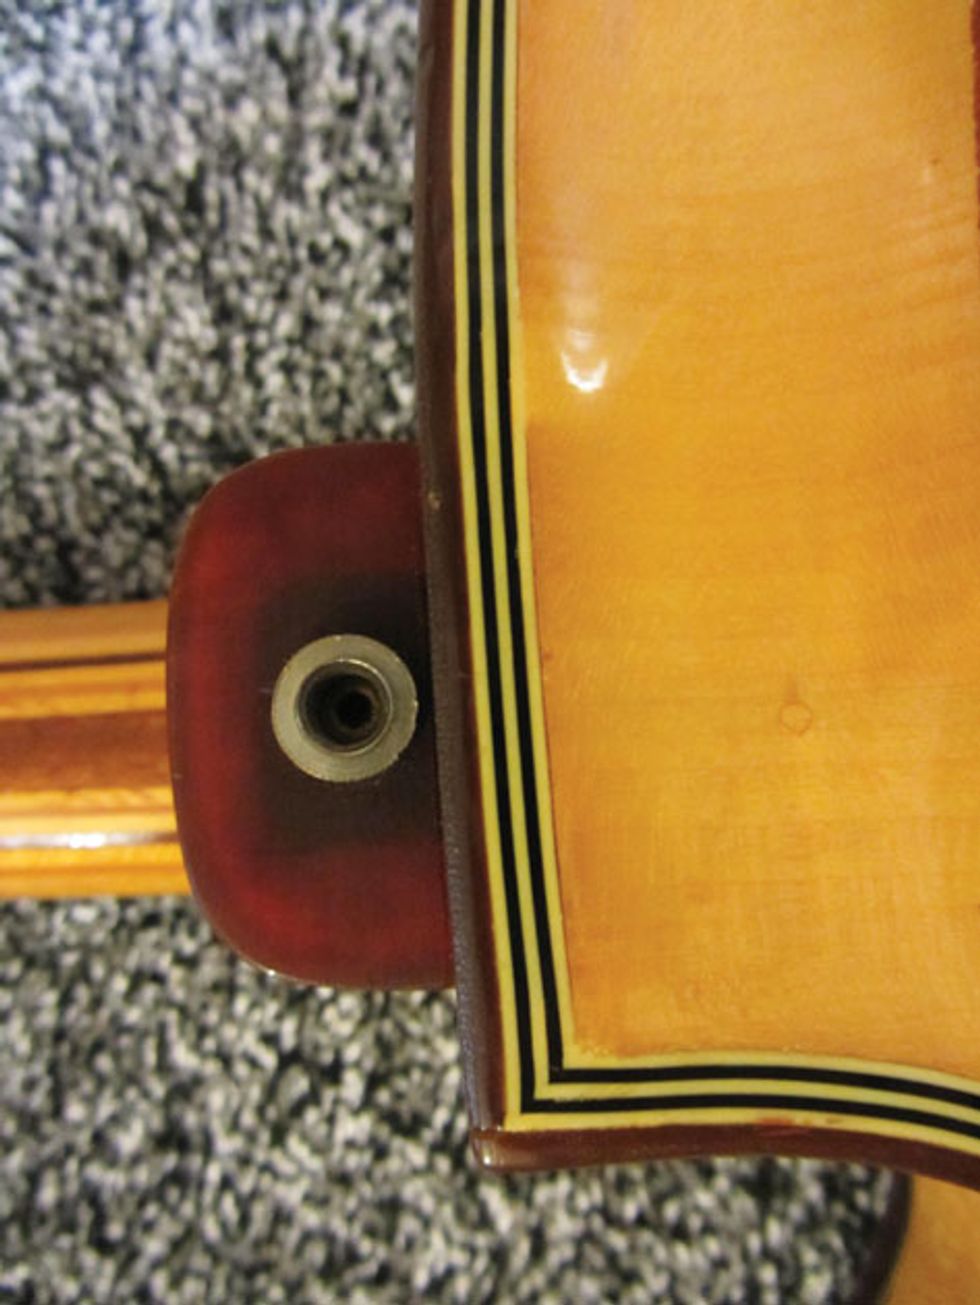
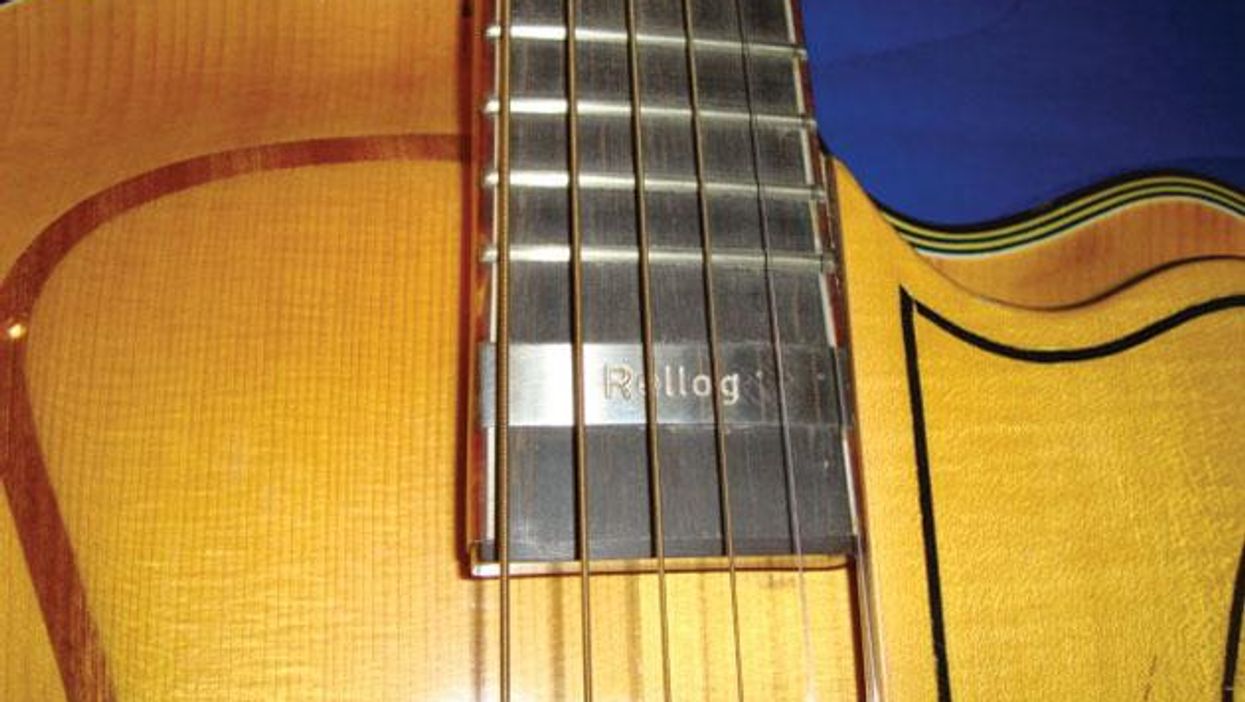
Photo 2 — Photo courtesy of singlecoil.com
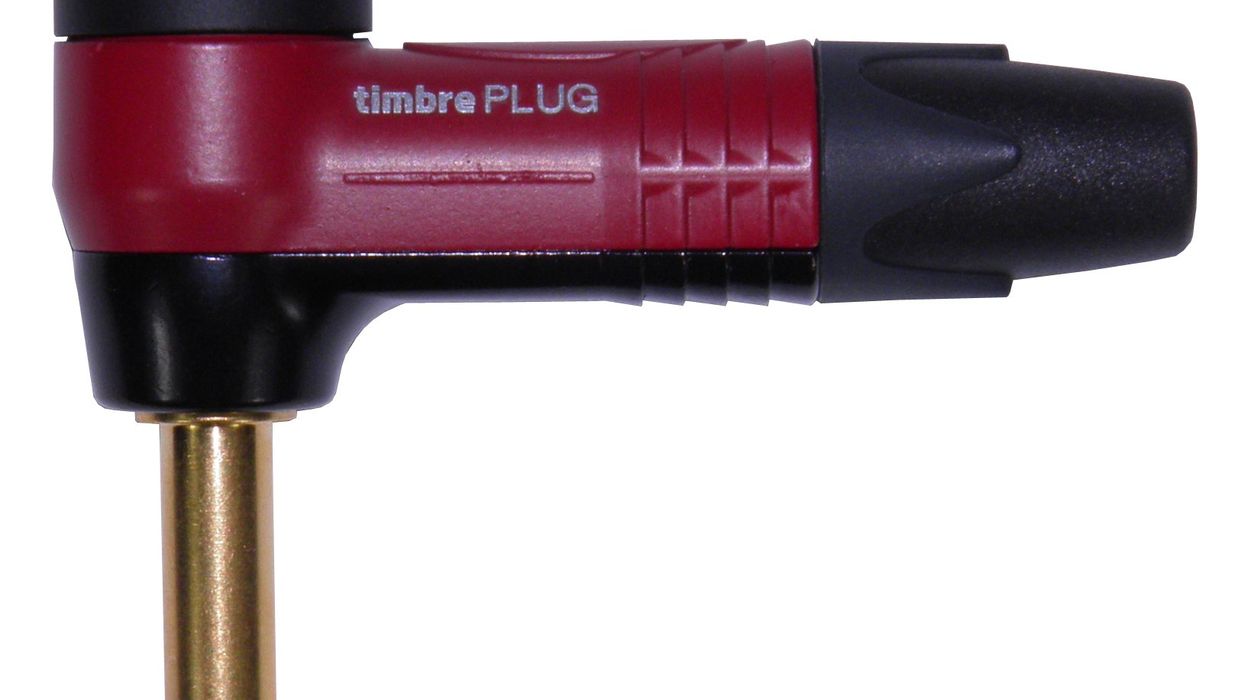
This was a very early example of the Record, and what's important here is that it has a Rellog pickup embedded in the end of the fretboard (Photo 1), as well as an ancient output jack mounted on the neck heel (Photo 2). The jack looks a little like a 3.5 mm output jack, but it requires a special plug. While there are still new-old-stock guitar cables and individual plugs available that work with this jack, the system is not very reliable because the plug won't lock into the jack. And only straight plugs are available, which means the guitar is difficult to play with a cable attached. The owner wanted the old jack replaced with a modern 1/4" jack so he could use a standard guitar cable with an angled plug.
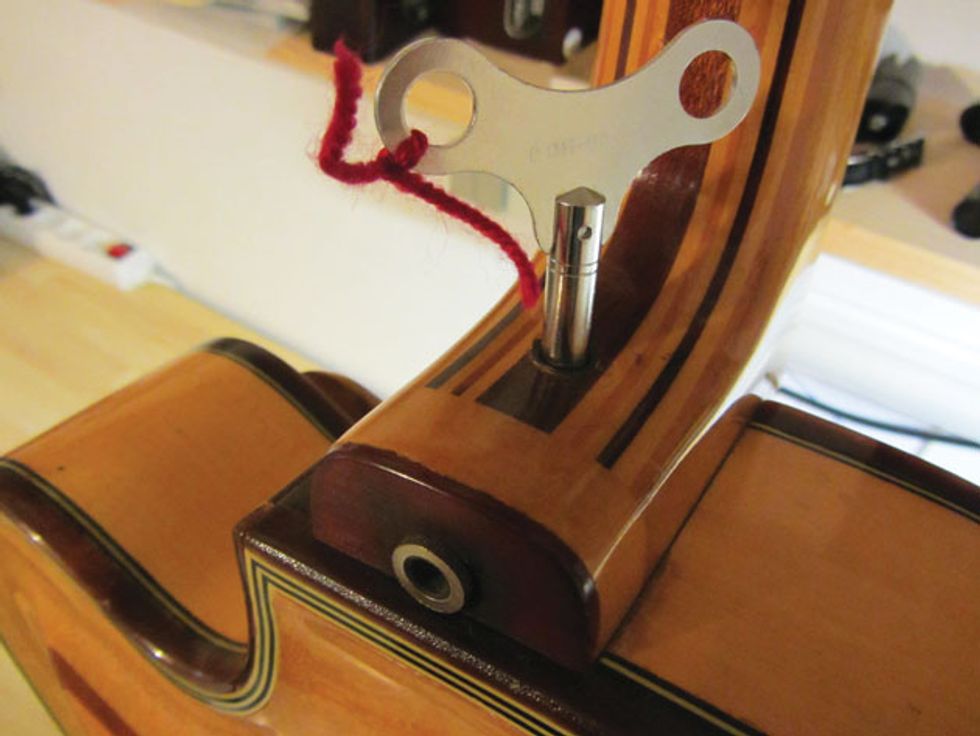
Photo 3 — Photo courtesy of singlecoil.com
To access the electronics on this archtop, you need to remove its neck, which is attached to the body with a Stauffer-screw system called a Rubner anchor. Removing the neck is easy ... if you have the right tool (Photo 3). Fortunately, it's still available from watchmaker supply stores.
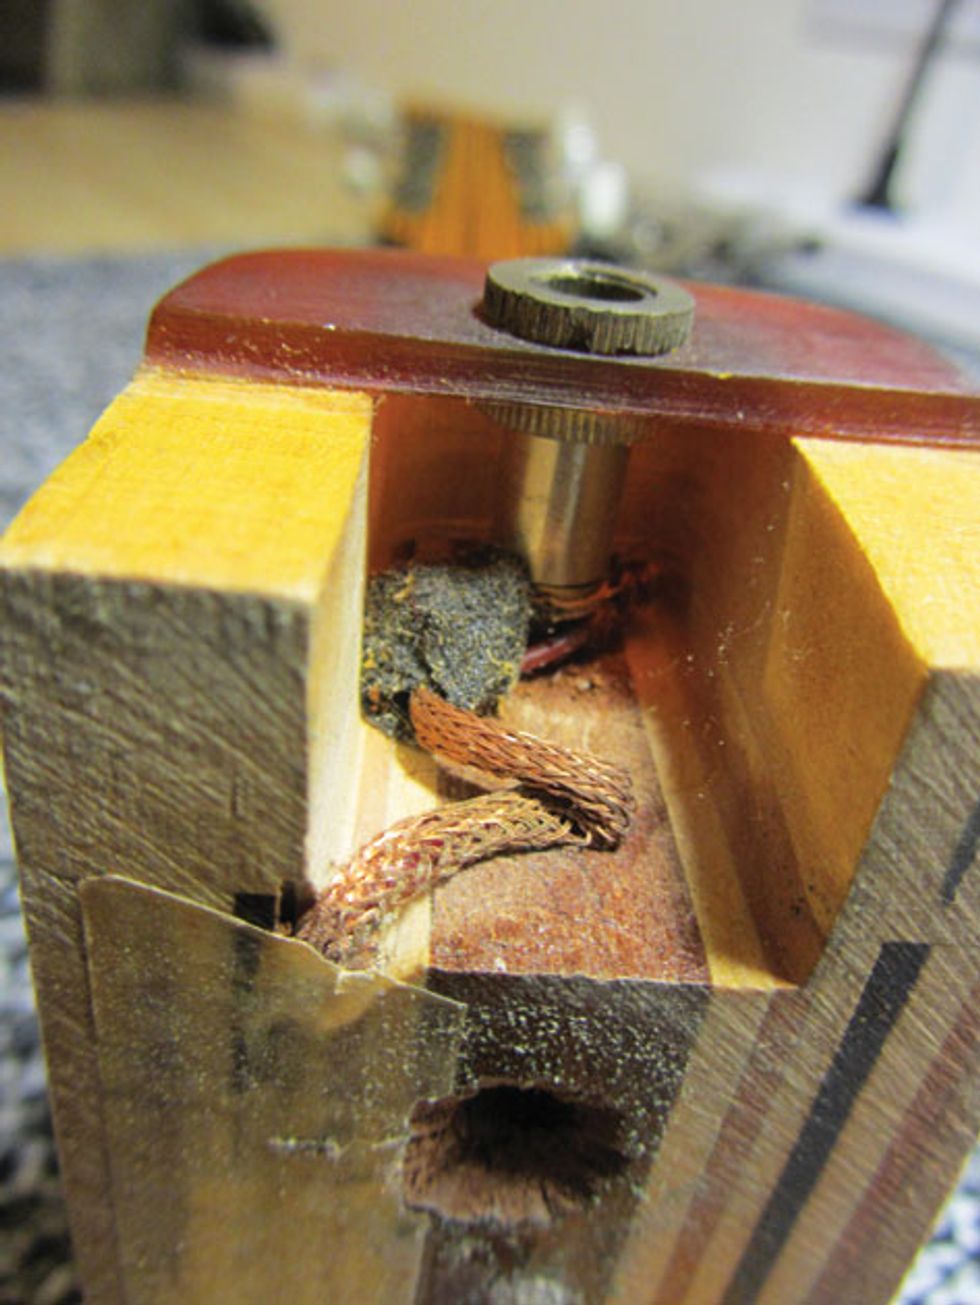
Photo 4 — Photo courtesy of singlecoil.com
Removing the neck revealed the thick celluloid heel cap that holds the jack (Photo 4). To access the ancient jack, I had to remove the heel cap, which was glued to the heel. For this task, I used a hair dryer and a bridge removal knife, which you can buy from luthier supply outfits like Stew-Mac.
Note: Celluloid is extremely flammable, so be very careful not to apply too much heat when working with it. In this case, I simply heated the knife with the hair dryer—a safe procedure.
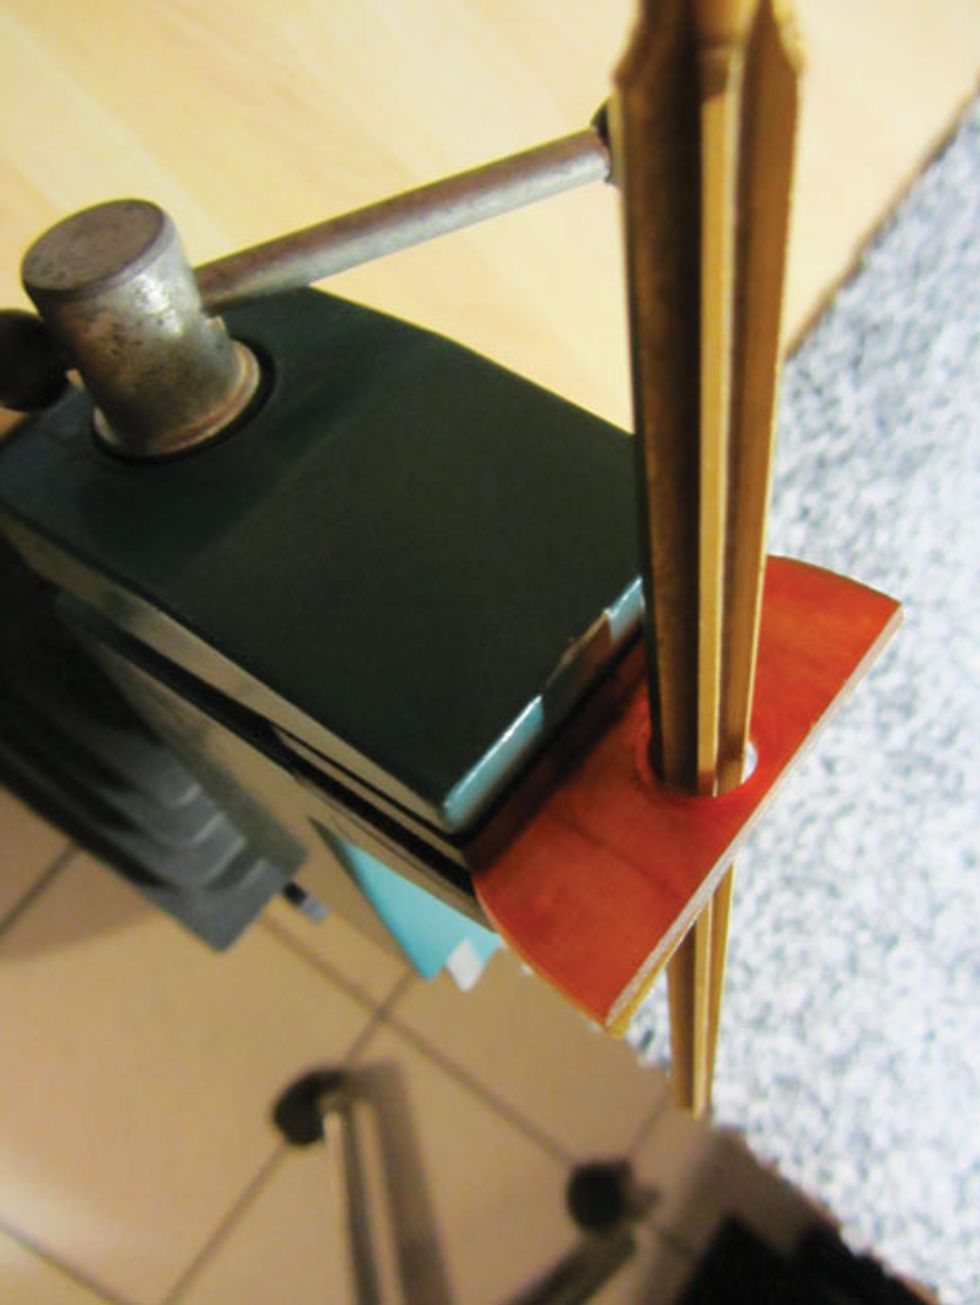
Photo 5 — Photo courtesy of singlecoil.com
After scraping away the crumbling insulation tape protecting the braided shield, I unsoldered the jack and removed it from the heel cap. The next step was to enlarge the 5 mm hole so it would accommodate the 1/4" jack. I used a tapered reamer for this task—this handy tool cuts through celluloid like butter (Photo 5). You could also use a small half-round file, but again be careful not to generate too much heat. And never try to enlarge a hole like this with a drill bit: Old celluloid breaks easily and the bit generates excessive heat.
After preparing the pickup wire by cleaning and pre-tinning it, and before soldering it to the new jack, I slid a piece of latex tubing over the braided shield to insulate it. It's a handy trick to prevent the shield from shorting out on something by accident, and it's especially important when packing wire into a small cavity.
Here's another tip: Don't bend old braided wires too much—they can be brittle. And when soldering, don't apply too much heat for the same reason.
Once I'd installed and wired up the new output jack, I glued the heel cap back in place using binding glue. A quick measurement at the output jack showed a DCR of 3.16k ohm. This was very close to the Rellog factory spec of 2.9k, so I could assume the 50-year-old pickup was still alive and kicking.
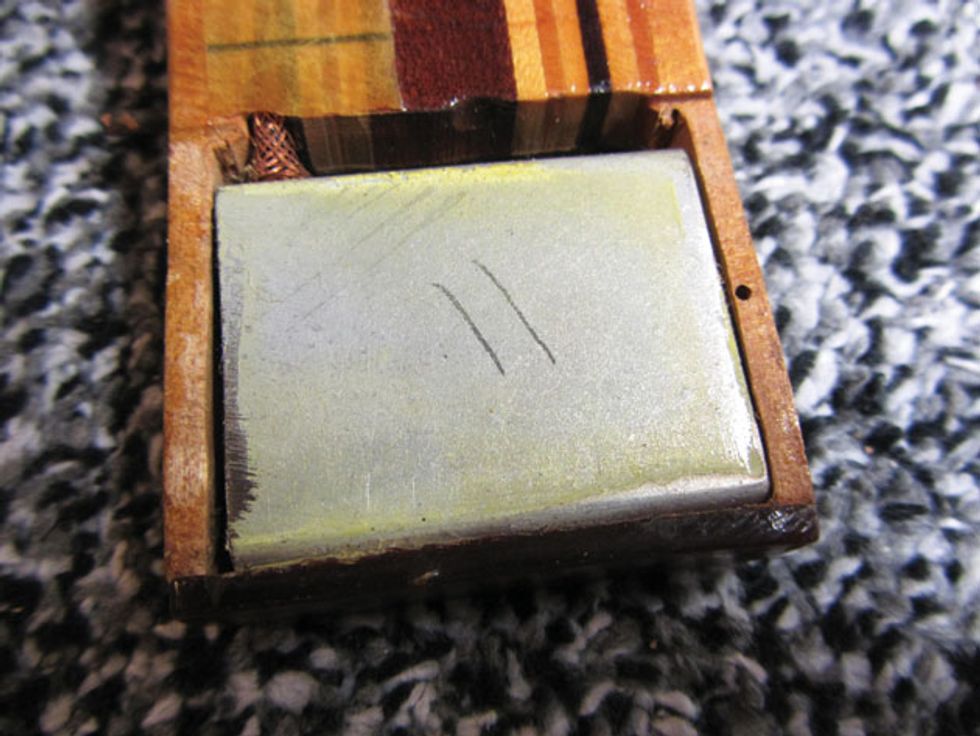
Photo 6 — Photo courtesy of singlecoil.com
And speaking of the pickup, you might be curious what a 1950s “stealth" pickup looks like. After removing its protective celluloid cover, there it was, tucked into a pocket cut out beneath the fretboard (Photo 6). I was eager to hear this little guy, so after I completed the entire restoration (which took a total of 52 hours) and finally had the guitar strung up, I plugged it in. Wow—the pickup sounded great and was really loud. With a DCR of only 3.16k, you might be tempted to conclude the pickup was going to be very weak, but that wasn't the case. Once again, this proves the point we discussed last month (“Demystifying DCR"): a DCR reading tells us virtually nothing about a pickup's output and tone.
Next month we'll resume exploring pickup parameters and examine magnet polarity. Until then ... keep on modding!