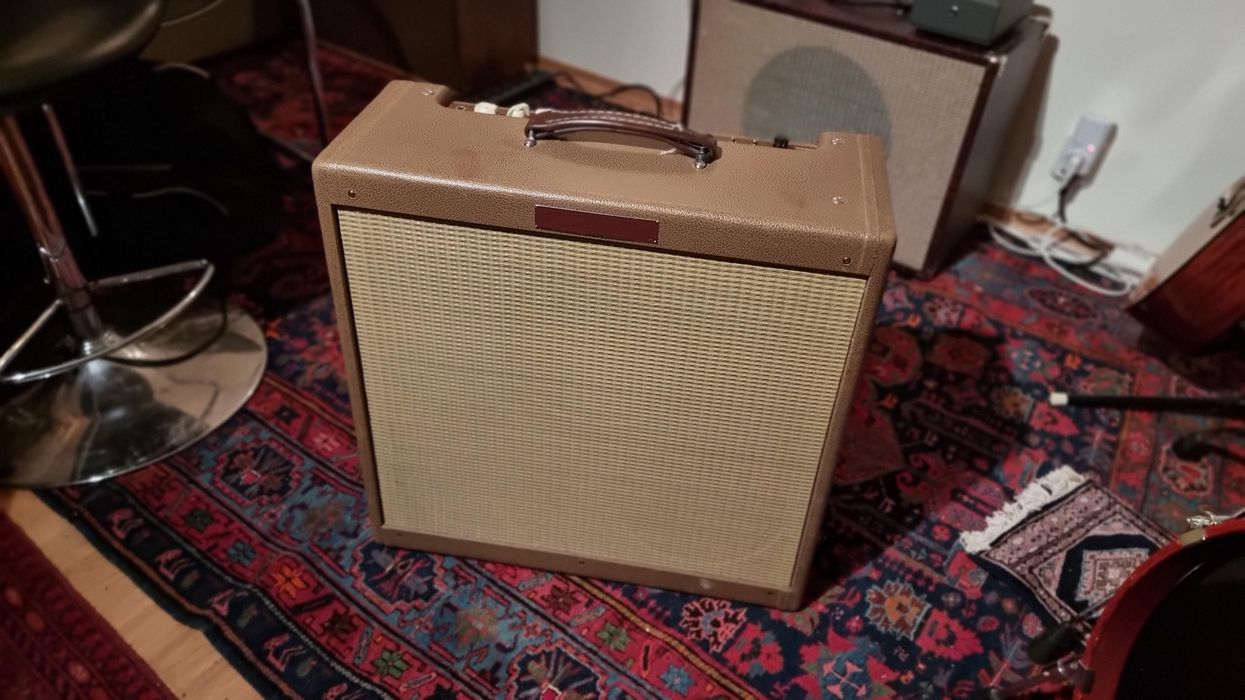
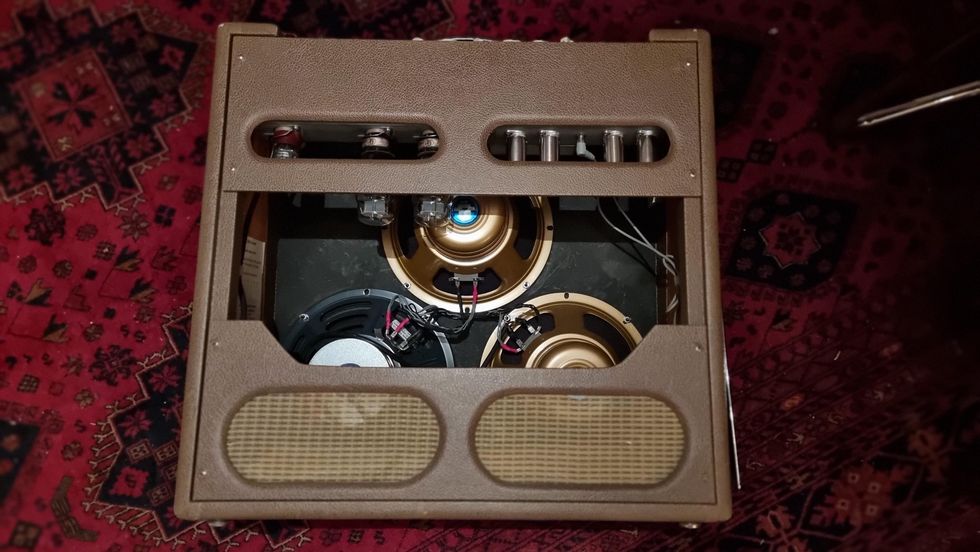
For a good percentage of 6-string guitarists out there, a tube amp isn’t just the preferred way to achieve the ultimate tone—it’s heresy to consider playing anything that doesn’t have glowing valves around back. And the longer you play, the more likely it is that you’ve been through a bunch of brands, models, and output-tube types in effort to find the sound(s) in your head. We all tend to start out with what we can afford, and gradually we graduate to something better—and better again—all to achieve the next degree of tonal satisfaction.
But at some point, most of us tube-amp fans also experience some sort of failure related to this arcane—yet fantastic and sonically satisfying— technology from the 1950s, and it’s often at the worst possible time. Unfortunately, there’s no practical or accurate way to predict when or where this will occur. But, as someone who has been in the repair and modification business for more than 25 years, I can tell you there’s a very good chance it’ll happen to you sometime if it hasn’t already. Sans a crystal ball and the ability to see into the future, the best way to prepare is to practice preventive maintenance and be prepared for the inevitable with a little bit of basic knowledge and the proper contingent of tools and parts to back it up. To that end, this article will furnish you with must-know information that will help save the gig and allow you to execute basic troubleshooting and repair on your amplifier.
Tube-Amp First-Aid Kit Essentials
Every guitarist who plays a tube amp, whether it’s a combo or a head and cab, should have the following tools and spare parts on hand to address low level first-aid needs:
- LED flashlight
- Small, inexpensive multimeter
- 1/4" female-to-female mono adapter
- Extra speaker cable
- Small flat-blade screwdriver
- Standard-size flat-blade screwdriver
- Philips screwdriver (for removing rear panel)
- Spare fuses
- Spare rectifier tube (if applicable)
- Spare set of matched power tubes
- At least one spare of each type of preamp-type tube in your amp
- Oven mitt or ‘Ove’ Glove
- Electronic contact cleaner without lubricant (for cleaning tube sockets)
- Electronic contact cleaner with lubricant (for cleaning 1/4" jacks)
- Spare amp, head, or power-amp pedal (for emergency gig triage)
- 1' speaker-extension cable with 1/4" male and female
- 1/4" connectors OR a 1/4" female-to-female mono adapter
Gig-Meltdown Triage
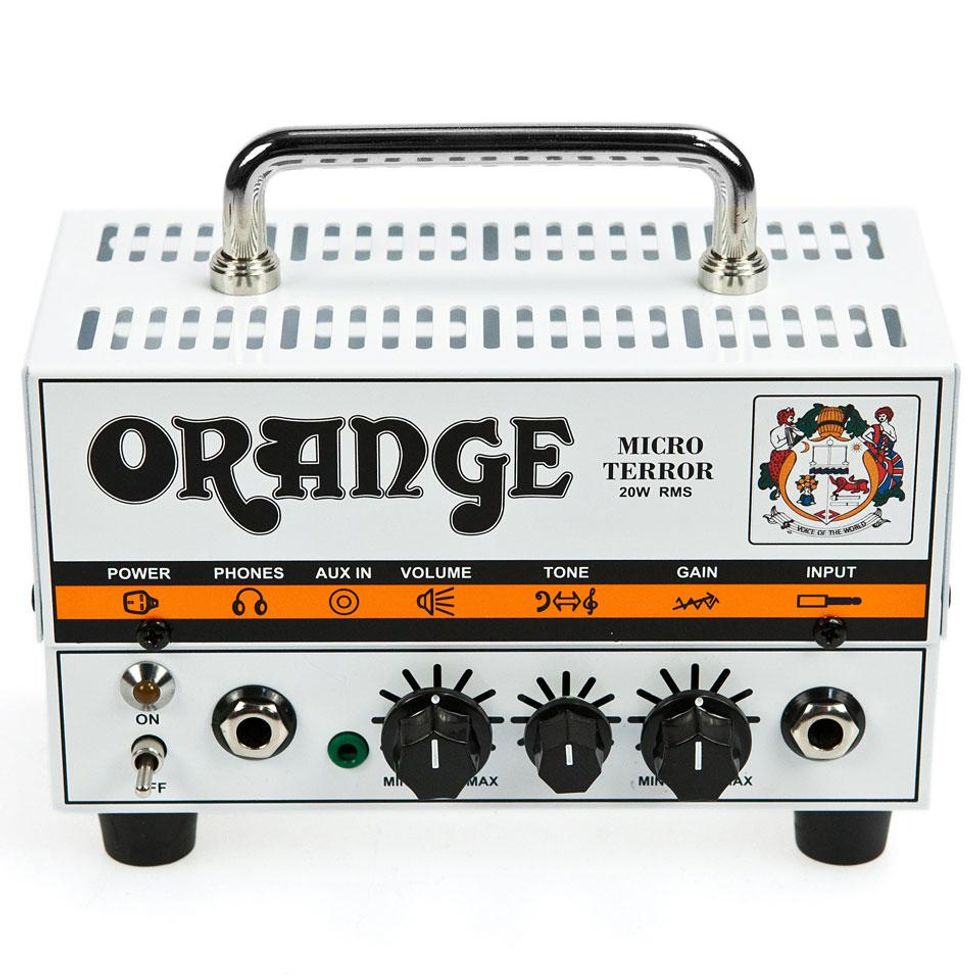
If your tube combo dies on a gig, a pint-sized solid-state head like the Orange Micro Terror or a small, mic-able solid-state amp such as the Roland CUBE-80XL—perhaps paired with your favorite overdrive/distortion pedal—will get you through the gig and avoid the embarrassment of cancelling mid-show.
The first and most important tip I can give is to bring a spare amp to every gig. If you notice, quite a few of the players you see in television performances have two amps of the same make. This is generally not for increased volume, tonal variety, or to look cool—it’s life insurance. There’s no time to change out or troubleshoot an amp in that situation, and it would certainly be an epic fail if you were performing on a latenight talk show and your one and only amp failed during the performance of a lifetime.
I know some of you will say you either can’t afford or don’t have room for another amp in your car, band van, or on your stage, but your backup doesn’t have to be the same model you normally prefer. If you don’t have another tube amp that’ll suffice, many solid-state options on the market offer an affordable solution. Remember, your backup doesn’t have to blow minds with its peerless tonal ecstasy—it just has to get you through the gig.
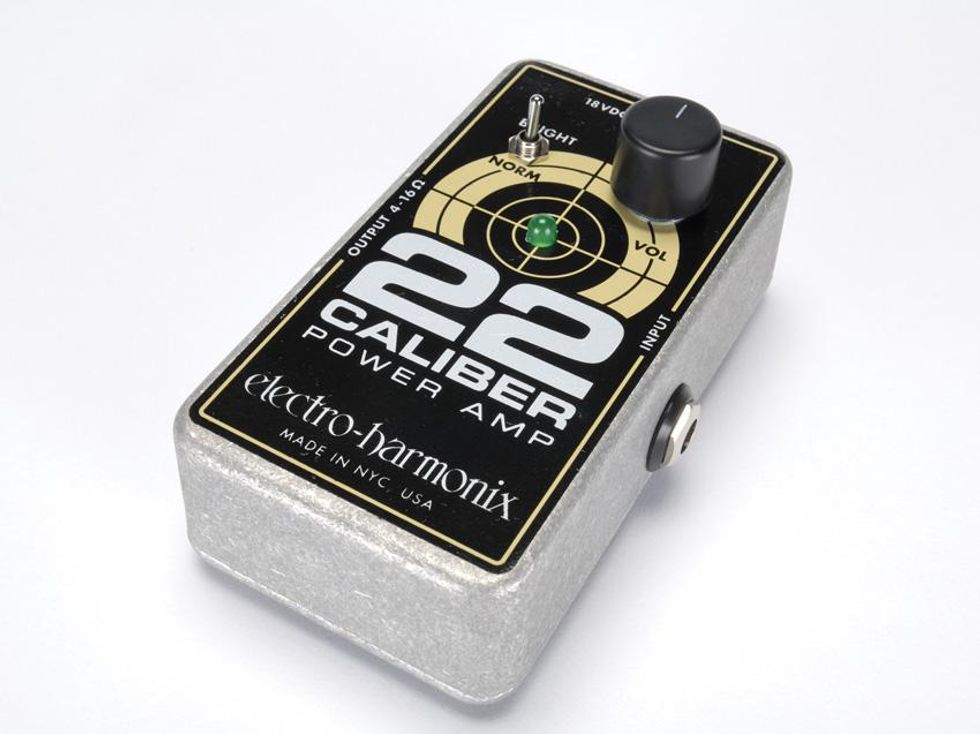
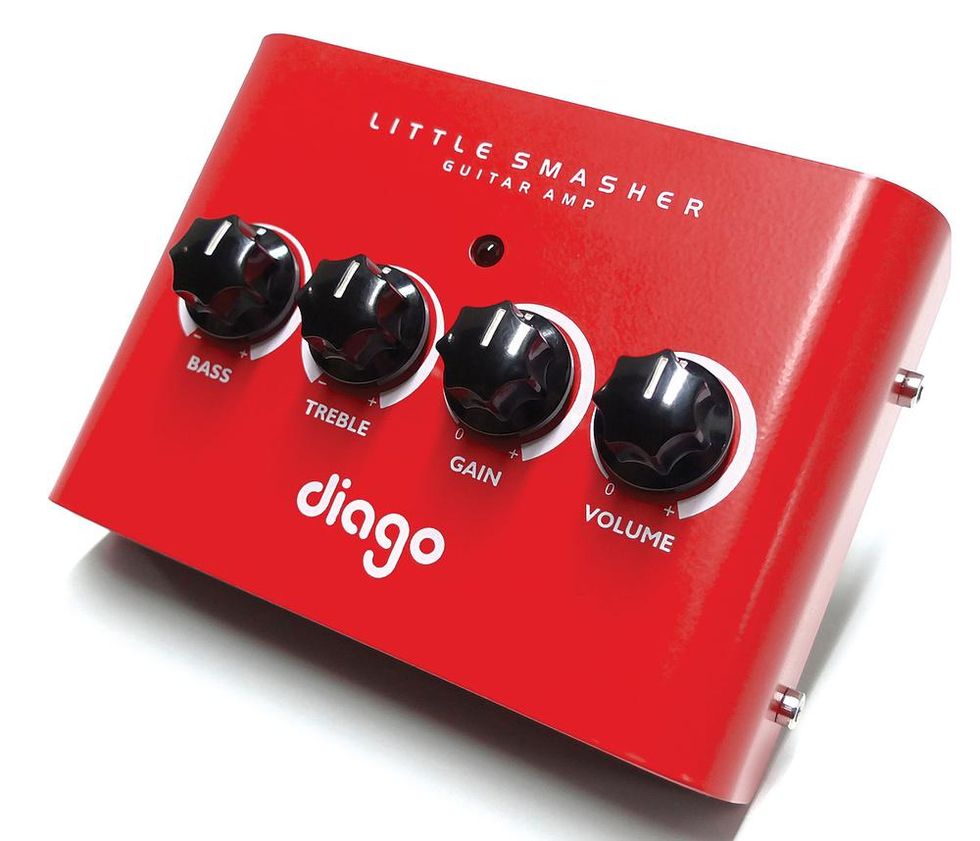
Stompbox-sized amps like the Electro-Harmonix Caliber 22 (above) and Diago Little Smasher (below) are an easy-as-pie lifesaver when your tube amp melts down on the go.
Whether you play a combo or a stack, you just need a spare head or combo with a speaker out. Something like an Orange Micro Terror head ($149 street) or a Roland CUBE- 80XL combo ($379 street) and an overdrive pedal will do—and if the volume isn’t raging, you can just mic the cab. Or, if most of your tone shaping comes from pedals and outboard gear, something like the überportable Electro-Harmonix Magnum 44 ($150 street) or Diago Little Smasher ($190 street) can be a godsend—even if you still need to mic your cab.
With most tube combos, you can use a 1/4" male-tofemale speaker cable or female-to-female mono adapter (which costs approximately $2 street) and another speaker cable to connect the internal speaker to your backup power amp. (Note: Because most cable adapters, whether male-to-female or female-to-female, aren’t up to the same specs as quality speaker cable, you should only resort to using them for short periods such as during an emergency onstage meltdown.) All of the aforementioned options are light, portable solutions that can be kept on hand with minimal inconvenience so you can do a quick swap and troubleshoot your main amp during a break or after your gig—when you’re not under performance pressure. That’s much more expedient than troubleshooting onstage—and it will keep your bandmates and audience happy.
Troubleshooting After the Gig
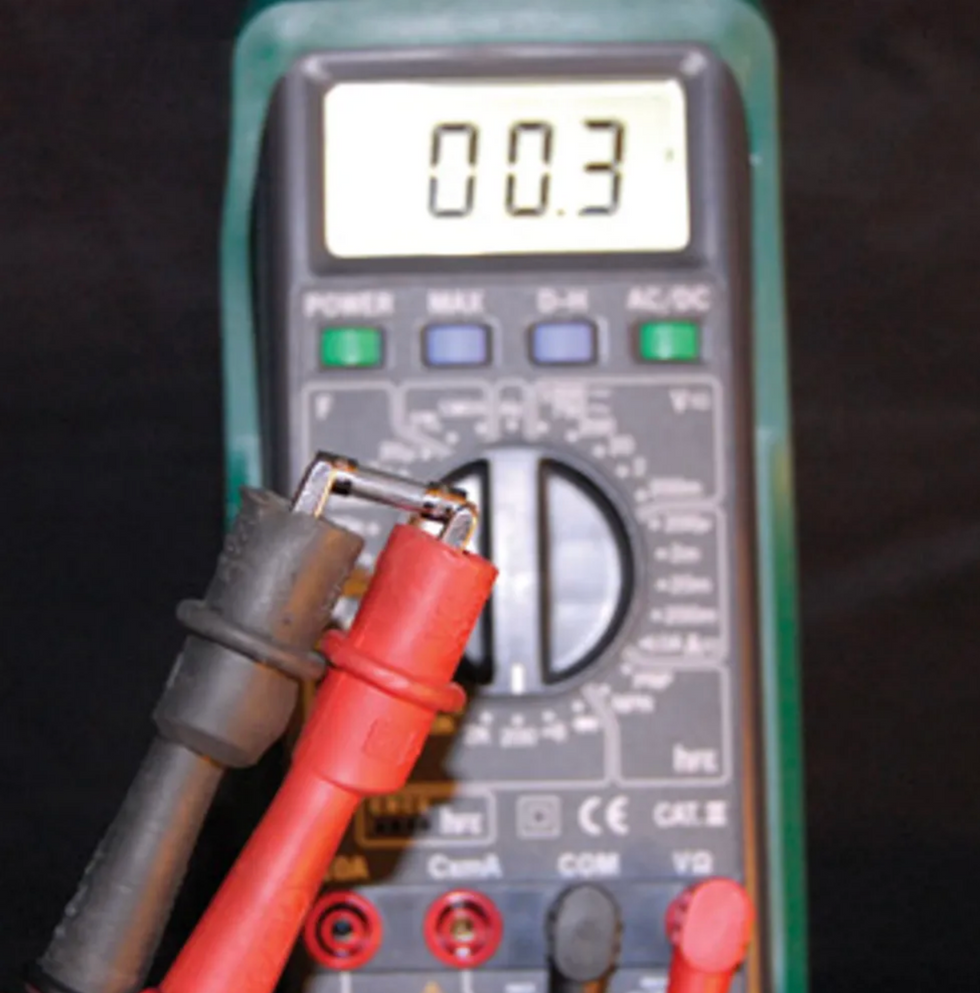
Because fuses can often appear good to the naked eye, it’s best to test them with a multimeter set to read continuity in ohms.
Now let’s move on to actual first-aid measures. It goes without saying, that if you think your amp may have issues, it’s probably either because it doesn’t sound right or isn’t making sound at all. Although it’s a bummer to deal with this at all, hopefully it happens at home or during a rehearsal, so it doesn’t interrupt a gig.
The first step to take when you think there’s something wrong with your amp is to make sure it’s actually the amp that’s faulty. To do so, first, plug directly into your amp, bypassing any pedals or effects gear. If the amp functions properly, look elsewhere in the signal chain to pinpoint the problem. If it still won’t work, try a different 1/4" cable, and if that doesn’t fix the problem, use a different guitar. If the problem persists, it’s probably your amp. The following sections detail some of the most common issues that the average guitarist should feel comfortable detecting and rectifying (forgive the pun) without going to an experienced amp-repair tech.
Is the Indicator Lamp Illuminated?
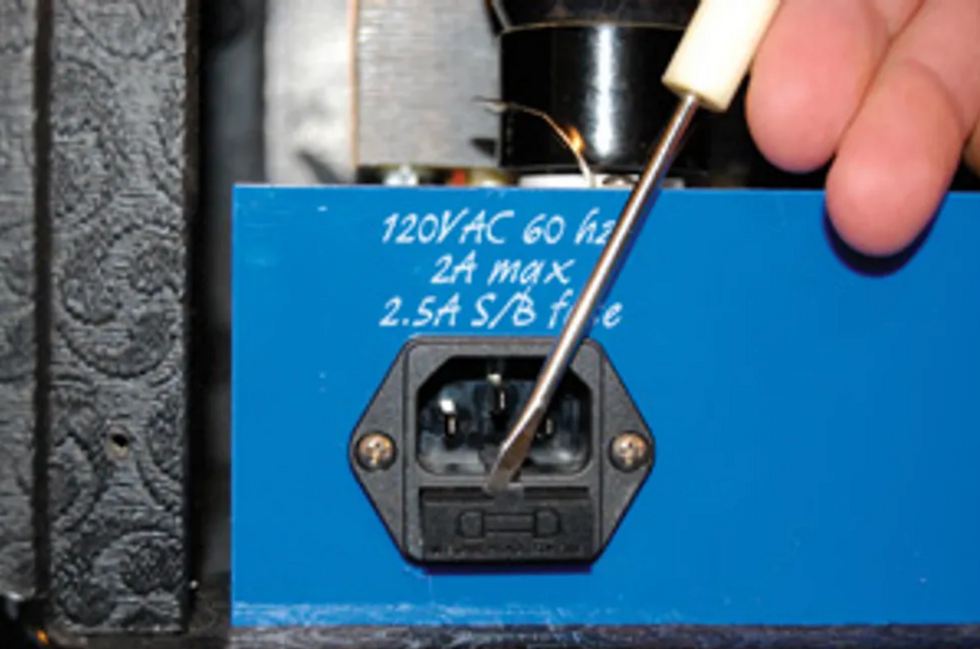
Some fuse holders are integrated with the line-cord receptacle and require a small flathead screwdriver.
If not, it’s probably because of a blown fuse. Usually a fuse blows due to a failure in the amp, but occasionally it’s due to something as simple as a power surge. Because fuses can sometimes look good to the naked eye even when they’re blown, the best way to check is to use a multimeter. Set the meter to read continuity in ohms (Ω) and measure across the fuse. If the meter indicates continuity or an almost zero reading, the fuse is good. If not, you’ll need to replace it.
To avoid buzzkill during a productive home jam session or band rehearsal, I recommend you get to know the fuses in all your amps and carry extras so you can pop them in and keep rocking. Some fuse holders are easy to find and as easy to operate as a push and a turn. Some require use of a flat-blade screwdriver. Others are an integral part of the line-cord receptacle and require you to remove the cord and use a small flat-blade screwdriver to pry out the fuse holder. Whichever type your amp uses, check the value of the fuse currently installed—especially if you’re not the original owner—and make sure it’s correct. If your amp has multiple fuses, such as a high-tension (aka “high-voltage” or “HT”) or output fuse, make sure you have multiple replacements for each.
One point that’s crucial to keep in mind is that you should never replace the fuse with a substantially higher current rating just to keep the amp running. If a fuse of the correct value continues to fail, the amp has a problem that needs to be addressed.
In such a scenario, possible causes for repeated fuse failure could be:
- A faulty rectifier tube. If your amp uses tube rectification in its power supply, a shorted rectifier tube can cause a fuse to repeatedly blow. To see if this is the case, locate the rectifier tube in the amp—it’s usually the tube closest to the mains (AC) transformer, and it’s typically a 5U4, 5Y3, 5AR4, GZ34, or 6X4. (Side note: It’s a good idea to know what kind of rectifiers are used in all your amps and to keep one of each necessary type in your spares kit.) After you’ve located the rectifier, install a new fuse and a new rectifier tube and try the amp again. If it now functions properly, you’ve found the cause of the failure. If not, replace the original rectifier tube and continue troubleshooting.
- A faulty output tube. This is an especially likely culprit if the fuse(s) failing is an HT or output fuse. If you suspect this is a problem, install the new fuse(s) and replace the full set of matched power tubes. If this corrects the fuse-blowing issue, you’ve found the cause of the failure. However, this unfortunately does not mean the amp has a clean bill of health. Some tube failure can cause internal components to fail. If you replace the power tubes and notice lackluster performance, an increase in hum, or one or more tubes glowing exceptionally red, the amp will need to be serviced by an experienced tech, because more than likely the grid or screen-grid resistor(s) have failed. If replacing the output tubes has not alleviated the problem, re-install the original tubes and have the amp serviced by an experienced tech.
Tube Tip
Whether they’re preamp or output tubes, valves of the same type (e.g., EL84, EL34, GZ34, or 12AX7) from different manufacturers do sound different. Whenever possible, make sure the tubes in your spares kit are from the same manufacturer as those currently installed in your amp. This is especially true with regard to output tubes: While preamp tubes from different companies can result in differences in tone and gain, output tubes from different manufacturers tend to bias up quite differently. So staying with the same manufacturer—and, if the tubes are graded, replacing with the same grade—should avoid having to get the amp re-biased.
In a pinch, you can replace power tubes of different brands or grades to get through a gig, but be sure to have the bias checked and/or set as soon as you can for optimal performance, tone, and lifespan.
Is the amp making rumbling or glassy, high-pitched noises?

An ‘Ove’ Glove or an everyday oven mitt is a handy tool for dampening hot preamp and power tubes to determine which is bad, as well as for removing them once you’ve isolated the offending valve.
If so, narrow down the source of the noise by turning down any internal effects such as reverb or tremolo, as well as all volume controls. With the amp in operating mode, hit the top of the amp with your hand or fist using moderate force. If this produces the noise in question, read the steps below:- If the noise is of a rumbling nature: It could indicate a faulty output tube. For a quick fix, replace the amp’s power tubes with a full set of matched output tubes. If this alleviates the noise, you’ve isolated and repaired the problem. If the problem persists, replace the original tubes and continue troubleshooting.
- If the noise is of a glassy or highpitched nature: It is likely due to a faulty preamp-type tube. Starting with the preamp-type tubes closest to the output tubes, tap each one with your fingernail or the end of a pencil. If one in particular produces the noise in question, replace that tube. If this alleviates the noise, you’ve found the problem. If not, replace the original and continue this process with the remaining preamp tubes. If more than one tube produces the noise during the tapping process, a trick to narrowing down the possible offender is to attempt to dampen the adjoining tubes while tapping. This can usually be done by placing your hand on as many of the tubes as possible except the one you’re tapping on. If they’re too hot to perform this barehanded, use an oven mitt or ‘Ove’ Glove. This same technique can be used to find an offending output tube.
If tapping on the amp with all the volume controls set to minimum produces no noise, set all the volume controls to your typical settings and try again. If the noise in question is now present, go through the preamp-tube tap test once again, starting with the tubes closest to the input(s) of the amp—you’ve most likely narrowed it down to the first couple of gain stages.
If none of the above troubleshooting techniques produce the noise in question and your amp has a mechanical type reverb (i.e., a spring unit), turn up the reverb control. If the noise is now present, the reverb drive and/or recovery tube could be the cause. Unless you know the specific location of these tubes, you may need to go through the tap test one more time to find exactly which tube is at fault. (If your amp is a blackface or silverface Fender style, looking at the amp from the rear, the reverb-driver tube is generally a 12AT7 and it’s usually third from the right, while the 12AX7 reverb recovery tube is fourth from the right, just past the small transformer.)
Is the amp making crackling or popping noises when you’re not playing?
If so, this is can be caused by faulty preamp or power tubes. The best course of action here is pure substitution. One by one, replace each preamp tube and see if it alleviates the noise. If none of the preamp tubes seem to be the cause, try replacing the full set of output tubes with your set of matched spares. If no tube substitution alleviates the problem, the amp will need to be serviced, because there’s a good chance it has a failing plate or cathode resistor in the preamp.
Is the amp making loud, static- like noises when you play?
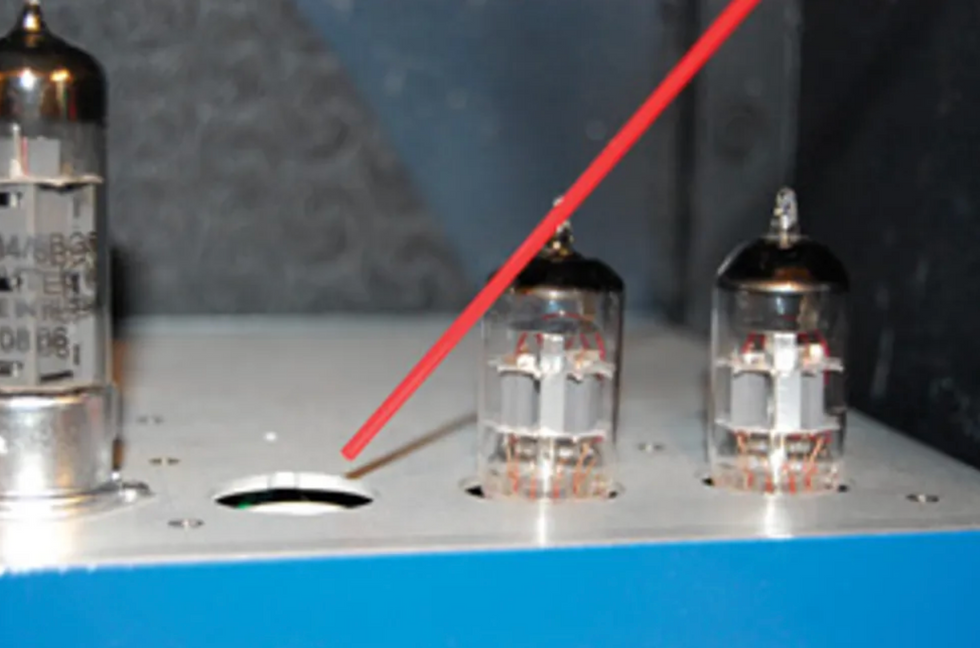
If your amp is making loud, static-y sounds when you play, you may need to clean its tube sockets with electronic contact cleaner.
This could be due to dirty, oxidized, or compromised connections in the tube sockets. To find out, while the amp is in operate mode, wiggle each tube, starting with the output tubes— which are usually the biggest offender. In order to avoid blurting out expletives in front of children or others with sensitive ears, be prepared for the amp to make a loud crackling noise. If it does, there’s a good chance the sockets are dirty or oxidized. More times than not, the fix is a good cleaning—and that’s something anyone can do.
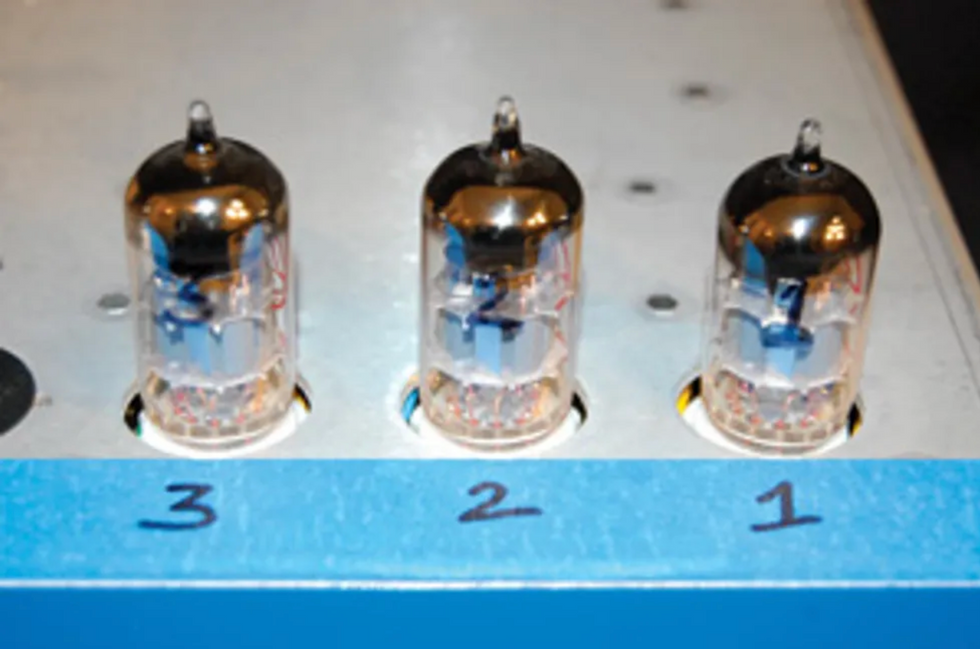
Before removing tubes to clean their sockets, label the tubes and their sockets to ensure you replace them in the spots that were producing satisfactory results prior to the static problem.
To clean the sockets, turn the amp off and remove the tubes once they’re cool, being sure to take note of their locations in the amp. I recommend marking each tube and its associated socket with a Sharpie (“1,” “2,” etc.) while you’re removing them. One by one, spray a couple of shots of electronic contact cleaner, and then insert and remove each tube in the socket 8 to 10 times. (Note: Be sure your electronic contact cleaner is the type without lubricant— lubricant can attract dust and debris, which can become conductive.) Once you’ve cleaned all the sockets, leave all of the tubes out for 5 to 10 minutes so that the cleaner can evaporate. After the sockets are dry, replace the tubes and try the amp again. If the symptom has cleared up, you’ve taken care of the issue. If not, try the socketcleaning procedure again—sometimes it can take more than one cleaning to get the job done. If the problem still persists after a couple of cleanings, the sockets may need to be re-tensioned or replaced, which is probably best left to a professional.
Does sound from the amp cut in and out while you play?
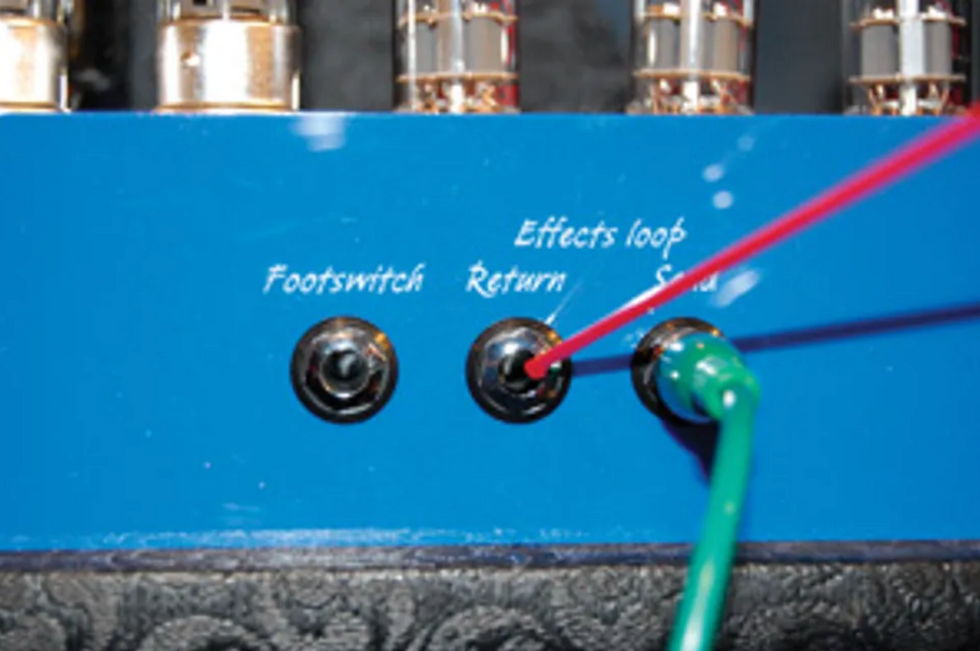
If your amp cuts in and out during play, your effects-loop jacks may need cleaning with an electronic contact cleaner that has lubricant.
This can be due to quite a few things, one of which can be related to the tube sockets (see the previous section on cleaning tube sockets).
If your amp has an effects loop, the problem could also be that the contacts in its 1/4" jacks are dirty or oxidized—especially if you don’t use the loop. To remedy this, spray electronic contact cleaner—only this time use the type that does have lubricant— into each jack, and then insert and remove a cable 8 to 10 times. Afterward, leave the plugs inserted for 15–30 minutes— or even overnight, if possible. This will leave the jacks’ switching contacts open and give the cleaner a chance to dry. You can then remove the cable and try the amp again. (Note: As a preventive measure, it’s not a bad idea to perform this type of jack cleaning on your input and speaker jacks.)
Does the amp not make sound at all?
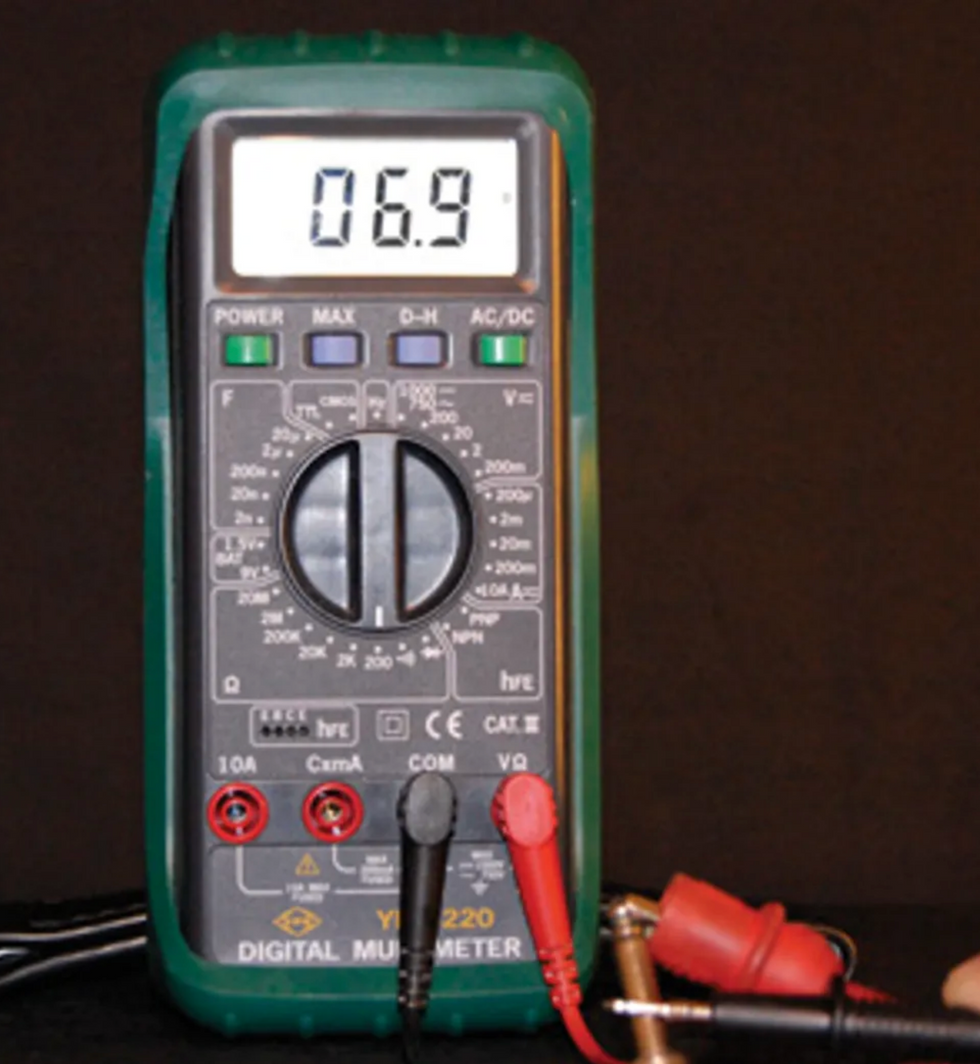
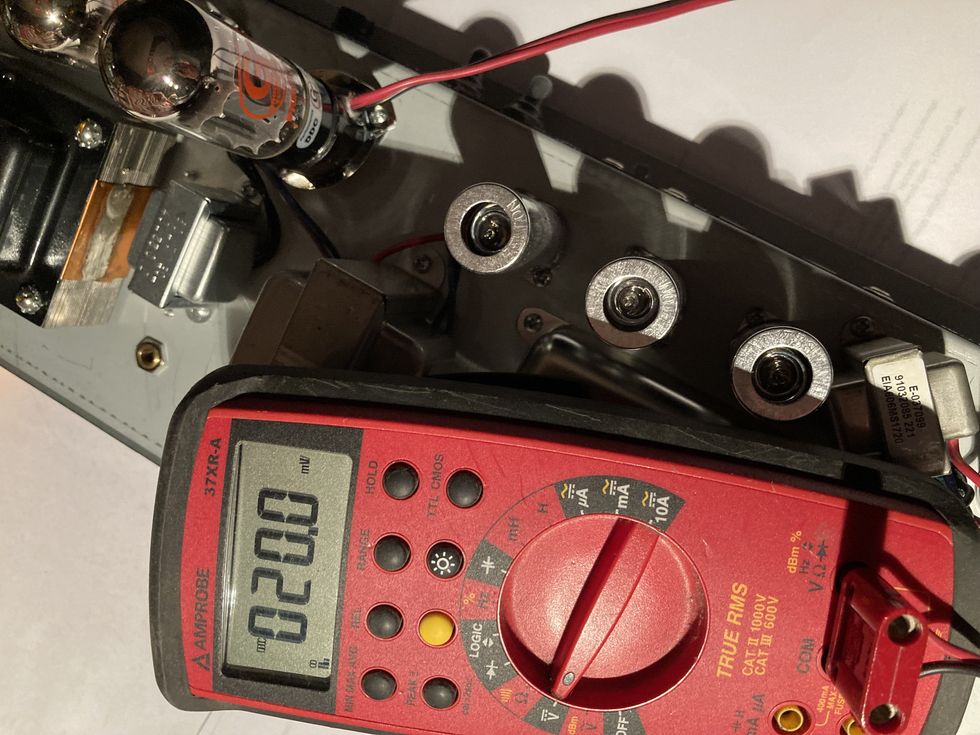
If your amp isn’t making any sound, it may have a bad speaker connection. You can test whether the speaker is getting a proper signal by connecting one multimeter lead to the sleeve (as shown with the black lead above) and the other to the tip.
This can be due to an open speaker connection. To check for this, unplug the speaker cable from the head (leaving the other end connected to the cab), and use your multimeter to measure the resistance of the speaker load. Set the meter to read resistance in ohms, connect one lead of the meter to the body (sleeve) of the plug, and then connect the other to the tip. A typical 16 Ω load will measure approximately 12–14 ohms, an 8 Ω load will measure approximately 6–7 Ω, and a 4 Ω load will measure approximately 3 Ω DC resistance with the meter. If you can’t get a resistance measurement, try again with a spare speaker cable. (Note: For testing purposes, a 1/4" instrument cable can be used, but you should not use one as a permanent substitute for a proper speaker cable.)
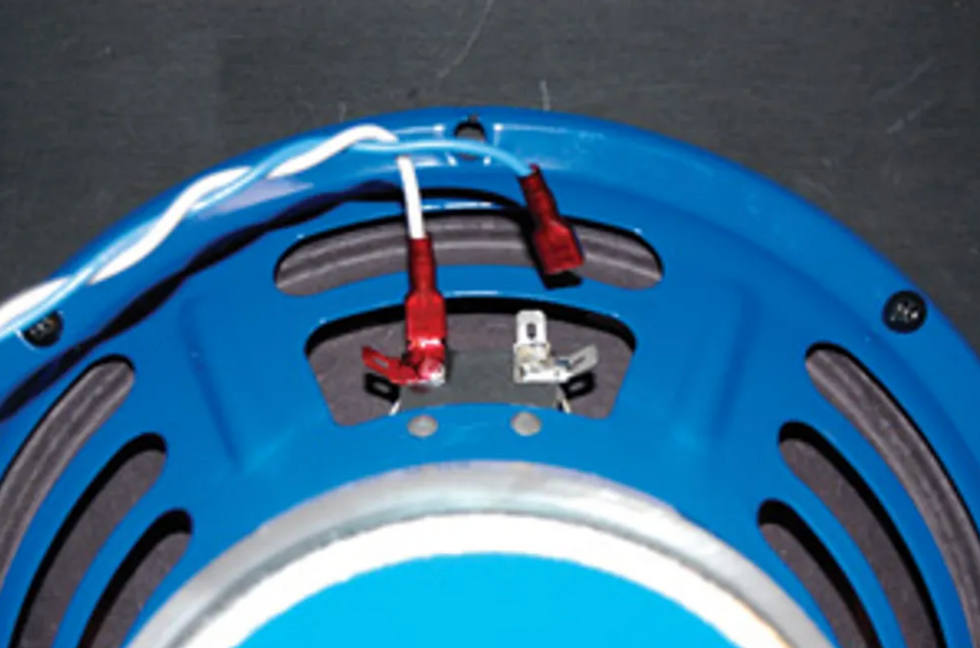
Although they may require a bit of a tug, the quick connects on many combo speakers can be removed to facilitate testing of the speaker’s resistance—which can help you determine whether the speaker cable has gone bad.
If you have a combo and you can’t get a reading at the end of the combo speaker cable, perform the resistance test right at the terminals on the speaker itself. I have seen numerous instances where inexpensive combo speaker cables with the molded plastic ends have failed, so it’s not a bad idea to replace these with an upgraded cable as a preventive measure—because an open speaker cable can cause substantial damage to a tube amp. If you happen to have a combo where the speaker is hardwired (i.e., it does not have a 1/4" jack you can disconnect from the chassis) and you still wish to check the speaker resistance, you will need to disconnect one of the leads coming from the chassis to the speaker(s). Luckily some amps use quick connects to attach the speaker leads. If this is the case, simply remove one connector from the speaker (this may take some force, but it will come off) and measure the speaker resistance by connecting the meter leads directly to the speaker terminals. If your hardwired speaker doesn’t have quick connects, you’ll need to unsolder one of the leads. (Note: Checking speaker resistance with the speakers still connected to the amplifier will result in a false reading. Because the amp’s output-transformer resistance is extremely low, it will cause your reading to look like the speaker(s) are shorted, which is almost never the case.)
Be Prepared—and Don’t Get in Too Deep
A number of issues with tube amps can be alleviated by even the most risk-averse and electrically un-inclined guitarist using the tools and methods discussed here. The most important thing is to have the proper instruments and supplies on hand and to follow the right processes. We recommend keeping this story handy (you can access it for free online or get the Premier Guitar app for Android or iPhone) so you can follow the steps outlined here precisely every time.
Hopefully your amp woes never become so great that these fixes don’t solve the problem, but if they do, be sure to document the problem well and get in touch with a qualified amp-repair person so they can help you get up and wailing again with minimal downtime.
[Updated 12/1/21]







![Rig Rundown: Russian Circles’ Mike Sullivan [2025]](https://www.premierguitar.com/media-library/youtube.jpg?id=62303631&width=1245&height=700&quality=70&coordinates=0%2C0%2C0%2C0)
