The condition of your frets will determine how well your guitar plays.
The condition of your frets will determine how well your guitar plays. Every time you press your strings against the frets, the friction between them subtly changes the shape of the frets, causing them to wear out. Over time, this metal-against-metal contact can lead to string rattle and intonation issues. The greatest fret damage is caused by capos—especially under the plain strings.
Fret wear is a normal by-product of playing your instrument. As a guitarist, it's important to know how to evaluate fret damage and understand what options you have to correct it. The big question is, can I refurbish my frets or is it time to replace them? Let's explore the subject starting with the fretwire itself.
What are frets made of?
Though fretwire is frequently called "nickel silver," it doesn't actually contain silver. Rather, it's typically composed of 18 percent nickel, 80 percent copper, and small amounts of such other materials as zinc, lead, and cadmium. Really good fret wire has more zinc and less copper. One of my favorite brands is Jescar, and their NS formula is 62 percent copper, 18 percent nickel, and 20 percent zinc. Because it's harder than traditional fretwire, it lasts longer.
Another option is stainless steel. Stainless steel is very difficult to work with, but it lasts dramatically longer than traditional fretwire. However, stainless steel frets come with a hefty price tag. Most luthiers will charge more than double to re-fret a guitar with stainless steel because it nearly destroys their tools and the job takes much longer to do. In the long run, it could be the perfect solution for your guitar since you may never have to replace the frets again!
How are frets sized?
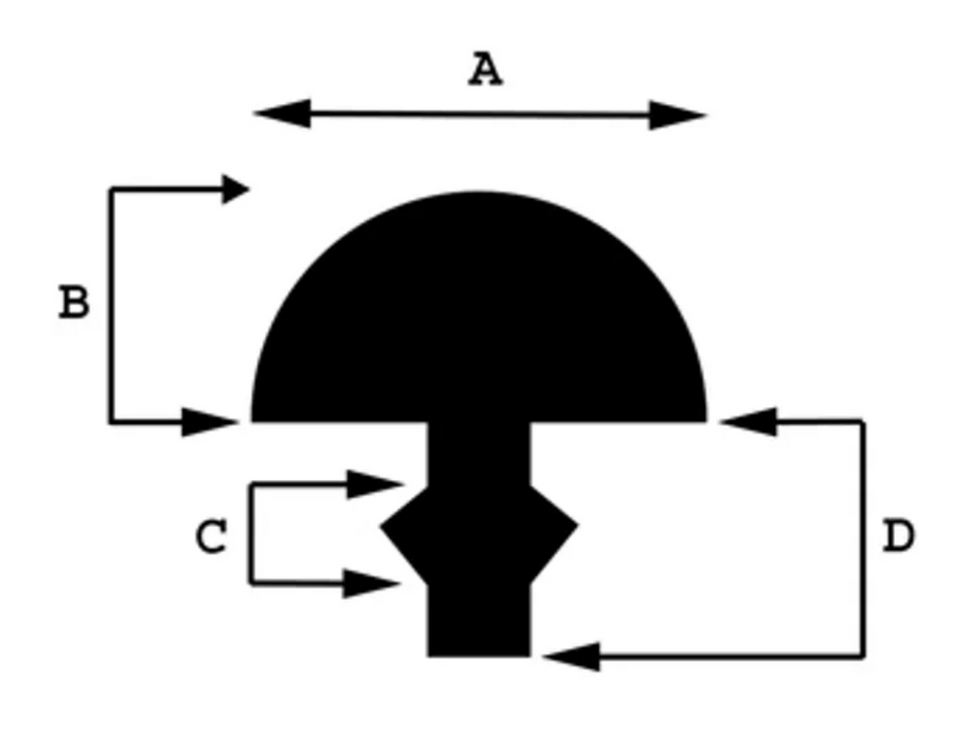
Fig. 1. Fretwire is measured by the crown's width (A) and height (B), as well as the size of the barb (C) and depth of the tang (D).
Fretwire comes in a variety of sizes and shapes. Fig. 1 illustrates the four elements that determine a particular style of fretwire. They are the width and height of the crown, the size of the barb, and the depth of the tang.
The crown is the exposed part of the fret. When you fret a note, you're pressing the string to the very top of the crown. Like a row of hooks, barbs secure the fret to the fretboard. Barb width determines the width of the fret slot and the tang determines the depth of the fret slot—i.e., how far the fretwire penetrates into the fretboard.
The size and shape of each of these four elements are specifically designed for different playing preferences and types of guitars. The crown width can vary from ultra narrow (.053") to super jumbo (.118"). The fret height can be anywhere from a short .032" to a tall .060". The width of the barbs and depth of the tang also vary from .019" to .040".
All these dimensions have a specific purpose and are important considerations when choosing fretwire. For example, wider frets can produce a stronger tone, but as they wear, the guitar's intonation "drifts" farther than with narrow frets. But narrow wire has its drawbacks, too: Narrow frets won't cause your intonation to drift as much, but they wear down faster than wide frets.
Tall frets will last longer before they need to be replaced. However, I don't recommend them for someone who plays with a strong grip. If you grip the neck tightly while playing or use a capo, the strings will pull sharp as you play. On the other hand, shorter frets wear out faster (especially if you use a capo) and need to be replaced more often.
The size of the barbs and tang have a profound effect on a guitar neck, and if you decide to install new frets, it's very important to use the correct size. If the barbs and tang are too narrow or shallow for the slots, the frets won't seat securely in the fretboard. This causes them to lift out when the weather changes and yields uneven frets and a lot of buzzy or dead notes. When the barbs and tang are too wide, they can crack and chip the fretboard, or even cause the neck to back-bow. In the case of a back-bow, you have to re-fret the guitar.
To summarize: A neck must have the correctly sized frets to match the fretboard and player. Otherwise, you'll end up with a very expensive mess!
Can the dents in my frets be repaired?
Dents always create problems with frets. But does discovering dents mean you need to replace your frets or is re-crowning an option?
It can go either way, and the answer depends on the depth of the dents. When the dents are deep, your tech would have to remove too much material from all the frets to correctly repair the problem ones. When the height of the fret is below .038" and it has deep pits and dents, chances are a re-fret is in order.
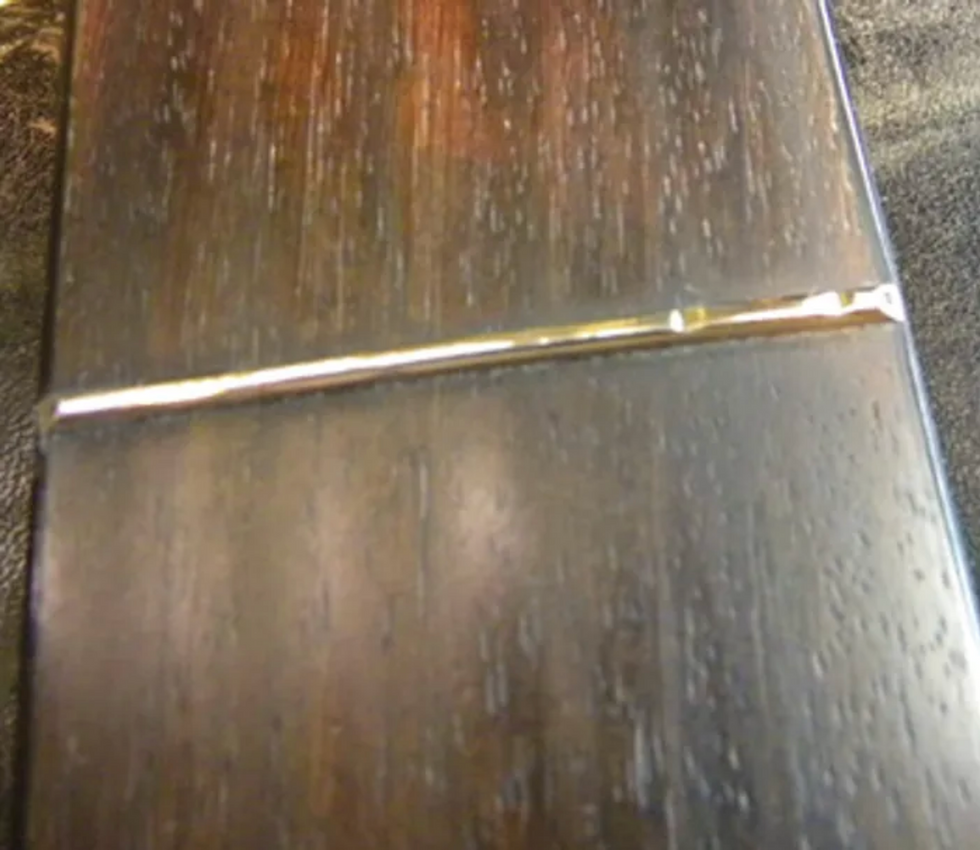
Fig. 2. A dented and pitted fret causes intonation problems, creates string rattle, and impedes smooth string bends.
Look at Fig. 2 and notice the deep pits in these frets. These dents are too deep to repair, so the frets must be replaced.
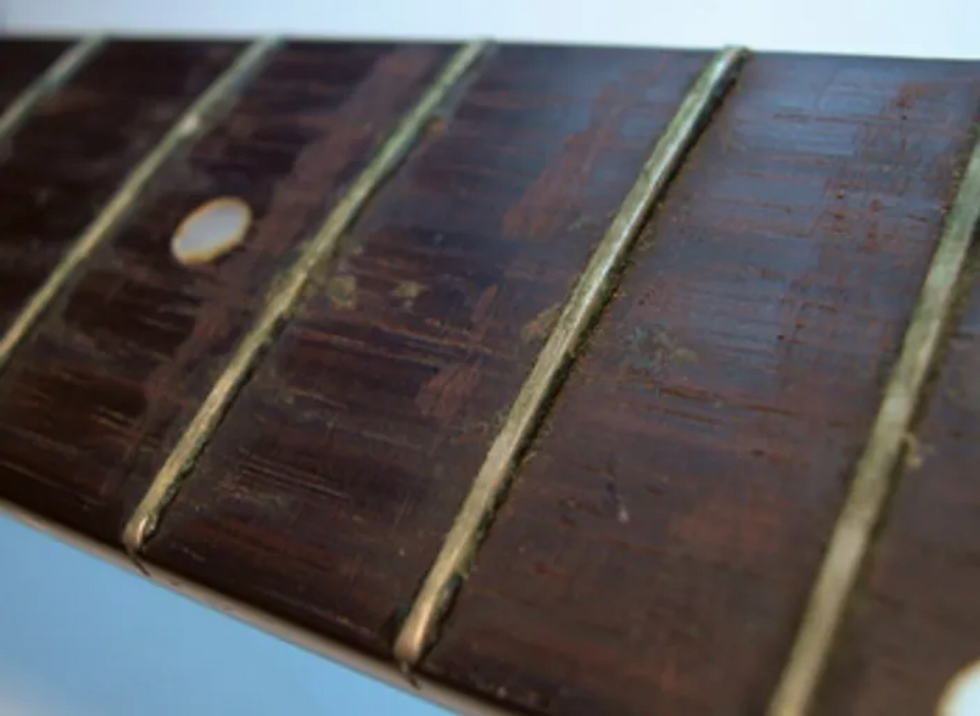
Fig. 3. A flat fret also creates rattle and intonation problems.
Dents and pits are not the only reason to replace frets. Flat spots in the frets are another culprit. For a fret to function properly, it must have a domed crown. If the crown is flat, as in Fig. 3, it will cause string rattle and intonation issues. Much like dents and pits, if the fret has a flat crown and is too short, it will need to be replaced.
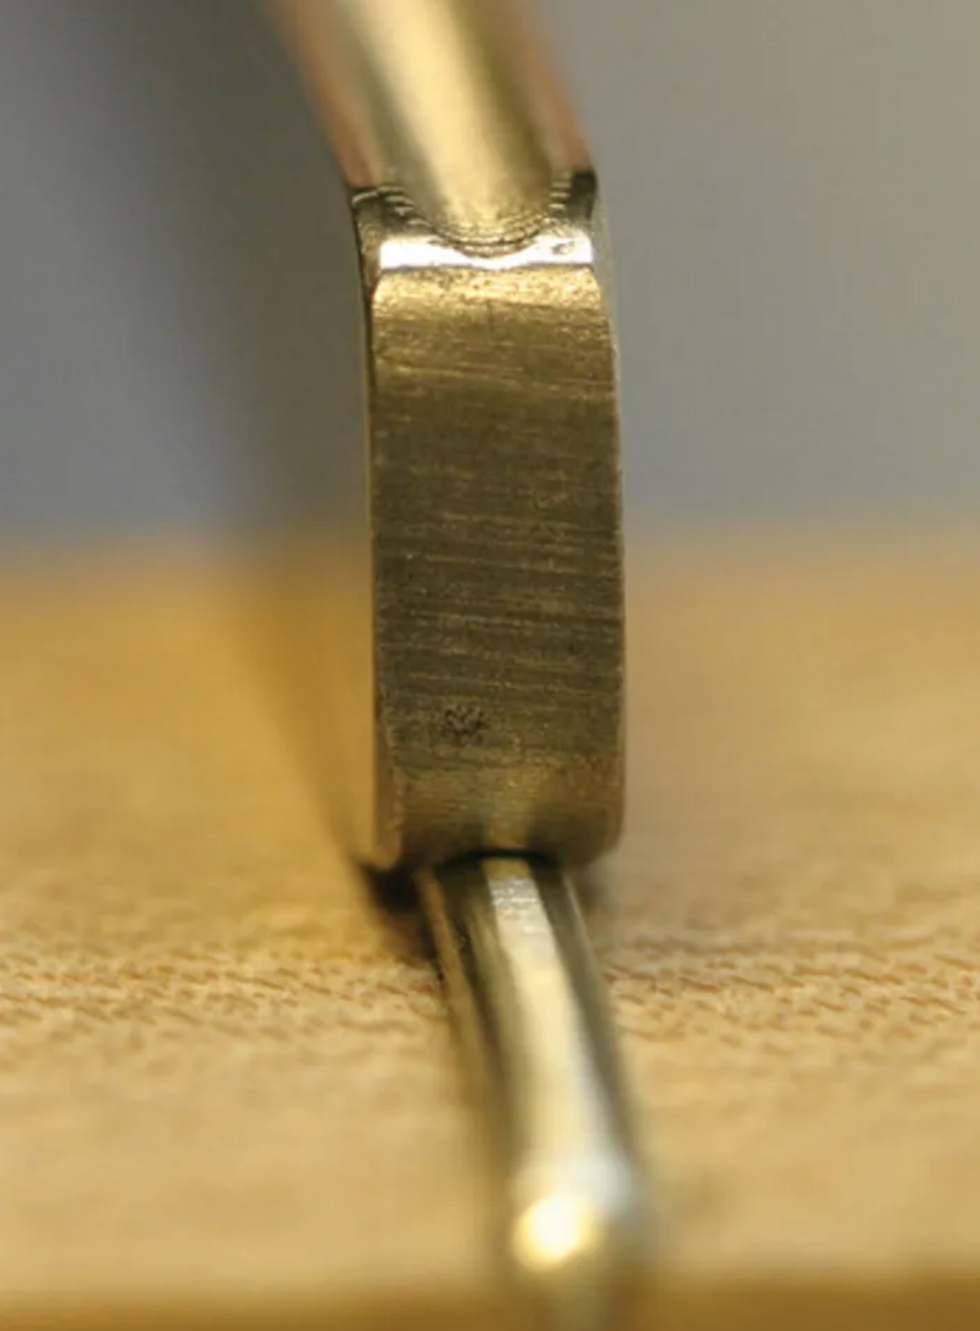
Fig. 4. Re-crowning a fret with a specialized tool.
If the frets are tall enough to repair, they are first leveled and then re-crowned. To level a fret, your tech grinds and sands the frets to an equal height. This leaves the frets with a flat crown. The next step is to re-crown the fret by removing material from its sides until the crown offers a narrow point of contact for the string Fig. 4. This is a very painstaking process and it takes years of practice to develop the proper skills—definitely a job for a pro.
What's involved with a re-fret?
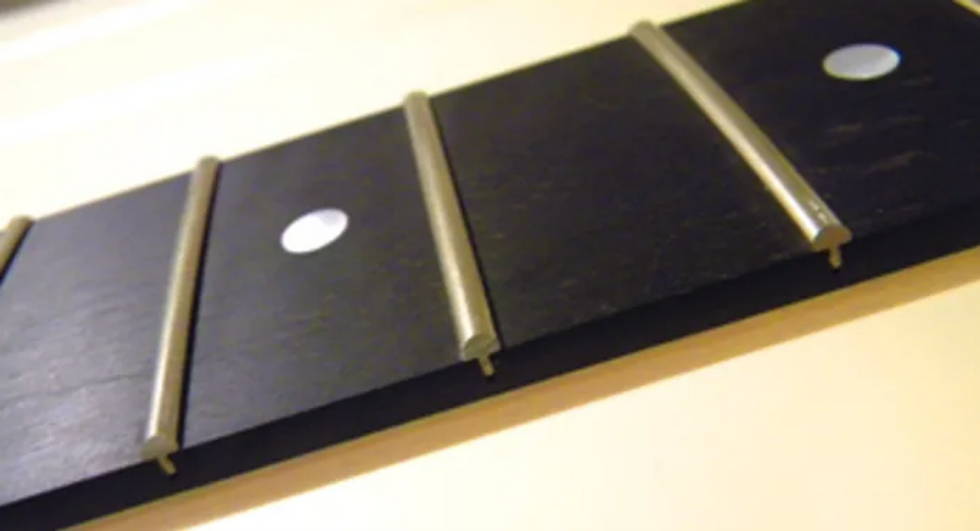
Fig. 5. A complete re-fret gives a guitar a new lease on life.
In a re-fret, all the frets in the neck are replaced. The process is very precise and requires expensive tools and great skill. The basic steps include disassembling the guitar, removing all the old frets, planing the fretboard, radiusing the fretboard, cleaning out the fret slots, installing the new frets and then leveling and re-crowning them, cleaning the fretboard and polishing the frets, and finally reassembling the guitar Fig. 5.
And this is just a basic overview of the process. There are many, many more steps—enough to fill an entire book. Re-fretting is expensive and time consuming, but generally worth the cost.
Over the years, I've had clients who choose to replace an old bolt-on neck with a new one, rather than opt for a re-fret. This can be a great choice, but beware—almost every new neck needs a fret level and re-crowning. Most guitar parts factories don't take the time that a luthier would to ensure that the frets are level. So keep in mind that by the time you pay for a new neck and the additional fretwork, you could have re-fretted the original neck and had some leftover change!
What about a partial re-fret?
Sometimes simply replacing several frets, rather than all of them, gets the job done. This is usually preferable for a neck that only has wear on the first six or seven frets and has a level fretboard. If the fretboard is in good condition and the rest of the frets are tall enough, a partial re-fret is a great way to save money. Not all guitars can qualify for this operation. If the fretboard has a twist or wave in it, a total re-fret is required.
Capo is a four-letter word.
The capo is a fret's worst enemy. Of course, I love capos because I love to do fretwork! If no one used capos, my income from fretwork would drop at least 60 percent. The more you use a capo, the more damage it does to the frets. As the capo clamps down on the strings, it smashes the strings into the frets and much harder than if you were to play a chord. As a result, frets begin to flatten and develop pits and dents. This is great news for a guitar tech, but not so good for the player.
To avoid unnecessary "capo-inflicted" fret damage, I suggest you use a capo with a tension adjustment. Many capos simply press the strings down to the fretboard without offering a way to adjust the tension. If you use a capo with a tension adjustment, you can clamp the device with just enough force to prevent string rattle, yet reduce additional fret wear.
Another great benefit to using a capo with adjustable clamping tension: It will help avoid tuning issues versus a nonadjustable capo. There are several great capos on the market that will diminish fret damage and tuning problems, including Planet Waves Dual Action capo and all the various Shubb models. If your capo doesn't offer a tension adjustment, buy one that does. This will save you a ton of money in fretwork.
[Updated 8/10/21]
- Understanding Frets and Fret Wear - Premier Guitar ›
- Jol Dantzig's Esoterica Electrica: Perfect Intonation and Other Myths ... ›
- Mod Garage: Fighting Fret Wear - Premier Guitar ›
- Guitar Shop 101: Squeezing More Life Out of Worn Frets - Premier ... ›
- The Recording Guitarist: Should You Change Your Electric's Strings Before Tracking? - Premier Guitar ›
- Dunlop Introduces the Pivot Capo - Premier Guitar ›
- Dunlop Pivot Capo Review - Premier Guitar ›
Don’t miss your chance to win a Reverend Roundhouse RA guitar! Enter now. Giveaway ends September 12, 2024. Winner will be displayed below following the end of the giveaway.
Reverend Roundhouse RA Electric Guitar - Wine Red
The Roundhouse wallops! The new Roundhouse RA is taking that wallop to another level! It’s the classic single cutaway reimagined for today’s player. This carved top set neck – a first for Reverend Guitars — has a massive tone but is lightweight and balanced. Every Roundhouse features a set of Railhammer Hyper Vintage Humbuckers, a flame maple top, a TOM stop-tail bridge, rosewood fretboards, and no pickguards. Perfect for all your rock-and-roll dreams!
Orianthi joins forces with Orange Amplification for her signature combo, the Oriverb, based on the classic Rockerverb MKIII 50 NEO Combo.
"Seeing this whole amp come to life has been a dream come true," said Orianthi, "it’s a beautiful amp and it really reflects my eccentric personality!"
The platinum-selling virtuoso guitarist has gained a reputation as a multi-faceted artist, singer, songwriter and first-call collaborator. With roots planted firmly in hard rock, her latest single "First Time Blues" featuring Joe Bonamassa and "Ghost" are a combination of blues-based riffs and memorable melodies. She is currently on tour in the USA and working on a new album to be announced soon.
The Oriverb, inspired by the Rockerverb 50 MKIII Combo Neo, is voiced to embody Orianthi’s unique sound. It has a cleaner mid-range warmth that reflects her classic blues and rock tone, whilst retaining all of its desired variable distortion.. A tweaked EQ gives the Oriverb creamy, sparkly cleans and saturated screaming overdrives.
Fitted with a pair of lightweight, British-made Celestion Neo Creamback speakers and EL34 valves, the Oriverb has that definitive British flavour with incredibly versatile tone shaping abilities. The new combo also boasts a much-loved footswitchable spring reverb, built-in attenuator for maxed out textures at neighbour-friendly volumes, switchable power options and a near-transparent, valve-driven effects loop. The cabinet is crafted using the highest quality 15mm Baltic birch plywood, making it one of the lightest 2 x 12” speaker cabinets on the market and is finished in an embossed white Tolex, selected by Orianthi.
"We created this to be something very special, unique, something that when people plug into it, whatever guitar they are gonna use through this, it is going to amplify their personality," explained Orianthi, "being able to bring something to life that I feel a lot of people are really going to enjoy has been a real honour. I am so proud of this amp and I can’t wait for people to check it out."
To find out more about the new Oriverb, plus all the other Orange Amplification
products, please go to orangeamps.com.
A roadside stop in Massachusetts yielded a mysterious gem that hinted at a recombinant building operation.
This month, I’m proud to say that my wife and I are celebrating 20 years of marriage! Yes, she puts up with all my weirdness, but the gal is just the best, and I’m glad we found each other in this crazy world. Over the years, we’ve had a running joke about how, wherever we travel, I have to look up old music haunts or check out local classifieds for treasure.
I bought a guitar on our honeymoon, and our yearly trips to the shore were often spent trying to get a music-store owner to sell me an old hollowbody. (He thought it made a nice decoration.) On our 10-year anniversary, I bought a few guitars up in New England. But this year, we were staying in a beautiful but remote part of northern Pennsylvania, and I couldn’t find anything. There wasn’t even a music store in the whole county! Plenty of dollar stores, though, which are totally not that fun.
On our drive home we had the best chat about all sorts of topics, but eventually I started talking guitars. (Actually, the reason the subject came up was because she wants me to sell some of mine! Ha!) We were discussing remote spots, crazy music locations, and some totally strangecollectors who had music “stores,” but never sold anything because the prices were nuts.
Once, we were driving through Massachusetts. I don’t remember the name of the town, but I do remember that it had a famous fire station that was depicted in some Norman Rockwell paintings. [It was likely Stockbridge.] As we were driving out of town, we spotted a big “SALE” sign in front of a kinda-sorta country store. The place was an amalgam of buildings, makeshift tents, and semi trailers filled with all sorts of goods and sundries. I remember it was hot as hell, and being inside the trailers felt like being broiled. Yet, I persevered, and went on searching for weird stuff.
the guitar featured a totally warped-looking body that was slightly offset and a tad offbeat.“
My wife bought a few things, like a fat ballerina mirror which we still have, and some old glass bottles of various colors. I wasn’t finding anything, but I asked one of the locals there about guitars. He eyed me up and must’ve thought I was worthy because he took me to a spot near the back, in an old shed that was probably being held together with paint. Inside, there was a little treasure trove of kooky instruments in all sorts of disrepair. Still, I was smitten with a few pieces, including this column’s subject.
This Decca guitar is the kissin’ cousin of that old Bruno our columnist found in Western Massachisetts.
Labeled as a Bruno Royal Artist, the guitar featured a totally warped-looking body that was slightly offset and a tad offbeat. Finished in redburst with lots of brown pearloid, the Bruno had a lot of oddities that left me wondering. The neck and pickups were Kawai-made, circa 1966, but the body and tremolo originated elsewhere. I just assumed it was pieced together, but I still dug the thing, and it came home to live with us for a little while.
In the years that followed, I started to see more guitars just like this Bruno. I also saw some different brand names like Crown, Conqueror, and, pictured here alongside my Bruno, Decca. What was the mystery guitar factory behind the hybrids, piecing together Kawai parts with different bodies? I guess I may never know, but these are the happy little accidents we see in the bizarre world of guitars.
The guitar sounded very good, and the Kawai pickups in that hollowbody were smoky as hell. The body was finely crafted, and felt much more solid than typical fare from the era. The tremolo was also a solid feature, and the darn thing actually returned to tune.
This Bruno did eventually find a new home, and if I don’t sell more guitars, well … you know.
Dark, enveloping, and mysterious tape-echo-style repeats on the cheap in an enclosure that fits in the smallest spaces.
Dark, enveloping repeats that rival more expensive tape-echo emulations and offer an alternative to click-prone BBD echoes. Cool chorus and flanger effects at fastest repeat times.
Small knobs make it tough to take advantage of real-time tweaking.
$137
Electro-Harmonix Pico Rerun
ehx.com
My most treasured effect is an old Echoplex. Nothing feels like it, and though I’ve tried many top-flight digital emulations, most of which sounded fantastic, nothing sounds quite like it either. If the best digital “tape” delays do one thing well, it’s approximating the darkness and unpredictable variations in tape-echo repeats.
Electro-Harmonix’s Pico Rerun plays the character of tape echo very convincingly in this respect. It hangs with more expensive digital tape echoes at a $137 price tag that’s easy to stomach. Better still, this Pico version is petite and offers unexpected surprises and flexibility.
Beyond the Pico Rerun’s essential enveloping voice, the pedal enables a lot of fairly authentic tape-echo functionality. Manipulating the feedback, blend, and echo rate controls together (which is tricky given their small size) yields flying-saucer liftoff and “Dazed and Confused” time/space-mangling textures in copious measure. These tweaks betray some digital artifacts—mainly trebly peaks that don’t have the benefit of real tape-compression softening, but they hardly get in the way of the fun. Saturation lends welcome drive and haze. And the flutter button adds faux tape wobble in three degrees of intensity. At the most intense setting, long repeats take on a woozy sense of drift. At the fastest rates, however, the flutter function will generate chorus and flange effects that neither my Echoplex, nor my best tape echo simulators, can manufacture.