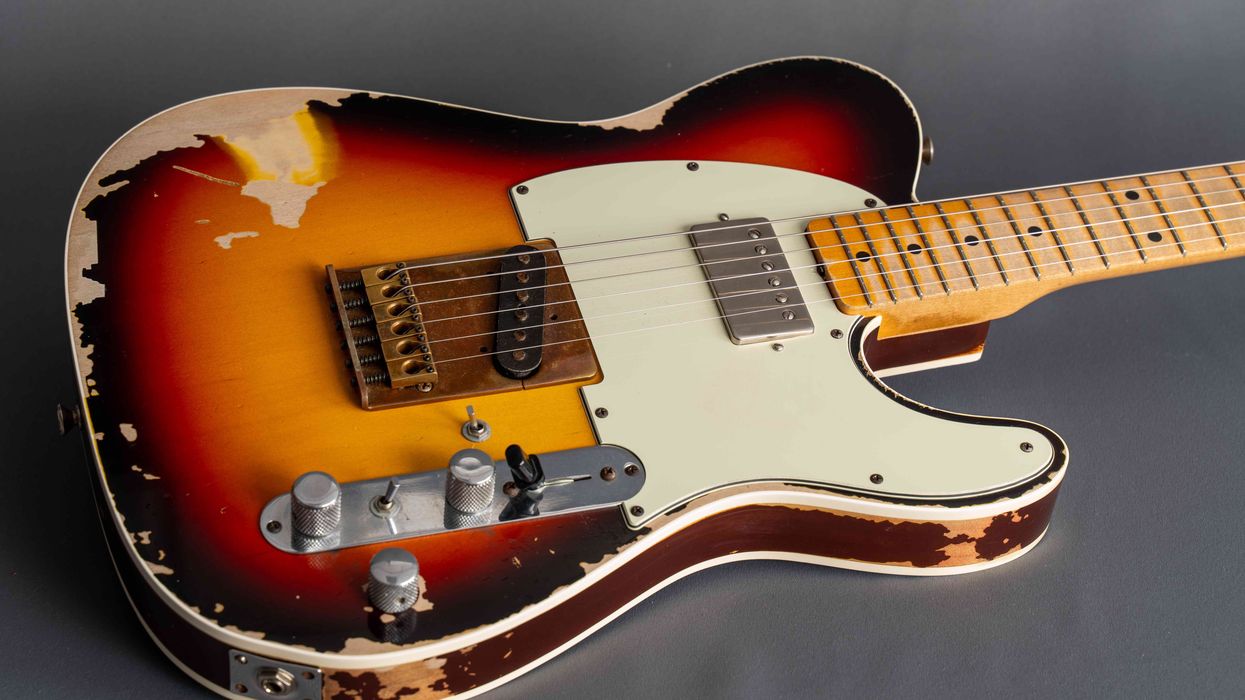
When aging a project guitar, it’s best to take it apart and start small. First, we focus on the metal.
This month, we'll discuss some basics about DIY aging/relic'ing and I'll explain a project I recently did. I chose a budget electric guitar that retails at €199 including shipping (about $217 USD). A guitar in this price range is perfect for a beginner relic'ing project, because if it's not perfect or you ruin something by accident, it's not the end of the world. Besides this, I was curious about the build quality of such a guitar, plus it gives us a perfect base to enhance and make more individual.
I decided on a Les Paul Junior Double Cut copy, a guitar design that Gibson released in 1958 and that's still in production today. It's a basic design: a single P-90 pickup placed above the wraparound bridge, with a Telecaster-like master volume/master tone configuration. This model is called DC-Junior TV Yellow and is made by Harley Benton, which is the home brand of the German-based Thomann company, one of the biggest guitar retailers in Europe.
A guitar in this price range is perfect for a beginner relic'ing project, because if it's not perfect or you ruin something by accident, it's not the end of the world.
The guitar offers good basic parameters: a solid mahogany body with a glued-in mahogany neck, a dark-stained amaranth (peltogyne) fretboard, aka purpleheart, instead of the classic rosewood material. The rest of the specs are close to vintage. We'll discuss single parts and aging them one by one, and replacing some of them for optical or performance reasons, as part of this project.
When the guitar arrived, I was more than surprised about the overall quality and craftsmanship. I brought it up to tune, plugged it in, and could instantly rock. Fret job, paint job, intonation, and action were excellent. The pickup sounds really good. What else could one expect for this price? Especially the fret job and the use of factory D'Addario strings (.010–.046) are remarkable in this price range.
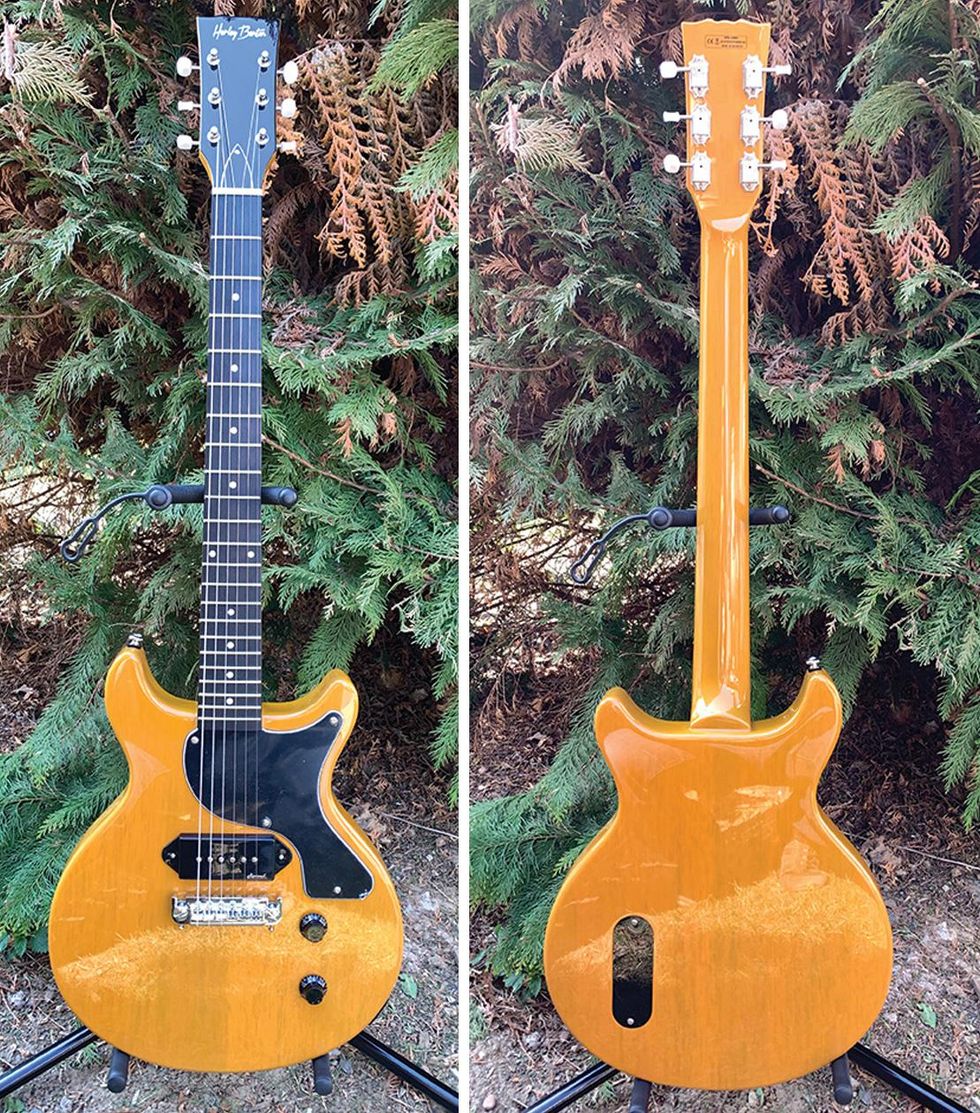
Images 1 (left) and 2 (right)
Courtesy of singlecoil.com
Images 1 and 2 show the guitar as received, so you have a first impression of what I'm talking about. It's not a real TV yellow, and more of a butterscotch/caramel/mustard color, but with a nice transparency so you can see the grain of the wood. We'll come back to this later in the project.
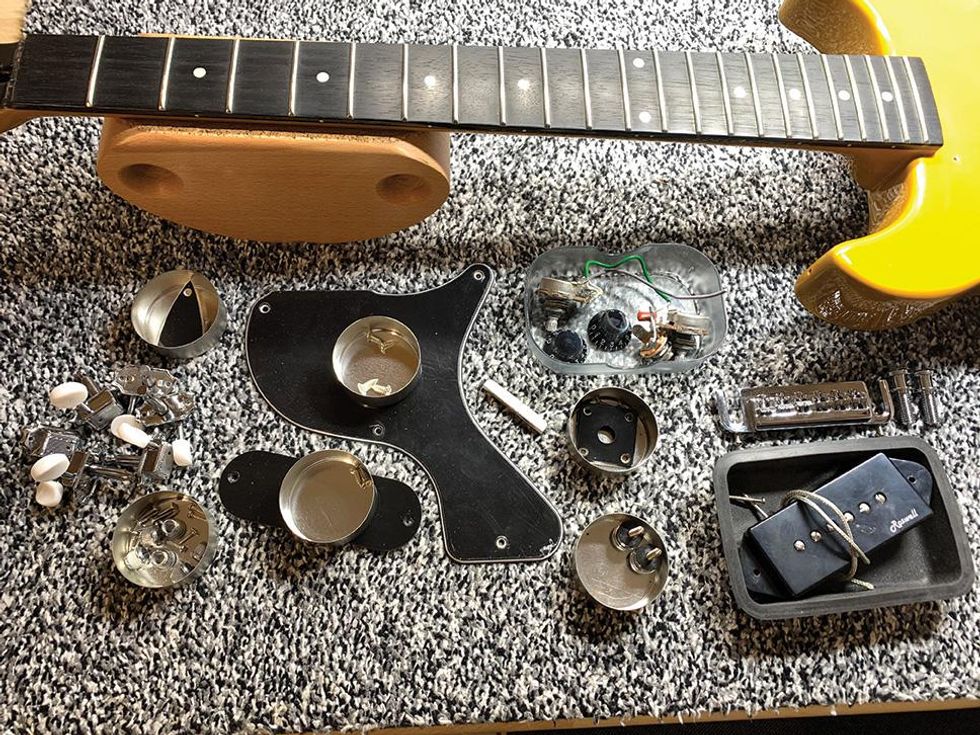
Photo 3
Courtesy of singlecoil.com
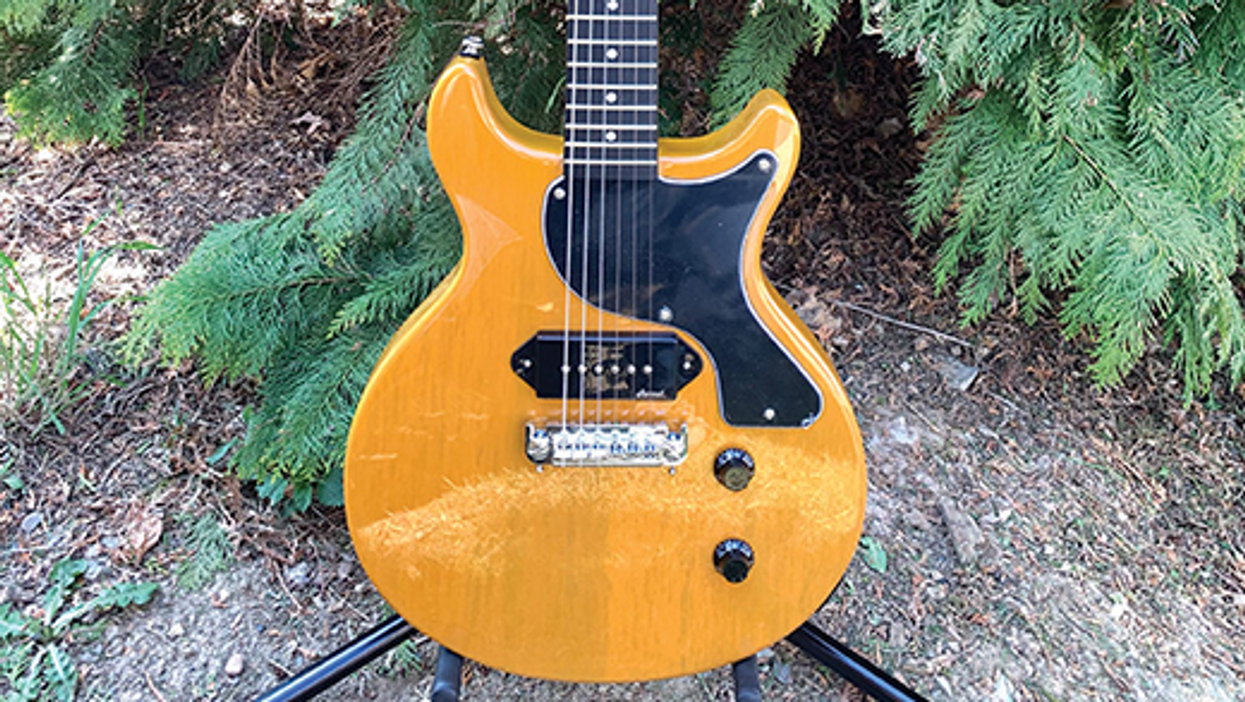
The first step is to completely disassemble your guitar, as I did, which you can see in Image 3. It's helpful to separate and label all small parts so you don't have any difficulties putting them back together. Take photos of the whole guitar and the details before you take it apart, and get some small containers (empty cans, boxes, cups, or whatever) to store all parts during the project. Store the screws together with the corresponding hardware, i.e. the screws from the pickguard taped on the back of it ... you get the idea. Also, as the proud owner of several cats and a dog, I speak from experience when I highly recommend using containers with a lid so you can close them, at least when your furry buddies have access to your working space.
I completely took the guitar apart except the bushings (aka "inserts" or "anchors"), because it was obvious that glue was used additionally to secure them. It's not difficult to get them out with the right tools, but in the process you could end up damaging the wood, having to repair the damage by re-drilling the hole and filling it with a wooden plug. There's a lot of debate on the possible tonal influence of the bushings, but my experience is that it's very, very little (if any) as long as it sits tight and can't move. I decided to leave them alone, but it's also possible to slightly age the visible part of the bushings so they won't stand out from the rest.
Let's proceed with an easy-yet-effective aging procedure. We will start with all the screws, followed by the rest of the metal parts.
Your shopping list for this is very small. Here we go:
- Goggles, gloves, surgical mask, and a shop apron to protect yourself. (We'll need this all through this series: safety first!)
- Old newspapers to protect your working space.
- A soft piece of wood like spruce, pine, fir, etc.
- Some Q-tips and paper towels.
- An old cup filled with cold water.
- Steel wool (preferably 0000 grade) or sanding pads (e.g. Micro-Mesh).
- Iron (III) oxide (ferric oxide) liquid.
You don't need much of the ferric oxide; a small bottle will do. This chemical is often used for etching printed circuit boards, so it should be easy to find. Be careful with this stuff! Chemicals can do harm if not used properly. Only use them in well-ventilated areas, always wear goggles, gloves, apron, and a surgical mask—and don't forget to protect your working space with old newspapers.
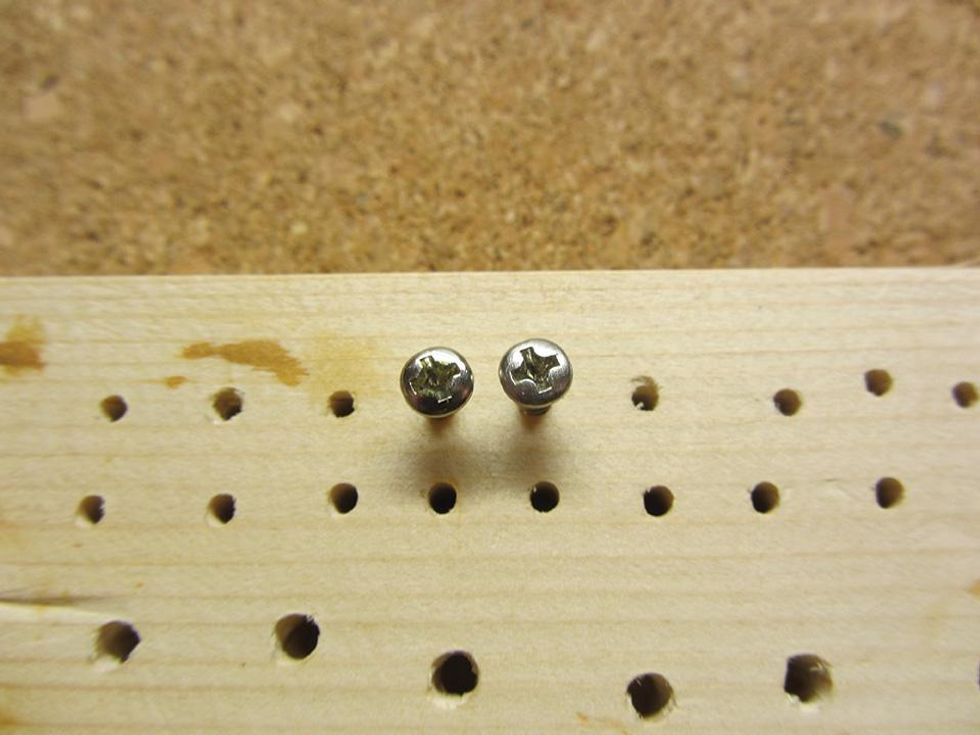
Photo 4
Courtesy of singlecoil.com
So here we go. Remember basic rule #1: break the shine! All screws on this guitar are nickel plated and very shiny. First, lightly rub them with steel wool or a fine-sanding pad until the glossy shine is gone and the color is dulled. Don't forget the edges of the screws. Image 4 is a before/after photo of this process. I used a flexible Micro-Mesh pad with 400 grid.
A lot of people are happy with the optical results after this simple treatment, but for more effect, we'll add some light signs of corrosion in the next step.
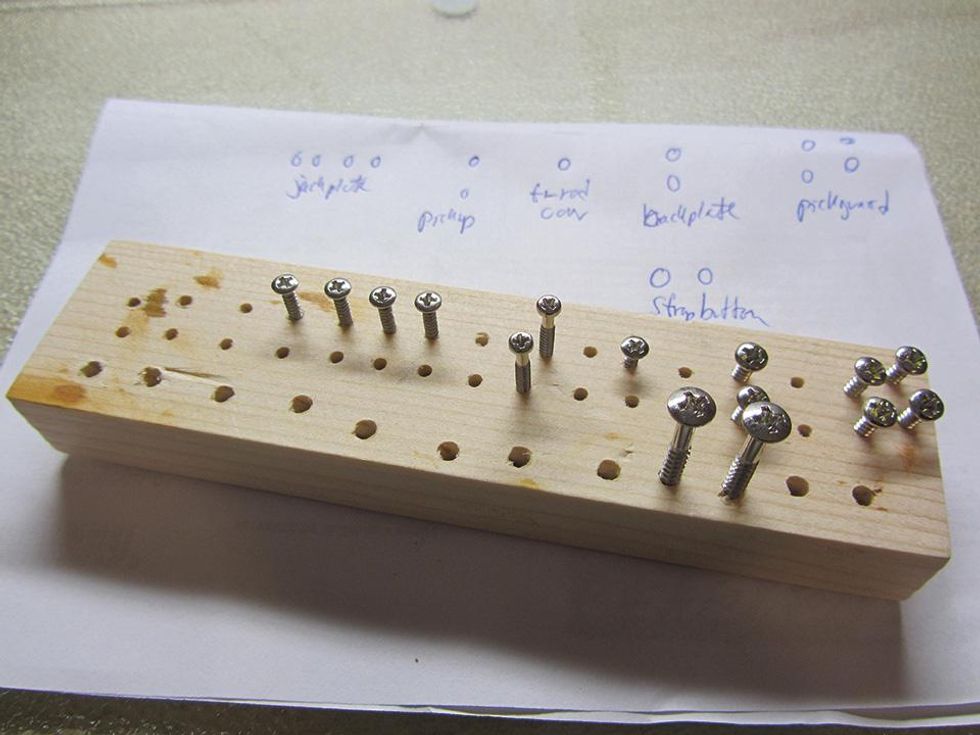
Photo 5
Courtesy of singlecoil.com
Take a piece of soft wood and screw in all of the screws with a screwdriver that matches the head type and size on your screws (Image 5). You don't need to screw them all the way in—just until they can't move or tip over. To keep the overview, arrange them in groups and make a kind of roadmap of what goes where. This way you won't mistake any of the screws as you reassemble the guitar.
Place the wooden piece with the screws on an even surface covered with old newspapers in a ventilated area. Place a cup with cold water within reach. Now dip a Q-tip into the ferric oxide liquid, but remember to use gloves, goggles, etc. to protect yourself. Place the Q-tip on the head of the screws to apply the ferric oxide. The oxidation process will start immediately. Depending on the metal of the screws and your personal taste, this process can range from seconds up to a minute, so it's a good idea to get a feeling for this by first testing it out on a few extra screws. To stop the process, simply dip the screw into the glass of cold water near you and rub it instantly with a piece of paper towel. Caution: Ferric oxide can color the coating of your sink. That's why a cup of water is advised here instead of rinsing screws with running water under a faucet.
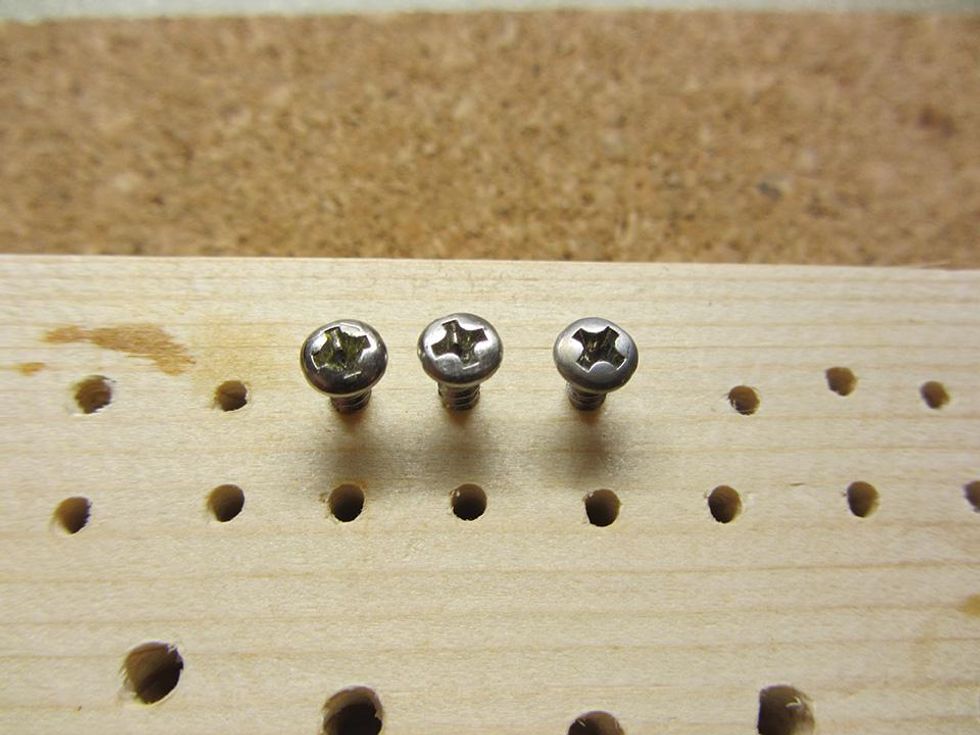
Photo 6
Courtesy of singlecoil.com
You can see the process and all three stages side by side in Image 6. If you feel the oxidation process was too much and you don't like the look, you can use steel wool or a Mesh pad to remove some of the oxidation.
Don't overdo it. I've never seen any rusty screws on a vintage guitar. They're usually a little bit dull, showing some light corrosion, if any. Perhaps breaking the shine will be enough without adding any of the ferric oxide. Simply test it on some extra screws and see what you prefer.
Next month we'll perform a different guitar mod before we return to age more metal parts: the bridge, strap buttons, and the tuners. For this, I'll leave you with a little homework to prepare: Get yourself a small bucket with a lid (larger yogurt buckets work perfectly) and collect a nice mixture of funny things like rusty nails, broken glass, gravel, sand, little stones, basalt, etc. to put in your bucket. Until then ... keep on modding!
[Updated 7/26/2021]
- Last Call: Someday You'll Regret That Relic Job - Premier Guitar ›
- The DIY Relic Job—Fantasy or Reality? - Premier Guitar ›
- Paranormal Guitar Mods That’ll Rock Your DIY World - Premier Guitar | The best guitar and bass reviews, videos, and interviews on the web. ›
- The DIY Relic Job—Fantasy or Reality? - Premier Guitar ›
- DIY Relic’ing: Hardware Continued - Premier Guitar ›
- DIY Relic’ing: Neck Treatment - Premier Guitar ›
- Chibson Announce The Priority Delay Pedal ›
Ernie Ball, the world’s leading manufacturer of premium guitar strings and accessories, proudly announces the launch of the all-new Earthwood Bell Bronze acoustic guitar strings. Developed in close collaboration with Grammy Award-winning guitarist JohnMayer, Bell Bronze strings are engineered to meet Mayer’s exacting performance standards, offering players a bold new voice for their acoustic guitars.Crafted using a proprietary alloy inspired by the metals traditionally found in bells and cymbals, Earthwood Bell Bronze strings deliver a uniquely rich, full-bodied tone with enhanced clarity, harmonic content, and projection—making them the most sonically complex acoustic strings in the Ernie Ball lineup to date.
“Earthwood Bell Bronze strings are a giant leap forward in tone, playability, and durability. They’re great in any musical setting but really shine when played solo. There’s an orchestral quality to them.” -John Mayer
Product Features:
- Developed in collaboration with John Mayer
- Big, bold sound
- Inspired by alloys used for bells and cymbals
- Increased resonance with improved projection and sustain
- Patent-pending alloy unique to Ernie Ball stringsHow is Bell Bronze different?
- Richer and fuller sound than 80/20 and Phosphor Bronze without sounding dark
- Similar top end to 80/20 Bronze with richer low end than Phosphor Bronze
Milkman’s Jerry Garcia-style JG-40 combo.
Grateful Dead-inspired gear from Milkman and Scarlet Fire helps to keep the guitarist’s sound alive.
Guitar players wanting to catch the Grateful Dead’s particular lightning in a bottle exist along a spectrum. Some are content to take inspiration from Jerry Garcia’s playing but make their own way regarding guitar choice and signal path. Others strive to emulate Garcia’s sonic decisions down to the most minor details and create signal paths as close to Jerry’s as possible. In recent years, an ecosystem of gear has developed around fostering Jerry Garcia’s electric tone, including everything from guitars, amps, and stompboxes to on-board preamps and speakers.
Entire books about the Grateful Dead’s gear have been written, so we can’t cover it all here. Garcia tinkered with all facets of his sound from about 1971 until 1978, when his signal path reached stability. By then, his On-Board Effects Loop—an innovation he developed to control how much signal reached his effects—was dialed in, his backline firm, and his choice of effects pedals solidified. Even then, adjustments were made, especially when MIDI arrived or when technology like in-ear monitoring was used. Here are some basics.
Scarlet Fire’s recreation of Garcia’s Wolf, originally built by Doug Irwin.
It starts with guitars. For players wanting to get their Jerry on, there’s a wide range of Garcia-esque instruments—with just as wide a range of prices—out there. Recreations of the Doug Irwin guitars and the Fender Alligator Strat abound. China-built models from companies likePhred Instruments can go for as little as $700 or so. Luthier Thomas Lieber apprenticed with Irwin long ago, and his Lieber Guitars will deliver a copy of a variety of Garcia models. Leo Elliott’sScarlet Fire Guitars out of Dallas, Texas, takes things in another direction. Elliott builds Doug Irwin replicas that start at $20,000 and go up from there, with a current wait time of about 18 months for an instrument. He’s outfitted many of the top Garcia guitarists today, including Tom Hamilton Jr. and Jeff Mattson. Elliott says, “I’m a self-taught luthier; I didn’t really build my first guitar until 2010. I understood a little bit about woodworking before I got started, but I learned by reading books and through trial and error. I started building replicas of Doug Irwin’s Wolf guitar right away, which is sort of like building a car and starting with a Ferrari. I didn’t know any better. Then, eventually I got to know Doug Irwin and collaborated with him. So, I got to hold Garcia’s Tiger guitar and get to know it really well, and by 2015, I had built replicas of that guitar. There’s one guy who helps me around the shop, but otherwise, I am building these guitars on my own. I’m collaborating with Doug Irwin on a new series of Tiger guitars, which will retail for 50 grand each.” That’s one way to get your Jerry going.
The JBL-inspired Milkman K-120.
Garcia’s choice of amplifiers is another matter. He preferred Fender Twin Reverbs loaded with JBL Alnico speakers, which were popular amongst many rock bands in the 1970s. The details get complicated; Garcia’s amps were heavily modified, and the Fender Twin served as a preamp that ran to a McIntosh MC-3500 power amp.
It’s hard to find vintage JBL speakers today—at least ones in good shape. San Francisco’s Milkman Sound, founded by Tim Marcus, has created a faithful reproduction of those classic JBLsthey call the K-140. They’re coupling those speakers with a Garcia-style recreation of his Fender Twin that Marcus named the JG-40. “I think 75 percent of Jerry’s tone is in the JBL speakers,” Milkman’s founder says. “But when you start to analyze the other 25 percent, you kind of have to start withDon Rich. [Editor’s Note: Rich was the guitar player in Buck Owens’ band, pioneers of the Bakersfield Sound.] That’s Jerry’s tone, too, but the difference is Garcia’s midrange was a bit throatier. It sounds clean, but really, it’s not clean at the same time. Especially his tone in the late ’70s. There is something about running that Fender Twin Reverb through the McIntosh that would just completely blow out the tone in a really interesting way.”
Garcia colored his tone with off-the-shelf effects. This was, after all, long before the days of boutique pedals. By 1978 and beyond, you’d hear him playing through an MXR Distortion+, an MXR Analog Delay, and an MXR Phase 100. He often used auto wahs, preferring the Musitronics Mu-Tron envelope filter as well as a Mu-Tron Octave Divider and a Mu-Tron combination volume and wah pedal.
When I asked Jeff Mattson, Bella Rayne, and Tom Hamilton Jr. exactly how orthodox they are about using the kind of gear that Garcia did, I got three different answers.
Mattson tells me that because Dark Star Orchestra is doing something very specific, he really has to tailor his sound as carefully to Garcia’s as he can. “Some folks get too hung up on small things, like what kind of cable to use and things like that, and I don’t go that far. But it’s important for Dark Star Orchestra to get Jerry’s sound right because we are covering different eras and different shows. In 2022, for example, we went to Europe and recreated shows from the Dead’s famous Europe ’72 tour, so you have to pay close attention to what kind of gear they were using to do that right.”
Hamilton works differently. He’s always preferred a higher-gain signal than Garcia ever did, landing in more of a British or heavy metal tone. (Randy Rhoads was a big influence.) “I’ve always approached it like, ‘What’s the new information we can put into this thing?’” he says. “Not just recreate but pushing in a forward direction. And anytime I’ve played with the guys who played with Garcia back in the day, they always said to me, ‘You’re here because you’re here. Don’t try and do what we did back in 1978 or do it because Garcia did it that way.’ They’ve always encouraged me to be myself.”
Bella Rayne is just wrapping her head around what it really means to try to sound like Garcia. “Besides Jerry, I’m influenced by guitarists like Dickey Betts and Derek Trucks, so my tone tends to be a bit heavier and bluesy,” she explains. “I’m generally running a Stratocaster through a Fender Twin Reverb. But recently, I was doing a show, and a buddy of mine set up a Jerry rig for me, and that was so cool: JBL speakers, McIntosh head, the whole setup. I had never played through one. I didn’t know what the hype was all about. I plugged in, and it was just amazing; there was such a snap, and I was really commanding the band. I can see myself keeping my current rig but adding a Dead-rig to experiment. But honestly, anything is fine; I am not picky. I just want to play the best that I can.”
Brent Mason is, of course, on of the most recorded guitarists in history, who helped define the sound of most ’90s country superstars. So, whether you know it or not, you’ve likely heard Mason’s playing.
Professional transcriber Levi Clay has done the deepest of dives into Brent Mason’s hotshot licks. At one point, he undertook the massive project of transcribing and sharing one of Mason’s solos every day for 85 or so days. Mason is, of course, on of the most recorded guitarists in history, who helped define the sound of most ’90s country superstars. So, whether you know it or not, you’ve likely heard Mason’s playing. Levi shares the insight he gleaned from digging deep, and he tells us what it was like when they shared a stage last year. Plus, Levi plays us some great examples of Mason’s playing.
PRS Guitars today launched five new three-pickup, 22-fret models across the S2 and SE series. The S2 Series release includes the S2 Special Semi-Hollow and S2 Studio, while the SE Series welcomes the SE Special Semi-Hollow, SE Studio, and SE Studio Standard.
“The distinctive pickup configurations of these five guitars deliver a versatile tonal platform, whether you’re exploring subtle textures or pushing the envelope. The deep dive into our Narrowfield technology is obvious with this launch. With both the S2 models made in our Maryland factory and the SE models made in Indonesia, our goal has been to create guitars that will inspire you and spark creativity, all at an exceptional value,” said PRS Guitars COO, Jack Higginbotham.
S2 Special Semi-Hollow
The PRS S2 Special Semi-Hollow features a pair of 58/15 LT humbuckers in the bass and treble positions and a PRS Narrowfield in the middle. A 5-way blade switch and two mini-toggles allow players to tap the humbuckers, creating twelve distinct pickup combinations for sonic exploration. The carved maple top and mahogany back encompass a semi-hollow body that adds a natural airiness and depth to the guitar’s tone while enhancing sustain.
S2 Studio
The PRS S2 Studio delivers a wide range of sonic possibilities through its distinctive single-single-hum configuration. Featuring two proprietary PRS Narrowfield pickups in the bass and middle positions and a 58/15 LT humbucker in the treble position, the S2 Studio offers a palette of sounds from single-coil clarity to vocal humbucker tones. This model also has a 5-way blade switch and push/pull tone control.
SE Special Semi-Hollow
The PRS SE Special Semi-Hollow is designed with the versatility of a hum/“single”/hum setup, bringing PRS’s Narrowfield DD pickup design to the SE Series in a classic maple-top guitar. The semi-hollow construction also enhances sustain and resonance, while the f-hole adds a classic aesthetic. The coil-tap switching system unlocks a wide range of tones through a pair of 58/15 LT “S” pickups in the bass and treble positions and a PRS Narrowfield DD “S” in the middle.
SE Studio
The PRS SE Studio’s “single”/”single”/hum pickup configuration provides a wide range of tonal options. This combination of PRS Narrowfield DD “S” bass and middle pickups with a PRS 58/15 LT “S” treble humbucker offers humbucking warmth, single-coil sparkle, and everything in between. The 5-way blade switch and push/pull tone control further enhance its versatility.
SE Studio Standard
The only bolt-on neck in this release group, the PRS SE Studio Standard brings the tone, playability, and versatility of the Studio model to the SE Series and into an all-mahogany design with a vintage-style pickguard aesthetic. At the heart of the SE Studio Standard is its versatile trio of pickups: an 58/15 LT “S” humbucker in the treble position with two Narrowfield DD “S” pickups in the middle and bass positions. The 5-way blade switch and push/pull tone control allow for an array of pickup configurations.
PRS Guitars continues its schedule of launching new products each month in 2025. Stay tuned to see new gear and 40th Anniversary limited-edition guitars throughout the year.