
Hello intrepid modders! As a result of countless requests, this month I'll launch a new series that explores the art of DIY relic'ing. We'll cover the whole story, including how to age wood, finish, metal, and plastic, and we'll also discuss what gives vintage instruments their special look and feel, and how to mimic these attributes. Put away the blowtorch and ball-peen hammer—there's a lot more to this than you might think.
To illustrate these techniques, I'll take a brand-new guitar and age it from headstock to endpin, while documenting each step of the process. I'll introduce our case-study 6-string—an affordable Junior-style double cut—in the next installment of this series. And while we're aging it, I'll offer tips for upgrading parts. As a bonus, I'll occasionally include advice, insights, and trade secrets from relic'ing pros I've recruited specifically for this project.
Okay, for starters, let's get some perspective on the whole relic phenomenon—one of the hottest topics ever in the guitar-modding community. It's almost a new religion: The number of players using "aged" guitars continues to increase, and players starting their own relic'ing jobs on the kitchen table is also on the rise. You can find a slew of videos online addressing this, along with wild stories about how to use coffee, tea, shoe polish, and other mysterious stuff to make a guitar look old. And, of course, the web is full of DIY relic photos.
What's so appealing about aging a guitar? Over the years, my customers have shared many different reasons for wanting me to relic their instruments. Some wish to own and play a faithful replica of a famous vintage guitar (think SRV's No. 1, Clapton's Blackie, or Rory Gallagher's '61 Strat). Some time ago, while picking up his new Strat in my shop that we'd relic'd to his wishes, a customer explained it this way: "I really like the look and feel of a vintage guitar that has been played for decades and every single ding tells a story. But I can't afford one, and now that I'm in my mid '50s, there simply isn't enough time left to play a new guitar for another 50 years and give it a history. So I'll go this route now."
The goal of a relic job has always been to make the object appear more vintage by mimicking age. The vintage craze isn't limited to guitars: Watches, cars, clothes, furniture, jewelry, hi-fi equipment, wine ... the list is endless and whole industries have sprung up around it. As guitarists, we have many reasons to consider doing a relic job on an instrument. Perhaps you want to individualize your guitar—make it a one-of-a-kind piece with you as the designer. Or maybe you yearn for an era when music was still handmade and not computer-generated or auto-tuned.
The goal of a relic job has always been to make the object appear more vintage by mimicking age.
Naturally, there are different degrees of aging, ranging from "barely noticeable" to "totally messed up" and everything between. I really like the definitions that the Fender Custom Shop uses for its Original-Era Finishes and Time Machine series—their builders have put a lot of thought into this. Here are Fender's terms (you'll find detailed descriptions of each one on the Fender Custom Shop website):
- N.O.S. (New Old Stock) - As if you bought it new in 1954.
- Closet Classic - Kept in a case most of its life—perhaps even forgotten.
- DLX Closet Classic - Owned with pride.
- Journeyman Relic® - Used but not abused.
- Relic® - There and back—and still here today.
- Heavy Relic® - Hard-fought wear and tear.
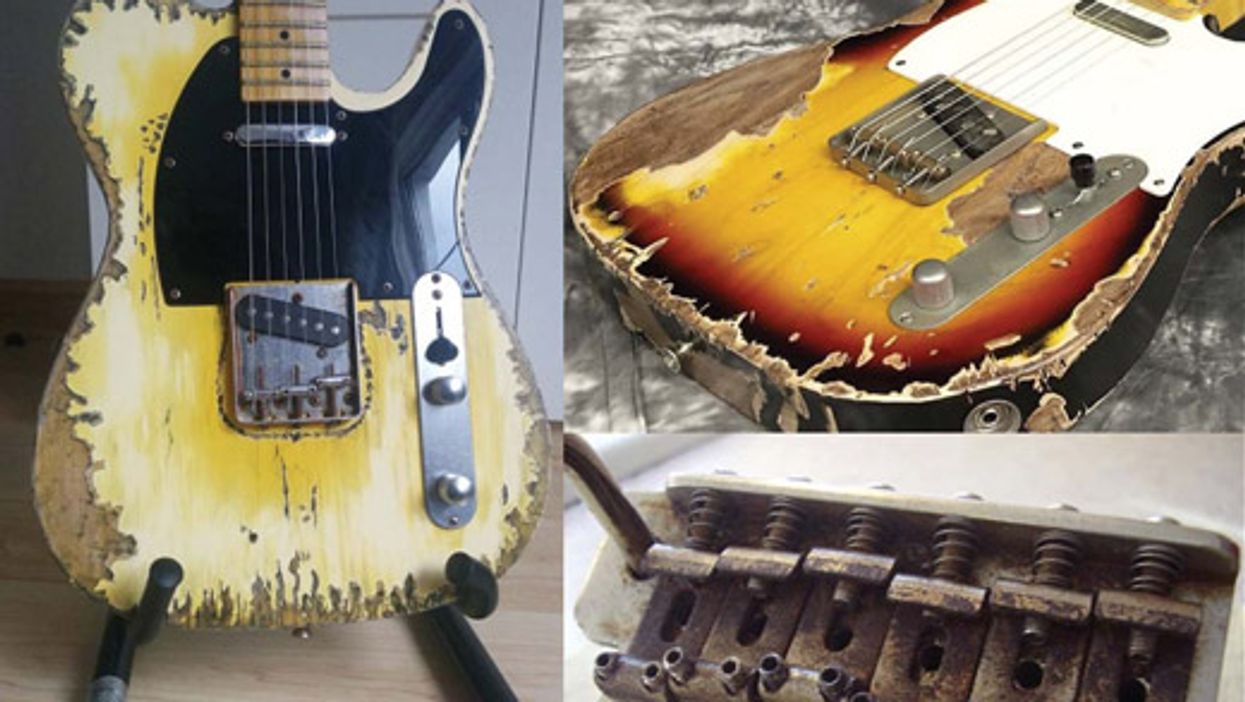
As we explore the aging techniques, I'll refer to these terms, focusing on what Fender calls Journeyman Relic and Relic—their most popular grades. Beyond Fender's Heavy Relic grade comes the "Gone Too Far" category, and, sadly, you'll see this a lot. Over the years I have encountered a lot of ugly relic jobs, consisting of completely destroyed finishes, rusty hardware that ceases working because of its condition, and unnatural wear in spots you'd never see on heavily played instruments.
Most people who overdo it somehow become possessed, once they start to relic a guitar. Or as PG's John Bohlinger said in his November 2013 Last Call column on relic'd guitars: "Those who relic also give themselves away because they go too far. They're not satisfied with a normal 50 years' worth of wear. They want their guitars to look like Keith Richards himself personally played 50 years' worth of gigs on it."
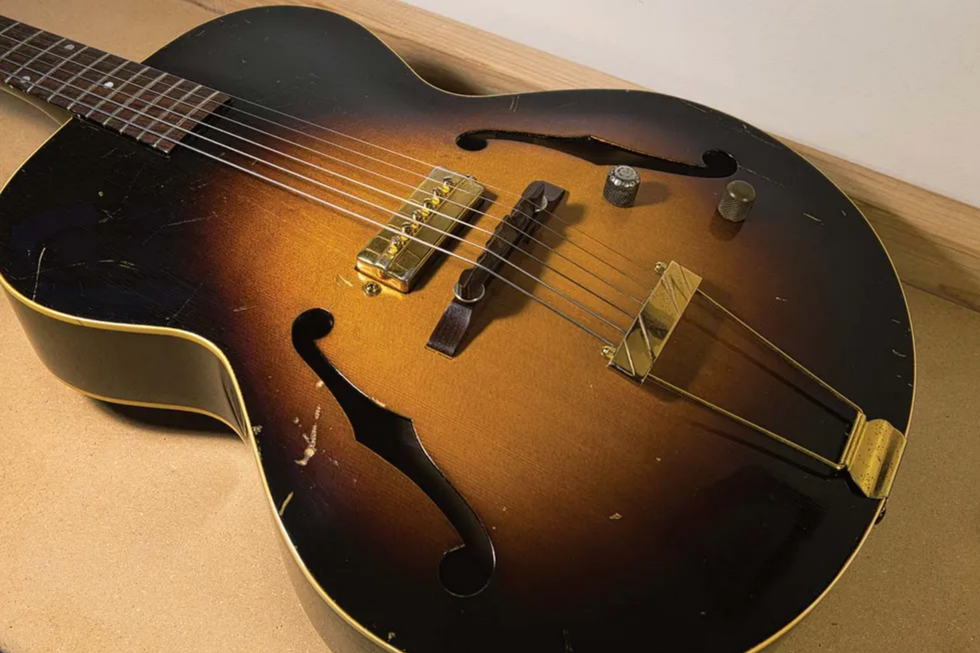
Photo 2
Photo by Andy Ellis
Over the years, customers have sent me many images of such projects, and I archive them so I know what not to do. Photo 1 shows a sampling of the Gone Too Far relic category. In contrast, look at Photo 2, which is a well-loved 1942 Gibson ES-150. This guitar is 78 years old—a veritable grandpa of electric 6-strings. It shows finish checking and the kind of hardware tarnishing, scrapes, and scratches that come from being played for almost eight decades, but somehow they ring true. (A side note: This guitar's owner explains that the big gouge across the bass f-hole occurred when someone was apprehended stealing the guitar out of its case from the backseat of the owner's car. The case latch tore into the wood as the would-be-thief bolted, leaving the instrument. That still qualifies as genuine aging, wouldn't you agree?)
Many guitarists have never seen, touched, or played a real vintage guitar, so they have no sense for honest wear-and-tear that comes with the territory, and this can't be substituted with pics from the internet—especially in terms of an instrument's feel. This includes rounded fretboard edges and fretboard wear—a subject we'll return to during this DIY relic series.
If you decide you want to relic your own instruments, here's some advice:
Do your research: Get as many vintage guitars as possible in your hands and pay close attention to them. Go to vintage guitar stores and trade shows—nobody will be annoyed if you tell them you want to admire the instruments. Check local ads to see if someone near you is selling a vintage guitar. Often the seller will invite you to examine it. Politely ask if you can take some photos, measurements, and notes. Over time, you'll get a better sense of what it's all about and start detecting similarities in vintage instrument wear.
Dress rehearsal: Get an inexpensive new guitar and train your skills on it before you start to work on your cherished instruments. This is a good investment. If something fails ... who cares?
Go easy: Over the years, I've developed three golden rules. In honor of my personal hero, Star Trek's Captain Jean-Luc Picard, let's call this the Relic Prime Directive:
- Break the shine.
- No rust.
- Don't overdo it.
If you remember these three simple rules when doing any relic job, you'll be rewarded with a successful, aesthetically pleasing result.
That's it for now. Next month, we'll perform our next guitar mod, and then return to our DIY relic series, so stay tuned. Until then ... keep on modding!
[Updated 9/15/21]