Pickup specs are often written to be user-friendly. But how can players make informed decisions on pickup combinations without phase and polarity details?
Hello and welcome back to Mod Garage! This month’s column is about phase and polarity, two pickup parameters we talked about in detail some time ago, but which could use a thorough review. From numerous emails and requests, I know that this can be a very confusing subject. So, here’s a story that happens every day, all around the planet. Maybe it sounds familiar to you:
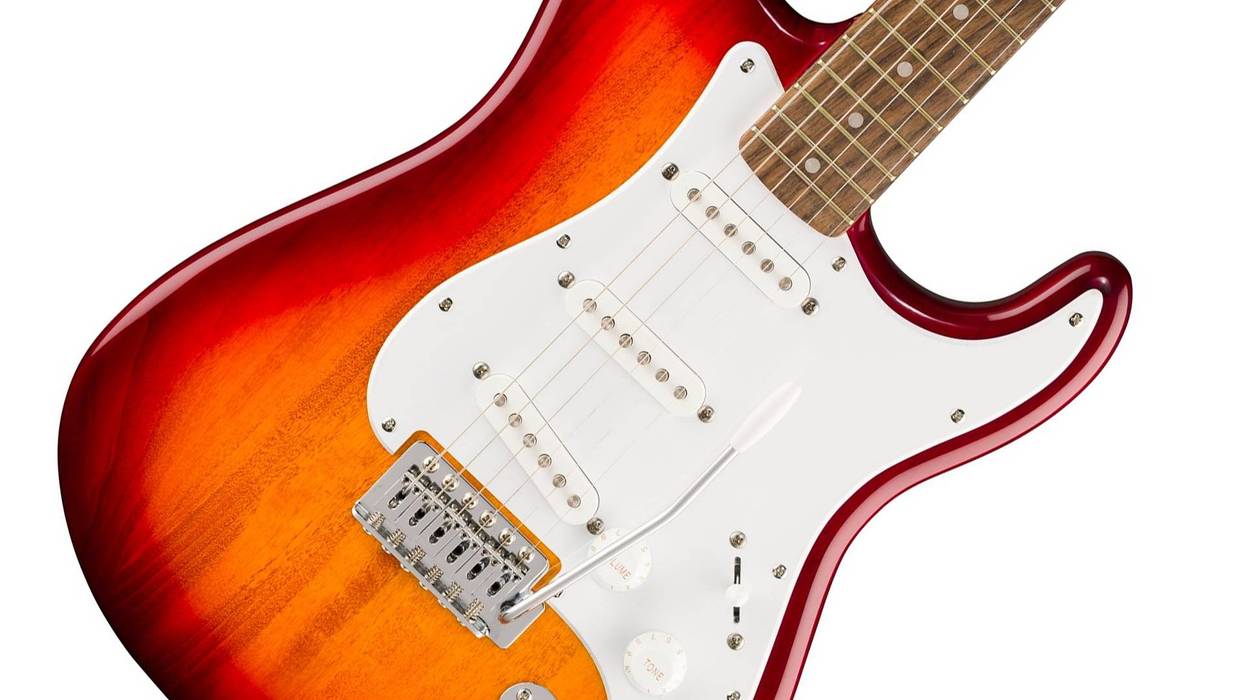
Your Strat plays great and sounds good, but it’s not quite right yet, so you’ve decided to spruce up the electronics to tweak the tone to your personal taste. You’ve spent months and countless hours researching. You logged onto Strat discussion forums and contacted shops and pickup makers. You interviewed your guitar buddies and your guitar teacher, subscribed to all kinds of blogs and newsletters about Stratocasters, and you read all of the PG articles and books you could find. Your YouTube algorithm is now full of Strat demos. Finally, after all this work, your shopping list is ready to go for a new Stratocaster pickup set.
For the bridge pickup, you decided to go for a certain model from the Smith company—one of your favorite pickers is using this one as well. On Smith’s website, you can read: output (DCR): 6.5k / magnet: alnico 5 / wires: plastic coated.
For your new middle pickup, you chose one from the Jones company. A lot of your new forum friends recommended this one because it is “super silent.” On the Jones pickup company website, it says: alnico 5 magnets / 42 gauge Formvar wire / 5.8k / middle RWR.
And finally, your dream neck pickup is one from the renowned Wilson pickup factory that is built just like they used to make them in the late ’50s. Searching the Wilson website, you found the technical specs of this pickup: alnico 2 magnets / DCR: 6.15k / treble 7.5, mid 5.5, bass 4.5.
Everything is only one click away now, and you pulled the trigger right away on your Friday evening. On Monday, your pickup set was delivered, but you had to wait until Friday to have the time to put them into your Strat. What a week, full of anticipation, and you can’t wait to heat up your soldering iron! After spending two hours on Friday evening putting everything together, you plug into your favorite amp, eager to reap the fruit of all your labor.
You start with the bridge pickup. It sounds marvelous after adjusting the pickup height a little. Now, the middle pickup—delicious. And the neck pickup—well, simply stunning. You can’t believe that it worked out so perfectly for you.
When you want to hear the in-between pickup positions, you start with the bridge and middle pickups, awaiting the total Knopfler experience. You strike a cool chord, but what the heck is this? The sound is thin and shrill with a lot of noise. How can that be? Switching over to the combination of neck and middle pickup, you receive the same thin, shrill tone, but dead quiet with no background noise.
You instantly open up your Strat again, checking all solder connections several times, but everything looks good. You start to post this problem on some forums, sharing sound samples and explaining what happened. After a short time, you’re told you have an out-of-phase problem and are given conflicting advice on how to fix it. It may seem, at this point, that you’re at an impasse.
“When you want to hear the in-between pickup positions, you start with the bridge and middle pickup, awaiting the total Knopfler experience. You strike a cool chord, but what the heck is this?”
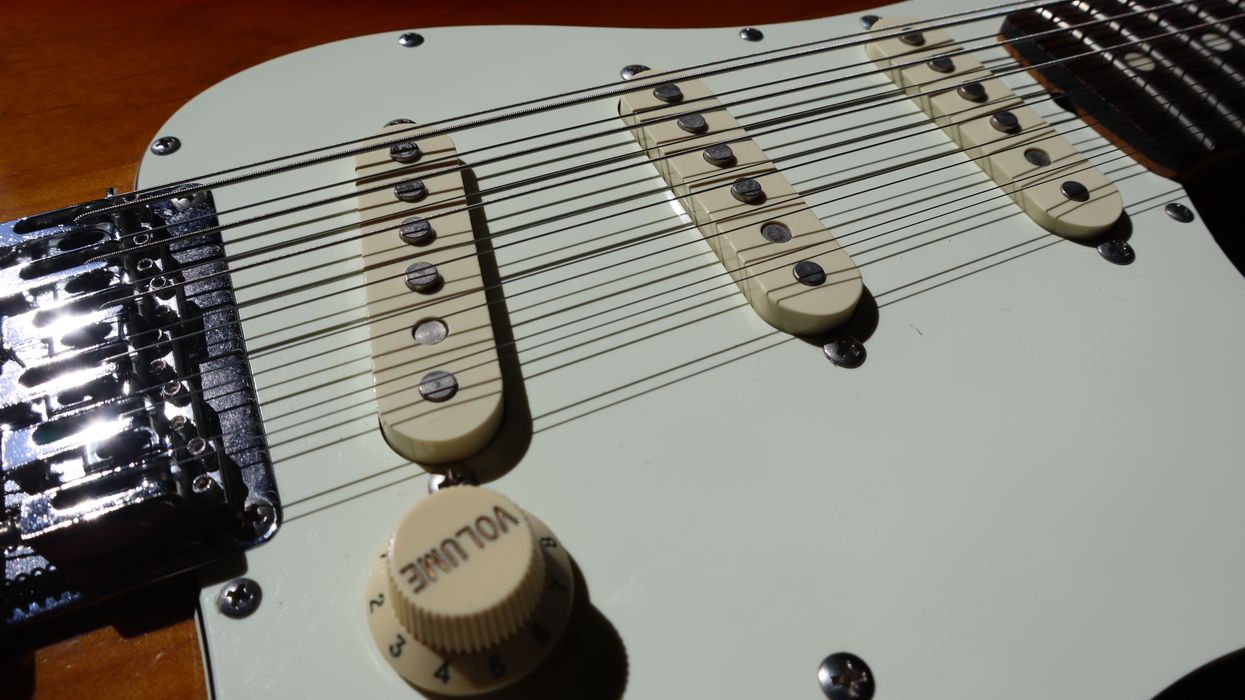
So, what happened here? It’s the old phase and polarity game when combining pickups from different companies. What is it and why? In simple and non-technical terms, we can define (electrical) phase as the winding direction and (magnetic) polarity as the magnetic direction of a pickup.
One reason this occurs is because there is no standard, so every pickup company is on their own regarding phase and polarity. The same goes for the color code of the wires on humbucker pickups—while the Jones company is using red for hot, Smith is using yellow, and Wilson prefers green. Personally, I think that as long as we don’t solve this problem, there will be no peace on Earth.
Another reason is that pickup companies usually only offer user-friendly parameters on their websites, with DCR and inductance as the most technical specs, if any. I’ve never seen a description like this, which, for my taste, would be complete and, of course, useful and expressive:
Magnets: alnico rod magnets A5, staggered D and G raised
Magnet polarity: south (towards the strings)
Magnet wire: plain enamel AWG 42
Winding direction: top right, top going
Number of turns: 7.600
Resistance: DCR 6.5 kiloohms
Inductance: 2.9 H (@120 Hz)
Quality factor Q: 5.95
Resonant peak: 7.850 Hz
See the entries for magnet polarity and winding direction? These are the really important parameters you need to know when you want to combine pickups from different companies, which is flirting with disaster anyway.
I don’t want to flame on pickup companies here, and there are also some companies, like Fralin pickups, that provide phase and polarity in their technical specs. But this is an exception and not the standard.
So, what can be done to avoid these problems?
There are only two ways to go. Number one is the easiest: Buying all your pickups from only one company as a set, often declared as “balanced” or “calibrated” in marketing language. Translated into normal language, this simply means that the pickups in a certain set will not have phase and polarity issues with each other.
The second option is to collect these specs by contacting the manufacturer or shop. Both phase and polarity are simple parameters, so the manufacturer should have them in their records, and every serious store selling pickups should be able to measure it within two minutes.
How this is done, what you need, and what both parameters are in detail will be part two of this column next month.
That’s it for now, so stay tuned, keep on modding, and may the phase be with you, young Padawan!
- Mod Garage: Three Ways to Wire a Tone Pot ›
- Mod Garage: The Sound of Silence ›
- Mod Garage: DIY Relic’ing with Dings and Dongs ›
Day 12 of Stompboxtober means a chance to win today’s pedal from LR Baggs! Enter now and check back tomorrow for more!
LR Baggs Session DI Acoustic Guitar Preamp / DI
Inspired by the LR Baggs Handcrafted Video Sessions and our experience in some of Nashville’s great studios, the Session Acoustic DI brings our signature studio sound to your live rig. The Session DI enhances your acoustic pickup and imparts the rich sonic character that you’d expect from an experienced audio engineer using some of the world’s finest studio gear. We’ve captured this studio magic and put it into a compact, easy-to-use DI that will transform your live sound.
Here, our XAct Tone Solutions columnist walks you through every aspect of how to put together your ideal pedalboard.
A well-organized pedalboard may be just as crucial to a guitar player’s setup as the guitar itself. Even the most seasoned professional can be completely sabotaged by a malfunctioning or poorly performing pedalboard setup. Things like layout and logistics may seem trivial until that boost pedal is just far enough out of reach to cause your crunchy, soaring solo to be decidedly quiet and squeaky-clean.
The process of designing and arranging a pedalboard can go far beyond simply placing pedals in a straight line and patching them together from junk-drawer cables; from conception to completion, a pedalboard setup rewards careful planning.
Before diving into the physical setup of your pedalboard, start by assessing your current collection of pedals and any potential additions. Start with the bare minimum of devices needed for your current repertoire, whether they be for a gig or at-home play. What types of effects do you need to cover the style of music you’re looking to perform? You’ll likely want to cover the basics of tuning, overdrive, distortion, boost, and delay, but you may need specific devices to cover unique parts in cover songs or personal compositions. A certain modulation for this bridge, a certain reverb for that intro. While it is impossible to completely future-proof your rig, you can make sure that you attempt to account for changing needs.
Next, you’ll need a platform suitable for holding the pedals you’ve chosen. Companies like Pedaltrain and Creation Music Company have a selection of pedalboards in various sizes. These can include bags or cases to fit. There are custom-sized pedalboard options available, but they and the associated cases/bags usually cost more due to their bespoke nature. Consider your needs when selecting a bag or case to protect your pedalboard. If you seldom leave the house, you might just need a well-made gig bag. These can even be sufficient for semi-professional playing, so long as you or a trusted ally are carrying it and responsibly packing it away. If you need something more durable, cases like those from Pedaltrain are sufficient for many touring arrangements. Bear in mind, they are lightweight in construction with a minimal amount of lateral padding. For heavy touring, a real ATA-style case will be required. Their stalwart construction and thicker internal padding will stand up to long-term touring abuse.
“Even the most seasoned professional can be completely sabotaged by a malfunctioning or poorly performing pedalboard setup.”
Pedalboard planning and design can be frustratingly iterative. As a result, you may begin with picking all the pedals you’d love to have, but then the board you’ve picked won’t quite fit everything. If so, you might go back a step, adjust the pedal choices, and start to move forward again. Similarly, power requirements can push and pull on your pedal selections. Pedals require consistent power at specific voltages and amperages to function correctly. If a supply does not have the necessary power ports, you may have to eliminate a certain pedal or change the power supply scheme altogether. Furthermore, the supply may or may not fit under the pedal mounting surface of the pedalboard type you’ve selected. Again, this may cause an adjustment to previous decisions that must be propagated.
Cabling carries your signal between your pedals and out to your amp, so you’ll want to make sure you have something of sufficient quality. Solderless cable systems allow you to make custom length cables, but may not be as long-lasting as soldered cables. Soldered cables can be a DIY affair if you have the inclination and time to develop enough expertise. In lieu of that, companies like BTPA and Goodwood Audio can make excellent soldered cables in custom lengths.
Another key thing to keep in mind is that signal order doesn’t necessarily dictate the physical location of your pedals. I recommend arranging your pedals based on frequency of use. Pedals you use most often should be positioned where they are easily accessible during performance. If you are right-footed, this may mean low and to the right. Pedals used less frequently can be placed further away or in less convenient spots. Pedals used in fast-breaking, small sections of songs may not be needed frequently, but must be available quickly when needed. Ensure that you can comfortably reach and engage each pedal as you play the required material.
A well-thought-out pedalboard layout and implementation can significantly enhance your performance and playing experience. Like practice and rehearsal, it may not be the most glamorous bit of guitar rudiments, but with the right approach, your pedalboard can become a powerful tool that complements your musical journey.
Our columnist stumbled upon massive success when he shifted his focus to another instrument. Here, he breaks down the many benefits you can get from doing the same.
A while back, I was doing a session for the History Channel at Universal in Hollywood, California. After the session, I sheepishly admitted to some of the other session players that I was really getting into bluegrass and specifically the square-neck resonator, or dobro guitar. Now, as a progressive-jazz guitarist, that was quite a revelation. After some classic lines from the Burt Reynolds movie, Deliverance, another friend said he also was getting into mandolin and banjo.
Long story short, we put together a band, Honeywagon (which is the vehicle that cleans out the toilets under actors’ trailers on movie sets), started playing bluegrass around L.A. (up and down the Sunset Strip), and three months later, we had a record deal. We sang three-part harmony, made “deranged” covers of songs by famous artists, produced it ourselves, and sold well over 1.5 million albums and counting, and played all over the world.
What started all of that was my love for Jerry Douglas’ dobro playing. It’s so vocal, and his timbral range! You see, music is a universal language that transcends cultural, social, and linguistic boundaries. And learning another instrument is a gateway to unlock levels of self-expression, creativity, and emotional exploration you might not even be aware of.
I don’t believe in “mastery”—there are always deeper levels to discover—so let me say that while gaining significant proficiency on one instrument is a huge achievement, the benefits of learning to play at least one other instrument are immense. It will enhance your musical skills, cognitive abilities, and personal growth. Tighten up your belts, the Dojo is now open.
Enhancing Musical Skills and Understanding
Learning multiple instruments can profoundly deepen a musician’s understanding of music theory, composition, and performance. Each instrument has its unique challenges, techniques, and approaches that require you to adapt and learn new skills. For instance, a guitarist transitioning to the piano will need to understand new techniques, two-hand interdependence, chord shapes, and different ways of producing sound.
New instruments also allow you to appreciate different timbres, textures, and roles within an ensemble. A drummer who learns to play the bass, for example, will gain a deeper understanding of rhythm and timing, as they experience how their drumming interacts with the bassline. This cross-instrumental knowledge can lead to more creative compositions and more nuanced performances, as musicians become adept at thinking from multiple musical perspectives.
Cognitive Benefits
The cognitive benefits of playing an instrument are widely documented. Learning to play an instrument can improve memory, enhance coordination, and increase cognitive flexibility. When a musician learns to play an additional instrument, these cognitive benefits are amplified. The process of learning new fingerings, reading different clefs, and adapting to various physical requirements engages the brain in unique ways, promoting neuroplasticity and cognitive growth.
“Music is a universal language that transcends cultural, social, and linguistic boundaries.”
Moreover, playing multiple instruments can improve problem-solving skills and adaptability. We often face challenges when learning a new instrument, but successfully navigating these challenges builds resilience and perseverance—skills that are valuable both in music and in other areas of life.
Emotional and Personal Growth
Music is not just a technical skill, it is also a deeply emotional and expressive art form. Learning to play multiple instruments can enhance your ability to express and connect with your rich emotions. Each instrument has its own voice and character, offering different ways to convey those emotions and tell stories. A violinist who learns to play the flute, for instance, may discover new ways to express lyrical melodies or subtle nuances in phrasing. In addition, taking on another instrument can boost confidence and self-esteem.
Expanding Musical Opportunities
It can also open you up to a wide range of musical opportunities. Musicians who can play multiple instruments are often more versatile and in-demand for various musical projects. The more you’re able to adapt to different genres, styles, and ensemble settings, the more valuable a collaborator you’ll be in bands and recording sessions.
Which One?
Ultimately, I’ve found that the instruments I can play besides the guitar have helped me deepen my connection with music and discover new ways to express myself. If this article is resonating with you, I would suggest choosing your new instrument based around what excites you the most. Is it bass, keys, pedal steel (one of my personal faves), or modular-synth programming? The possibilities are as wide as your mindset. In “Song of Myself, 51,” Walt Whitman said, “I am large, I contain multitudes.” Namaste.John Mayer Silver Slinky Strings feature a unique 10.5-47 gauge combination, crafted to meet John's standards for tone and tension.
“I’ve always said that I don’t play the guitar, I play the strings. Having a feeling of fluidity is so important in my playing, and Ernie Ball strings have always given me that ability. With the creation of the Silver Slinky set, I have found an even higher level of expression, and I’m excited to share it with guitar players everywhere.”
— John Mayer
hese signature sets feature John’s previously unavailable 10.5-47 gauge combination, perfectly tailored to his unique playing style and technique. Each string has been meticulously crafted with specific gauges and core-to-wrap ratios that meet John’s exacting standards, delivering the ideal balance of tone and tension.
The new Silver Slinky Strings are available in a collectible 3-pack tin, a 6-pack box, and as individual sets, offered at retailers worldwide.
"Very few guitarists in the history of popular music have influenced a generation of players like John Mayer. For over 25 years, John has not only been a remarkable artist but also a dear friend to the Ernie Ball family. This partnership represents our shared passion for music and innovation, and we can't wait to see how John’s signature Silver Slinky strings continue to inspire guitarists around the world.”— Brian Ball, CEO of Ernie Ball
Product Features
- Unique gauge combination: 10.5, 13.5, 17.5, 27, 37, 47
- John’s signature gauge for an optimal balance of tone, tension, and feel
- Reinforced Plain Strings (RPS) for enhanced tuning stability and durability
- Custom Slinky recipes tailored to John’s personal preferences