
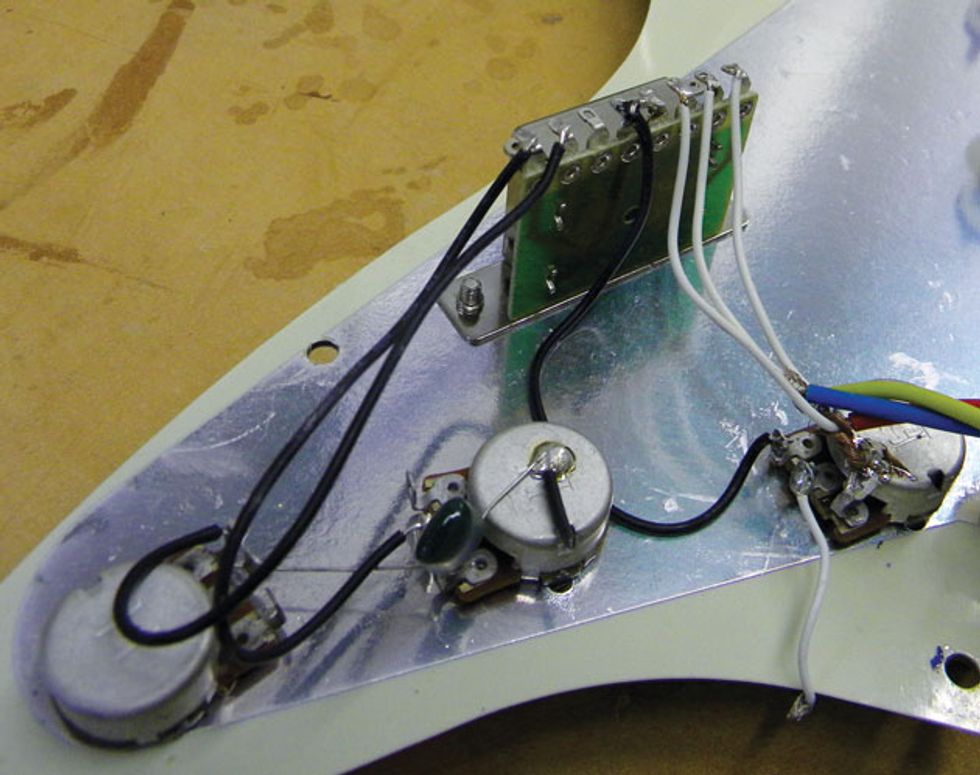

A client recently came to my shop with a Strat-style guitar that had a faulty 5-way pickup selector switch. The problem? Its inexpensive stock "box” switch (Photo 1) sounded scratchy and was cutting out in the bridge position. Most imported box switches like this are primarily made of plastic and tend to fail when you re-solder wires on them. So a new switch was in order.
I decided to upgrade it with a high-quality CRL 5-way switch (Photo 2), a rugged device that’s built to last. Other great brands I’ve used are Oak Grigsby and Switchcraft. Available from such luthier supply outfits as Allparts and Stewart-MacDonald, these products are preferable to the budget box switch.
Soldering tips. Whatever replacement switch you choose, it’s important to develop good soldering skills. Following these simple tips will help your solder joints and wiring look professional.
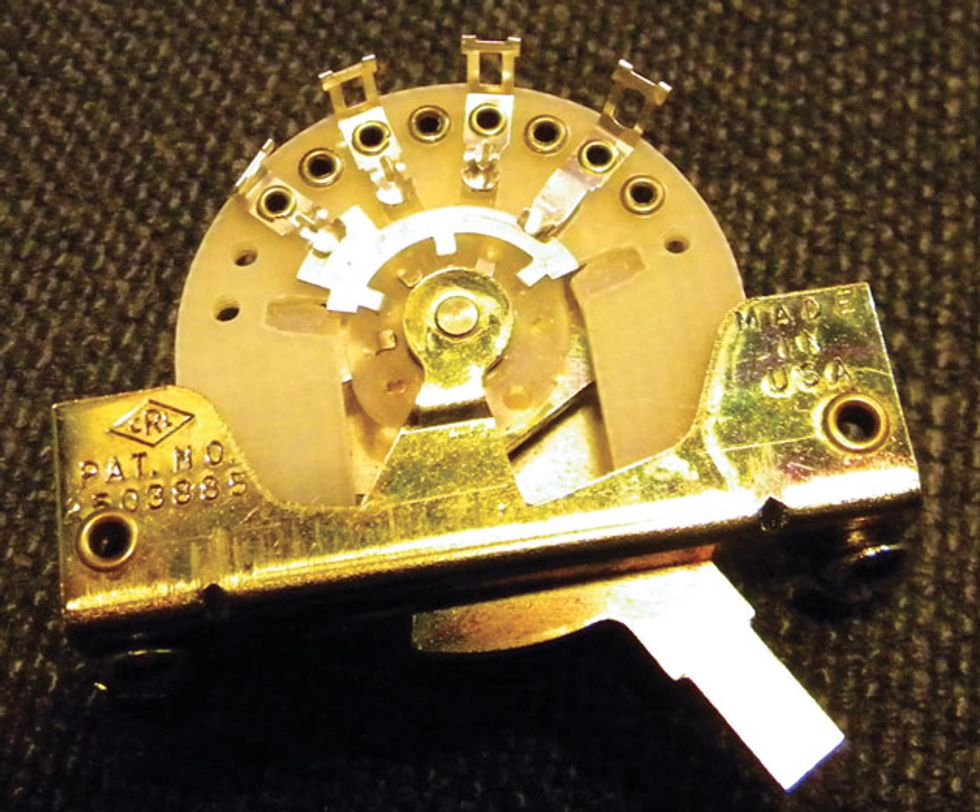
Photo 2
For guitar projects, use a 30- or 40-watt soldering iron with a small, tapered tip to keep your soldered joints clean. It’s an effective range, but doesn’t get too hot. Anything less than 30 watts will make it painfully slow to heat components for good solder flow.
This is important: Never use a soldering gun around anything magnetic because its large transformer can degauss the magnets in your pickups. A soldering iron is the right tool.
I recommend using 60/40 rosin-core solder. Look for .032" diameter solder. It’s quite thin, so it melts easily and helps prevent over-soldering. Never use acid-core solder because it will ruin your electronics.
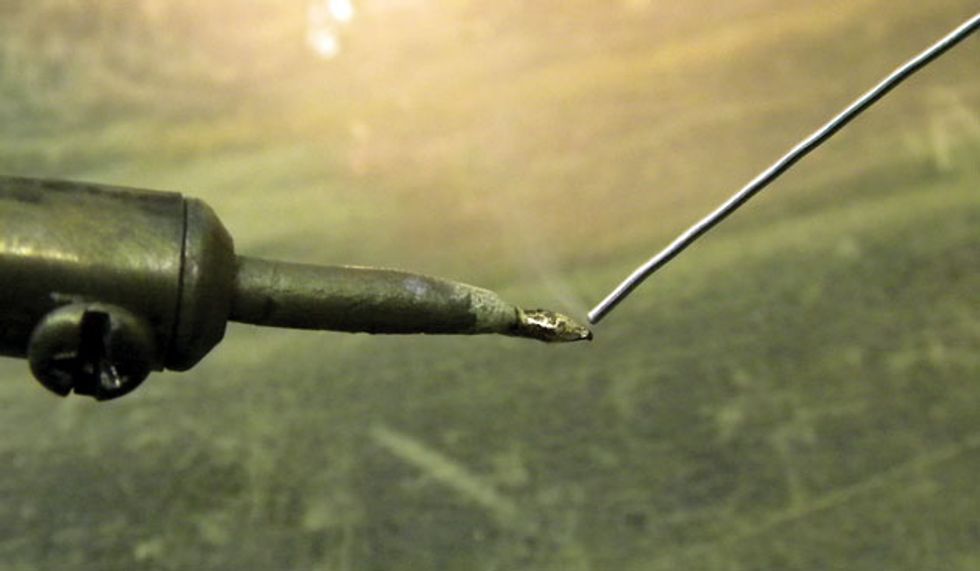
Photo 3
A clean tip performs better than a dirty one. After heating your iron, use a brass wire brush, followed by a damp paper towel or sponge to remove any residue. When the tip is clean, coat it with solder (Photo 3). Called “tinning” the tip, this process helps the solder melt faster and cleaner. Finally, each time you make a connection, swipe both sides of the tip across the damp towel or sponge to keep it clean.
By the way, never blow on a solder joint after you’ve made a connection. It may be tempting to clear the smoke and hasten the hardening process, but a solder joint must cool and harden on its own. If you blow on it, air pockets can form inside, creating a “cold” solder joint. If the solder joint doesn't look shiny, clean it off and start over.
A good pair of hemostats will help you grip the wire and parts you’re about to solder without burning your fingers. I use a pair with rubber-coated handles, in case they get hot. It’s important to have a pair that locks, so your wires don’t slip when you are tinning or soldering them.
For connecting parts inside a guitar, I like to use 22-gauge stranded wire. I prefer the type with a cloth jacket, rather than a plastic jacket, because plastic can peel off when the wire gets hot during soldering and cloth will not. Also, you can easily slide the cloth jacket back on the wire to expose a tip for soldering, which explains why this wire is often called “push-back” wire. Cloth-covered wire is available from the part suppliers I mentioned earlier.
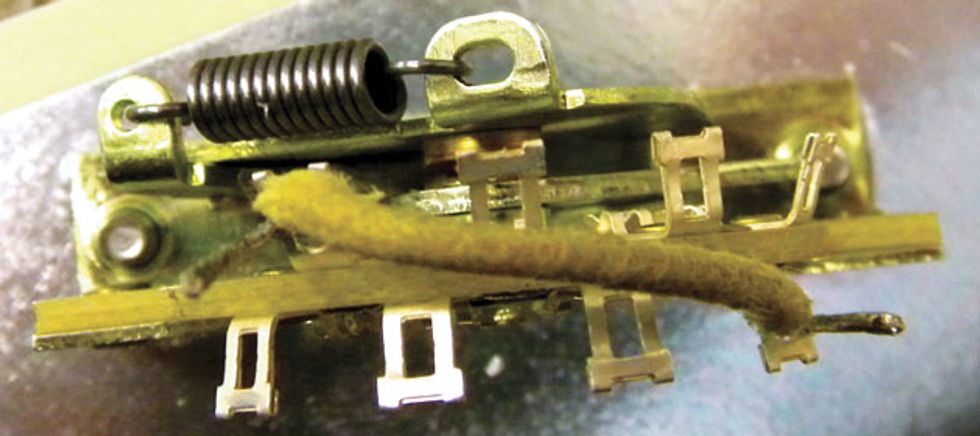
Photo 4
Draw a wiring diagram. There are several ways to wire up a Strat switch, so you need to decide how you want to configure the switch and draw out a corresponding diagram. Unless you’re planning a special mod, the big decision is how you want to configure the two tone controls. On vintage Strats and new guitars with traditional wiring, the neck and middle pickups both have dedicated tone controls, while the bridge pickup has no tone control. On most American Standard Strats and many modern Strat-style guitars the neck pickup has its own tone control and the middle and bridge pickups share the second pot (the one closest to the output jack).
This is a personal choice that requires some thought and research. Different players like it different ways, and that’s the beauty of a Strat. Fortunately, diagrams for these wirings (and other alternatives) are readily available. Fender and many pickup makers offer free downloadable diagrams, as do the luthier supply outfits. Premier Guitar’s master of mods, Dirk Wacker, has many columns devoted to standard and alternative Strat wirings, and they’re all available at premierguitar.com. To get started on your journey, read his Mod Garage columns “The Anatomy of the Stratocaster 5-way Switch, Part II” and “Strat Bridge Pickup Tone Control.”
If you’re replacing a worn switch with an identical new one (and you’re happy with your Strat’s current tone-control configuration) simply draw a diagram of the old switch and replicate the wiring. But otherwise, do your research before popping open the pickguard and heating up your iron.
Remove the old switch. After removing the strings and carefully unscrewing the pickguard, unsolder each wire on the old switch. Choose a wire, place the tip of your iron on the underside of the switch prong, and let it melt the solder. Using your hemostats, lift the wire out of the prong while the iron is still under it, keeping the solder hot. Repeat this for each wire.
Next remove the switch tip and mounting screws and gently pull the old switch from the pickguard. Now insert the new switch and attach it to the pickguard. I recommend positioning the “spring side” away from the pickups. This gives you a little more room in the cavity to run wires without them getting caught in the spring when you use the switch.
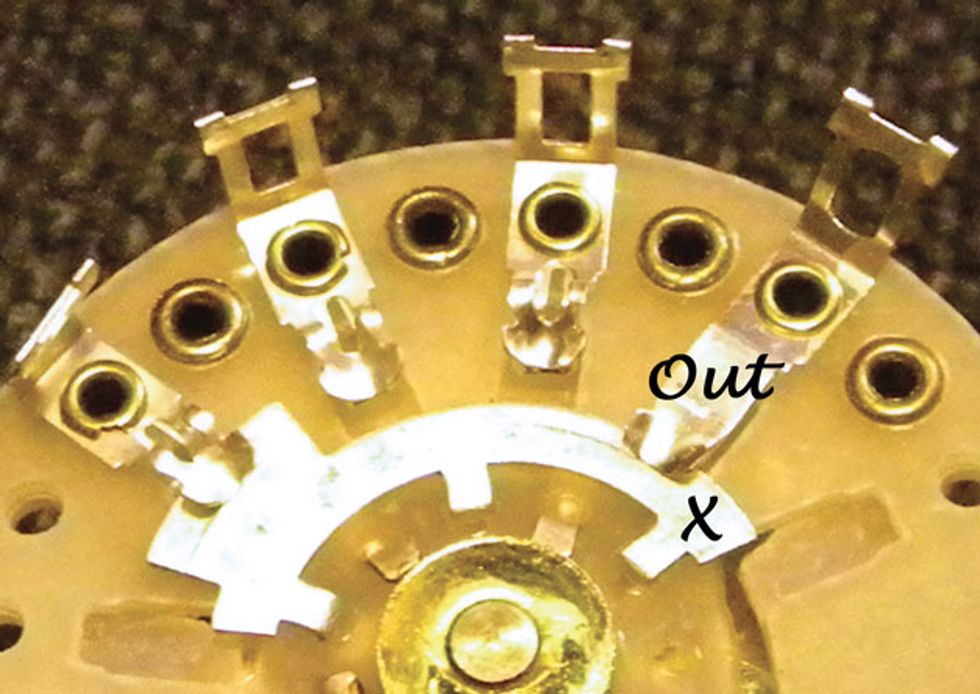
Photo 5
Wire up the new switch. At the risk of being redundant, remember that depending on the type and brand of switch you’ve selected, the wiring can vary dramatically. So again, take the time to map out the switch and make sure you’ve done you homework before you solder. I’ve replaced thousands of switches and learned the hard way that you want to avoid repeatedly re-soldering the wires because you’ve attached them to the wrong prong.
Once you’ve crossed the threshold of selecting a wiring and studying the corresponding diagram, the tricky part is done. Now you simply follow your diagram and wire up the switch.
The CRL switch I chose for my project is a double-sided wafer switch (a common design in high-quality switches). This means the prong connections on either side are independent until you wire them together. I typically begin by soldering a jumper wire to connect both sides of the switch (Photo 4).
You can see why if you squint at Photo 5. The output prong, which is marked “Out” on the photo, makes constant contact with the long, flat connector that’s marked with an “X.” When the switch is moved, the wider contact section (shown at the far left in this image) slides under a particular prong and makes an electrical connection. Whatever is wired to this given prong is automatically connected to the switch output. The same thing is happening on the other side too, and the jumper links that connection to the output.
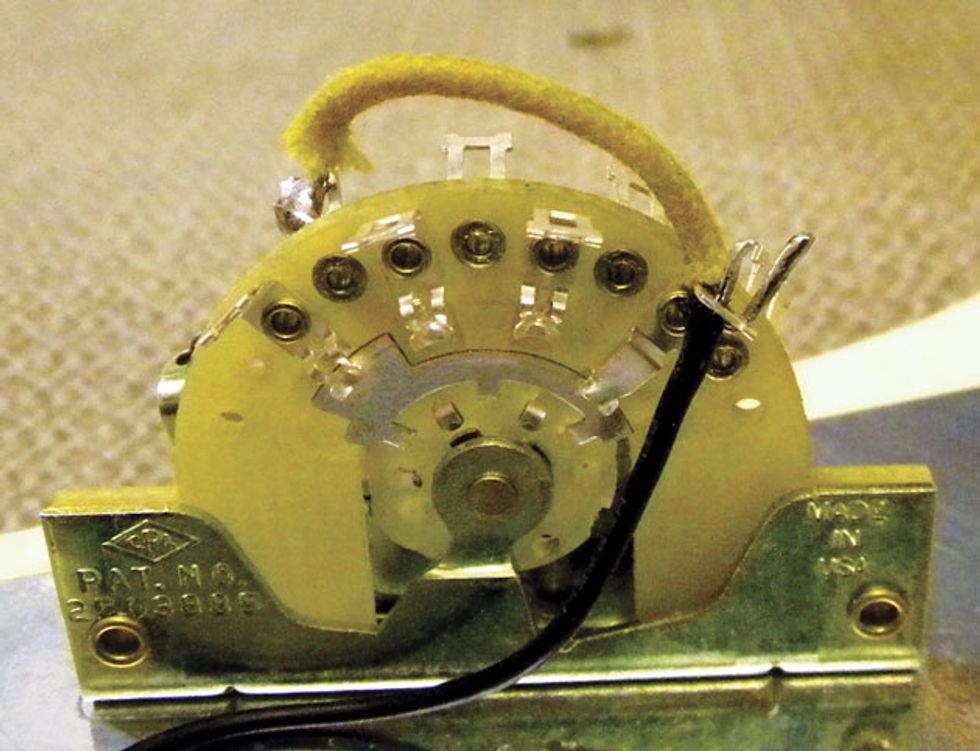
Photo 6
The switch’s output is wired to the volume pot, as shown in Photo 6. (The black wire leads to the volume pot’s input lug.) Assuming you’re just replacing the switch, the wire leading to the volume pot is already connected. All you’re doing is reattaching the volume pot to the new switch’s output.
So that’s the basics of the operation. From here, you’ll be soldering the pickup lead wires and tone pots to the switch. Simply follow the schematic that corresponds to the operation you’ve selected based on your research.
Tin the tip of the wire you’re going to connect, then loop the wire onto the appropriate prong. Touch the tinned wire with the soldering iron while gently bringing the solder to the prong. Only use a little solder—a big glob can cause a bad connection or interfere with the mechanics of the switch. When soldering, less is more!
Once you’ve finished connecting the three pickups and two tone pots, test each switch position by gently tapping the pickups with your hemostats as you change positions on the selector switch. You can test the volume and tone controls by rubbing the top of the pickup with your hemostats while turning the knobs.
It may sound like a lot of work, but installing a reliable switch yields years of sonic dividends. Plus you’ll get the satisfaction of working on your own guitar—and that can be almost as fun as playing it.


![Rig Rundown: The Black Crowes’ Rich Robinson [2026]](https://www.premierguitar.com/media-library/youtube.jpg?id=66952027&width=1245&height=700&quality=70&coordinates=0%2C0%2C0%2C0)