A client wanted her D-12-20 to fret in tune all along the fretboard. Can it be done?
Intonating a flattop’s bridge saddle is tricky, and that’s especially true when it comes to vintage 12-string guitars. Back in the day, it was rare to find an acoustic 12-string with a compensated bridge saddle. In fact for many players, the slightly out-of-tune jangle was a big part of a 12-string’s aural mystique. But times have changed, and as music and recording technology have evolved, most musicians and producers expect a 12-string to play reasonably in tune all along the fretboard.
Intonating a flattop 12-string with a straight bridge saddle involves filing unique break angle and intonation points for each string—an operation that requires skill and patience. Let’s investigate and see exactly what’s involved.
We’ll use a beautiful 1972 Martin D-12-20 as our project guitar. The guitar was in good shape when its owner brought it into the shop, but it didn’t play even remotely in tune and the action was uncomfortably high. Many old 12-strings require a neck reset (an expensive proposition), but I checked the neck angle and it was fine. Fortunately for the guitar’s current owner, the problem was rather simple. Somewhere along the line a previous owner or tech had installed a saddle that was both too high and incorrectly radiused (Photo 1).
My job was twofold: lower the action by reshaping the bridge saddle and then intonate each string. I knew that once I completed these tasks, the D-12-20 would play better than ever and sound more in tune at the higher frets.
Requisite tools. To intonate a 12-string, you need a few specialized luthier tools. These include a string action gauge, radius gauges, and a radius block (the latter must match the fretboard radius). You’ll also need a mechanical pencil, a capo, self-adhesive 80-grit and standard 400-grit sandpaper, and flat, single-cut miniature needle files.
You can estimate where each string should rest on the saddle, but it’s nearly impossible to get it perfect on the first try.
Preliminary check. Before starting this kind of work on a guitar, it’s important to tune to concert pitch and take measurements. These specs provide a baseline to help gauge your progress. You’ll be taking several measurements, so write them down as you go.
First, put a capo on the 1st fret and measure action at the 12th fret with a string action gauge. Take this measurement for both the 1st and 11th strings—the first of the doubled high Es and the low E string. (We’ll assume your 12-string has the standard octave-string configuration, i.e., the octaves in each pair are closer to you than their wound partners. Some electric 12s, notably Rickenbackers, reverse this order.) Measure the distance between the bottom of the string and the top of the 12th fret.
Next measure the relief: With the capo still on the 1st fret, hold the 11th and 12th strings down at the 14th fret and measure the greatest gap between the bottom of the 11th string and the top of the frets. Typically this occurs around the middle of the fretboard, somewhere between the 7th and 9th frets. You can identify this gap by tapping the 11th and 12th strings against the frets while still pressing them down at the 14th fret.
Now remove the capo and check the action at the 1st fret.
Finally, using a strobe tuner, check the intonation for each string. (Naturally, this is tricky on a 12-string because you have to pluck each individual string of the six pairs.) Starting with the 1st string, play the 12th-fret harmonic—make sure it’s in tune—and then fret the same note. If the fretted note is sharp or flat compared to the reference harmonic, write down how many cents it’s off and in which direction. Repeat the process until you’ve documented the intonation at the 12th fret for all 12 strings.
Our 12-string’s preliminary specs. Here’s how the D-12-20 measured up: The action at the 12th fret was 6/64" for the 1st string and 7/64" for the 11th string. Too high to play! The relief was .012"—perfect for my client’s playing style. At the 1st fret, the 1st string was 1/64" and the 11th string was just over 2/64" above the fret. Again, perfect action at the string nut. At this point, I knew my job would simply entail lowering the action at the bridge saddle.
When I checked the intonation with a strobe tuner, and compared the 12th fret harmonics to their corresponding fretted notes, I found most of the fretted notes were from two to six cents sharp, although the G and D pairs were flat by about three cents.
With these measurements in hand, I was ready to get to work.
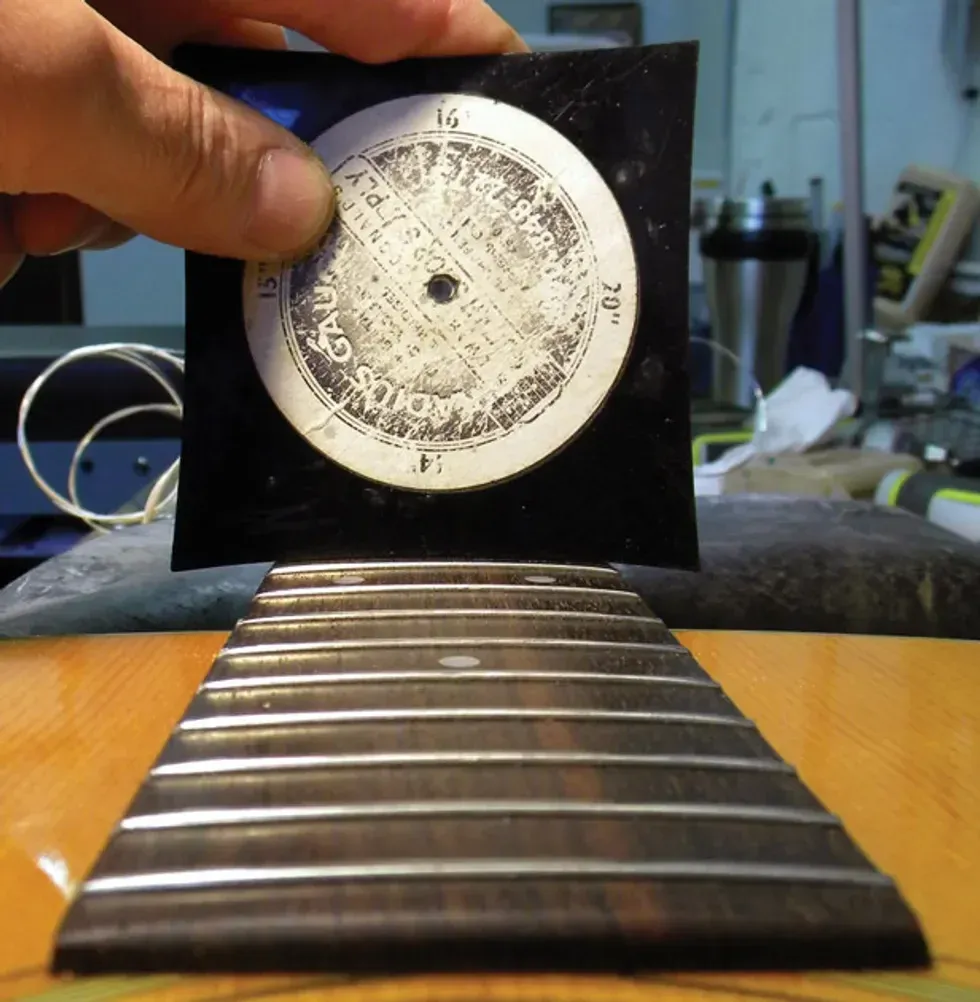
Photo 2
Sanding the bridge saddle. My next step was to check if the saddle’s radius matched the fretboard radius. My radius gauge revealed what I’d suspected—it wasn’t even close. The fretboard had a 14"radius (Photo 2), but the bridge saddle was around 8". This meant the saddle had a much more pronounced arch than the fretboard. I knew if I didn’t reshape the top of the saddle to match the fretboard, the D and G pairs would be radically higher than the other strings.
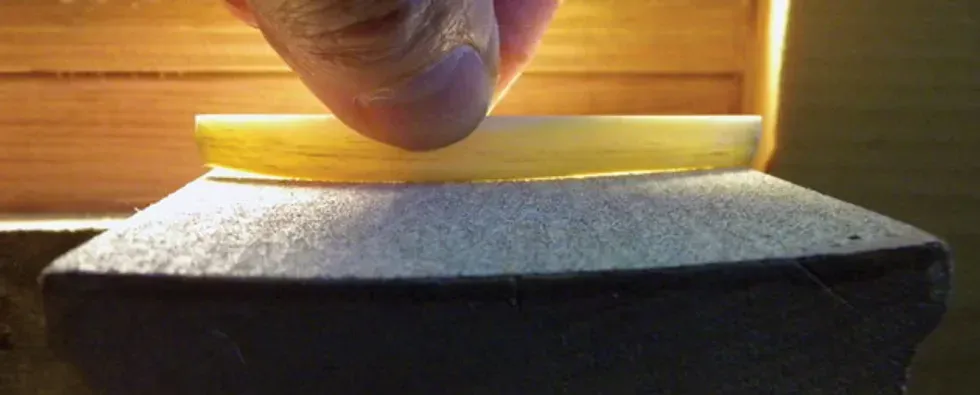
Photo 3
Using a 14" radius block and self-adhesive 80-grit sandpaper, I sanded the top of the saddle until it matched the block’s radius. Here’s the most accurate way to reshape the top of the saddle: Place the radius block in a vise with the radius side up and affix the self-adhesive sandpaper to the block. Now remove the saddle from its bridge slot, turn it upside down, and gently sand its top in the block’s concave area. If you shine light behind the saddle, you’ll be able to see how much material you’re removing from the saddle and make sure its radius matches the block (Photo 3).
Since the action was pretty high on our 12-string, I removed about 1/32" from the top of the saddle at both E string pairs. I removed quite a bit more from the middle of the saddle to flatten out the arch.
Once the saddle is correctly radiused, slip it back into the bridge and grab your mechanical pencil.
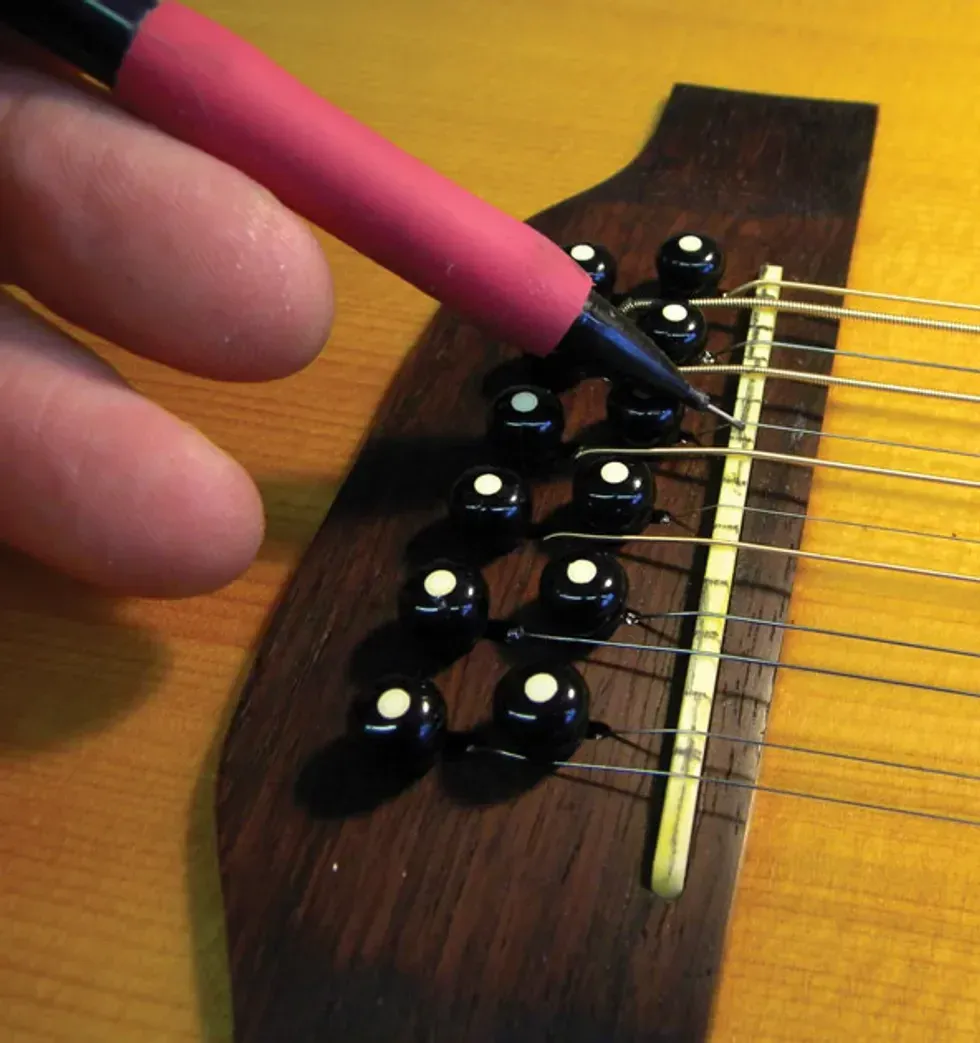
Photo 4
Marking the saddle. Now it’s time to draw guidelines on the saddle crown for both the individual intonation points and the various angles needed to guide the strings as they emerge from the pin holes (Photo 4). But before you start drawing lines, let’s take a moment to discuss where the strings should sit on the top of the saddle. First we’ll deal with the intonation points, then the string angles.
Fair warning: Setting the intonation entails some trial and error. You can estimate where each string should rest on the saddle, but it’s nearly impossible to get it perfect on the first try.
For this task, it’s helpful to mentally divide the 12 strings into three groups:
• The six E, A, D, G, B, and E strings you’d find on a regular flattop. We know the lowest four are wound, and the top two are plain. So far, so good.
• The plain octave strings (E, A, D, G) that pair with the wound E, A, D, and G strings.
• The doubled unison B and high-E strings. Just like their mates, these are plain.
Okay, think about the first group—our standard 6-string. As a general rule, both the low E and B strings intonate best at the rear edge of the saddle (closest to the bridge pins). The G string’s intonation point is typically at the very front of the saddle (closest to the soundhole).
That leaves the high E, D, and A strings to be accounted for. The high E will typically fall between the B (remember, that’s at the rear of the saddle) and the G (at the front of the saddle). The D and A strings usually create a stair-step pattern between the G and low E strings, with the D closer to the G, and A closer to the low E.
The four plain octave strings are a different story. Both the low E’s octave and the G’s octave points will be at the front of the saddle. The octave strings for A and D will be further back toward the bridge pins.
As you’d expect, the unison B and E strings sit at exactly the same point as their siblings.
Now consider how each string travels from the pin hole in the bridge to the top of the saddle—the intonation point. On this Martin, the six primary strings—those that correspond to a standard flattop—are set back toward the rear of the bridge. The six additional strings, the four octaves and two unisons that make a 12-string such a beautiful beast, emerge through the soundboard and bridge right behind the saddle.
On the rear of the saddle, you need to file individual angles (think of them as ramps) that allow each string to reach its intonation point without encountering a sharp edge. Correctly filed angles minimize string breakage and maximize sustain. The angle for the primary strings will be shallower than the six extra strings.
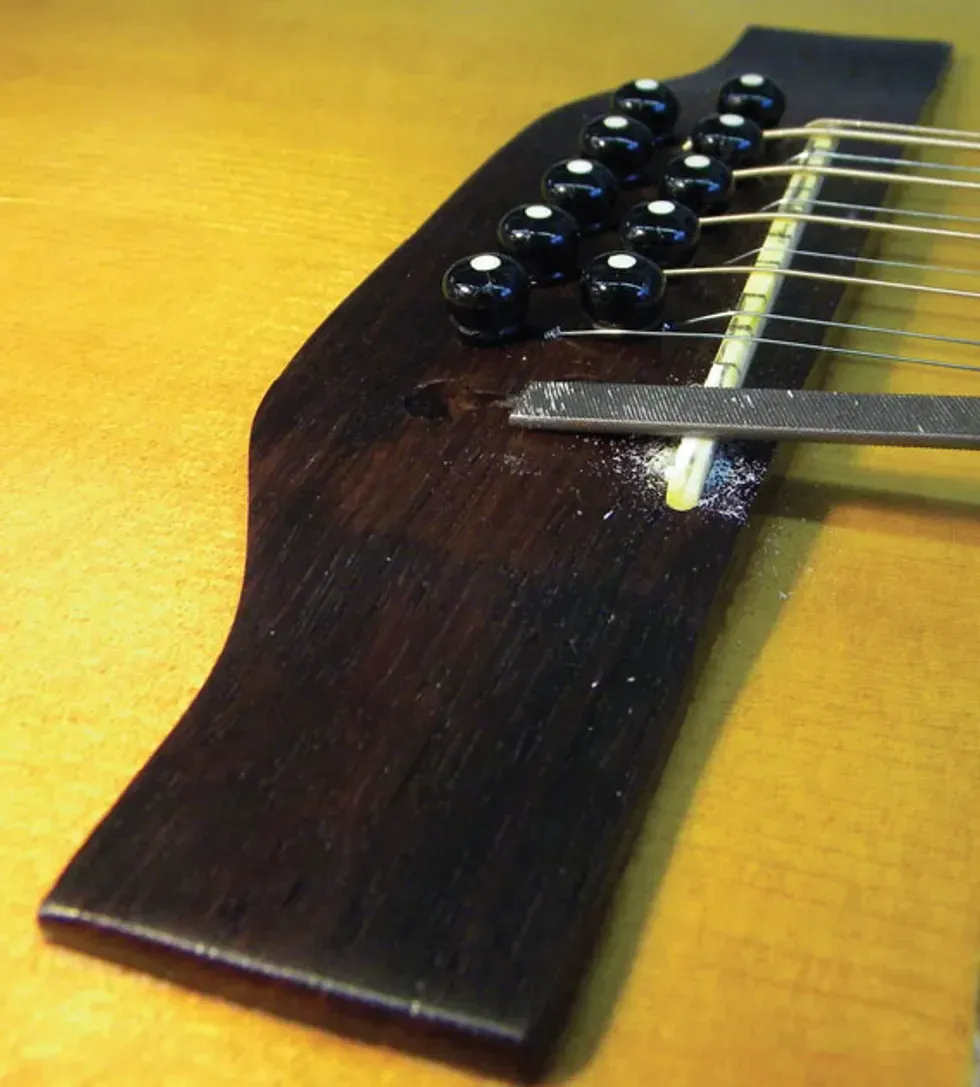
Photo 5
On the rear of the saddle, you need to file individual angles (think of them as ramps) that allow each string to reach its intonation point without encountering a sharp edge. Correctly filed angles minimize string breakage and maximize sustain. The angle for the primary strings will be shallower than the six extra strings.
Filing the saddle. This is where your inner artist gets a chance to shine. Using a miniature flat file, carve each string’s intonation point and rear angle, based on your markings (Photo 5). Go slowly, and to prevent any sitar-like buzzing, be sure each string leaves the saddle from a crisp, defined peak as it heads toward the soundhole.
Checking intonation. As I mentioned earlier, there’s a lot of trial and error involved with intonating a 12-string. Once you’ve done the first pass of filing, put on a fresh set of strings, tune them to pitch, and check the intonation.
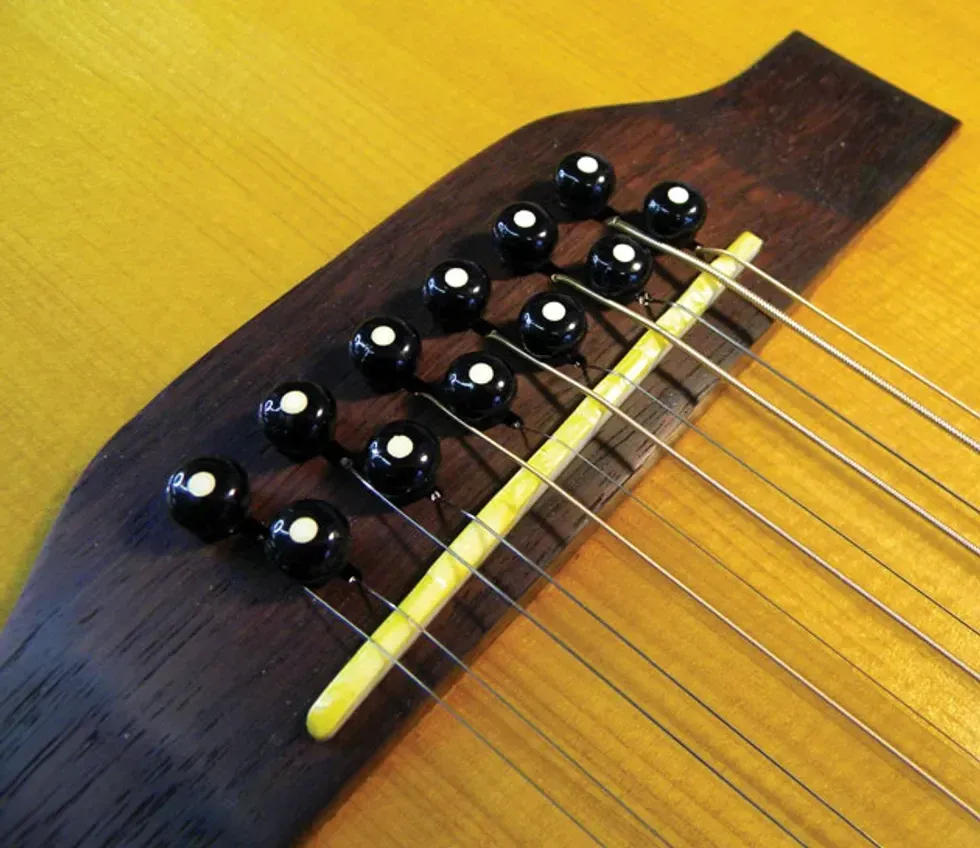
Photo 6
The goal is to have the fretted note at the 12th fret match the corresponding 12-fret harmonic. Use a tuner to keep track of how close the fretted note comes to its reference harmonic. If the string frets sharp, file the intonation point back toward the rear of the saddle. Conversely, if the fretted note is flat, carve the intonation point forward toward the front of the saddle. When you’re done, the saddle should look similar to Photo 6. Don’t be dismayed at how many times you’ll need to slacken and remove the strings, file the saddle, restring, retune, and recheck the intonation.
Wrap it up. When you’ve got the intonation dialed in to your satisfaction, take off the strings one last time, pop out the saddle, and then polish it with 400 grit sandpaper, followed with a polishing cloth. Restring, retune, and you’re good to go.
This process takes a long time to master, but in the end, it’s worth it when your 12-string plays in tune all the way up the neck.
The two-in-one “sonic refractor” takes tremolo and wavefolding to radical new depths.
Pros: Huge range of usable sounds. Delicious distortion tones. Broadens your conception of what guitar can be.
Build quirks will turn some users off.
$279
Cosmodio Gravity Well
cosmod.io
Know what a wavefolder does to your guitar signal? If you don’t, that’s okay. I didn’t either until I started messing around with the all-analog Cosmodio Instruments Gravity Well. It’s a dual-effect pedal with a tremolo and wavefolder, the latter more widely used in synthesis that , at a certain threshold, shifts or inverts the direction the wave is traveling—in essence, folding it upon itself. Used together here, they make up what Cosmodio calls a sonic refractor.
Two Plus One
Gravity Well’s design and control set make it a charm to use. Two footswitches engage tremolo and wavefolder independently, and one of three toggle switches swaps the order of the effects. The two 3-way switches toggle different tone and voice options, from darker and thicker to brighter and more aggressive. (Mixing and matching with these two toggles yields great results.)
The wavefolder, which has an all-analog signal path bit a digitally controlled LFO, is controlled by knobs for both gain and volume, which provide enormous dynamic range. The LFO tremolo gets three knobs: speed, depth, and waveform. The first two are self-explanatory, but the latter offers switching between eight different tremolo waveforms. You’ll find standard sawtooth, triangle, square, and sine waves, but Cosmodio also included some wacko shapes: asymmetric swoop, ramp, sample and hold, and random. These weirder forms force truly weird relationships with the pedal, forcing your playing into increasingly unpredictable and bizarre territories.
This is all housed in a trippy, beautifully decorated Hammond 1590BB-sized enclosure, with in/out, expression pedal, and power jacks. I had concerns about the durability of the expression jack because it’s not sealed to its opening with an outer nut and washer, making it feel more susceptible to damage if a cable gets stepped on or jostled near the connection, as well as from moisture. After a look at the interior, though, the build seems sturdy as any I’ve seen.
Splatterhouse Audio
Cosmodio’s claim that the refractor is a “first-of-its-kind” modulation effect is pretty grand, but they have a point in that the wavefolder is rare-ish in the guitar domain and pairing it with tremolo creates some pretty foreign sounds. Barton McGuire, the Massachusetts-based builder behind Cosmodio, released a few videos that demonstrate, visually, how a wavefolder impacts your guitar’s signal—I highly suggest checking them out to understand some of the principles behind the effect (and to see an ’80s Muppet Babies-branded keyboard in action.)
By folding a waveform back on itself, rather than clipping it as a conventional distortion would, the wavefolder section produces colliding, reflecting overtones and harmonics. The resulting distortion is unique: It can sound lo-fi and broken in the low- to mid-gain range, or synthy and extraterrestrial when the gain is dimed. Add in the tremolo, and you’ve got a lot of sonic variables to play with.
Used independently, the tremolo effect is great, but the wavefolder is where the real fun is. With the gain at 12 o’clock, it mimics a vintage 1x10 tube amp cranked to the breaking point by a splatty germanium OD. A soft touch cleans up the signal really nicely, while maintaining the weirdness the wavefolder imparts to its signal. With forceful pick strokes at high gain, it functions like a unique fuzz-distortion hybrid with bizarre alien artifacts punching through the synthy goop.
One forum commenter suggested that the Gravity Well effect is often in charge as much the guitar itself, and that’s spot on at the pedal's extremes. Whatever you expect from your usual playing techniques tends to go out the window —generating instead crumbling, sputtering bursts of blubbering sound. Learning to respond to the pedal in these environments can redefine the guitar as an instrument, and that’s a big part of Gravity Well’s magic.
The Verdict
Gravity Well is the most fun I’ve had with a modulation pedal in a while. It strikes a brilliant balance between adventurous and useful, with a broad range of LFO modulations and a totally excellent oddball distortion. The combination of the two effects yields some of the coolest sounds I’ve heard from an electric guitar, and at $279, it’s a very reasonably priced journey to deeply inspiring corners you probably never expected your 6-string (or bass, or drums, or Muppet Babies Casio EP-10) to lead you to.
The author in the spray booth.
Does the type of finish on an electric guitar—whether nitro, poly, or oil and wax—really affect its tone?
There’s an allure to the sound and feel of a great electric guitar. Many of us believe those instruments have something special that speaks not just to the ear but to the soul, where every note, every nuance feels personal. As much as we obsess over the pickups, wood, and hardware, there’s a subtler, more controversial character at play: the role of the finish. It’s the shimmering outer skin of the guitar, which some think exists solely for protection and aesthetics, and others insist has a role influencing the voice of the instrument. Builders pontificate about how their choice of finishing material may enhance tone by allowing the guitar to “breathe,” or resonate unfettered. They throw around terms like plasticizers, solids percentages, and “thin skin” to lend support to their claims. Are these people tripping? Say what you will, but I believe there is another truth behind the smoke.
It’s the shimmering outer skin of the guitar, which some think exists solely for protection and aesthetics, and others insist has a role influencing the voice of the instrument. Builders pontificate about how their choice of finishing material may enhance tone by allowing the guitar to “breathe,” or resonate unfettered. They throw around terms like plasticizers, solids percentages, and “thin skin” to lend support to their claims. Are these people tripping? Say what you will, but I believe there is another truth behind the smoke.
Nitrocellulose lacquer, or “nitro,” has long been the finish of choice for vintage guitar buffs, and it’s easy to see why. Used by Fender, Gibson, and other legendary manufacturers from the 1950s through the 1970s, nitro has a history as storied as the instruments it’s adorned. Its appeal lies not just in its beauty but in its delicate nature. Nitro, unlike some modern finishes, can be fragile. It wears and cracks over time, creating a visual patina that tells the story of every song, every stage, every late-night jam session. The sonic argument goes like this: Nitro is thin, almost imperceptible. It wraps the wood like silk. The sound is unhindered, alive, warm, and dynamic. It’s as if the guitar has a more intimate connection between its wood and the player's touch. Of course, some call bullscheiße.
In my estimation, nitro is not just about tonal gratification. Just like any finish, it can be laid on thick or thin. Some have added flexibility agents (those plasticizers) that help resist damage. But as it ages, old-school nitro can begin to wear and “check,” as subtle lines weave across the body of the guitar. And with those changes comes a mellowing, as if the guitar itself is growing wiser with age. Whether a tonal shift is real or imagined is part of the mystique, but it’s undeniable that a nitro-finished guitar has a feel that harkens back to a romantic time in music, and for some that’s enough.
Enter the modern era, and we find a shift toward practicality—polyurethane and polyester finishes, commonly known as “poly.” These finishes, while not as romantic as nitro, serve a different kind of beauty. They are durable, resilient, and protective. If nitro is like a delicate silk scarf, poly is armor—sometimes thicker, shinier, and built to last. The fact that they reduce production times is a bonus that rarely gets mentioned. For the player who prizes consistency and durability, poly is a guardian. But in that protection, some say, comes a price. Some argue that the sound becomes more controlled, more focused—but less alive. Still, poly finishes have their own kind of charm. They certainly maintain that showroom-fresh look, and to someone who likes to polish and detail their prized possessions, that can be a big plus.
“With those changes comes a mellowing, as if the guitar itself is growing wiser with age.”
For those seeking an even more natural experience, oil and wax finishes offer something primal. These finishes, often applied by hand, mostly penetrate the wood as much as coating it, leaving the guitar’s surface nearly bare. Proponents of oil and/or wax finishes say these materials allow the wood to vibrate freely, unencumbered by “heavy” coatings. The theory is there’s nothing getting in the way—sort of like a nudist colony mantra. Without the protection of nitro or poly, these guitars may wear more quickly, bearing the scars of its life more openly. This can be seen as a plus or minus, I imagine.
My take is that finishes matter because they are part of the bond we have with our instruments. I can’t say that I can hear a difference, and I think a myth has sprouted from the acoustic guitar world where maybe you can. Those who remove their instrument’s finish and claim to notice a difference are going on memory for the comparison. Who is to say every component (including strings) went back together exactly the same? So when we think about finishes, we’re not just talking about tone—we’re thinking about the total connection between musician and instrument. It’s that perception that makes a guitar more than just wood and wire. The vibe makes it a living, breathing part of the music—and you.
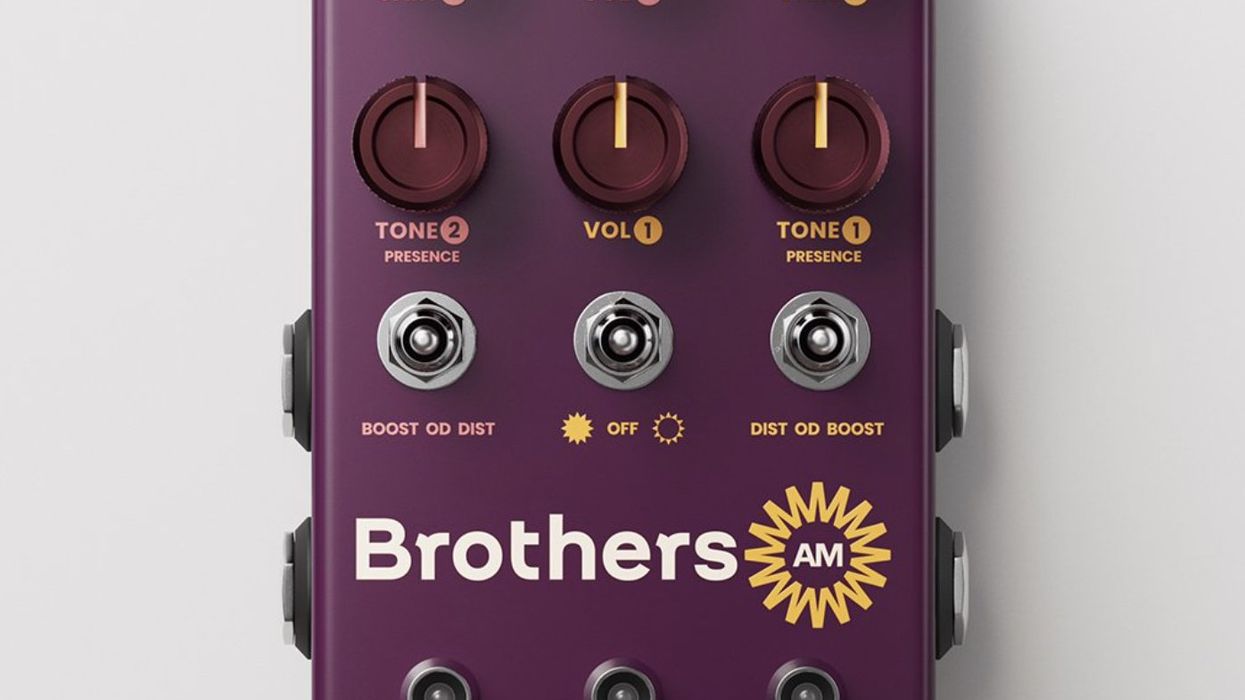
Featuring a preamp and Dynamic Expansion circuit for punch and attack, plus switchable amp simulations.
"Like a missile seeking its target, Heatseeker will give you the explosive sound of rock! Inspired directly from the gear setup used by Angus Young,it features the most important sonic elements to match the tone of the short-pants-rock-God.
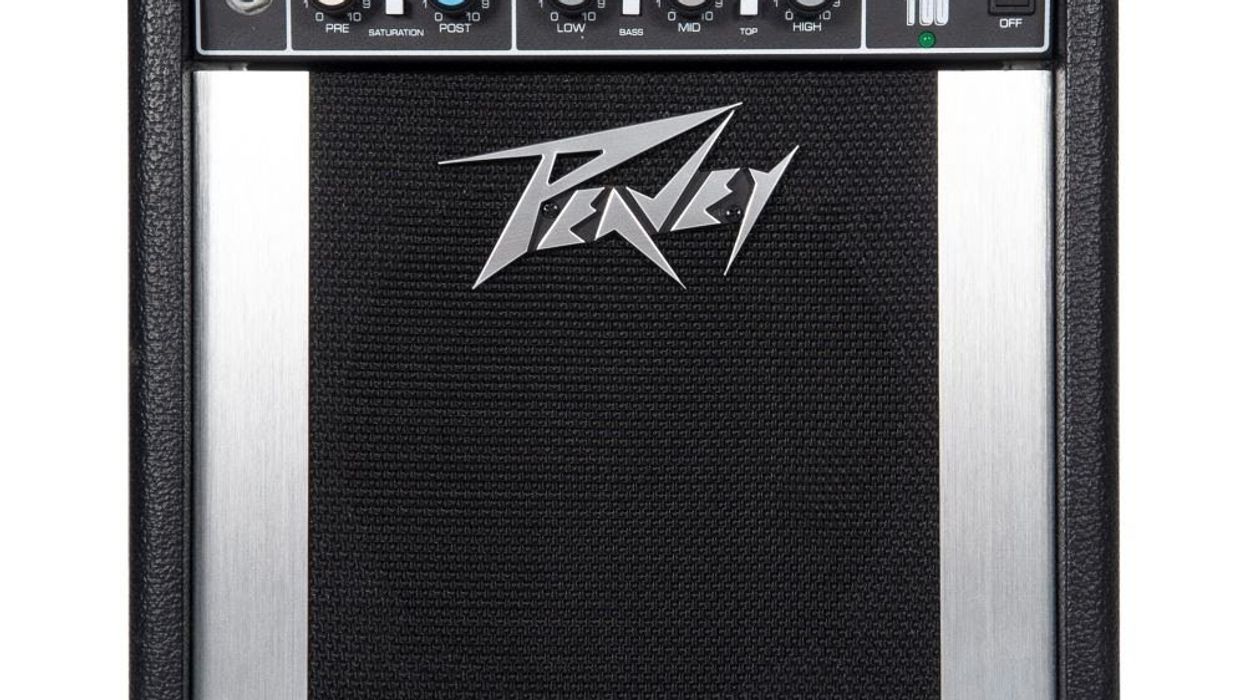
It’s no secret that a major role to his sound, along with the Marshall-brick walls, played one of the first wireless systems for guitar that quickly became a classic among guitar greats, the Schaffer Vega Diversity System."
The preamp along with the Dynamic Expansion circuit found in the wireless transmitter/receiver gave it its distinct sound. Besides boosting the signal, the preamp tightens up lower frequencies and slightly accentuates mid frequencies while the Dynamic Expansion circuit enhances the dynamic response and harmonics of the signal giving punch and attack to ensure that it will cut through the mix. Instead of opting for a prefix setting for the Dynamic Expansion circuit as found in the original unit, we have re-imagined our version with the enhanced knob on the Heatseeker to have more control over the guitar tone’s dynamic response. Setting it around 10 o‘clock is a good starting point to add some extra sparkle. Max it out to bring back to life even the most dull and colorless sounds.
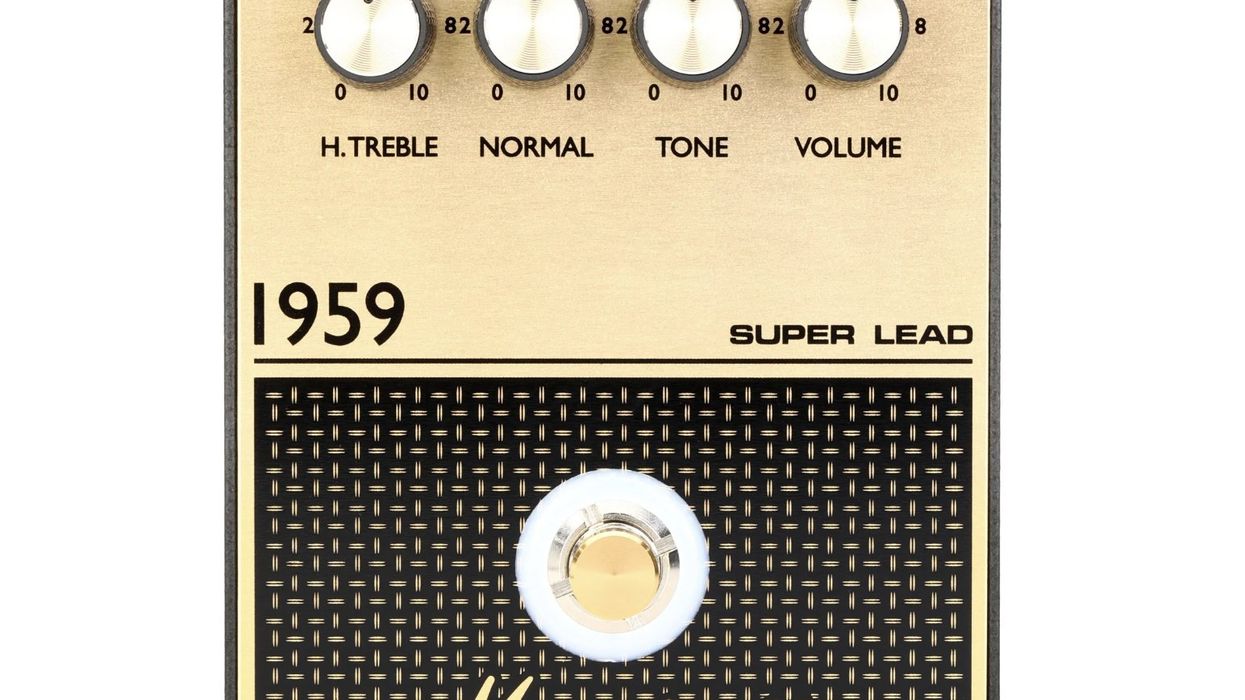
Utilizing an all-analog JFET circuit, running on 27 volts via an internal voltage boost (DO NOT plug higher than 9V DC power supply), we have captured the tone and feel of three British tube amplifiers, synonymous with the sound of rock and roll, with an excellent clean-to-mean dynamic response. With the flip of a toggle switch, you can capture the sound and feel of a JTM45, 1959 Super Lead, or JMP 2203. A smart switching circuit follows the signal path and respective gain stages tuned for each amp and combines them with an actual Marshall style EQ and power amp simula-tion circuit for thundering rock tones. Angus Young usually plugs into Channel 1 or High Treble input of his JTM45s and Super Leads so we opted for that sound when we started visualizing Heatseeker on the drawing board. We have also extended the range of the presence control beyond the original so that the user will be able to match the pedal to any amp or gear setup. The master volume offers plenty of output so that you can also use the pedal as a preamp and plug it into a clean power amp or straight to your DAW. Note that the pedal doesn’t feature any speaker simulation circuit so we recommend using a separate hardware or software guitar speaker simulation when going direct to DAW or a full-range speaker.
A new feature to our booster/drive + amp-in-a-box line of pedals, recreating legendary sounds, is the switchable WoS (Wall of Sound) circuit. We have carefully tuned this circuit at the output of the AMP section of the Heatseeker to open up the soundstage by increasing the output, adding thundering lows, and thickening high mid frequencies. Imagine standing in front of a wall loaded with Marshall amp heads and 4x12 speaker cabinets, grabbing your SG, and hitting a chord. You will be blown away by the sound projection! In combination with the tube power amp simulation and the enhanced circuit of the right section, we’ve made sure that the pick attack will be as dynamic as it gets, so¥er picking will produce clean and slightly crunchy sounds, and hard picking will give explosive distorted sounds! While primarily designed for Angus Young sounds, Heatseeker will definitely open the door to countless other guitar-great tones that use these Marshall amps and/or the Schaffer Vega Diversity System. Think of KISS, Peter Frampton, and Van Halen to name a few.
Like our other dual overdrive/amp-in-a-box designs, Heatseeker features a passive effects loop to give you the option to connect your beloved pedals between the preamp/enhancer and amp-in-a-box circuit or use the two sections as separate and independent effects when using an external bypass switcher/looper. SND is the output of the BOOST/ENHANCE section, RTN is the input of the AMP section. SND is connected to RTN when no instrument jacks are inserted in the effects loop. Note that all pedals inserted in the passive effects loop are still in the signal chain when any or both sections of the Heatseeker are in bypass mode.
Heatseeker features a power-up bypass/engage pre-set function for the footswitches. You can change the default function by holding down the footswitch(es) during power-up. That way you can select which state your pedal will go to when you plug the power supply. This function comes in especially handy to people who use remote pedal switchers/loopers as they only set the state of the pedal once and then operate from the controller.
Street/MAP Price: $279
For more information, please visit crazytubecircuits.com.
Creed extend their sold-out Summer of ’99 Tour with 23 additional dates.
Produced by Live Nation, the dates begin July 9 at Rupp Arena in Lexington, KY and wrap August 20 at the Scotiabank Saddledome in Calgary, AB with support from 3 Doors Down, Daughtry, Mammoth WVH and Big Wreck. *Check individual dates for lineup in each market.
When it kicked off in 2024, The Summer of ’99 Tour quickly became “one of the most anticipated tours of the summer” (USA Today) and “one of the hottest rock tickets of the year” (Billboard) for a return that “may be something this industry has never seen” (Pollstar). To date, CREED’s Scott Stapp, Mark Tremonti, Brian Marshall, and Scott Phillips have performed over 60 sold-out concerts throughout North America, selling over 800,000 tickets and breaking venue records in multiple markets.
“Thirty years in, it’s been a blessing to pick up right where we left off with longtime fans and to meet the next generation for the first time. It’s been an incredible ride, and we aren’t done, so here’s to a ‘Summer’ that never ends. We’ll see you on the road,” states Scott Stapp.
Creed will close out 2024 with shows in Las Vegas, NV (Dec. 30 & Dec. 31) and their newly announced dates in 2025 will follow their already sold-out Summer of ’99 and Beyond cruise sailing April 9– April 13 from Miami to Nassau with Sevendust, Hoobastank, Lit, Hinder, Fuel and more. Also in April, the band - whose audience has included fans of mainstream, rock, and country for over 25 years - will perform at Stagecoach.
For more information on all Creed tour dates as well as the opportunity to purchase entry into Mark Tremonti’s guitar clinic can be found at https://creed.com.
Tour Dates
CREED: SUMMER OF ‘99 TOUR 2025 DATES:
3DD – 3 Doors Down / D – Daughtry / BW – Big Wreck / MWVH – Mammoth WVH
Wed Jul 09 | Lexington, KY | Rupp Arena – 3DD/MWVH
Fri Jul 11 | Syracuse, NY | Empower Federal Credit Union Amphitheater at Lakeview – 3DD/MWVH
Sat Jul 12 | Camden, NJ | Freedom Mortgage Pavilion – 3DD
Tue Jul 15 | Wantagh, NY | Northwell at Jones Beach Theater – D/MWVH
Wed Jul 16 | Scranton, PA | The Pavilion at Montage Mountain – D/MWVH
Sun Jul 20 | Columbus, OH | Schottenstein Center – 3DD/MWVH
Tue Jul 22 | Hartford, CT | Xfinity Theatre – 3DD/MWVH
Thu Jul 24 | Charleston, SC | Credit One Stadium – 3DD/MWVH
Sat Jul 26 | New Orleans, LA | Smoothie King Center – 3DD/MWVH
Sun Jul 27 | Memphis, TN | FedExForum – 3DD/MWVH
Tue Jul 29 | Wichita, KS | INTRUST Bank Arena – D/MWVH
Fri Aug 01 | Lincoln, NE | Pinnacle Bank Arena – D/MWVH
Sat Aug 02 | Ridgedale, MO | Thunder Ridge Nature Arena – D/MWVH
Mon Aug 04 | Albuquerque, NM | Isleta Amphitheater – D/MWVH
Wed Aug 06 | Chula Vista, CA | North Island Credit Union Amphitheatre – D/MWVH
Thu Aug 07 | Palm Desert, CA | Acrisure Arena at Greater Palm Springs – 3DD/MWVH
Sat Aug 09 | Mountain View, CA | Shoreline Amphitheatre – 3DD/MWVH
Sun Aug 10 | Stateline, NV | Lake Tahoe Outdoor Arena at Harveys – 3DD/MWVH (Not a Live Nation date)
Wed Aug 13 | Ridgefield, WA | RV Inn Style Resorts Amphitheater – 3DD/MWVH
Thu Aug 14 | Auburn, WA | White River Amphitheatre – 3DD/MWVH
Sat Aug 16 | Vancouver, BC | Rogers Arena – BW/MWVH
Tue Aug 19 | Edmonton, AB | Rogers Place – BW/MWVH
Wed Aug 20 | Calgary, AB | Scotiabank Saddledome – BW/MWVH
Previously Announced CREED Dates:
Sat Dec 28 | Durant, OK | Choctaw Casino & Resort (Sold Out)
Mon Dec 30 | Las Vegas, NV | The Colosseum
Tue Dec 31 | Las Vegas, NV | The Colosseum
Apr 9 – Apr 13 | Miami – Nassau | Summer of ’99 and Beyond Cruise (Sold Out)
Sat Apr 26 | Indio, CA | Stagecoach