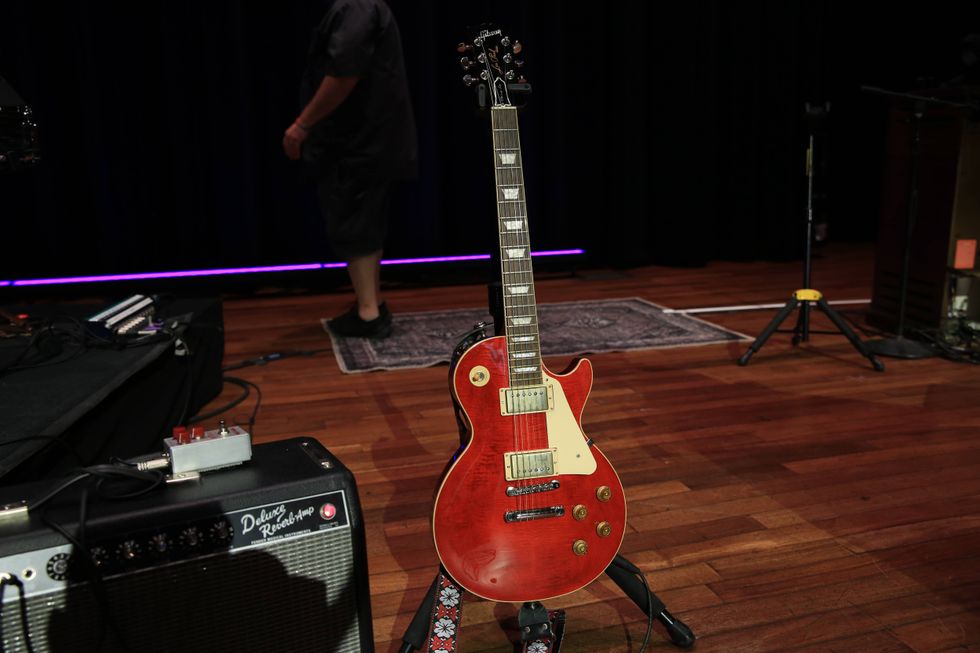
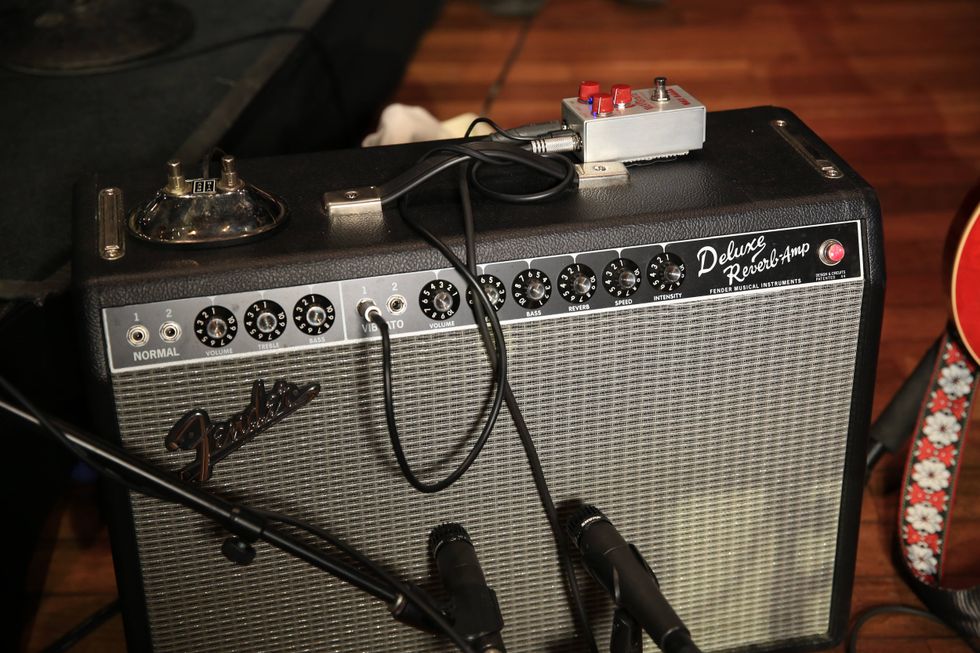
To mod or not to mod? Three experts tell us what we should and shouldn’t do to our ’70s-era Fender amplifiers.
Fender’s silver-panel amplifiers have a mixed reputation. Some people will happily bend your ear about how they can’t compare to their counterparts from the tweed, black-panel, or drip-edge eras, while others will tell you they simply sound great. And some are in between—admiring the silver-panel amps for exactly the reliable, powerful, and plentiful specimens they are.
Not too long ago, you could easily find low asking prices on silver-panels of all types, earning them a designation as vintage amps for working musicians (prices have gone up, but you can still find a deal with a little effort). Yet thanks to those more affordable tags and their reputations, the years haven’t always been kind. These amps have been put through the ringer and subjected to their share of mods: everything from tweaks to increase midrange to ill-advised attempts to turn them into Marshalls and Voxes. Still, so many have survived the test of time—a testament to their durability.
“What we see today is from 50, 60 years of things becoming the industry standard. Back in the ’50s or ’60s, everything was new. They were just throwing things out there.”—George Alessandro
If you own a silver-panel model, you know that there’s a lot of subjective information floating around between the internet and our local amp-repair shop. If you’re not a tech, and you just want an amp that works well and sounds good, it can be a lot to unpack—suggestions about mods, restorations, and other tweaks can really leave your head spinning. It might seem like the easiest path is to never change anything and just fix what’s broken when it’s time to service yours, but that’s not always possible. Vintage examples of these amps have been rocking for so long that many of them are likely to need quite a bit of maintenance or have received extensive servicing over the years, and possibly not at the highest level.
So, when it comes time to fix your amp, what’s the best way to proceed? Do you restore your amp to factory spec? And will you even like the way that sounds? Considering how much time has passed, there’s a good chance it could make for a dramatic difference. And are some modifications to the circuit in order?
I’m no tech. I’m just a player who has an appreciation for these amplifiers and has owned my share of ’em. So, with all these questions in mind, I hit up a couple experts who know their way around a Fender amp in order to set the record straight on how to proceed with servicing our silver-panel amps and getting the best, most reliable tones out of them.
What’s the Deal with Silver-Panel Amps?
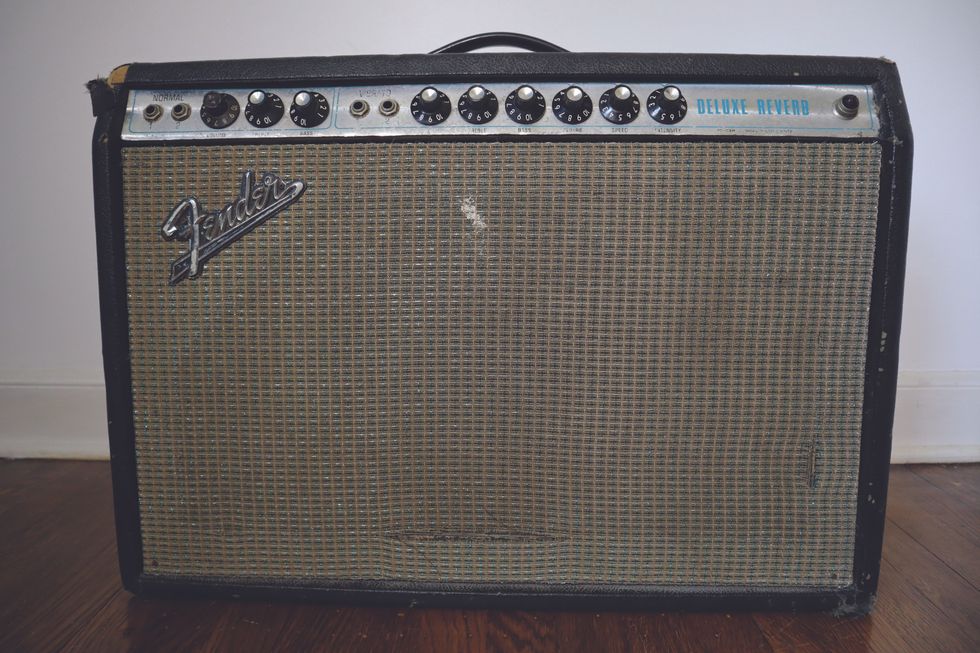
The author’s beloved 1971 Deluxe Reverb shows some wear after 51 years of heavy use. Except for a replaced speaker—now a Celestion Vintage 30—this amp is up to original spec.
Through 1965, Fender kicked out one iconic, revered amp design after another. After CBS took over, those circuits slowly changed over the course of the transitional late-’60s “drip-edge” era of amps. By the ’70s, the entire line had evolved into the silver-panels. This was Fender’s first era to really draw significant negative feedback from players. (When’s the last time you read a piece about modding a tweed Deluxe!?) One big point of criticism is that, during this phase, the company was looking for cheaper ways to build their amps—choices often blamed on the accounting department rather than their engineers—which affected everything from speaker quality to the type of wire used inside the circuits.
But there’s more to it than just skimping on parts. “They were just trying to keep up with the times,” explains George Alessandro of Alessandro High-End Products. In addition to his own amps, which are famously used by artists like Derek Trucks, Eric Clapton, and John Mayer, Alessandro also rebuilds plenty of vintage models for some of those same players. While some parts were of a lesser quality in the silver era, he points out that “Fender’s raw materials were still relatively good quality. By the ’70s, the caps were still good, the transformers were still authentic, the chassis were still right.”
“I find that the silver-panel amps, even if they are 10 years newer than the black-panel amps, are usually in much worse condition because they are stacked away in a moist basement or garage.”—Jens Mosbergvik
A big reason that silver-panel amps don’t live up to the reputation of their older siblings is that “their focus was more on getting output than tone.” Alessandro explains, “By the mid-60s, things were getting louder. PAs were just coming into play. Concerts were getting bigger. So, amplifiers had to get much larger and louder.” This eventually amounted to larger transformers in some models and other changes to boost power and bass response.
“At the time, there was no set rule,” he continues. “What we see today is from 50, 60 years of things becoming the industry standard. Back in the ’50s or ’60s, everything was new. They were just throwing things out there.”
But the lesser-than reputation of the silver-panel amps is often not exclusively about choices that Fender made back in the ’70s. It’s also about how these amps have been treated in subsequent decades. Once “pre-CBS” became a revered term, that solidified the reputation of anything Fender built before 1965, and those amps were often treated differently than the silver-panels. “The thing with silver-panel amps,” says Jens Mosbergvik, PG’s own Fender expert and author of our Silver and Black column, “is that they have been less looked after than black-panel amps because they were considered cheap amps. I find that the silver-panel amps, even if they are 10 years newer than the black-panel amps, are usually in a much worse condition because they are stacked away in a moist basement or garage.” With its lesser status, a silver-panel amp is also more likely to have been either serviced poorly or modified.
What’s in a Mod?
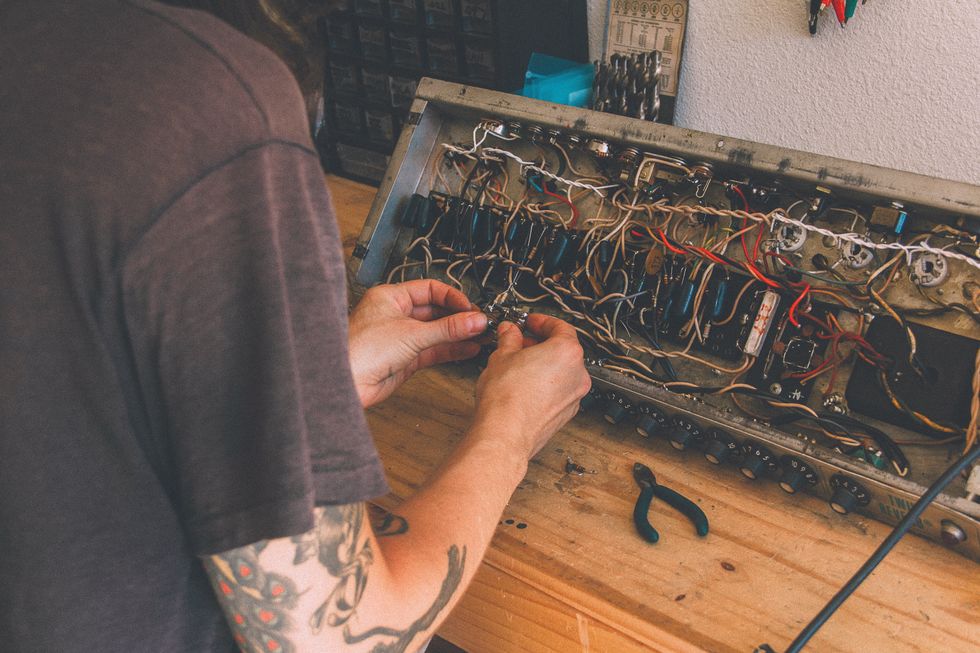
Colleen Fazio works on a silver-panel Twin Reverb. “Fender amps are so nice and so well designed,” she says, “it’s pretty easy to bring them back to stock if you want to.”
Photo courtesy of Colleen Fazio
Nowadays, plenty of players love silver-panel amps. They might not always deliver the hallowed tones of their pre-CBS siblings, but these models certainly hold their own when stacked against many modern amps that command similar prices. If you own one that hasn’t been restored, when you service it or take it to get serviced, you’ll have some decisions to make.
The most important thing to do is consider your expectations. Los Angeles guitar tech Colleen Fazio, who posts extensive and informative vintage amp repair and restoration videos to her YouTube channel, calls herself a “minimally invasive” tech and says, “I always tell people, ‘If you want your amp to sound like a different amp, you should probably just get a different amp.’ Because each amp is designed to do its own thing.”
Vintage Fender Deluxe Reverbs: 1965 Black-Panel Vs. 1974 Silver-Panel
Watch the author test out these two vintage gems.
“My philosophy with vintage amps is do no harm. I don’t like mods,” says Alessandro. “I’m really against mods, because almost 100 percent of the time it ruins what something is supposed to be.” He also warns against any sort of modification that will change an amp’s intended character. “I do more un-modding of vintage amps than you can imagine. A Deluxe Reverb is not going to be a tweed Deluxe. It’s not going to be a little Bluesbreaker. It’s gonna be a Deluxe Reverb. Try and make it the best it is supposed to be.”
Alessandro advocates looking at the changes made by Fender in the silver-panel era with perspective and hindsight. “That circuit from ’64, ’65 is right,” he says. “So, when Fender started changing it through the years, they were making it less right.” When it comes to restoring a silver-panel amp to black-panel specs, Alessandro doesn’t necessarily consider that to be a mod, but, rather, “restoring from what their engineers changed and making it what it’s supposed to be.” He adds, “It’s kind of like an old computer. What do you do when your new software doesn’t work? You revert back to the old one.”
“I always tell people, ‘If you want your amp to sound like a different amp, you should probably just get a different amp.’ Because each amp is designed to do its own thing.”—Colleen Fazio
Some Black-Panel Mods
Whatever you’re doing, whether it’s servicing or making changes to the circuit, Alessandro stresses using the correct components. “People go in there and replace all the parts,” he says, “because this resistor is supposed to be 100k, and it’s reading 112. But it’s not that it’s reading 112 that’s the problem. It’s when they replace it with a 100k resistor and it’s not the right type.”
To get the most from your amp, Mosbergvik says “there are only a few solid things you should do that will really improve the amp in terms of tone.” While different models and years will have their own idiosyncrasies—including the push-pull boosts, master volumes, and larger transformers found in models from the latter part of the decade—here are a few things you or your tech might consider.
Speakers
Mosbergvik’s favorites for amps with 10" speakers are Weber 10A100s ($114 street), which he says are “pretty close to the Jensen P10R or CTS alnicos in 1964 black-panel Super Reverbs,” or Weber 10A125s ($119 street) “for a tad more punch and bigger/cleaner bottom end.” For ceramic speakers, he likes Weber’s 10F125s ($108), which he says are “like the CTS ceramics in some ’65 Super Reverbs.”
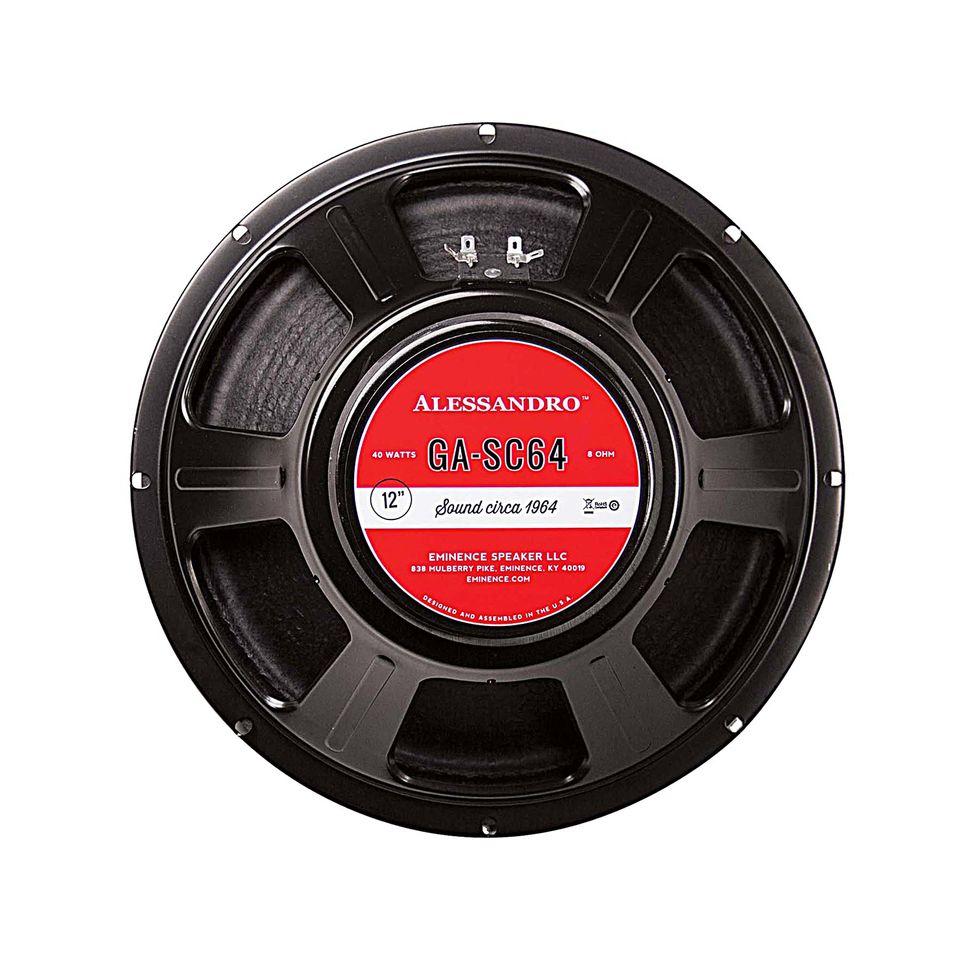
For amps loaded with 12s, George Alessandro specially designed the GA-SC64 ($144 street) with Eminence to capture the black-panel-era sound.
Bias Circuits
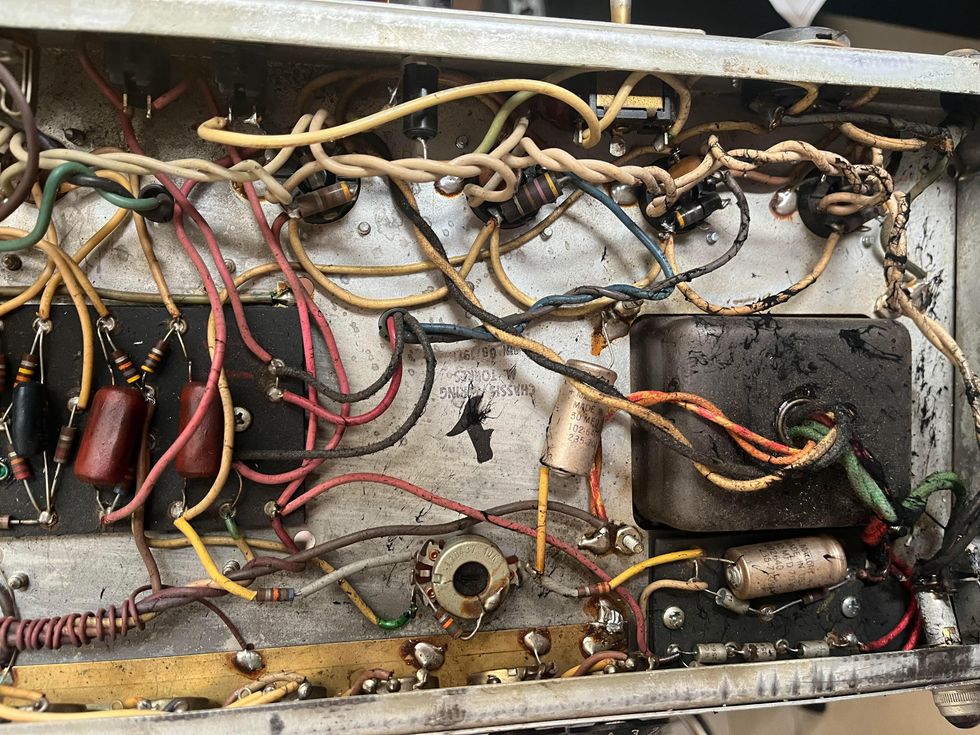
The gory guts of a pre-overhaul silver-panel Twin Reverb.
Photo by Colleen Fazio
By the ’70s, Fender switched all their fixed bias amps from a standard bias control, which allows users to raise or lower the bias on the power tubes but requires a matched pair, to a balance-style control, which accommodates non-matched power-tube pairs yet might not give those tubes the power they need. This creates bigger problems than simply purchasing a matched pair of power tubes and can have a negative effect on an amp’s tone.
“You can re-wire the control to be like the ’60s control, so you’re adjusting the bias,” says Fazio. “It’s a pretty simple re-wire. I would probably include that with a service. You’re not replacing any parts, you’re just re-wiring the configuration.”
Baffle Boards
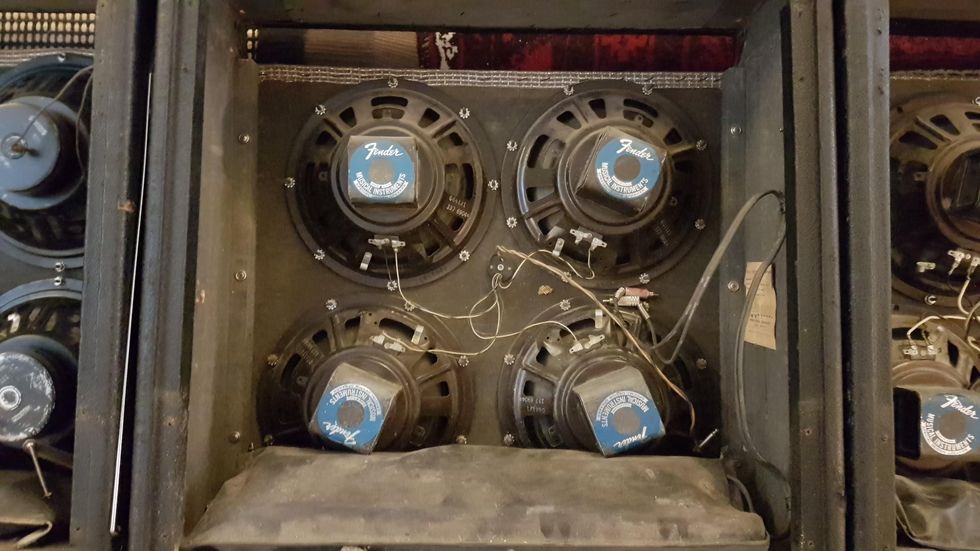
Look at the sides to spot the differences. This Super Reverb has a screwed-in style baffle board.
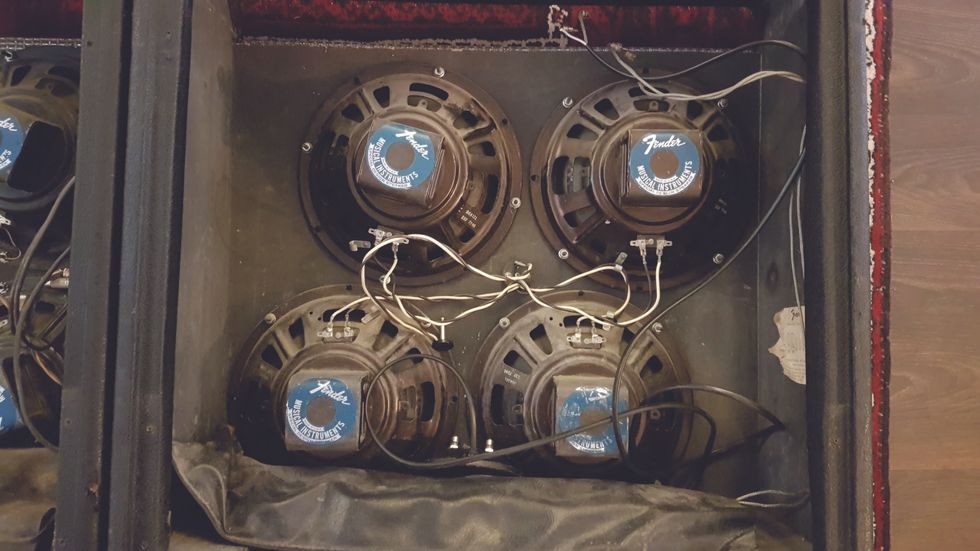
This Super Reverb offers an example of a glued-in baffle board for speaker mounting.
“Try and make it the best it is supposed to be.”—George Alessandro
Early in the ’70s, Fender switched from using a screwed-in baffle to a glued-in baffle, so removing them can be tricky on the latter models. Mosbergvik says the glued-in design sounds “unbalanced” to his ears and points out that it is possible to switch back to the early screwed-in style if you’re already removing the baffle. “You’ll need to work to get it screwed in,” he explains. This includes adding supports to screw the baffle into. “It’s a lot of dirty work.”
If the baffle needs to be replaced, you’ll have to decide between a plywood baffle, a popular choice for many players who believe it changes the tone for the better, or stick with the original particle-board style, which is consistent with both silver- and black-panel models.
Phase Inverter Changes
All that is easy enough for us non-techs to wrap our heads around. But Fazio points out there are some finer differences to be found by looking at schematics.
The coupling capacitor is in the part of the circuit that connects the preamp signal to the output section. “A bigger value in the silver-panel amps increased the bass response. If you want tighter bass like the ’60s amps, you lower the value of that capacitor back to the ’60s specs, which is .001 µF, and a lot of the silver amps are .01. There are some exceptions, but those are common values to find.”
She also points out that the values of the plate resistors on the phase-inverter tube were lowered in the silver-panel amps to reduce gain, and those can be changed to original spec.
Good, Clean Work
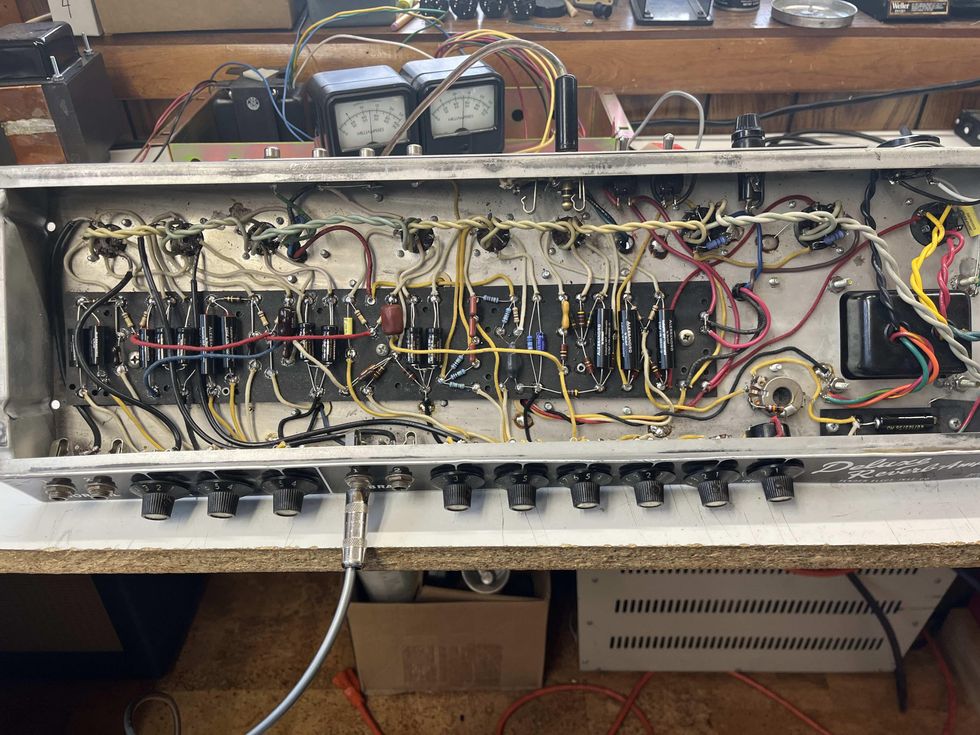
This modern Deluxe Reverb has been hand re-wired to black-panel specs by George Alessandro, offering a great example of a clean, tidy circuit.
Photo courtesy of George Alessandro
It’s always good to remember that any change you make to your amp will affect the way it sounds and feels. If you have an amp you already like, you should especially keep that in mind and don’t feel any pressure to make changes that aren’t necessary. “If it has been modified and you like how it sounds, that’s cool. Silver-panel amps sound really good as they are, and I’ve heard really good modified ones, too,” says Fazio.
If you’re looking to purchase an amp that has been modified, it can be helpful to take a look at the circuit, when possible, even if you’re not a tech. Mosbergvik suggests inspecting to see “if it’s done tidy and properly, with twisted wires, and if the soldering work is done properly—the wires are cut to correct length, they are soldered with enough lead, etcetera.” This will at least help you decide the quality of work that has gone into the amp over the course of its decades of servicing.
One of the great things about these vintage specimens is that they’re easy enough to work on and it’s not hard to source parts. “Fender amps are so nice and so well designed,” says Fazio, “it’s pretty easy to bring them back to stock if you want to.” So, there’s a good chance you’ll be able to keep your amp in good working order for many years to come. And with some of these tips, you’ll be able to have it sounding better than ever.
1971 Fender Twin Reverb | Vintage Amp Repair | The Electric Lady
Watch as Colleen Fazio overhauls a 1971 Twin Reverb.
- Silver and Black: Tips for Buying Vintage Fender Amps - Premier ... ›
- Ask Amp Man: Beefing Up a Vintage Fender Vibrolux Reverb ... ›
- Wake Up Tired Amps with New Speakers - Premier Guitar ›
Guest columnist Dave Pomeroy, who is also president of Nashville’s musicians union, with some of his friends.
Dave Pomeroy, who’s played on over 500 albums with artists including Emmylou Harris, Elton John, Trisha Yearwood, Earl Scruggs, and Alison Krauss, shares his thoughts on bass playing—and a vision of the future.
From a very young age, I was captivated by music. Our military family was stationed in England from 1961 to 1964, so I got a two-year head start on the Beatles starting at age 6. When Cream came along, for the first time I was able to separate what the different players were doing, and my focus immediately landed on Jack Bruce. He wrote most of the songs, sang wonderfully, and drove the band with his bass. Playing along with Cream’s live recordings was a huge part of my initial self-training, and I never looked back.
The electric bass has a much shorter history than most instruments. I believe that this is a big reason why the evolution of bass playing continues in ways that were literally unimaginable when it began to replace the acoustic bass on pop and R&B recordings. Players like James Jamerson, Joe Osborn, Carol Kaye, Chuck Rainey, and David Hood made great songs even better with their bass lines, pocket, and tone. Playing in bands throughout my teenage years, I took every opportunity I could to learn from musicians who were more experienced than I was. Slowly, I began to understand the power of the bass to make everyone else sound better—or lead the way to a train wreck! That sense of responsibility was not lost on me. As I continued to play, listen, and learn, a gradual awareness of other elements came to the surface, including the three Ts: tone, timing, and taste.
I was ready to rock the world with busy lines and bass solos when I moved to Nashville in the late ’70s, and I was suddenly transported into the land of singer-songwriters. It was a huge awakening when I heard the lyrics of artists like Guy Clark, whose spare yet powerful stories and simple guitar changes opened up a whole new universe in reverse for me. It was a reset for sure, but gradually I found ways to combine my earlier energetic approach in different ways. Playing what’s right for a song is a very subjective thing.
“If the song calls for you to ramp up the energy and lead the way like Chris Squire, Bootsy Collins, Geddy Lee, Sting, Flea, Justin Chancellor, or so many others, trust yourself and go for it.”
Don Williams, whom I worked with for many years, was known as a man of few words, but he gave me some of the best musical advice I ever received. I had been with him for just a few months when he pulled me aside one night after a show, and quietly said, “Dave, you don’t have to play what’s on the records, just don’t throw me off when I’m singing.” In other words: It’s okay to be creative, but listen to what’s going on around you. I never forgot that lesson.
As I gradually got into recording work, in an environment where creativity is combined with efficiency and experimentation is sometimes, but not always, welcome, I focused on tone as a form of expression, trying to make every note count. As drum sounds got much bigger during the ’80s, string bass was pretty much off the table as an option in most situations. Inspired by German bassist Eberhard Weber, I bought an electric upright 5-string built by Harry Fleishman a few years earlier. That theoretically self-indulgent purchase gave me an opportunity to carve out a tone that would work with both big drums and acoustic instruments. It gave me an identifiable sound and led to me playing that bass on records with artists like Keith Whitley, Trisha Yearwood, Alison Krauss, Emmylou Harris, and the Chieftains.
In a world of constantly evolving and merging musical styles, the options can be almost overwhelming, so it’s important to trust yourself. Ultimately, you are making a series of choices every time you pick up the instrument. Whether it’s pick versus fingers versus thumb, or clean versus overdrive versus distortion, and so on … you are the boss of your role in the song you are playing. When the sonic surroundings you find yourself in change, so can you. It’s all about listening to what is going on around you and finding that sweet spot where you can bring the whole thing together while not attracting too much attention.
On the other hand, if the song calls for you to ramp up the energy and lead the way like Chris Squire, Bootsy Collins, Geddy Lee, Sting, Flea, Justin Chancellor, or so many others, trust yourself and go for it. Newer role models like Tal Wilkenfeld, Thundercat, and MonoNeon have raised the bar yet again. The beauty of it all is that the bass and its role keep evolving.
Right now, I guarantee there are young bassists of all descriptions we have not yet heard who are reinventing the bass and its role in new ways. That’s what bass players do—we are the glue that ties music together. Find your power and use it!
A reverb-based pedal for exploring the far reaches of sound.
Easy to use control set. Wide range of sounds. Crush control is fun to explore. Filter is versatile.
Works best as a stereo effect, which may limit some players.
$299
Old Blood Noise Endeavors Dark Star Stereo
oldbloodnoise.com
The Old Blood Dark Star Stereo (DSS) is one of those pedals that lives beyond simple effect categorization. Yes, it’s a digital reverb. But like other Old Blood designs, it’s such a feature-rich, creative take on that effect that to think of it as a reverb feels not only imprecise but unfair.
In this case, reverb describes how the DSS works more than how it sounds. I’ve come to think of this pedal as a reverb-based synthesizer, where reverb is the jumping-off point for sonic creation. As such, the sounds coming out of the Dark Star can be used as subtle sweetener or sound design textures, opening up worlds that might otherwise be unreachable.
Reverb and Beyond
Functionally speaking, the DSS starts with reverb and applies a high-/low-pass filter, two pitch shifters, each with a two-octave range in each direction, plus bit-crushing and distortion. Controls for lag (pre-delay), multiply (feedback), and decay follow, with mini knobs for volume, mix, and spread. Additional control features include presets, MIDI functionality, plus expression and aux control.
The DSS can be routed in mono, stereo, or mono-in/stereo-out. Both jacks are single TRS, and it’s easy to switch between settings by holding down the bypass switch and selecting via the preset button.
Although it sounds great in mono, stereo is where this iteration of the Dark Star—which follows the mono Dark Star and Dark Star V2—really comes alive. Starting with the filter, both pitch shifters, and crush knobs at noon—all have center detents—affords the most neutral settings. The result is a pad reverb, as synthetic as but less sparkly than a shimmer. The filter control is a fine way to distinguish clean and effect signals. In low-pass mode, the effect signal can easily get dark and spooky while maintaining fidelity and without getting murky. On the other end, high-pass settings are handy for refining those reverb pads and keeping them from washing out the clarity of the clean signal.
Lower fidelity is close at hand when you want it. The crush control, when turned counterclockwise, reduces the bit rate of the effect signal, evoking all kinds of digitally compromised sounds, from early samplers to cell phones, depending on how you flavor it. Counterclockwise applies distortion to the reverb signal. There’s a lot to explore within the wide ranges of the two pitch controls, too. With a four-octave range, quantized in half steps, the combinations can be extreme, and Dark Star takes on a life of its own.
Formless Reflections of Matter
The DSS is easy to get acquainted with, especially for a pedal with so many features, 10 knobs, and two footswitches. I quickly got a feel for the reverb itself at the most neutral filter and pitch settings, where I enjoyed the weight a responsive, textural pad lent to everything I played.
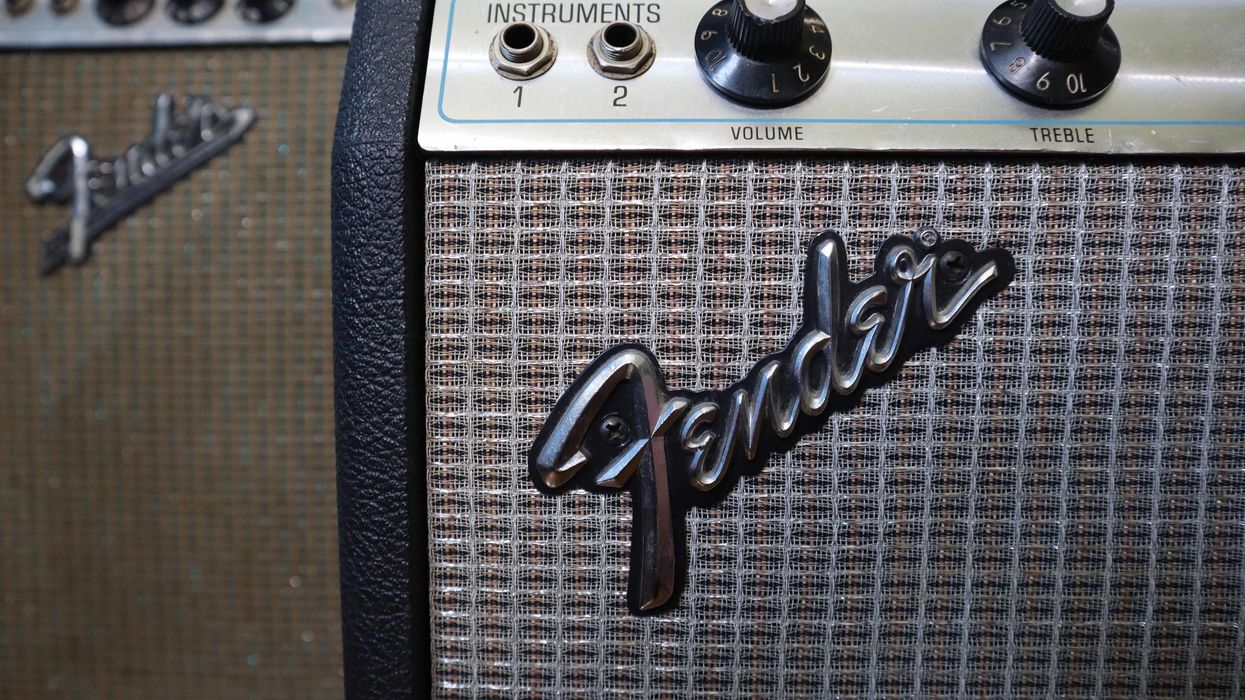
With just the filter and crush controls, there’s plenty to explore. Sitting in the sweet spot between a pair of vintage Fenders, I conjured a Twin Peaks-inspired hazy fog to accompany honeyed diatonic arpeggios, slowly filtering and crushing that sound into a dark, evil low-end whir as chords leaned toward dissonance. Eventually, I cranked the high-pass filter, producing an early MP3-in-a-good-way “shhh” that was fine accompaniment to sparser voicings along my fretboard. It was a true sonic journeyThe pitch controls increase possibilities for both ambience and dissonance. Simple tweaks push the boundaries of possibility in exponentially deeper directions. For more subtle thickening and accompaniment sounds, adding octaves, which are easy to tune by ear, offers precise tone sculpting, dimension, and a wider frequency range. Hearing simple harmonic ideas plucked against celeste- and organ-like reverberations kept me in the Harold Budd and Brian Eno space for long enough to consider new recording projects.
There is as much fun to be had at the highest feedback settings on the DSS. Be forewarned: Spend too much time there and you might need a name for your new ambient band. Cranking the multiply and decay knobs, I’d drop in a few notes, or maybe just a chord, and get to work scanning the pitch knobs and sculpting with the filter. Soon, I conjured bold Ligeti-inspired orchestral sounds fit for a guitar remix of 2001: A Space Odyssey.
The Verdict
The Dark Star Stereo strikes a nice balance between deep control, a wide range of sonic rewards, playability, and an always-sounds-great vibe. The controls are easy to use, so it doesn’t take long to get in the zone, and once you do, there’s plenty to explore. Throughout my time with the DSS, I was impressed with its high-fidelity clarity. I attribute that to the filter, which allows clean and reverb signals to perform dry/wet balance and EQ functions. That alone encouraged more adventurous and creative exploration. Though not every player needs this kind of tone tool, the DSS is a must-check-out effect for anyone serious about wild reverb adventures, and it’s simple and intuitive enough to be a good fit for anyone just starting exploration of those zones. However you come to the Dark Star, it’s a unique-sounding pedal that deserves attention. PG
The exquisite BilT Brothers collaborative guitar: a Frank Brothers Ultra Light in BilT eggplant sparkleburst with Arcane 3x3 Gold Foil Humbuckers and loaded with a Caroline Custom Cannonball Distortion.
This forward-thinking custom guitar commissioned by our columnist makes a special case for partnership in the guitar building community.
Owning a guitar shop, your brain is full of to-do lists, questions, and plenty of compulsive thoughts over details. And when you run a shop that specializes in custom builds that you spec out from boutique companies, the ideas for these guitars often come at the most random times of day (and night). While I don’t subscribe to the notion of fate, the following makes a case for its existence.
It was like any other random day at work: We had customers coming in, items shipping out, services on the bench. I was simultaneously working on a pedalboard for a customer and making plans with some vendors. I was on the phone with Brandon Darner of BilT Guitars when DHL dropped off our latest Frank Brothers guitar. Now, I’m never shy about talking up builds from any of our vendors. Spec’ing guitars for our shop, seeing their execution exceed my expectations, and then getting it into the hands of its new owner is one of my absolute favorite parts of my job. So, naturally I mentioned that we just got a new Frank Brothers in. Brandon told me how much he loved their stuff—sort of a “game recognizing game” kind of thing.
After we unboxed the guitar, I called Tim Frank to let him know how we continue to be impressed with their work and how much we loved the new arrival. I also mentioned Brandon had some very nice things to say about their work. Tim’s response was something like, “Oh wow! That’s really cool. Their stuff is amazing and we have a lot of respect for those guys.” At first, I thought he was just being polite, but I’ve gotten to know him pretty well. I knew that the compliment and sentiment was genuine and past the point of his wonderful Canadian pleasantness. One thing led to another, and I started a group text. Very quickly, they became friends. In fact, Brandon even ordered a Frank Brothers shortly after the introduction.
The Frank Brothers and BilT team, left to right: Tim Frank, Tim Thelen (BilT), Nick Frank, and Brandon Darner (BilT).
My last call of the day was to Philippe Herndon from Caroline Guitar Company. As we talked, he was glowing about the pedal building community and how friendly and collaborative it is, and obvious questions popped into my head: “Why aren’t guitar companies like that?” “Why can’t we do a collab guitar?”
Long story extremely short, with tons of excitement, I got Brandon and Tim on the phone and proposed the idea of doing a guitar together. Without hesitation, the response from both was “Hell yeah, let’s do it!” and it was time for us to spec it. We decided on a Frank Brothers Ultra Light. BilT would apply their world-class fit/finish as well as their signature effects treatment. I picked my favorite finish in the BilT repertoire called eggplant sparkleburst, selected Arcane 3x3 Gold Foil Humbuckers, and tapped Philippe on the shoulder to ask if he had any Custom Cannonball Distortions—the first pedal I bought from Caroline in 2013—that he could provide for the build, to which he happily obliged.
A year or so later, the BilT Brothers was born. Of course, it is exceptional beyond words and is a true testament to the results of these incredible companies working together to produce something truly remarkable. We decided, with custom shirts and all, to proudly debut our creation at Fretboard Summit in Chicago. The reaction from everyone exceeded our expectations and showed me that the level of mutual respect and admiration in this business can lead to phenomenal results.
This project has opened a lot of doors that I’m not sure anyone knew existed. For me, the most exciting part of all of this is the fact that, like the smaller pedal companies, there is an actual community here filled with like-minded, pure enthusiasts who also happen to be master craftsmen—and who truly geek out over each other’s work.
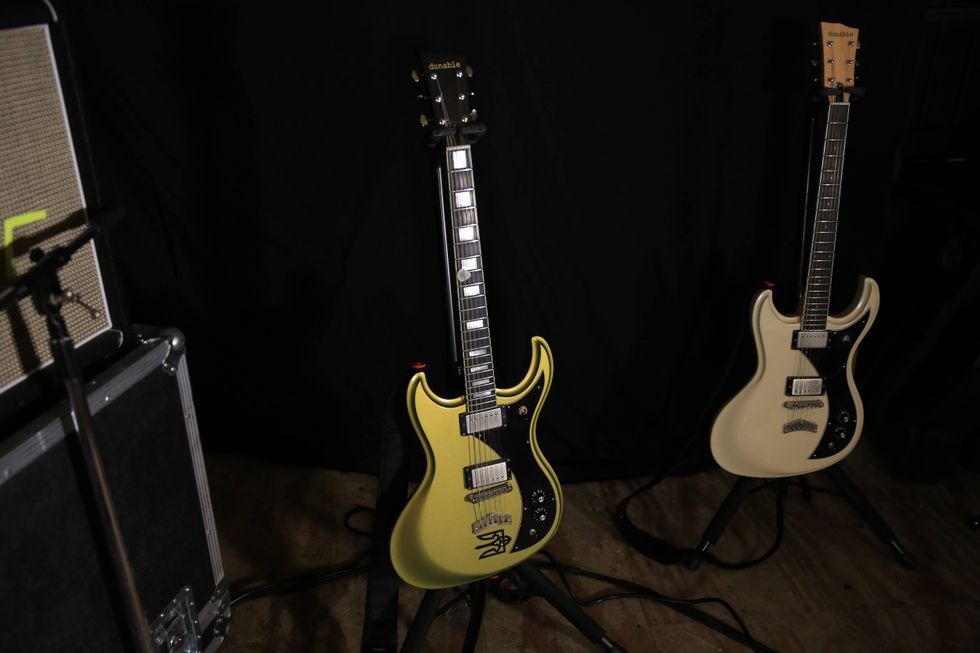
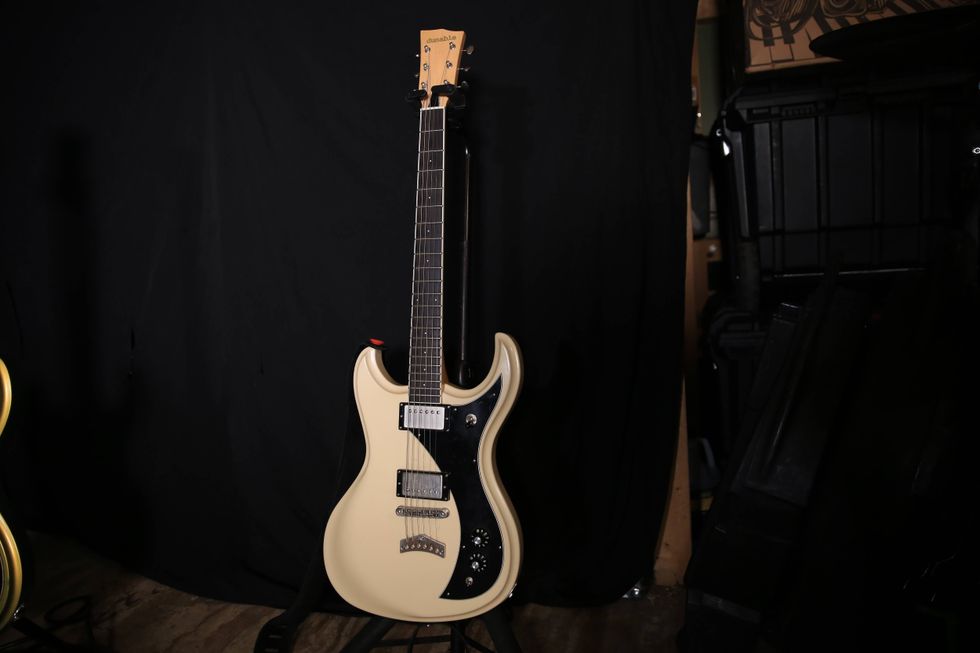
Never was this more evident than at the Wood Wire Volts show this January, where not only did the BilT and Frank Brothers crews travel and stay together, they were also often in deep chats with fellow luminaries Sacha Dunable (Dunable Guitars) and Carlos Lopez (Castedosa Guitars), discussing the trade, the work, and ideas for the future. If the vibe is any indicator, we can safely assume that while the BilT Brothers was, by all accounts, the first ever collab guitar of its kind, it will not be the last.
This entire experience is reminiscent of the DIY community ethos that I’ve clung to and has inspired me for most of my life. There is a cliché about the journey being greater than the destination, and while the destination in this case is one of the finest guitars I’ve ever laid my hands on, I’d have to say it holds true
Introducing the new Gibson Acoustic Special models, handcrafted in Bozeman, Montana, featuring solid wood construction, satin nitrocellulose lacquer finishes, and L.R. Baggs electronics.
Solid Wood Construction
Each of the three Acoustic Special models from Gibson are crafted using solid mahogany for the back and sides, solid Sitka spruce for the tops, utile for the necks, and rosewood for the fretboards for a sound that will only get better and better as they age.
Satin Nitrocellulose Lacquer Finishes
All three Gibson Acoustic Special models are finished in satin nitrocellulose lacquer for a finish that breathes, ages gracefully, and lets the natural beauty–both in sound and appearance–of the quality tonewoods come through.
L.R. Baggs Electronics
The Gibson Acoustic Special guitars come with L.R. Baggs Element Bronze under-saddle piezo pickups and active preamps pre-installed, making them stage and studio-ready from the moment you pick them up.
For more information, please visit gibson.com.