Want to reduce the power in an amp with four output tubes? Here’s how to do it right.
Hi Amp Man,
I’ve heard of people pulling one of the two output tubes to reduce the power in a dual-power tube amp. Does this affect the amp’s reliability? Also, if the technique is okay, can you use it on quad output amps like a Fender Twin? And which tubes would you pull? Thanks!
David Lemnah
Hi David,
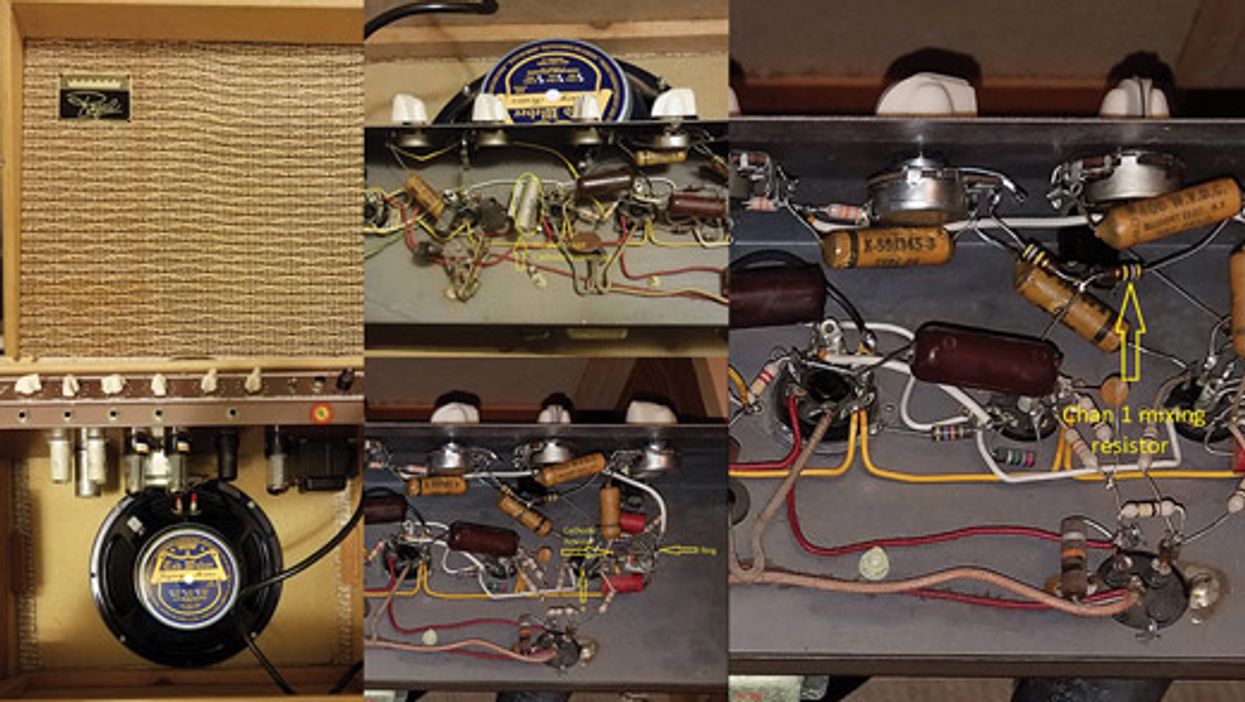
It seems there’s no shortage of players who want to drop the output power of their amplifier. Some may want to drive their amp’s output stage hard to achieve output-tube distortion, while others may simply find their amp has too much power to even use as a clean platform. Sometimes an amp just sounds better, even when playing it clean, if the output tubes are working a bit harder. This will cause the current flow to increase past the idle current, especially in standard-biased class A/B amps. In my opinion, this makes for a better sounding output tube. Whatever your reason, there is a right way and a wrong way to remove output tubes.
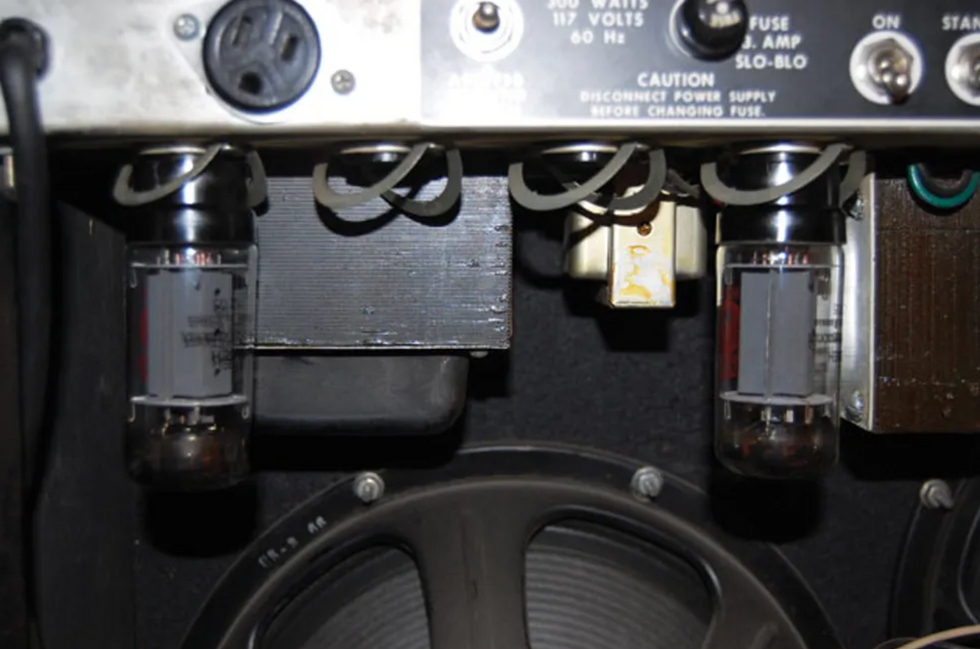
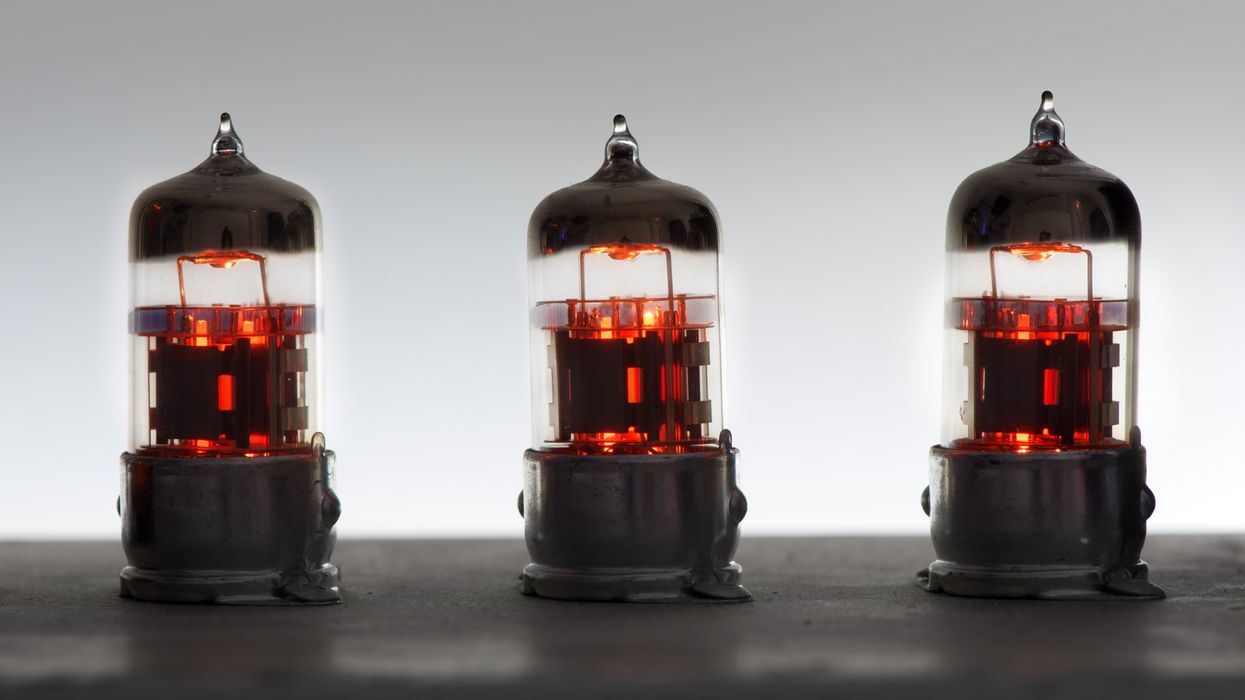
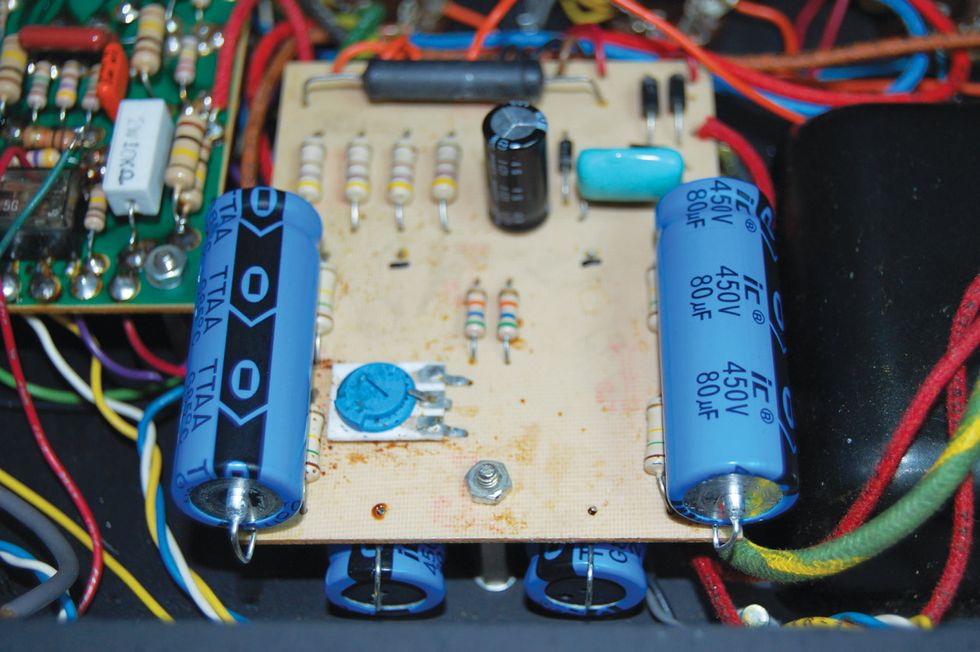
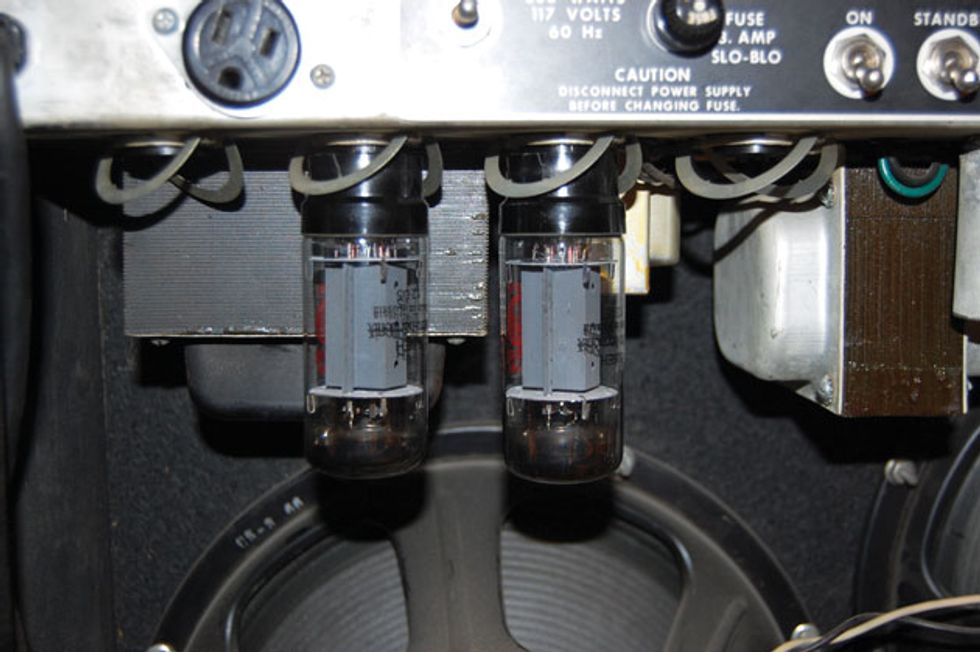
Photo 2
But first, in a standard amplifier with only two output tubes, it’s never okay to remove one output tube. While this would certainly reduce the output power of the amp, two things will happen: It will unbalance the primary side load the tubes place on the transformer, and it will leave one side of the primary completely unloaded. The latter could create excessively high voltage in the winding, and thus cause arcing and transformer damage. Bottom line: Do not remove one output tube in a two-output tube amp. There may be exceptions, such as a single-ended output amp with multiple output tubes in parallel, but I’m sure these are few and far between.
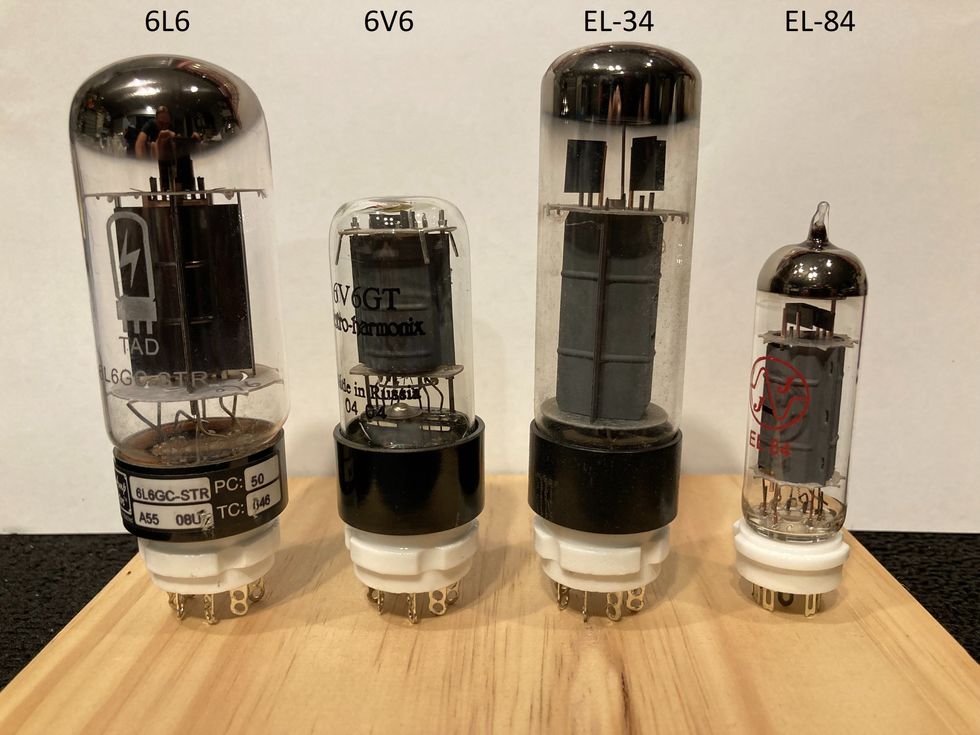
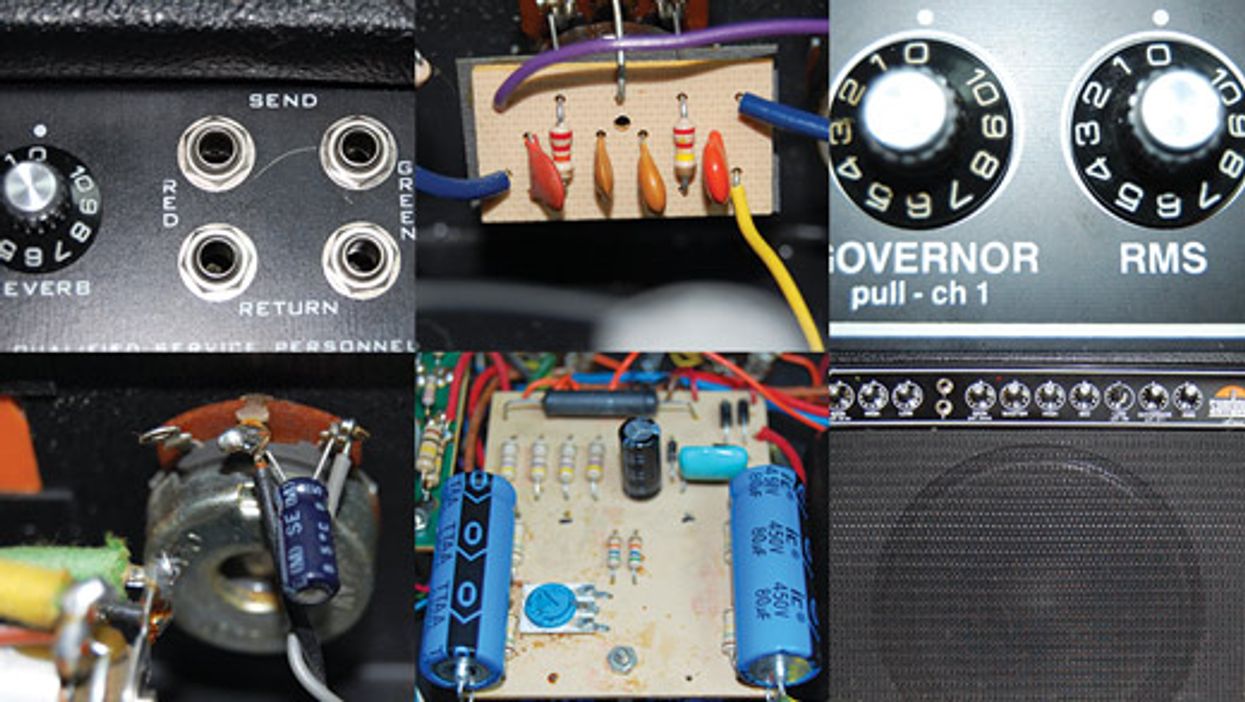
Now, in an amp with four output tubes it is possible to remove two of them, but you need to know which two to remove. Typically amps with a quartet of output tubes have what’s known as a push-pull output stage. (This also applies to amps with dual output tubes.) This basically means that each half of the output stage amplifies one half of the audio signal.
Sometimes an amp just sounds better, even when playing it clean, if the output tubes are working a bit harder.
If two of the output tubes are removed from the same side of the output stage, half of the signal will not be amplified and the sound will be extremely distorted. This will also cause the same issues as removing one tube in a dual-tube amp, so let’s make sure the correct output tubes are removed!
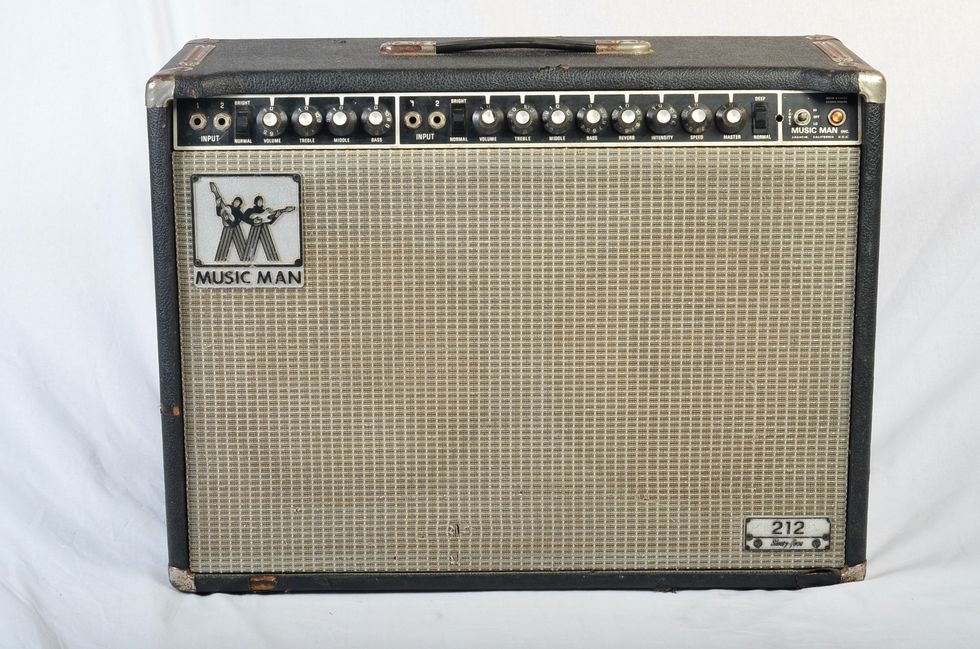
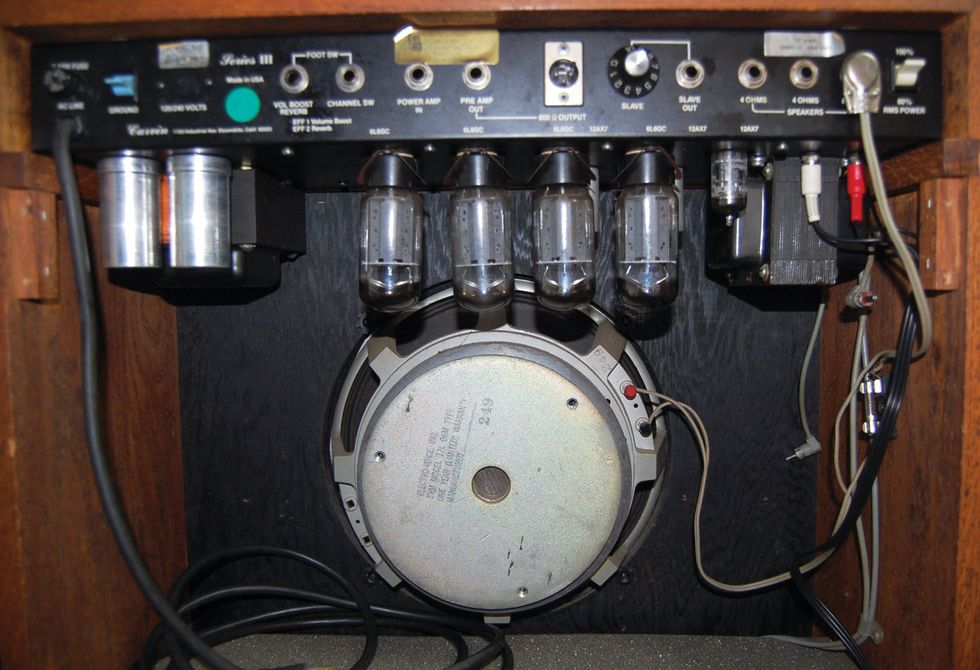
You have a few options: remove the two outside tubes (Photo 1), remove the two inside tubes (Photo 2), remove the first and third (Photo 3), or remove the second and fourth (Photo 4). I prefer any of the last three methods, because each provides a bit more cooling area between the tubes.
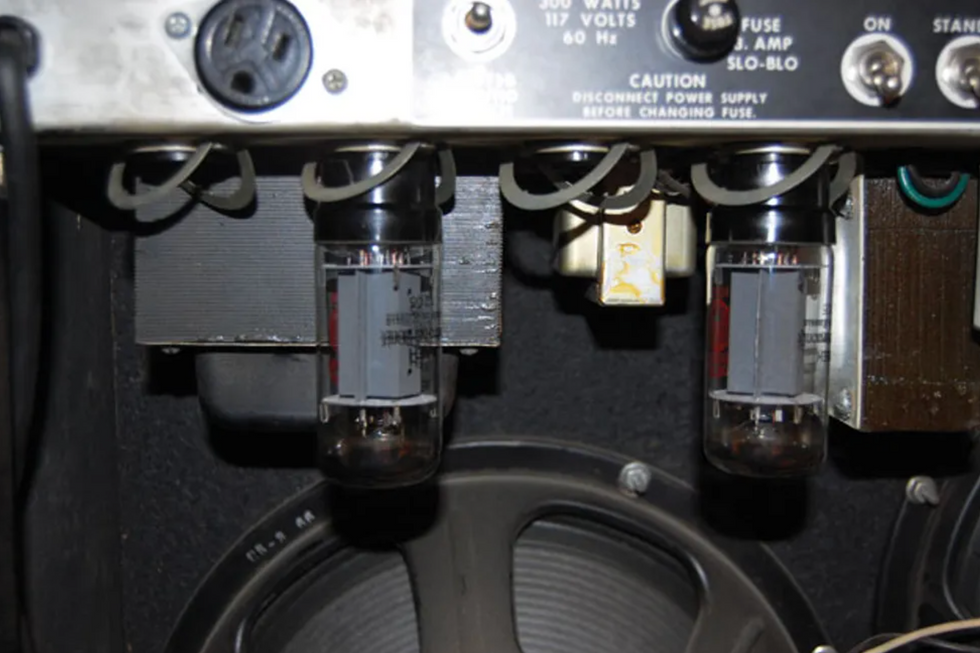
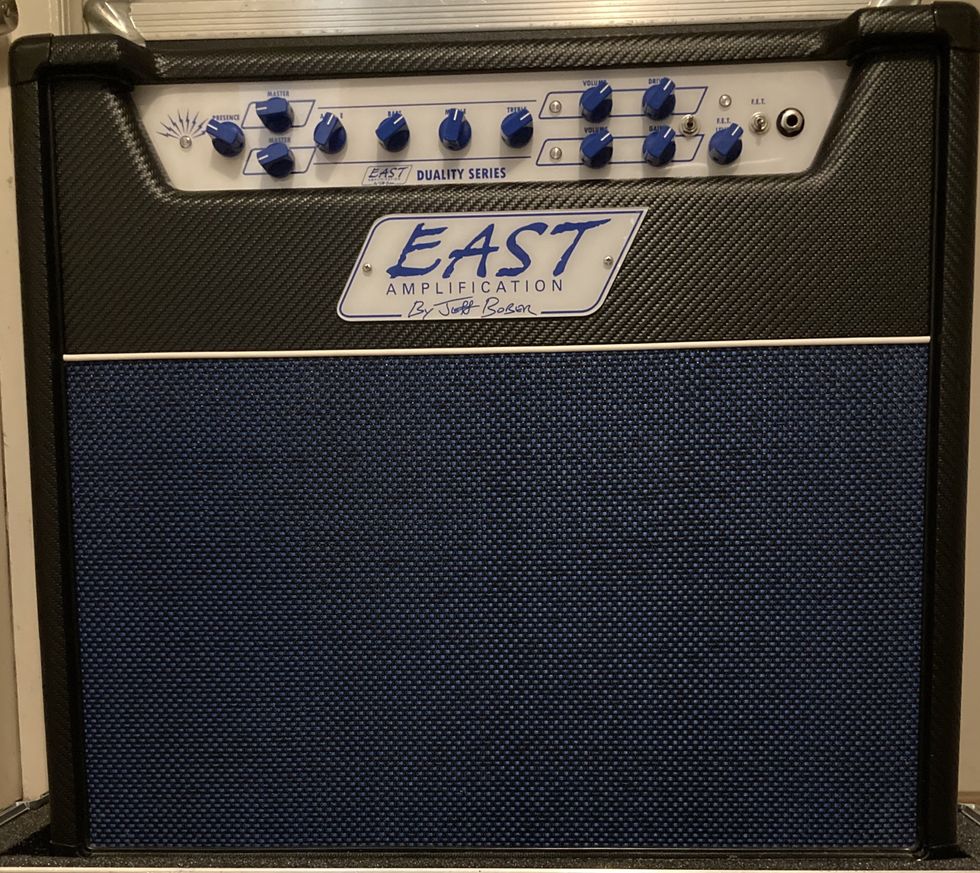
Photo 3
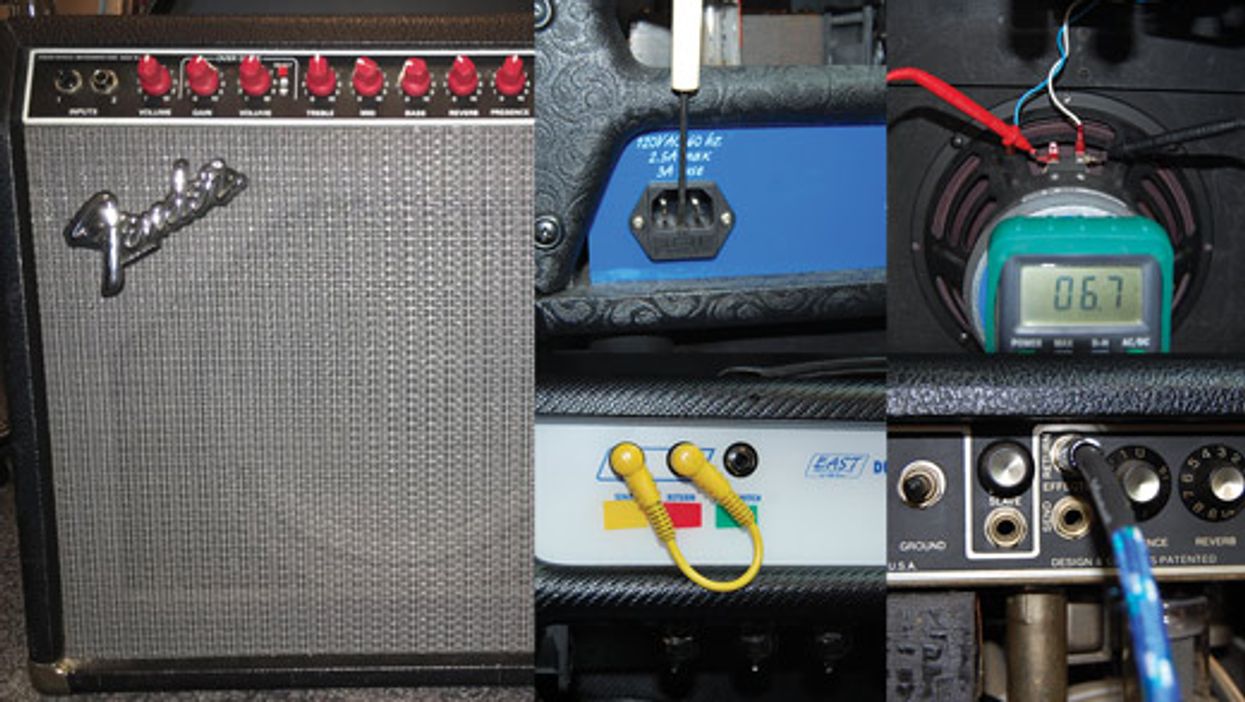
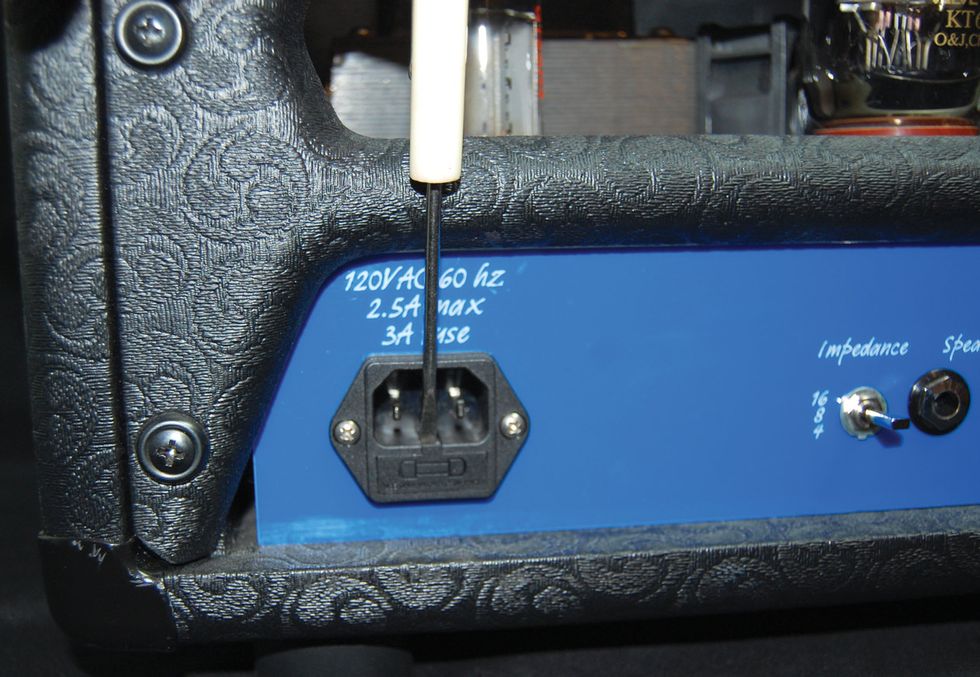
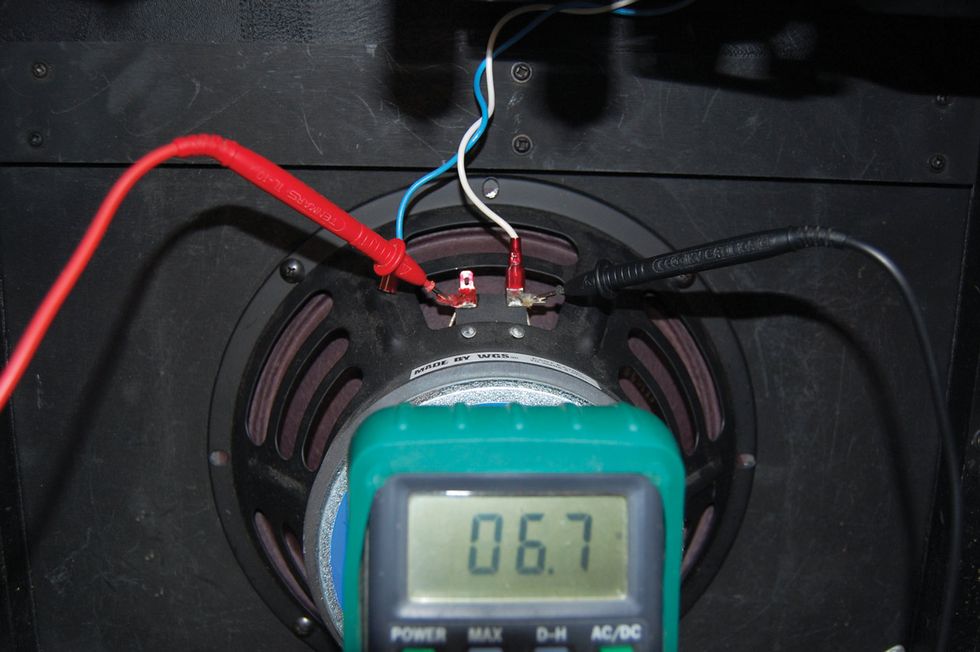
After removing the two output tubes, there’s another step that is theoretically necessary, and you should take it if possible. This is to change the output impedance selection to reduce the speaker load by half. For example, if you are running your amp into a 16-ohm load, reduce the impedance selector to 8-ohm. For an 8-ohm load, reduce the impedance selector to 4.
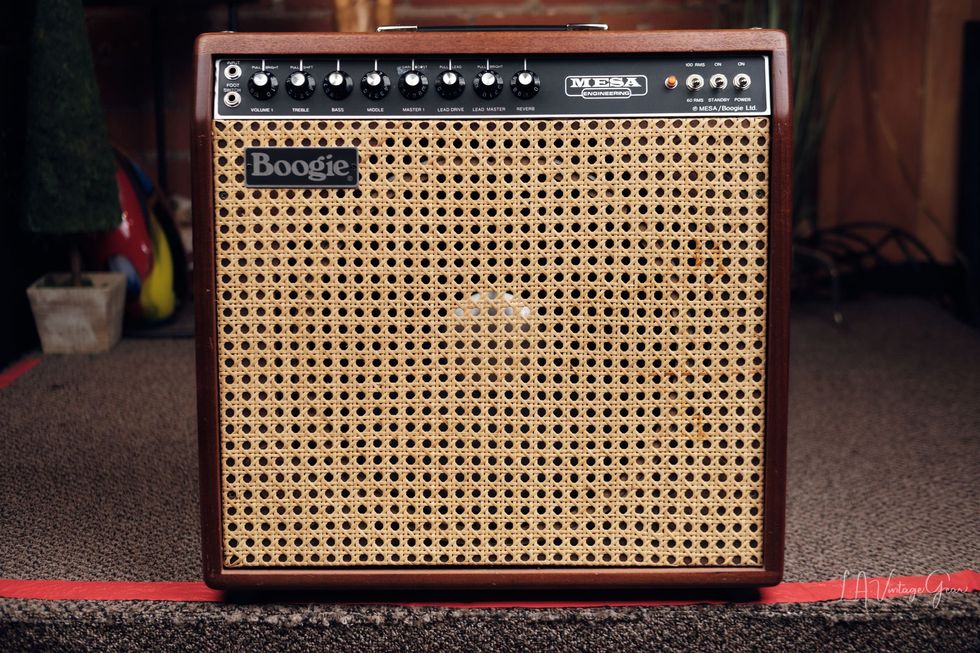
This is more important in Marshall-style amps, as their output transformer design seems to be, or at least is perceived to be, a bit more finicky and vulnerable. Impedance reduction is not an option in amps without impedance selectors, such as early Fender amps, but they seem to be pretty stable and not significantly impacted by this mismatch. In fact, certain amps—such as the Mesa/Boogie Mark Series—feature a “half power” switch that electrically disconnects two output tubes from the output stage with no impedance adjustment and no ill effects.
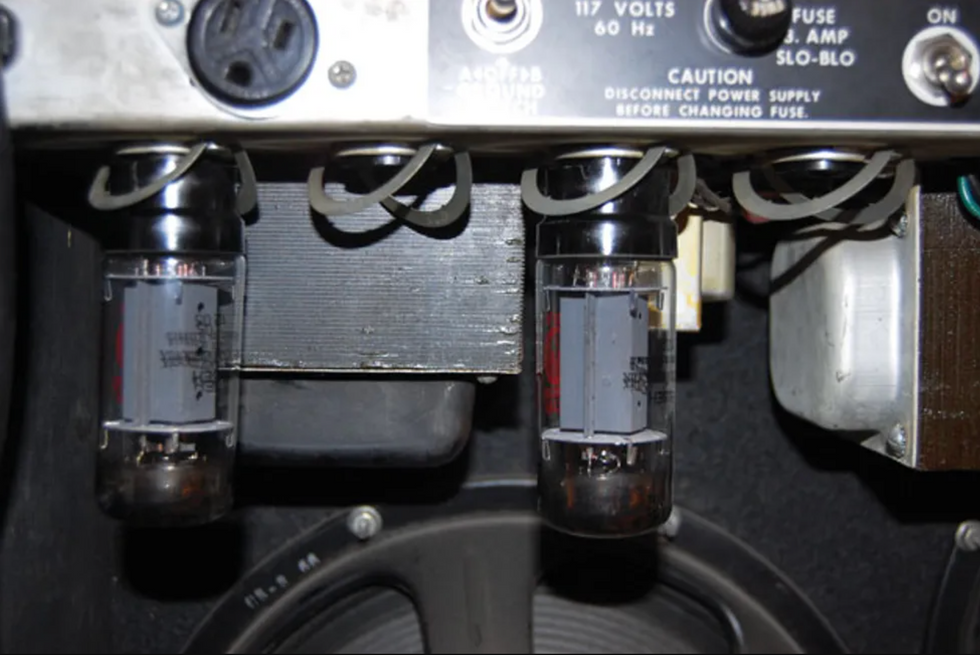
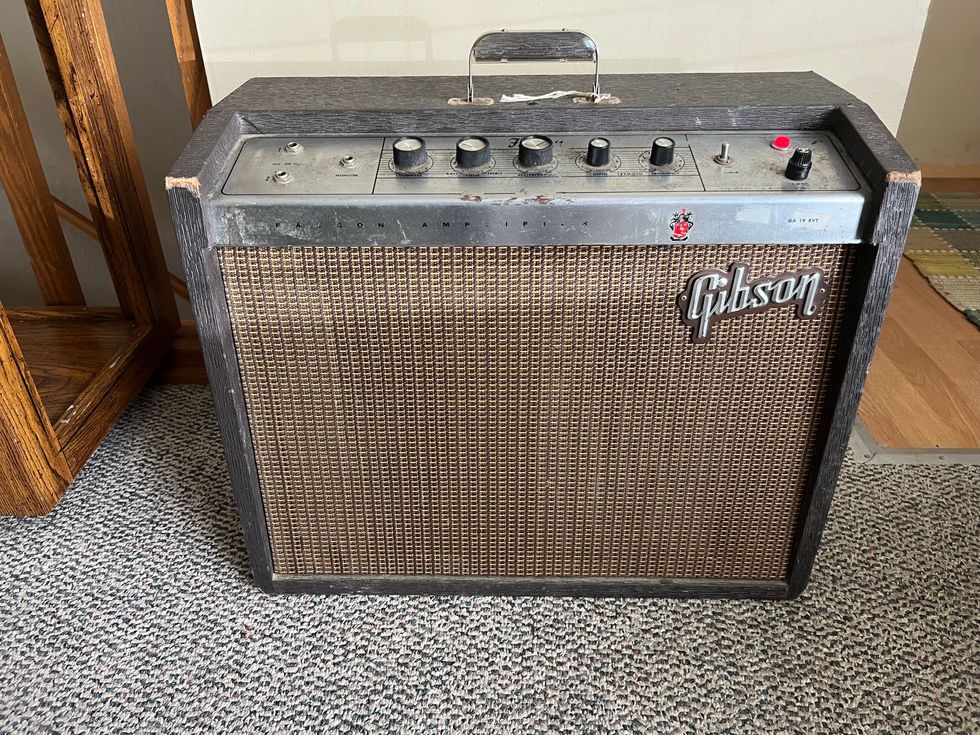
Photo 4
This tube-removal technique works best in amps that are fixed biased, as opposed to cathode biased. Also, some amps have their output tubes physically arranged in asymmetrical patterns, so consult with the amp manufacturer if possible before removing any tubes. As far as the amp’s reliability, other than the aspects we already addressed, if you occasionally use the amp with all tubes and occasionally with two, consider alternating the tubes you pull so they all wear evenly.
One more point: There are other ways to reduce the volume level of an amp. One is by simply inserting an attenuation device between the amplifier and speaker. THD, Weber, Soldano, Tube Amp Doctor, and other companies make such devices and they function quite well. Another option is to have your tech install a “pentode/triode” switch. This changes the wiring of the output tubes, converting them to a “faux” triode operation. This reduces the amp’s output by approximately 40 percent, which is on par with removing two output tubes.
WARNING: All tube amplifiers contain lethal voltages. The most dangerous voltages are stored in electrolytic capacitors, even after the amp has been unplugged from the wall. Before you touch anything inside the amp chassis, it’s imperative that these capacitors are discharged. If you are unsure of this procedure, consult your local amp tech.
[Updated 12/30/21]
- Ask Amp Man: Taming a Hiwatt DR-201 - Premier Guitar ›
- Tube-Amp Basics For Beginners - Premier Guitar ›
- DIY: Amp Safety 101 - Premier Guitar ›
- Western Electric Considers Expanding Into Guitar Tubes ›
- Two-Rock Vintage Deluxe Review - Premier Guitar ›
- Marshall's Studio JTM ST20C—A Fresh Take on a Blast From the Past ›
- Pick The Perfect Extension Cabinet For Your Fender Amp ›
- Carr Bel-Ray Guitar Amp Review ›
- Sunn Amps Return for Guitar and Bass - Premier Guitar ›
A well-organized sample library is crucial for musicians, producers, and sound designers. It enables smoother workflows, saves time, and nurtures creativity by providing easy access to the perfect sounds.
Greetings, and welcome! Last month, I began the first of a multi-part Dojo series centered around field recording and making your own sound libraries by focusing on the recording process. This time, I’m going to show you ways to organize and create a library from the recordings you’ve made. We discover things by noticing patterns in nature, and we create things by imposing our own patterns back into nature as well. This is exactly what you’re doing by taking the uncontrolled, purely observant recordings you’ve made in the natural world and prepping them as raw material for new patterned, controlled forms of musical expression. Tighten up your belts, the Dojo is now open.
Easy Access Needs
Before you start diving in and heavily editing your recordings, identify what you have and determine how to categorize it for easy retrieval. A well-organized sample library is crucial for musicians, producers, and sound designers. It enables smoother workflows, saves time, and nurtures creativity by providing easy access to the perfect sounds. Whether you are starting from scratch or adding to an existing collection, a systematic approach can make a world of difference.
Take stock of your files, identify patterns, themes, and timbres, and then decide on potential categories for folders that make sense for your workflow. Typically, I will make dozens and dozens of raw recordings (empty stairwells, gently tapping two drinking glasses together, placing a contact mic on industrial equipment, etc.) and I will prearrange them into sub categories before I even start to edit. My top-level folders are: percussive and melodic. I may divide further depending on the source material.
For instance, recordings that could become drum hits can be separated into folders for kicks, snares, hi-hats, and percussion. Melodic information that might be used for one-shots or loops can be sorted by potential instrument type or key. This will save you hours of time later. For those who work with a specific genre, it can also be useful to group recordings by their possible stylistic context, like industrial, cinematic, or soundscapes.
Working with Raw Material
What are the best ways to start working with the raw recordings? First, make sure you have some way to edit them. Open your DAW and create a new session. Be sure to include the date and “raw recordings” in your session title and save the session. Next, import the file(s) into your DAW as a new audio track, or hardware sampler (for old schoolers). Then start listening for anything that ignites your imagination. Keep it short and pay attention to what you’re hearing. Ask yourself, “What would this be cool for?” Here’s a personal tip: Don’t delete everything that is not of immediate interest, just mute the sections that you’re not identifying with right now—they might become amazing once you start to process them with delays, reverb, and pitch shifting. Once you’ve got loads of appealing individual snippets and you’ve trimmed the start and ending for each one, you’re going to bounce or export each individual element to a specified folder on your hard drive. Now it’s time to think about file naming conventions.
“A well-organized sample library is crucial for musicians, producers, and sound designers.”
Clear and consistent file names are crucial. They ensure you can search for samples directly through your operating system or DAW without relying solely on folder hierarchies. Include lots of details like sample type, tempo, key, or sound source in the file name because it makes it easier to locate quickly in the future. For example, instead of naming a file “loop001.wav,” a more descriptive name like “Broken_Guitar_Arp_Raw.wav” provides instant context. I like using “Raw” at the end of my file name so I know it is in its original state. If you want to add processing like distortion, amp sims, modulation, and time-based effects, go ahead! Export each iteration with a new file name, e.g., “Broken_Guitar_Arp_TapeDelay.wav.”
Building a sample library isn’t just about organization—it’s also about curation. Remember that the quality of your library is waymore important than its size. Focus on making high-quality samples. Take the time to audition each of your recordings to weed out those of inferior sound quality. This decluttering process helps streamline your workflow and ensures that every file in your collection adds value.
Next month, I’ll guide you through ways to import and use your samples in your recording sessions. Namaste.
This versatile ramping phaser is distinguished by a fat voice, vibrato section, and practical preamp.
Uncommonly thick phaser voice. Useful range of ramping effects. The practical preamp section can be used independently. Nice vibrato mode.
Visually cluttered design. Some ramping effects can be difficult to dial in with precision.
$249
Beetronics FX
beetronicsfx.com
The notion behind a ramping phaser predates the phaser pedal by many moons—namely in the form of thetwo-speed Leslie rotating speaker. A Leslie isn’t a phaser in the strictest sense, though the physics behind what the listener perceives are not dissimilar, and as any phaser devotee can tell you, there are many audible similarities between the two. At many phase rates and intensities, a phaser stands in convincingly for a Leslie, and the original king of phasers, theUniVibe was conceived as a portable alternative to rotary speakers.
Fundamentally, the analog 6-stageBeetronics Larva Morphing Phaser (which, henceforth, we shall call the LMP) effectively mimics the acceleration and deceleration of a two-speed Leslie speaker. That isn’t a new concept in the pedal universe. But Beetronics’ take offers many cool variations on that ramping effect. It also features a wet-signal-only vibrato setting and a nice sounding preamp. And at its core is a rich, deep phase voice that is a distinct alternative to many standard-bearing phasers.
Thick As Honey
There is an inherent richness in the low-to-mid range in the LMP’s phase voice—even at the lowest resonance settings. Beetronics lofty sonic goal and inspiration were the famously warm and dusky Moogerfooger MF-103 12 -stage Phaser, and it certainly It sounds thicker than any of my vintage or vintage-clone phasers, including both 4- and 6-stage models. The heft of this phaser voice will be enough to sell the LMP to some prospective customers. Surely the preamp, which lends its own fatness, contributes something to the low-mid weight. On the other hand, I used the LMP’s preamp alone in front of each of the vintage phasers I tested and each still sounded comparatively thin in that part of the EQ spectrum, so there is something in the modulation section of the LMP circuit that adds its own thump and heft. When you use the phaser in clean and low-gain overdrive situations, that low-mid bump can sound pretty nice, especially if a bright amp or guitar are in the chain or you use reverb or another effect that tends to emphasize treble peaks. Things can get a little more complicated when you stack effects, use big, mid-scooped fuzzes, or situate your phaser at the front of an effects chain. A potential buyer would be wise to investigate how that tone profile fits with the most permanent parts of their rig, and some may dig a more traditional sound that makes room for more detail, but in general I loved the sound, particularly in minimalist effect arrays.
Fluid States
The ramping or “morphing” effect that is the marquee feature in the LMP is engaging, practical, and opens up many possibilities, particularly in terms of segues and phrase punctuation. Obviously, the independent sets of rate and depth controls for each phase circuit enable morphs between very different phase textures. But it’s the ramp-shape switch that makes the LMP much more than just two phasers in one. In the leftmost position, phaser 1 will ramp up or down to the phaser 2 position at the rate determined by the ramp speed control and stay fixed there until you hit the left footswitch again (clip 1). If you also set the ramp speed to zero, this makes the switches between the two phasers instantaneous.
In the middle position, the left footswitch assumes non-latching functionality. It will ramp to the phaser 2 speed when you hold the switch and return to phaser 1 speed when you release. And when you set the ramp rate to zero, you can create momentary and instantaneous switches between speeds as you hold or release the switch (clip 2). In the rightmost position, phaser 1 ramps to phaser 2 as you hold the switch and then moves back to the phaser 1 rate immediately after it is released. I enjoyed using radically different phaser rates for these functions most, but more subdued and mellow shifts are no less useful for lending musical interest in the right context.
Hits From the Hive
Beetronics famously has fun with their pedal designs. Enclosure graphics are typically bold and eye-engaging, and while that makes the company’s wares feel like treasures among meat-and-potatoes stomps, it can make the pedals needlessly busy to some. A number of players will no doubt feel the same about the LMP, and the cluttered enclosure graphics and blinking lights can have the effect of making the pedal seem less approachable than it is. In fact, the LMP is pretty intuitive once you learn which control is which. The phaser knobs are mirror images of each other. The preamp controls (preamp level and master output) are comparatively petite but grouped conveniently in the center. The chrome-ringed (and very range-y) ramping speed and resonance controls are visually distinct from the rest of the knobs, while the two 3-way toggles for ramping shape and the preamp-only, preamp + phaser, and vibrato + phaser modes are easy to sort out. It’s no model of minimalist, easy-to-read graphics, and I wouldn’t want to sort out this pedal for the first time on a dark stage. In general, though, functionality does not suffer much for the bold appearance.
The Verdict
The U.S.-made LMP is a solid, high-quality piece of work that makes its $249 price tag much more digestible. And the degree to which you perceive the cost as excessive will certainly depend on the degree to which you consider phaser, rotary, and vibrato sounds foundational within your musical creations. Accordingly, you should consider the value score here on a sliding scale. But with a fine-sounding and functional preamp section and ramping capability broad enough to span simple Leslie emulation, and radical shifts that can themselves serve as dramatic musical hooks and punctuation, the Larva Morphing Phaser could, for the right player, … um …“bee” more than the sum its parts
The voice of the guitar can make the unfamiliar familiar, expand the mind, and fill the heart with inspiration. Don’t be afraid to reach for sounds that elevate. A host of great players, and listening experiences, are available to inspire you.
In late fall, I had the good fortune of hearing David Gilmour and Adrian Belew live, within the same week. Although it’s been nearly two months now, I’m still buzzing. Why? Because I’m hooked on tone, and Gilmour and Belew craft some of the finest, most exciting guitar tones I’ve ever heard.
They’re wildly different players. Gilmour, essentially, takes blues-based guitar “outside”; Belew takes “outside” playing inside pop- and rock-song structures. Both are brilliant at mating the familiar and unfamiliar, which also makes the unfamiliar more acceptable to mainstream ears—thereby expanding what might be considered the “acceptable” vocabulary of guitar.
Belew was performing as part of the BEAT Tour, conjuring up the music of the highly influential King Crimson albums of the ’80s, and was playing with another powerful tone creator, Steve Vai, who had the unenviable role of tackling the parts of Crimson founder Robert Fripp, who is a truly inimitable guitarist. But Vai did a wonderful job, and his tones were, of course, superb.
To me, great tone is alive, breathing, and so huge and powerful it becomes an inspiring language. Its scope can barely be contained by a venue or an analog or digital medium. At Madison Square Garden, as Gilmour sustained some of his most majestic tones—those where his guitar sound is clean, growling, foreign, and comforting all at once—it felt as if what was emanating from his instrument and amps was permeating every centimeter of the building, like an incredibly powerful and gargantuan, but gentle, beast.
“The guitar becomes a kind of tuning fork that resonates with the sound of being alive.”
It certainly filled me in a way that was akin to a spiritual experience. I felt elevated, joyful, relieved of burdens—then, and now, as I recall the effect of those sounds. That is the magic of great tone: It transports us, soothes us, and maybe even enlightens us to new possibilities. And that effect doesn’t just happen live. Listen to Sonny Sharrock’s recording of “Promises Kept,” or Anthony Pirog soloing on the Messthetics’ Anthropocosmic Nest, or Jimi Hendrix’s “Freedom.” (Or, for that matter, any of the Hendrix studio recordings remixed and remastered under the sensibilities of John McDermott.) Then, there’s Jeff Beck’s Blow by Blow, and so many other recordings where the guitar becomes a kind of tuning fork that resonates with the sound of being alive. The psychoacoustic effects of great tones are undeniable and strong, and if we really love music, and remain open to all of its possibilities, we can feel them as tangibly as we feel the earth or the rays of the sun.
Sure, that might all sound very new age, but great tones are built from wood and wires and science and all the stuff that goes into a guitar. And into a signal chain. As you’ve noticed, this is our annual “Pro Pedalboards” issue, and I urge you to consider—or better yet, listen to—all the sounds the 21 guitarists in our keystone story create as you examine the pedals they use to help make them. Pathways to your own new sounds may present themselves, or at least a better understanding of how a carefully curated pedalboard can help create great tones, make the unfamiliar familiar, and maybe even be mind-expanding.
After all these years, some players still complain that pedals have no role other than to ruin a guitar’s natural tone. They are wrong. The tones of guitarists like Gilmour, Belew, Vai, Hendrix, Pirog, and many more prove that. The real truth about great tones, and pedals and other gear used with forethought and virtuosity, is that they are not really about guitar at all. They are about accessing and freeing imagination, about crafting sounds not previously or rarely heard in service of making the world a bigger, better, more joyful place. As Timothy Leary never said, when it comes to pedalboards and other tools of musical creativity, it’s time to turn on, tune up, and stretch out!
Follow along as we build a one-of-a-kind Strat featuring top-notch components, modern upgrades, and classic vibes. Plus, see how a vintage neck stacks up against a modern one in our tone test. Watch the demo and enter for your chance to win this custom guitar!