The condition of your frets will determine how well your guitar plays.
The condition of your frets will determine how well your guitar plays. Every time you press your strings against the frets, the friction between them subtly changes the shape of the frets, causing them to wear out. Over time, this metal-against-metal contact can lead to string rattle and intonation issues. The greatest fret damage is caused by capos—especially under the plain strings.
Fret wear is a normal by-product of playing your instrument. As a guitarist, it's important to know how to evaluate fret damage and understand what options you have to correct it. The big question is, can I refurbish my frets or is it time to replace them? Let's explore the subject starting with the fretwire itself.
What are frets made of?
Though fretwire is frequently called "nickel silver," it doesn't actually contain silver. Rather, it's typically composed of 18 percent nickel, 80 percent copper, and small amounts of such other materials as zinc, lead, and cadmium. Really good fret wire has more zinc and less copper. One of my favorite brands is Jescar, and their NS formula is 62 percent copper, 18 percent nickel, and 20 percent zinc. Because it's harder than traditional fretwire, it lasts longer.
Another option is stainless steel. Stainless steel is very difficult to work with, but it lasts dramatically longer than traditional fretwire. However, stainless steel frets come with a hefty price tag. Most luthiers will charge more than double to re-fret a guitar with stainless steel because it nearly destroys their tools and the job takes much longer to do. In the long run, it could be the perfect solution for your guitar since you may never have to replace the frets again!
How are frets sized?
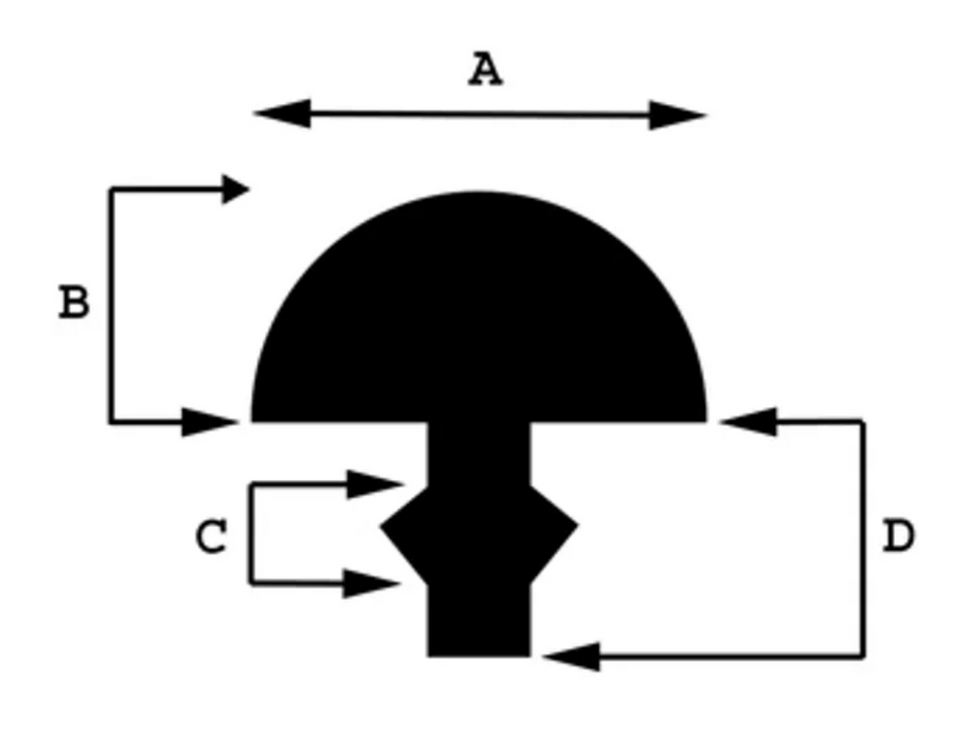
Fig. 1. Fretwire is measured by the crown's width (A) and height (B), as well as the size of the barb (C) and depth of the tang (D).
Fretwire comes in a variety of sizes and shapes. Fig. 1 illustrates the four elements that determine a particular style of fretwire. They are the width and height of the crown, the size of the barb, and the depth of the tang.
The crown is the exposed part of the fret. When you fret a note, you're pressing the string to the very top of the crown. Like a row of hooks, barbs secure the fret to the fretboard. Barb width determines the width of the fret slot and the tang determines the depth of the fret slot—i.e., how far the fretwire penetrates into the fretboard.
The size and shape of each of these four elements are specifically designed for different playing preferences and types of guitars. The crown width can vary from ultra narrow (.053") to super jumbo (.118"). The fret height can be anywhere from a short .032" to a tall .060". The width of the barbs and depth of the tang also vary from .019" to .040".
All these dimensions have a specific purpose and are important considerations when choosing fretwire. For example, wider frets can produce a stronger tone, but as they wear, the guitar's intonation "drifts" farther than with narrow frets. But narrow wire has its drawbacks, too: Narrow frets won't cause your intonation to drift as much, but they wear down faster than wide frets.
Tall frets will last longer before they need to be replaced. However, I don't recommend them for someone who plays with a strong grip. If you grip the neck tightly while playing or use a capo, the strings will pull sharp as you play. On the other hand, shorter frets wear out faster (especially if you use a capo) and need to be replaced more often.
The size of the barbs and tang have a profound effect on a guitar neck, and if you decide to install new frets, it's very important to use the correct size. If the barbs and tang are too narrow or shallow for the slots, the frets won't seat securely in the fretboard. This causes them to lift out when the weather changes and yields uneven frets and a lot of buzzy or dead notes. When the barbs and tang are too wide, they can crack and chip the fretboard, or even cause the neck to back-bow. In the case of a back-bow, you have to re-fret the guitar.
To summarize: A neck must have the correctly sized frets to match the fretboard and player. Otherwise, you'll end up with a very expensive mess!
Can the dents in my frets be repaired?
Dents always create problems with frets. But does discovering dents mean you need to replace your frets or is re-crowning an option?
It can go either way, and the answer depends on the depth of the dents. When the dents are deep, your tech would have to remove too much material from all the frets to correctly repair the problem ones. When the height of the fret is below .038" and it has deep pits and dents, chances are a re-fret is in order.
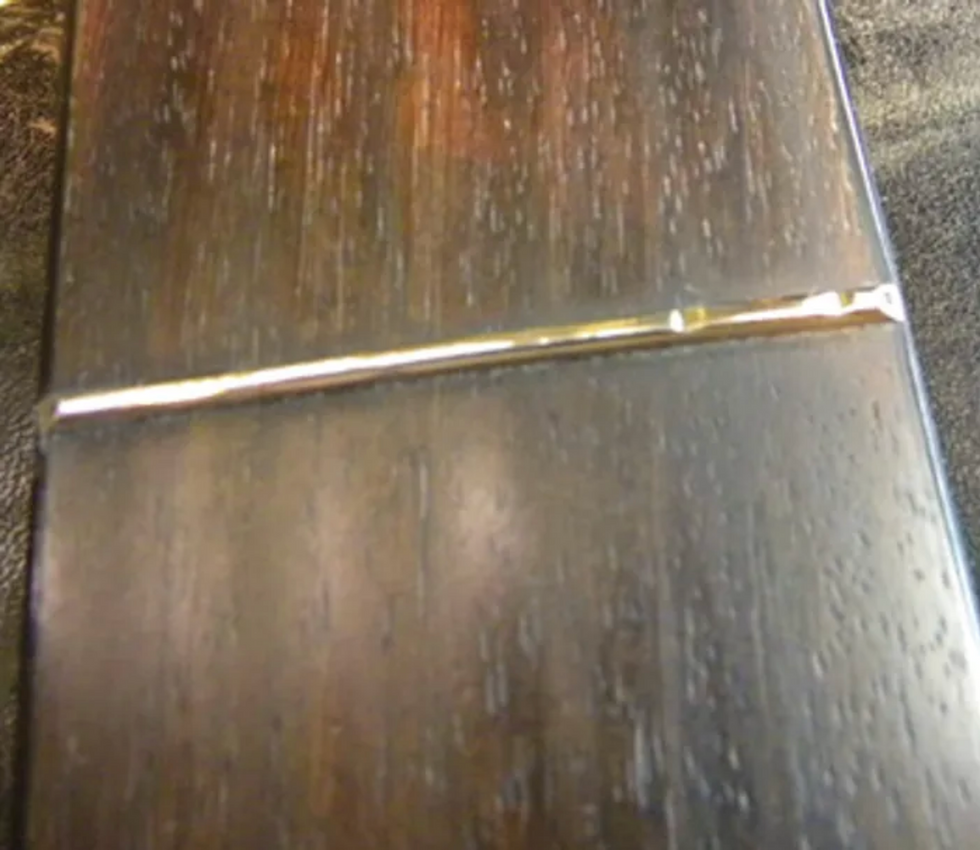
Fig. 2. A dented and pitted fret causes intonation problems, creates string rattle, and impedes smooth string bends.
Look at Fig. 2 and notice the deep pits in these frets. These dents are too deep to repair, so the frets must be replaced.
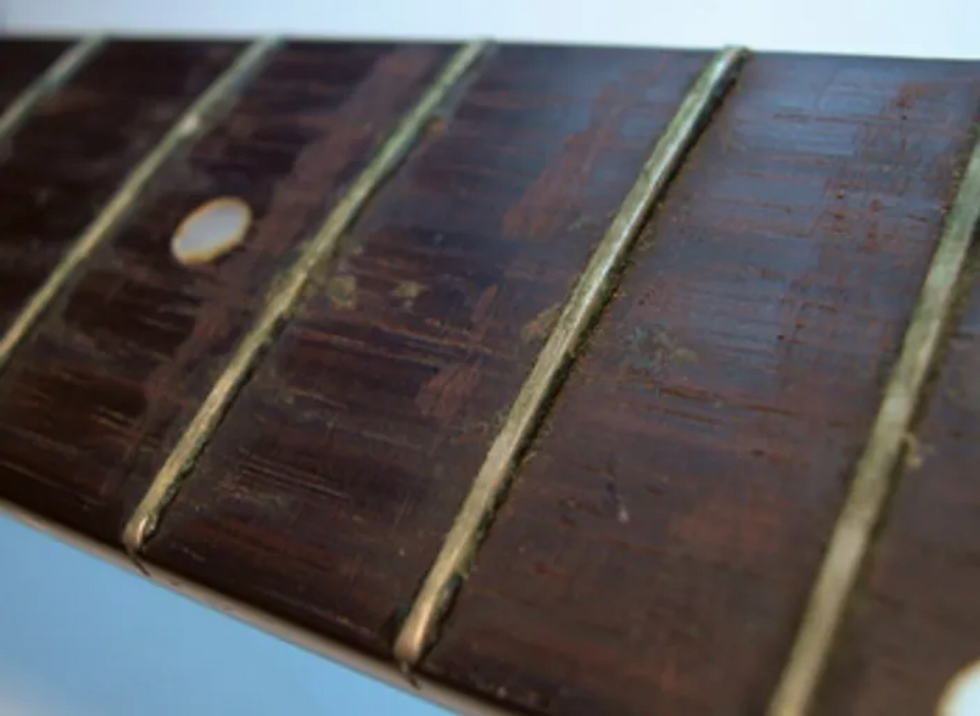
Fig. 3. A flat fret also creates rattle and intonation problems.
Dents and pits are not the only reason to replace frets. Flat spots in the frets are another culprit. For a fret to function properly, it must have a domed crown. If the crown is flat, as in Fig. 3, it will cause string rattle and intonation issues. Much like dents and pits, if the fret has a flat crown and is too short, it will need to be replaced.
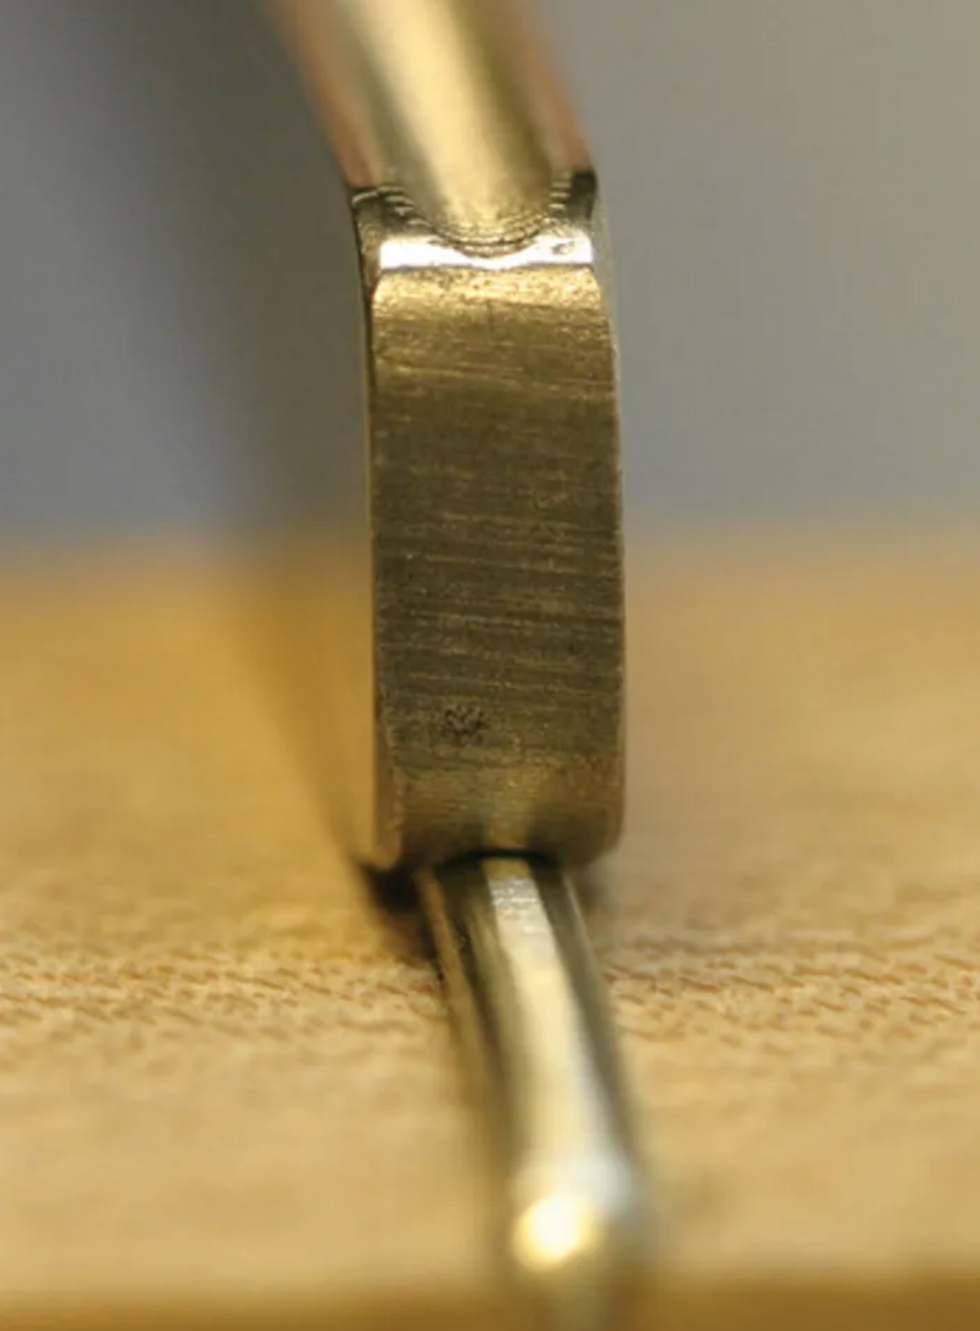
Fig. 4. Re-crowning a fret with a specialized tool.
If the frets are tall enough to repair, they are first leveled and then re-crowned. To level a fret, your tech grinds and sands the frets to an equal height. This leaves the frets with a flat crown. The next step is to re-crown the fret by removing material from its sides until the crown offers a narrow point of contact for the string Fig. 4. This is a very painstaking process and it takes years of practice to develop the proper skills—definitely a job for a pro.
What's involved with a re-fret?
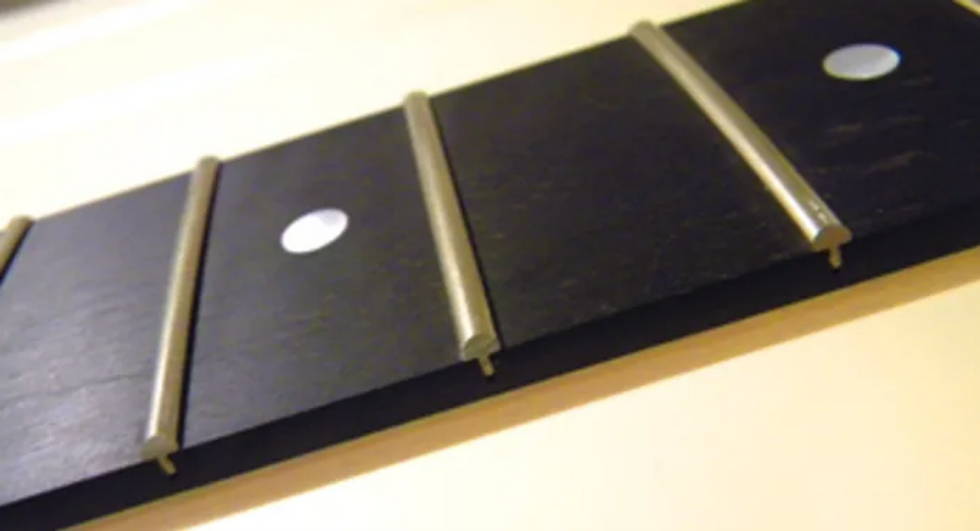
Fig. 5. A complete re-fret gives a guitar a new lease on life.
In a re-fret, all the frets in the neck are replaced. The process is very precise and requires expensive tools and great skill. The basic steps include disassembling the guitar, removing all the old frets, planing the fretboard, radiusing the fretboard, cleaning out the fret slots, installing the new frets and then leveling and re-crowning them, cleaning the fretboard and polishing the frets, and finally reassembling the guitar Fig. 5.
And this is just a basic overview of the process. There are many, many more steps—enough to fill an entire book. Re-fretting is expensive and time consuming, but generally worth the cost.
Over the years, I've had clients who choose to replace an old bolt-on neck with a new one, rather than opt for a re-fret. This can be a great choice, but beware—almost every new neck needs a fret level and re-crowning. Most guitar parts factories don't take the time that a luthier would to ensure that the frets are level. So keep in mind that by the time you pay for a new neck and the additional fretwork, you could have re-fretted the original neck and had some leftover change!
What about a partial re-fret?
Sometimes simply replacing several frets, rather than all of them, gets the job done. This is usually preferable for a neck that only has wear on the first six or seven frets and has a level fretboard. If the fretboard is in good condition and the rest of the frets are tall enough, a partial re-fret is a great way to save money. Not all guitars can qualify for this operation. If the fretboard has a twist or wave in it, a total re-fret is required.
Capo is a four-letter word.
The capo is a fret's worst enemy. Of course, I love capos because I love to do fretwork! If no one used capos, my income from fretwork would drop at least 60 percent. The more you use a capo, the more damage it does to the frets. As the capo clamps down on the strings, it smashes the strings into the frets and much harder than if you were to play a chord. As a result, frets begin to flatten and develop pits and dents. This is great news for a guitar tech, but not so good for the player.
To avoid unnecessary "capo-inflicted" fret damage, I suggest you use a capo with a tension adjustment. Many capos simply press the strings down to the fretboard without offering a way to adjust the tension. If you use a capo with a tension adjustment, you can clamp the device with just enough force to prevent string rattle, yet reduce additional fret wear.
Another great benefit to using a capo with adjustable clamping tension: It will help avoid tuning issues versus a nonadjustable capo. There are several great capos on the market that will diminish fret damage and tuning problems, including Planet Waves Dual Action capo and all the various Shubb models. If your capo doesn't offer a tension adjustment, buy one that does. This will save you a ton of money in fretwork.
[Updated 8/10/21]
- Understanding Frets and Fret Wear - Premier Guitar ›
- Jol Dantzig's Esoterica Electrica: Perfect Intonation and Other Myths ... ›
- Mod Garage: Fighting Fret Wear - Premier Guitar ›
- Guitar Shop 101: Squeezing More Life Out of Worn Frets - Premier ... ›
- The Recording Guitarist: Should You Change Your Electric's Strings Before Tracking? - Premier Guitar ›
- Dunlop Introduces the Pivot Capo - Premier Guitar ›
- Dunlop Pivot Capo Review - Premier Guitar ›
These pedals are designed with fast response times, versatile routing options, and durable construction.
ISP Technologies has introduced the latest generation of their pioneering noise reduction products: the Decimator X Pedal Series for guitarists and bassists.
Building upon the legacy of ISP’s earlier Decimator pedals, the new Decimator X models utilize cutting-edge patented circuitry to get rid of unwanted noise and 60-cycle hum, effectively eliminating even the most stubborn background noise.
The pedals offer lightning-fast response times and ultra-smooth decay with enhanced tracking technology. If you’re playing staccato, with or without pauses, or if you desire a nice long decay, this technology allows for a natural sound and feel. You can preserve the integrity of your tone, even during fast-paced passages and intricate playing.
Whether you’re running a complex pedalboard setup or keeping it simple, the Decimator X pedals offer versatile routing options to suit your needs. With flexible input and output configurations, you can easily integrate the pedals into any rig, ensuring maximum compatibility and convenience.
ISP offers two variations of the pedal depending on your routing needs. The standard Decimator Xsimply has an IN and OUT jack. You place this pedal in your rig after your gain or noise-prone pedals. The THRESHOLD control is set based on the noise coming into the IN jack.
The Decimator X G-String provides 4 jacks: GUITAR IN, GUITAR OUT, DECIMATOR IN, and DECIMATOROUT. This provides a direct connection from the GUITAR and the direct GUITAR signal is used to control the block of DECIMATOR noise reduction. This allows you to insert your noisy pedals between GUITAROUT and DECIMATOR IN, but the DECIMATOR noise reduction is controlled by the direct GUITAR signal at the GUITAR IN. This configuration offers an important advantage: you can switch from extreme high gain to crunch or clean and never need to re-adjust the threshold control on the pedal, because the direct guitar signal is used to control the noise reduction block.
Built like a tank, the X pedals are housed in a durable enclosure, designed to withstand the demands of the gigging musician and provide reliable performance night after night. Both pedals have a battery compartment for a 9-volt battery and provide a 5.5mm barrel connector for use with a standard external 9-volt DC power adaptor. The new Decimator X carries a $146.72 street price; the Decimator X G-string carries a $236.42 street price.
For further information visit isptechnologies.com.
Dave Friedman evolves the Marshall Super Lead template with a 50-watt thumper that adds tone-shaping flex on top of the Plex.
Bright switches add flexibility. Master volume sounds good at lower levels. Switchable built-in Variac.
No effects loop. Priced at upper end of plexi modern reproduction market
$2,799
Friedman Plex Head
friedmanamplification.com
The first entry in Friedman Amplification’s much-anticipated Vintage Collection is the Plex, a painstakingly crafted homage to Dave Friedman’s own 1968 JMP Super Lead plexi—the archetype and foundation on which the entireFriedman lineup is based.
Any working ’60s JMP Super Lead is an amazing amplifier, but the combination of Dave’s ears, experience, and quality time with his own Super Lead add up to a melding of twists and tradition that captures the richness, power, and dynamics of Marshall non-master-volume amps in a high-quality and, if you want, quieter package.
Stripped Down, Lowdown, Bright, and Brighter
True to lineage, the 50-watt Plex uses a pair of EL34 power tubes and a trio of 12AX7s pulling preamp and phase inverter duties. The familiar volume 1, volume 2, presence, bass, and mid knobs handle gain and EQ tasks. But the Plex deviates from tradition, too. An old Marshall Super Lead has four inputs—high and low sensitivity inputs for channel I and II. The Plex, however, uses a single pair of inputs that are hardwired in jumpered fashion—the same way you might jumper on the front panel of a 2-channel Marshall—effectively mixing the two preamp stages. A post-phase-inverter master volume helps keep the sound pressure level in check when you need to cool it without compromising feel and dynamics. And above each volume knob is a 3-way bright switch. The switches alter the frequency and gain response of the corresponding volume control, toggling between a darker bypassed setting, a mild treble boost enabled by a 100 pF bright capacitor, or a screaming third setting with a 4700 pF cap in the line. The power switch doubles as a high/low voltage selector, engaging an internal Variac that drops operational voltage from 120 volts to 90 volts, achieving the brown sound synonymous with ’80s hard-rock Super Lead applications.
The spartan back panel sports outputs for 4-, 8-, or 16-ohm loads and an IEC mains power input. The head weighs in at a reasonable 34 pounds with dimensions of 24" x 10" x 8.75"—just a hair smaller than a real JMP. The circuit is arrayed on a high-quality printed circuit board—a manufacturing method Friedman favors in many respects for quality control purposes.
But … Does It Van Halen?
Hell yes it does. Dime the Plex, flip it to low voltage, and you’re living in the Eddie zone. Recreating that high-octane, modded-Marshall aggression and kerrang with the most familiar Marshall-style knobs is easy and intuitive. But this amp is full of surprises, too, and many sonic possibilities hide behind the simple additional controls.
The lead channel, controlled by volume 1, is aggressive and edgy, capturing the cut and midrange growl most immediately associated with vintage plexis. Anything below 3 on the gain control is pretty clean. At around 4, hot pickups will induce breakup. And in the 5-to-6 range, it comes alive with rich saturation, enhanced harmonics, and sustain. Approaching 10, the Friedman blossoms into something furious and snarling. The 100 pF bright capacitor setting gently lifts the top end for a hint of jangle, while the 4700 pF cap boosts upper midrange and treble, adding even more chimey range and sharper bite.
The normal channel, controlled by volume 2, feels very much like the antithesis of the lead channel. It’s dark and brooding with lots of resonance in the bass. Keeping the gain below 5 still yields a woolly, forceful voice. Starting around 6 it slips into thick clipping, and as you move toward 10, the Friedman delivers progressively denser tonalities, more compression, and more sustain. The 100 pF bright cap mode adds a splash of air, while the 4700 pF setting significantly jacks the drive and boosts frequencies from 1200 Hz up. Each is a very different version of a cool color.
Sonic Structure
Much of the amp’s tone-shaping flexibility comes from using the volume knobs, not just for gain, but as tone controls to create a best match for a specific guitar. In a general sense, the normal channel adds fullness and body to single-coils, while the lead channel brings definition, bite, and clarity to humbuckers. With a Stratocaster, setting both channel volumes in the 3-to-6 range achieves classic Marshall clean that hints at Hendrix. Strat pickups sound zingy with bright caps bypassed, but the 100 pF setting adds even more attractive shimmer. Lead mode and high gain settings are a nice fit for a Strat, too. Setting the lead channel to 7-to-8 and backing the normal channel to 4 pushes the amp to full-bodied, blistering sustain, and adding the 4700 pF bright cap adds upper midrange urgency. P-90s in a Les Paul Jr. are a more extreme version of this recipe—gritty, snarling, and explosive. But if I ever sensed the signal was lacking, just rolling up the normal channel and using the 100 pF cap did the trick—evoking, more than once, the gritty style of the Pixies’ Joey Santiago.
The Plex’sdynamics and touch sensitivity are outstanding. Using just variation in guitar volume and picking intensity, I effortlessly moved from clean arpeggios to crunch and full-on shred. The low sensitivity input felt especially nice for working with these intensity adjustments, too. It predictably reduces gain, but it also darkens and mellows edgier pickups. The vintage-voiced tone stack is sensitive as well. Treble, mid, bass, and presence controls are accommodating, cover a lot of harmonic range, and even extreme EQ settings never seem to neuter the fundamental voice. If you use pedals, you’ll run them straight into the front of the amp. There’s no effects loop here. Still, a Riveter Electric Brass Tacks treble booster with dark amp settings conjured the sounds of early Sabbath, and the front end easily handled the extra level.
My Kid’s Asleep
Usually, implementing a master volume in this type of circuit can produce sonic anemia at low levels. But Dave Friedman’s addition of a unique post-phase-inverter master volume means you can preserve much more tone, character, and feel at tiny-venue levels. The low-voltage Variac mode offers interesting less-hot options, too, enabling spongier, more saturated, creamier tones at less deafening volumes.
The Verdict
The Plex offers a perfect balance of vintage Marshall-ness and a not-too-busy list of practical extra features—maintaining the essence of plexi tone while expanding tone-shaping functionality and increasing the amp’s useful volume range. But for all its enhancements, the Plex stays close to its vintage inspiration, giving it a brash, raw, unruliness that’s always exciting
Friedman PLEX 50-Watt Tube Amplifier Head
PLEX Vintage Style 50-Watt Head with EL-34 TubesThis "Multi-Generational Time Reflection Device" offers three delay modes in one pedal with six presets, tap-tempo, and user-assignable expression control.
"That’s right, we’ve taken a digital delay, an analog delay, and a tape delay and merged them all together as one pedal with six presets, a tap-tempo, and user assignable expression control. Take a moment to compose yourself, we totally understand. Let us give you a little backstory; it all started when EQD founder Jamie Stillman was admiring his three favorite delay pedals from his personal collection and began ruminating on their vast differences. This sparked an ambitious foray into uncharted territory in finding a way to assemble them all together as one uncomplicated unit. After months of tinkering, his mission was accomplished and the Silos was born. With just four knobs, one three-way switch, one Save/Recall button, and two footswitches, he made the impossible possible and now your guitar playing shall reap the rewards!"
Features
Each of the three modes offers up to one second of delay time which allows it to be a longer delay than our other delay pedals. From noon and back is 500 milliseconds to zero, which has its own character. From 500 milliseconds to one second of delay time, it’s an entirely different beast. Dial them in for shorter delay times where they really excel and add loads of atmosphere and vibes. Push them further for rhythmic delays that are perfect for strumming and adding extra ambiance for your riffs. And the tap tempo is truly precise and responsive so you can lock in your rate quickly within the first revolutions.
- Three-mode delay with the ability to save and recall six presets, tap-tempo, and user-assignable expression control
- Mix, Time, and Repeats knobs dial in the sound in each of the 3 modes
- Mode D: Digital Delay mode offers nearly infinite repeats that hold their fidelity while gradually rolling off the top end with each regeneration.
- Mode A: Analog Delay mode is more mid-focused in the initial attack and gradually degrades while getting darker with each repeat.
- Mode T: This mode resembles an old, well-loved tape delay with all its glorious artifacts. Dark and moody with just a hint of distortion when you hit it just right.
- User-assignable expression control
- Dedicated tap tempo footswitch
- Two global operating modes which are indicated by the color of the Save/Recallswitch:
- Green = Live Mode
- Red = Preset Mode
- Buffered bypass featuring Flexi-Switch® Technology with tails
- Lifetime warranty
- Current Draw: 75 mA
- Input Impedance: 500 kΩ
- Output Impedance: 100 Ω
- USA Retail price: $149.00 USD
- GTIN-12 (U.P.C.): 810019914409
- SKU: EQDSILOV1USA
- Boxed Dimensions: 3.25” x 5.5” x 3.25” (8.255 cm x 13.97 cm x 8.255 cm)
- Out of Box Dimensions: 2.625” x 5” x 2.3125” (6.6675 cm x 12.7 cm x 5.87375 cm)
- Boxed Weight: 0.845 lb / 0.38328555 kg
- Out of Box Weight: 0.68 lb / 0.3084428 kg
For more information, please visit earthquakerdevices.com.
Silos Multi-Generational Time Reflection Device Demo
The San Francisco-born roots-rock guitarist feels like an East Coaster at heart, and his latest, She Loved the Coney Island Freak Show, might be his most rocking, fitting homage to the Big Apple.
When Jim Campilongo phones in with Premier Guitar, it’s from his home in the Bay Area—the same place where he first picked up the guitar in the 1970s, began playing shows with local groups some years later and, eventually, launched his recording career in the 1990s. Over the subsequent decades, he established himself as one of the instrument’s foremost creatives, building a catalog of primarily instrumental albums that encompass a dazzling array of styles—rock, jazz, roots, Western swing, classical, experimental—all informed by his inventive, flexible and never-predictable playing, mostly on a Fender Telecaster plugged direct into an amp.
He did this largely in his adopted home of New York City, where, for most of the 2000s, he was a mainstay—and, for music fans in the know, a must-see—of the downtown arts scene, with long-running and celebrated residencies at Lower East Side venues like Rockwood Music Hall and the now-defunct Living Room.
Campilongo left the East Coast to return West roughly two years ago. But his newest record, She Loved the Coney Island Freak Show, is very much a New York album—maybe his most New York one of all. It is also very much a rock album—maybe his most rock one of all. There are reasons for this. The roots of the record stretch back to the dark days of Covid, when words like “quarantine” and “distancing” were too much a part of the common vernacular. Life was weirder, quieter and, truth be told, often drearier. Campilongo found escape where he could, which manifested in daily 5 a.m. walks around his Brooklyn neighborhood. His companion was an old iPod playlist of classic-rock songs. “I’d go out, it’d be pitch black, there’d be no one around—it was like a science-fiction movie,” he recalls. “I had these old-school Vic Firth headphones, and an iPod that had a playlist of maybe 300 classic-rock tunes that I made back when iPods were the latest thing. And I would walk the streets listening to it over and over.”
The 4TET, from left to right: drummer Dan Rieser, Campilongo, bassist Andy Hess, and guitarist Luca Benedetti.
Some of the songs that, quite literally, got into Campilongo’s head? “It was ‘Mississippi Queen’ kind of stuff,” he says. “‘Hush’ by Deep Purple. Elvin Bishop’s ‘Travelin’ Shoes,’ which is an amazingly eventful track. There’s background vocals, there’s a little breakdown, there’s a melodic solo. There’s harmonies, a great rhythm.... I became obsessed with it.”
These songs, and the 297 or so others on Campilongo’s playlist, informed several of the tracks on She Loved the Coney Island Freak Show. One, a greasy, growly workout titled “This Is a Quiet Street,” was influenced by Grand Funk Railroad’s live version of the Animals’ 1966 single, “Inside Looking Out”—“a song I’ve been listening to since high school, and that I’ve been trying to write for 20 years,” Campilongo says. “This is about the closest I’ve gotten.” Another track, “Do Not Disturb,” he continues, “is like my interpretation of a ZZ Top tune.”
“I’d go out, it’d be pitch black, there’d be no one around—it was like a science-fiction movie.... And I would walk the streets listening to it over and over.”
But She Loves the Coney Island Freak Show is not all rock-influenced. Leadoff track “Dragon Stamp,” a dark, deep-in-the-pocket jam that Campilongo introduces by sounding a detuned open low string, and then hitting a harmonic and raising the pitch by bending the string behind the nut (something of a JC trademark move), came to Campilongo after repeated playings of “Step to Me,” a 1991 song from deceased New York hardcore rapper Tim Dog, on his early morning walks. “I think I listened to that 50 times in a row, numerous times,” Campilongo says. “I couldn’t get enough of it.” The emotive “Sunset Park,” meanwhile, in which Campilongo unspools languid, vocal guitar lines in a manner that is nothing short of a master class in the subtle art of touch, tone and phrasing, was influenced by a Maria Callas aria. Another track, “Sal’s Waltz,” by Frédéric Chopin. “Whether it’s successful or not, who knows?” Campilongo says self-effacingly.
Sunset Park
While many of the She Loved the Coney Island Freak Show songs have their origins in Campilongo’s early-morning walks and his iPod-provided soundtrack, bringing them into existence was in some ways a more immediate affair. To record the album, Campilongo got together with guitarist and longtime collaborator Luca Benedetti, bassist Andy Hess, and drummer Dan Rieser in a combo they dubbed the 4TET, and laid down the tracks live in the studio—two studios, to be exact. “We did two days recording at Bunker [in Williamsburg, Brooklyn], and then another two days at a different studio [Atomic Sound, in Red Hook, Brooklyn],” he says. “It was pure joy to play with those guys.”
“I always figured I could get all the sounds I want from the volume and tone knobs on the guitar, or from where I pick, and how hard; all those little variations.”
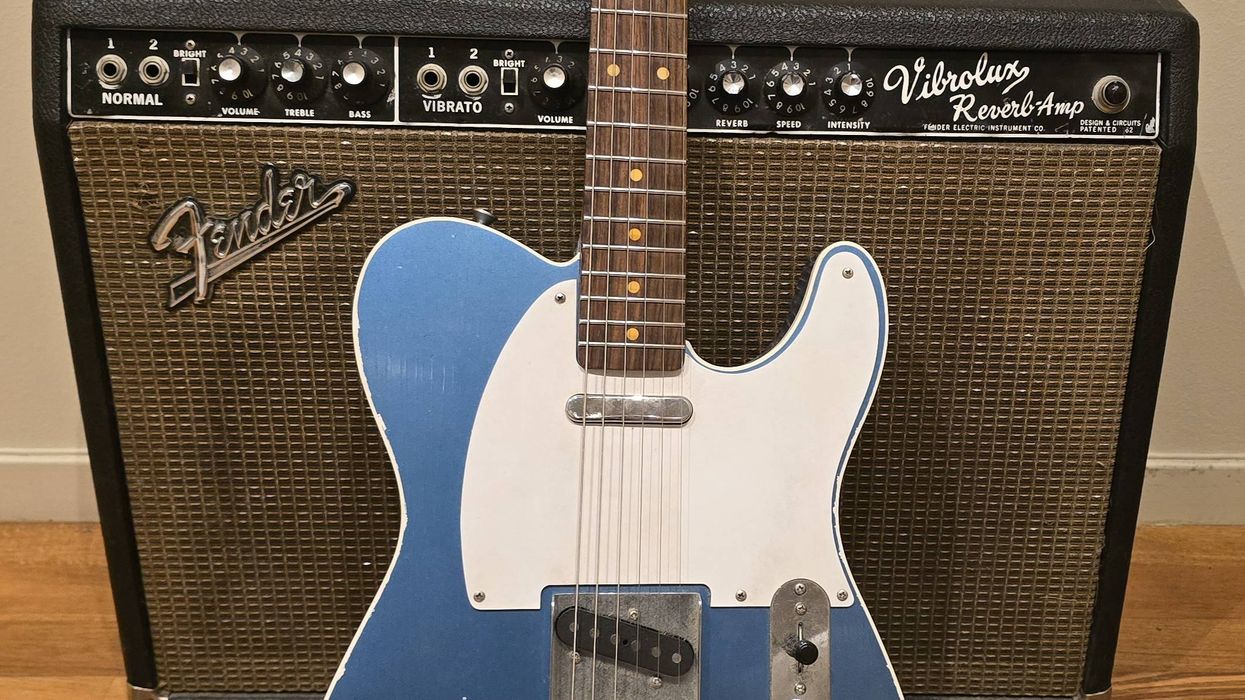
Campilongo, as is his way, kept his gear setup minimal: his trusty 1959 Fender Telecaster with a top-loader bridge, plugged straight into a 1970 silver-panel Fender Princeton Reverb fitted with a Celestion G10 speaker—no pedals required. “It’s so uninteresting for me to talk about gear, because it’s basically the same answer every time,” he says with a laugh. As for why he mostly eschews effects? “I always figured I could get all the sounds I want from the volume and tone knobs on the guitar—and on a Tele, those knobs are really dramatic—or from where I pick, and how hard; all those little variations,” he reasons. Another benefit of going sans pedals? “You kind of just accept the hand you’re dealt, and you can get down to playing music quicker.”
When it came to the playing, Campilongo stuck to another tried-and-true aspect of his guitar style—improvisation. “None of what I’m doing on the album was worked out beforehand,” he says of his solos on She Loved the Coney Island Freak Show. In his opinion, this makes for not only a better playing experience, but a better listening one, too. “If I play a perfect solo and it’s worked out, I generally don’t like listening to it, because it’s not a time capsule of that moment,” he says. “It’s like going out on a first date and having a script of what to talk about, instead of it just being a natural conversation. I want to hear the real talk, warts and all.”
Jim Campilongo's Gear
Campilongo performing at Rockwood Music Hall Stage 3, the same Lower East Side venue where he previously held a long-running residency.
Photo by Manish Gosalia
Guitars
- 1959 Fender Telecaster
- Lumiere Jim Campilongo Signature T- Model
- Fender Custom Shop Jim Campilongo Signature Telecaster
Amps
Effects
- Crazy Tube Circuits Splash Reverb
- Crazy Tube Circuits Stardust Overdrive
- JAM Pedals Wahcko
- Universal Audio OX Amp Top Box
- Boomerang Phrase Sampler
Strings, Picks, & Accessories
- D’Addario EXL120 Nickel Wound Super Light (.009–.042)
- V-Picks Fusion
- Klotz Titanium guitar cable
- Souldier guitar straps
Campilongo’s commitment to balancing on that creative knife edge informs every aspect of the album, and also his music in general. “I don’t want to ever put out the same record twice in a row,” he says. To that end, he is already plotting future challenges, including a “pseudo-jazz record where I’m playing standards in the way I would present them, which would be a little scary.”
For all his musical adventurism, one aspect of Campilongo’s artistic makeup that remains steadfast is his connection to the city that helped birth She Loved the Coney Island Freak Show. “Even though I’m back in California, in many ways I feel like a transplanted New Yorker,” Campilongo says. “It’s in my DNA,” he laughs. “It’s not like I’m returning home to the West Coast and, you know, I can’t wait to go surfing.”
YouTube It
For years, Jim Campilongo held court at New York City’s Rockwood Music Hall. Here, Jim and the 4TET tear through a She Loved the Coney Island Freak Show highlight: the Southern-rock-inflected, ZZ Top-inspired “Do Not Disturb.”