The condition of your frets will determine how well your guitar plays.
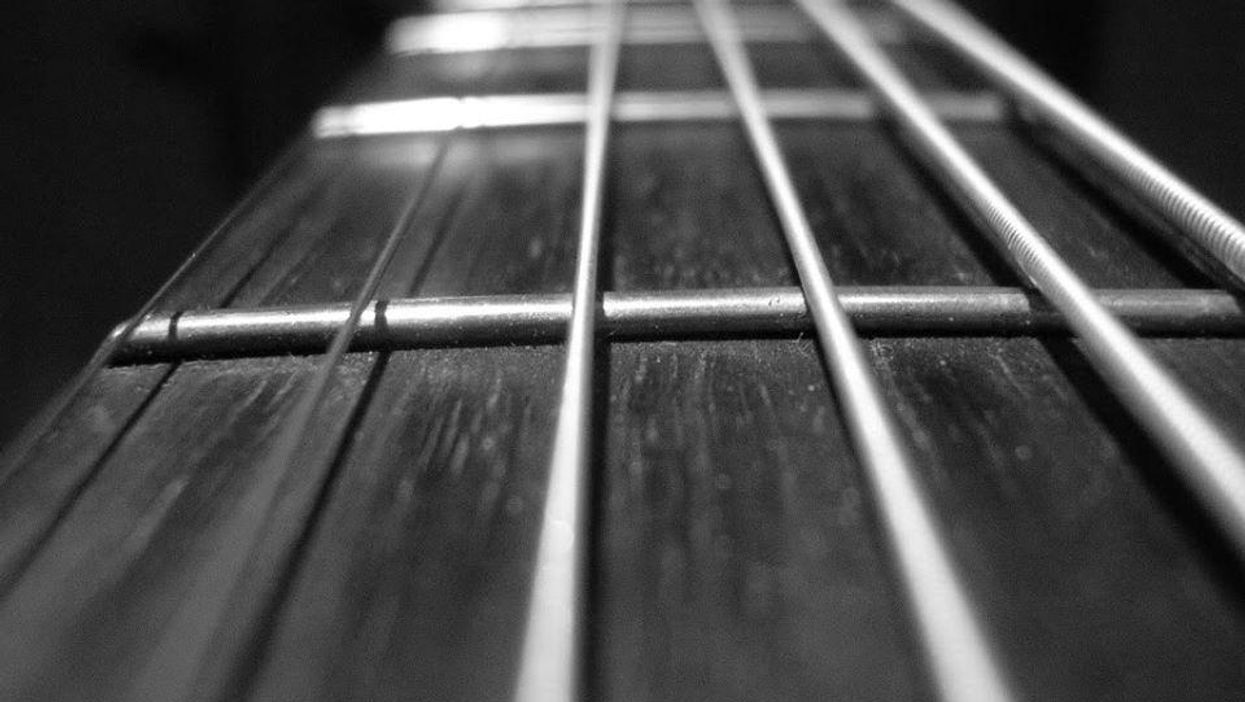
The condition of your frets will determine how well your guitar plays. Every time you press your strings against the frets, the friction between them subtly changes the shape of the frets, causing them to wear out. Over time, this metal-against-metal contact can lead to string rattle and intonation issues. The greatest fret damage is caused by capos—especially under the plain strings.
Fret wear is a normal by-product of playing your instrument. As a guitarist, it's important to know how to evaluate fret damage and understand what options you have to correct it. The big question is, can I refurbish my frets or is it time to replace them? Let's explore the subject starting with the fretwire itself.
What are frets made of?
Though fretwire is frequently called "nickel silver," it doesn't actually contain silver. Rather, it's typically composed of 18 percent nickel, 80 percent copper, and small amounts of such other materials as zinc, lead, and cadmium. Really good fret wire has more zinc and less copper. One of my favorite brands is Jescar, and their NS formula is 62 percent copper, 18 percent nickel, and 20 percent zinc. Because it's harder than traditional fretwire, it lasts longer.
Another option is stainless steel. Stainless steel is very difficult to work with, but it lasts dramatically longer than traditional fretwire. However, stainless steel frets come with a hefty price tag. Most luthiers will charge more than double to re-fret a guitar with stainless steel because it nearly destroys their tools and the job takes much longer to do. In the long run, it could be the perfect solution for your guitar since you may never have to replace the frets again!
How are frets sized?
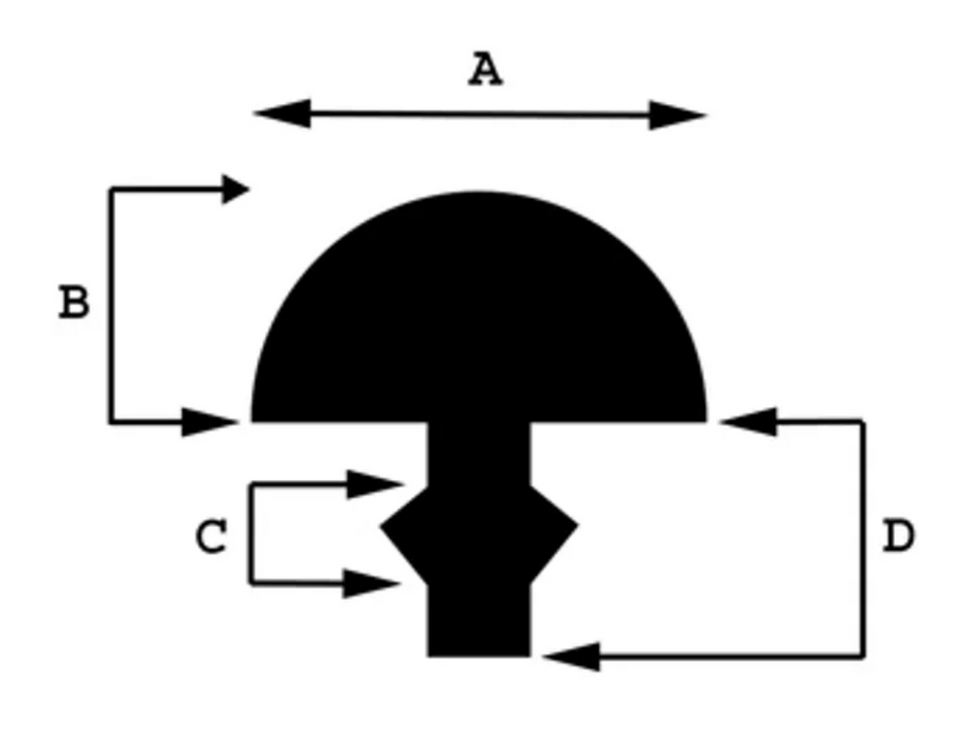
Fig. 1. Fretwire is measured by the crown's width (A) and height (B), as well as the size of the barb (C) and depth of the tang (D).
Fretwire comes in a variety of sizes and shapes. Fig. 1 illustrates the four elements that determine a particular style of fretwire. They are the width and height of the crown, the size of the barb, and the depth of the tang.
The crown is the exposed part of the fret. When you fret a note, you're pressing the string to the very top of the crown. Like a row of hooks, barbs secure the fret to the fretboard. Barb width determines the width of the fret slot and the tang determines the depth of the fret slot—i.e., how far the fretwire penetrates into the fretboard.
The size and shape of each of these four elements are specifically designed for different playing preferences and types of guitars. The crown width can vary from ultra narrow (.053") to super jumbo (.118"). The fret height can be anywhere from a short .032" to a tall .060". The width of the barbs and depth of the tang also vary from .019" to .040".
All these dimensions have a specific purpose and are important considerations when choosing fretwire. For example, wider frets can produce a stronger tone, but as they wear, the guitar's intonation "drifts" farther than with narrow frets. But narrow wire has its drawbacks, too: Narrow frets won't cause your intonation to drift as much, but they wear down faster than wide frets.
Tall frets will last longer before they need to be replaced. However, I don't recommend them for someone who plays with a strong grip. If you grip the neck tightly while playing or use a capo, the strings will pull sharp as you play. On the other hand, shorter frets wear out faster (especially if you use a capo) and need to be replaced more often.
The size of the barbs and tang have a profound effect on a guitar neck, and if you decide to install new frets, it's very important to use the correct size. If the barbs and tang are too narrow or shallow for the slots, the frets won't seat securely in the fretboard. This causes them to lift out when the weather changes and yields uneven frets and a lot of buzzy or dead notes. When the barbs and tang are too wide, they can crack and chip the fretboard, or even cause the neck to back-bow. In the case of a back-bow, you have to re-fret the guitar.
To summarize: A neck must have the correctly sized frets to match the fretboard and player. Otherwise, you'll end up with a very expensive mess!
Can the dents in my frets be repaired?
Dents always create problems with frets. But does discovering dents mean you need to replace your frets or is re-crowning an option?
It can go either way, and the answer depends on the depth of the dents. When the dents are deep, your tech would have to remove too much material from all the frets to correctly repair the problem ones. When the height of the fret is below .038" and it has deep pits and dents, chances are a re-fret is in order.
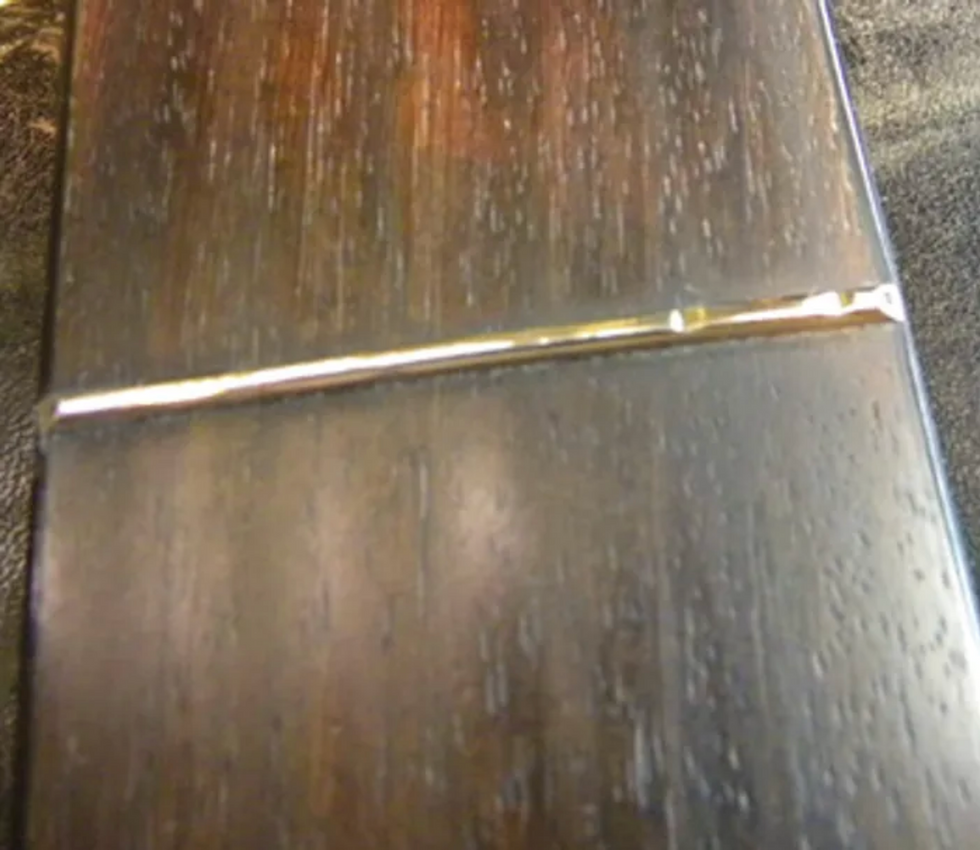
Fig. 2. A dented and pitted fret causes intonation problems, creates string rattle, and impedes smooth string bends.
Look at Fig. 2 and notice the deep pits in these frets. These dents are too deep to repair, so the frets must be replaced.
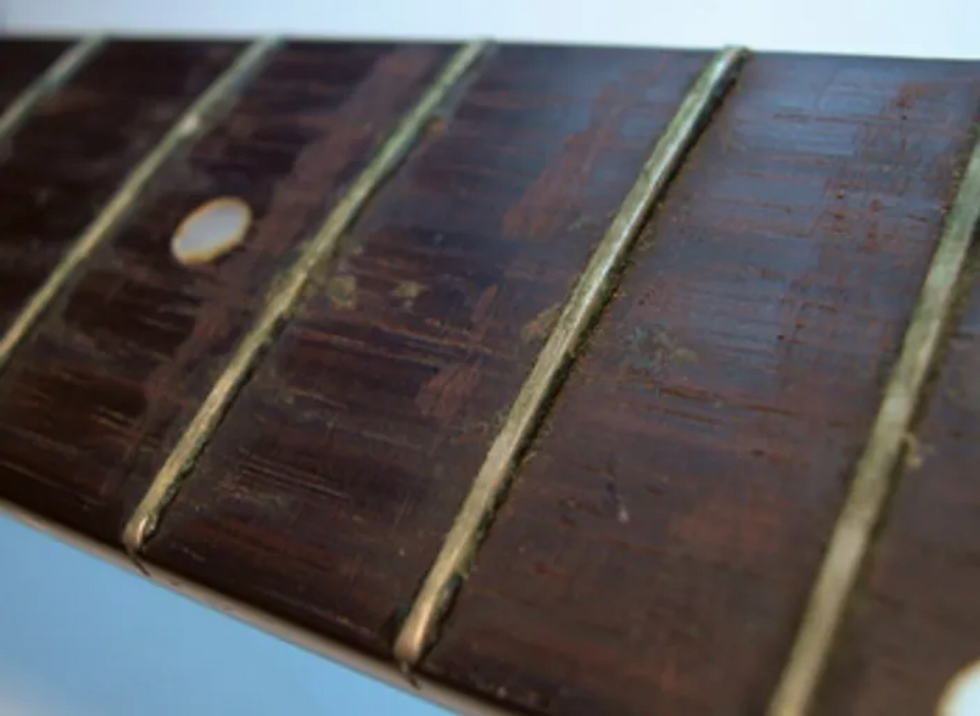
Fig. 3. A flat fret also creates rattle and intonation problems.
Dents and pits are not the only reason to replace frets. Flat spots in the frets are another culprit. For a fret to function properly, it must have a domed crown. If the crown is flat, as in Fig. 3, it will cause string rattle and intonation issues. Much like dents and pits, if the fret has a flat crown and is too short, it will need to be replaced.
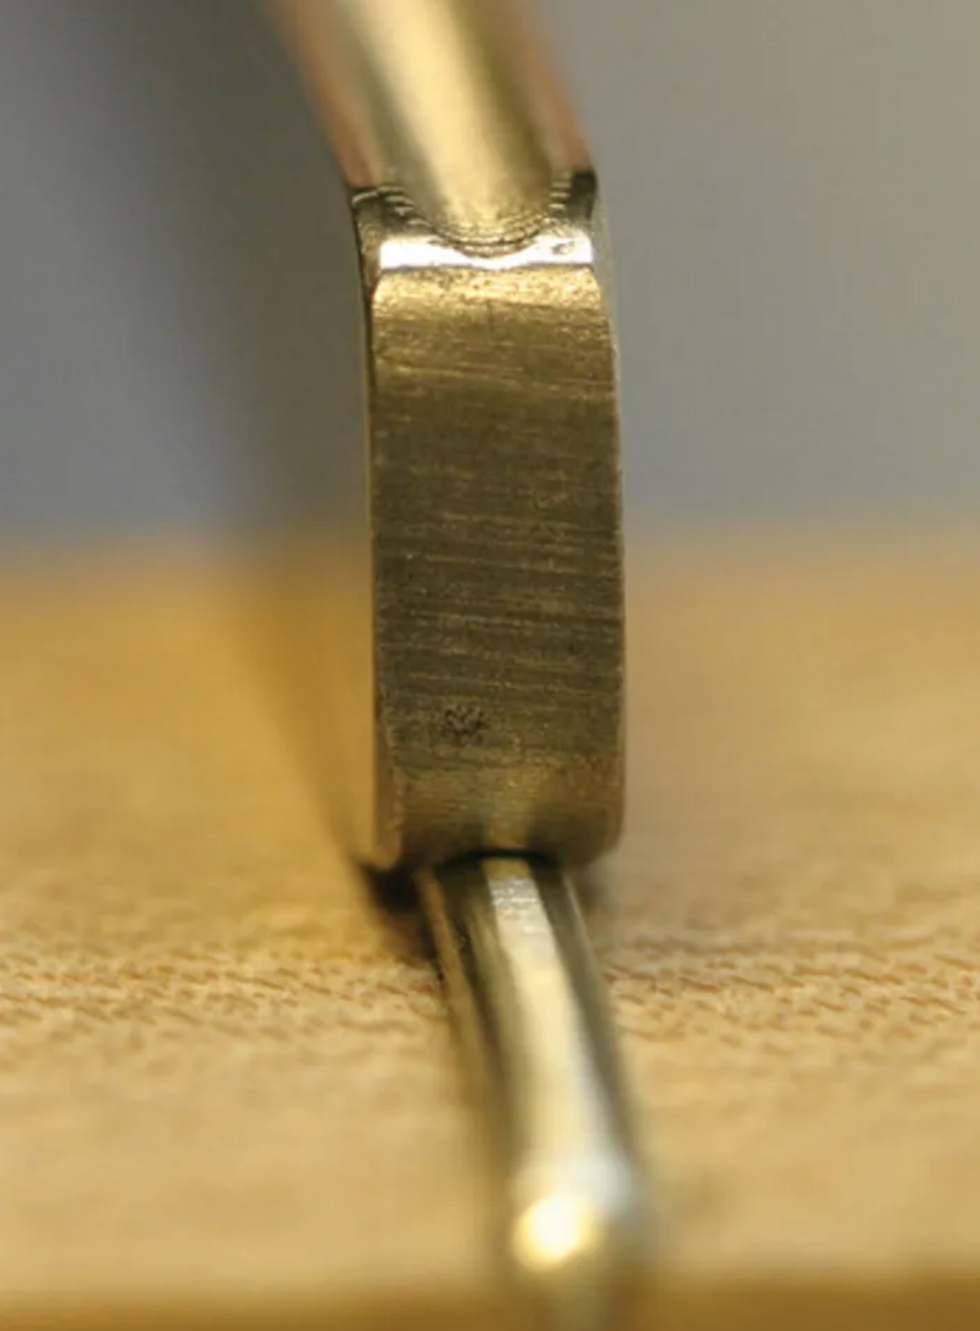
Fig. 4. Re-crowning a fret with a specialized tool.
If the frets are tall enough to repair, they are first leveled and then re-crowned. To level a fret, your tech grinds and sands the frets to an equal height. This leaves the frets with a flat crown. The next step is to re-crown the fret by removing material from its sides until the crown offers a narrow point of contact for the string Fig. 4. This is a very painstaking process and it takes years of practice to develop the proper skills—definitely a job for a pro.
What's involved with a re-fret?
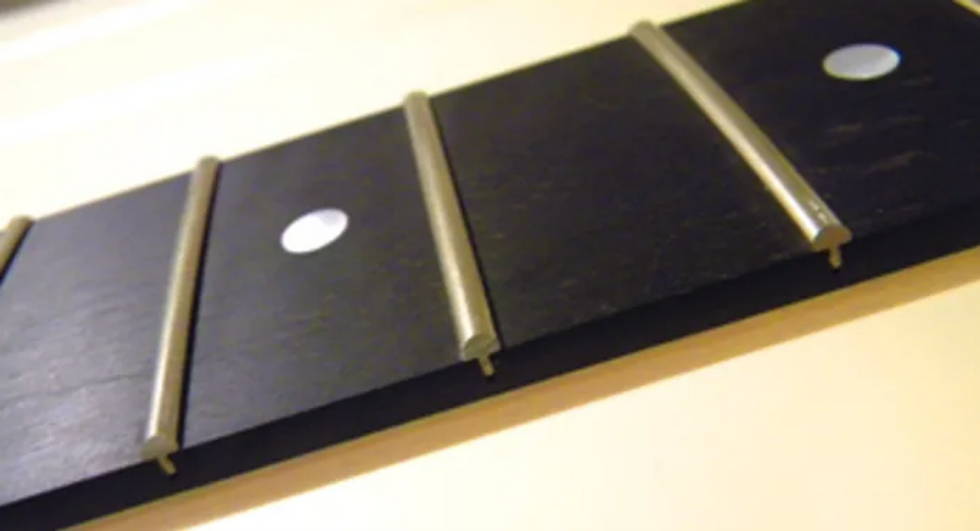
Fig. 5. A complete re-fret gives a guitar a new lease on life.
In a re-fret, all the frets in the neck are replaced. The process is very precise and requires expensive tools and great skill. The basic steps include disassembling the guitar, removing all the old frets, planing the fretboard, radiusing the fretboard, cleaning out the fret slots, installing the new frets and then leveling and re-crowning them, cleaning the fretboard and polishing the frets, and finally reassembling the guitar Fig. 5.
And this is just a basic overview of the process. There are many, many more steps—enough to fill an entire book. Re-fretting is expensive and time consuming, but generally worth the cost.
Over the years, I've had clients who choose to replace an old bolt-on neck with a new one, rather than opt for a re-fret. This can be a great choice, but beware—almost every new neck needs a fret level and re-crowning. Most guitar parts factories don't take the time that a luthier would to ensure that the frets are level. So keep in mind that by the time you pay for a new neck and the additional fretwork, you could have re-fretted the original neck and had some leftover change!
What about a partial re-fret?
Sometimes simply replacing several frets, rather than all of them, gets the job done. This is usually preferable for a neck that only has wear on the first six or seven frets and has a level fretboard. If the fretboard is in good condition and the rest of the frets are tall enough, a partial re-fret is a great way to save money. Not all guitars can qualify for this operation. If the fretboard has a twist or wave in it, a total re-fret is required.
Capo is a four-letter word.
The capo is a fret's worst enemy. Of course, I love capos because I love to do fretwork! If no one used capos, my income from fretwork would drop at least 60 percent. The more you use a capo, the more damage it does to the frets. As the capo clamps down on the strings, it smashes the strings into the frets and much harder than if you were to play a chord. As a result, frets begin to flatten and develop pits and dents. This is great news for a guitar tech, but not so good for the player.
To avoid unnecessary "capo-inflicted" fret damage, I suggest you use a capo with a tension adjustment. Many capos simply press the strings down to the fretboard without offering a way to adjust the tension. If you use a capo with a tension adjustment, you can clamp the device with just enough force to prevent string rattle, yet reduce additional fret wear.
Another great benefit to using a capo with adjustable clamping tension: It will help avoid tuning issues versus a nonadjustable capo. There are several great capos on the market that will diminish fret damage and tuning problems, including Planet Waves Dual Action capo and all the various Shubb models. If your capo doesn't offer a tension adjustment, buy one that does. This will save you a ton of money in fretwork.
[Updated 8/10/21]
- Understanding Frets and Fret Wear - Premier Guitar ›
- Jol Dantzig's Esoterica Electrica: Perfect Intonation and Other Myths ... ›
- Mod Garage: Fighting Fret Wear - Premier Guitar ›
- Guitar Shop 101: Squeezing More Life Out of Worn Frets - Premier ... ›
- The Recording Guitarist: Should You Change Your Electric's Strings Before Tracking? - Premier Guitar ›
- Dunlop Introduces the Pivot Capo - Premier Guitar ›
- Dunlop Pivot Capo Review - Premier Guitar ›
A scalpel for carving out huge but controlled reverb spaces.
Makes huge reverb blooms possible in tight spaces. Adds ghostly character to metal, shoegaze, psychedelic, and pop riffs and hooks. Fun tool for tightening arrangements.
Controls can feel elusive in early experimentation.
$199
Catalinbread CBX Gated Reverb
catalinbread.com
For music fans of a certain age, gated reverb can conjure conflicted, even hostile, feelings. Though there are myriad uses, in the 1980s it was employed to drive snare drums to migraine-inducing levels in mixes. But as the Catalinbread CBX proves, gated reverb needn’t be an ice pick or bludgeon. In fact, the CBX works best as a scalpel of sorts—enabling the player to fit big reverb sounds in very confined and specific musical spaces.
The basic reverb voice of the CBX is plate-like—spectral, blooming, and vaporous. It’s a nice fit for the CBX’s functionality and makes surreal juxtapositions of big reverb and tight spaces even more striking. At first, CBX’s control set can feel elusive. But that’s the key to its surgical tunability. The lag control enables cool swelling effects, which can, in turn, be more dramatic with saturation from the preamp control and advanced mix settings—which then can be clipped and tightened by the gate. The musical possibilities made by these combinations are endless. High-gain, palm-muted, machine-gun riffing can be made extra ghostly and huge when the CBX is placed after distortion. And aspiring Kevin Shields-types looking to twist My Bloody Valentine templates can use spacious, gated sounds to lend clarity to melody and pitch-shifted overtones when the CBX is situated before overdrive or fuzz. But even mainstream producers and players seeking punch in arrangements will find many paths forward via this unusual stompbox
Dark, enveloping, and mysterious tape-echo-style repeats on the cheap in an enclosure that fits in the smallest spaces.
Dark, enveloping repeats that rival more expensive tape-echo emulations and offer an alternative to click-prone BBD echoes. Cool chorus and flanger effects at fastest repeat times.
Small knobs make it tough to take advantage of real-time tweaking.
$137
Electro-Harmonix Pico Rerun
ehx.com
My most treasured effect is an old Echoplex. Nothing feels like it, and though I’ve tried many top-flight digital emulations, most of which sounded fantastic, nothing sounds quite like it either. If the best digital “tape” delays do one thing well, it’s approximating the darkness and unpredictable variations in tape-echo repeats.
Electro-Harmonix’s Pico Rerun plays the character of tape echo very convincingly in this respect. It hangs with more expensive digital tape echoes at a $137 price tag that’s easy to stomach. Better still, this Pico version is petite and offers unexpected surprises and flexibility.
Beyond the Pico Rerun’s essential enveloping voice, the pedal enables a lot of fairly authentic tape-echo functionality. Manipulating the feedback, blend, and echo rate controls together (which is tricky given their small size) yields flying-saucer liftoff and “Dazed and Confused” time/space-mangling textures in copious measure. These tweaks betray some digital artifacts—mainly trebly peaks that don’t have the benefit of real tape-compression softening, but they hardly get in the way of the fun. Saturation lends welcome drive and haze. And the flutter button adds faux tape wobble in three degrees of intensity. At the most intense setting, long repeats take on a woozy sense of drift. At the fastest rates, however, the flutter function will generate chorus and flange effects that neither my Echoplex, nor my best tape echo simulators, can manufacture.
The three bassists—whose collective work spans Vulfpeck, D’Angelo, Rage Against the Machine, and much more—cast a wide musical net with their StingRay basses.
The story of the Ernie Ball Music Man StingRay is a deep journey through the history of the electric guitar business, going way back to connections made in Leo Fender’s early days. When the StingRay was introduced in 1976, it changed the electric-bass game, and it’s still the instrument of choice for some of the most cutting-edge bass players around. Here’s what a few of them have to say about their StingRays:
Joe Dart (Vulfpeck)
“My first glimpse of a StingRay was watching early videos of Flea, who had a black StingRay that he played in an early instructional video, as well as on the Funky Monks tape, showing the making of Blood Sugar Sex Magik. After that, I discovered Bernard Edwards and his playing with Chic, where he developed such an iconic funk and disco sound. From there, I discovered Pino Palladino’s brilliant fretless StingRay playing. Luckily, one day in the studio, someone handed me an old StingRay, and I used it on a couple of Vulfpeck recordings. I love the punchy, growly, bright tone. The StingRay cuts through the mix. It’s the perfect funk and disco bass.
Pino Palladino
“I played guitar in bands until 1976, when I decided to start playing bass, and that coincided with the StingRay coming out. I actually tried one in a store in Cardiff in Wales, where I come from. I remember plugging it in, and I didn’t really know much about preamps. I don’t think anybody knew much about preamps back then, because it wasn’t even a thing in a bass guitar. So, I turned everything up and it was too trebly for me. I didn’t know you could tweak the controls. I didn’t gravitate towards the instrument at first, to be honest.
Fast forward a few years and I was in my early twenties on my first trip to America with Jools Holland in 1981. I stumbled into Sam Ash Music on 48th Street in New York one day, and I saw a fretless Music Man StingRay on the wall. It sounded amazing straight away. I hadn’t played much fretless bass up until that point, but for some reason I could just play that instrument in tune. I was playing it and thinking, ‘Wow, this is not so hard.’ I backed off the treble a little bit and found a nice, little happy position where it felt really good. And it just had such a great punchy sound. I played it with Jools Holland on the first night I bought it, and I pretty much never put it down for 10 or 15 years after that.”
Tim Commerford (Rage Against the Machine)
“I got a blonde StingRay when I was about 19 years old, and that was the bass that I played for the first Rage record. At that time in my life, as a musician, I was kind of clueless to the nuances of the sound of an instrument. If it worked, it worked; if it didn’t work for me, it didn’t. I was just a knucklehead. I can’t even remember the reason why I went away from it. I think it’s because I wanted to get a real edgy sound, and I didn’t really know how to shape things in the way that I do now through experimenting. I’ve been very lucky, and I’ve had a lot of opportunities to experiment, so I’ve learned a lot over the years. And the StingRay could have done it all. I really could have done it all with the StingRay. Long story short, the preamp is arguably the best one, still. It took me a minute to realize just how powerful that preamp is—it’s a banger. Listening back, sometimes I hear [Rage Against the Machine] songs on the radio, and I’m just like, ‘Wow.’ It’s such a clean, pristine sound that comes from a StingRay.”
Our columnist breaks down why Leo’s original designs are still the benchmark for pristine guitar sounds.
It’s time to discuss a favorite topic of mine: the Fender clean tone. I’m a big fan of pristine guitar tones, and I think it might be the reason why I got into Fender amps in the first place. So, in this column, I’ll break down and explain what creates the beautiful, crystalline tone in vintage Fender amps, and share which amps are best for capturing these huge, squeaky-clean sounds.
Among my music friends, I am known for advocating these tones. Sometimes my bandmates want more distortion and growl from my guitar, but I proudly resist and argue that the music we create profits from a clearer guitar tone. It’s not about volume and distortion; it’s about melody, rhythm, and dynamics. Personally, I find it more interesting to hear guitarists with clarity, where I can identify single notes and what they are doing. It’s much harder to play clean, and the transparency forces us guitarists to consider more carefully what we play.
Tone and music are definitely matters of personal taste. What someone finds naked and thin, others will find clear and articulate. Let me therefore explain my definition of “clean tone.” A good, clean tone means clarity and little distortion. Clarity is achieved when there is a certain balance between the frequencies. There must be enough sparkle and brightness together with a firm low end. In my definition, you can also have some distortion as long as you have enough clarity to hear single strings in a chord, which some define as a “bell-like” tone. Muddy or overwhelming mid and bass frequencies will spoil this clarity. I like punchy guitar sounds, and for that we need muscle and power from large power-amp sections and larger speaker cabinets. But again, there must be enough sparkle and treble attack to balance that big low end.
The black- and silver-panel Fender amps excel in this area. Fender designed these amps specifically to support the music style of the 1950s and ’60s: Whether it was folk, country, rock, or surf, the guitars were supposed to be bright and clean. The amps therefore had to produce a sound that was both clean and loud, often without PA systems.
There are several reasons why these Fender amps sound the way they do. Let’s dive into the most important factors. Firstly, the tone stack and EQ section play a significant role in creating a scooped tone with few mids. Most AB763 Fender amps have 250 pF, 0.1 μF, and 0.022 μF caps (treble, mid, and bass, respectively), controlled by 250k bass and treble pots and a 10k mid pot (or a fixed 6.8k resistor in amps without the mid pot). If you alter the value of the mid resistor or insert a larger coupling cap after the preamp section, you will get more, and earlier, breakup. If we look at the preamp sections of the AB763 amps, there is no tube gain stage, whose purpose is to introduce distortion. There are only the necessary tube gain stages to mix and lead the signal to the power amp section.
“Fender designed these amps specifically to support the music style of the 1950 and ’60s: The guitars were supposed to be bright and clean.”
The power amp section is equally important. The AB763-style amps have dual power tubes in a Class AB push-pull configuration which has significant clean headroom—more than single-end Class A amps. The fixed-bias design provides more headroom than cathode bias, which creates sag and less headroom. The efficient long-tail phase inverter and the negative feedback loop are also used to minimize clipping. Finally, using American-style speakers in the open-back cabinet design of the black- and silver-panel combo amps will enhance bright frequencies and tame the mids and low end. All these details point to one conclusion: Fender designed the AB763 amps to achieve the cleanest possible tone.
For me, the cleans of a Super Reverb are especially fantastic. The four, lightly driven 10″ speakers produce a scooped sound with great dynamics and touch sensitivity. The full set of EQ controls, robust power amp, and large transformers work together to give you both sparkle and a firm low end, even at high volumes. The Pro Reverb and Princeton Reverb, however, will struggle to stay clean when pushed. The relatively small-output transformers are a bottleneck in these amps, and they both lack the important mid control to tame the bass and mids. The Pro Reverb’s boomy 2x12 cabinet gives a flabby bass response, and the Princeton Reverb has a cheaper and inefficient phase inverter. This means that these amps can play clean only at lower volumes. If you read my previous articles on these amps, you will find easy instructions for how to improve the clean headroom, if that’s what you want.
If it’s natural distortion you’re after, the best black- or silver-panel Fender amp is the AB165 Bassman. But that’s a different story we’ll come back to later.