
Welcome back to Mod Garage. This month we’ll have a look at a special Stratocaster wiring that’s known as the Ricky King wiring. Born in 1946, Ricky King is a well-known German instrumental guitarist who was very popular in Europe during the ’70s and ’80s, with some top-charting hits like “Verde,” “Le Rêve,” “Mare,” and “Hale, Hey Louise.” King, whose real name is Hans Lingenfelder, was also famous for his “toothpaste smile” when performing. I don’t think Ricky King was very popular in the United States, but his personal Stratocaster wiring is an interesting one, so I think you’ll have fun with this.
King started his career as studio player in the ’70s and remains an active performer. Inspired by Hank Marvin, King chose a Stratocaster as his go-to instrument long ago—he’s often called the German Hank Marvin, which I think says it all. The Ventures and Swedish instrumental band the Spotnicks are also big influences, and you and you can clearly hear this in his playing style and in his trademark guitar tone. Across his catalog of 30 records, he’s sold more than 6 million copies and hopefully will continue making music for years to come.

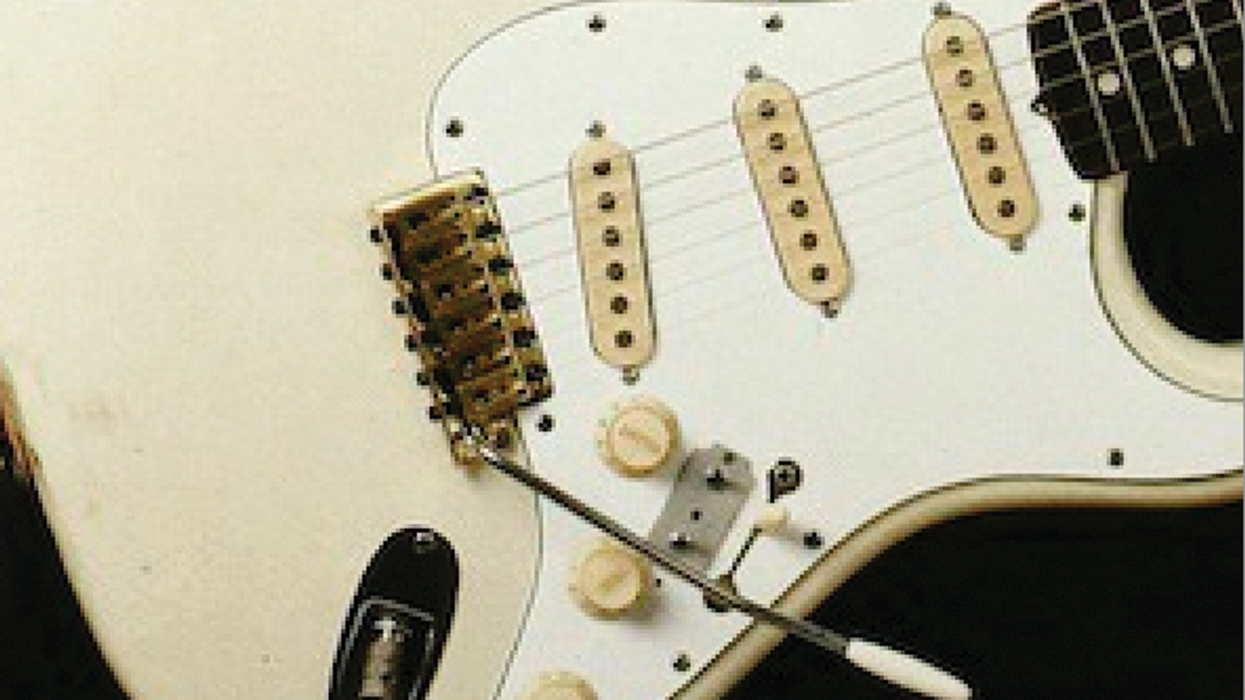
Photo 1
King is known for playing ’70s Fender Stratocasters in vintage white with the era-correct big headstock, rosewood fretboard, and white pickguard, plus two modifications that are quite unique. Have a look at the cover of his Greatest Hits record from 1983 in Photo 1 (there’s his famous smile). Between the 5-way pickup-selector switch and the volume and tone controls, you can clearly see a small metal plate containing two small toggle switches.
I asked Ricky King about the secret of these two additional switches, and this was his answer (translated from German):
“With one of the switches, I was able to engage a little preamp inside the guitar to influence the volume and the high frequencies. This little unit was developed and built by one of the studio technicians, and the necessary 9V battery was also placed inside the guitar. You can have the same operation by using an external booster and EQ pedal, so this feature was later removed. The preamp also made technical problems from time to time, which was another reason to remove it. This was long ago, and I don’t have the original preamp anymore. In my later guitars, the additional metal plate with the two switches was no longer present and the only toggle switch I used was directly built into the pickguard. With the second switch I was able to engage all possible pickup combinations.”
With this description, it’s not too difficult to re-engineer the original Ricky King wiring from the era when he recorded his greatest hits. One of the switches engaged an onboard preamp that boosted both the volume and treble. Keeping the timeline in mind—we’re talking about the mid ’70s—and from the description (boost plus EQ), I’m pretty sure we’re talking about a treble-booster circuit with a fixed boost because there’s no additional element to control the boost level. We don’t know exactly how much is being boosted, and we don’t know what exact circuit was used. The trademark Ricky King sound was always ultra clean and free of any overdrive and distortion, so the boost was for sure moderate. From the timeline, we can’t be sure if it was an old-school discrete transistor-based circuit like the famous Rangemaster or a modern one using an IC circuit like the good old LM741 that was used in the MXR Distortion Plus. Both are possible, and my own guess is it’s a Rangemaster-based circuit with silicon instead of the old traditional germanium transistors.
The second switch you’ll recognize as a good, old 7-sound Stratocaster mod to get the two additional pickup combinations: bridge plus neck and all three pickups together, both in parallel.
To combine both mods, I’ll use a feature without knowing if this was originally used in Ricky King’s guitar. If so, all is perfect. If not, it’s a fine and modern upgrade, resulting in the same tone.
So, what do we need to get this wiring?
1. A DPDT mini toggle switch for the preamp and an SPST mini toggle switch for the 7-sound modification.
2. An onboard preamp circuit of your choice.
3. A stereo output jack.
4. A 9V battery, connector strip, and battery holder.
There are a wide choice of ready-to-drop-in onboard preamp devices available on the market. I would choose a PCB with a trim pot for the boost factor so you can set and forget it, pretty much like on Ricky King’s guitar. You’ll have to experiment, but don’t start with a high setting, the trademark King tone is always crystal clear (think Hank Marvin). Some units also offer trim pots for bass, mids, and highs so you can mimic the treble boost by setting bass and mids flat and kick in a little bit more highs. You can also download countless wiring diagrams for such units on the internet and make your own custom one if you want to.
I don’t think Ricky King was very popular in the United States, but his personal Stratocaster wiring is an interesting one, so I think you’ll have fun with this.
Depending on your Strat and the size of the preamp, you’ll have to decide where to place the unit and the battery. Usually Strats with the swimming-pool routing offer plenty of space for this.
You also must decide where to place the two switches, or if you want to substitute them with two push-pull or push-push pots. Between the 5-way switch and the controls is enough space to place both mini toggle switches. Die-hard Ricky King fans can naturally make a custom plate like the one on his original guitar.
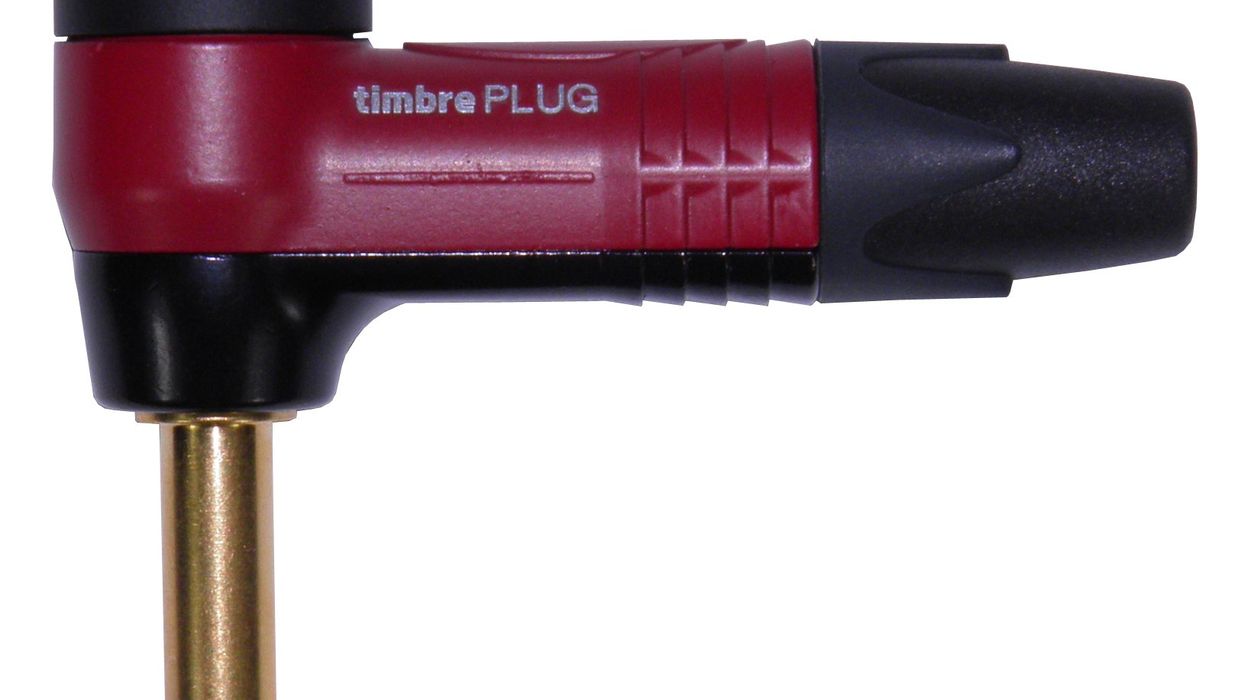
With this wiring, we’ll replace the standard mono output jack with a stereo jack to make engaging the preamp module much more comfortable. It’s possible to leave the standard mono output jack, but instead of the 2PDT switch, you’d need a 3PDT switch. Such mini switches are available, and with their three switching stages, it’s possible to engage the booster signal plus the 9V power.
With the standard mono output jack, you’ll hear a noticeable “PLOP” when you use the switch, which can be very annoying. When you use the stereo output jack to engage the 9V power, the “PLOP” will be present as well, but you can’t hear it because the power contact will be closed before the signal contact, so it can’t reach the amp. I’m pretty sure 3PDT mini toggle switches weren’t available in the mid ’70s, so it’s most likely that a stereo jack was used in the original wiring.
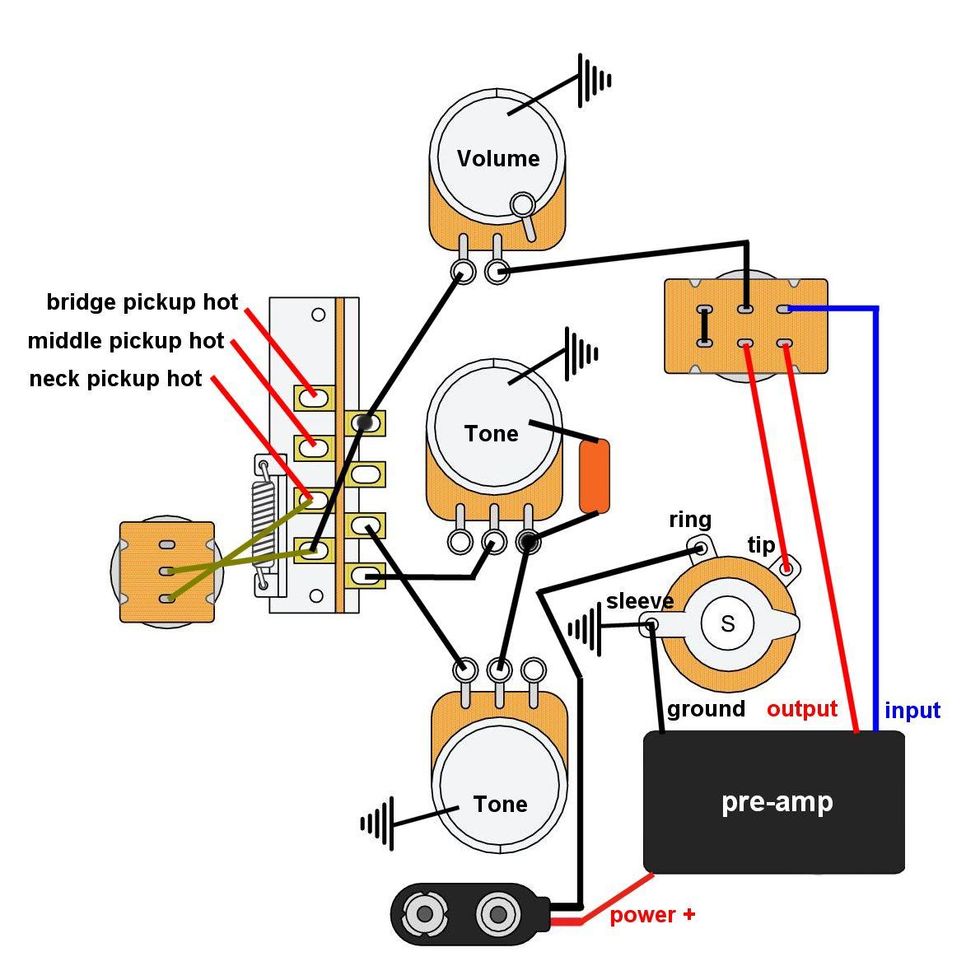
Fig. 1
So, here is the wiring with both mods for you, as shown in Fig. 1.
That’s it. Next month, we’ll take a deeper look into the Johnny Marr Jaguar wiring before we finish the DIY relic’ing project after that.
Until then … keep on modding!