Long to try your hand at building a pedal but can't help feeling overwhelmed? Let us enlighten you on the tools, materials, and available resources, as well as teach you how to build a critical, oft-overlooked testing device.
The DIY guitar-pedal world has been exploding over the past few years—so much so that it's likely at least a few of you have dipped a toe in already. I know I did. After using pedals for so many years and becoming pretty much obsessed with them, I felt a burning desire to learn what's going on inside these contraptions. But initially I was pretty intimidated. There is so much to learn! And even though we live in an age when all the information we need is practically at our fingertips, it's sometimes difficult to know how to word things in a search engine to get what we're looking for. Luckily, there's an immense DIY community out there, too—blogs, forums, and general-information reference sites. In my experience, just about everyone in the community is eager to help each other, so it didn't take long for me to feel welcome and encouraged.
Even so, two big things have become glaringly obvious to me during my years of pedal building. First, while there's a ton of information and lots of goodwill on the scene, there isn't really a single place that pulls together both the most important foundational concepts and a comprehensive list of the tools a novice needs to have not just a fun time, but a successful first building experience. No one likes spending a bunch of time and money on parts, tools, and assembly only to have a worthless hunk of junk that doesn't work at the end of it all.
Secondly, very few places mention one of the most important, helpful, and time- and wits-saving tools that a would-be pedal builder can have at their disposal. No matter how experienced you are, no matter what you're building, the simple fact is that if you don't have a circuit-tester box, you're probably losing a lot of time and getting way more frustrated than you need to during a pedal build.
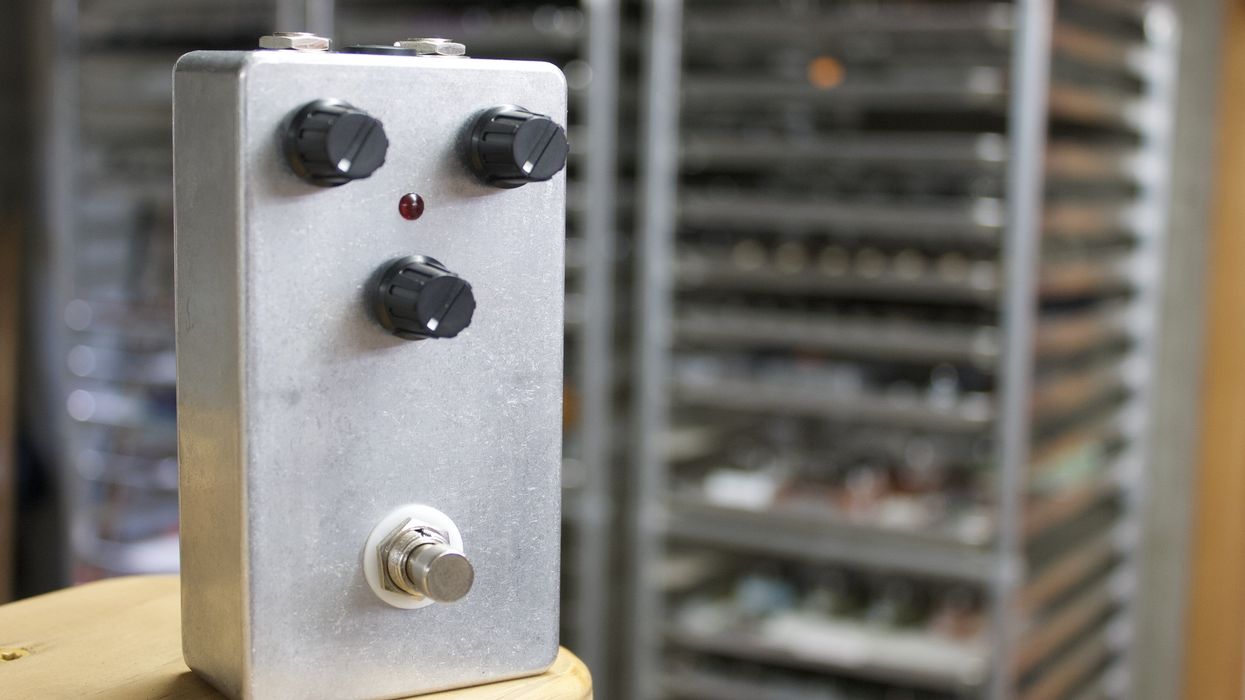
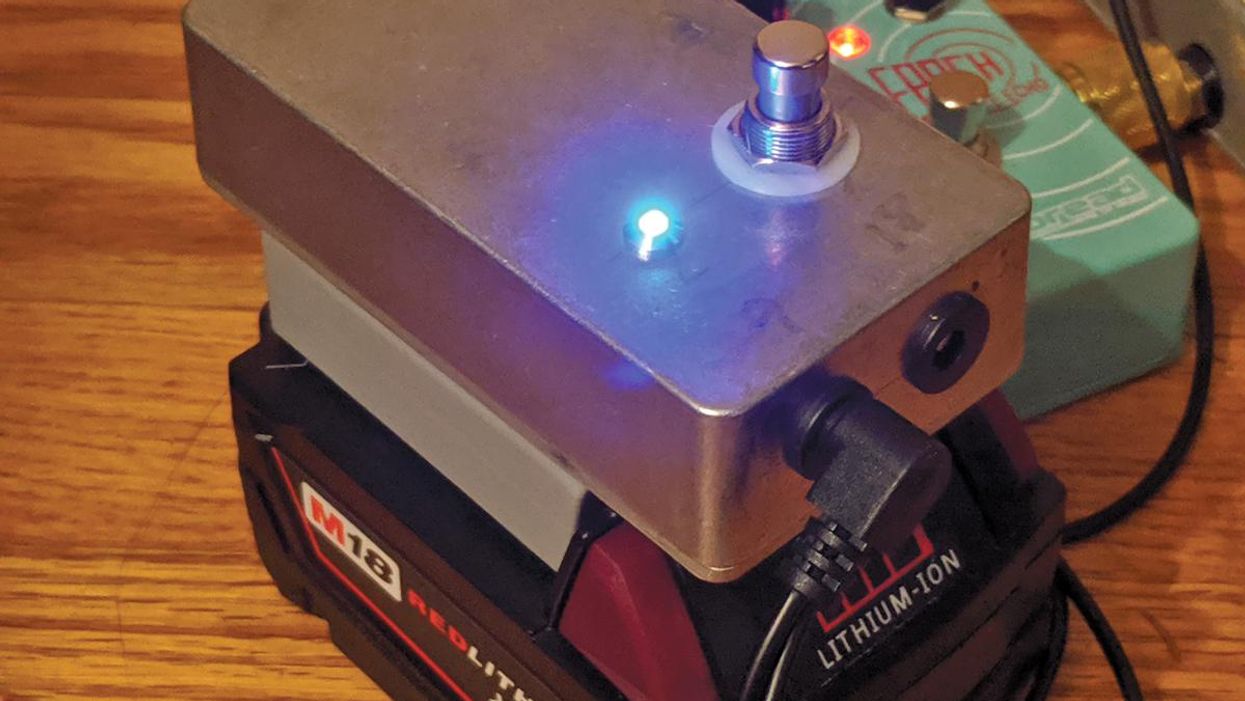
What exactly is a circuit-tester? It's a special, prewired "dummy" pedal you can use over and over again to test any circuit you're working on. In other words, it will function as the vicarious housing for any DIY pedal project you're working on, allowing you to hear it and know that it works before you install the project in a housing with its own jacks, etc. To that end, I put together this brief tutorial for a DIY tester box. Besides being very useful for any future pedal projects you might undertake, the tester-building process itself will be great practice for upcoming pedal builds, too. Once you've mastered this, you'll be ready to move onto building your first pedal, whether it's a kit or a copy of a popular circuit.
Let's start with essential tools, since there are so many options on the market that might seem fine but actually aren't well suited to pedal-building tasks.
Essential Pedal-Building Tools
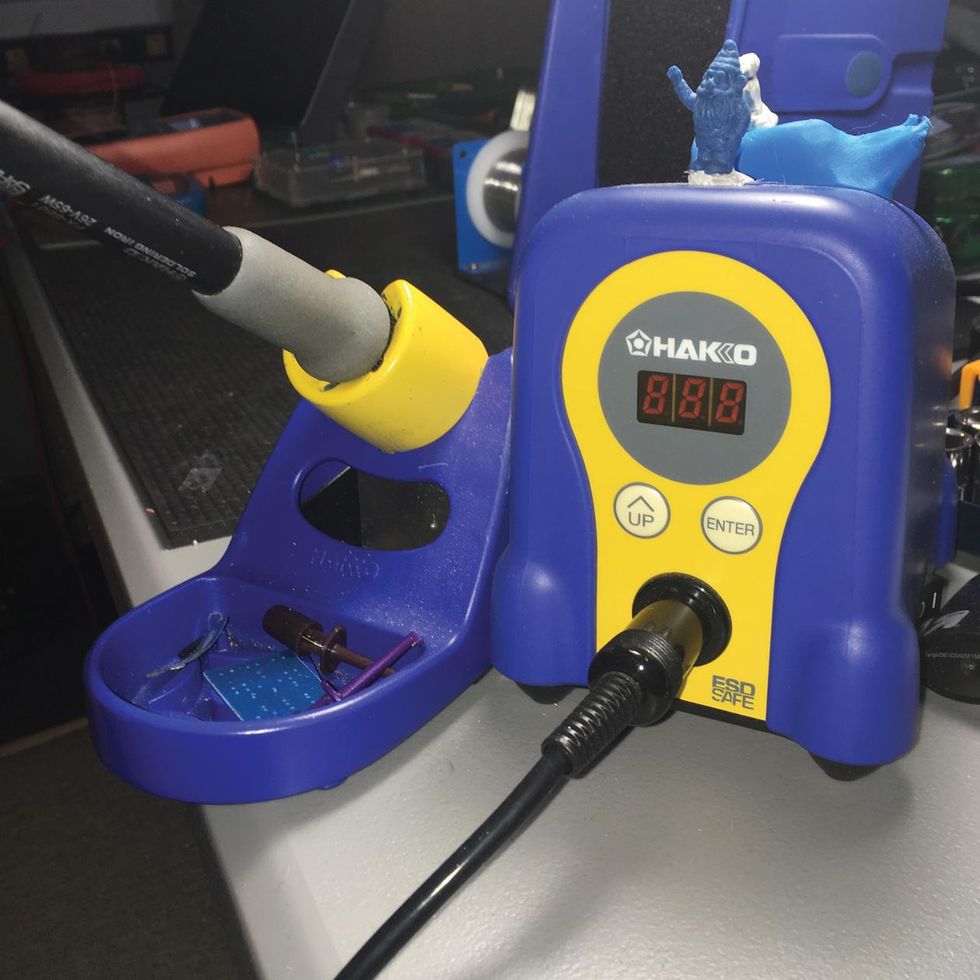
Soldering iron. You don't need the fanciest one around, but a cheapie can definitely make your projects a lot less fun. An iron of 40 or more watts will get the job done. And while you don't have to get one with a digital readout, it's a heck of a lot easier to use. Otherwise, you'd need to rig up a way to test your iron's temperature to ensure it stays at an appropriate, steady temperature for creating good solder joints. I solder at anywhere from 600 to 750 degrees, and I like the set-it-and-forget-it aspect of digital soldering irons. If the temperature drifts, the readout will reflect that fluctuation and readjust within seconds. I've tried about six different soldering irons, including an expensive Weller digital model. I keep going back to the Hakko FX-888D, but if you're not quite ready to plunk down a hundo on your iron, the Weller WLC100 40-Watt Soldering Station will work just fine, too.
Soldering tips. Soldering stations typically come with one soldering tip, usually a large one that's not very useful for pedal building. There are many sizes to choose from, but I tend to use two sizes mostly: a .8mm conical tip and, much less often, a .8mm chisel tip. In my experience, it is better to purchase original-equipment-manufacturer (OEM) brand soldering tips, as after-market tips often don't last long.
Solder. The type of solder typically used for this type of work has an activated rosin flux core and is composed of approximately 60 percent tin and 40 percent lead, although lead-free options are available. I have tried many kinds—lead-free, silver-bearing, no-clean, you name it. I've found lead-free solder incredibly difficult to work with, though perhaps I will find one that works for me in the future. Some folks like a bit thicker diameter of solder than the Kester .02"-diameter solder that I use. I find anything from .02" to .03" in diameter acceptable for pedal building. (Note: Even if you've been soldering for a while, I also recommend finding out more about it from a source such as ElectronicsAndYou.com. There's also a wonderful tutorial video by trusted electronics outfit Pace, Inc.)
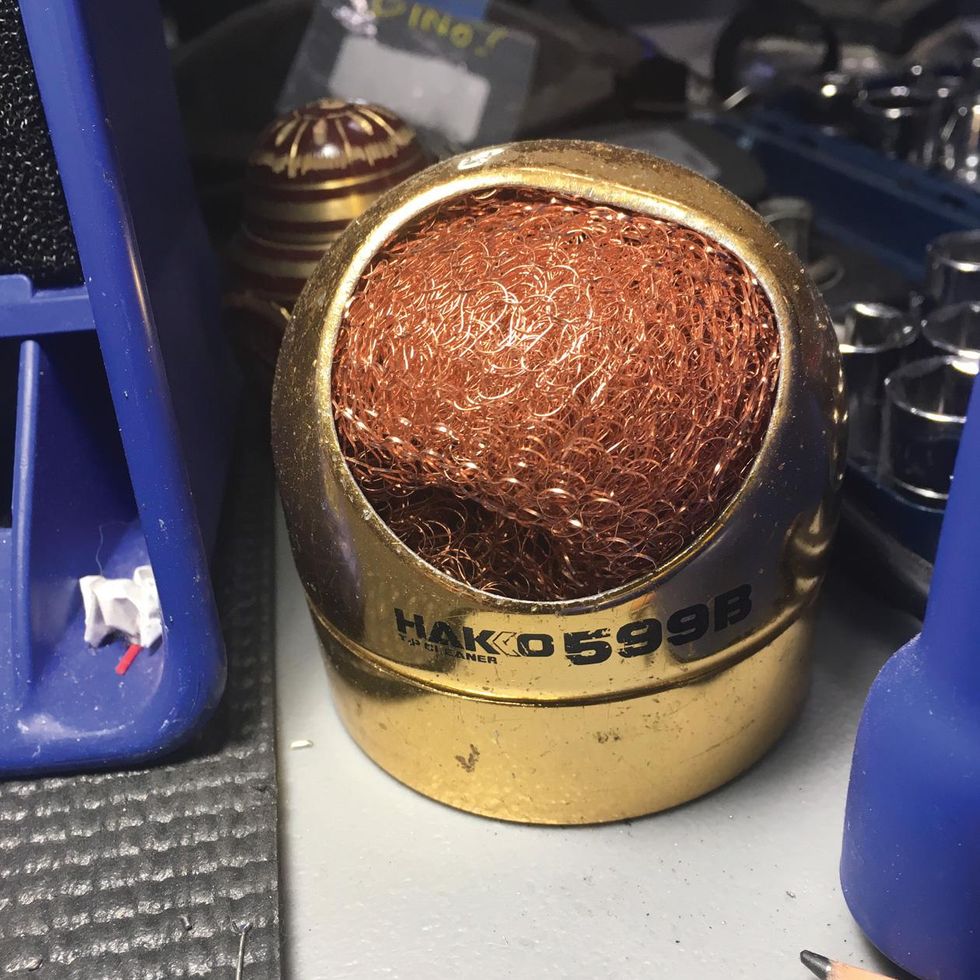
Something to clean your iron. This is something you should be doing quite frequently! A moistened sponge works, while something like the handy Hakko 599B Tip Cleaner helps prevent solder blobs from flying in your face or hair.
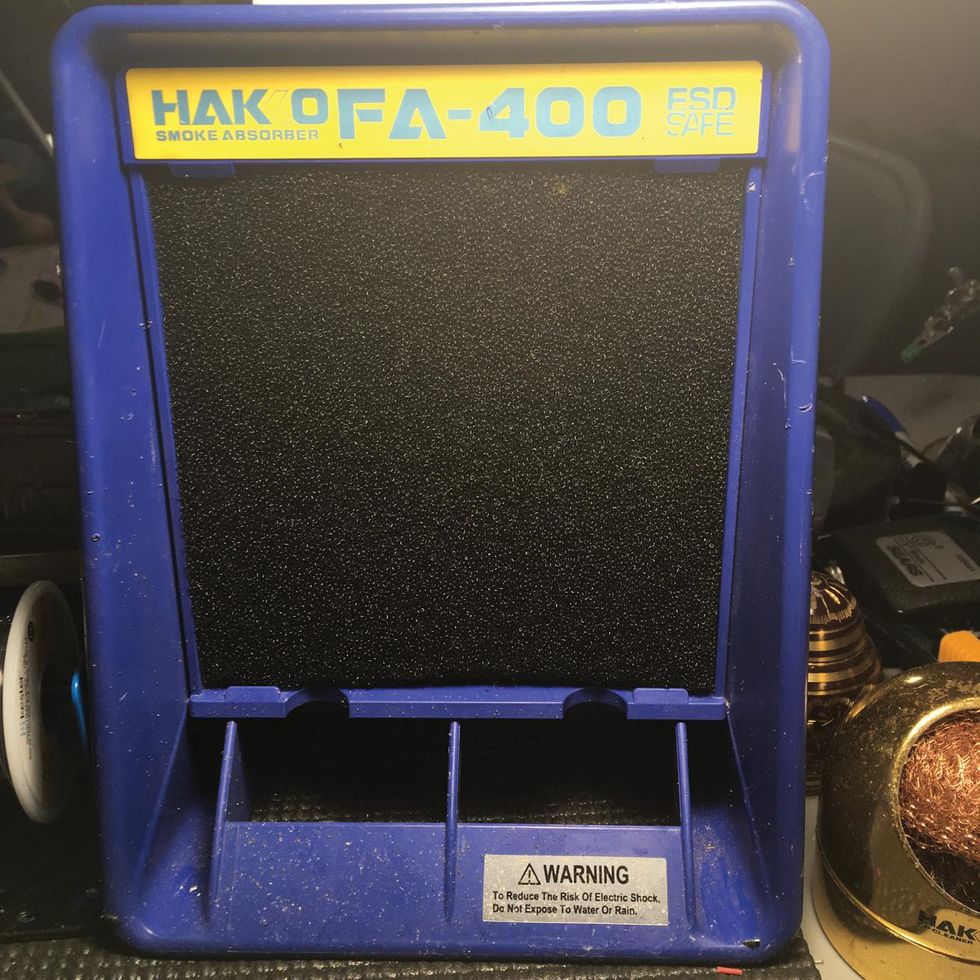
Smoke absorber. Solder fumes are highly toxic, so a de-fuming fan/smoke absorber is essential—even if you're working in a well-ventilated room. I use a Hakko FA-400, but I still keep all shop windows open and use a ceiling fan to keep the air circulating out. Placing a soldering station right next to an open window with the de-fumer blowing the fume-y air out is the easiest way I have found to keep solder smoke from lingering.
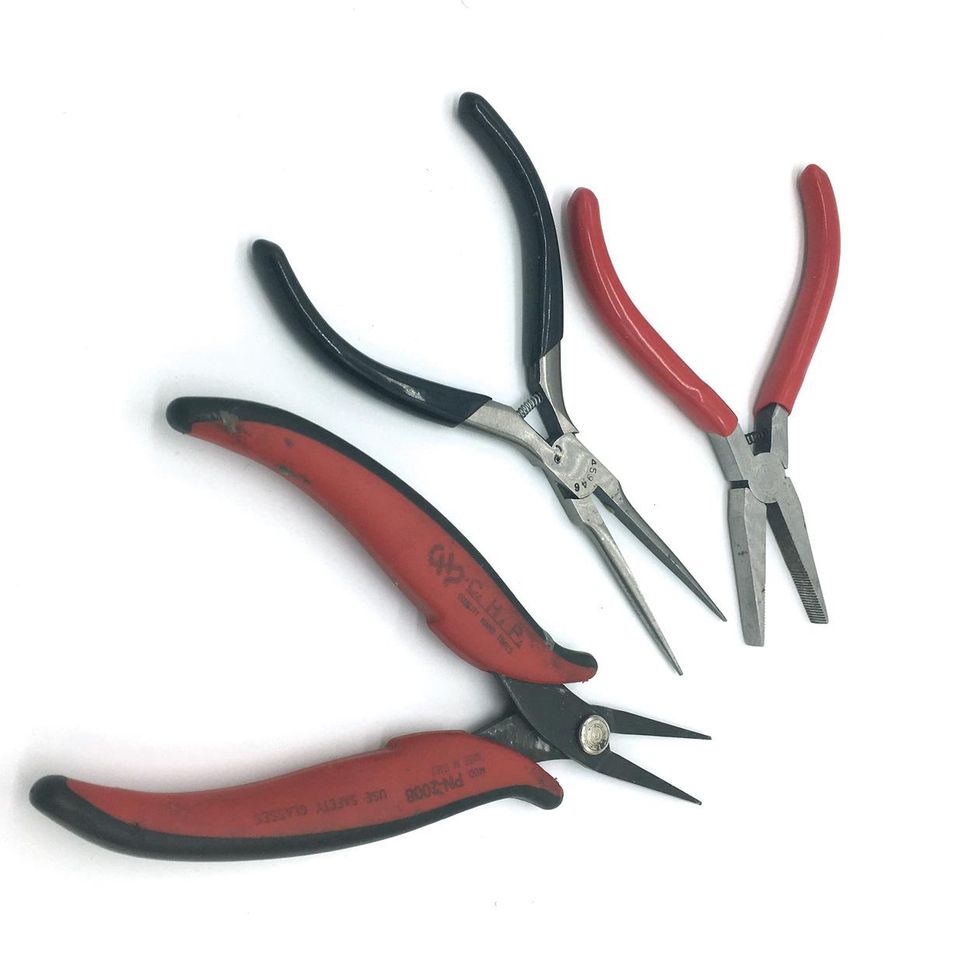
Pliers. I use three different sets of pliers every time I build: a flat long-nose variety with no teeth, a skinny long-nose with no teeth, and flat long-nose pliers with teeth.
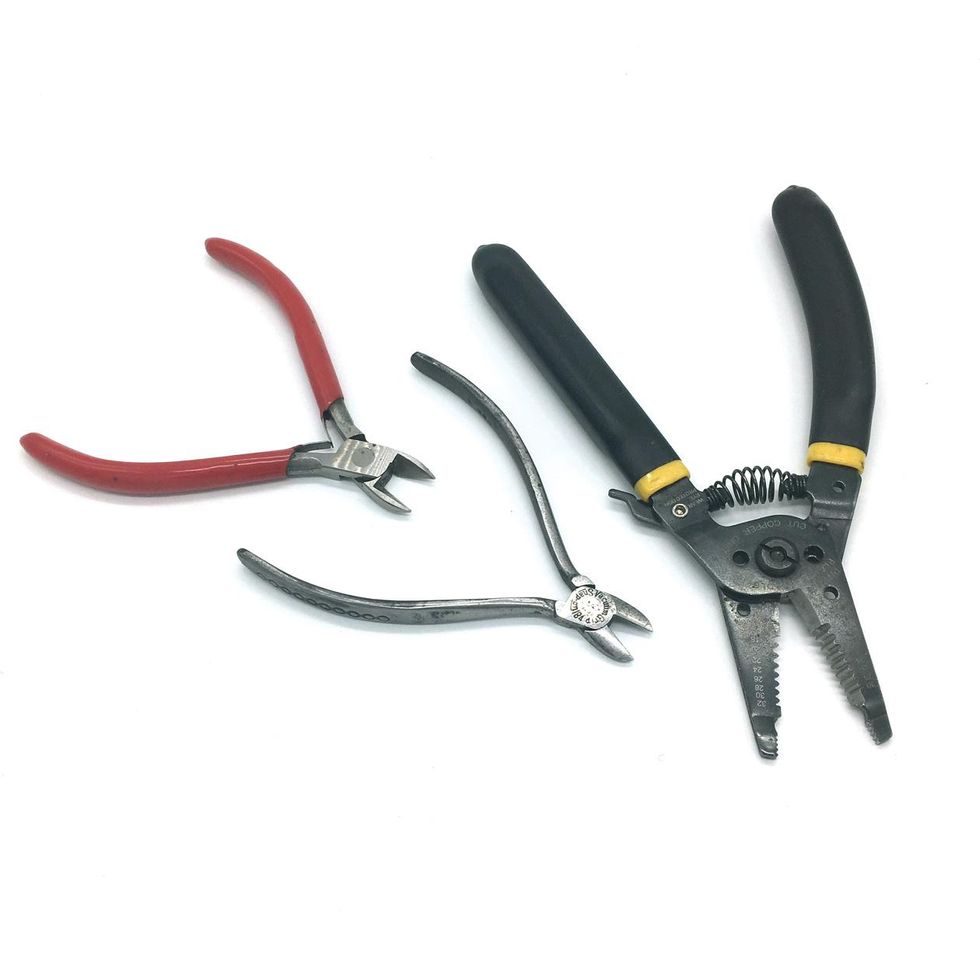
Wire cutters. For snipping wires and component leads. I tend to break wire cutter tips rather often, so I keep a few pairs around. I have a robust pair for cutting thick wires and metal, a pair of Xytronic AX103 Side Cutters for most everyday clipping work, as well as a fancy, sharp pair for more dainty work (like snipping leads off of PCBs).
Wire strippers. For trimming a small piece of each wire's outer coating (or "jacket") to expose the bare wire underneath. I like models like this Hanlong 20-30AWG stripper because they can strip a few different gauges of wire. "Self-adjusting" wire strippers like models from Irwin are also popular with some builders, though I find them a bit clunky to use. Note: When I'm not using wire salvaged from unused electronics, I prefer Teflon-coated wire because its outer jacket won't melt. One disadvantage, however, is that it's slippery as can be and nearly impossible to strip with the previously mentioned strippers. The tiny Jonard ST-550 works wonderfully with Teflon—and any other kind of jacket material.
A drill and drill bit(s). A powered hand drill will work fine, however I like to use a step bit like the Irwin 10231 Unibit self-starting fractional step drill bit so I don't have to change the bit every time I want to drill a different-sized hole. You might also want to pick up a center punch like those from Starrett, as well as a very small bit (1/16" or 1/8") that's made to go through aluminum or metal to drill pilot holes for the step bit.
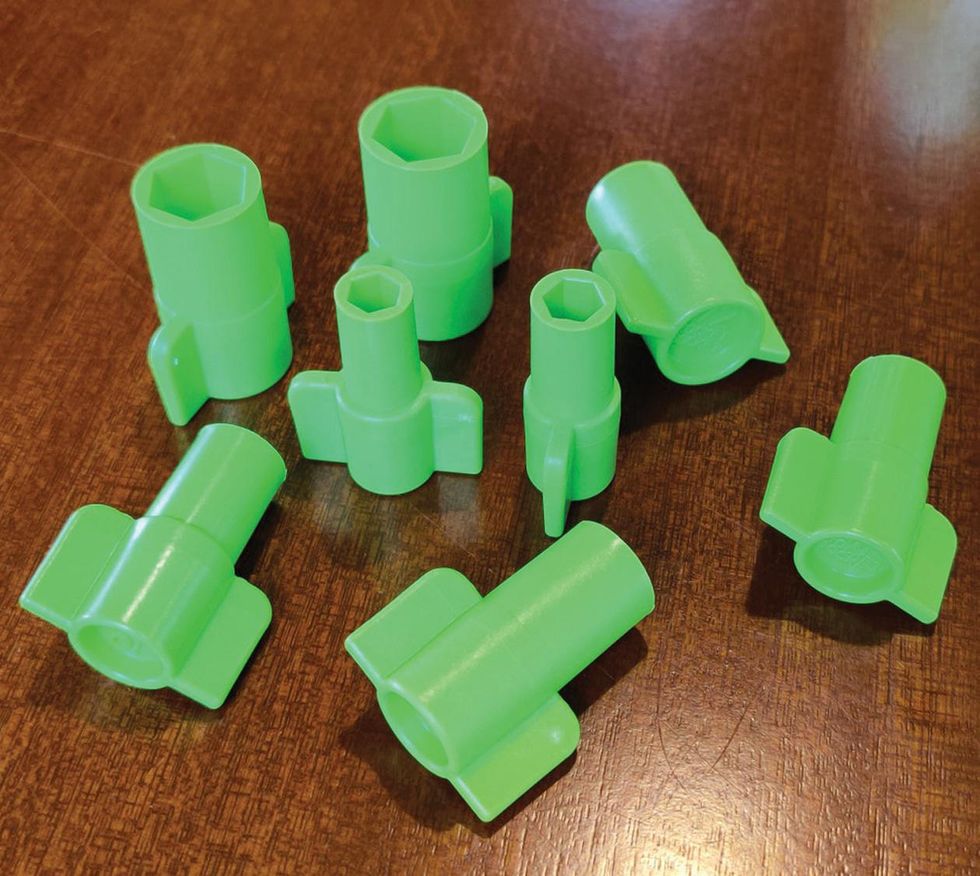
Rocket Sockets. They're not absolutely necessary, but they make installing jacks and hardware easier, faster, and safer. (Trust me—if you use pliers to tighten hardware, they're almost guaranteed to scratch the finish.) Rocket Sockets come in a set that includes all the sizes you'll need for building pedals.
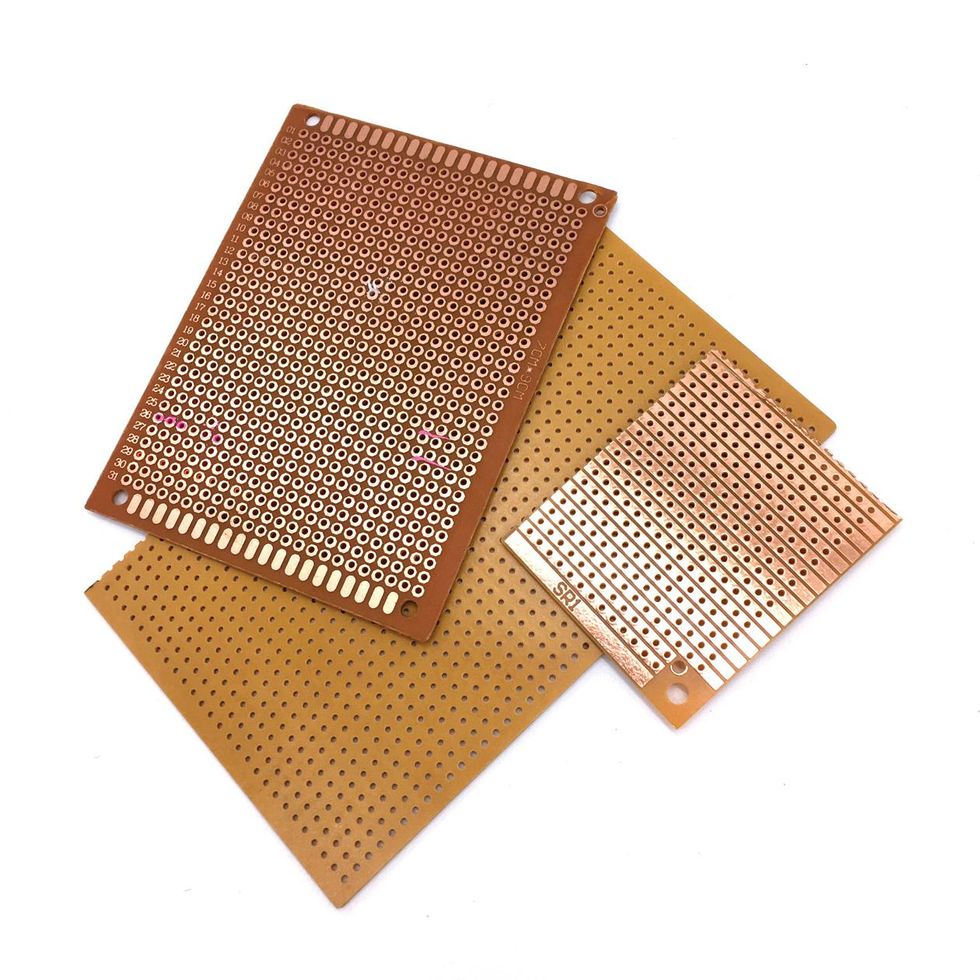
Circuit-board blanks. Two kinds of circuit-board substrate are most widely used for pedal circuits: stripboard (Veroboard is a common brand) has preprinted, horizontal copper rails, while perforated board (aka "perf board") looks similar but doesn't have copper rails (although some types of perf boards have copper tracing around each of the holes). Parts get directly loaded through the top of the board and are connected to each other on the underside. Note: Because we'll be wiring all our circuit-tester parts together directly (aka "point to point"), you won't need circuit-board material for the direct purposes of this article.
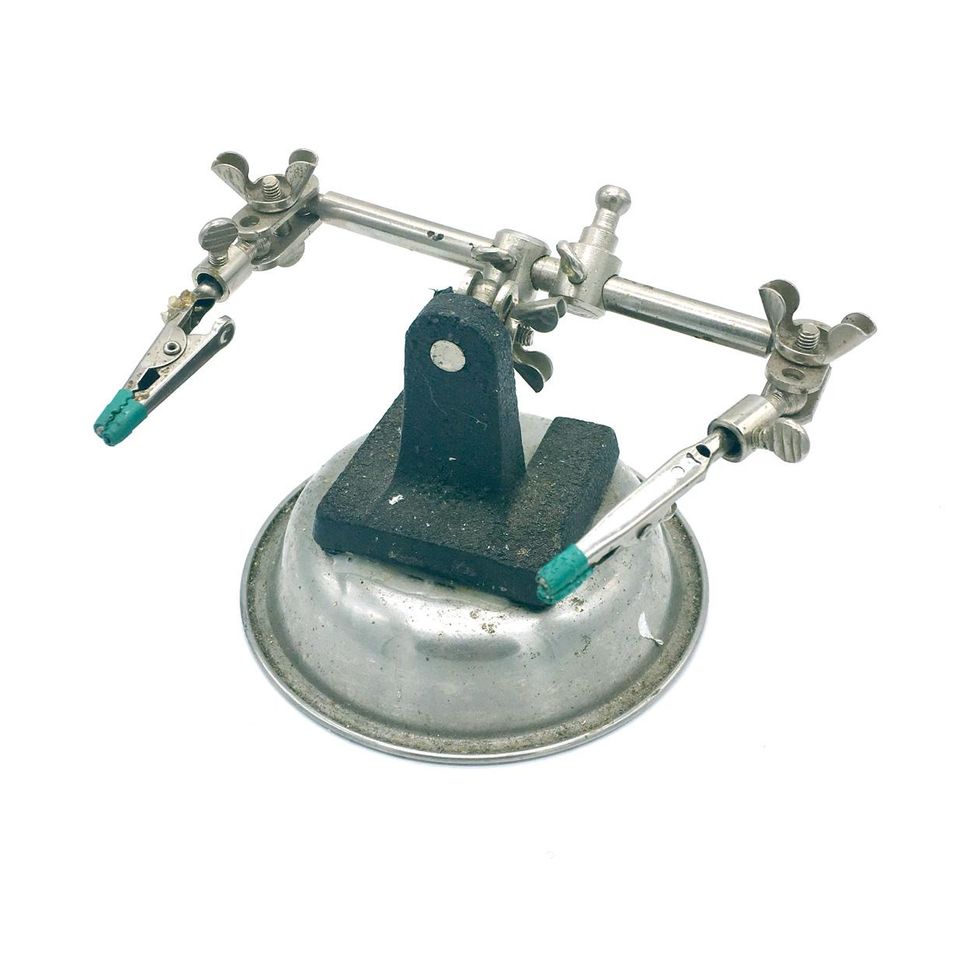
Helping Hands circuit-board holder. This affordable Radio Shack accessory is incredibly useful for holding boards and parts while you solder them.
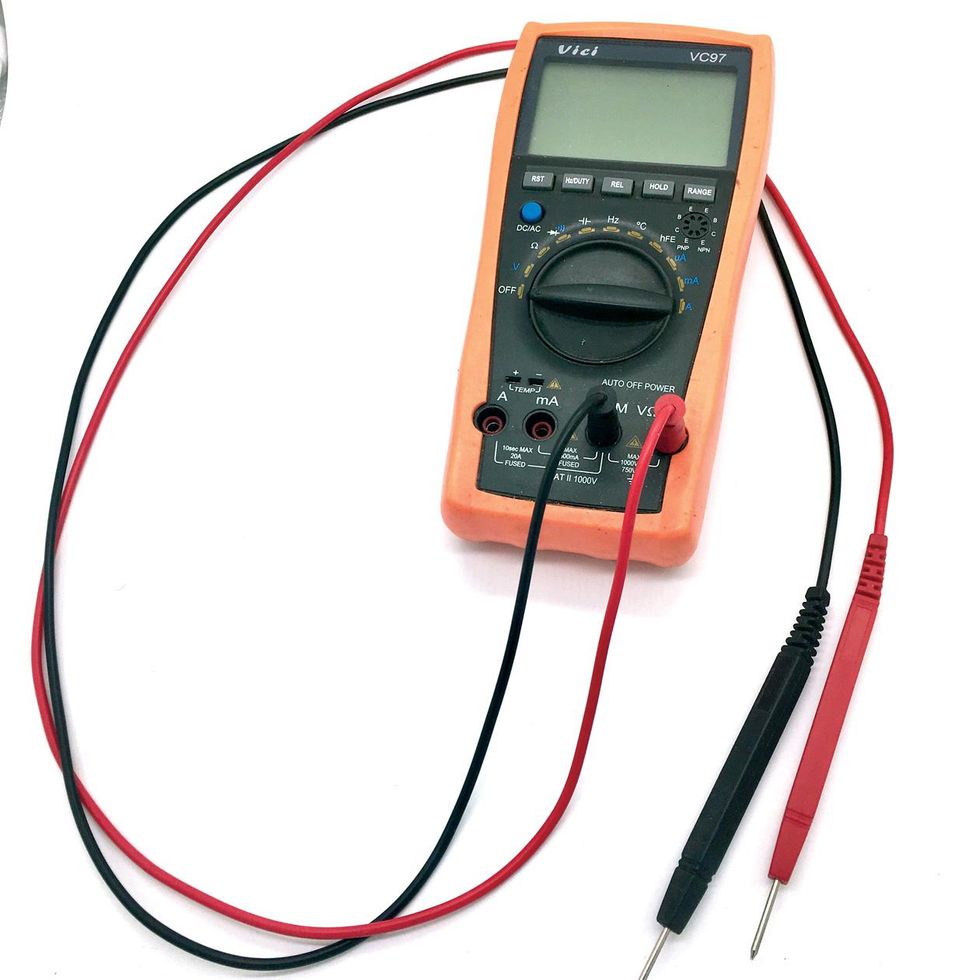
Digital multimeter. This isn't absolutely necessary for our project, but if you expect to keep building pedals it will definitely end up being the most important tool in your kit. Why? To avoid massive headaches at the end of your build, it's a good idea to get in the habit of testing all components before adding them to the circuit. A multimeter is also useful for checking continuity when you solder any two (or more) points together. Cheaper multimeters have a rotary dial that must be set to certain ranges of values to get an accurate reading. I prefer "auto-ranging" multimeters, which automatically test the exact value of an electrical component simply by putting a probe on each of its "legs." The affordable Vici VC97A works well in my experience.
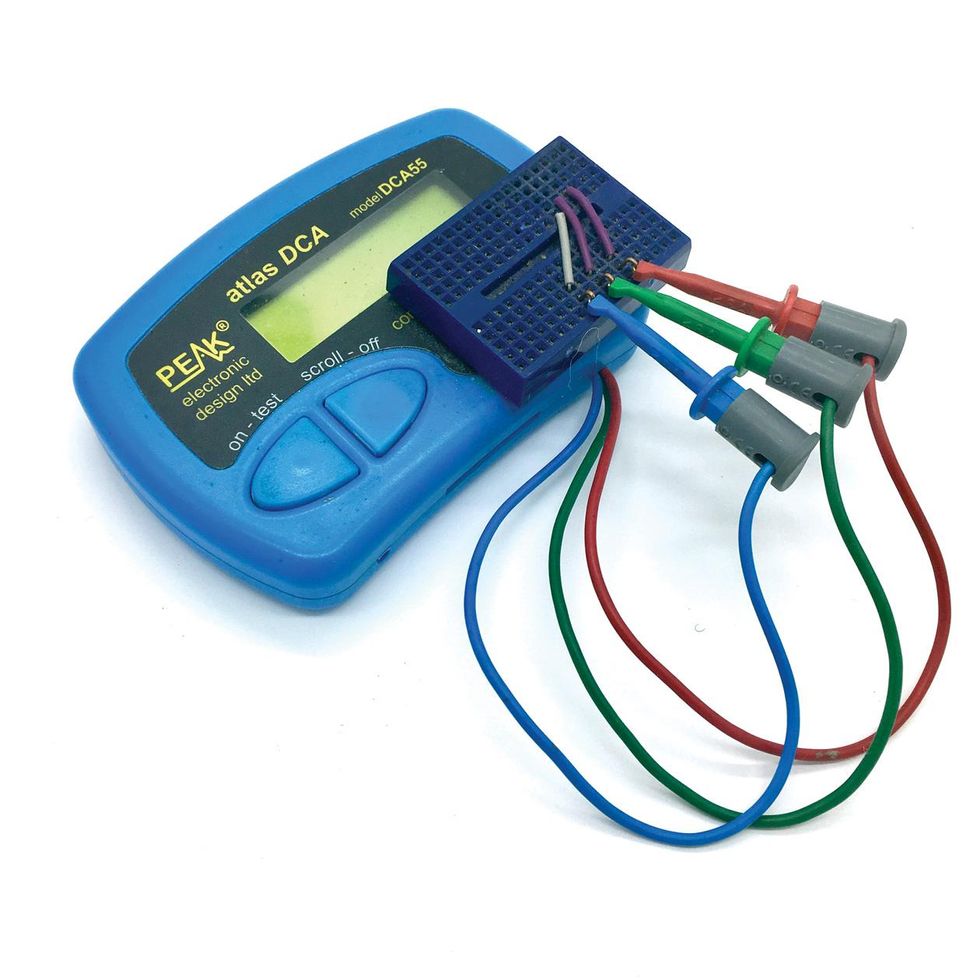
Semiconductor analyzer. The Peak Atlas DCA55 is one of the most-used tools in our shop. We use it to quickly and accurately measure transistors and diodes.
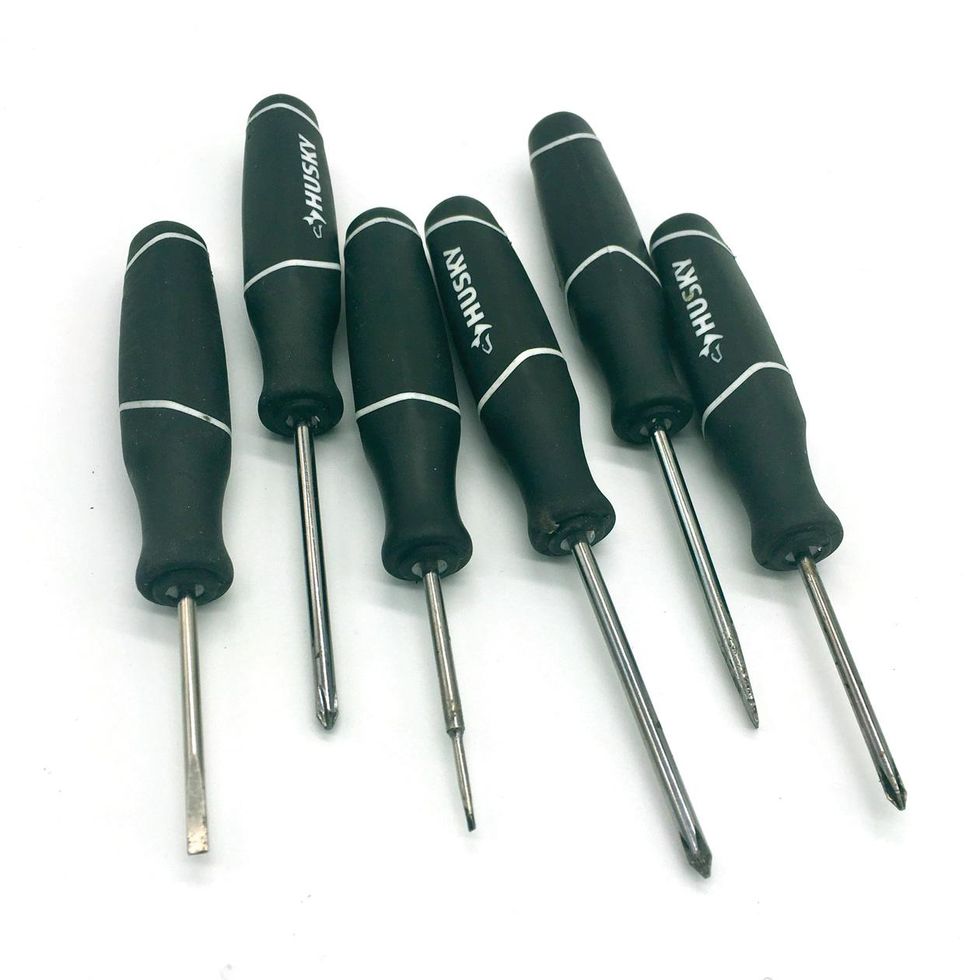
Screwdrivers. One standard-size flathead and one standard-size Phillips head are a must. I also use small screwdrivers for all sorts of things, including forming leads, pushing wires and components into place in tight spaces, and installing knobs. Radio Shack's RS Pro 6-Piece works just fine.
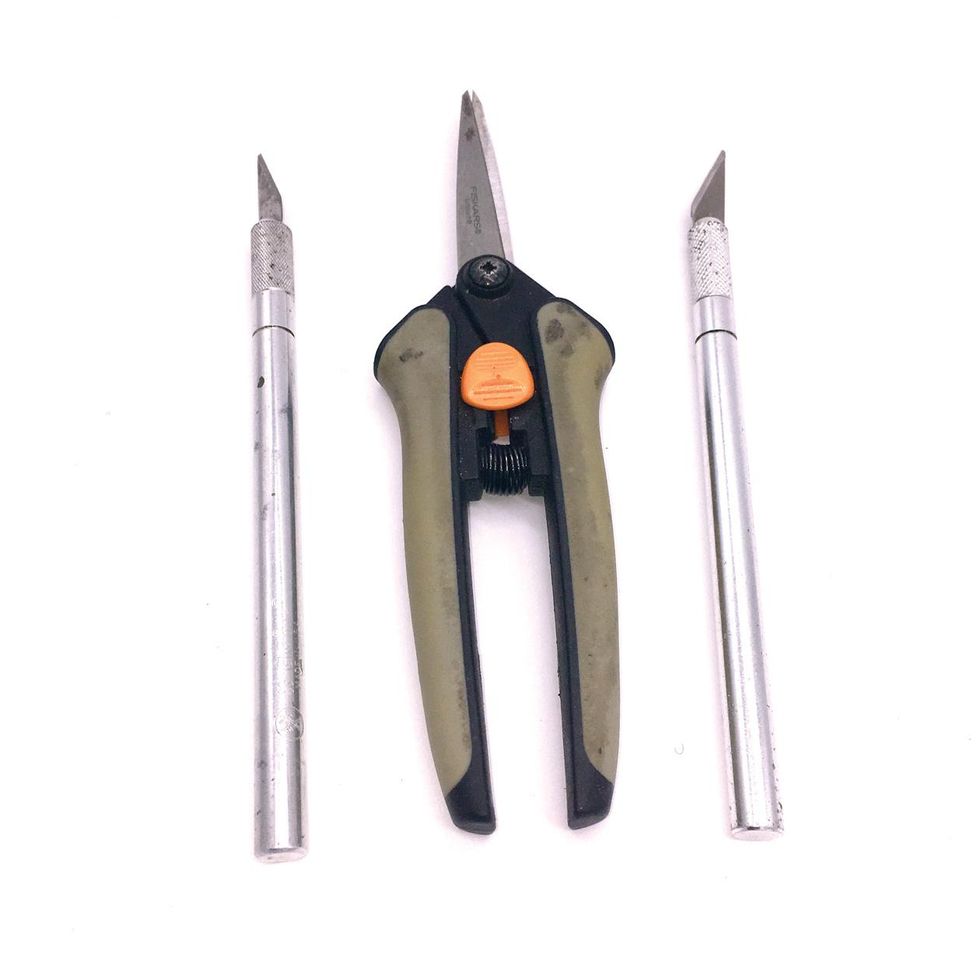
X-Acto #1 precision knife. I can't tell you how handy and necessary these are in every aspect of my creations!
Scissors. I like Fiskars Softouch Micro-Tip Pruning Snips, but just about any kind will work.
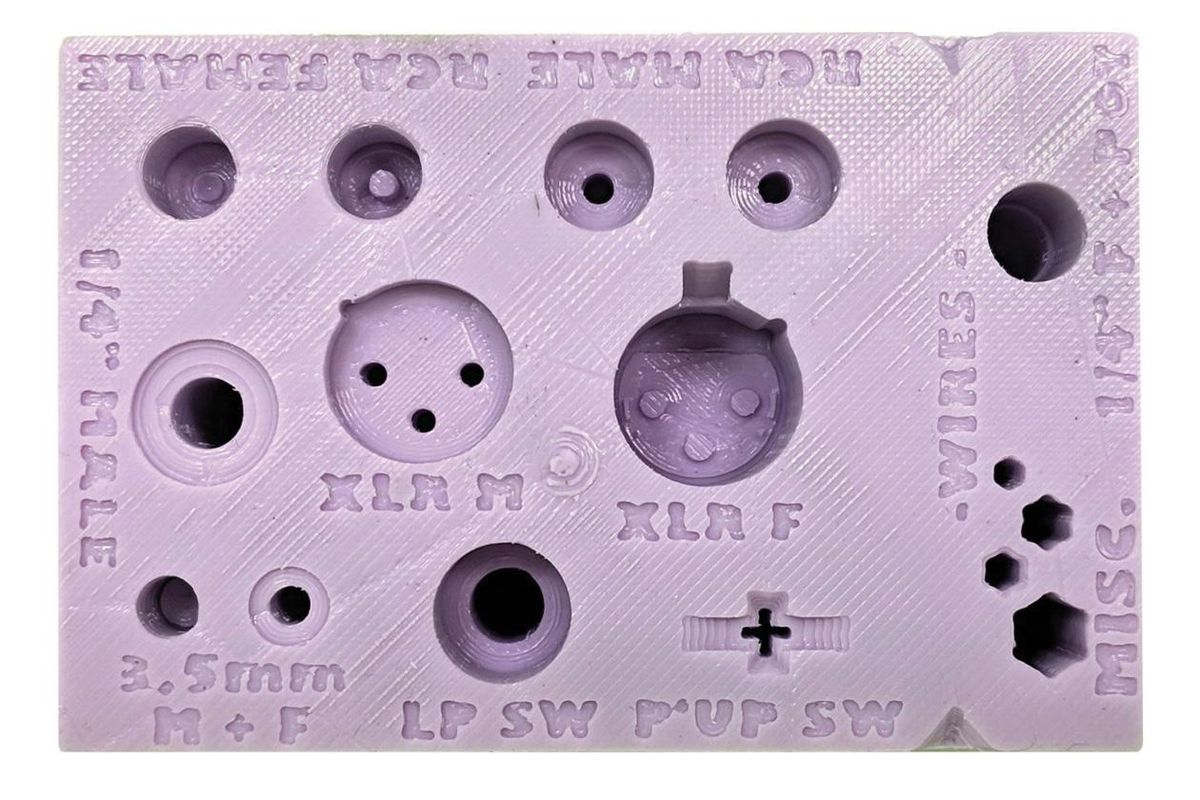
Radio Shack Hot Holder. This silicon block has molded compartments for holding everything from 1/4" jacks to footswitches, RCA and XLR plugs, and even pickup switches while you solder parts onto them. I initially balked at the price, but I have to admit I'm using it often.
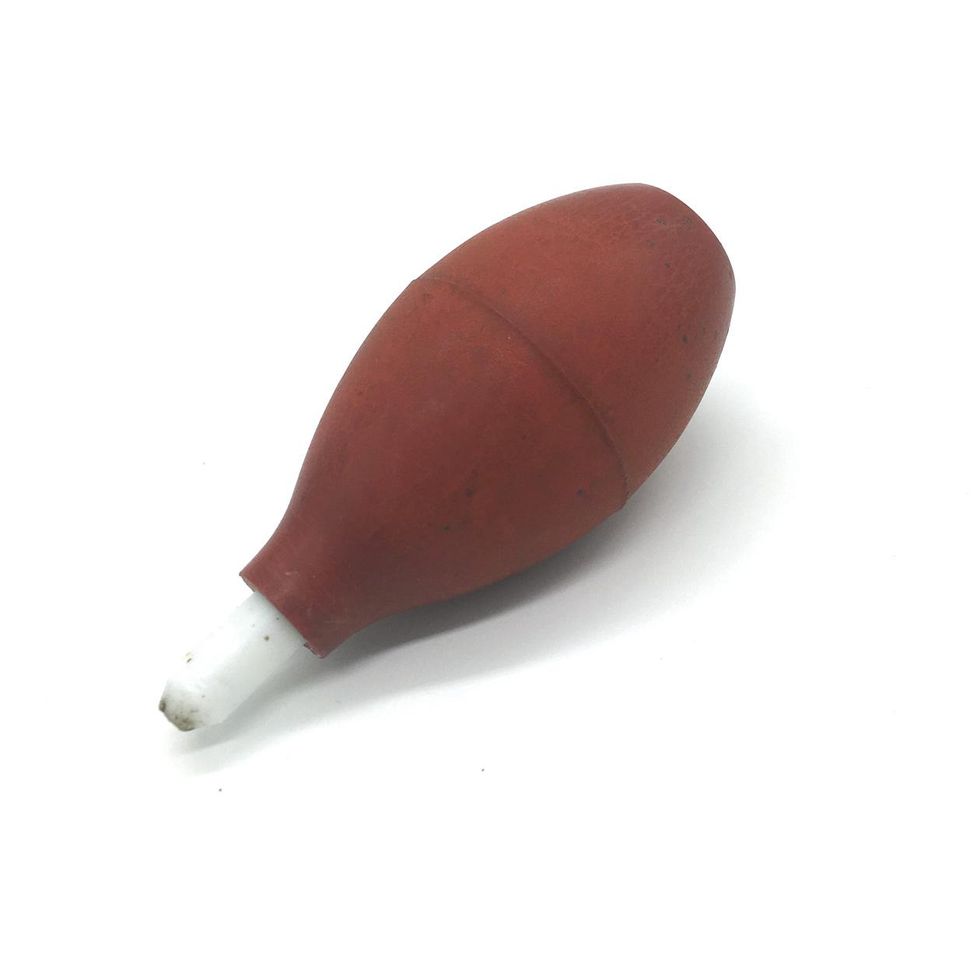
Desoldering bulb. Learning to desolder is an invaluable skill, as even the most seasoned pedal builders make soldering mistakes, and circuit-board pads and traces don't typically stand up to a lot of reheating while you try to do the job with just your soldering iron. A great way to practice is by desoldering components off PCBs from old or broken electronics. This is one of my favorite things to do, because you get comfortable with the process while saving a precious transistor or two from landfills. (There are other ways to desolder—some folks like to use a pump or solder wick. But I find the bulb to be the easiest, cleanest method, because you can apply different amounts of pressure to desolder more delicately.)
Parts Needed for Our Circuit-Tester Project
Hookup wire. 22- and 24-gauge stranded, pre-bond hookup wire is most common in pedal building, as anything thicker than 22 won't fit some hardware and some circuit-board holes, while anything thinner than 24 won't be robust enough. Jackets can be made of a few different materials— cloth-covered, polytetrafluoroethylene (Teflon)-coated, or the polyvinyl chloride (PVC) type most builders use. You can even get your preferred wire type in pre-cut, pre-"tinned" sets. However, knowing how to strip and tin wires (condition their tips for proper conduction—we'll talk more about this later) is a valuable skill, so I suggest using raw wire like the 24-gauge options available from LoveMySwitches.com.
DIY TIP: Although many pro pedal builders use a single color of wiring for their circuits, it's a good idea for new builders to purchase red, black, green, and blue wire, since, when you go a-hunting for layouts to build, you'll find that many use this color-coding scheme to denote positive, ground, input, and output wires, respectively—just as we have in our circuit-tester project.
Testing leads. Most pedal circuits have four wires coming off of the circuit boards: input (the green lines in our diagrams), output (blue lines), positive (red +9V lines), and ground (black). That means we'll need four testing leads. Because our circuit-testing box will be used over and over again, we should invest in quality, durable leads. I've found Mueller BU-2031-A-12-0 leads to be robust. (If you prefer longer leads, Velleman sets will work as well—but be sure to buy two packages, since each only comes with three.) The alligator-clip end of each lead hooks onto the input, output, positive, or ground wires of the circuit board we are testing, and the "banana-plug" end of each lead plugs into the corresponding banana post (see next entry for more) on the tester pedal.
You can also make your own leads to the exact lengths that are ideal for your workstation. If you go that route, Keystone Electronics 5046 alligator clips are a nice choice. Mueller even has a helpful video showing three different ways to attach an alligator clip to a wire. Meanwhile, AudioTrendsTV has a helpful video showing how to solder a banana plug. (Solder-less screw-on plugs are available, but in my experience the soldered variety are much more durable. If you buy the screw-on type, I recommend soldering the wire in for extra strength.)
You'll also need four banana plugs, and Mueller tapered-handle models are a good option. "Banana plugs" are single-wire electrical connectors used for joining wires to equipment, and the awesome thing about them is that the leads are removable, so you have a ton of options as far as tester leads go. Just be sure to buy the ones with an alligator clip on one end and a 4 mm male banana post on the other.
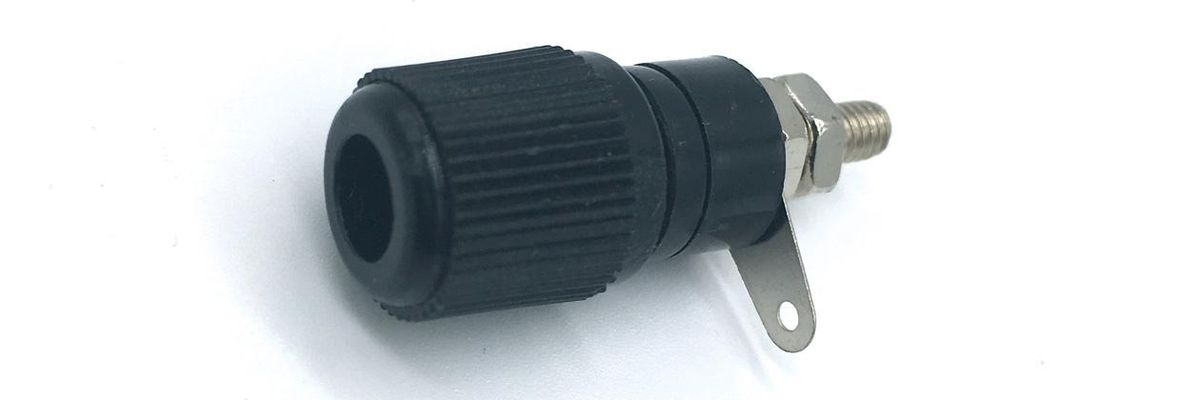
Banana posts. These are the jacks that the detachable test lead cables with alligator clip ends will plug into when the tester pedal is finished. They are also sometimes referred to as "binding posts" or "terminal binding posts," and you'll need four of these, too.
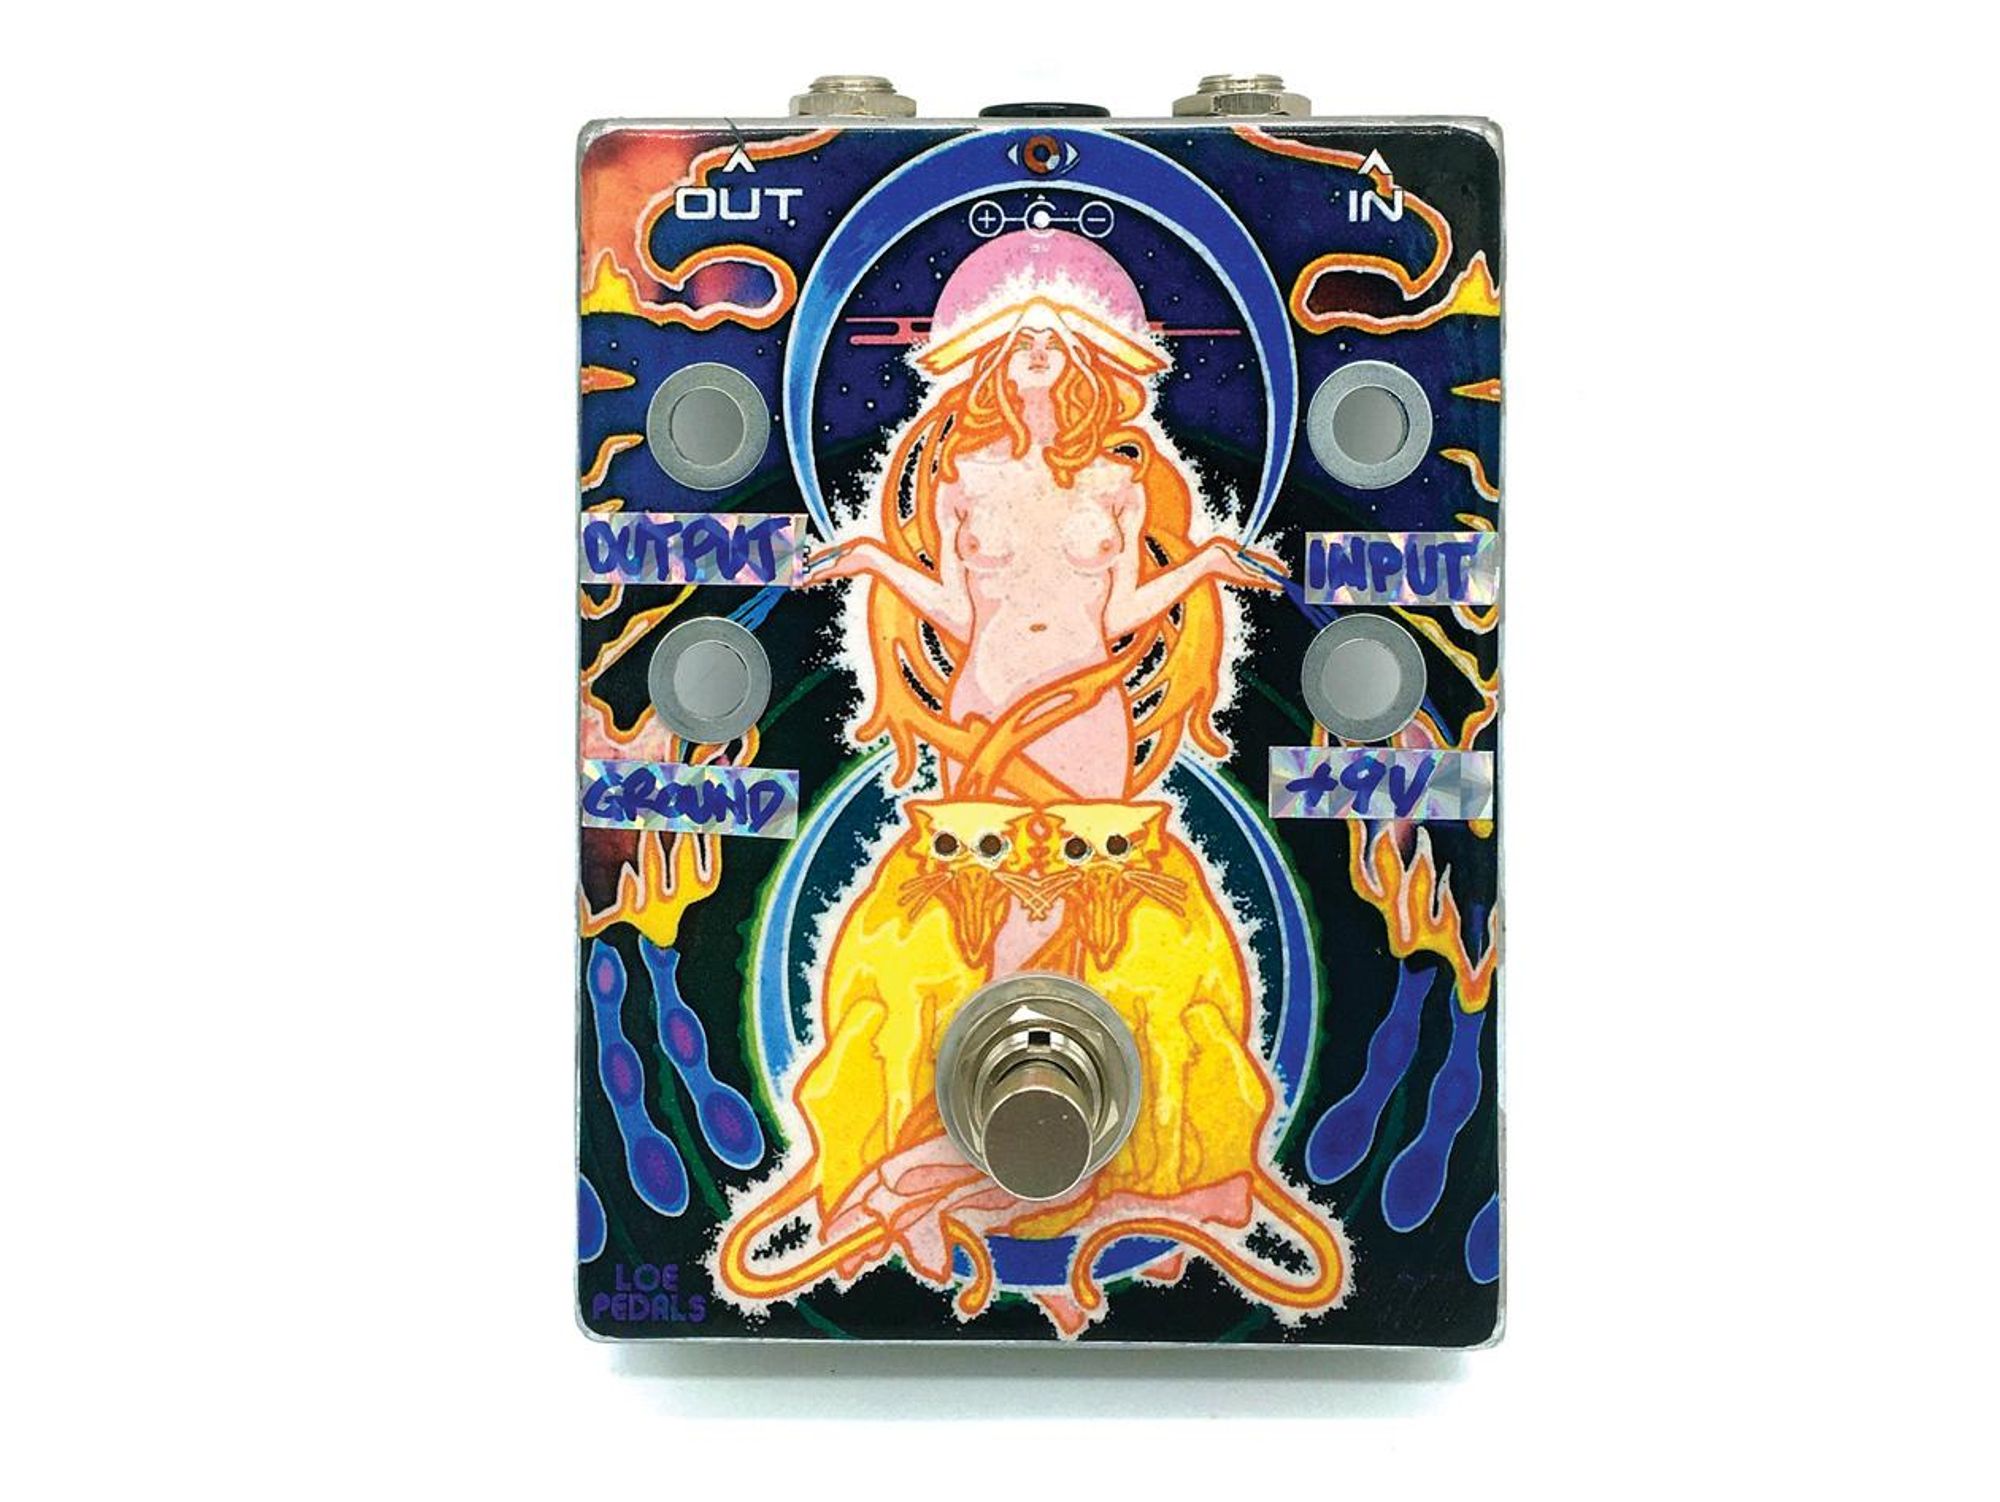
A metal enclosure. Aluminum enclosures are the most widely used for guitar pedals. For our project, I used an aluminum 1590BB-size enclosure I already had from a previous project. LoopholePedals.com is one of many places that offers drilling services for those who don't have the tools to do so themselves.
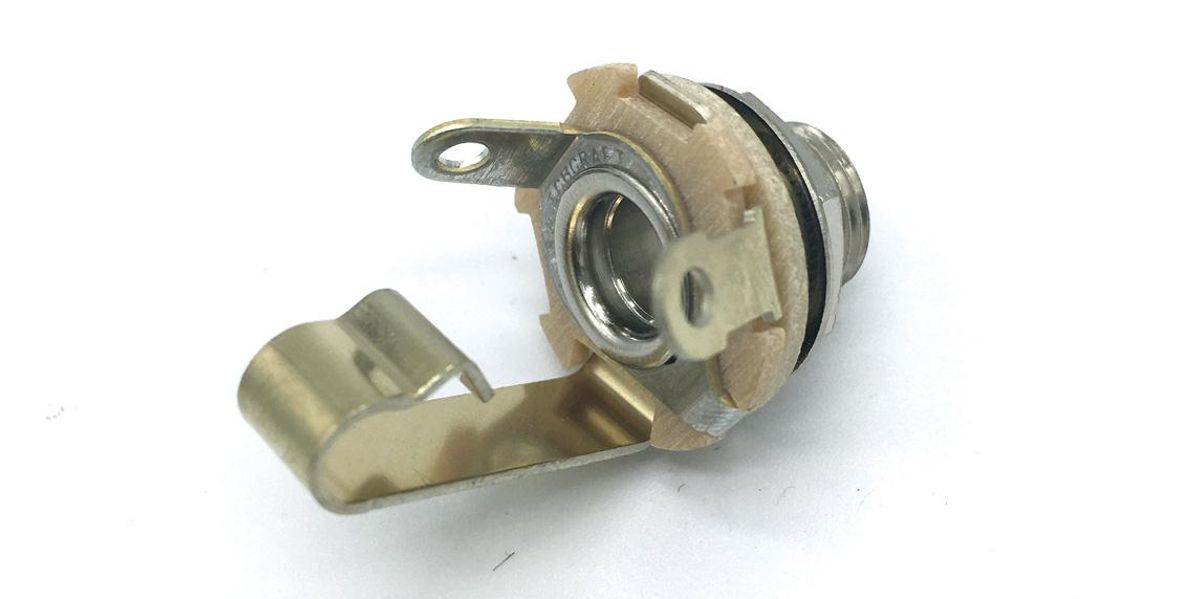
Jacks. Our test box has two 1/4" female audio jacks, as well as one 2.1 mm barrel power jack. I use Switchcraft #11 monoand #12B stereo jacks, and Lumberg or Mouser DC jacks.
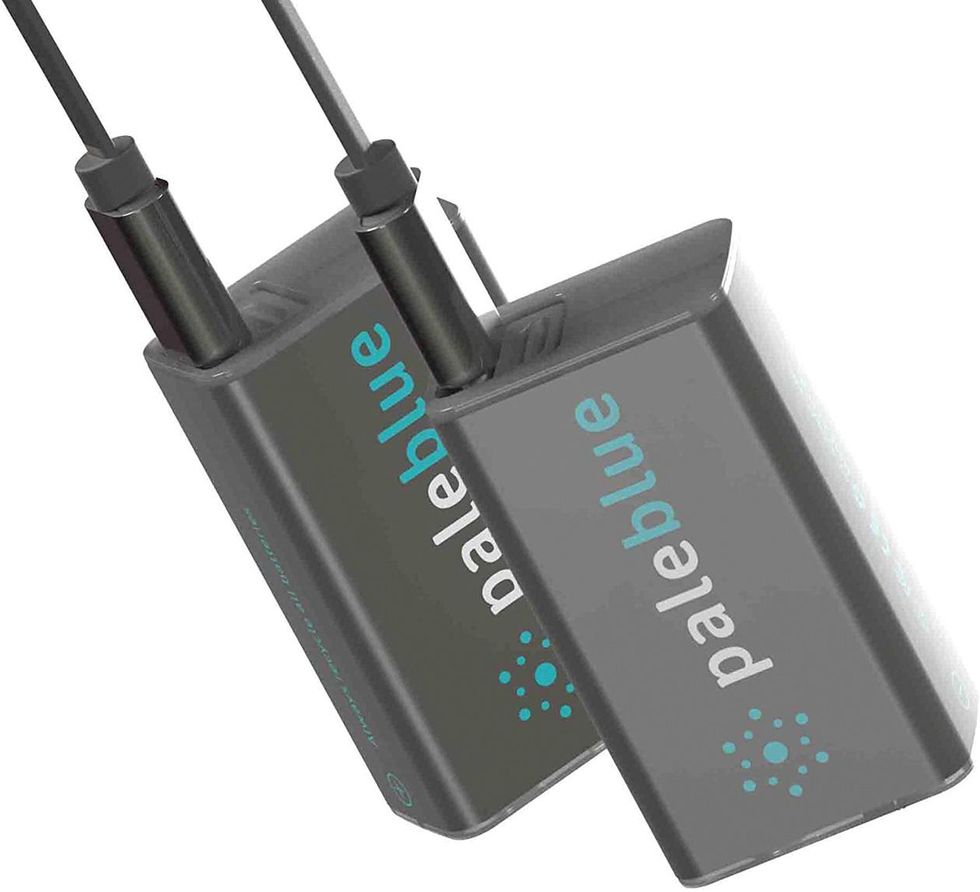
9V batteries. Batteries are terrible for the environment, but we sometimes need them for circuit testing. I always plug into a circuit powered by just the battery at first. Once it powers on properly, I switch to a 9V DC center-negative power supply for further testing. Rechargeable 9V batteries help ease environmental impact and are easy to charge via USB cable. They don't seem to hold a full 9V charge, but since I only use them for the initial test, the 8.6V I've measured from their leads is good enough.
• 9V battery clip connector (center-negative) power-supply cable. To connect the rechargeable battery to the tester pedal's power jack without having to remove the back of the enclosure. (Don't worry—if you prefer a regular 9V connector, I'm including the wiring scheme for that, too.)
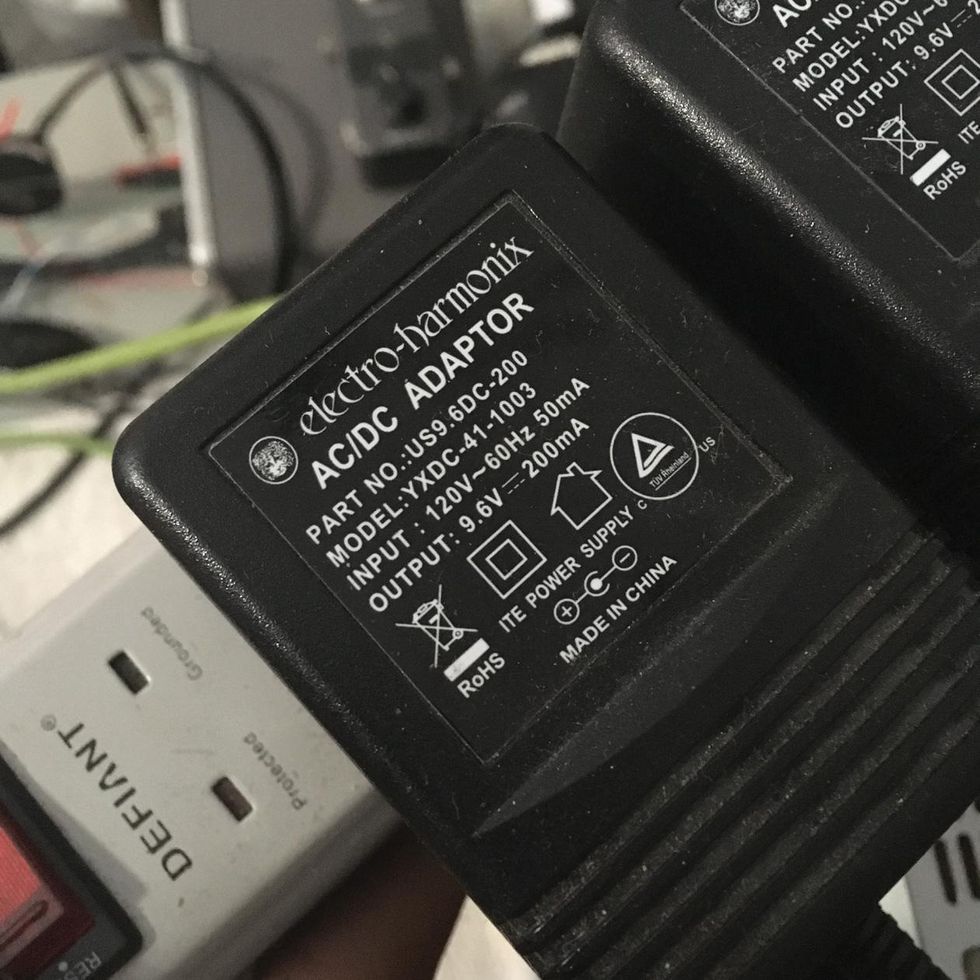
9V, center-negative regulated power supply. Clean power is crucial for a pedal, but especially so when you're testing it. I use the Electro-Harmonix US96DC-200BI, because the power seems to be clean and less noisy than others (I've tried more than a dozen brands).
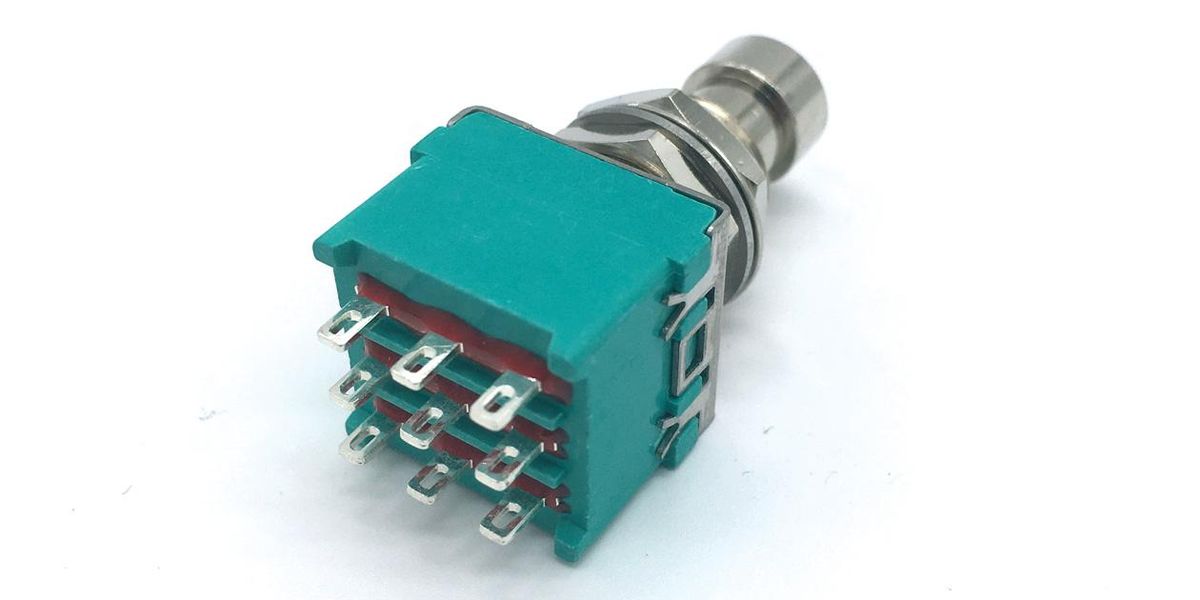
A latching 3PDT (triple-pole, double-throw) switch. It can be either a footswitch or a toggle.
Note: Speaking of switches, it's a good idea to research how they work if you haven't already done so. Understanding how the internal mechanisms connect and how the connections change as the switch is engaged makes the whole off-board-wiring experience much less daunting. BeavisAudio.com has some very useful information on the subject, and DIY Guitar Pedals has an informative video, too.
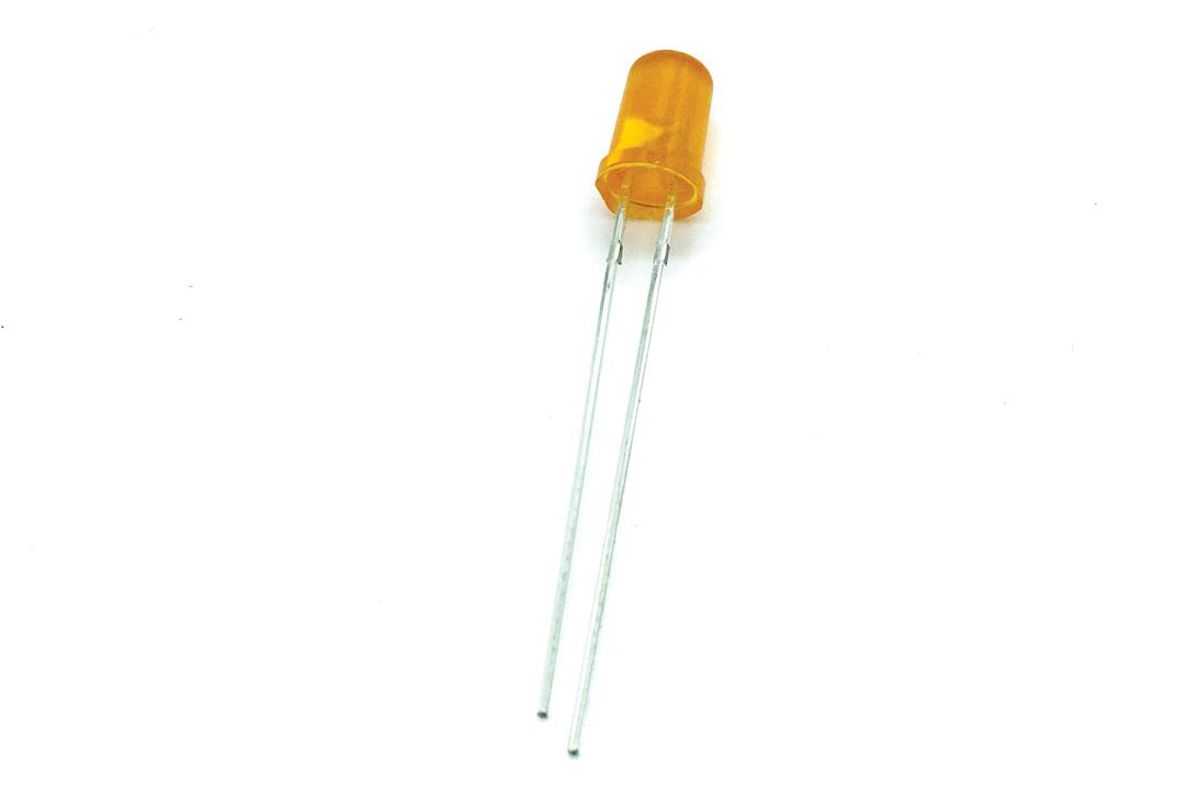
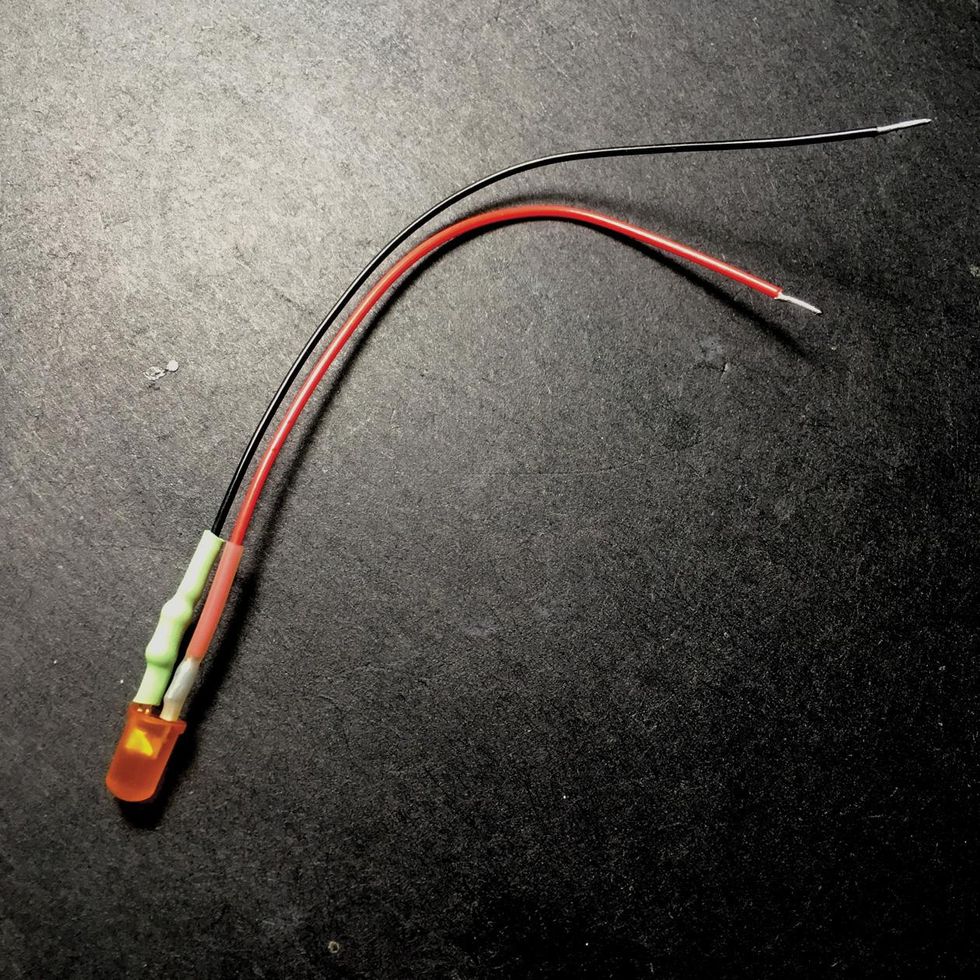
Bypass LED (light-emitting diode) and LED holder. Pick any color you like. 5 mm and 3 mm models seem to be most popular for pedal building.
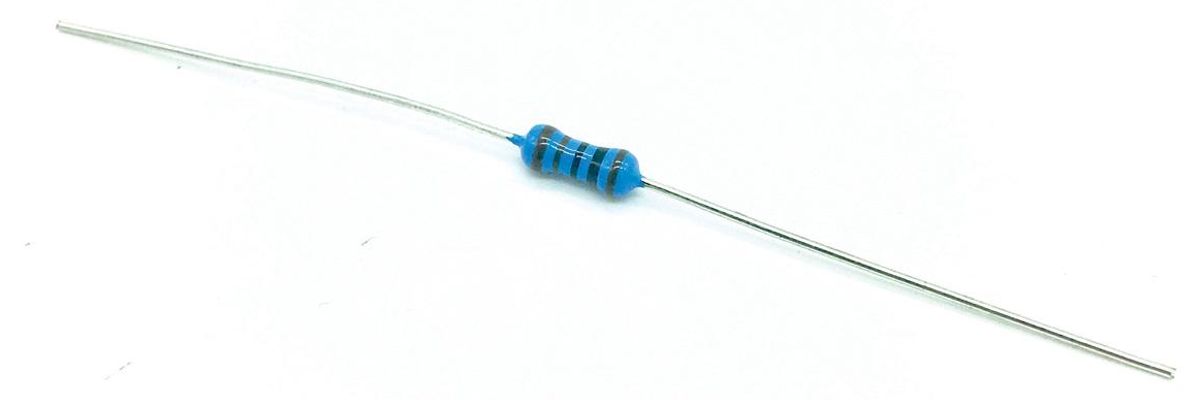
1kΩ 1/4-watt resistor. LEDs are quite robust, but they need a resistor attached as a current limiter so they don't blow. You can use a 2.2k or 4.7k resistor too. The higher the resistance, the dimmer the light will be.
The Pedal Builder’s Best Friend: How to Build a Circuit Tester
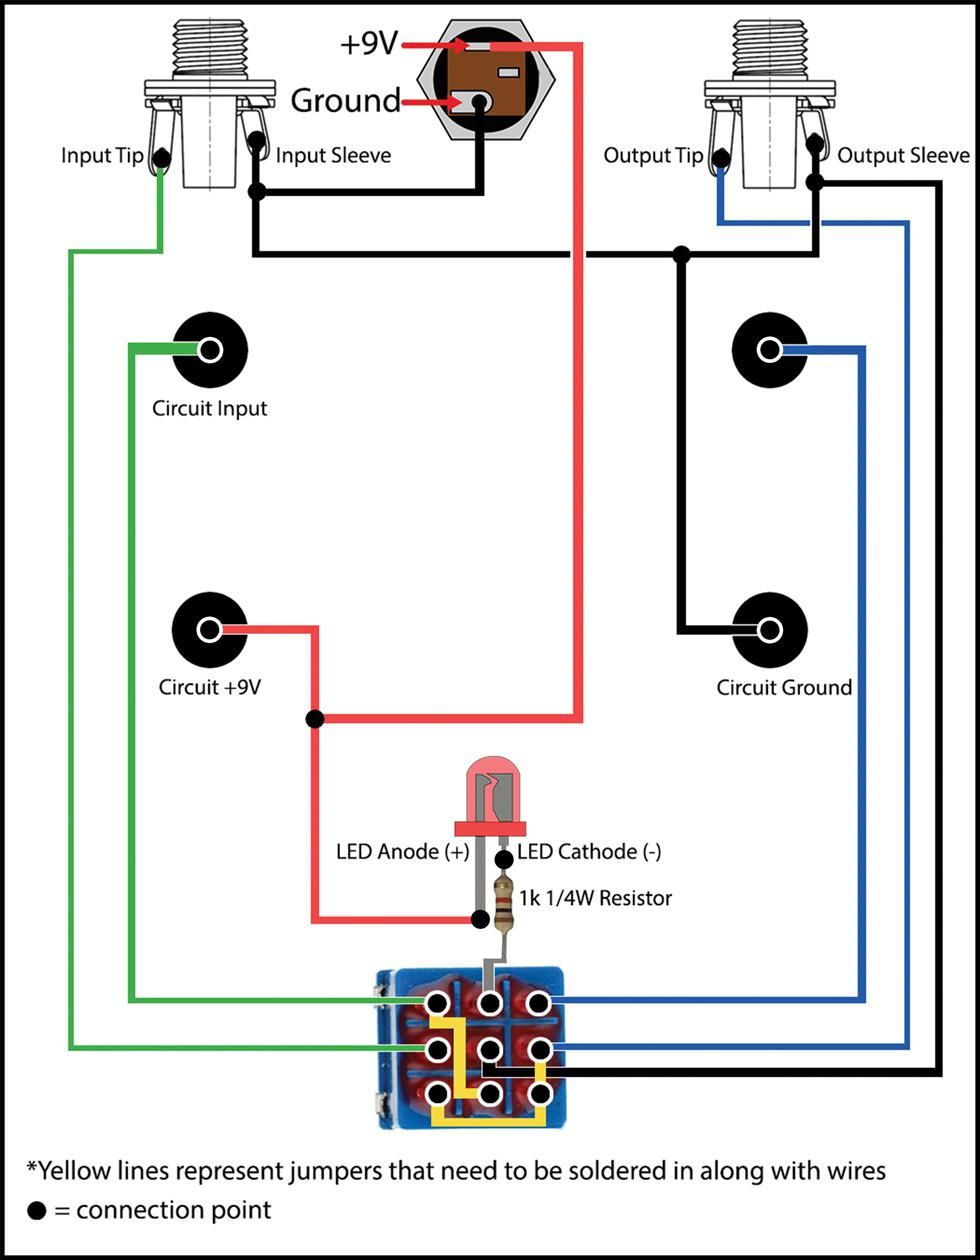
Okay, I think I've hyped this killer tool enough. Unless you need to take a sec to go online and consult our Soldering 101: A Step-by-Step Guide, let's build this thing! Here's a wiring diagram.
1. Drill the housing. Before we can start wiring, the enclosure needs holes drilled out to accommodate the input, output, and power jacks, as well as the LED and bypass (on/off) switch. If your enclosure didn't come with predrilled holes, you can drill for the jacks on the housing's top or sides, whichever you prefer. I prefer power and audio jacks on top, with the power jack in the center and the input and output jacks opposite each other whenever possible.
We also need to drill four holes for the banana posts that will be connected internally. As mentioned earlier, every circuit you build will have input (green diagram lines), output (blue), positive (red), and ground (black) wires that need to be connected to your tester pedal. Note: The enclosure I'm using already had four holes on top, so my layout reflects this. You might choose to put the banana posts on the side(s), top, or someplace else. That's the beauty of DIY!
I have a mantra: Measure three times, drill once. You can use a Sharpie or other marker to mark the spots you want to drill. Hit each mark with the center-punch tool, then drill pilot holes. Once pilot holes are drilled, you're ready to install your step bit in the drill. (Reminder: The step bit is marked on its side with size values so you know where to stop drilling for the desired hole size.)
PRO TIPS: Some DIY sites have drill guides you can download and print out to make the process easier, but it's still good to learn how to do it manually. Also, Barry Steindel from GuitarPCB.com has a great video tutorial on how to drill pedal enclosures with a hand drill, and DIY Guitar Pedals has one for those who prefer a drill press.
IMPORTANT: Most component and hardware manufacturers publish data sheets listing characteristics and specifications—including physical measurements—for their products. It's a good idea to consult the data sheet for each of your components prior to drilling so that you know how many steps of your step drill bit (or which sizes of standard drill bits) to use.
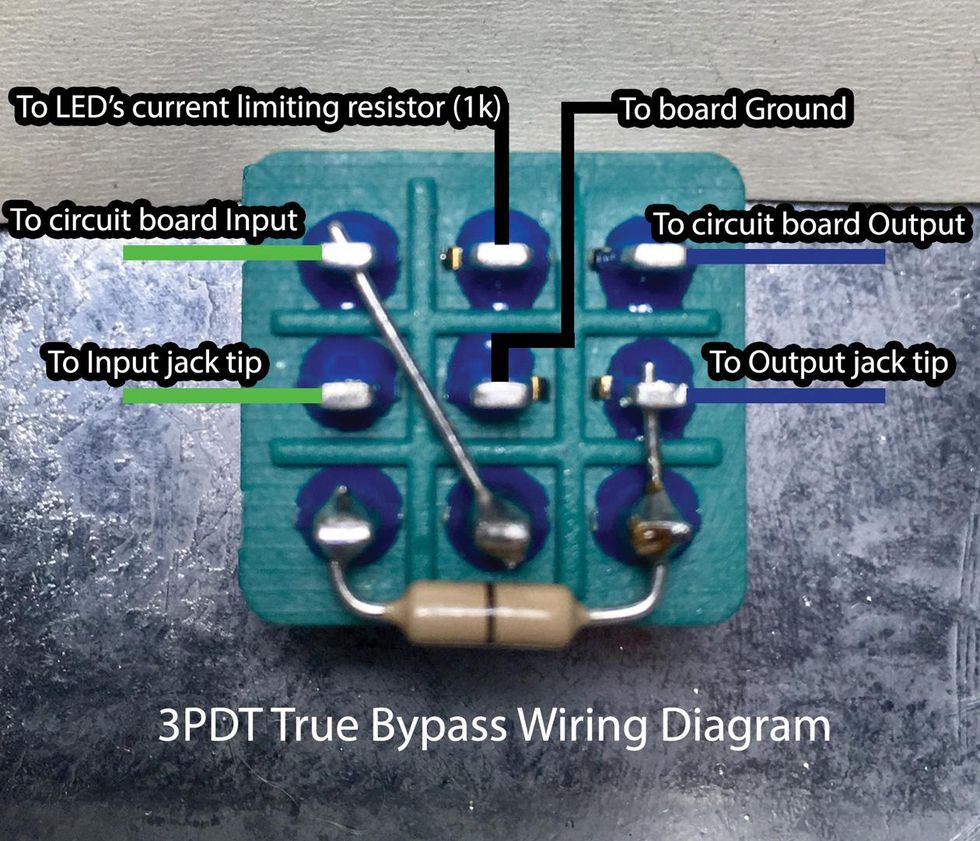
2. Prepare the switch. To start with, let's connect a couple of "jumpers" on the underside of our 3PDT switch so it functions as a "true bypass" switch (which provides the most transparent signal for circuit testing). This can be done a few different ways, but my preferred method is to add a wire between lugs 1 and 8, as well as lugs 6, 7, and 9. (As you see in the image below, some builders use a 0Ω resistor rather than a bare wire for the jumper between lugs 6, 7, and 9. It's perfectly fine to use a simple wire for this, which is why I didn't include a second resistor in the list of necessary parts for this build.) For now, only apply solder to the three bottom lugs, since the two other lugs (1 and 6) also need to accommodate the wires we'll add in later.
Note: Although you can use regular hookup wire, I use snipped-off leg pieces from resistors or other components for these jumpers.
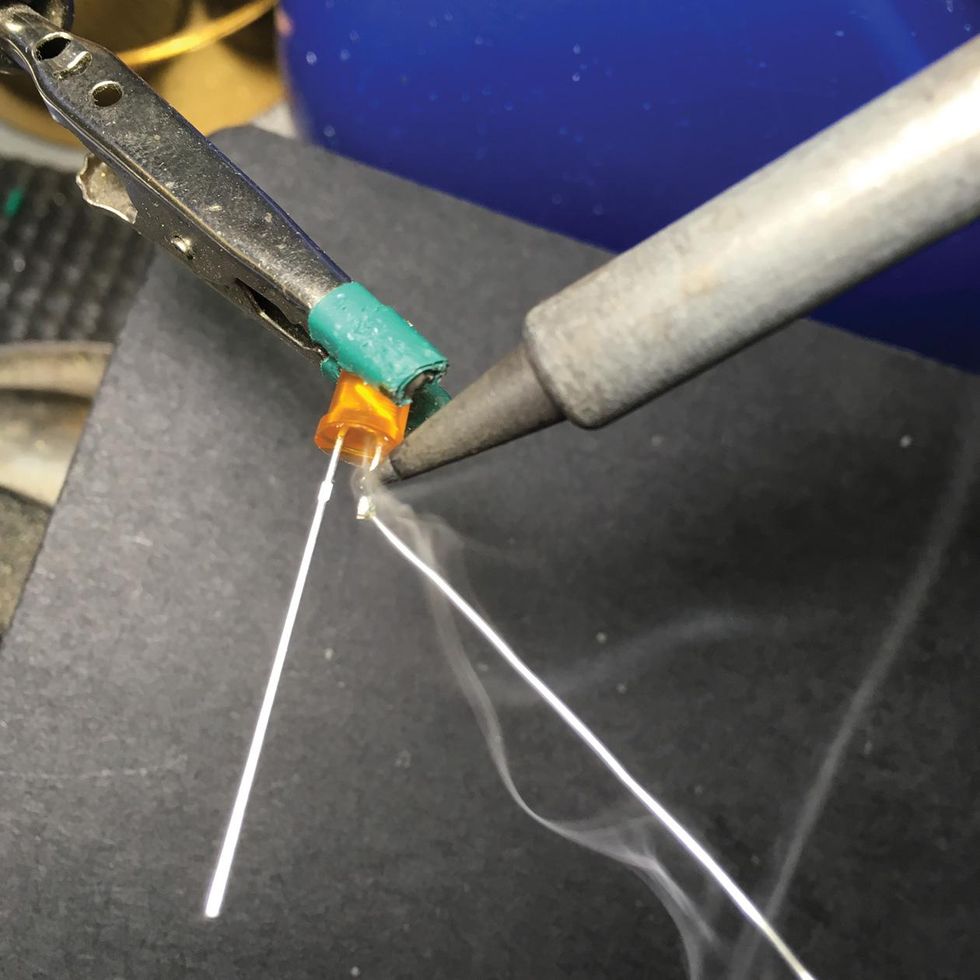
3. Prepare the LED wiring "harness." First, we're going to trim the LED's ground (cathode) lead, which is the shorter leg. Then we'll "tin" the trimmed end by touching the soldering-iron tip to it, applying a tiny dab of solder, and then sliding the iron tip back and forth along the ground lead for a brief moment until the solder melts and the entire surface of the leg appears shiny. Why? Tinning limits corrosion of the metal leads and helps components fuse together better at solder joints. The LearnElectronics channel has a useful tinning demo video.
Next, cut all but a 1/4" off the 1kΩ resistor's legs, then tin the short end. Put the LED's body into one of the "hands" of the Helping Hands tool, with the legs facing inward, then put the long lead of the resistor in the other "hand," with the snipped, tinned leg facing in. Push the "hands" together until the two short, tinned leads of each component overlap. Touch the soldering-iron tip to the junction for a brief moment, add a dab of solder, and remove the iron's tip once the solder has pooled and settled in, nice and shiny. A shiny solder joint is generally a solid solder joint.
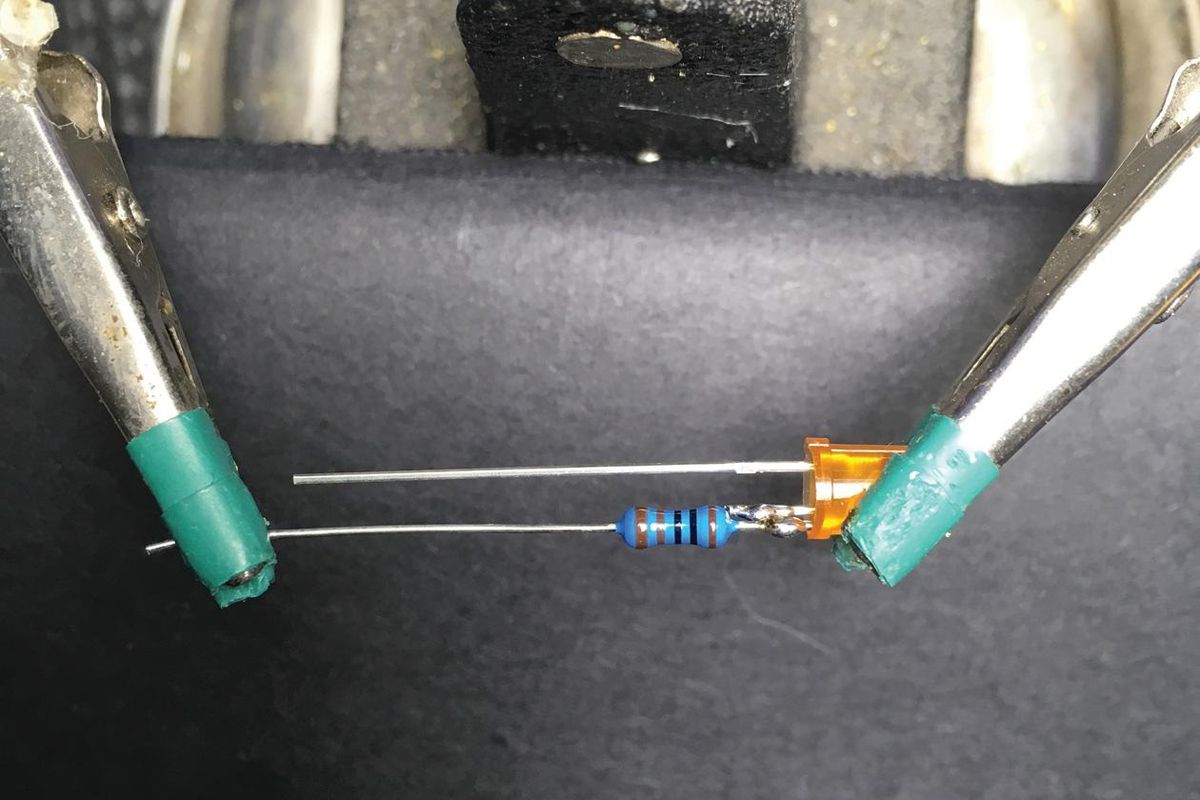
The leftover leg on the 1kΩ resistor is sometimes long enough to be soldered directly to the footswitch, as is the case here. But if your LED hole is further away than ours, you'll need to add a wire. To do this, trim the resistor's other leg to 1/4" and tin it. Next, strip and tin a piece of black hookup wire long enough to reach from the 3PDT switch to the LED hole. Now snip the LED's longer leg (the positive or "anode" lead), again to a 1/4", and tin it. Cut another wire long enough to reach from your power jack to the LED hole, then strip and tin the ends. Load the stripped, tinned wire into the other Helping Hands holder and push the "hands" together until the end of the wire overlaps the LED's anode. Solder them together so that the solder has pooled and settled, nice and shiny, as before.
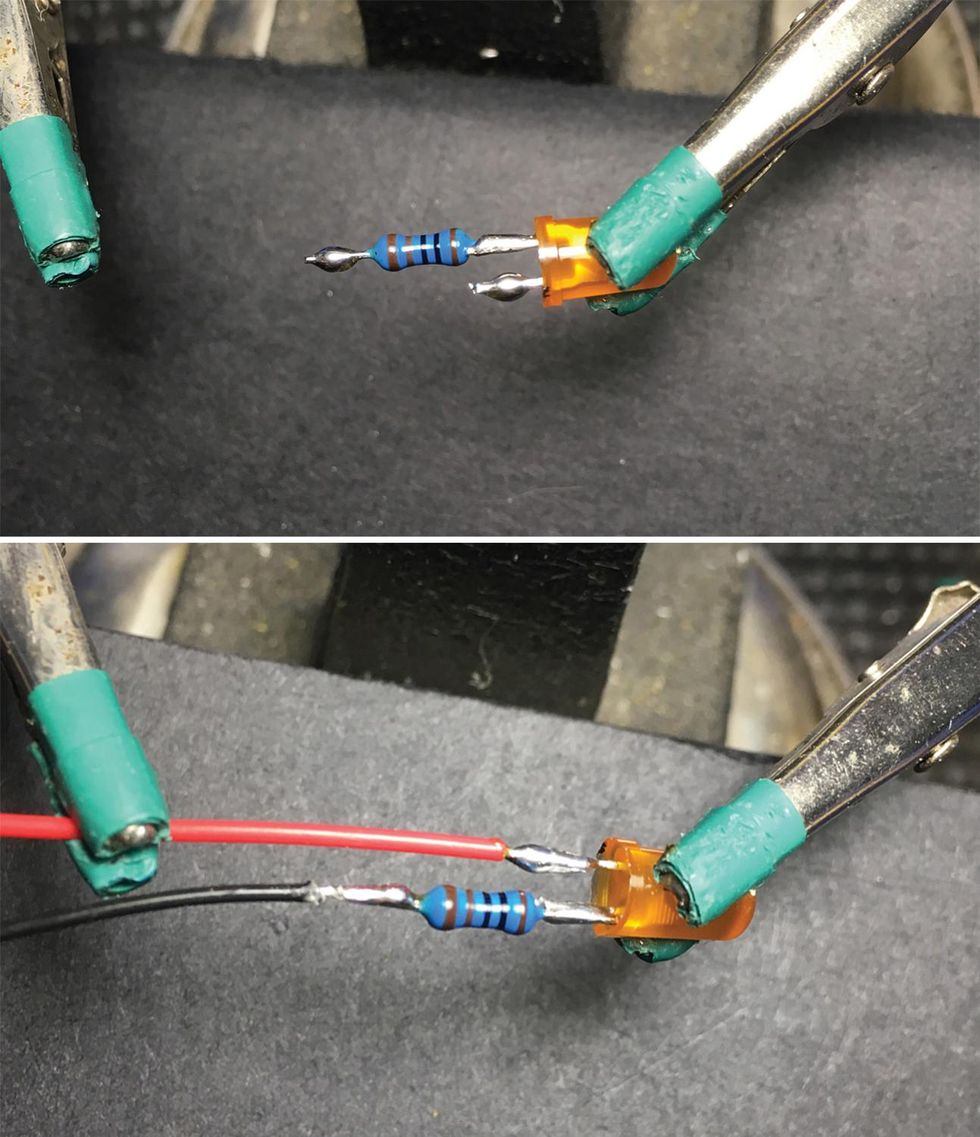
Although it's not crucial, you can encase these two solder points in 1/8" shrink tubing for extra stability, neatness, and to help keep the joints from shorting out against each other or the enclosure (don't use electrical tape instead—you'll regret it!). The YouTube channel MrJustDIY has a helpful video on how to do so. The most important thing is to make sure your solder joint is good before you cover it. I recommend testing for continuity with a multimeter before adding the shrink stuff.
4. Install the enclosure's hardware. With our footswitch and LED harness ready to go, we're set to use those Rocket Sockets (or other appropriately sized socket wrenches) to attach the footswitch and the input, output, and power jacks.
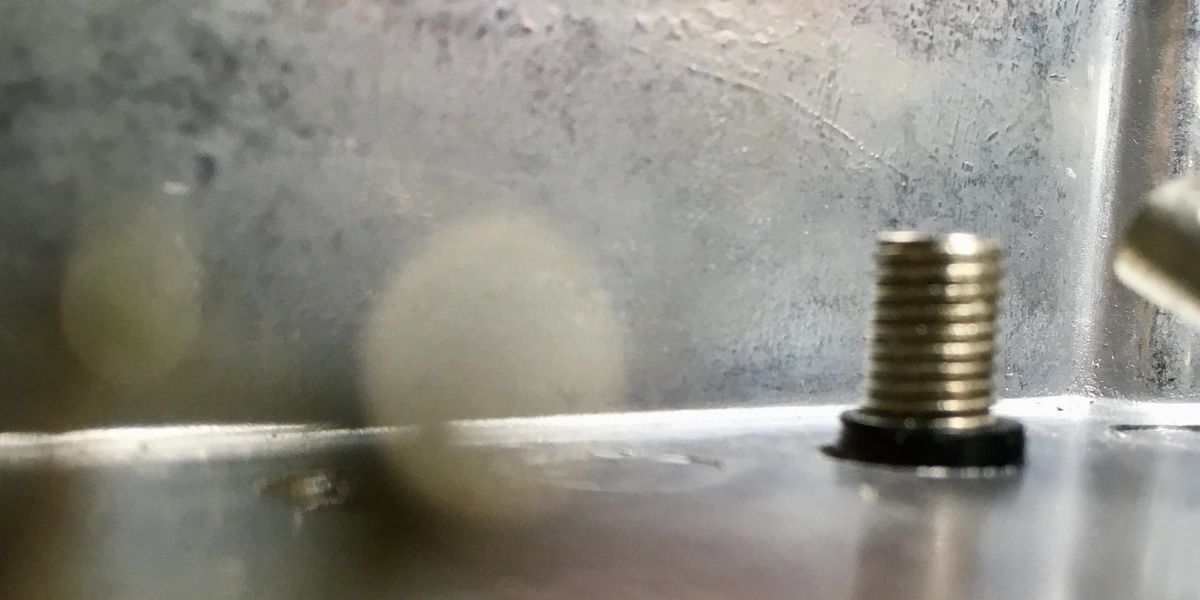
As for the banana posts, they have a hollow, threaded column with an insert at the top that accepts a banana plug. IMPORTANT: You don't want that metal post touching the metal enclosure at all. Thankfully, banana posts come with plastic insulators that go around the post, ensuring that they don't short-out the circuit. Install the banana post from the top, as shown below.
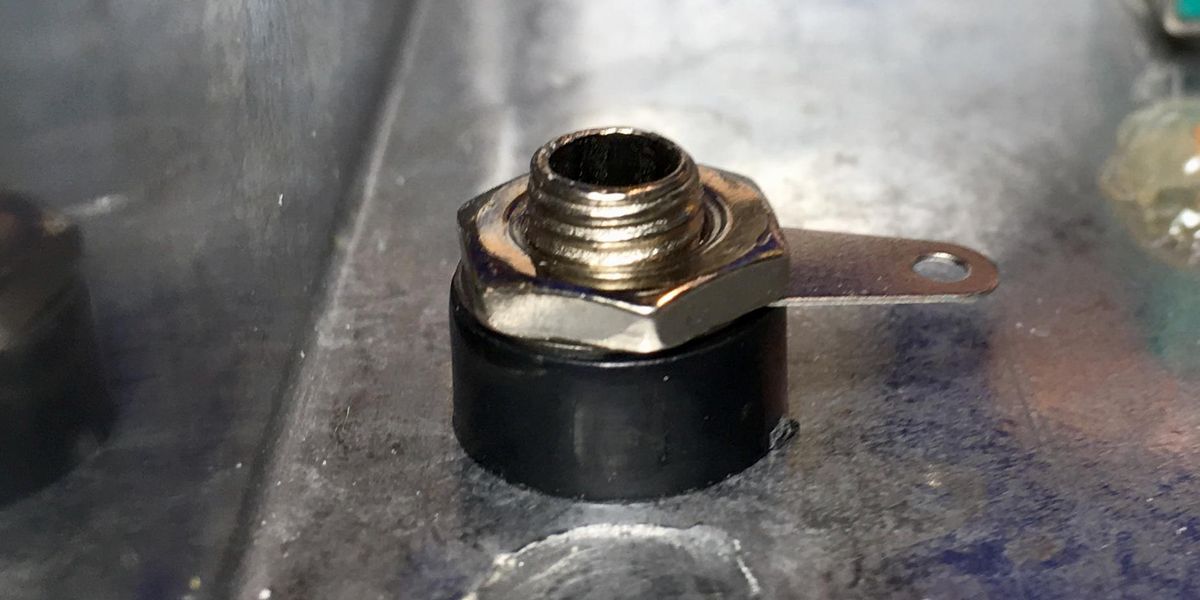
Next, put the plastic insulator cylinder over the post, followed by the little tab thing, then the nut. Tighten it snugly, but be careful not to crack the plastic insulator by over-tightening.
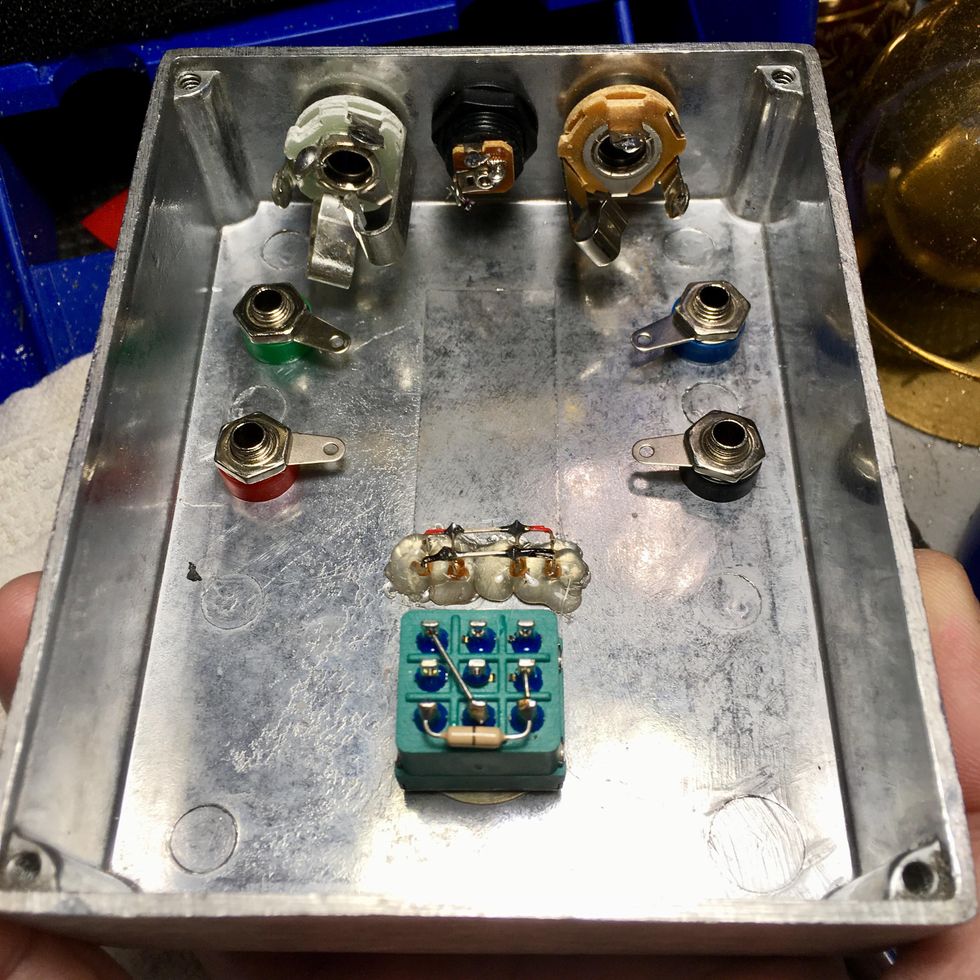
Note: If you're wondering why my LED isn't installed in a holder/bezel, it's because my recycled enclosure already had an LED glued in. It's much cleaner and sturdier to use a holder or bezel, however. If you aren't using shrink tubing around the joints, it's imperative that none of the bare leads touch the bezel (if it's metal) or the enclosure. We don't want it to short out—or worse, to blow! When you install your LED, make sure the positive and ground wires are properly oriented before you push the LED into the holder. Point the positive wire toward the power jack, and gently bend the ground-plus-resistor lead toward the bypass switch.
5. Wire and solder the circuit. Measure the distance to and from each of the points that need to be connected, as per the wiring diagram—and, ideally, in the same colors. Be sure to add a couple extra millimeters on each wire, as it's really annoying to get in the building groove only to realize a wire is too short! Next, use your wire strippers to strip 1/4" of the plastic jacket off the ends of each wire. As you tin each wire end, keep in mind that PVC jacketing melts very easily, so don't apply heat too long or you'll end up with a mess. The tinned wire ends should look shiny all the way around, like they're encased in chrome.
TECH TALK: Let's discuss 1/4" jack anatomy for a second. We are using two types—our output jack is mono and has two tabs, while our input jack is stereo and has three tabs. Turn the input jack sideways, and you'll see three protective wafer layers separating three metal terminals on the jack. These are commonly referred to as the "tip" and "ring." The ring is above the second wafer. The tip is the terminal above the first wafer, just above the base of the jack itself. The ground tab, or sleeve, is connected to the center part of the jack at the base, floating above all three wafers, and does not have a protective wafer on top. The output jack will only have two protective wafers separating the two metal conductors (the ground and tip tabs). If you decide not to add the battery snap internally, you could use two mono Switchcraft jacks as you would not need the additional ring connection used for turning the battery on and off.
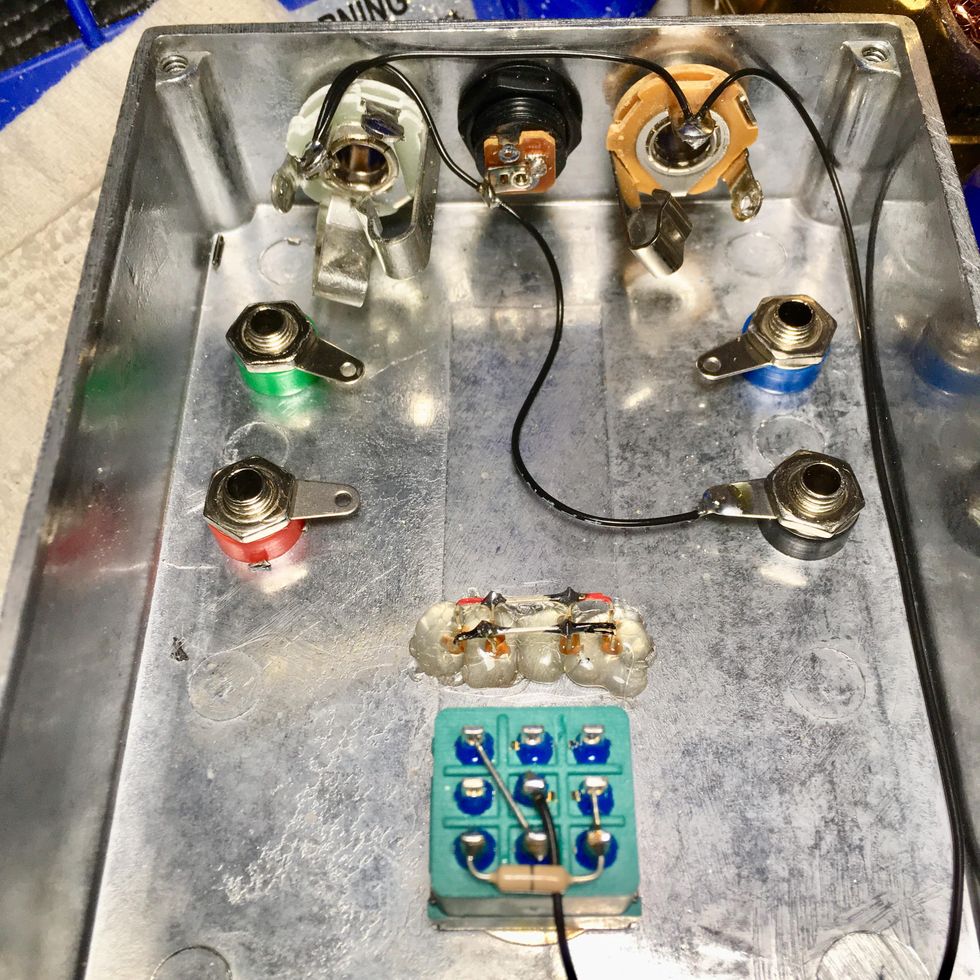
Okay, let's insert and solder all the ground wires first. I always use black wire to avoid confusion and match the diagram. Again, make sure each solder joint is shiny before you move to the next one. Also, be sure none of the wires are too taut, or they're likely to eventually come loose.
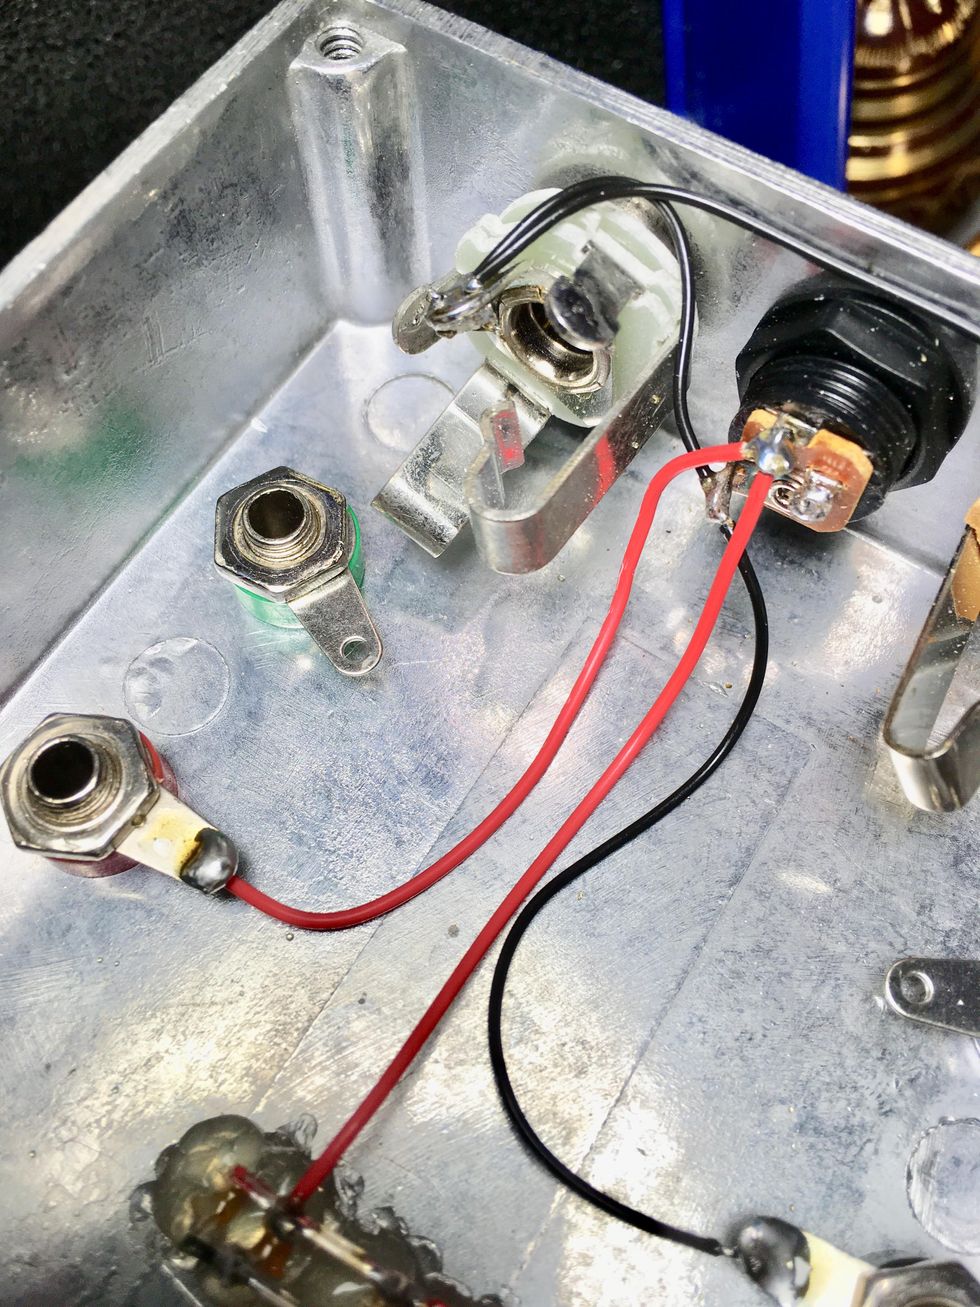
Next, I like to insert and solder the red, positive-connection wires. This is easier than ground wiring, because it only connects in two spots and one wire is already attached to the LED's positive leg. Note: Although the diagram looks like only one wire is attached to the power jack, a separate red wire will go from both the LED and the positive banana post to the power jack's sleeve pin (see photo). Both wires should fit there fine, but don't solder that joint until both wire tips are gently squeezed into the hole.
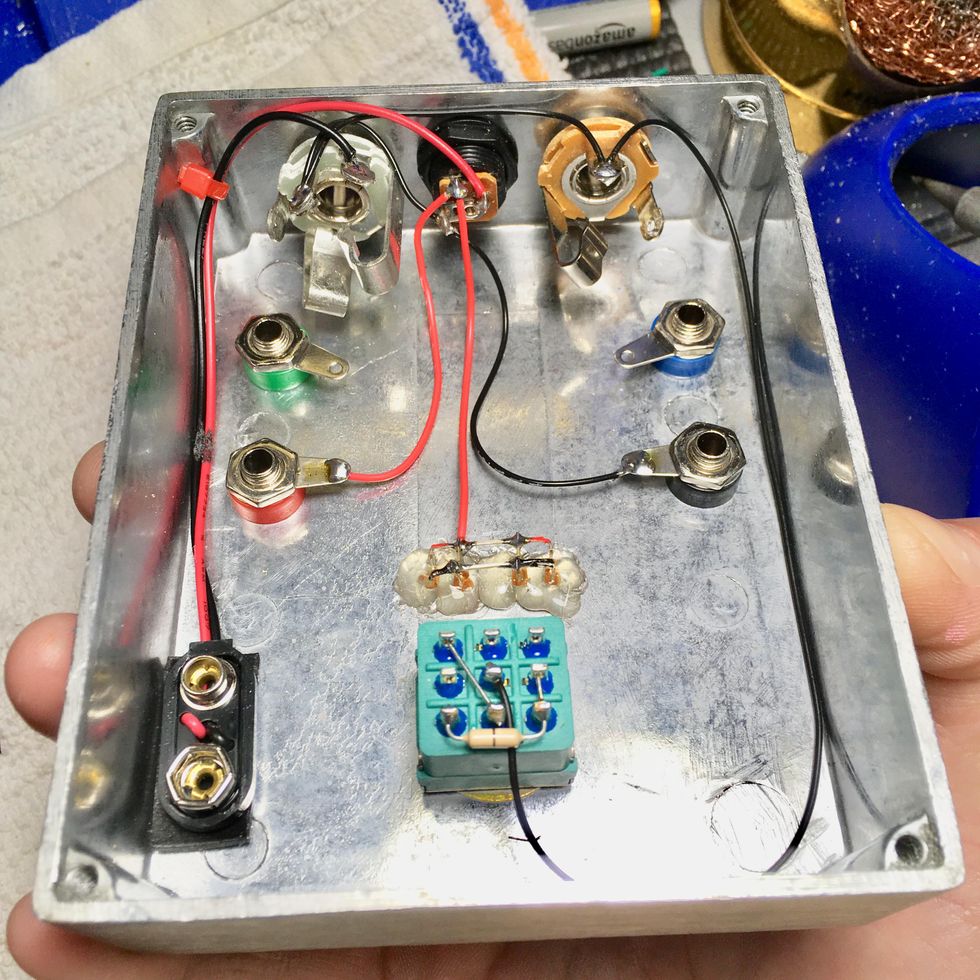
If you want to install a battery snap, do that now. Strip and tin the ends. Note: Soldering the red wire to the power jack's one remaining empty tab prevents the battery from losing juice—but only if you remember to unplug your 1/4"instrument cable from the input when you're not using the box. Plugging into the input connects the battery. Unplugging disconnects it.
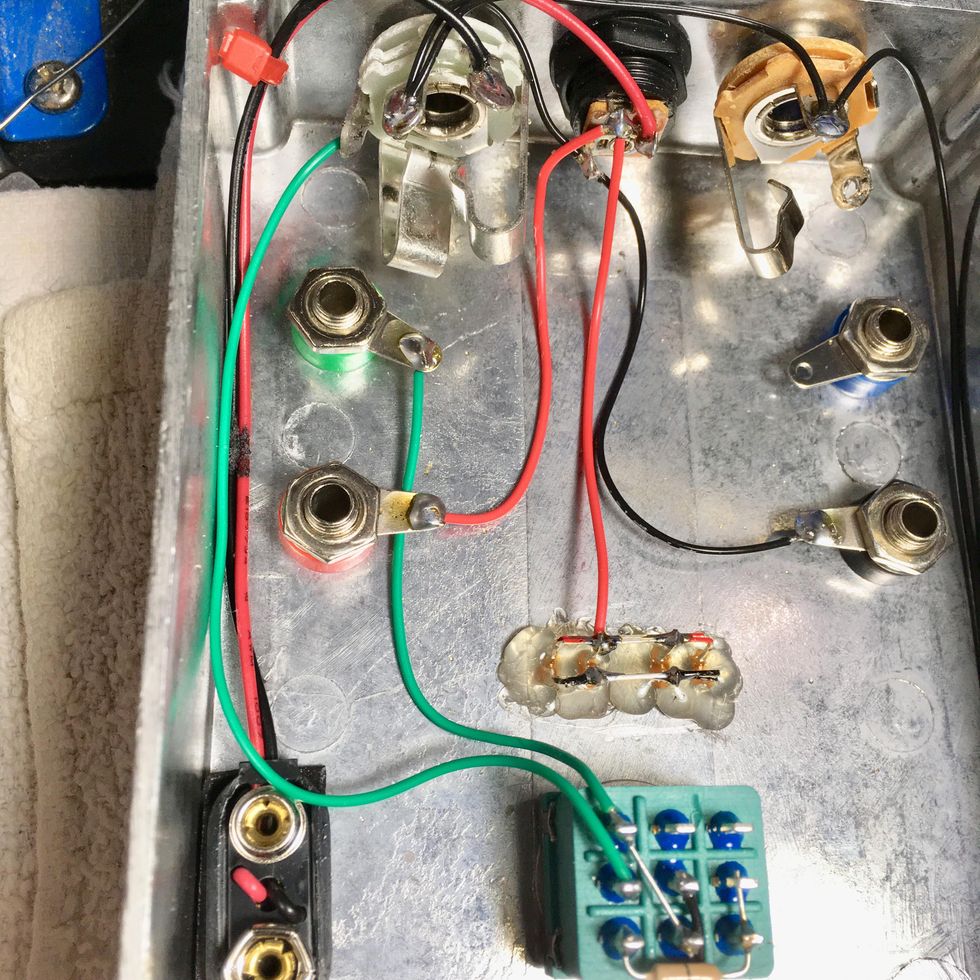
Now let's install our input (green) wires. One goes from the tip of the input jack to lug 2 (middle lug in the leftmost column) of our 3PDT switch. The other green wire goes from the input banana post's tab to lug 1 (top left) on the switch, along with one end of the jumper.
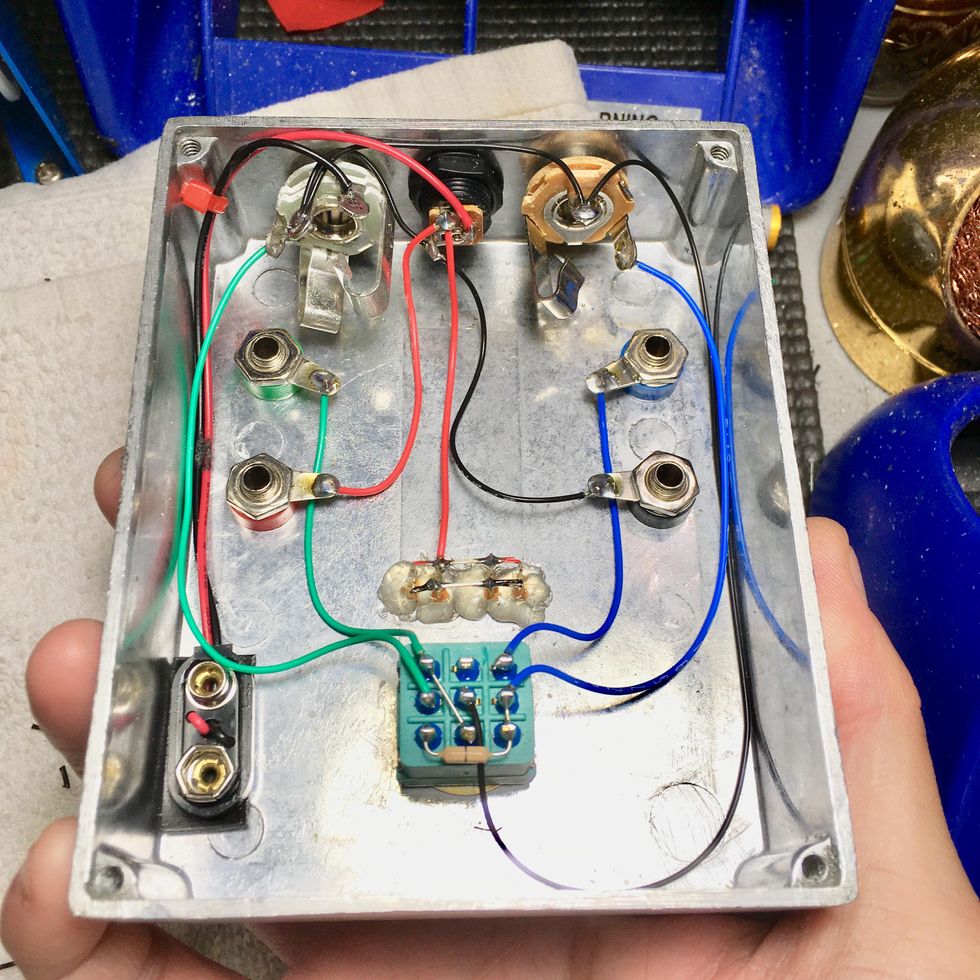
To connect output (blue) wires, route one from the tip of the output jack to lug 8 (middle of rightmost column) on the switch. The second blue wire goes from the output banana post to lug 7 (top right) on the 3PDT switch.
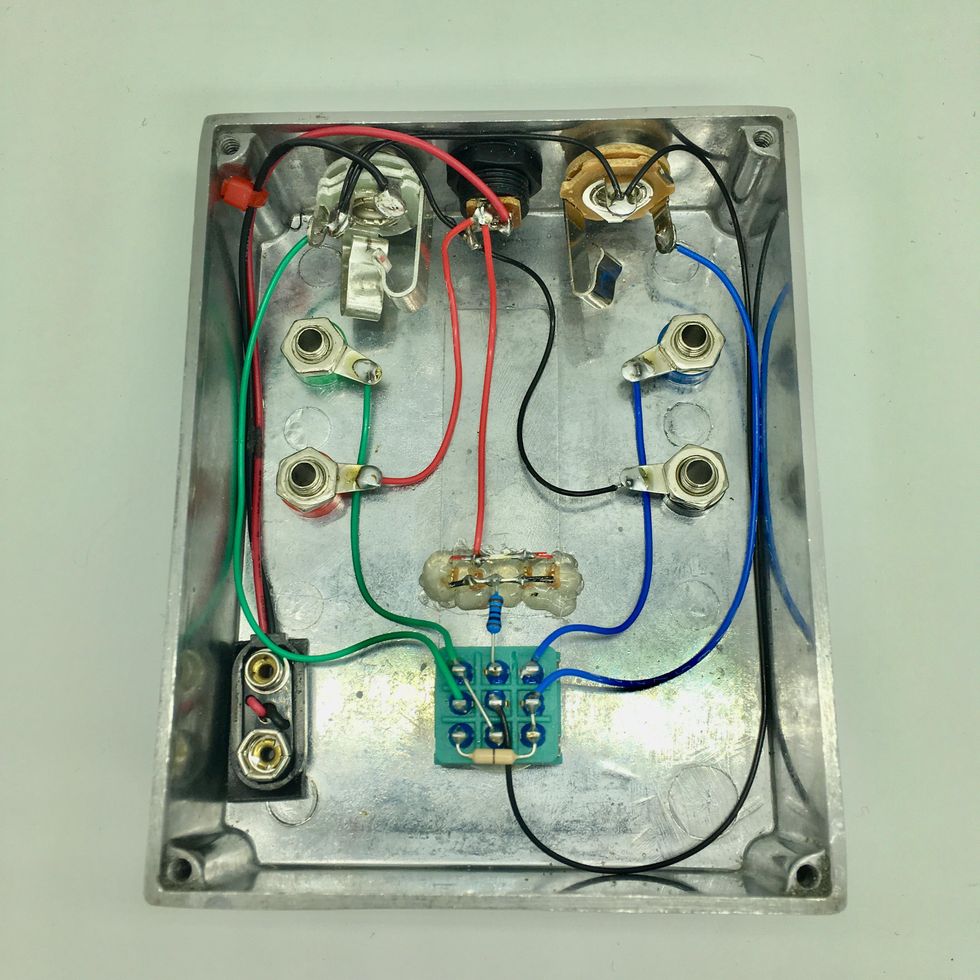
Lastly, connect the LED's ground leg to lug 4 (top row, middle) on the footswitch. Remember, my example looks a little different and your ground will be the black wire coming off the LED.
6. Test the circuit with a multimeter. Set your meter to "continuity" mode (consult its manual if you're not sure how to do so), touch one of its probes to a solder point in our circuit tester, then touch the other probe to the solder point on the other end of that particular connection. For example, touch one probe to the solder point located on the input-jack tip, and touch the other probe to lug 2 (middle lug in the leftmost column) of our 3PDT switch. Your meter should beep or light up if you have a solid connection. Once you've tested and found continuity in all our circuit tester's connections, you'll know it's ready to start testing guitar-pedal guts.
Using your new circuit tester is really easy. First, make sure it's got power from a 9V battery or an adapter, then simply plug your guitar into the tester's input jack, and your amp into its output. Then attach each of the circuit-tester's four leads (input, output, ground, and positive) to the corresponding wires on the circuit board you're building or testing. In other words, connect the alligator clip from your new circuit-tester's input lead to your project pedal's input wire, connect the alligator clip from the tester's output lead to the output wire on your project pedal, and so on for the positive and ground connections, as well. That's it! Engaging the bypass switch will connect the circuit. Bypassing will yield a clean guitar signal.
Now you have a simple, easy way to test all the wonderful DIY effects you'll be building. Congratulations! Hopefully, this article has shined a little light on the processes involved with learning to wire a pedal. Moreover, I hope you had as much fun building it as I did! In fact, I'd love it if you'd share your tester-pedal shots with Loe Sounds (@loesounds) on Instagram Stories.
I would be remiss if I didn't acknowledge Steve Daniels and the crew at Small Bear Electronics for their dedication to providing education and reliable supplies to the DIY pedal community for 22 years. At publication time, Small Bear had announced it would soon be closing its doors. Pedal builders everywhere will miss them dearly, and we can only hope someone comes along to carry the torch and fill the big void Small Bear will leave.
DIY Pedal Sites You Should Check Out
- The DIYStompboxes.com forum is my go-to. It's where I met invaluable mentors like Pink Jimi Photon (of PJP Effects), and Dino Tsiptsis and Phil Moulder, whose Dead End FX site has intermediate to advanced projects and PCBs, including some pretty rare stompbox gems.
- The Effects Layouts blog features some of the tidiest PCBs and layouts for perf boards based on popular guitar-pedal schematics.
- The Tagboard Effects blog has Vero-type stripboard layouts for popular pedal schematics, as well as a helpful forum.
- Madbean Pedals hosts a forum with lots of really nice, helpful folks. They've also got downloadable PCB layouts, sell quality PCBs, and some of the most well-documented projects out there, from beginner to advanced level.
- Beavis Audio Research has a whole bunch of great information, including well-laid-out, easy-to-read diagrams.
- R.G. Keen's Geofex. Keen is practically the godfather of DIY guitar effects. Most of us couldn't be doing what we are doing without what we have learned from this invaluable site!
- RunOffGroove.com is an old-school site with great, bare-basics schematics and articles.
- ElectroSmash.com is a treasure trove of projects, schematics, component information, and detailed breakdowns of popular pedal circuits.
- MusicFromOuterSpace.com features mostly DIY synth stuff, but I learned so much from their articles. Ray Wilson's contributions to the DIY community are too many to count.
- Experimentalists Anonymous allows you to make your own layouts from dozens of schematics.
- DIY Layout Creator offers freeware for designing layouts and is great for learning.
- 5 DIY Mods to Perfect Your Ibanez TS9 and Boss SD-1 - Premier ... ›
- DIY Pedalboard Build - Premier Guitar ›
- Killer Pedals Under $100 - Premier Guitar ›
- Soldering 101: A Step-by-Step Guide - Premier Guitar ›
- Short on Supplies, Not on Ideas - Premier Guitar ›
- PG Explained: Guitar Pedals/Effects - Premier Guitar ›
- Death By Audio Exploding Head Review - Premier Guitar ›
- State of the Stomp: Journey to the Center of the Fuzz Face - Premier Guitar ›
- EHX Pico Attack Decay, Oceans 3-Verb, Canyon, Deep Freeze ›
- The Messthetics’s Anthony Pirog’s Pedal-Powered Tones - Premier Guitar ›
Throughout his over-30-year career, Keith Urban has been known more as a songwriter than a guitarist. Here, he shares about his new release, High, and sheds light on all that went into the path that led him to becoming one of today’s most celebrated country artists.
There are superstars of country and rock, chart-toppers, and guitar heroes. Then there’s Keith Urban. His two dozen No. 1 singles and boatloads of awards may not eclipse George Strait or Garth Brooks, but he’s steadily transcending the notion of what it means to be a country star.
He’s in the Songwriters Hall of Fame. He’s won 13 Country Music Association Awards, nine CMT video awards, eight ARIA (Australian Recording Industry Association) Awards, four American Music Awards, and racked up BMI Country Awards for 25 different singles.
He’s been a judge on American Idol and The Voice. In conjunction with Yamaha, he has his own brand of affordably priced Urban guitars and amps, and he has posted beginner guitar lessons on YouTube. His 2014 Academy of Country Music Award-winning video for “Highways Don’t Care” featured Tim McGraw and Keith’s former opening act, Taylor Swift. Add his marriage to fellow Aussie, the actress Nicole Kidman, and he’s seen enough red carpet to cover a football field.
Significantly, his four Grammys were all for Country Male Vocal Performance. A constant refrain among newcomers is, “and he’s a really good guitar player,” as if by surprise or an afterthought. Especially onstage, his chops are in full force. There are country elements, to be sure, but rock, blues, and pop influences like Mark Knopfler are front and center.
Unafraid to push the envelope, 2020’s The Speed of Now Part 1 mixed drum machines, processed vocals, and a duet with Pink with his “ganjo”—an instrument constructed of a 6-string guitar neck on a banjo body—and even a didgeridoo. It, too, shot to No. 1 on the Billboard Country chart and climbed to No. 7 on the Pop chart.
His new release, High, is more down-to-earth, but is not without a few wrinkles. He employs an EBow on “Messed Up As Me” and, on “Wildfire,” makes use of a sequencerreminiscent of ZZ Top’s “Legs.” Background vocals in “Straight Lines” imitate a horn section, and this time out he duets on “Go Home W U” with rising country star Lainey Wilson. The video for “Heart Like a Hometown” is full of home movies and family photos of a young Urban dwarfed by even a 3/4-size Suzuki nylon-string.
Born Keith Urbahn (his surname’s original spelling) in New Zealand, his family moved to Queensland, Australia, when he was 2. He took up guitar at 6, two years after receiving his beloved ukulele. He released his self-titled debut album in 1991 for the Australian-only market, and moved to Nashville two years later. It wasn’t until ’97 that he put out a group effort, fronting the Ranch, and another self-titled album marked his American debut as a leader, in ’99. It eventually went platinum—a pattern that’s become almost routine.
The 57-year-old’s celebrity and wealth were hard-earned and certainly a far cry from his humble beginnings. “Australia is a very working-class country, certainly when I was growing up, and I definitely come from working-class parents,” he details. “My dad loved all the American country artists, like Johnny Cash, Haggard, Waylon. He didn’t play professionally, but before he got married he played drums in a band, and my grandfather and uncles all played instruments.
One of Urban’s biggest influences as a young guitar player was Mark Knopfler, but he was also mesmerized by lesser-known session musicians such as Albert Lee, Ian Bairnson, Reggie Young, and Ray Flacke. Here, he’s playing a 1950 Broadcaster once owned by Waylon Jennings that was a gift from Nicole Kidman, his wife.
“For me, it was a mix of that and Top 40 radio, which at the time was much more diverse than it is now. You would just hear way more genres, and Australia itself had its own, what they call Aussie pub rock—very blue-collar, hard-driving music for the testosterone-fueled teenager. Grimy, sweaty, kind of raw themes.”
A memorable event happened when he was 7. “My dad got tickets for the whole family to see Johnny Cash. He even bought us little Western shirts and bolo ties. It was amazing.”
But the ukulele he was gifted a few years earlier, at the age of 4, became a constant companion. “I think to some degree it was my version of the stuffed animal, something that was mine, and I felt safe with it. My dad said I would strum it in time to all the songs on the radio, and he told my mom, ‘He’s got rhythm. I wonder what a good age is for him to learn chords.’ My mom and dad ran a little corner store, and a lady named Sue McCarthy asked if she could put an ad in the window offering guitar lessons. They said, ‘If you teach our kid for free, we’ll put your ad in the window.’”
Yet, guitar didn’t come without problems. “With the guitar, my fingers hurt like hell,” he laughs, “and I started conveniently leaving the house whenever the guitar teacher would show up. Typical kid. I don’t wanna learn, I just wanna be able to do it. It didn’t feel like any fun. My dad called me in and went, ‘What the hell? The teacher comes here for lessons. What’s the problem?’ I said I didn’t want to do it anymore. He just said, ‘Okay, then don’t do it.’ Kind of reverse psychology, right? So I just stayed with it and persevered. Once I learned a few chords, it was the same feeling when any of us learn how to be moving on a bike with two wheels and nobody holding us up. That’s what those first chords felt like in my hands.”
Keith Urban's Gear
Urban has 13 Country Music Association Awards, nine CMT video awards, eight ARIA Awards, and four Grammys to his name—the last of which are all for Best Country Male Vocal Performance.
Guitars
For touring:
- Maton Diesel Special
- Maton EBG808TE Tommy Emmanuel Signature
- 1957 Gibson Les Paul Junior, TV yellow
- 1959 Gibson ES-345 (with Varitone turned into a master volume)
- Fender 40th Anniversary Tele, “Clarence”
- Two first-generation Fender Eric Clapton Stratocasters (One is black with DiMarzio Area ’67 pickups, standard tuning. The other is pewter gray, loaded with Fralin “real ’54” pickups, tuned down a half-step.)
- John Bolin Telecaster (has a Babicz bridge with a single humbucker and a single volume control. Standard tuning.)
- PRS Paul’s Guitar (with two of their narrowfield humbuckers. Standard tuning.)
- Yamaha Keith Urban Acoustic Guitar (with EMG ACS soundhole pickups)
- Deering “ganjo”
Amps
- Mid-’60s black-panel Fender Showman (modified by Chris Miller, with oversized transformers to power 6550 tubes; 130 watts)
- 100-watt Dumble Overdrive Special (built with reverb included)
- Two Pacific Woodworks 1x12 ported cabinets (Both are loaded with EV BlackLabel Zakk Wylde signature speakers and can handle 300 watts each.)
Effects
- Two Boss SD-1W Waza Craft Super Overdrives with different settings
- Mr. Black SuperMoon Chrome
- FXengineering RAF Mirage Compressor
- Ibanez TS9 with Tamura Mod
- Boss BD-2 Blues Driver
- J. Rockett Audio .45 Caliber Overdrive
- Pro Co RAT 2
- Radial Engineering JX44 (for guitar distribution)
- Fractal Audio Axe-Fx XL+ (for acoustic guitars)
- Two Fractal Audio Axe-Fx III (one for electric guitar, one for bass)
- Bricasti Design Model 7 Stereo Reverb Processor
- RJM Effect Gizmo (for pedal loops)
(Note: All delays, reverb, chorus, etc. is done post amp. The signal is captured with microphones first then processed by Axe-Fx and other gear.)
- Shure Axient Digital Wireless Microphone System
Strings & Picks
- D’Addario NYXL (.011–.049; electric)
- D’Addario EJ16 (.012–.053; acoustics)
- D’Addario EJ16, for ganjo (.012–.053; much thicker than a typical banjo strings)
- D’Addario 1.0 mm signature picks
He vividly remembers the first song he was able to play after “corny songs like ‘Mama’s little baby loves shortnin’ bread.’” He recalls, “There was a song I loved by the Stylistics, ‘You Make Me Feel Brand New.’ My guitar teacher brought in the sheet music, so not only did I have the words, but above them were the chords. I strummed the first chord, and went, [sings E to Am] ‘My love,’ and then minor, ‘I'll never find the words, my,’ back to the original chord, ‘love.’ Even now, I get covered in chills thinking what it felt like to sing and put that chord sequence together.”
After the nylon-string Suzuki, he got his first electric at 9. “It was an Ibanez copy of a Telecaster Custom—the classic dark walnut with the mother-of-pearl pickguard. My first Fender was a Stratocaster. I wanted one so badly. I’d just discovered Mark Knopfler, and I only wanted a red Strat, because that’s what Knopfler had. And he had a red Strat because of Hank Marvin. All roads lead to Hank!”
He clarifies, “Remember a short-lived run of guitar that Fender did around 1980–’81, simply called ‘the Strat’? I got talked into buying one of those, and the thing weighed a ton. Ridiculously heavy. But I was just smitten when it arrived. ‘Sultans of Swing’ was the first thing I played on it. ‘Oh my god! I sound a bit like Mark.’”
“Messed Up As Me” has some licks reminiscent of Knopfler. “I think he influenced a huge amount of my fingerpicking and melodic choices. I devoured those records more than any other guitar player. ‘Tunnel of Love,’ ‘Love over Gold,’ ‘Telegraph Road,’ the first Dire Straits album, and Communique. I was spellbound by Mark’s touch, tone, and melodic choice every time.”
Other influences are more obscure. “There were lots of session guitar players whose solos I was loving, but had no clue who they were,” he explains. “A good example was Ian Bairnson in the Scottish band Pilot and the Alan Parsons Project. It was only in the last handful of years that I stumbled upon him and did a deep dive, and realized he played the solo on ‘Wuthering Heights’ by Kate Bush, ‘Eye in the Sky’ by Alan Parsons, ‘It’s Magic’ and ‘January’ by Pilot’—all these songs that spoke to me growing up. I also feel like a lot of local-band guitar players are inspirations—they certainly were to me. They didn’t have a name, the band wasn’t famous, but when you’re 12 or 13, watching Barry Clough and guys in cover bands, it’s, ‘Man, I wish I could play like that.’”
On High, Urban keeps things song-oriented, playing short and economical solos.
In terms of country guitarists, he nods, “Again, a lot of session players whose names I didn’t know, like Reggie Young. The first names I think would be Albert Lee and Ray Flacke, whose chicken pickin’ stuff on the Ricky Skaggs records became a big influence. ‘How is he doing that?’”
Flacke played a role in a humorous juxtaposition. “I camped out to see Iron Maiden,” Urban recounts. “They’d just put out Number of the Beast, and I was a big fan. I was 15, so my hormones were raging. I’d been playing country since I was 6, 7, 8 years old. But this new heavy-metal thing is totally speaking to me. So I joined a heavy metal band called Fractured Mirror, just as their guitar player. At the same time, I also discovered Ricky Skaggs and Highways and Heartaches. What is this chicken pickin’ thing? One night I was in the metal band, doing a Judas Priest song or Saxon. They threw me a solo, and through my red Strat, plugged into a Marshall stack that belonged to the lead singer, I shredded this high-distortion, chicken pickin’ solo. The lead singer looked at me like, ‘What the fuck are you doing?’ I got fired from the band.”
Although at 15 he “floated around different kinds of music and bands,” when he was 21 he saw John Mellencamp. “He’d just put out Lonesome Jubilee. I’d been in bands covering ‘Hurts So Good,' ‘Jack & Diane,’ and all the early shit. This record had fiddle and mandolin and acoustic guitars, wall of electrics, drums—the most amazing fusion of things. I saw that concert, and this epiphany happened so profoundly. I looked at the stage and thought, ‘Whoa! I get it. You take all your influences and make your own thing. That’s what John did. I’m not gonna think about genre; I’m gonna take all the things I love and find my way.’
“Of course, getting to Nashville with that recipe wasn’t going to fly in 1993,” he laughs. “Took me another seven-plus years to really start getting some traction in that town.”
Urban’s main amp today is a Dumble Overdrive Reverb, which used to belong to John Mayer. He also owns a bass amp that Alexander Dumble built for himself.
Photo by Jim Summaria
When it comes to “crossover” in country music, one thinks of Glen Campbell, Kenny Rogers, Garth Brooks, and Dolly Parton’s more commercial singles like “Two Doors Down.” Regarding the often polarizing subject and, indeed, what constitutes country music, it’s obvious that Urban has thought a lot—and probably been asked a lot—about the syndrome. The Speed of Now Part 1 blurs so many lines, it makes Shania Twain sound like Mother Maybelle Carter. Well, almost.
“I can’t speak for any other artists, but to me, it’s always organic,” he begins. “Anybody that’s ever seen me play live would notice that I cover a huge stylistic field of music, incorporating my influences, from country, Top 40, rock, pop, soft rock, bluegrass, real country. That’s how you get songs like ‘Kiss a Girl’—maybe more ’70s influence than anything else.”
“I think [Mark Knopfler] influenced a huge amount of my fingerpicking and melodic choices. I devoured those records more than any other guitar player.”
Citing ’50s producers Chet Atkins and Owen Bradley, who moved the genre from hillbilly to the more sophisticated countrypolitan, Keith argues, “In the history of country music, this is exactly the same as it has always been. Patsy Cline doing ‘Walking After Midnight’ or ‘Crazy’; it ain’t Bob Wills. It ain’t Hank Williams. It’s a new sound, drawing on pop elements. That’s the 1950s, and it has never changed. I’ve always seen country like a lung, that expands outwards because it embraces new sounds, new artists, new fusions, to find a bigger audience. Then it feels, ‘We’ve lost our way. Holy crap, I don’t even know who we are,’ and it shrinks back down again. Because a purist in the traditional sense comes along, whether it be Ricky Skaggs or Randy Travis. The only thing that I think has changed is there’s portals now for everything, which didn’t used to exist. There isn’t one central control area that would yell at everybody, ‘You’ve got to bring it back to the center.’ I don’t know that we have that center anymore.”
Stating his position regarding the current crop of talent, he reflects, “To someone who says, ‘That’s not country music,’ I always go, “‘It’s not your country music; it’s somebody else’s country music.’ I don’t believe anybody has a right to say something’s not anything. It’s been amazing watching this generation actually say, ‘Can we get back to a bit of purity? Can we get real guitars and real storytelling?’ So you’ve seen the explosion of Zach Bryan and Tyler Childers who are way purer than the previous generation of country music.”
Seen performing here in 2003, Urban is celebrated mostly for his songwriting, but is also an excellent guitarist.
Photo by Steve Trager/Frank White Photo Agency
As for the actual recording process, he notes, “This always shocks people, but ‘Chattahoochee’ by Alan Jackson is all drum machine. I write songs on acoustic guitar and drum machine, or drum machine and banjo. Of course, you go into the studio and replace that with a drummer. But my very first official single, in 1999, was ‘It’s a Love Thing,’ and it literally opens with a drum loop and an acoustic guitar riff. Then the drummer comes in. But the loop never goes away, and you hear it crystal clear. I haven’t changed much about that approach.”
On the road, Urban utilizes different electrics “almost always because of different pickups—single-coil, humbucker, P-90. And then one that’s tuned down a half-step for a few songs in half-keys. Tele, Strat, Les Paul, a couple of others for color. I’ve got a John Bolin guitar that I love—the feel of it. It’s a Tele design with just one PAF, one volume knob, no tone control. It’s very light, beautifully balanced—every string, every fret, all the way up the neck. It doesn’t have a lot of tonal character of its own, so it lets my fingers do the coloring. You can feel the fingerprints of Billy Gibbons on this guitar. It’s very Billy.”
“I looked at the stage and thought, ‘Whoa! I get it. You take all your influences and make your own thing. I’m gonna take all the things I love and find my way.’”
Addressing his role as the collector, “or acquirer,” as he says, some pieces have quite a history. “I haven’t gone out specifically thinking, ‘I’m missing this from the collection.’ I feel really lucky to have a couple of very special guitars. I got Waylon Jennings’ guitar in an auction. It was one he had all through the ’70s, wrapped in the leather and the whole thing. In the ’80s, he gave it to Reggie Young, who owned it for 25 years or so and eventually put it up for auction. My wife wanted to give it to me for my birthday. I was trying to bid on it, and she made sure that I couldn’t get registered! When it arrived, I discovered it’s a 1950 Broadcaster—which is insane. I had no idea. I just wanted it because I’m a massive Waylon fan, and I couldn’t bear the thought of that guitar disappearing overseas under somebody’s bed, when it should be played.
“I also have a 1951 Nocaster, which used to belong to Tom Keifer in Cinderella. It’s the best Telecaster I’ve ever played, hands down. It has the loudest, most ferocious pickup, and the wood is amazing.”
YouTube
Urban plays a Gibson SG here at the 2023 CMT Music Awards. Wait until the end to see him show off his shred abilities.
Other favorites include “a first-year Strat, ’54, that I love, and a ’58 goldtop. I also own a ’58 ’burst, but prefer the goldtop; it’s just a bit more spanky and lively. I feel abundantly blessed with the guitars I’ve been able to own and play. And I think every guitar should be played, literally. There’s no guitar that’s too precious to be played.”
Speaking of precious, there are also a few Dumble amps that elicit “oohs” and “aahs.” “Around 2008, John Mayer had a few of them, and he wanted to part with this particular Overdrive Special head. When he told me the price, I said, ‘That sounds ludicrous.’ He said, ‘How much is your most expensive guitar?’ It was three times the value of the amp. He said, ‘So that’s one guitar. What amp are you plugging all these expensive guitars into?’ I was like, ‘Sold. I guess when you look at it that way.’ It’s just glorious. It actually highlighted some limitations in some guitars I never noticed before.”
“It’s just glorious. It actually highlighted some limitations in some guitars I never noticed before.”
Keith also developed a relationship with the late Alexander Dumble. “We emailed back and forth, a lot of just life stuff and the beautifully eccentric stuff he was known for. His vocabulary was as interesting as his tubes and harmonic understanding. My one regret is that he invited me out to the ranch many times, and I was never able to go. Right now, my main amp is an Overdrive Reverb that also used to belong to John when he was doing the John Mayer Trio. I got it years later. And I have an Odyssey, which was Alexander’s personal bass amp that he built for himself. I sent all the details to him, and he said, ‘Yeah, that’s my amp.’”
The gearhead in Keith doesn’t even mind minutiae like picks and strings. “I’ve never held picks with the pointy bit hitting the string. I have custom picks that D’Addario makes for me. They have little grippy ridges like on Dunlops and Hercos, but I have that section just placed in one corner. I can use a little bit of it on the string, or I can flip it over. During the pandemic, I decided to go down a couple of string gauges. I was getting comfortable on .009s, and I thought, ‘Great. I’ve lightened up my playing.’ Then the very first gig, I was bending the crap out of them. So I went to .010s, except for a couple of guitars that are .011s.”
As with his best albums, High is song-oriented; thus, solos are short and economical. “Growing up, I listened to songs where the guitar was just in support of that song,” he reasons. “If the song needs a two-bar break, and then you want to hear the next vocal section, that’s what it needs. If it sounds like it needs a longer guitar section, then that’s what it needs. There’s even a track called ‘Love Is Hard’ that doesn’t have any solo. It’s the first thing I’ve ever recorded in my life where I literally don’t play one instrument. Eren Cannata co-wrote it [with Shane McAnally and Justin Tranter], and I really loved the demo with him playing all the instruments. I loved it so much I just went with his acoustic guitar. I’m that much in service of the song.”
The English guitarist expands his extensive discography with 1967: Vacations in the Past, an album paired with a separate book release, both dedicated to the year 1967 and the 14-year-old version of himself that still lives in him today.
English singer-songwriter Robyn Hitchcock is one of those people who, in his art as well as in his every expression, presents himself fully, without scrim. I don’t know if that’s because he intends to, exactly, or if it’s just that he doesn’t know how to be anyone but himself. And it’s that genuine quality that privileges you or I, as the listener, to recognize him in tone or lyrics alone, the same way one knows the sound of Miles Davis’ horn within an instant of hearing it—or the same way one could tell Hitchcock apart in a crowd by his vibrantly hued, often loudly patterned fashion choices.
Itchycoo Park
“I like my songs, but I don’t necessarily think I’m the best singer of them,” he effaces to me over Zoom, as it’s approaching midnight where he’s staying in London. “I just wanted to be a singer-songwriter because that’s what Bob Dylan did. And I like to create; I’m happiest when I’m producing something. But my records are blueprints, really. They just show you what the song could be, but they’re not necessarily the best performance of them. Whereas if you listen to … oh, I don’t know, the great records of ’67, they actually sound like the best performances you could get.”
He mentions that particular year not offhandedly, but because that’s the theme of the conversation: He’s just released an album, 1967: Vacations in the Past, which is a collection of covers of songs released in 1967, and one original song—the title track. Boasting his takes on Procol Harum’s “A Whiter Shade of Pale,” the Beatles’ “A Day in the Life,” Pink Floyd’s “See Emily Play,” and Small Faces’ “Itchycoo Park,” among eight other tracks, it serves as a sort of soundtrack or musical accompaniment to his new memoir, 1967: How I Got There and Why I Never Left.
Hitchcock, who was 14 years old and attending boarding school in England in 1967, describes how who he is today is encased in that period of his life, much like a mosquito in amber. But why share that with the world now?
In the mid ’70s, before he launched his solo career, Hitchcock was the leader of the psychedelic group the Soft Boys.
Photo by Tim Bugbee/tinnitus photography
“I’m 71; I’ve been alive quite a long time,” he shares. “If I want to leave a record of anything apart from all the songs I’ve written, now is a good time to do it. By writing about 1966 to ’67, I’m basically giving the context for Robyn Hitchcock, as Robyn Hitchcock then lived the rest of his life.”
Hopefully, I say, the publication of these works won’t ring as some sort of death knell for him.
“Well, it’s a relative death knell,” he replies. “But everyone’s on the conveyor belt. We all go over the edge. And none of our legacies are permanent. Even the plastic chairs and Coke bottles and stuff like that that we’re leaving behind.... In 10- or 20-thousand-years’ time, we’ll probably just be some weird, scummy layer on the great fruitcake of the Earth. But I suppose you do probably get to an age where you want to try and explain yourself, maybe to yourself. Maybe it’s me that needs to read the book, you know?”
“I’m basically giving the context for Robyn Hitchcock, as Robyn Hitchcock then lived the rest of his life.”
To counter his description of his songs above, I would say that Hitchcock’s performances on 1967: Vacations in the Past carve out their own deserved little planet in the vintage-rock Milky Way. I was excited in particular by some of his selections: the endorsement of foundational prog in the Procol Harum cover; the otherwise forgotten Traffic tune, “No Face, No Name and No Number,” off of Mr. Fantasy, the Mamas & the Papas’ nostalgic “San Francisco,” and of course, the aforementioned Floyd single. There’s also the lesser known “My White Bicycle” by Tomorrow and “I Can Hear the Grass Grow” by the Move, and the Hendrix B-side, “Burning of the Midnight Lamp.”
Through these recordings, Hitchcock pays homage to “that lovely time when people were inventing new strands of music, and they couldn’t define them,” he replies. “People didn’t really know what to call Pink Floyd. Was it jazz, or was it pop, or psychedelia, or freeform, or systems music?”
His renditions call to mind a cooking reduction, defined by Wikipedia as “the process of thickening and intensifying the flavor of a liquid mixture, such as a soup, sauce, wine, or juice, by simmering or boiling.” Hitchcock’s distinctive, classic folk-singer voice and steel-string-guided arrangements do just that to this iconic roster. There are some gentle twists and turns—Eastern-instrumental touches; subtly applied, ethereal delay and reverb, and the like—but nothing that should cloud the revived conduit to the listener’s memory of the originals.
And yet, here’s his review of his music, in general: “I hear [my songs] back and I think, ‘God, my voice is horrible! This is just … ugh! Why do I sing through my nose like that?’ And the answer is because Bob Dylan sang through his nose, you know. I was just singing through Bob Dylan’s nose, really.”
1967: Vacations in the Pastfeatures 11 covers of songs that were released in 1967, and one original song—the title track.
❦
“I wait for songs to come to me: They’re independent like cats, rather than like dogs who will faithfully trail you everywhere,” Hitchcock explains, sharing about his songwriting process. “All I can do is leave a plate of food out for the songs—in the form of my open mind—and hope they will appear in there, hungry for my neural pathways.”
Once he’s domesticated the wild idea, he says, “It’s important to remain as unselfconscious as possible in the [writing] process. If I start worrying about composing the next line, the embryonic song slips away from me. Often I’m left with a verse-and-a-half and an unresolved melody because my creation has lost its innocence and fled from my brain.
“[Then] there are times when creativity itself is simply not what’s called for: You just have to do some more living until the songs appear again. That’s as close as I can get to describing the process, which still, thankfully, remains mysterious to me after all this time.”
“In 10- or 20-thousand-years’ time, we’ll probably just be some weird, scummy layer on the great fruitcake of the Earth.”
In the prose of 1967: How I Got There and Why I Never Left, Hitchcock expresses himself similarly to how he does so distinctively in his lyrics and speech. Amidst his tales of roughing his first experiences in the infamously ruthless environs of English boarding school, he shares an abundance of insight about his parents and upbringing, as well as a self-diagnosis of having Asperger’s syndrome—whose name is now gradually becoming adapted in modern lexicon to “low-support-needs” autism spectrum disorder. When I touch on the subject, he reaffirms the observation, and elaborates, “I think I probably am also OCD, whatever that means. I’ve always been obsessed with trying to get things in the right order.”
He relates an anecdote about his school days: “So, if I got out of lunch—‘Yippee! I’ve got three hours to dress like a hippie before they put me back in my school clothes. Oh damn, I’ve put the purple pants on, but actually, I should put the red ones on. No! I put the red ones on; it’s not good—I’ll put my jeans on.’
Robyn Hitchcock's Gear
Hitchcock in 1998, after embarking on the tour behind one of his earlier acoustic albums, Moss Elixir.
Guitars
- Two Fylde Olivia acoustics equipped with Sennheiser II lavalier mics (for touring)
- Larrivée acoustic
- Fender Telecaster
- Fender Stratocaster
Strings & Picks
- Elixir .011–.052 (acoustic)
- Ernie Ball Skinny Top Heavy Bottom .010–.054 (electric)
- Dunlop 1.0 mm
“I’d just get into a real state. And then the only thing that would do would be listening to Trout Mask Replica by Captain Beefheart. There was something about Trout Mask that was so liberating that I thought, ‘Oh, I don’t care what trousers I’m wearing. This is just, whoa! This music is it.’”
With him having chosen to cover “See Emily Play,” a Syd Barrett composition, the conversation soon turns to the topic of the late, troubled songwriter. I comment, “It’s hard to listen to Syd’s solo records.... It’s weird that people enabled that. You can hear him losing his mind.”
“You can, but at the same time, the fact they enabled it means that these things did come out,” Robyn counters. “And he obviously had nothing else to give after that. So, at least, David Gilmour and the old Floyd guys.... It meant they gave the world those songs, which, although the performances are quite … rickety, quite fragile, they’re incredibly beautiful songs. There’s nothing forced about Barrett. He can only be himself.”
“There was something about Trout Mask Replica that was so liberating that I thought, ‘Oh, I don’t care what trousers I’m wearing. This is just, whoa!’”
I briefly compare Barrett to singer-songwriter Daniel Johnston, and we agree there are some similarities. And then with a segue, ask, “When did you first fall in love with the guitar? Was it when you came home from boarding school and found the guitar your parents gifted you on your bed?”
Robyn pauses thoughtfully.“Ah, I think I liked the idea of the guitar probably around that time,” he shares. “I always used to draw men with guns. I’m not really macho, but I had a very kind of post-World War II upbringing where men were always carrying guns. And I thought, ‘Well, if he’s a man, he’s got to carry a gun.’ Then, around the age of 13, I swapped the gun for the guitar. And then every man I drew was carrying a guitar instead.”
Elaborating on getting his first 6-string, he says, “I had lessons from a man who had three fingers bent back from an industrial accident. He was a nice old man with whiskers, and he showed me how to get the guitar in tune and what the basic notes were. And then I got hold of a Bob Dylan songbook, and—‘Oh my gosh, I can play “Mr. Tambourine Man!”’ It was really fast—about 10 minutes between not being able to play anything, and suddenly being able to play songs by my heroes.”
❦
Hitchcock does me the kindness, during our atypically deep conversation—at least, for a press interview—of sharing more acute perceptions of his parents, and their own neurodivergence. Ultimately, he feels that his mother didn’t necessarily like him, but loved the idea of him—and that later in life, he came to better understand his lonely, depressive father. “My mother was protective but in an oddly cold way. People are like that,” he shares. “We just contain so many things that don’t make sense with each other: colors that you would not mix as a painter; themes you would not intermingle as a writer; characters you would not create.... We defy any sense of balance or harmony.
“Although the performances are quite rickety, quite fragile, they’re incredibly beautiful songs. There’s nothing forced about Barrett. He can only be himself.”
“The idea of normality.... ‘Normal’ is tautological,” he continues. “Nothing is normal. A belief in normality is an aberration. It’s a form of insanity, I think.
“It’s just hard for us to accept ourselves because we’re brought up with the myth of normality, and the myth of what people are supposed to be like gender-wise, sex-wise, and psychologically what we’re supposed to want. And in a way, some of that’s beginning to melt, now. But that probably just causes more confusion. It’s no wonder people like me want to live in 1967.”
YouTube It
In this excerpt from the Jonathan Demme-directed concert film of Robyn Hitchcock, Storefront Hitchcock, the songwriter performs an absurdist “upbeat” song about a man who dies of cancer.
The legendary bass amp used by Geddy Lee and Glenn Hughes has been redesigned and revamped.
The new AD200 is still designed on the premise that the best tone comes from the shortest signal path from bass to speaker. Whatever type of bass, playing style, or genre of music, the AD200 faithfully retains the tone of that instrument.
The addition of a new clean switch, in combination with a powerful three-band EQ, gives AD200 players an even broader frequency spectrum to dial into their amp. In addition, a brand new output transformer, with 3 inches of laminations, harnesses double the power at 30Hz, offering better response at low frequencies. ‘It now pushes more air, flaps more trouser leg — simple as that,’ explains Orange Amps Technical Director Ade Emsley. From mellow hues to heavy, percussive growl and even slap bass, the ultimate incarnation of the AD200, has just become even more versatile.
Internal changes make the amp easier to service and maintain. Each output valve now has its own 12 turn bias pot, so unmatched valves can sit side by side. ‘Now, any tech with a multimeter can bias the amp and match the valves into the amp,’ explains Emsley. ‘So, if you’re on the road with a band, you can go swap a worn valve for a new one, dial it in and you’re good to go.’ Whilst the four KT88 output valves push 200 Watts of power, the amp will run equally as well on 6550s or a combination of the two.
‘It’s a big improvement on the previous version,’ says Ade Emsley, of his work on the updated AD200. ‘It still does everything the old one does, it’s still the industry standard, but it’s now simpler, easier to use, easier to service and futureproof.’
The new, decluttered front panel design is reminiscent of the company’s iconic 1970’s amps with its original ‘bubble-writing’ Orange logo and the ‘pics-only’ hieroglyphs, all wrapped in the company’s distinctive orange Tolex covering.
Over the last forty years, the Orange Bass Cabinets have become an undeniable industry standard. They have been remodelled to use Celestion Pulse XL bass speakers across the OBC810C, OBC410HC, and OBC115C cabs. The upgrade delivers a tight, punchy low-end with a warm mid-range that’s full of presence. The premium build of these cabinets remains, delivering players, bands and techs the road-worthy dependability they demand. In addition, the popular OBC410HC has been modified by removing one vertical partition and strengthening the horizontal one to be lighter and tighten up low-end response.
For more information, please visit orangeamps.com.
Designed in collaboration with Blu DeTiger, this limited-edition bass guitar features a Sky Burst Sparkle finish, custom electronics, and a chambered lightweight ash body.
"This bass is a reflection of everything I love about playing," said Blu DeTiger. "I wanted an instrument that could handle the diversity of sounds I create, from deep, funky grooves to melodic lines that cut through the mix. Fender and I worked closely together to make sure this bass not only looks amazing but sounds incredible in any setting."
Featured as the cover of the Forbes 30 Under 30 music list, Blu, who defines her musical style in the "groovy Indie” genre blending elements of Pop, Rock, and Funk, represents the next generation of pop music, earning accolades and a dedicated global fanbase with her work alongside top artists and successful solo releases. Bringing her signature sound and style, Blu marks a new milestone in her storied partnership with Fender and solidifying her influence on the future of music in creating the Limited Edition Blu DeTiger x Player Plus Jazz Bass.
Limited Edition Blu DeTiger x Player Plus Jazz Bass ($1,599.99) - From the Sky Burst Sparkle to the chrome hardware and mirrored pickguard, every detail on this Jazz Bass echoes Blu’s artistic vision. The offset ash body is chambered to keep this bass as lightweight and comfortable as possible. The satin finished maple neck, bound 9.5” rosewood fingerboard and vintage tall frets provide smooth playability. The Custom Blu DeTiger Fireball bass humbucker and Player Plus Noiseless Jazz Bass Pickups fuse vintage charm with modern punch. The bass also includes an 18V Player Plus preamp with 3-band EQ and active/passive toggle, great for sculpting your tone and ideal for capturing the funky snap and growl that defines Blu’s sound. With its inspired aesthetics, signature sonics and Blu-approved features, the Limited Edition Blu DeTiger x Player Plus Jazz Bass lets you tap into the infectious pop energy that keeps this star shining!
Her successful releases including "Figure It Out,” "Vintage," and recent album “All I Ever Want is Everything” have earned her accolades and sent her on the road to tour across the world to perform for her dedicated fanbase. Her distinct style of playing has also seen her play live with top tier artists such as Olivia Rodrigo, Bleachers, Dominic Fike, Caroline Polachek, Chromeo, and more.