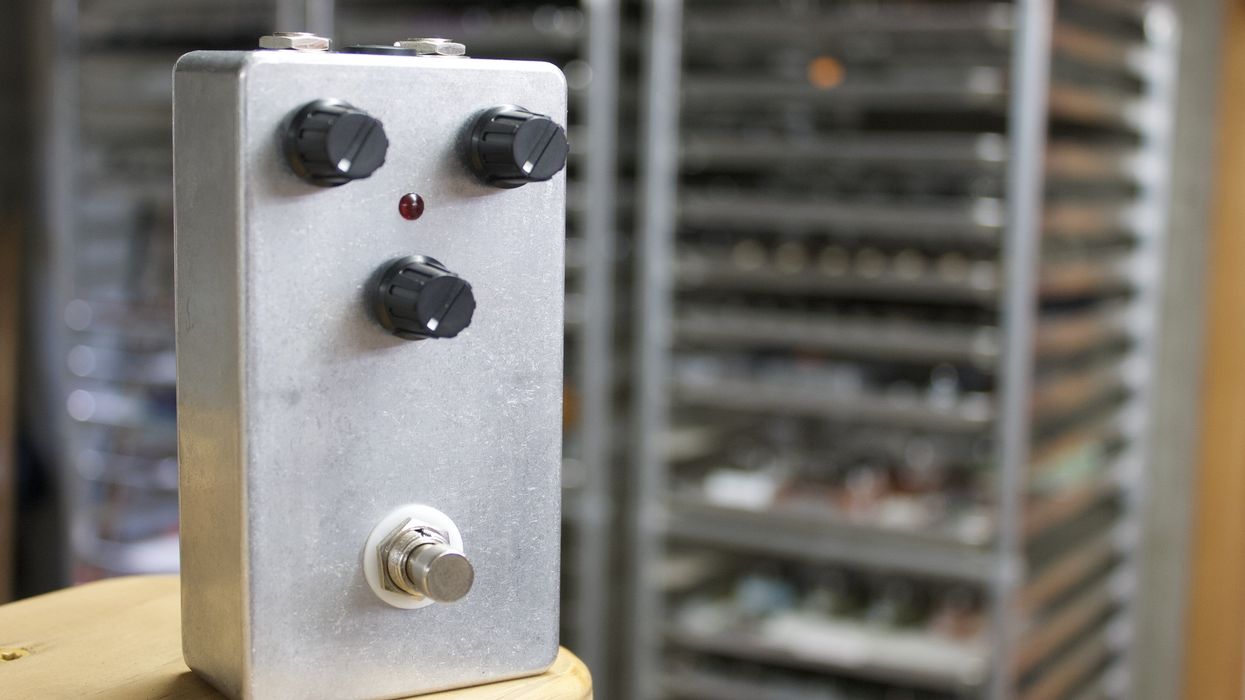
Looking for more classic growl in a simple, contemporary overdrive? CopperSound’s Alex Guaraldi explains how to swap the clipping LEDS in an ultra-affordable EarthQuaker Devices Plumes for germanium diodes, in nine easy steps.
Pedals offer a lot of opportunities for DIY projects. One of the coolest and easiest is removing the LED clipping diodes in a modern overdrive pedal and replacing them with old-school-sounding germanium ones. The result will be a more raw, aggressive tone. For this project, I used the popular and affordable EarthQuaker Devices Plumes ($99 street). Whether your version is the original with through-hole-type components or the current model with surface-mount components, you’ll easily be able to perform this mod because both versions contain through-hole-type LEDs.
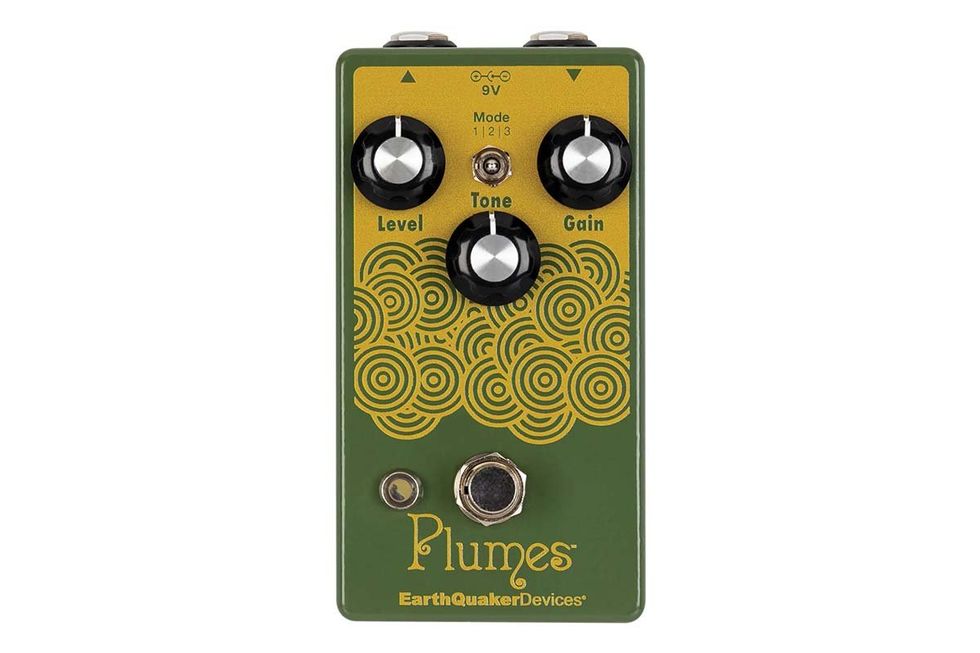
Tools Required
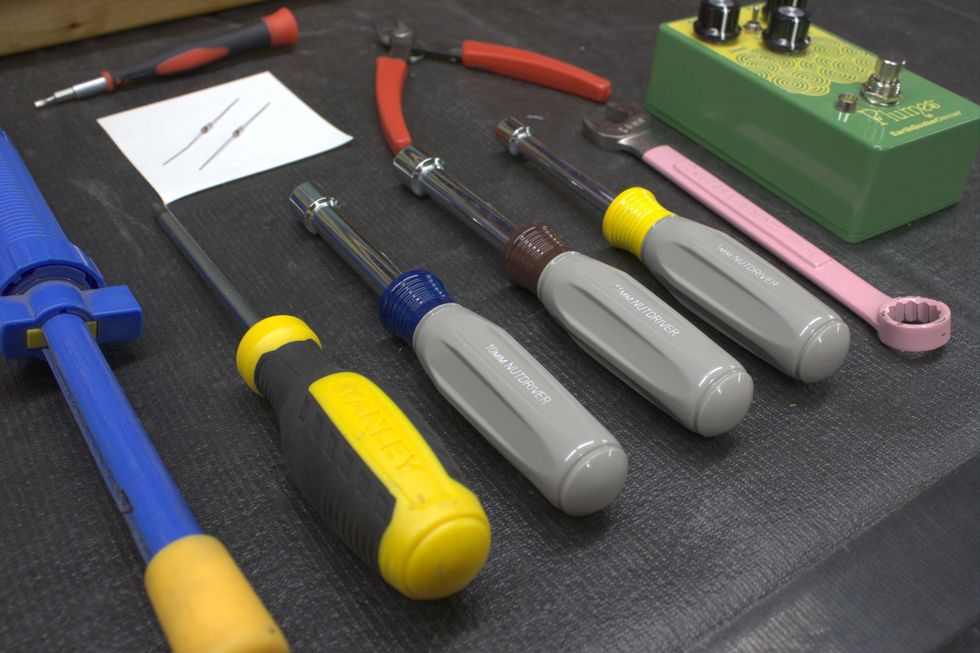
These tools and supplies are available online. StewMac, for example, sells soldering irons, a desoldering pump, and other tools for instrument work, while nut drivers and germanium diodes can be acquired via a number of sources, including Amazon.
• Soldering iron
• Solder
• Desoldering pump
• No. 2 Phillips-head screwdriver
• Small flathead screwdriver
• 8 mm (5/16") nut driver/wrench
• 10 mm (25/64") nut driver/wrench
• 11 mm (7/16") nut driver/wrench
• 14 mm(9/16") wrench
• Flush cutters
• Small needle-nose pliers
• Germanium diodes
Step 1: Remove back cover.
Using a No. 2 Phillips-head screwdriver, remove the four screws holding the back cover on.
Step 2: Remove external hardware.
The fastest way to swap diodes may be to do it from the component side, without even removing the circuit board from the enclosure. But for easier access and less difficulty, I’m going to remove the entire printed circuit board (PCB) from the enclosure. Since almost everything is mounted directly to the PCB, this should be easy.
Using a small flathead screwdriver, remove the knobs from the potentiometer shafts. Only loosen the knob set screws enough to slide the knobs off. No need to be searching the floor for tiny screws.
Next, using an 8 mm (5/16") nut driver or wrench, remove the nut from the toggle switch. Then, using a 10 mm (25/64”) nut driver or wrench, remove the three nuts and washers from the potentiometers.
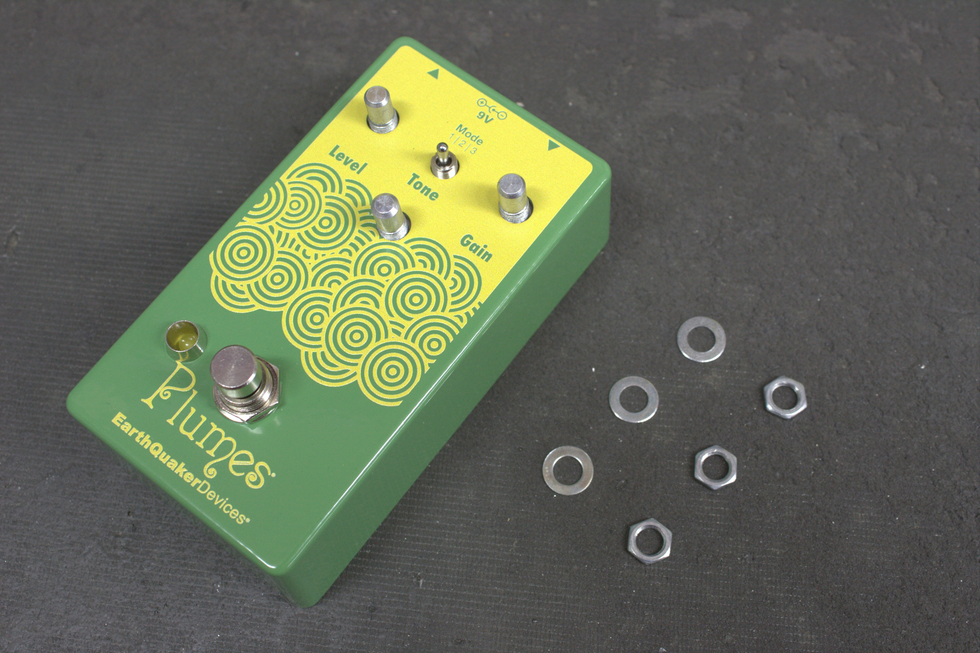
Photo 1
For the last piece of external hardware located on the face—the footswitch—we’ll actually want to go inside and disconnect its plug from the board.
On the bottom left side of the PCB, there will be a white rectangular connector. We need to unplug the female end from the male end. This is where small needle-nose pliers can help. A small screwdriver or even fingers may do the trick, too. Finesse is key. We don’t want to break the wires from the female connector.
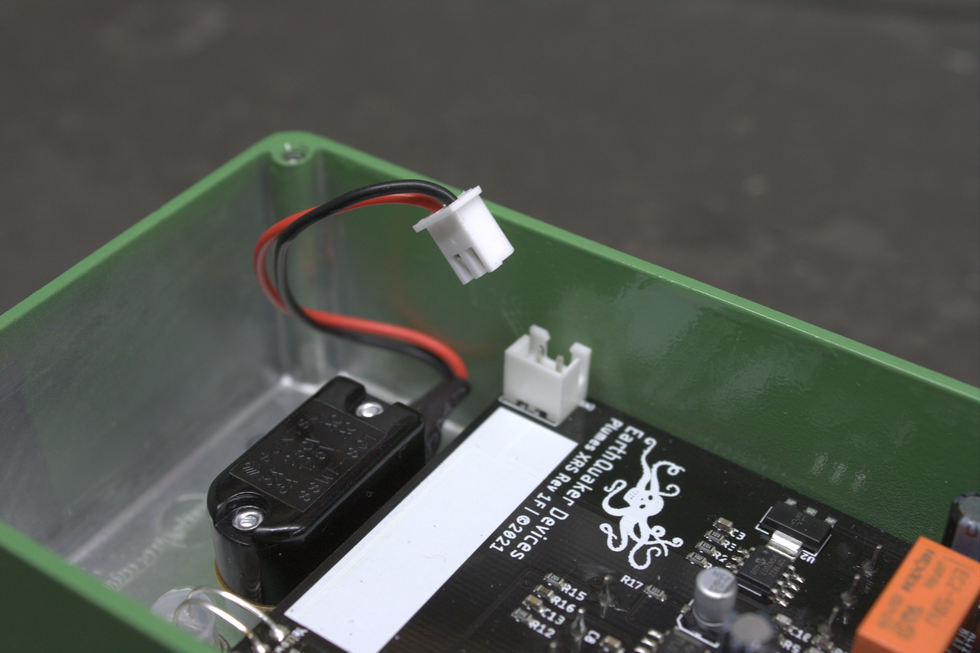
Photo 2
Once dislocated, we can go back to the face and remove the footswitch using a 14 mm (9/16") wrench.
Step 3: Remove external hardware on the back heel.
The last external hardware to remove is the audio jack bushings.
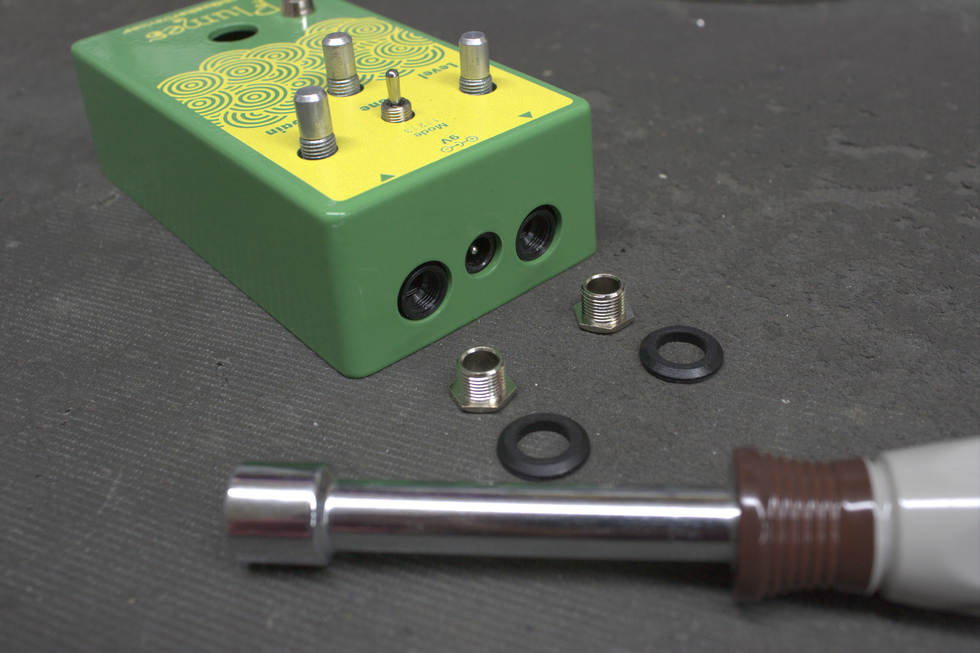
Photo 3
Removing these will allow the PCB to slide out of the enclosure. Using an 11mm (7/16") nut driver or wrench, remove the bushings and beveled washers from the audio jacks. Now, the circuit board is free to be removed from the enclosure.
Step 4: Remove the PCB from the enclosure.
The four controls and two audio jacks that interface with the enclosure may create some resistance when trying to remove the PCB. Typically, it’s from the collars of the audio jacks. Using a small screwdriver in one of the top corners and gently prying the PCB back usually does the trick.
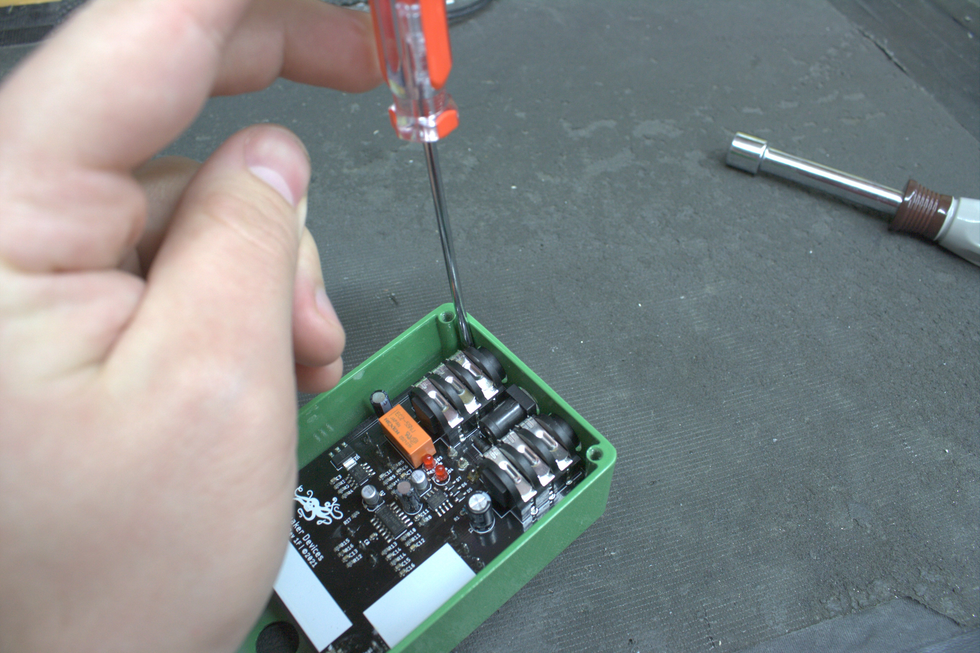
Photo 4
Step 5: Locating the clipping LEDs.
Now that the PCB is removed from the enclosure, we need to locate the clipping LEDs from the top side. They are the two small red silos at the center of the pedal.
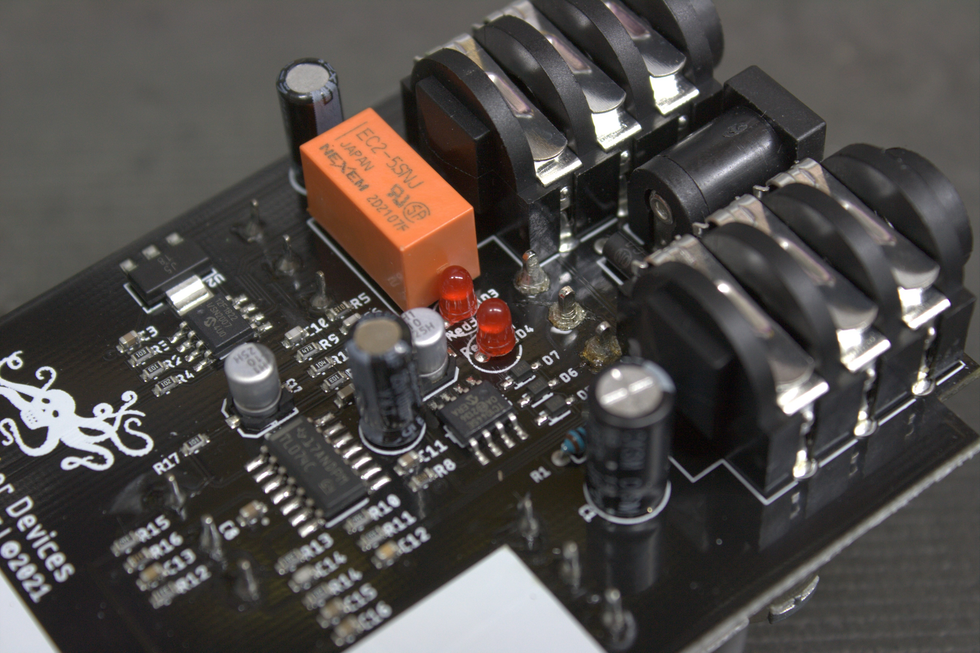
Photo 5
Then, we need to locate the pads (the exposed metal on the PCB) for them on the bottom side, and, once again, they are centrally located.
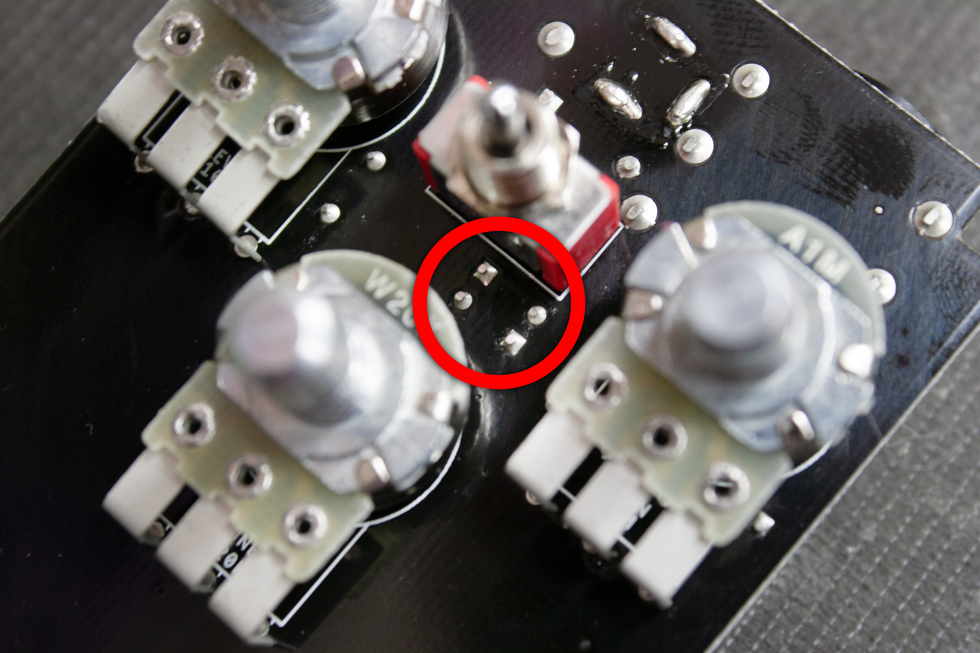
Photo 6
Step 6: Removing the clipping LEDs.
Now that we’ve located the LEDs, let’s go ahead and remove them. Quick note: The Plumes I worked on was a new unit consisting primarily of surface mount device (SMD) components. The LEDs are located between the pots and switch, so they can be difficult to access from the bottom side. The easiest way to remove the LEDs is to actually snip them from the top side, after noting how they are soldered in place.
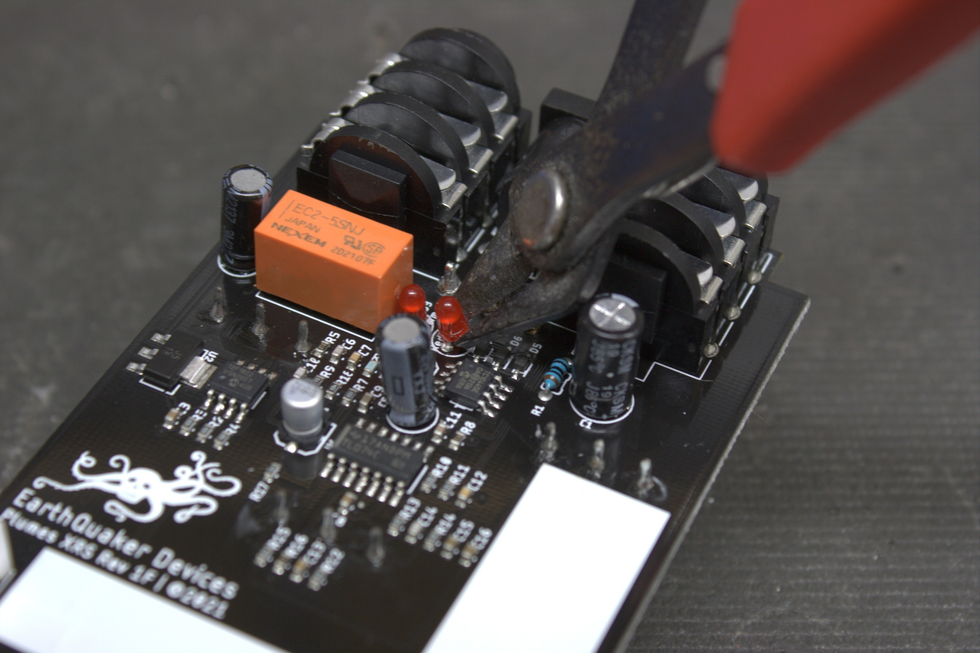
Photo 7
We’re not planning on using them, and they’re cheap enough to purchase again, so breaking them is no worry. We just need to be sure not to damage any of the nearby components. The best approach may be to break the shell/bulb of the LEDs. Doing this will expose the two leads.
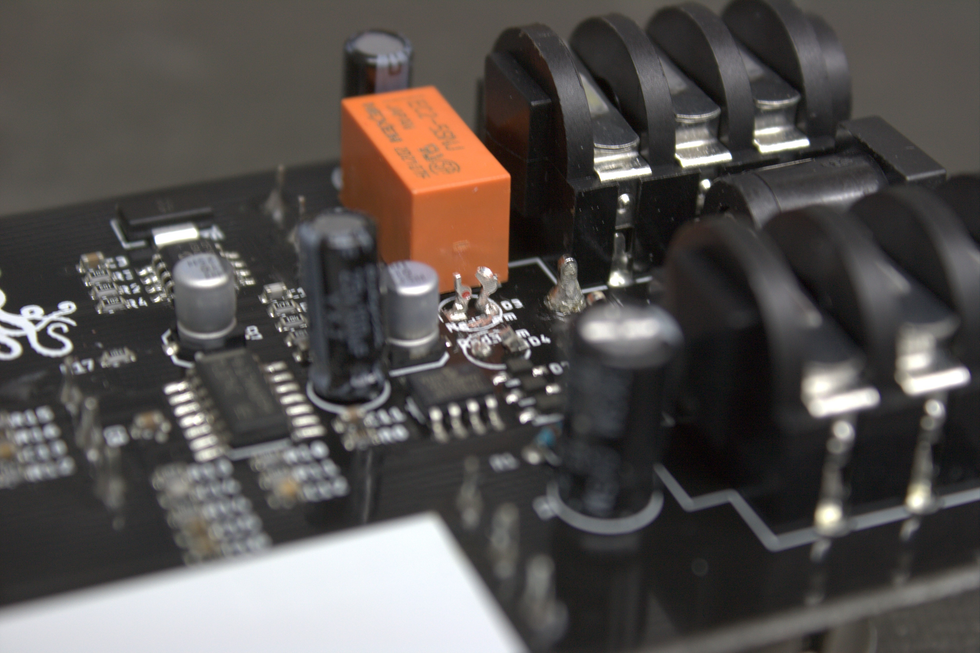
Photo 8
With these two leads exposed, we can easily remove each lead from the solder pads on the top side. Let’s apply heat to each pad and remove the leads with small needle-nose pliers. Jump to the alternate approach section in step seven if you experience solder removal difficulties. (Quick tips: Existing solder tends to flow better when a bit of fresh solder is applied to it. You’ll also want to heat the lead/pad and then grab the lead with the pliers. Grabbing the lead with the pliers first will take longer because the heat will transfer to the metal of the pliers. Don’t apply heat to a solder pad longer than needed. Doing this can compromise the pad.)
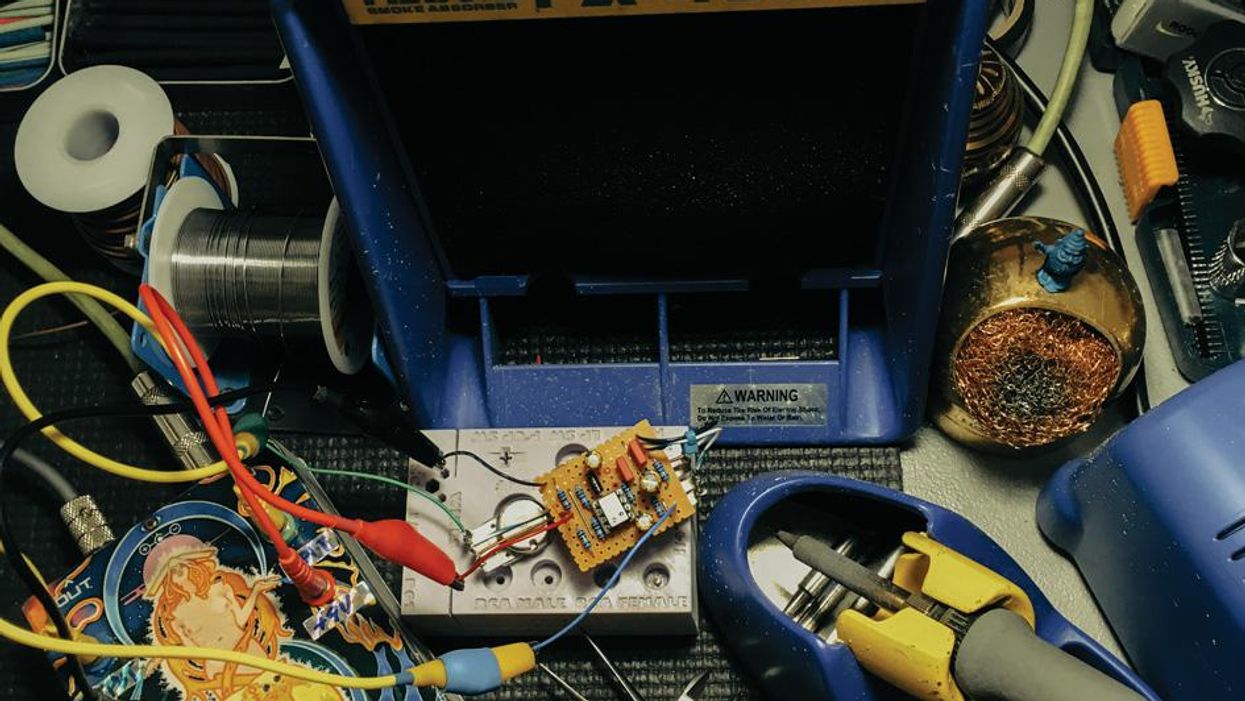
Once the leads are removed, we need to remove the remaining solder from the pads. This is where the desoldering pump (commonly referred to as a “solder sucker”) comes in. Apply a bit of fresh solder to the pads and remove it using the pump. YouTube is your friend here, for some quick desoldering pump lessons.
Step 7: Adding germanium diodes.
Check the polarity of the diode. For this mod, I chose 1n34a diodes, which are very common and available on Amazon. These diodes are polarized and have a positive and negative side. On the 1n34a, the negative lead is designated by the black band that wraps around the body of the diode (this is not the case for all germanium diodes). On PCBs, square pads denote positive. However, for the diode package that we’re adding, the square pad is negative.
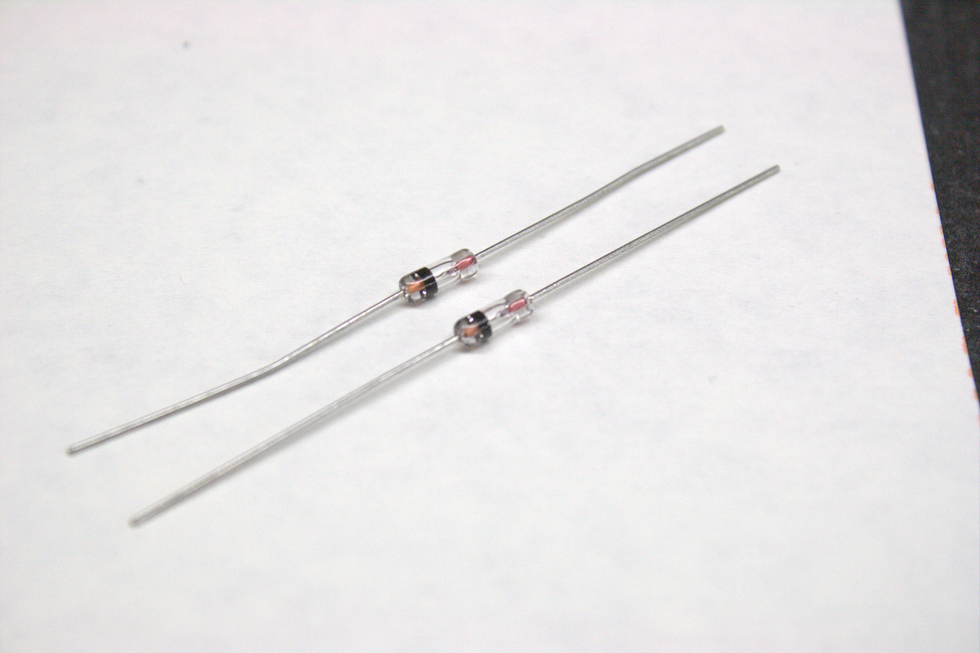
Photo 9
Using Photo 10 for reference, gently bend one of the diode legs so that it’s parallel with the body of the diode. Place the bent legs into their correct pads—the negative side of the diode will go into the square pad and the positive into the circlular pad. Solder the pads from the bottom side of the PCB and snip the excess leg length with a pair of flush cutters. The excess leg length can also be removed with needle-nose pliers by bending the legs back and forth several times.
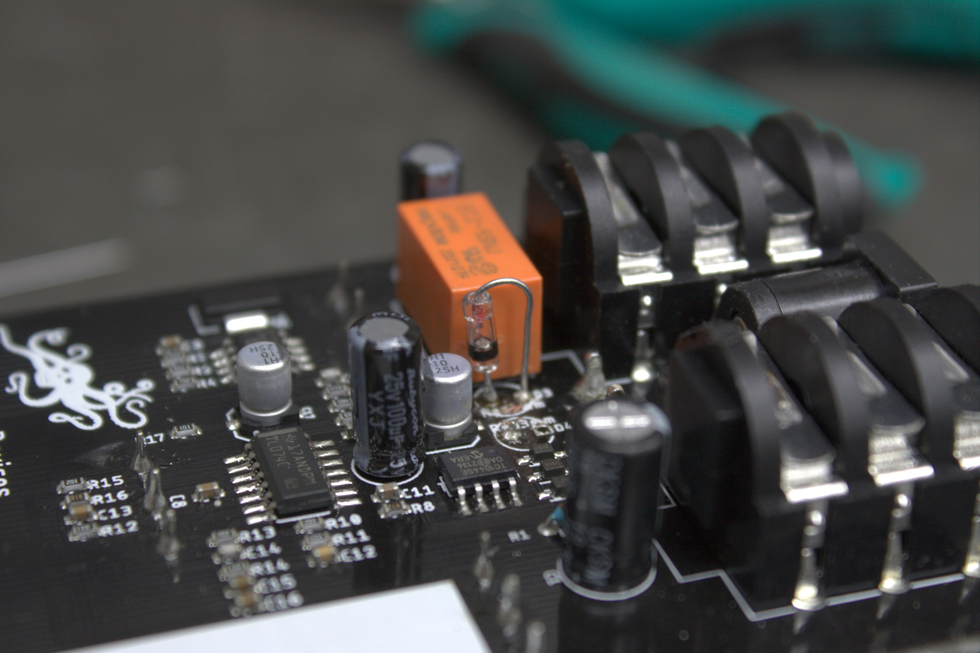
Photo 10
Alternate approach: If you’re experiencing trouble getting the remaining solder out of each pad, there’s a different approach to try. This approach may actually be helpful for this particular mod, because the pad spacing is small. If a pad connects to a ground plane (a layer of copper typically the size of the entire PCB that connects directly to the main ground pin on the DC jack) or several locations (other components in the schematic) it will require more heat because the applied heat wants to travel to all the connected areas. Typically, with clipping diodes, only one pad will experience this and give desoldering difficulties. In such a case, follow these steps:
1. Establish which pad has remaining solder. For this mod, the square pads are the positive pads, because they hosted LEDs. The diodes we’re adding want to have the negative side go into the square pad.
2. Cut the negative side of the germanium diode lead down to about 5 mm length. The negative side on the 1n34a is the lead closest to the black line indicator seen in Photo 9.
3. Heat the pad that has remaining solder in it and drop the short side lead into the solder.
4. Bend the other lead over like a horseshoe and mate it with the desoldered pad. (See Photo 10)
5. Solder the second side.
6. Repeat for the second diode, keeping in mind that the polarity of the diode needs to be opposite of the first diode that we soldered in as seen in Photo 11.
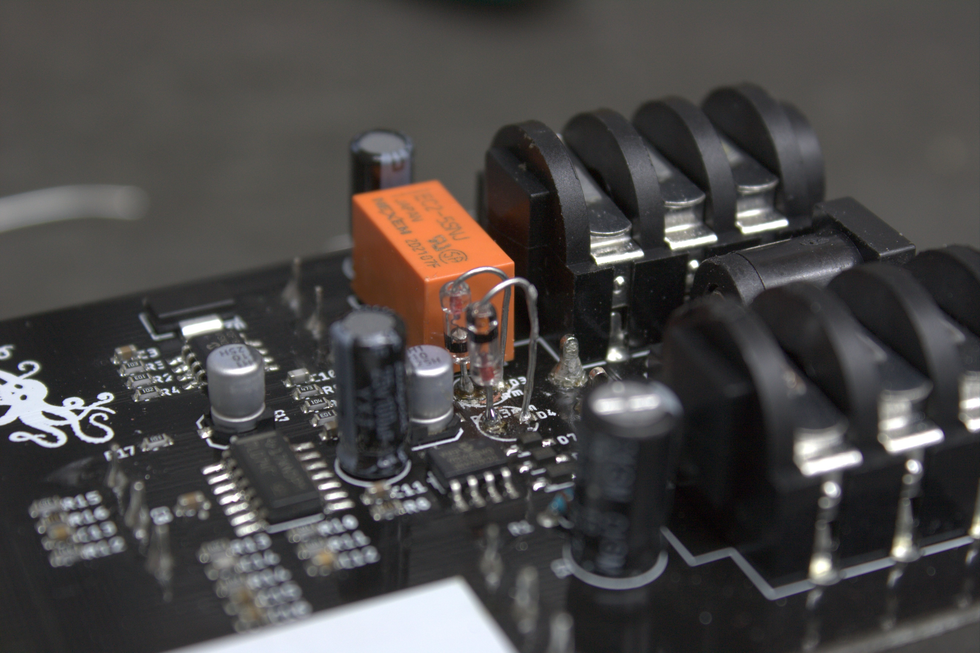
Photo 11
Step 8: Test.
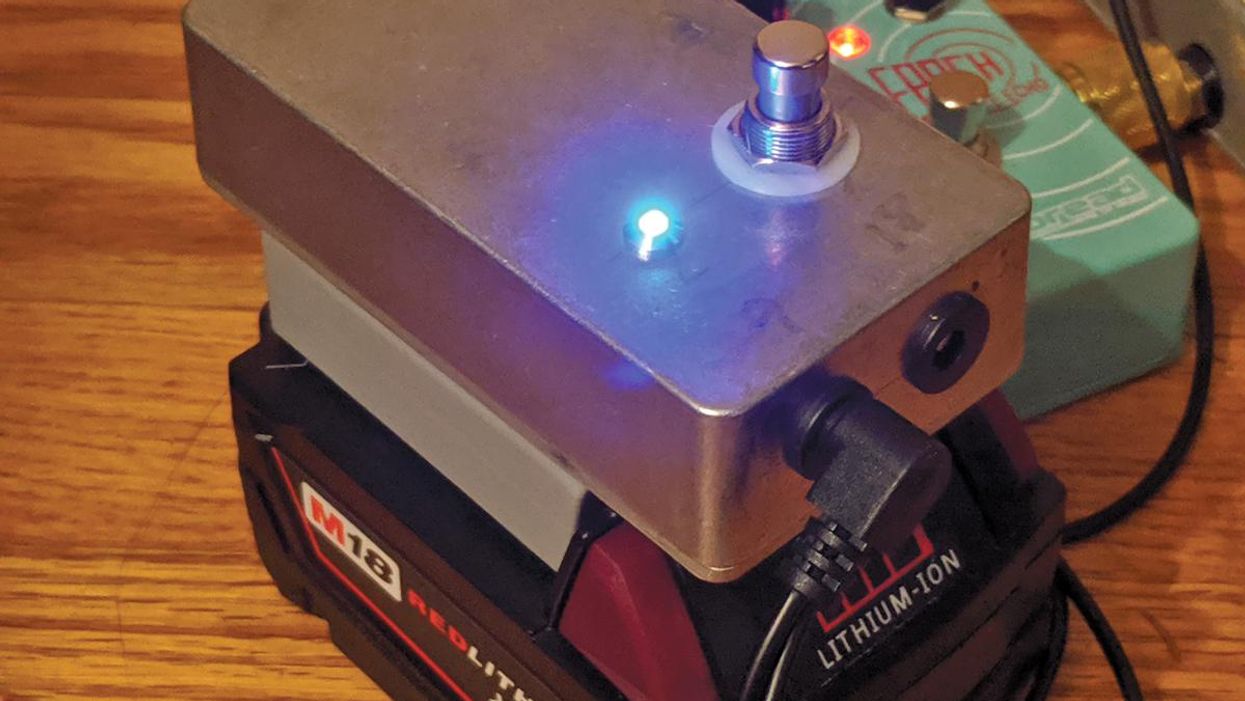
Before putting everything back together, plugging the unit in as-is can be helpful. This way, if it isn’t working, we can go back and look at solder joints and any potential issues.
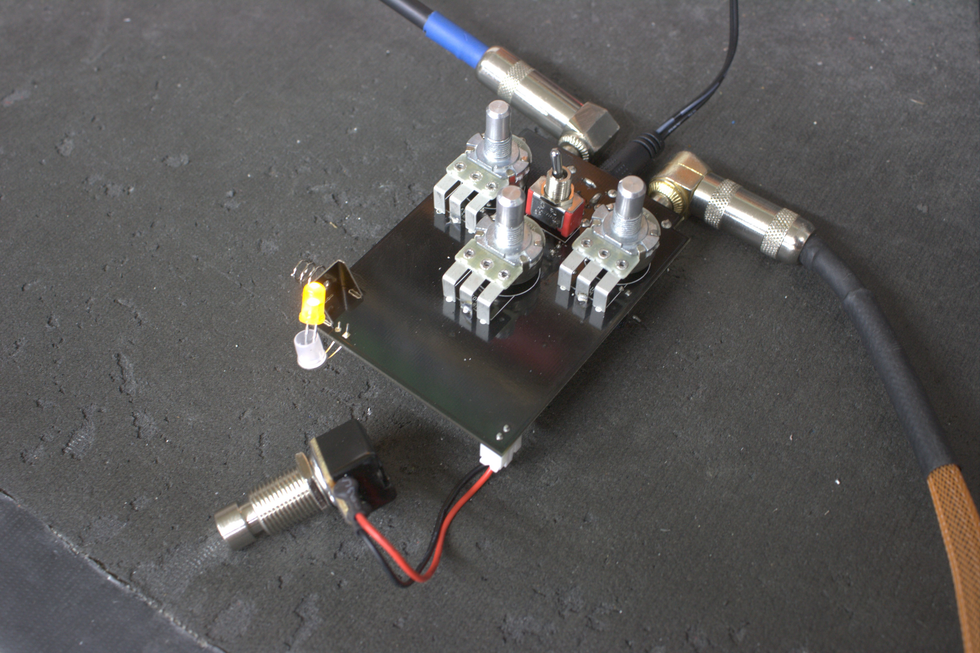
Photo 12
Step 9: Put everything back together.
Simply reverse the disassembly steps and enjoy!
A final note: If you love DIY projects or are interested in learning pedal design, my company, CopperSound, has a DIY section on its website, which also includes links to other DIY dealers. We offer integrated breadboards, component substitution boxes, adaptors for toggle switches, and even solder dispensers. For more information, please check out coppersoundpedals.com/DIYTwo Iconic Titans of Rock & Metal Join Forces for a Can’t-Miss North American Trek
Tickets Available Starting Wednesday, April 16 with Artist Presales
General On Sale Begins Friday, April 18 at 10AM Local on LiveNation.com
This fall, shock rock legend Alice Cooper and heavy metal trailblazers Judas Priest will share the stage for an epic co-headlining tour across North America. Produced by Live Nation, the 22-city run kicks off September 16 at Mississippi Coast Coliseum in Biloxi, MS, and stops in Toronto, Phoenix, Los Angeles, and more before wrapping October 26 at The Cynthia Woods Mitchell Pavilion in The Woodlands, TX.
Coming off the second leg of their Invincible Shield Tour and the release of their celebrated 19th studio album, Judas Priest remains a dominant force in metal. Meanwhile, Alice Cooper, the godfather of theatrical rock, wraps up his "Too Close For Comfort" tour this summer, promoting his most recent "Road" album, and will have an as-yet-unnamed all-new show for this tour. Corrosion of Conformity will join as support on select dates.
Tickets will be available starting Wednesday, April 16 at 10AM local time with Artist Presales. Additional presales will run throughout the week ahead of the general onsale beginning Friday, April 18 at 10AM local time at LiveNation.comTOUR DATES:
Tue Sep 16 – Biloxi, MS – Mississippi Coast Coliseum
Thu Sep 18 – Alpharetta, GA – Ameris Bank Amphitheatre*
Sat Sep 20 – Charlotte, NC – PNC Music Pavilion
Sun Sep 21 – Franklin, TN – FirstBank Amphitheater
Wed Sep 24 – Virginia Beach, VA – Veterans United Home Loans Amphitheater
Fri Sep 26 – Holmdel, NJ – PNC Bank Arts Center
Sat Sep 27 – Saratoga Springs, NY – Broadview Stage at SPAC
Mon Sep 29 – Toronto, ON – Budweiser Stage
Wed Oct 01 – Burgettstown, PA – The Pavilion at Star Lake
Thu Oct 02 – Clarkston, MI – Pine Knob Music Theatre
Sat Oct 04 – Cincinnati, OH – Riverbend Music Center
Sun Oct 05 – Tinley Park, IL – Credit Union 1 Amphitheatre
Fri Oct 10 – Colorado Springs, CO – Broadmoor World Arena
Sun Oct 12 – Salt Lake City, UT – Utah First Credit Union Amphitheatre
Tue Oct 14 – Mountain View, CA – Shoreline Amphitheatre
Wed Oct 15 – Wheatland, CA – Toyota Amphitheatre
Sat Oct 18 – Chula Vista, CA – North Island Credit Union Amphitheatre
Sun Oct 19 – Los Angeles, CA – Kia Forum
Wed Oct 22 – Phoenix, AZ – Talking Stick Resort Amphitheatre
Thu Oct 23 – Albuquerque, NM – Isleta Amphitheater
Sat Oct 25 – Austin, TX – Germania Insurance Amphitheater
Sun Oct 26 – Houston, TX – The Cynthia Woods Mitchell Pavilion
*Without support from Corrosion of Conformity
For two decades, Clapton's Choice Signature Strings have delivered the legendary tone Eric Clapton relies on every time he picks up an acoustic guitar. To celebrate this milestone, Martin Guitar is introducing limited-edition 20th anniversary packaging for these fan-favorite strings--available now through March 2026.
Every limited-edition pack also gives players a chance to win a Martin 000-EC 30th Anniversary guitar--a beautifully crafted instrument with a retail value of $4,999, inspired by the Martin guitars Eric played during his legendary MTV Unplugged performance. The guitar will be awarded to one lucky winner who finds a special ticket inside a pack of strings.
Fans can also enter a second-chance giveaway online for more opportunities to win exclusive prizes, including a Martin guitar strap, poster, collectible lanyard with three custom patches, or even a year's supply of strings.This contest is open to U.S. residents only and ends March 31, 2026. No purchase necessary.
Enter now and learn more at martinguitar.com/eric-clapton-giveaway.
The anniversary release also coincides with the upcoming arrival of Unplugged: Enhanced Edition on vinyl and CD, available May 9. The iconic installment of the MTV Unplugged series--and the greatest-selling live album of all time--returns over 30 years later in an all-new extended, remixed, and remastered version. Featuring never-before-heard commentary from Eric recorded just before the original 1992 performance, the release offers fresh insight into the inspiration behind the songs and includes tracks not featured in the original MTV airing.
Crafted from 92/8 phosphor bronze, Clapton’s Choice Signature Strings are known for their warm, rich tone, smooth feel, and long-lasting performance. They're the same strings Eric uses in the studio and on stage--including during his current eight-night residency at the Nippon Budokan in Tokyo--and he calls them "the sound that I demand."
Whether you're chasing Eric's iconic tone or simply looking for strings that deliver great sound and playability, now is the perfect time to pick up a pack--available in a music store near you or online at
martinguitar.com--and celebrate two decades of signature sound.
Jackson's new Pro Series Signature Misha Mansoor Juggernaut guitars, including the HT6 and ET6 models, are designed for classic and progressive metal players. Featuring premium construction, innovative pickups, and advanced bridge options, these guitars deliver the modern sound and performance needed to ignite your tone. Visit jacksonguitars.com for more information.
Jackson is once again partnering with Misha Mansoor to release three new signature guitars, The Pro Series Signature Misha Mansoor Juggernaut HT6 in Red Crystaland Blue Sparkle and The Pro Plus Series Signature Misha Mansoor Juggernaut ET6 in Riviera Blue. Developed in close partnership with Misha, these Juggernaut metal guitars are built to withstand the demands of Misha’s steadfast and fleet-fingered technique. Perfect for both classic and progressive metal players, these guitars deliver the modern sound that every shredder needs to ignite their tone.
“This refresh came about because every few years we want to see what we can do…these guitars travel around the world and they need to be road ready,” said Misha Mansoor on his new signature guitars.“It’s a no-nonsense guitar that looks good, sounds good, and plays good.”
Djent forefather, Misha Mansoor, has gained widespread acclaim as the mastermind behind the axe-centric progressive metal band Periphery. Based in Washington D.C., Periphery is renowned for pushing the limits of progressive metal, using detuned, extended-range instruments to craft a sound that is both technically complex and unapologetically heavy. Misha Mansoor, guitarist and producer, co-founded the band in 2005. With the same precision and innovation that defines Misha's playing, the Juggernautsignature gives players the power to transform their sound.
The premium Juggernaut models feature a 25.5” scale length, poplar body, and bolt-on caramelized maple neck with graphite reinforcement, wrap-around heel, and oiled back finish for greater playing comfort. With a 20” flat radius ebony fingerboard that features rolled edges, fans can enjoy blazing fast leads. These models feature 24 jumbo stainless steel frets and offset dot inlays. Lastly, the Luminlay side-dots will guide the guitarist's path even on the darkest of stages, while the heel-mount truss rod adjustment wheel allows for convenient neck relief tweaks.
Misha worked closely, as he did with past models, to develop the exceptional uncovered direct-mount Jackson MM1 pickups. Unwilling to sacrifice tone, these pickups can be shaped with a five-way blade switch, single volume control, and a single tone control with push/pull feature that allows for players to engage or disengage tone options. Designed for articulate heavy picking, the humbuckers deliver a well-balanced sonic range with rich dynamics, intentionally left uncovered to enhance brightness and clarity.
The Pro Plus Series Signature Misha Mansoor Juggernaut ET6 comes equipped with an EverTune F6Model bridge, engineered to maintain perfect tuning and intonation across the entire neck, even with low tunings. Its counterpart, the Pro Series Signature Misha Mansoor Juggernaut HT6, features a string-through-body hardtail bridge that delivers enhanced sustain, rock-solid tuning stability, and simplified string changes. Both bridges are built to withstand intense playing conditions, providing the unwavering stability essential for Misha's signature heavy metal style.
“We’re beyond thrilled to be partnering with Misha Mansoor on his latest signature guitar collection. His innovation and vision perfectly align with our passion for pushing the boundaries of tone and design, ”said Jon Romanowski, VP of Product of Jackson Guitars. “This collaboration reinforces Jackson’scommitment of providing for players who demand nothing but the best.”
For more information, please visit jacksonguitars.com.
Introducing The Pro Plus Series Misha Mansoor 6-String Juggernauts | Jackson Guitars - YouTube
“The Archon Classic is not a reissue of the original Archon, but a newly voiced circuit with the lead channel excelling in ’70s and ’80s rock tones and a hotter clean channel able to go into breakup. This is the answer for those wanting an Archon with a hotrod vintage lead channel gain structure without changing preamp tube types and a juiced up clean channel without having to use a boost pedal, all wrapped up in a retro-inspired cabinet design." - Doug Sewell, PRS Amp Designer