
Hello, and welcome to the first Mod Garage column that doesn't deal with electric guitars.
Many guitar players have at least one classical guitar in their arsenal, and a lot of us strummed our first chords on a nylon-stringed guitar. But changing strings on a classical guitar isn't easy, and it takes time to develop a solid technique. When you have to change strings often, this can be an annoying, time-consuming procedure. (Flamenco players know what I'm talking about!)
and other materials.
I often receive classical guitars with “tuning issues," though few have actual problems with their tuning machines. In most cases the owners simply put the strings on wrong, especially the plain nylon treble strings. But don't worry—I won't torment you with a lecture on nylon string installation—the web is already full of them. Instead, I'll show you some alternatives and mods to speed up the process while improving tuning stability.
Beginning at the Bridge
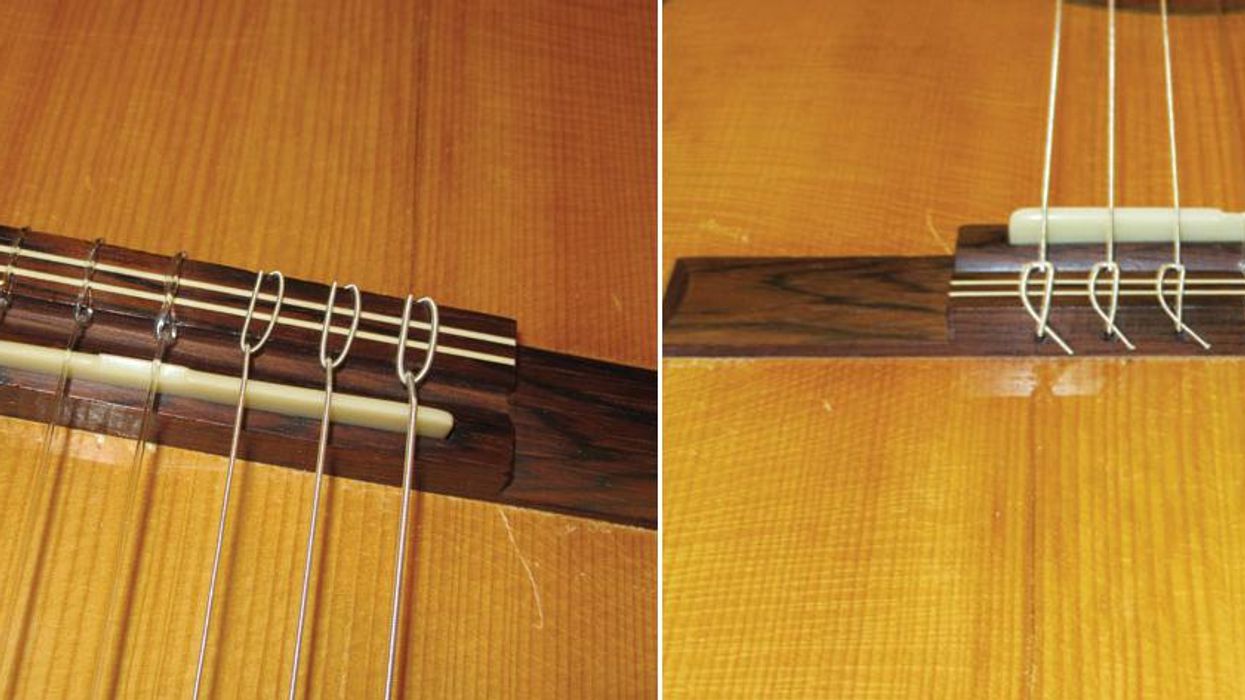
The bridge of a classical guitar properly strung in the traditional manner should look something like Photo 1 and Photo 2.
Now let's consider some alternatives.
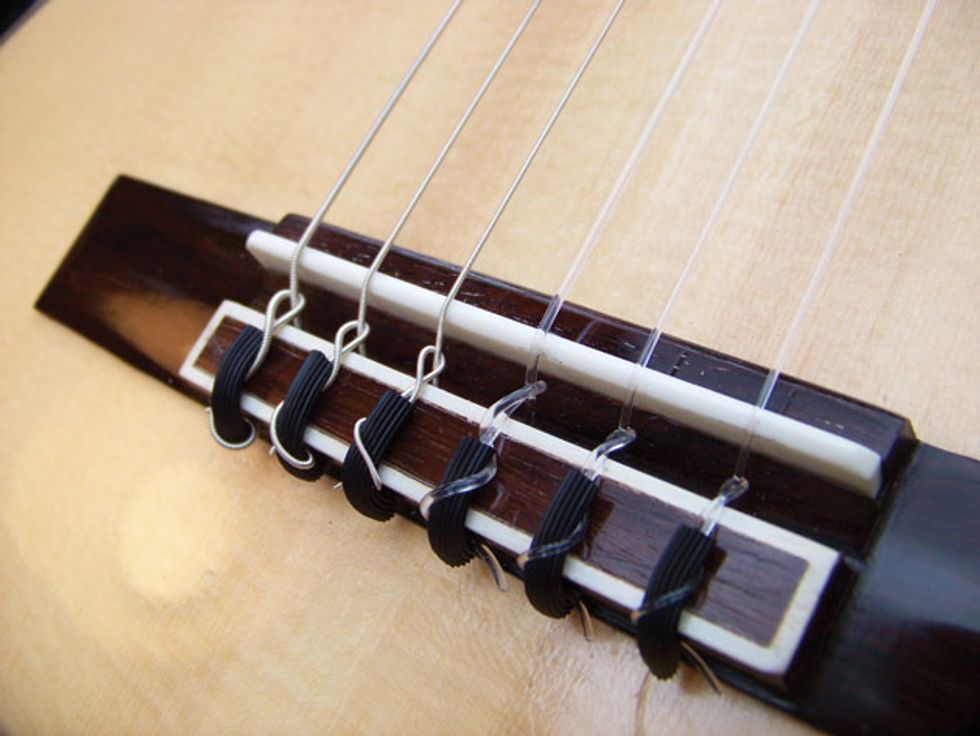
Photo 3. Image courtesy of Rosette Guitar.
Bridge Grips
Bridge grips are short tubes of polymer material that you slide onto each string before fastening it. They won't spare you from learning the traditional method, but they reduce the chance of slippage. The grips hold everything in place while securing the strings, speeding up the process. Bridge grips are reusable, so no need to buy new ones with each set of strings. The only downside is their unusual look [Photo 3].
Strings with Ball Ends
Some companies offer classical strings with ball ends, much like typical steel strings for acoustic guitar. These strings aren't made primarily for tie-block bridges, though some older classical guitars, like Viennese and Munich models, have bridges similar to those on steel-string guitars with bridge pins. But you can use this string type with tie-block bridges. Simply protect the soundboard around the bridge with a piece of cardboard, wood veneer, plastic, or such.
The downsides? Steel ball-ends can damage the tie block over time, leaving unsightly dents. Also, you're limited to the relatively small number of string companies that manufacture sets of this type.
WARNING: Never put standard steel strings on a classical guitar! Their high tension will quickly ruin your instrument.
Many players don't like the look of ball-end strings on a tie-block bridge. A good way to spruce up the optics is to countersink the holes in the tie block, so the ball ends no longer reside outside the block. But leave this mod to a professional luthier, because it requires specialized tools, and you must work dangerously close to the soundboard.
Bridge Beads (AKA String Ties)
This is a great solution if you want to try the ball-end method but can't live without your favorite non-ball-end strings. Using bridge beads converts your regular strings into ball-end ones. Bridge beads are available in bone, wood, nylon, and other materials. They come in several shapes and colors. It's easy to fasten them to strings with a self-securing technique you may know from sailor's or mountaineer's knots. The beads are reusable, and they're real time-savers.
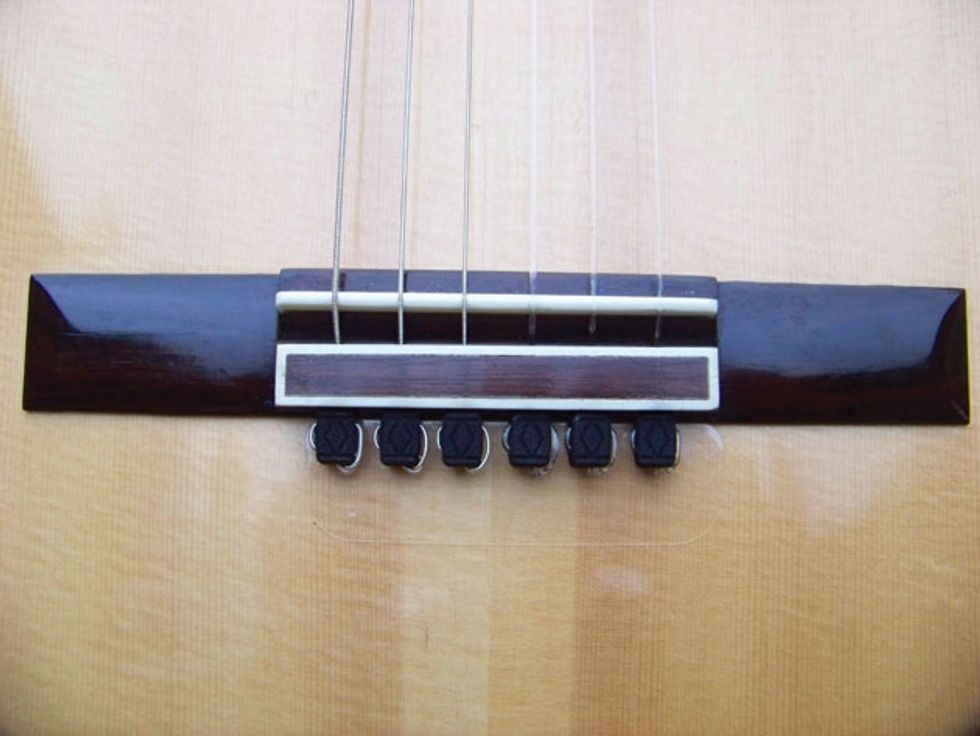
Photo 4. Image courtesy of Rosette Guitar.
Downsides? Depending on their shape and material, bridge beads can leave dents in the tie block. As when using ball ends, you should protect the soundboard area around the bridge when changing strings. Also, the appearance is untraditional [Photo 4].
Tip: When using ball-end strings or bridge beads, it's a good idea to permanently protect the soundboard area directly below the bridge with a clear mini pickguard like the one in Photo 4. Flamenco players often protect their guitar tops with stick-on golpeadores, which come in both white and clear materials. You can buy a golpeador and cut the material to size. (One advantage of the clear ones: Light permeates them, so the wood beneath slowly darkens along with the top's unprotected surfaces.)
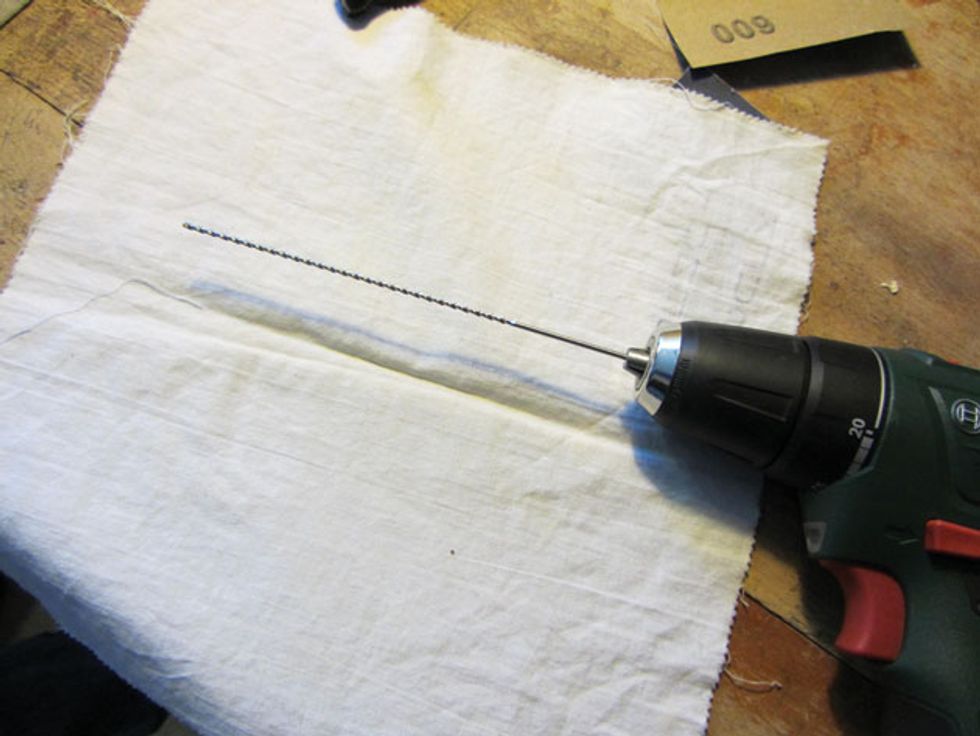
Photo 5. Image courtesy of singlecoil.com.
The 12-Hole Bridge
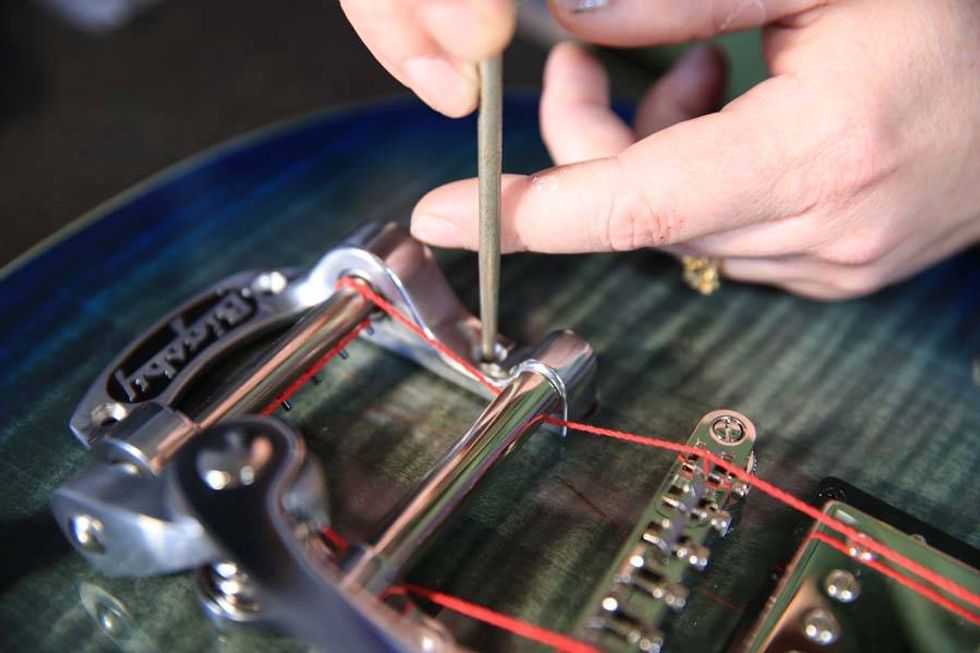
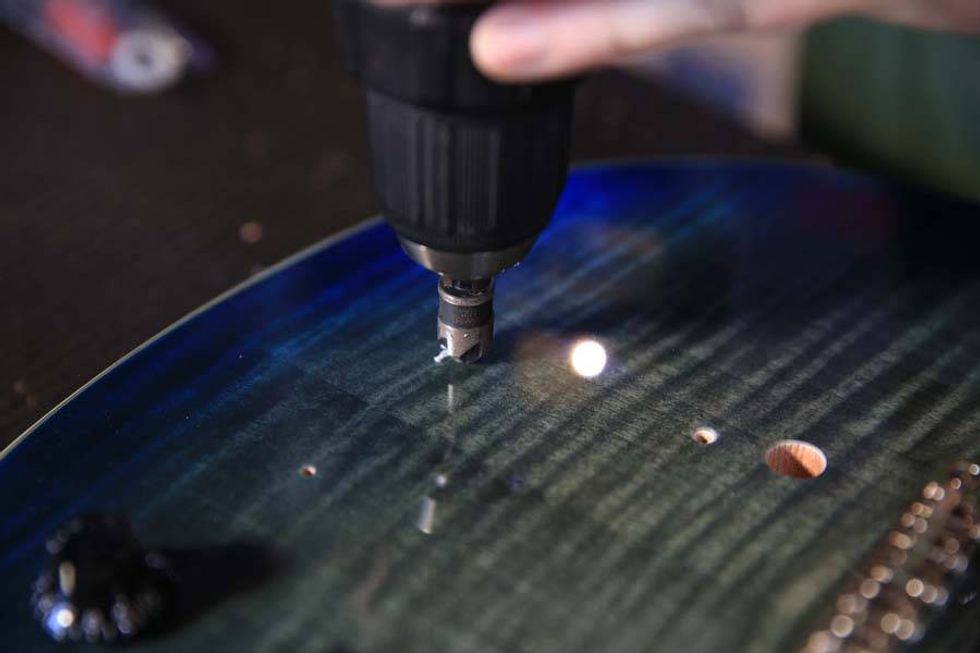
This is my favorite solution. It's highly functional, nearly invisible, and easy to do: Simply drill a second hole near each of the existing bridge holes. But you need the right tools—specifically, a long, sharp drill bit like the one in Photo 5. Proceed with caution, because you must work close to the soundboard. Be sure to protect the soundboard while working—or just leave the operation to a professional luthier.
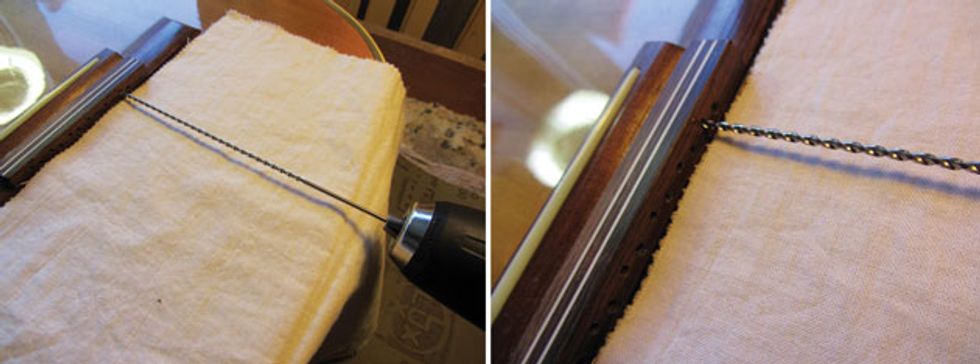
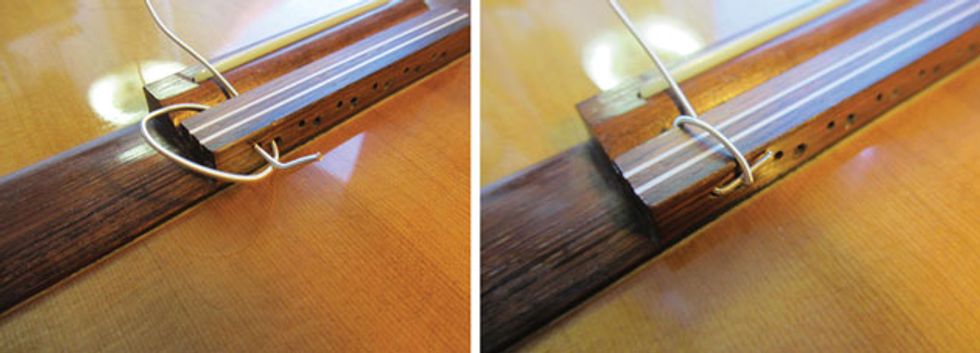
Photos 6 (left) and 7 (right). Images courtesy of singlecoil.com.
Photo 6 and Photo 7 show two views of the drilling process. Photo 8 shows the other side of the bridge after drilling.
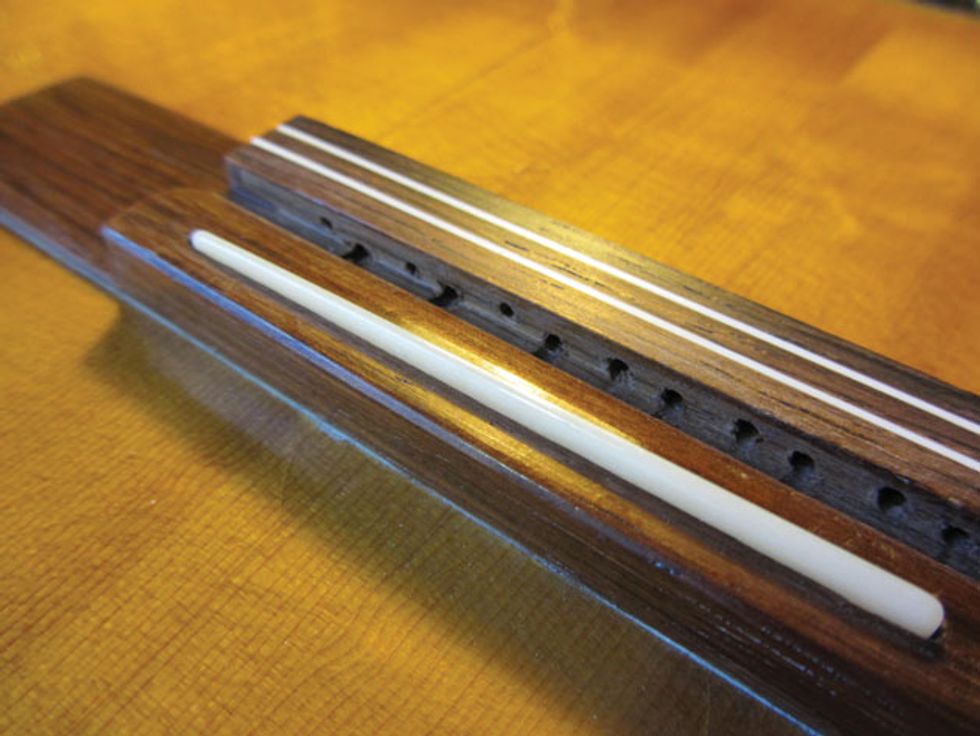
Photo 8. Image courtesy of singlecoil.com.
Stringing a 12-hole bridge requires a modified technique [Photo 9 and Photo 10], though it's easier and faster than the traditional six-hole method. Just run the string through its original bridge hole, loop it over the top of the bridge, and reinsert the tip through the new hole, securing the string beneath itself at the point where it emerges from the original hole.
Photos 9 (left) and 10 (right). Images courtesy of singlecoil.com.
The 18-Hole Option
Another popular design uses 18 holes, which spares you from having to loop the string over the tie block [Photo 11]. This method looks nice and clean, and the tie block is safer from string damage. (Just to keep things straight: The traditional six-hole bridge uses two turns over the tie block. The 12-hole method uses only one turn. The 18-hole uses none.)

Photo 11. Image courtesy of Stephen Rees.
Converting your six-hole bridge to an 18-hole can be tricky, and there may not be sufficient space between the extant holes, so consult your luthier.
Tuning Machine Mods
Now let's look at speeding up string changes from the other end of the guitar. The magic phrase here is “double holing."
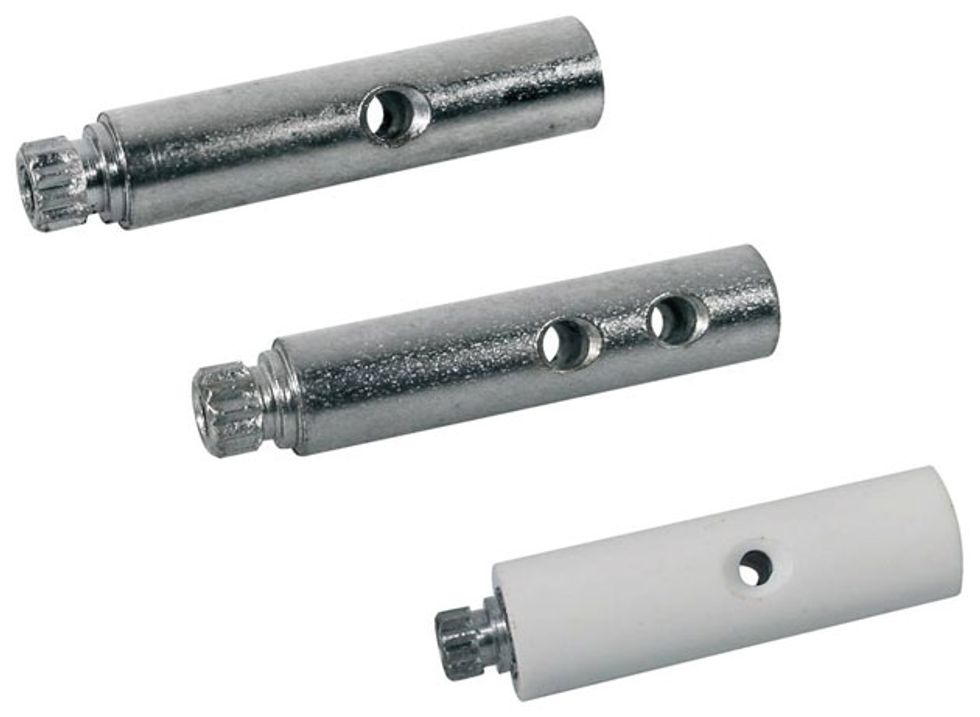
Photo 12. Image courtesy of singlecoil.com.
he tuning machines of most classical guitars use one of two roller types: standard nylon-covered rollers, also available in aluminum (Photo 12), and the Emberger-type rollers found mostly on vintage guitars. While Emberger tuners sometimes come from the factory with two holes, most classical rollers only have one hole.
Emberger rollers are smaller in diameter than conventional nylon-covered rollers. If yours have only one hole, you may be able to get replacements with double holes. If not, you need a very sharp drill bit for metal and a multi-speed drill press—you can't use a hand-held drill for this operation. (If in doubt, consult your luthier.)
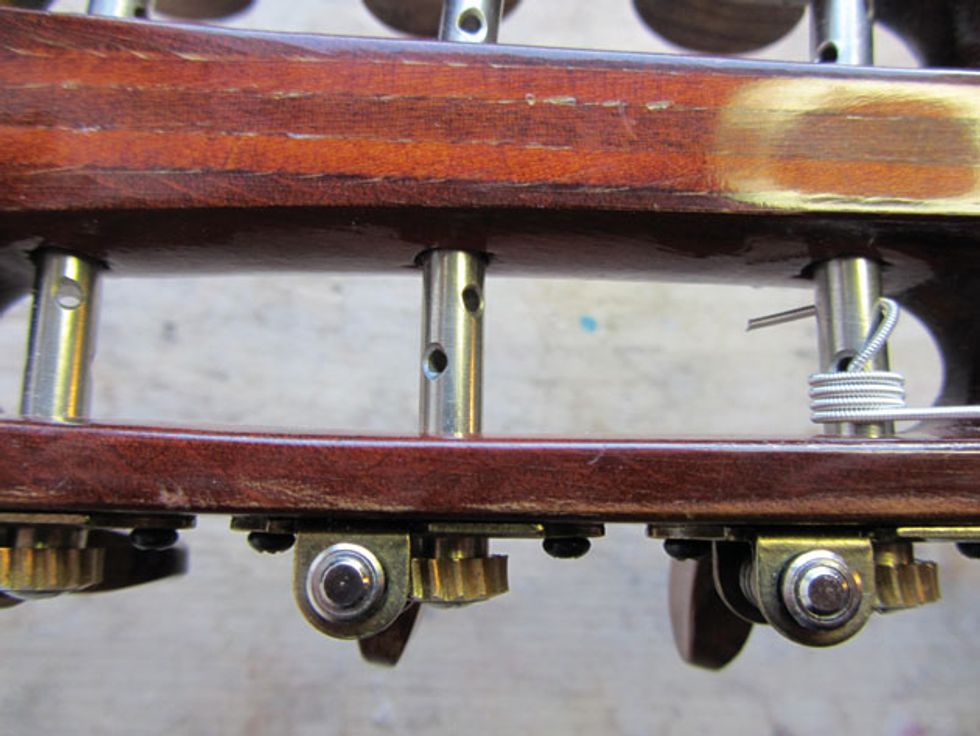
Photo 13. Image courtesy of singlecoil.com.
If you attempt the work, be sure to secure the rollers tightly so they don't turn into bullets while drilling, and wear gloves and goggles. You can orient the second hole like the stock ones, or angle them slightly for even greater locking strength [Photo 13].
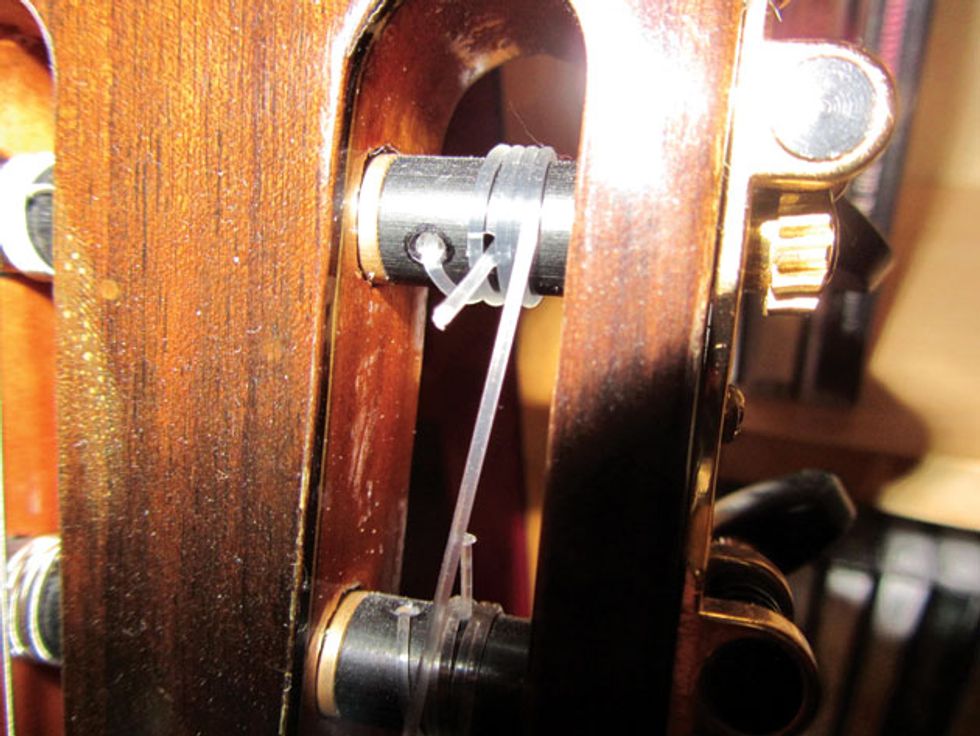
Photo 14. Image courtesy of singlecoil.com.
On standard nylon-covered rollers, note that the nylon part is merely a cover that slides over the metal shaft beneath. It's a little easier to do this mod on aluminum rollers, which are one-piece barrels. Photo 14 shows a modded aluminum barrel on a flamenco guitar.
That's it! Next month we'll return to electric guitar mods. But if you'd like to read more about acoustic guitar mods, just let me know, and I'll throw some in from time to time. Until then, keep on modding!