Hello modders! Once again, I'm feeling the urge to share another workbench tip from my repair shop. (But don't stash that soldering iron, because we'll return to the world of pickups, pots, schematics, and hot-rodding in the next column.) This time out, I want to show you a cool way to keep your frets shiny and smooth. The technique has a great side benefit: It will extend the life of your frets. Though there are countless ways to clean and polish frets, this is my favorite. It's simple and it doesn't require much in the way of tools and supplies, and you can perform the procedure every time you change strings. If you follow this regimen, your frets will always be in perfect playing condition—shiny and smooth like a twinkling star. And this works not only for guitars, but also basses, mandolins, banjos, and other fretted instruments.
Note: This technique only works if your fretboard is clean and the frets are in good condition, showing only signs of normal playing wear. If your fretboard is encrusted with grime and the frets are corroded, your guitar needs more intensive care—a topic for another day.
The supplies. It's a pretty short list and chances are good you already have some of these items at home. Photo 1 shows the essentials:
- An old leather belt or strip of leather sold for making a belt. It's important that this is genuine leather—not leatherette, Naugahyde, Rexine, or some other synthetic product. It doesn't matter if your old belt is dyed brown or black, as long as it's the real deal.
- A few pieces of hardwood, such as maple, oak, or alder.
- A silver-cleaning cloth. This is something you can buy in any jewelry store, but be sure not to buy a gold-cleaning cloth. That won't work as well for this job as a cloth treated to clean silver.
- Fretboard oil or conditioner of your choice. There are countless options available. Two caveats: Do not use silicone oil—it won't seep into the fretboard wood, but will instead remain on the surface and create a mess. Also do not use any cooking or salad oil from your kitchen. That will seep into the fretboard wood and eventually turn rancid, getting gummy and smelling foul. You can avoid these hassles by selecting a product intended for guitar fretboards.
- An old t-shirt or piece of cotton cloth.
- A fresh set of your favorite strings.
Crafting your custom tool. Before we get to the polishing, you'll need to tinker a little with the leather belt and piece of hardwood. The goal is to make a small polishing block with a thick piece of leather glued beneath it. The block needs to fit in your hand while you rub the leather across the frets, but in terms of size, you have some latitude: Do you want a larger piece of wood that covers several frets at once? Or do you want to use a small block to polish one fret at a time?If you have enough leather, you can make several blocks sized to span all types of frets and fretboards. That's what I've done in my shop. It gives me the flexibility to tackle different instruments. Incidentally, I use scrap maple for my blocks, and my leather comes from “belt blanks" sold by leathercraft suppliers.
First, cut the piece of wood you want to use as a block. Next, trim off a matching piece of leather. Finally, glue the leather to the block so the smooth side of the leather faces out. This is the surface that will polish the frets. You can use any kind of household craft glue for this last step, but I've found that super glue and wood glue don't work well for this task.
The fret-polishing process. After removing the old strings, rub the silver-cleaning cloth over the frets until they shine like new, which won't take long.The cloth will darken when you polish something with it, but this is normal and not a sign of wear or degradation. Never wash this type of cleaning cloth. It will last a very long time, even if it has turned completely dark. Polishing cloths will last years before the fabric starts to wear through. You can also use this silver-cleaning cloth for all chrome and nickel hardware, such as tremolos, pickup covers, tuners, and knobs. (There are special cleaners available for black and gold hardware.)
Once you've gone over the frets with the cleaning cloth, wait a few minutes, then use the cotton cloth to rub over the frets again.
Now take your leather-backed polishing block and rub the devil out of the frets until they take on a mirror-like shine. The leather will also turn dark through use, but, as with the cleaning cloth, you can simply ignore that. After polishing the frets, run your fingers over them. You'll be amazed at how smooth and silky they'll feel. So what's going on with this leather treatment? Hang on, we'll get to that in a moment.
The next step is only for guitars with a rosewood or ebony fretboard. For any guitar with a one-piece maple neck, you can skip this fretboard-conditioning step. Rub the fretboard oil or conditioner of your choice onto the fretboard. Go easy—only use a driblet of the stuff. In this case, less is more. After you've applied the conditioner, let it sit for a few hours, then wipe off any excess with the cotton cloth.
The last step: Put on your new strings and start wailing.
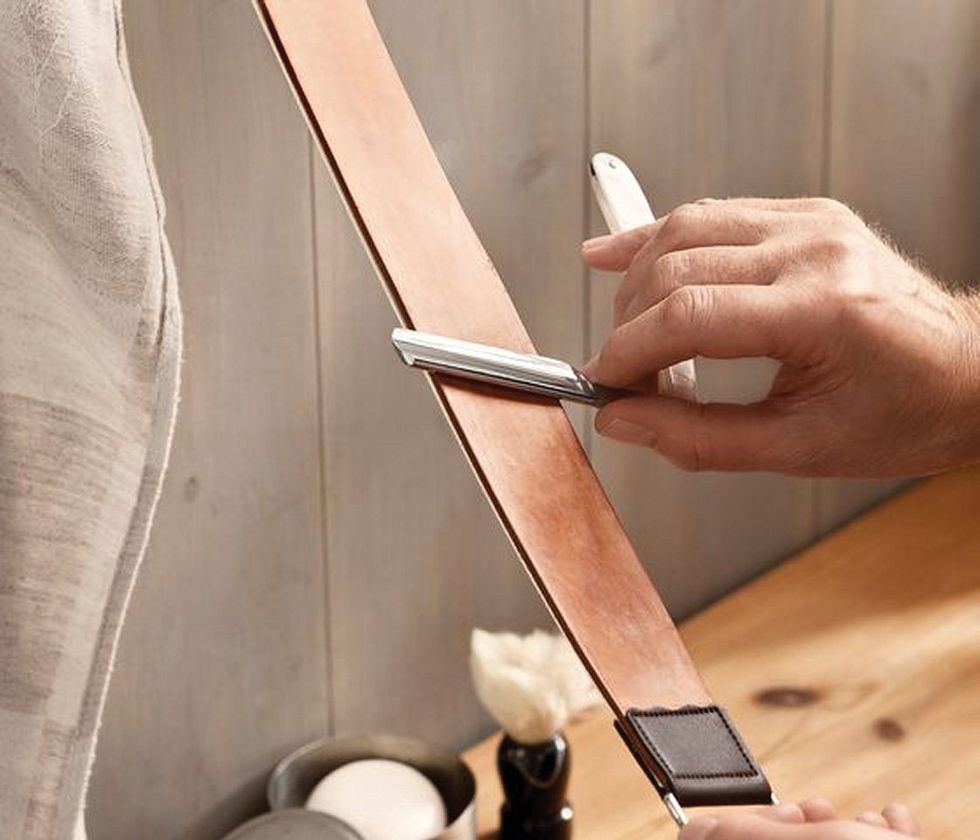
Photo 2 — Photos courtesy of singlecoil.com
Leather mojo. Using leather to put a fine finish on metal is nothing new. If you've ever watched a barber draw an old-school straight razor across a leather “strop," you know this is a time-honored technique that's still being practiced in vintage barber shops (Photo 2). In contrast to sandpaper or hard abrasives, leather softly embeds the polishing particles into the frets' surface, yielding a buttery-smooth playing experience.
Essentially, leather polishing enhances the surface quality of the metal, making it more resistant to all kinds of corrosion. But there's more: You may not realize that frets get harder the older they are and the more they get played. This is a similar process to forging, which results in material compaction. [Editor's note: Wikipedia describes forging as “a manufacturing process involving the shaping of metal using localized compressive forces."] This inherent hardening, coupled with the enhanced corrosion resistance offered by the leather stropping action, will noticeably extend the lifespan of your frets.
To close, a few words about corrosion: If two different metals make contact with electrolytes (e.g., sweat from the hands), the base metal, according to the electrochemical series, will start to corrode. On a coarse surface, such as found on standard frets, the electrochemical potentials will change and conspicuously speed up the corrosion process. Leather stropping prevents or dramatically retards corrosion, so your frets will always be in tip-top shape. The finer a fret is polished, further reducing the micro- and nano-roughness of its surface, the better it will resist corrosion.
That's it. Next month we'll explore our next guitar mod, so stay tuned. Until then, keep on stropping!