
What you'll need:
- A soldering iron such as S-TWLC100.
- Some solder. We use S-T9000 on almost everything.
- Helping hands or a vice. S-THHM is a simple but useful one for this.
- Wire cutters. You can't go wrong with a pair of the Xcelite S-T170M.
- Some wire. Solid core is a good choice. We use S-W429 for this one.
- An RCA plug. The W-SC-3501MX is ideal.
Getting Started
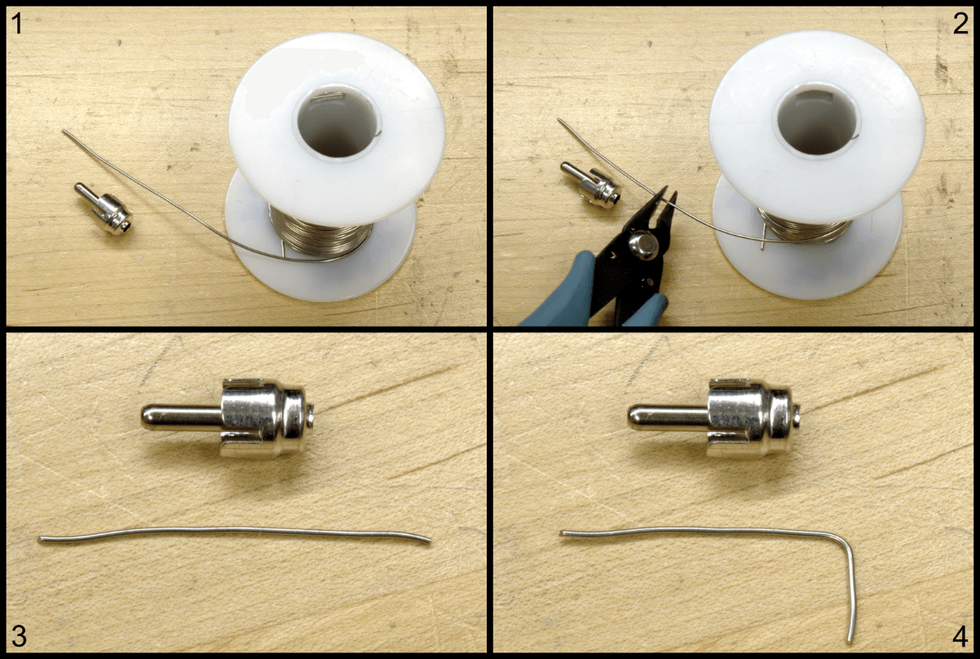
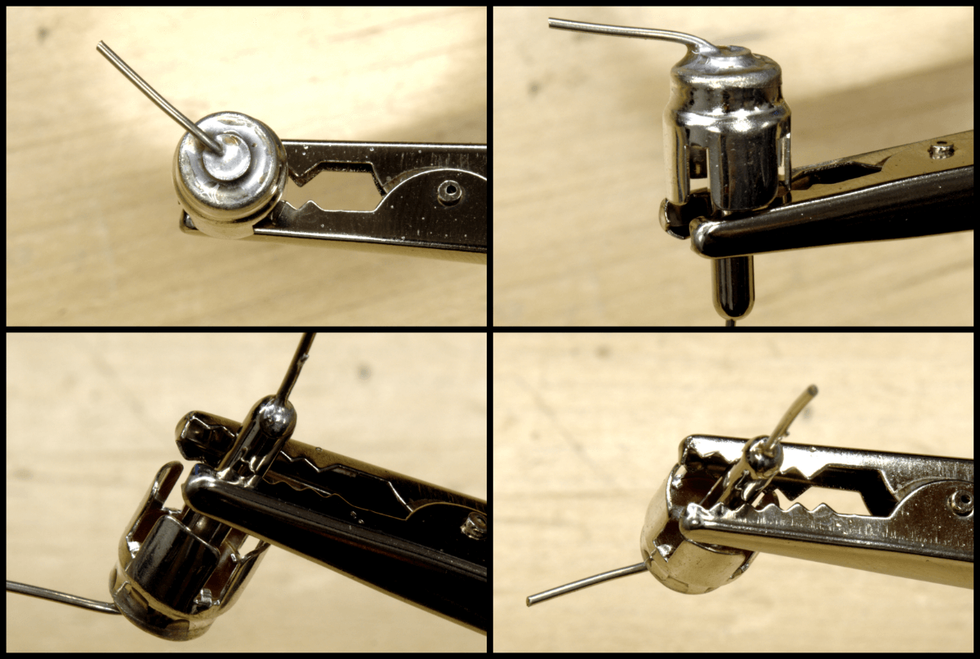
First, cut a piece of wire that is longer than the RCA plug. We cut it to about 2 inches but the length is not important as long as there's enough wire to stick out of each end of the plug. Then bend the wire at a right angle leaving enough wire on one side of the bend to completely pass through the tip of the plug. Now is a good time to heat up the soldering iron.
Next, set up the plug with the helping hands. The tip of the plug should face downwards and the back end will point up. The wire is then inserted into the plug. The right angle bend should stop the wire from falling through and there should be some wire sticking out of the tip. Touch the soldering iron to both the back of the plug and wire so both begin heating. After a few seconds, start applying the solder. There should be enough solder to cover the hole on the back of the plug. If solder is falling into the cavity of the plug, remove the iron, let the metal cool down and then begin the process over. When done correctly, the solder will spread across the hole and slope onto the wire.
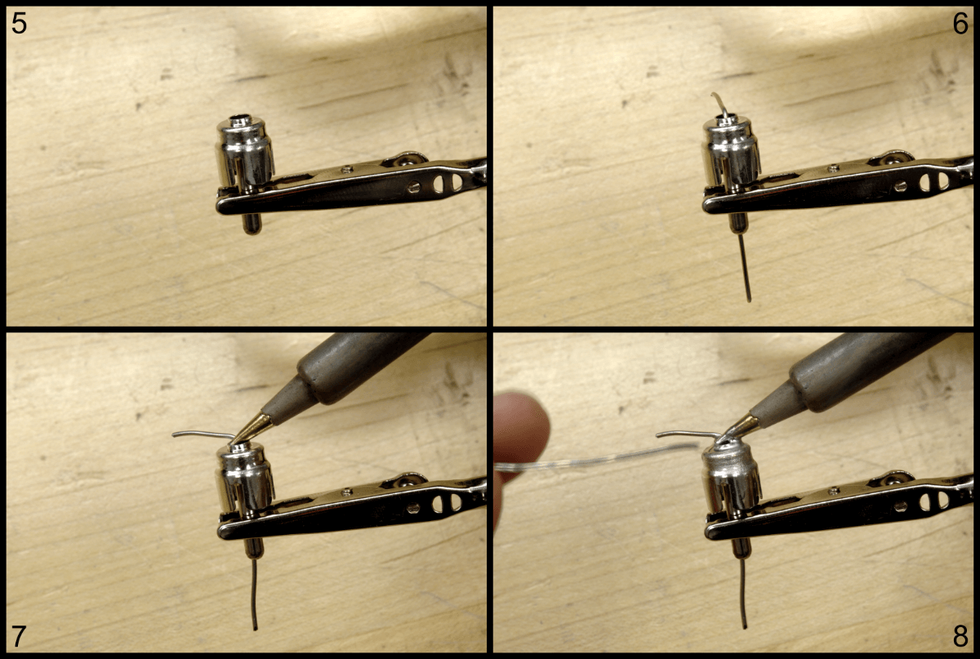
After the joint cools, flip the helping hand clip over so that the tip is facing up and the back is now pointing down. When looking closely at the tip there will be a small gap between the hole and the wire. Place the tip of the soldering iron towards one side of this gap leaving some of it exposed making sure that there is contact with both the wire and the plug tip. Feed some solder in at the gap. Try to be careful not to solder to the outside of the plug's tip or else a solder blob might form making it difficult to plug it into a jack. Don't sweat it too much if there is a little bit on the outside, though; RCA jacks can be pretty forgiving.
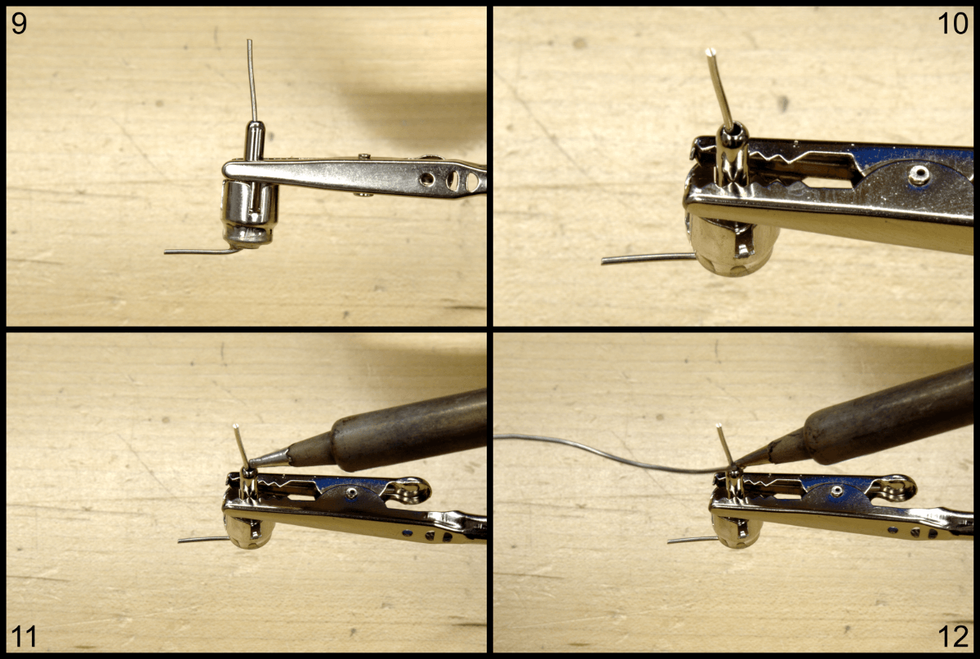
Now is a good time to check the solder joints. The end should have the hole filled with some solder sloping up the wire. The tip should have the gap filled with solder also slightly sloping up the wire.
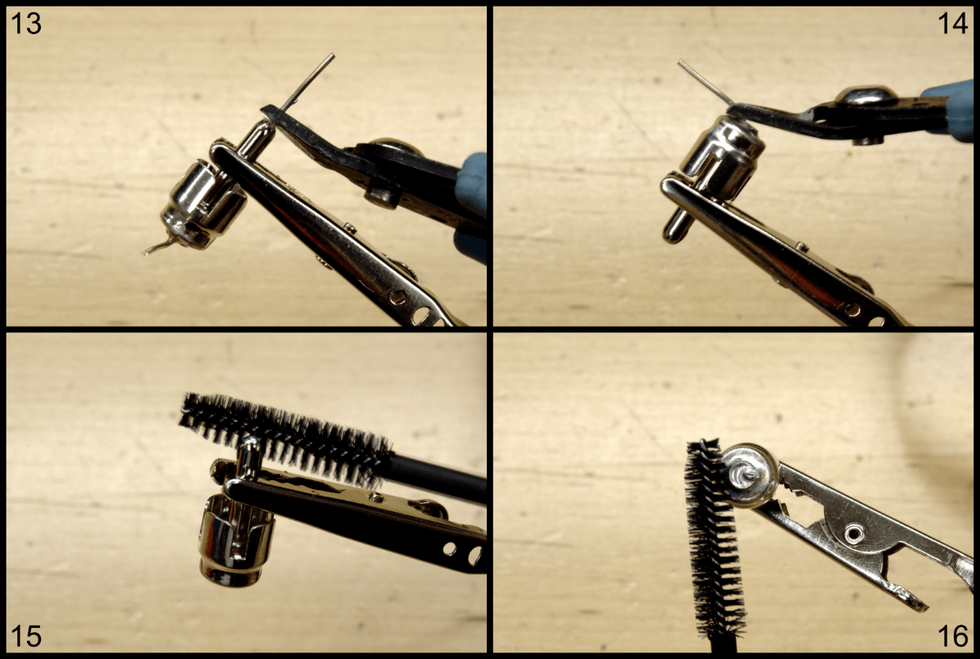
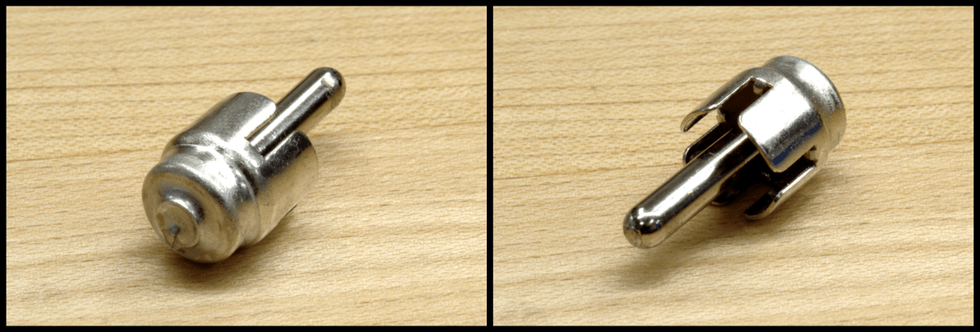
When the joints look good, it's time to cut the excess wire from the plug. Be careful not to cut into the tip of the plug itself. For some finishing touches, brush the plug with a flux remover. We used Caig Flux Wash,
S-CDFW-V711, and a small brush from Caig, S-CAB-25. Cleaning the flux is sometimes not important and other times very important. Be sure to check the specs on your solder. Cleaning the flux will always give a more finished look though.
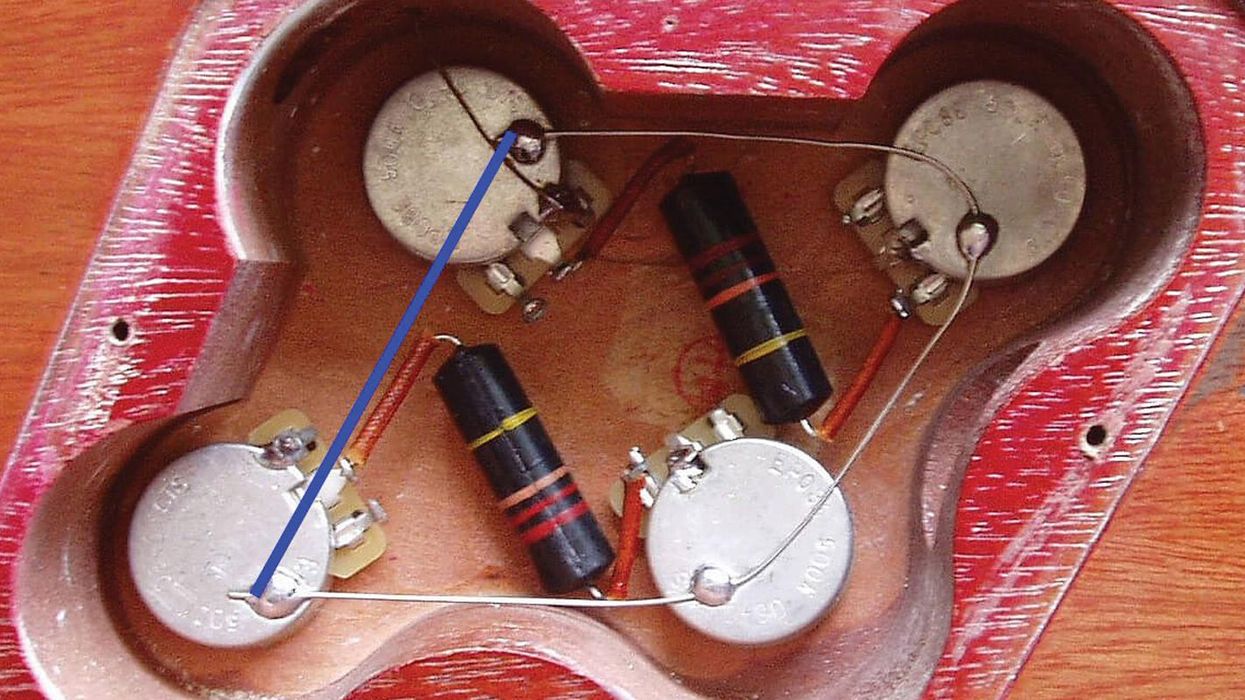
The plug is finished and ready for use. Simply plug it into the vibrato footswitch jack and the front panel controls will now operate as if the footswitch is plugged in and switched on.
The original article can be found at https://www.amplifiedparts.com/tech-articles/diy-vibrato-shorting-for-blackface-silverface-amps
For more articles like this one as well as other tips, online tools, and guitar/amplifier information please visit https://www.amplifiedparts.com/


![Rig Rundown: The Black Crowes’ Rich Robinson [2026]](https://www.premierguitar.com/media-library/youtube.jpg?id=66952027&width=1245&height=700&quality=70&coordinates=0%2C0%2C0%2C0)