
Hello everyone, and welcome to another Recording Dojo installment. You may recall that back in November 2020 I introduced you to the mighty HPF (high-pass filter) and how to employ its power. This time, I'm going to focus on the other side of the spectrum: the LPF (low-pass filter). A DAW's LPF does exactly what its name implies: It allows low-frequency information to pass and attenuates the high frequencies. Strategic use of an LPF can really help clean up your recordings and mixes by allowing you to control where and how much high-frequency information you want—especially on groups of tracks where there might be a lot of high-frequency overlap.
Like its cousin the HPF, the LPF also has many of the same parameters and controls—most importantly, the slope of the filter. The slope of the filter is represented by dBs per octave, and the higher the value, the steeper the slope. Typically ranges include -12 dB to -48 dB per octave, but sometimes higher values can be really effective, as we will see.
Here are three scenarios to try that will help you learn how to use a LPF in your mixes.
Scenario 1: acoustic guitar and vocal (or second guitar).
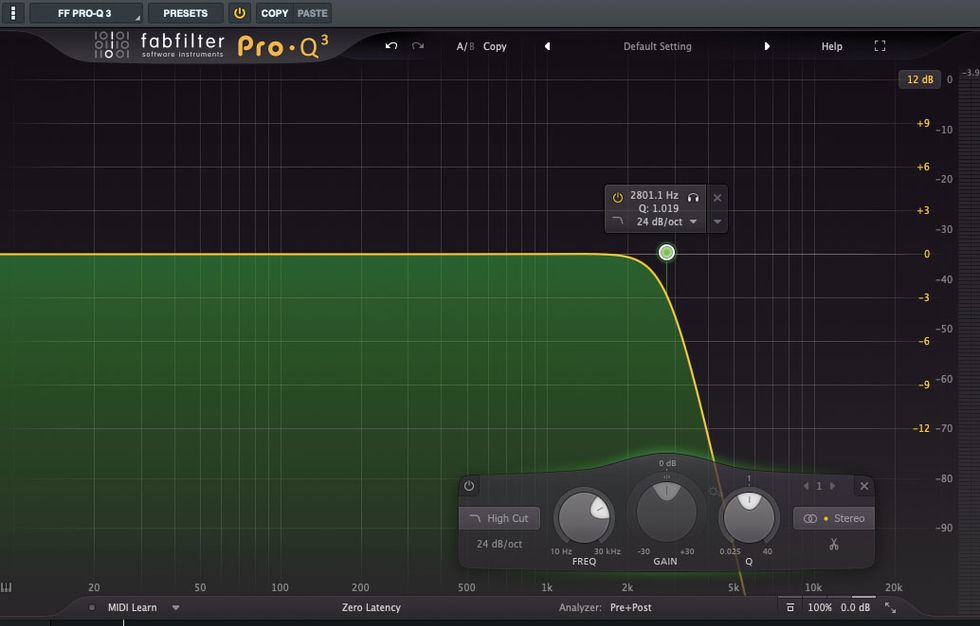
In this situation, you should record your acoustic guitar and your vocal separately, on two different tracks, and not at the same time. If you don't sing, then just play a solo to go along with your acoustic guitar track. First, in your DAW, instantiate and EQ on your acoustic guitar track with an LPF and set it for a -24dB/octave with a center frequency somewhere around 2800 kHz (Fig.1). Next, sweep the frequency to the left and the right and notice how the guitar track will lose its top end (“air") and begin to sound warm. It should immediately start sounding a bit more lo-fi, or like an old recording from last century. Find a frequency range that sounds good to you but is still cutting out a significant amount of the high frequencies and transients of the acoustic guitar. For the vocal track (or your solo track), don't use any EQ at all. Just let it be au naturel. Now listen to both tracks at the same time while toggling the acoustic track's LPF on and off. What you should immediately notice is the vocal track (solo track) will be much more in focus and really have some distance and dimension from the acoustic track when the LPF is active. Season to taste.
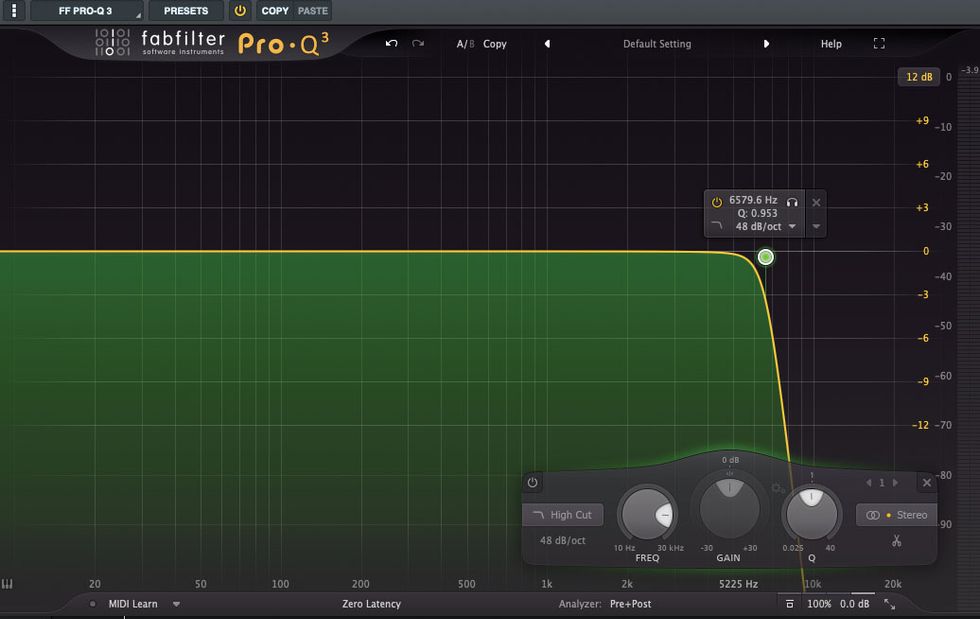
Fig. 2
Scenario 2: finding more “space" between the drums and the lead guitar tracks.
Especially in rock music, a significant amount of the drums' energy can come from those cymbals that the drummer is bashing on relentlessly. Cymbals can kill a mix faster than Kryptonite, and they can obscure the subtle pick attacks of lead guitar parts and solos. In this situation, try putting an LPF on the drum overhead tracks, or the main drum track if you are playing with loops, or software instruments, etc. Start around 6,500 kHz (Fig. 2) with -48 dB/octave and sweep around until the drums start to sound warm and the cymbals aren't stepping all over the guitar parts. There are many complex ways to achieve this result, but we have to start somewhere and we want to keep it as simple as possible while putting you in the right territory. For a good reference, listen to U2's “Beautiful Day," and notice how the cymbals don't fatigue your ears or take over the mix.
Scenario 3: using an LPF to make room for a vocal in a mix.
Have a look at Fig. 3 and pay attention to the far right side of the audio spectrum. Notice how the aggressive LPF is literally cutting off high frequency information above 20 kHz. This brick wall (greater than -96 dB/octave) setting can be used to your advantage—especially if your voice (or your singer) has a lot of breathiness and air, but it's getting lost in the mix within the rest of the band. Or perhaps you want to make the mix sound more vintage.
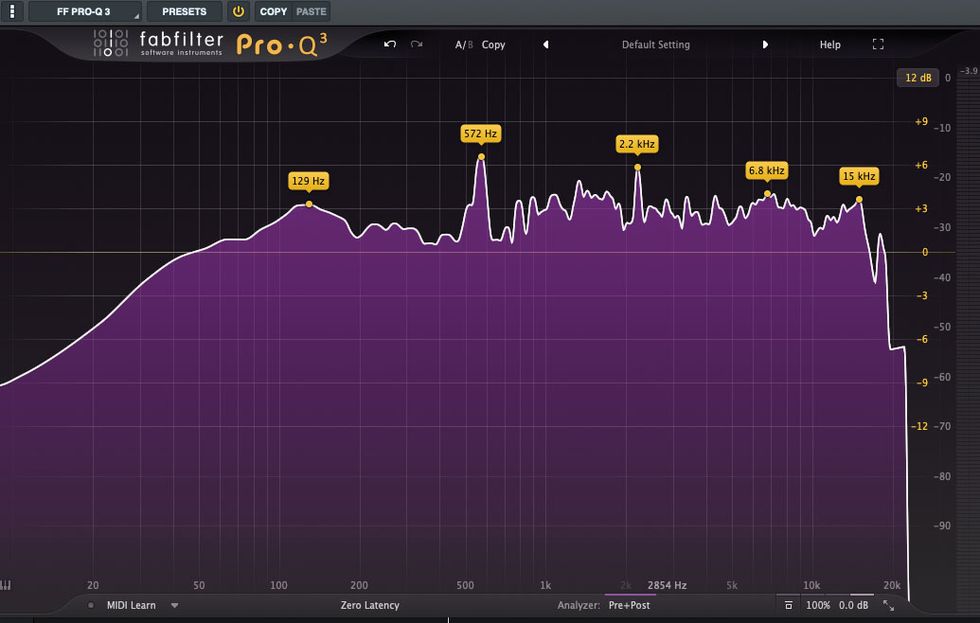
Fig. 3
What we want to do here is sum all of the band tracks except the vocal to a new bus (or track), and then put an LPF on the newly summed track. Here is where you'll want to play around and move quickly to see if you can find that sweet spot between having the band track sounding too dull and giving the vocals the right amount of air or breathiness. Once you dial it in, you can toggle the LPF on and off to hear how the vocals can come in and out of focus.
Don't get frustrated when trying these techniques. It might take some time to really start hearing the differences, and to find ways to use LPFs to your advantage.
Until next time.