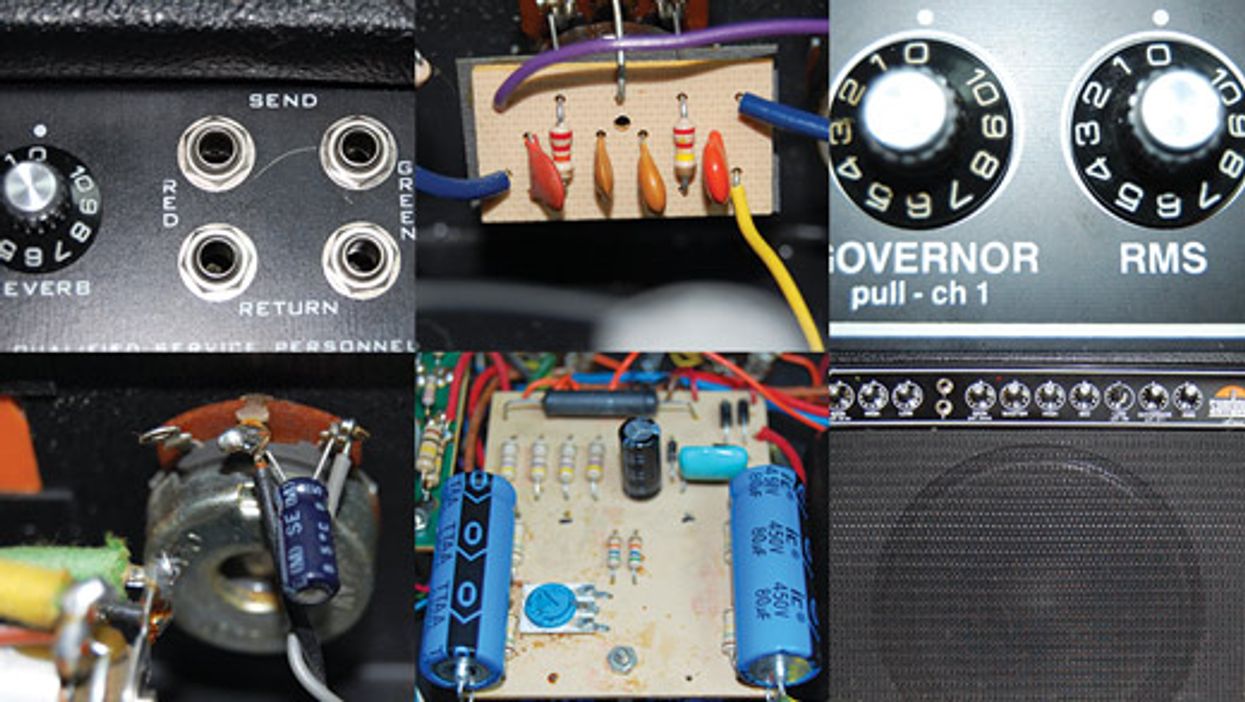
How to get more drive with a simple mod.
Hello Ask Amp Man fans. Well, this month I thought I'd do something a bit different. Instead of answering a reader question, I thought I'd make one up myself! I mean, why not? I write and read my column as well, so that makes me a reader, too! Here's my question to me.
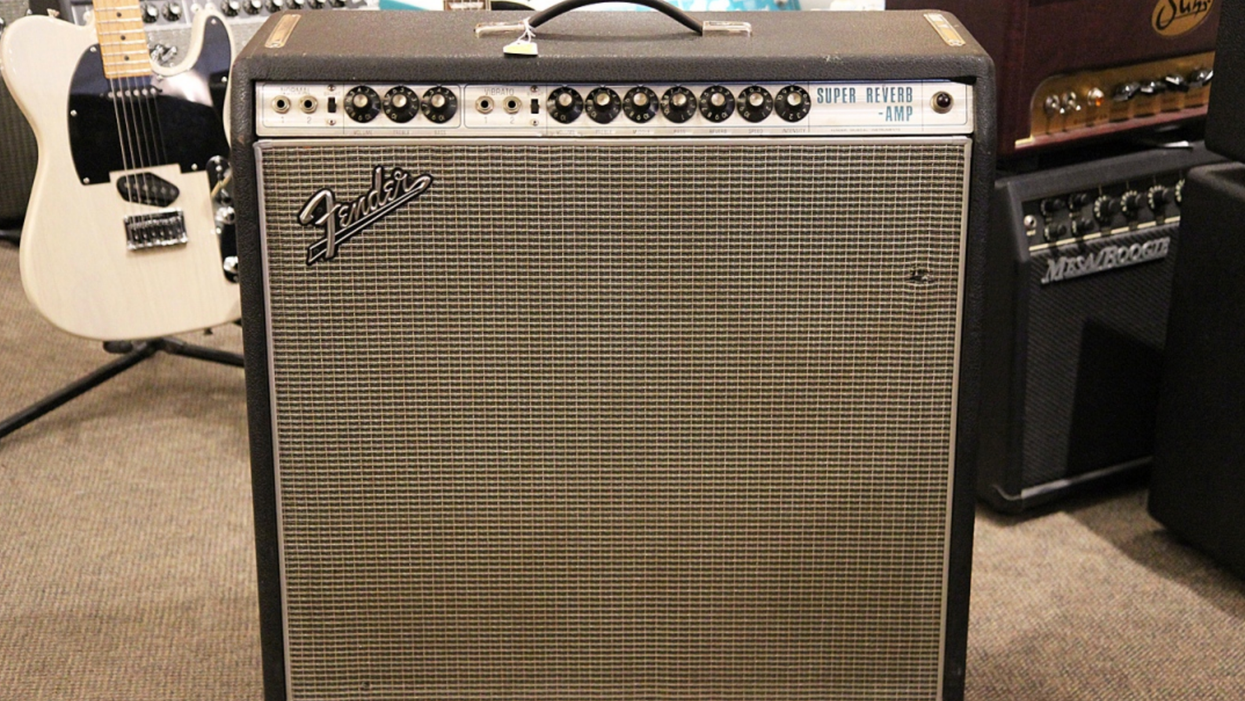
Hello Amp Man. I have two '70s Fender Super Reverb amps, and while I don't want to do anything crazy to them, I'd like to know if there's a quick mod I can do to one of them to make it different from the other. Maybe get a bit more gain or drive? I don't like a lot of hyper-gain or scooped mids and am more of an old-school rock 'n' roll kinda player, so what can I do?
Sincerely,
Jeff
Hi Jeff, and thanks for writing. Okay—something old-school and simple. I have just the thing. I actually did this as an experiment the other day to see what would happen, so I'll pass along the results. I wanted to see if there was a really down-and-dirty way to cascade the two channels of a Super Reverb to get more front-end gain from an amp that really doesn't have much, so let's see what happens.
Warning:
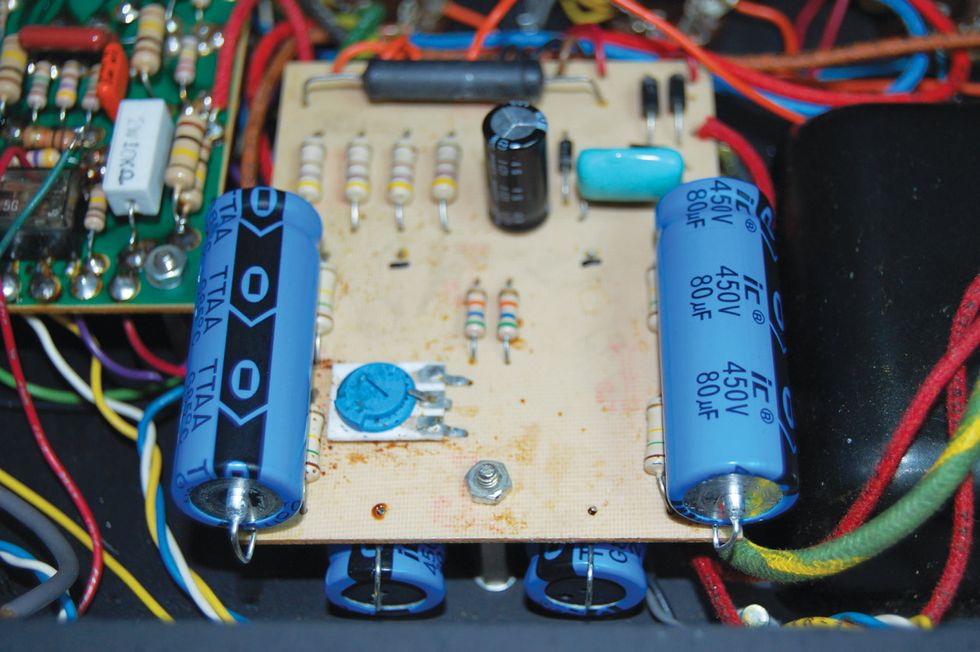
All tube amplifiers contain lethal voltages. The most dangerous voltages are stored in electrolytic capacitors, even after the amp has been unplugged from the wall. Before you touch anything inside the amp chassis, it's imperative that these capacitors are discharged. If you are unsure of this procedure, consult your local amp tech.
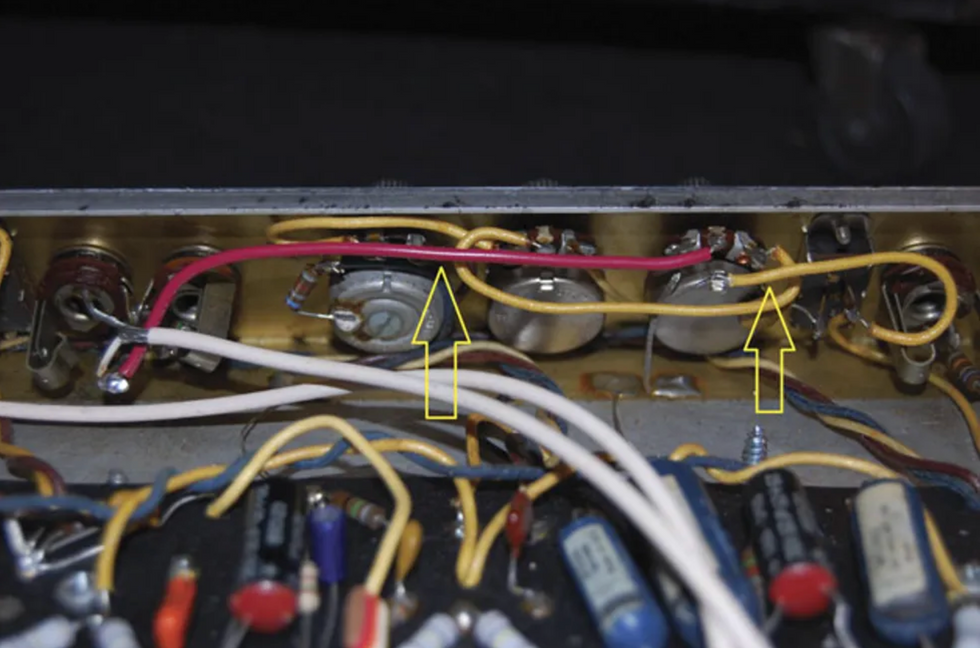
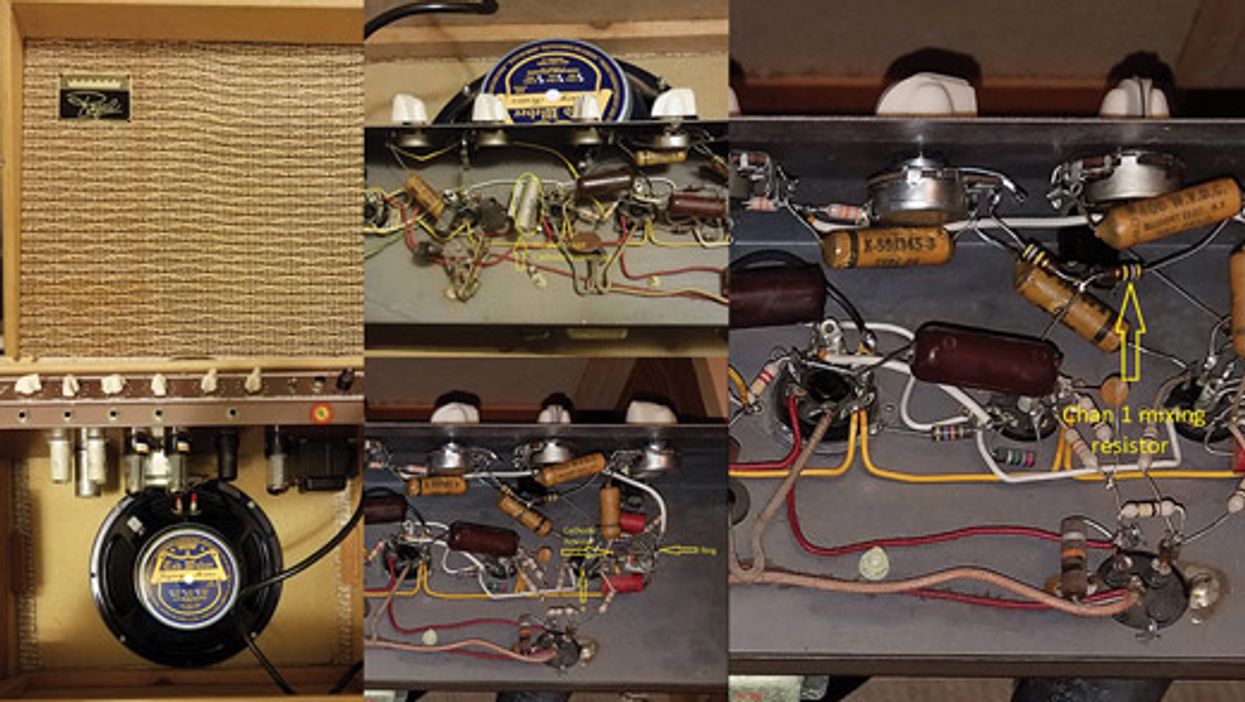
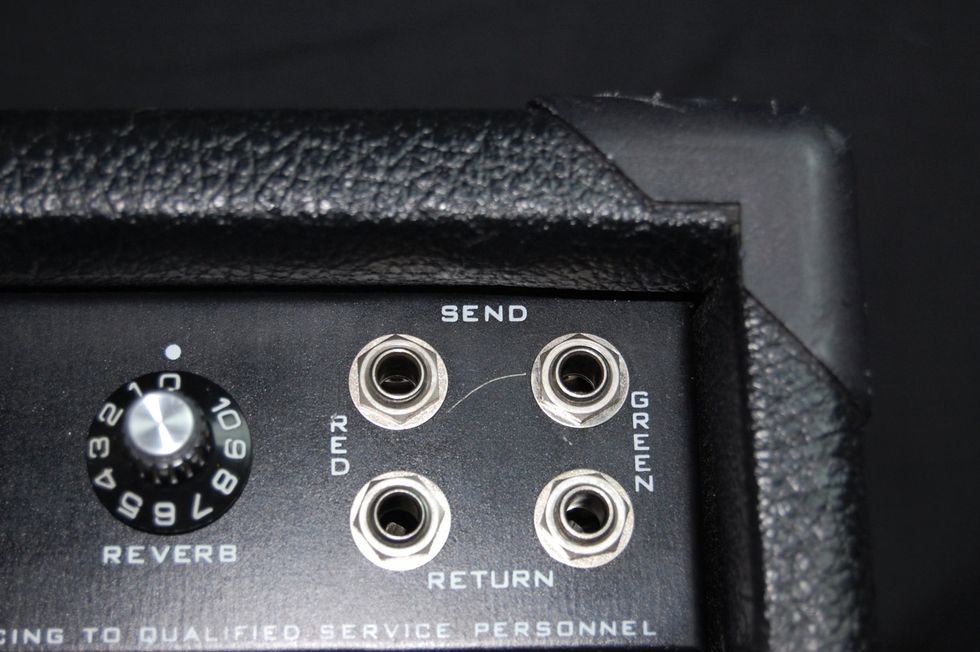
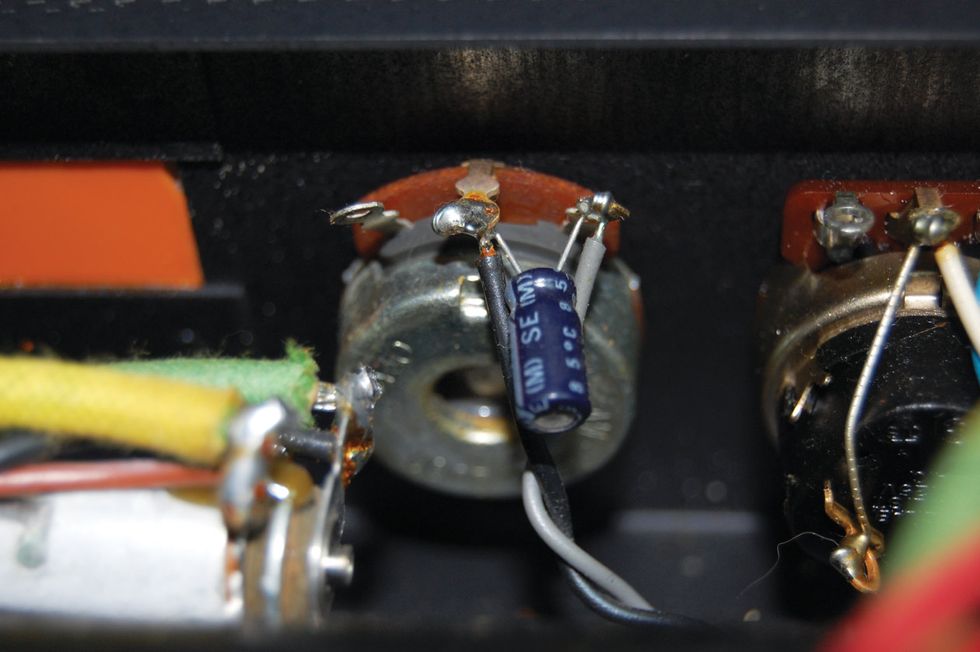
Fig. 1 — Once the wire from the wiper of the volume pot (middle terminal) in the normal channel is disconnected, a new wire is connected from there to the input of the vibrato channel at the junction of the input resistors.
The initial modification I tried was to take the output of the first gain stage in the normal channel and feed it to the input of the vibrato channel. The easiest way to do this was to disconnect the wire from the wiper of the volume pot (middle terminal) in the normal channel and connect a new wire from there to the input of the vibrato channel at the junction of the input resistors, which are attached to the input jacks (Fig. 1). Okay, let's see what happens. Turn the amp on, set the tone controls on both channels to the mid-point, plug a guitar into the normal channel, and bring up both volume controls slowly. The volume of the normal channel is now the "pre-amp" control.
The result? A bit more drive in the front end, but not as much as I would've expected. But wait, the signal is being loaded down by the input resistors, which—with nothing plugged into the vibrato input jacks—are connected to ground. Quick solution: Plug a blank 1/4" plug (no cable connected, just a raw plug) into the #1 input. This will open the switching contact and remove the resistive load to ground. The result is definitely a bump in gain, but let's see if we can do something different and get more gain.
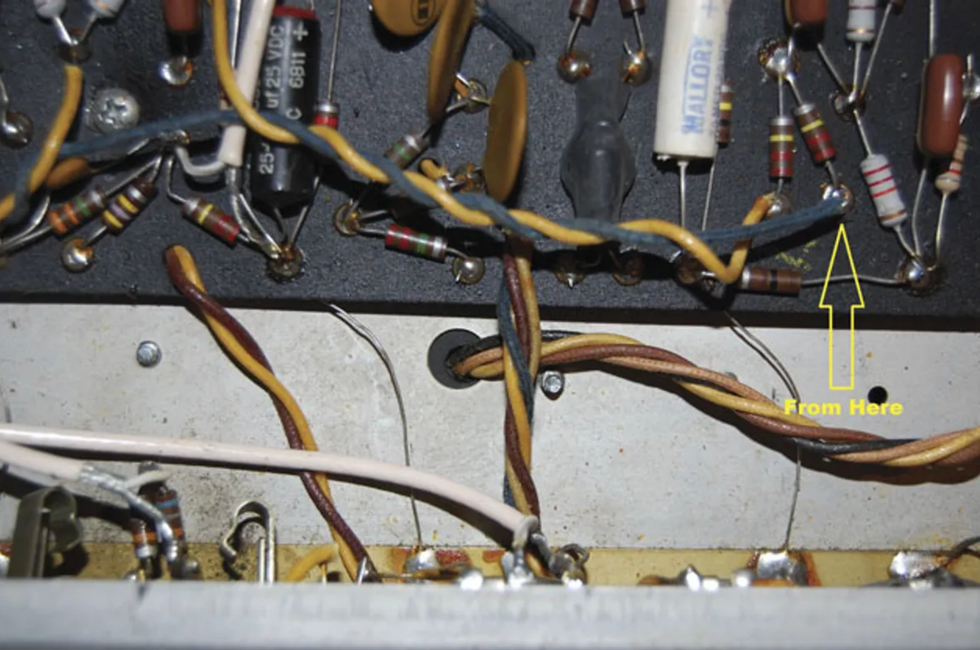
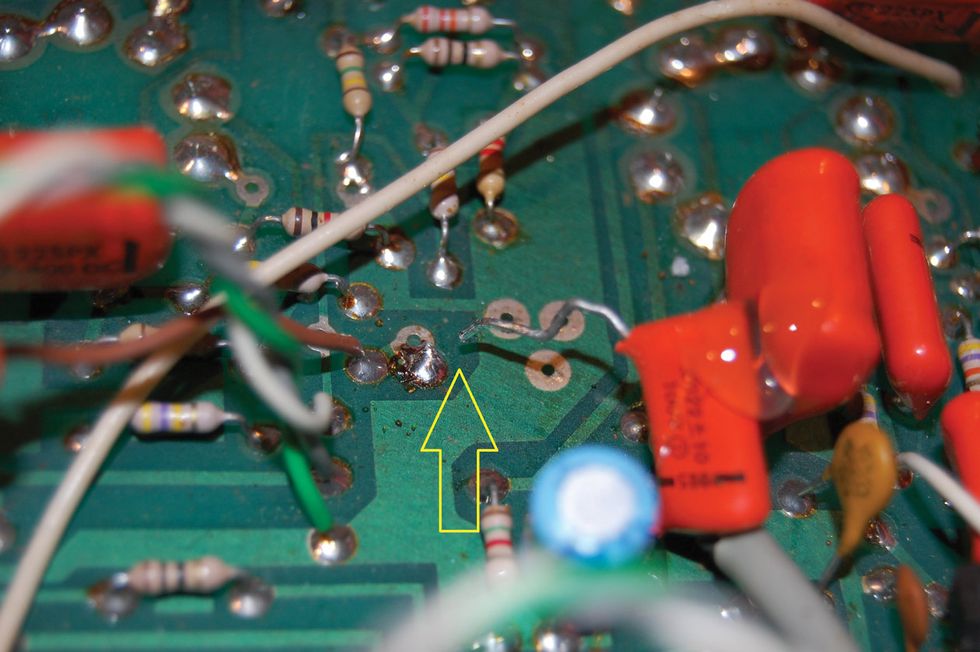
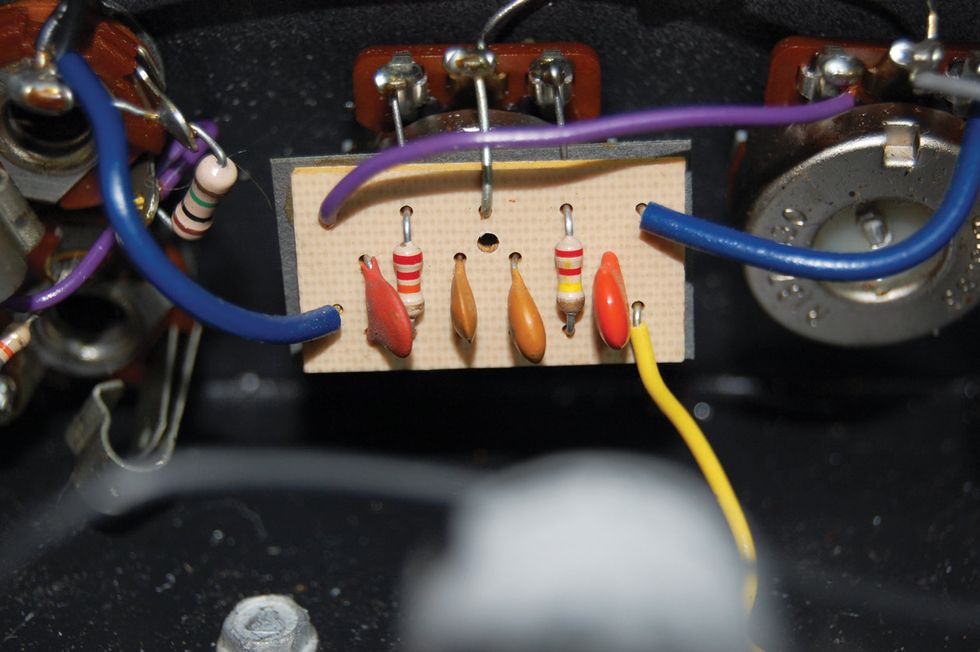
Fig. 2a — The first step of accessing the output of both stages of the normal channel before it enters the phase inverter and output section of the amp is finding the blue wire indicated and disconnecting it from the resistor.
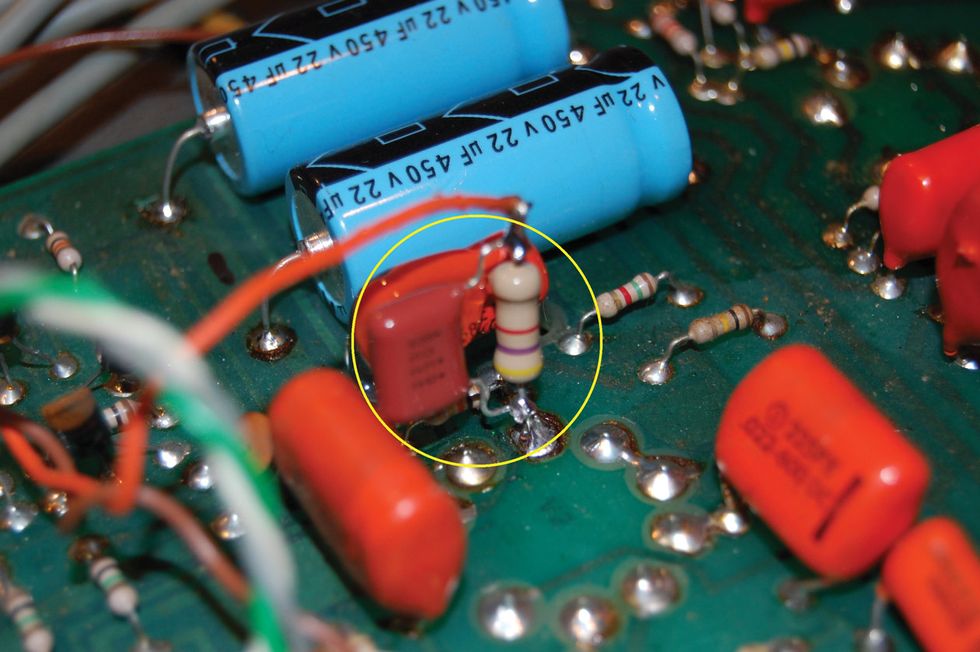
The next attempt will use both gain stages of the normal channel. This starts with removing the new wire we installed and reconnecting the volume wiper to its original connection. Next, we'll access the output of both stages of the normal channel before it enters the phase inverter and output section of the amp. This is quite easy because the wire is handily accessible and long enough to use to complete the mod. Find the blue wire indicated (Fig. 2a) and disconnect it from the resistor. Next, connect it to the same pair of resistors in the previous modification (Fig. 2b). Now let's see what we have.
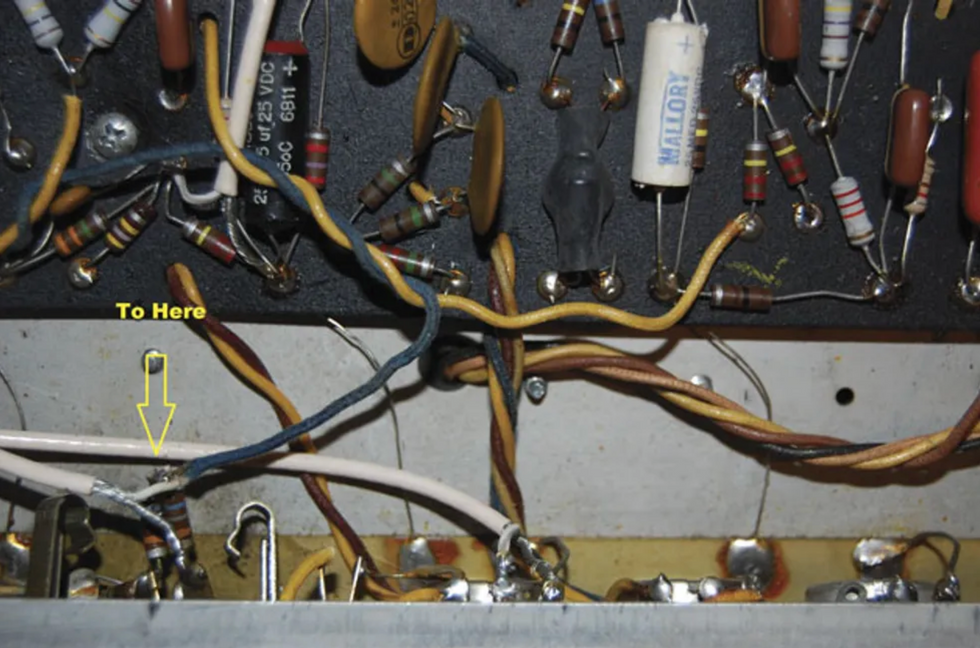
Fig. 2b — The next step is connecting it to the same pair of resistors in the previous modification.
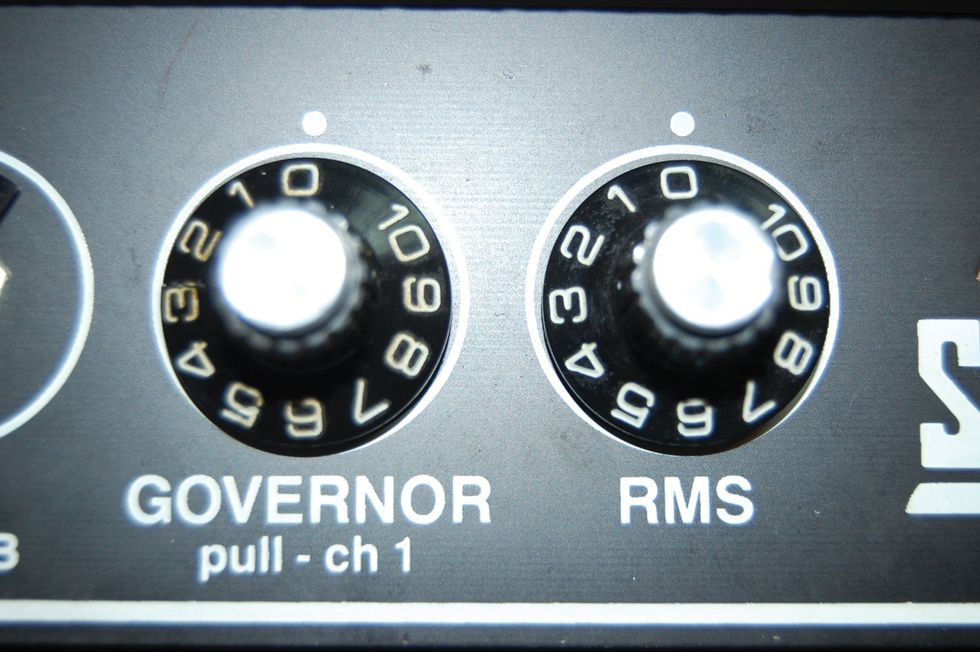
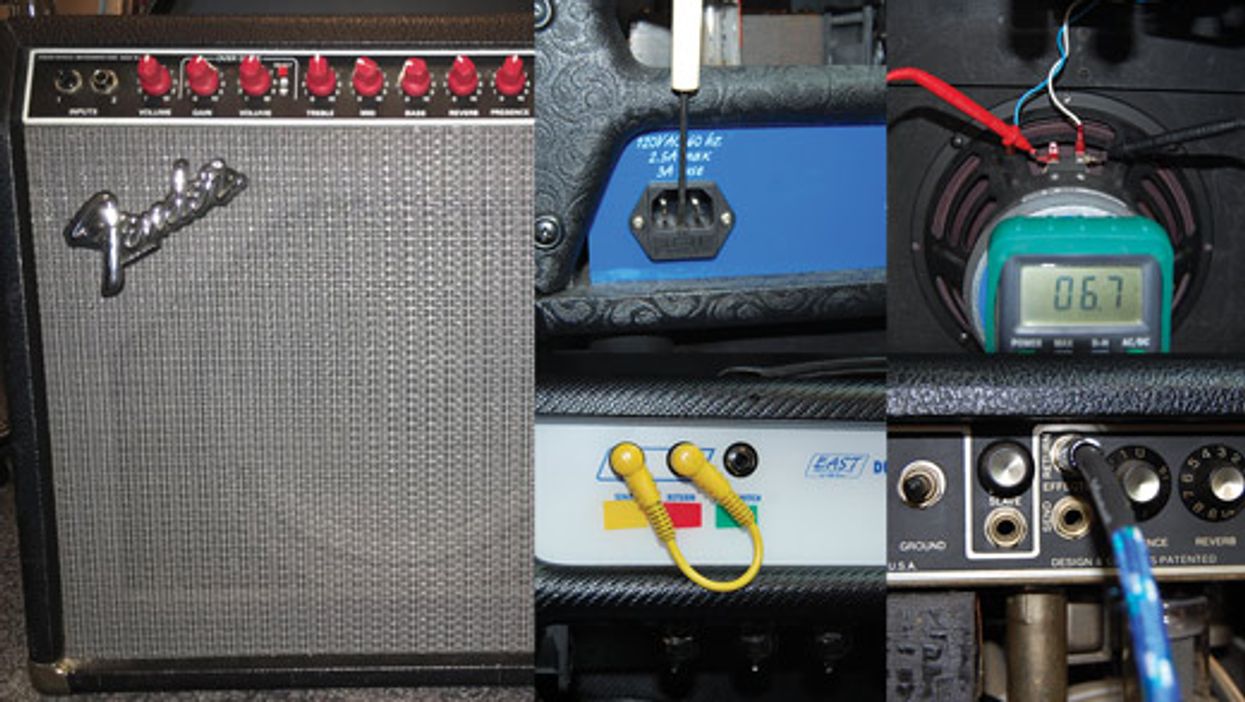
With the same settings as before, there is substantially more gain. Enough to put it into metal territory? Far from it. Is it a great-sounding overdrive? Not really, but after twisting knobs for a few minutes (Fig. 3) with my P-90 equipped Tele plugged in, I found myself playing early Santana licks, because it actually sounded very similar to the early Carlos tone. Unless I was in a Santana tribute band, it's not something I would use all night, but it was a fun little experiment.
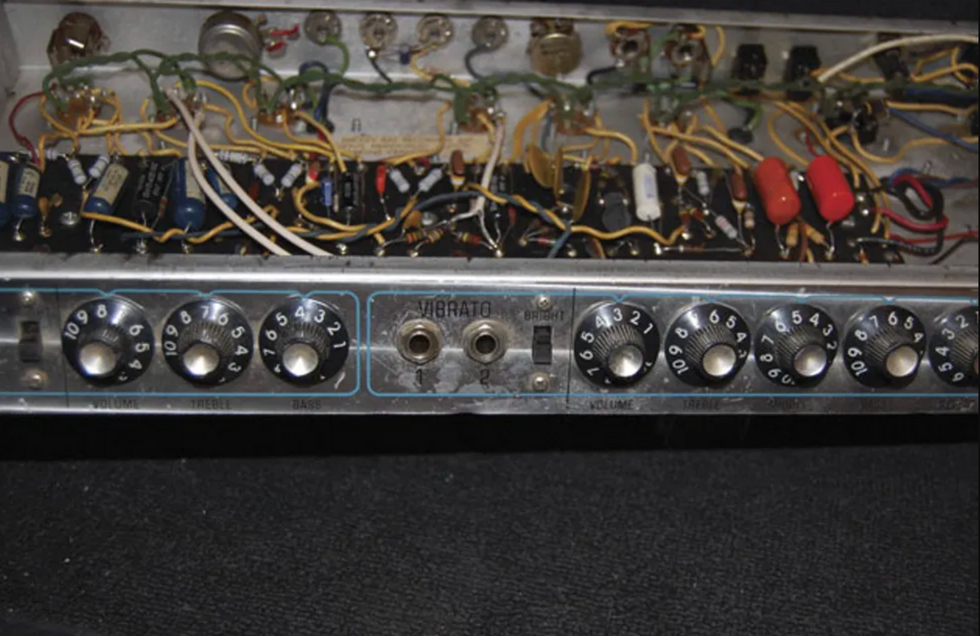
Fig. 3 — Before closing the amp, test your work. After twisting knobs for a few minutes with a P-90 equipped Tele plugged in, the author was able to conjure up an early Carlos Santana tone.
You could even make this switchable if you like. Simply install a SPDT (single pole double throw) switch in the amp somewhere and connect the signal wire from channel 1 to the center terminal. Next, connect a wire to one of the remaining terminals and attach the other end to the two input resistors. Connect a wire to the last terminal on the switch and attach it to the original location of the normal channel signal wire.
There you have it. Stock when you want it to be, with the option of a raunchy-yet-cool overdrive if you need it. Personally I prefer it to the push-pull master volume boost feature that showed up on Twin Reverbs and the like in the late '70s. And you get a few more benefits. For one, you have two sets of tone controls: one that controls the tone in the early stages and one set for the later stages. And, if you have a single-button footswitch, you can connect it to the #1 input of the vibrato channel and, as before, with the plain jack lift the signal loading from the input resistors for a gain/volume boost. Just make sure the wire on the footswitch is shielded. Pretty cool, and while it's not for everyone, hopefully it will make an amp that's just sitting around or needs a bump a bit more interesting. Enjoy!
[Updated 8/17/21]
- Meet My 1965 Super Reverb—The Greatest Amp I've Ever Played ... ›
- Fender Unveils the Tone Master Super Reverb - Premier Guitar ›
- All the World’s a Gain Stage - Premier Guitar ›
- Meet My 1965 Super Reverb—The Greatest Amp I've Ever Played - Premier Guitar ›
- Must Know Amp First-Aid - Premier Guitar ›
The Hi/Low footswitch is designed to provide a gain boost with an EQ shift for tight tones.
Now featuring enhanced functionality, along with a new and improved look, the Dutch Overdrive ‘24 offers versatility in a pedalboard-friendly package.
The Dutch Overdrive retains its ability to cover a broad range of musical styles, from transparent clean tones and edgy breakup to medium-gain blues, hard rock rhythms, and searing leads. Delivering a perfect blend of classic American and British sounds, its smooth, balanced voice ensures compatibility with a wide variety of instruments and amplifiers.
In addition to a familiar four-knob control set – controlling drive, treble, bass and output level – the new Dutch ’24 offers a potent Hi/Low mode selector controlled by an independent footswitch. By engaging the Hi gain mode, you can add a preset, carefully tailored EQ/gain boost to provide just the right amount of punch, clarity, and output level to your solos.
Key features and upgrades to the Dutch Overdrive include:
- Hi/Low footswitch provides a gain boost with an EQ shift, enhancing added gain and focusing the midrange for tight tones
- A refreshed design for a modern aesthetic, with top-mounted input/output jacks
- Upgraded soft touch switching with last state memory – powers up with the same settings you were using when you previously powered down
- 9-18 volt operation using standard external supply (no battery compartment)
- US-made in Mesa, AZ
The re-release of the Dutch Overdrive brings back a classic with modern improvements. The street price for the upgraded Dutch Overdrive is $225 and is now available for purchase at lpdpedals.com.
Developing good, clean workshop practices will help you save time and money.
Who doesn’t like a sweet, sustaining, saturated guitar sound? I know I do, but I also love a clear and full clean tone maybe even more. Dirty or clean, to me a guitar sounds like a million bucks when the tubes are glowing and the playing flows. But most of the time I’m in the workshop making lots of dirt, and I don’t mean the overdriven amplifier kind. Making guitars can be a dirty business. Carving wood, plastic, and steel into a majestic instrument creates a lot of mess, and eventually you have to sweep your way clear.
Half a century ago, a mentor passed on this advice: The best way to clean up a mess is to not make one in the first place. Maybe this sounds quaint, but I assure you that it is good for business—any business. It doesn’t matter if you make pedals, guitars, amps, or even music, mess is money down the drain. Not only that, it’s a psychological strain on you that saps your energy and makes you careless.
When I worked at Fender, I was part of a team that was charged with revamping departments for efficiency, safety, and worker well-being. I can’t say that we made a huge difference, but I learned a lot that I could apply to my own shop and a host of other businesses. One thing there we didn’t have to fix was cleanliness. Despite the gargantuan scale of the enterprise, all of the factories are incredibly clean, especially considering the amount of materials that get processed. It reminded me of the race cars and shops of Roger Penske, who understood that a clean, organized workplace sets the tone for excellence. It’s also difficult to pinpoint problems when areas are cluttered, and you can’t see what’s going on clearly.
Beyond the obvious advantages of keeping things organized, there is another benefit created by keeping things clean, one that I’m surprised that more shops I visit (and see in videos) don’t understand. Sooner or later, you’re going to have to stop making your product and clean up. When you’re buried in debris, straightening up is time-consuming, and time is money. When you determine your cost per unit, whether it’s guitars, amps, or even rehearsal time, do you factor in the hours you spend cleaning up? It may not seem like much, but it can really add up. Regardless of if you own a shop or are in a band, if you create a tangle every time you work, the time you spend undoing it is time you could have been with your friends, family, or doing anything else.
A well-designed work area that reduces clutter will save your health and save you money. You don’t have to be a big organization to justify some basic cleanliness improvements like a good dust-collection system, either. It doesn’t have to be a huge investment. There are a slew of affordable mobile dust-collectors/vacuums with adjustable arms that can be rolled from task to task.
"When you determine your cost per unit, whether it’s guitars, amps, or even rehearsal time, do you factor in the hours you spend cleaning up?"
Stop blowing dust off your workbench or machinery onto the floor—picking it up later is like throwing profit away. Everybody benefits because cleanliness improves efficiency that reduces passing unneeded costs on to your customers. Over the course of a year, cleaning up 60 minutes a week adds up to almost seven days’ worth of time you could be using for something better, and who doesn’t want an extra week?
I’ve found that if you build cleanup time into your daily routine, it reduces stress as well. It’s important to create procedures that promote a constant state of improvement and order. After a gig, pro techs have a mandated way of breaking down and stowing gear that avoids confusion when the next setup happens. Daily routines of maintenance and cleanup catch problems before they stop the show or cripple production. If you habitually clean the spilled beer off your cables and amplifier, you’re making it easier for yourself in the long run. I know this all seems pretty obvious to some of you, but I’ve learned from master Kaizen practitioners that there’s always a higher level to reach for. If you are a one-person shop or a weekend warrior musician, those steps can really make a difference.
I suppose the reverse is true for me. If I apply this multi-tiered improvement regime to my guitar playing, I’d probably be a lot happier with my proficiency. An old dog can learn new tricks, and that’s exactly what I mean to do. So when I step on that distortion pedal, it will be the only dirt I deal with.A very Vox-like template yields a surprising wealth of trans-Atlantic tones—all in a light, compact head.
Relatively small and light. All-tube power and preamp sections. Surprising versatility for a single-channel format.
You’ll have to be willing to tinker a lot with the EQ to tap into the maximum number of sounds.
$1,499
Victory The Deputy Compact Guitar Head
victoryamps.com
If a venue’s dimensions demand you turn down, you might as well lighten your load.Victory Amps are hip to this trade-off. Their line is now thickly populated with amps that are smaller, quieter, but still sound massive.
The EL86-driven, 25-watt, single-channelThe Deputy Compact Head is the newest of Victory’s mighty mites. Although it’s generally lunchbox-sized, The Deputy looks like a proper amp head—eschewing the mostly metal, vented enclosure design used in some other Victory offerings. Created in conjunction with Pete Honoré (known to many YouTube guitar heads as Danish Pete), The Deputy Compact Head aims to span ’60s British-style clean tones and ’70s classic-rock overdrive. It’s truly compact at 15" x 8" x 7.5" and 17.6 pounds.
Dawg Daze
Other than the bijou size, which is not unusual these days, The Deputy stands out for its use of EL86 output tubes. Although it can be re-biased to use the more common EL84, Victory ships the head with a pair of new-old-stock EL86 tubes which are broadly similar to EL84s in character and output power—though capable of a little more of it from a little less voltage. They are also relatively available and affordable as NOS components. The preamp is driven by three 12AX7s. Rectification is solid-state.
The straightforward controls include gain, treble, middle, bass, reverb, and master, plus a 2-way bright switch and a 3-way voice switch. The latter is arguably more of a gain-structure switch, though gain, voice, and tone are often used interchangeably in guitar-speak. The amp’s lowest gain setting is accessed via the upper position. The middle position stacks another +6 dB of gain on top of that, and the lower position adds upper-mid and treble on top of the extra 6 dB. As for the reverb, Victory describes it as a mix of plate- and hall-type textures, and it is probably meant to sound a bit more contemporary, studio-like, and less specific than a traditional spring reverb.
The amp’s back panel includes send and return jacks for the series effects loop, two 8-ohm speaker outputs and one 16-ohm output, bias checkpoints, and a bias adjustment pot. Rather than being cathode-biased like most EL84 amplifiers, The Deputy’s EL86s are run in adjustable fixed bias, which delivers slightly tighter, firmer response from any given pair of tubes, while maximizing their output potential (all else being equal). As such, you need to check and adjust this setting when replacing the EL86s or substituting EL84s. The Deputy’s circuit is arranged on a rugged printed circuit board, the components are all high quality, and the transformers are U.K.-made.
Hot Lunch
I tested The Deputy with an open-back 1x12 cabinet equipped with a Scumback J75 and a closed-back 2x12 with Celestion M65 Creambacks. I also paired it with a Gibson ES-355, a Fender Stratocaster, a selection of overdrive pedals at the front end, and a Source Audio Collider in the effects loop for delay and reverb. Almost regardless of what’s in the mix, The Deputy is a great-sounding little head. In fact, any sense of “little” largely vanishes from consideration once you start playing it. Full, fat, deep, clear, and vintage-leaning, with a character that’s very much its own, The Deputy doesn’t care if there’s a stompbox anywhere in sight, but it’s also an excellent pedal platform.
The Deputy’s tube complement and Victory’s English origins might imply that strictly Vox-like voices emit from this diminutive head, but the circuit enables many more trans-Atlantic sounds. With the EQ dialed in right and the bright switch engaged, The Deputy will indeed cop AC-style tones on the clean and crunchy side of that spectrum. But the robust preamp voicing and fixed-bias output stage—as well as the solid-state rectification—lend a tautness that enables convincing Fender-like tones when you want them. By dialing down the middle control to around 10 o’clock with the voice in the low-gain position, the gain below noon, and master just advanced from midday, I heard pretty good Deluxe Reverb sounds. There’s certainly more than just one breed of clean to source.
On the whole, I preferred heavier amp-generated crunch and lead sounds with the voice switch in the middle position, the bright switch off, and a little bump from the midrange control. Set this way, The Deputy lends thickness to a Strat without adding harsh or spiky clipping, while the ES-355’s humbuckers are blissfully muscular and aggressive. With more conservative gain settings, the extra upper mid and high end from the brighter voice add cutting power and a shimmering, cranked-Vox-like character that plays well with many styles. Add digital reverb—which moves readily from “just a touch” to an evocative atmospheric wash—and the palette of tones at hand becomes even more impressive.
The Verdict
With an able assist from Pete Honoré, Victory has pulled off another deft design. It’s a toneful performer that can sound and feel bigger than it is. For a single-channel head, it’s crazy versatile—with or without pedals. But if you’re into economy on the equipment and cost fronts, you’re bound to be pleased with how much you can do with this high-quality, diminutive head, a cab, a guitar, and nothing else.
Victory Amplification The Deputy 25 25-watt Tube Amplifier Head
Deputy 25W Tube HeadThe Jason Richardson signature includes HT humbucker pickups, 24 stainless steel frets, and custom tremolo.
Inspired by over a decade of guitar string research, HT pickups deliver an ultra-high-output, powerful low-end response while retaining a distinctively clean, clear tone and definition at lower volume levels. The HT pickups in the latest Jason Richardson model have been voiced specifically for Jason with unparalleled clarity, power, and output. Additional features include 24 stainless steel frets, a custom Music Man tremolo, and innovative electronics, including a push/push volume knob for a 20+ dB gain boost and coil splitting via the push/push tone knob. The Jason Richardson Artist Series Cutlass HT is available now in two new finishes:
- Kokiri Forest—a mesmerizing translucent green finish. Crafted with an alder body, a buckeye burl top, and a roasted, figured maple neck with an ebony fretboard.
- Venetian Red —a striking translucent finish. Crafted with an alder body, a maple burl top, and a white maple neck with a striped ebony fretboard.
“These new pickups are a level up! More body and fullness, effortless pinch harmonics. I’m stoked to have more variations for everyone to choose from with my models now!” “The KokiriForest might be my new favorite color! Absolutely stunning to see in person! The Venetian Red also adds a more diverse option between the woods we haven’t done with my line before, incredibly stoked on both these guitars!” -Jason Richardson
The Jason Richardson Artist Series Cutlass HT in Venetian Red is available exclusively in the Ernie Ball Music Man Vault and is limited-to-25 units in a 6-string and limited-to-25 units in a 7-string. The Kokiri Forest colorway is available at your local Ernie Ball Music Man dealer.
For more information, please visit music-man.com