Photo 1 — The essentials: a low-watt soldering iron, a stand, a small damp sponge, and a roll of “electronic silver solder” like this .020" 60/40 tin/lead rosin flux solder from Kester.
Learn to solder like a pro in this easy-to-follow demonstration.
Given the DIY nature of this issue, we thought it would be appropriate to address good soldering technique. If you’re willing to invest a few bucks in some modest tools and spend a little time practicing the basics, you can learn to wire up guitars, stomp kits, speaker cabinets, and even do some simple amp mods. Once you understand the fundamentals, you can save money and derive a lot of satisfaction from working on your own gear.
The tools.
You’ll want a decent soldering pencil (a small type of soldering iron) rated at least 25 watts, but no more than 60 watts. (Many guitar techs like a 30-watt soldering iron for working on guitars and amps, and a 15-watt iron for working inside stompboxes and on delicate printed circuit boards.) You’ll also want a stand to hold the hot iron when not in use, a damp sponge, and some rosin core solder made for electronic work (Photo 1).
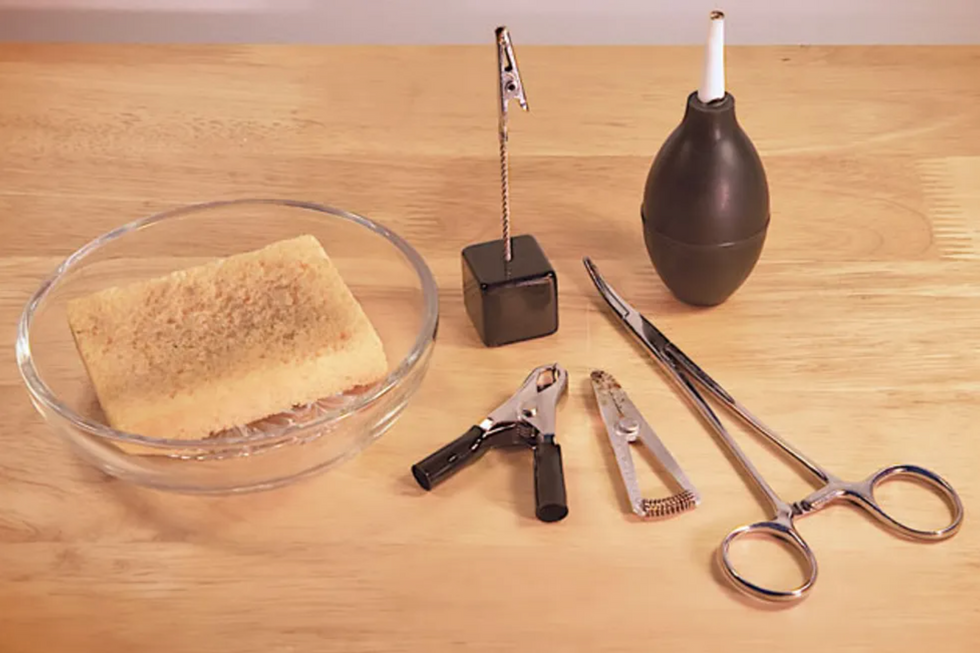
Photo 2 — If your soldering stand doesn’t house a sponge, just put a damp household sponge in a glass or ceramic dish. Other helpful tools: a hemostat and small clamps to hold parts still as you solder them, and a “solder sucker” bulb for removing solder.
You should also have some basic hand tools, such as wire strippers, needle-nose pliers, wire cutters, and something to hold the wire in place while a solder joint cools (Photos 2 and 3).
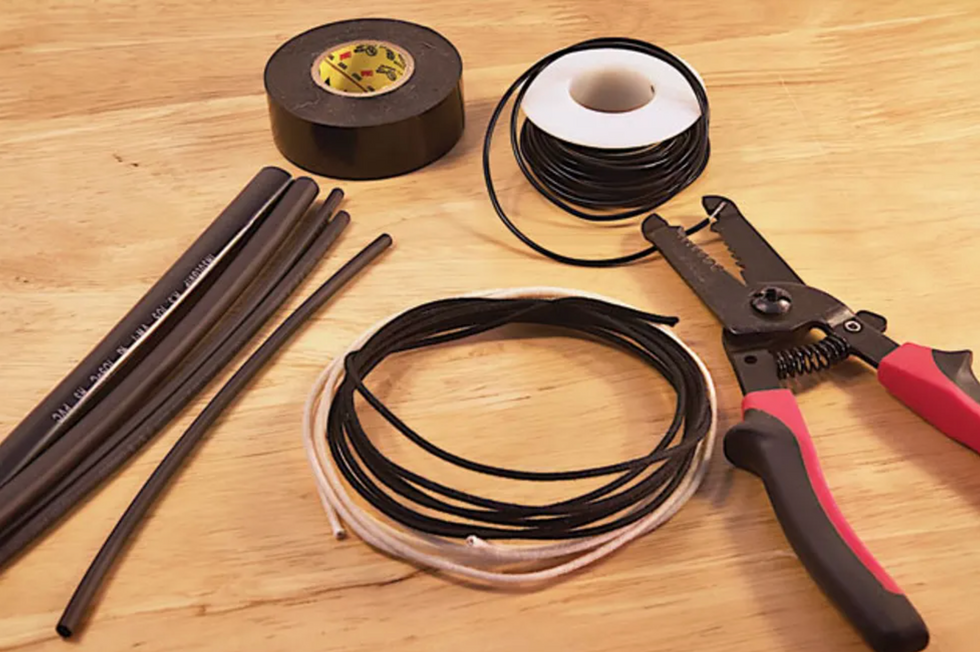
Photo 3 — In addition to hook-up wire, you’ll want wire strippers. Alternatively, luthier suppliers offer old-school “push-back” wire with a waxed cotton jacket (center) that eliminates the need for stripping off the plastic insulation from the end of the wire. Electrical tape and heat shrink tubing come in handy when you need to protect or insulate your work.
There are tools sold specifically for holding wires and parts, available through an electronics supply house.
Step 1: Prepare the Joint
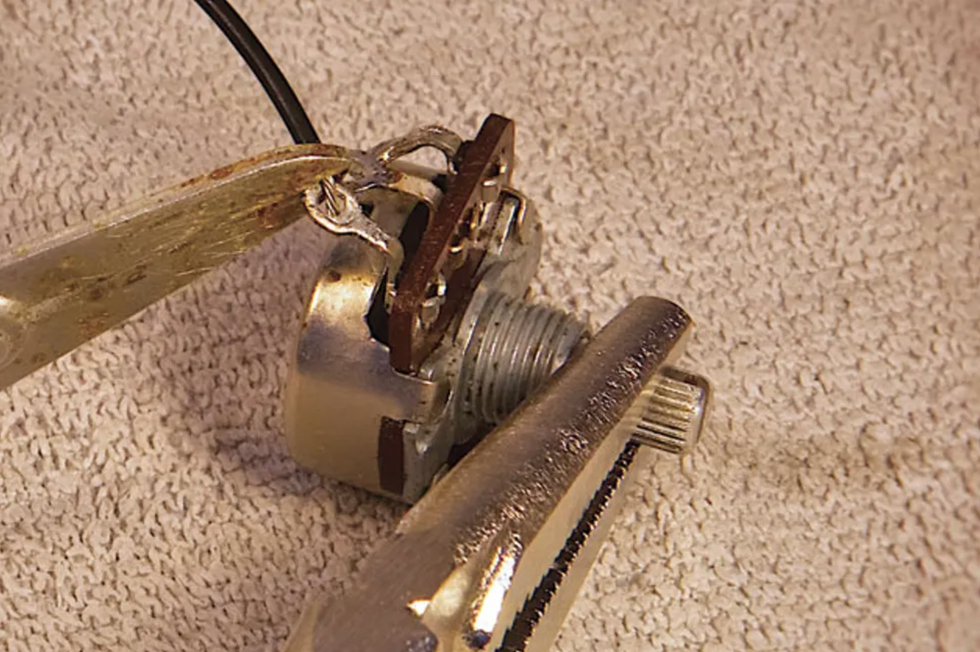
Photo 4 — Before you attempt to solder a connection, the wire and component must be secured to assure they remain absolutely motionless. Here, a spring-loaded heat-sink clamp holds the wire in place while a vice grip gently clamps the pot shaft.
For every joint, you need to find a way to hold the wire in position without using your hands (Photo 4). Wrap the wire through the solder lug once to make it hold tightly on its own, use tape to hold it in place, lay a pair of pliers on the wire to hold it firmly where you want it, or use a mechanical soldering aid to hold it. Use whatever works, except holding the wire manually. When you make a solder connection and rely on your hands to hold the soldered wire steady while the joint cools, you will fail—no human hands are steady enough to hold anything perfectly still, and you want the wire to remain absolutely motionless while it cools. If there is movement, the result will be internal fractures in the solder.
Step 2: Clean the Tip
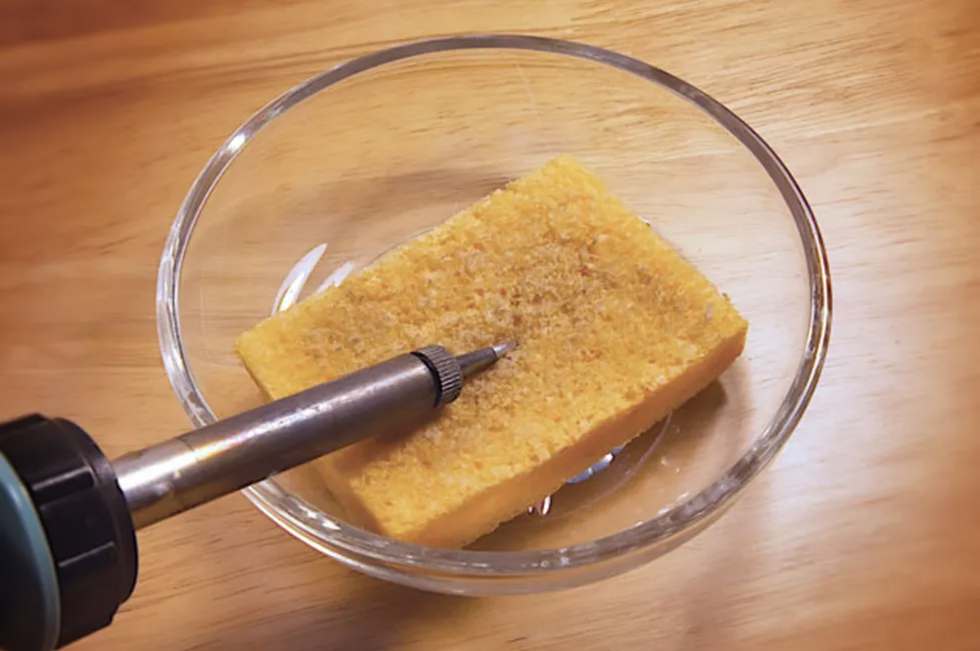
Photo 5 — Wipe the hot tip with a damp sponge to keep it clean.
The tip must be cleaned before each and every joint—you can use the damp sponge for this (Photos 5 and 6).
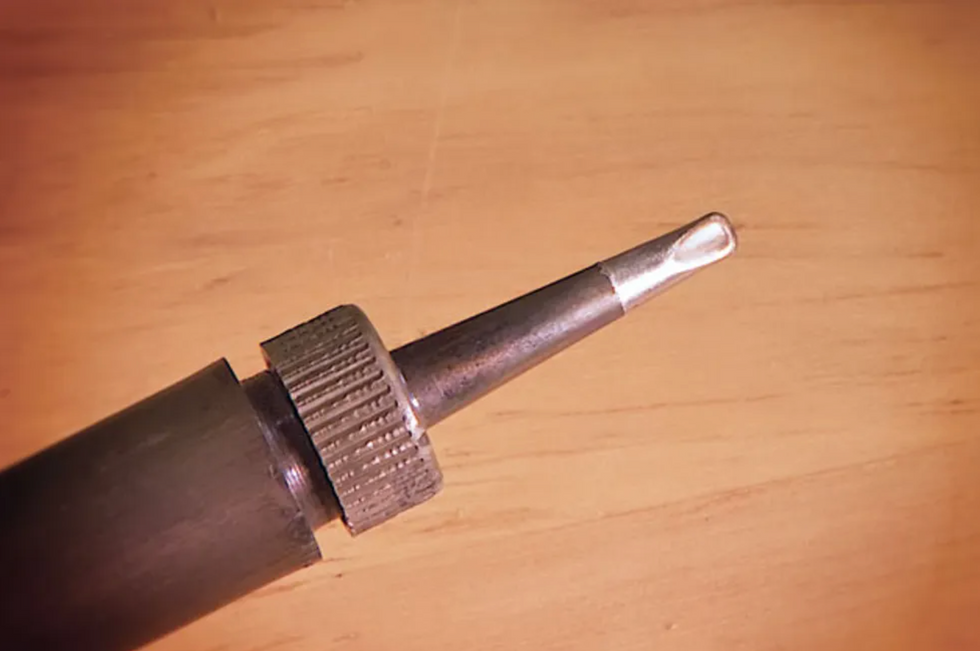
Photo 6 — A clean, dross-free tip looks smooth and shiny.
Solder produces a by-product called dross very, very quickly, and the dross fouls the tip, preventing good heat conduction and introducing waste material into your solder joints.
Step 3: Tin the Tip
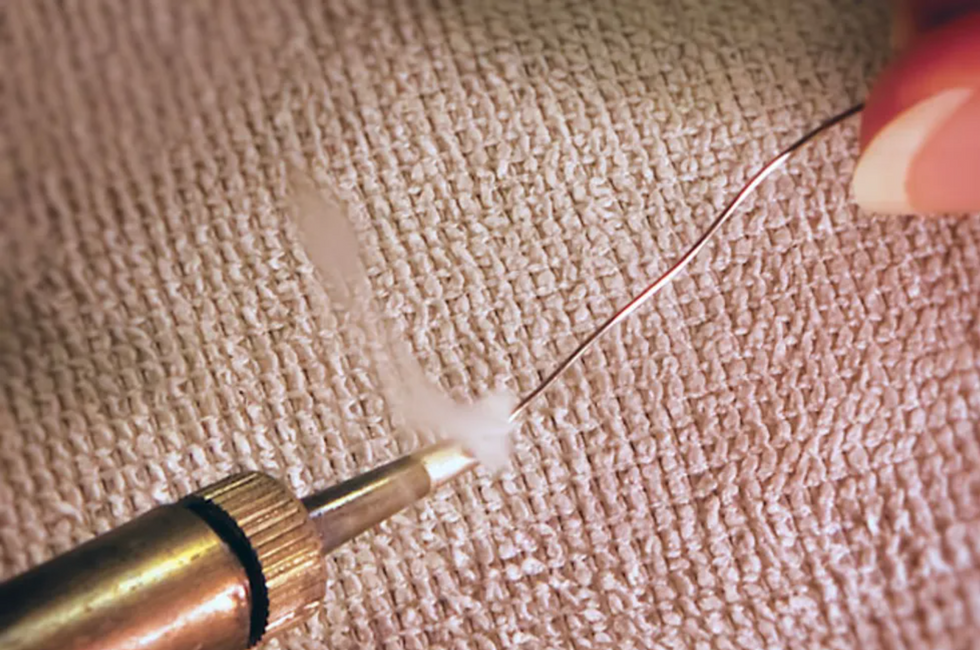
Photo 7 — Add a small amount of solder to a freshly cleaned tip just before you solder a connection. When you see this telltale puff of smoke, pull the strand of solder off the tip, shake off any excess, and then move quickly to the joint.
Immediately before you get on the joint with the heat, add fresh solder to the tip of the iron to “tin” it. Simply feed solder directly onto the tip so it’s completely coated (Photo 7). A tinned tip will provide much better heat conduction than a tip that’s clean but not tinned.
Step 4: Remove the Excess Solder
Shake off the excess solder after tinning—you want the tip coated, but not dripping. I have a fire-resistant container beside my soldering bench, and after tinning I tap the barrel of my iron on the edge of the container to knock excess molten solder into it. You can use any fire-resistant container for this, such as a tin can or ceramic bowl, but use care not to start a fire. Because solder melts at such a low temperature the risk of a fire is very low—molten solder is unlikely to ignite even highly flammable materials like paper—but use care anyway!
Step 5: Get on the Joint Right Away
As soon as you’ve removed the excess solder from the tip, get right on the joint. By “joint,” I mean the wire and the solder lug, or the wire and the back of the pot, or whatever it is you’re soldering. Dross will start to form on the tip very quickly, so as soon as the tip is prepared, get to work.
Step 6: Heat the Joint
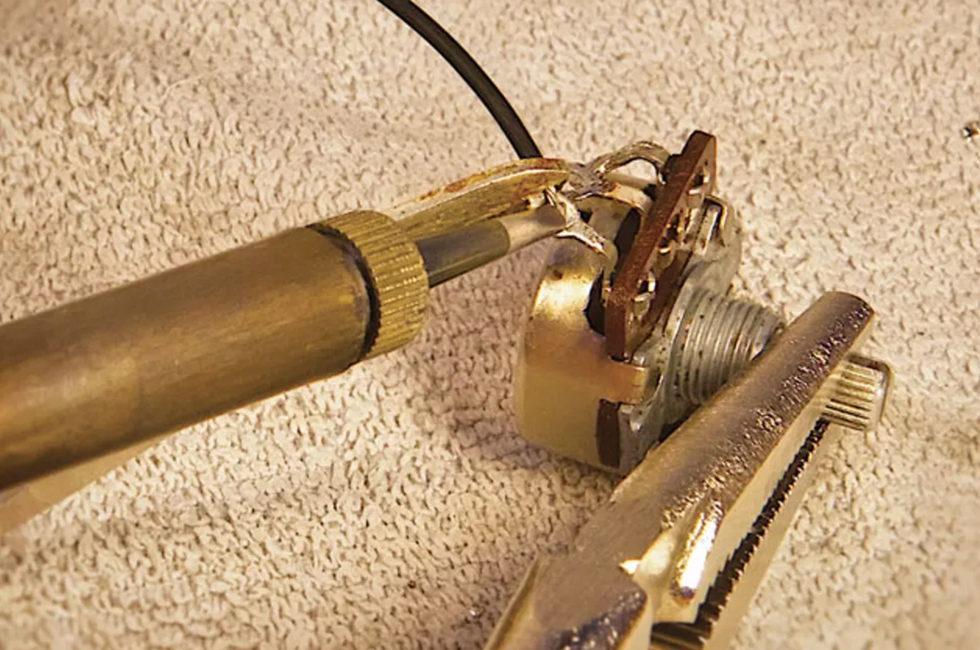
Photo 8 — Gently press the iron’s hot tip against the joint to heat it before you bring the solder into the equation. The goal is to make the joint itself hot enough to melt the solder.
Heat the joint, not the solder (Photo 8). You want the joint to be hot enough to melt the solder. It’s a given that the iron is hot enough to melt it—just feed a little onto the tip and you’ll see—but you also want the joint itself to be hot enough to do the same.
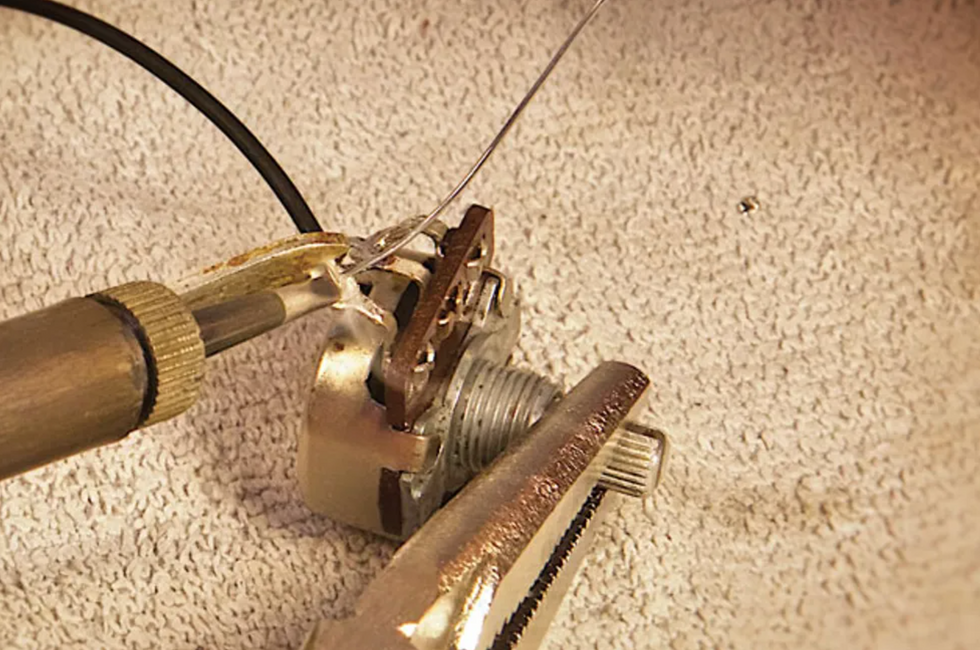
Photo 9 — While holding the tip against the joint, feed the solder onto the heated joint, not the soldering iron tip. Here the emerging puff of smoke indicates the solder is melting.
If you feed solder onto the joint without it touching the iron (Photo 9), the solder will melt and be attracted right to the joint. You can watch the solder actually wick out onto the surface you’re soldering to—this is what you want.
Step 7: Get off the Joint
As soon as the solder has flowed onto the joint properly, remove the heat from the joint. Most components can stand a fair amount of heat, but some are more susceptible to damage than others, so there’s no need to push your luck. Pots are fairly durable (unless it’s a cheap pot), so it’s highly unlikely you’ll damage one by trying to solder a wire to its back. But again, there’s no need to push your luck, so as soon as you’ve completed the joint, pull the iron away and let the joint cool with the components remaining motionless.
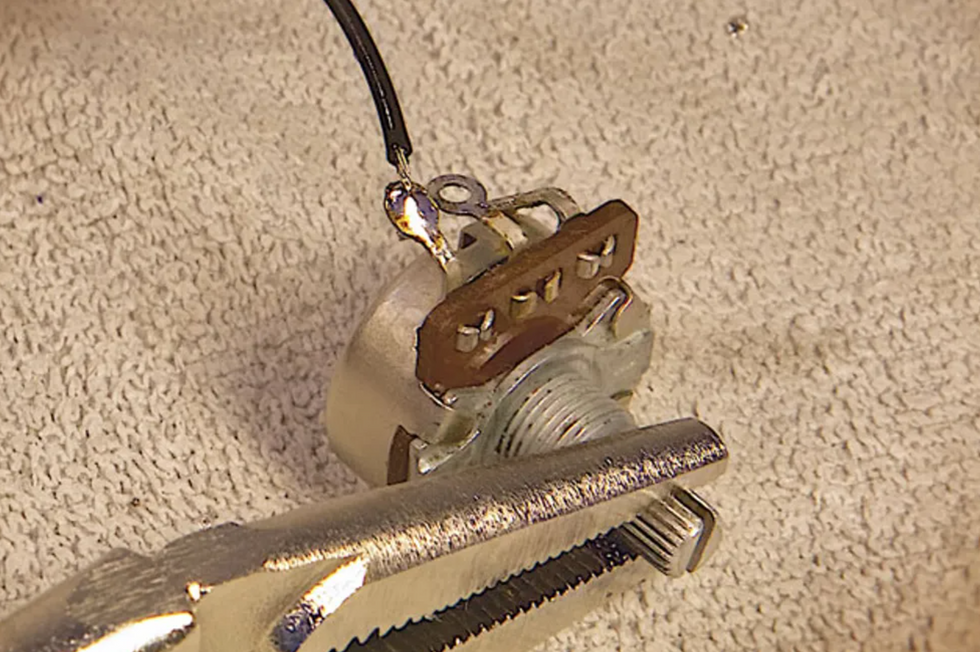
Photo 10 — When the molten solder has flowed into the joint, pull away both the solder and iron. Keep the joint motionless as it cools and don’t blow on it—the moisture in your breath will enter the cooling connection and potentially cause it to fail.
If you’re soldering to a ring-shaped solder lug, then you’ll want to fill it completely with solder (Photo 10). This will maximize the mechanical strength of the joint.
Like most skills, soldering proficiency is acquired through practice. Employing good technique will allow you to become competent all the more quickly, so follow these steps, and you’ll be soldering like a pro in no time. You should probably practice on projects that aren’t expensive or mission critical—you might want to think twice about rewiring your only guitar before that gig with Clapton tonight. But if you keep at it, you’ll be one step closer to being a consummate DIY’er.
Two Ways to Improve Your Soldering Projects
After you master the basics, there are two more skills to add to your bag of tricks: removing old solder and installing heat shrink tubing. There are plenty of occasions where you’ll wish you could remove old solder and re-use a part. For example, you might have rescued a volume or tone pot from a previous mod or project. If it’s a high-quality pot, like those from CTS, why toss it and buy a new replacement when you can put the old one back into service? It’s easy to reverse the soldering process and remove old solder and bits of wire. You simply need a solder removal tool. There are several types, including disposable braided wire that’s designed to wick molten solder away from a joint, and various vacuum pump tools and “solder suckers.” I prefer a simple rubber bulb with a heat-resistant Teflon tip.
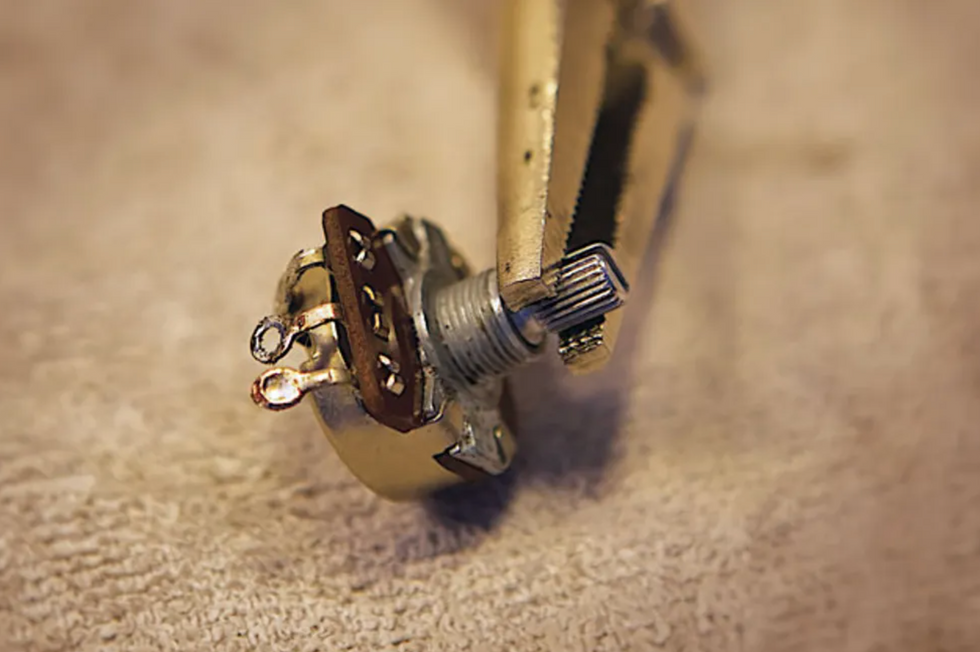
Photo 11
Here’s how it works: Stabilize your component, in this case, a pot (Photo 11). See how one lug is filled with solder? Let’s make that go bye-bye. Apply heat to the lug with a freshly cleaned soldering-iron tip.
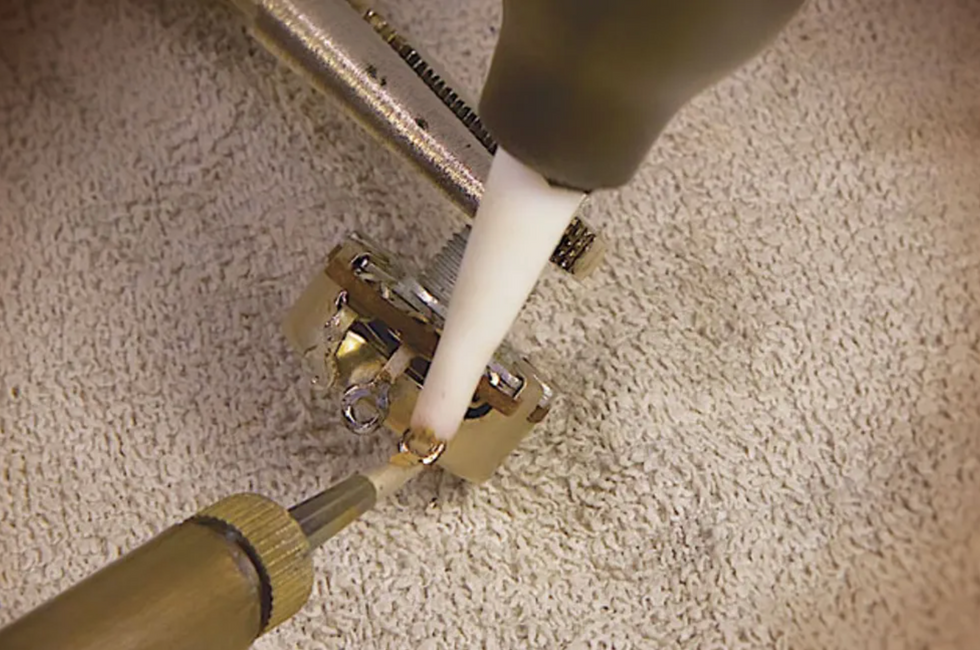
Photo 12
When you see the solder turn shiny and molten, hold the bulb away from the lug, squeeze and hold the bulb, and then bring its tip to the lug and release the bulb. Fffffft! The molten solder goes up the tip and into the bulb (Photo 12).
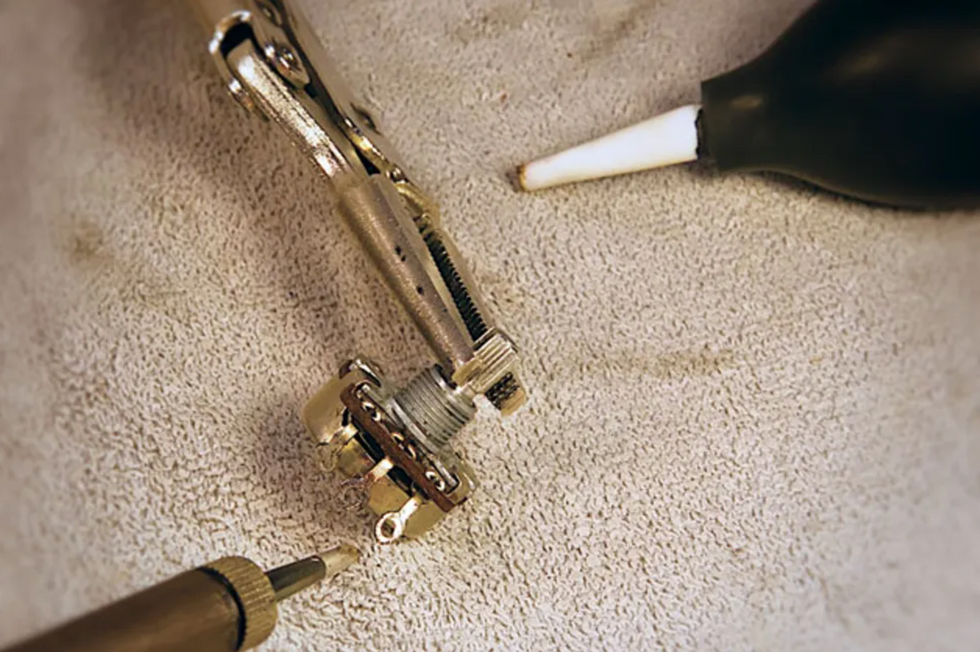
Photo 13
Look at that—a nice clean lug ready for its next mission (Photo 13).
Tip:It’s good to recycle pots and parts, but never try to reuse old solder. Clean it off and start fresh.
In case you’re wondering what happens to the old solder, every few months you simply work the tip out of the bulb, shake the collected cold solder beads into the trash, and reinsert the tip into the bulb. Good to go.
When you’re working with wire and electronics, you’ll often encounter instances where you need to insulate a connection from other wires or components. For example, you want to install a favorite old pickup into another guitar. However, the pickup leads have been cut back over the years and now they won’t reach the intended switch or pot, which means it’s time to splice short extensions to the pickup leads. No problem, except if the exposed wires touch each other or other components, they’ll create a short and you’ll hear only silence (or an annoying hum).
Electrical tape will do the job to insulate the splices, but heat shrink tubing—aka heat shrink—offers a more elegant solution. To make this work, you’ll need a heat source. Some folks use a lighter, but I prefer a heat gun because I like to avoid open flame in my workshop. Heat guns aren’t expensive and they get the job done efficiently and safely.
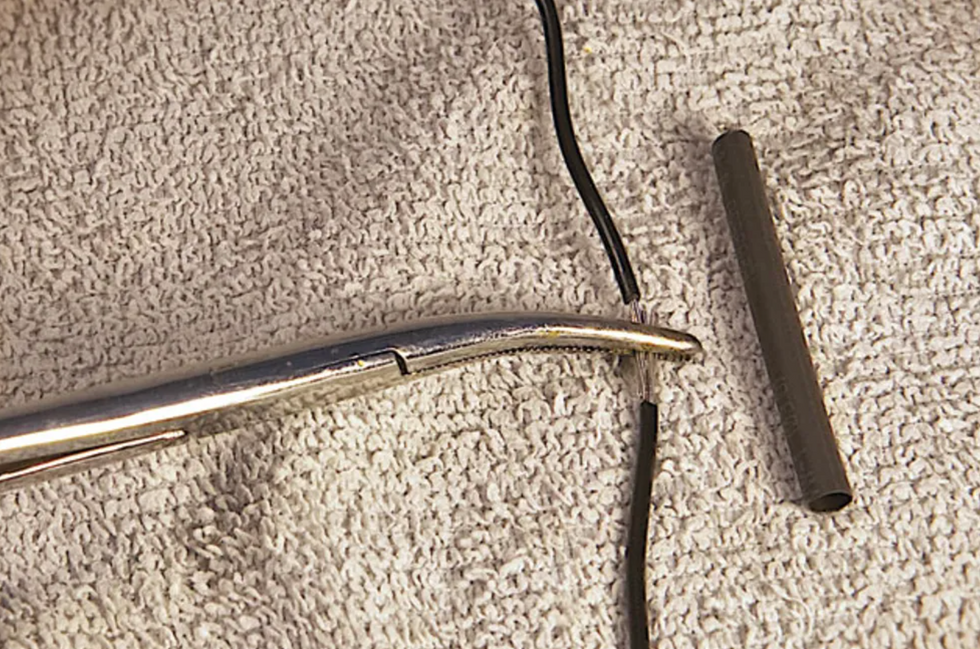
Photo 14
The details: Designed to slide over wire of different gauges, heat shrink comes in various diameters. After you select the right diameter to comfortably slip over your wire, cut off a piece that will straddle the solder splice or joint you plan to cover. The pros suggest a length that’s about three times as long as the exposed section. Use hemostats or a clamp to temporarily hold the ends together while you gauge the length you’ll need to cut (Photo 14).
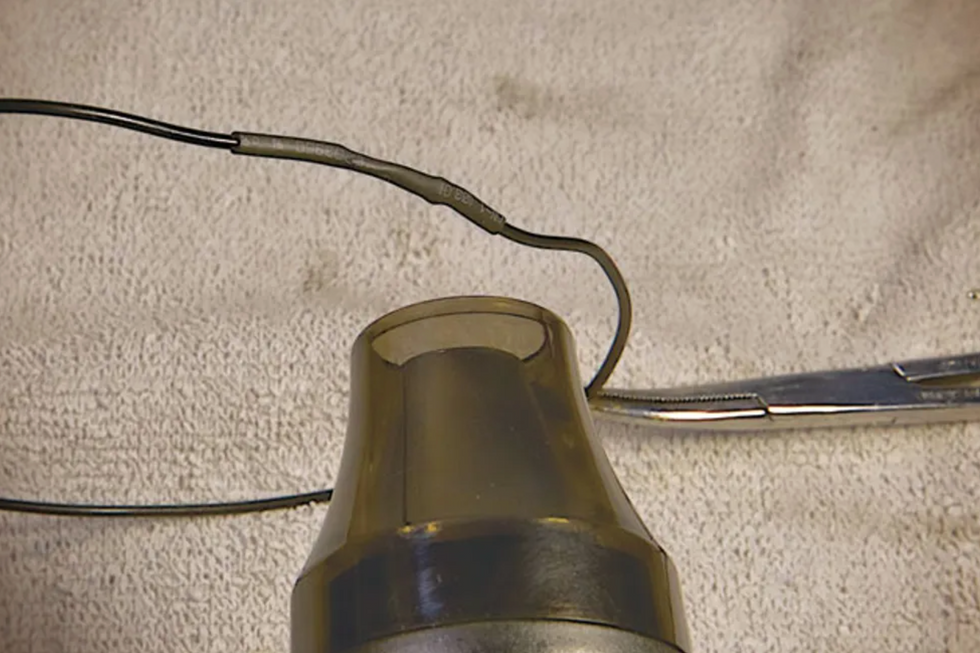
Photo 15
Next, remove the clamp, slide the heat shrink over one end of the wire (keep it far away from your hot iron) and solder the wires. When the solder has cooled, slip the heat shrink over the new joint, center it, and fire up the heat gun. The tubing will start to immediately contract around the joint (Photo 15). Don’t worry, air from the heat gun doesn’t get hot enough to compromise the solder joint. Once the tubing has completely closed up around the wire, you’re done. The joint now has a tough, new skin to protect it. —Andy Ellis
[Updated 1/13/22]
- Three Must-Try Guitar Wiring Mods - Premier Guitar ›
- The ABCs of Output Jacks - Premier Guitar ›
- The Stompbox-Builder's Secret Weapon - Premier Guitar ›
Sublime, fronted by Jakob Nowell, son of late Sublime singer Bradley Nowell, are in the studio writing and recording new songs for an upcoming full-length album. This marks their first new album since 1996.
When not performing at various festivals across North America in 2024, front man Jakob Nowell immersed himself in the Sublime catalog and found a deep sense of connection to his late father. The band is tapping into the 90s nostalgia, writing and recording the new songs with powerhouse producing duo Travis Barker and John Feldmann, in addition to working with producer Jon Joseph (BØRNS). The first single will be released this Summer via their newly established label Sublime Recordings.
"I grew up on Sublime. ‘40oz. to Freedom’ changed the way I listened to music. I’m so honored to be working with the guys in Sublime. Creating music for this album has been so fun and exciting. Bradley comes through his son Jakob while writing in the studio and performing. Chills every day in the studio when he sings and play guitar. This is going to be really special." – Travis Barker
“Sublime has always been a huge influence on me and to be able work with the band has been inspirational and game changing…It has been a highlight of my life to work on such a seminal record with such talented people. I’m so grateful for this opportunity and to continue the legacy and keep it authentic to what they have historically done.” – John Feldmann
After Jakob Nowell’s debut as Sublime’s new front man at Coachella 2024, he and his uncles Bud Gaugh and Eric Wilson continued the momentum of this latest chapter of the band, performing at over 20 festivals and shows across North America by the end of last year. Additional highlights from 2024 include Sublime’s late-night television debut on The Tonight Show Starring Jimmy Fallon, a 4-song set on the Howard Stern Show and the band’s first top 10 hit on alternative radio since 1997 with their single “Feel Like That,” featuring the vocals of both Bradley Nowell and his son Jakob together.
2025 is shaping up to be an even busier year for the band, with a handful of headlining shows, high-profile festival appearances to support the release of the new album.
For more information, please visit sublimelbc.com.
Sublime 2025 Tour Dates
- April 5 – LIV Golf Miami – Miami, FL
- April 18 – Red Rocks Amphitheater – Morrison, CO
- May 3 – Beachlife Festival – Redondo Beach, CA
- May 16 – Welcome To Rockville – Daytona Beach, FL
- May 23 – BottleRock Napa Valley – Napa, CA
- May 25 – Boston Calling – Boston, MA
- June 14 – Vans Warped Tour – Washington, DC
- July 12 – 89.7 The River’s 30th Anniversary Show – Omaha, NE
- July 20 – Minnesota Yacht Club Festival – Saint Paul, MN
- September 14 – Sea.Hear.Now – Asbury Park, NJ
- September 19 – Shaky Knees Festival – Atlanta, GA
Price unveiled her new band and her new signature model at a recent performance at the Gibson Garage in Nashville.
The Grammy-nominated alt-country and Americana singer, songwriter, and bandleader tells the story behind the creation of her new guitar and talks about the role acoustic Gibson workhorses have played in her musical history—and why she loves red-tailed hawks.
The Gibson J-45 is a classic 6-string workhorse and a favorite accomplice of singer-songwriters from Bob Dylan to Jorma Kaukonen to James Taylor to Gillian Welch to Lucinda Williams to Bruce Springsteen to Noel Gallagher. Last week, alt-country and Americana artist Margo Price permanently emblazoned her name on that roster with the unveiling of her signature-model J-45. With an alluring heritage cherry sunburst finish and a red-tail-hawk-motif double pickguard, the instrument might look more like a show pony, but under the hard-touring and hard-playing Price’s hands, it is 100-percent working animal.
The 6-string was inspired by the J-45 she bought at Nashville’s Carter Vintage Guitars after she was signed to Third Man Records, where she made her 2016 ice-breaker album, Midwest Farmer’s Daughter. But her affection for Gibson acoustics predates that, going back to when she found a 1956 LG-3 in her grandmother’s home. The guitar had been abandoned there by her songwriter great uncle, Bobby Fischer.
“I played it for years before I found my J-45,” Price recounts. “At Carter Vintage, I tried a lot of guitars, but when I picked up that J-45, I loved that it was a smaller guitar but really cut through, and I was just really drawn to the sound of it. And so I went home with that guitar and I’ve been playing it ever since.”
“Having a signature model was something I had dreamed about.”
Of course, Price was also aware of the model’s history, but her demands for a guitar were rooted in the present—the requirements of the studio and road. The 1965 J-45 she acquired at Carter Vintage, which is also a cherry ’burst, was especially appealing “compared to a Martin D-21 or some of the other things that I was picking up. I have pretty small hands, and it just was so playable all up the neck. It was something that I could easily play barre chords on. I could immediately get everything that I needed out of it.”
If you’ve seen Price on TV, including stops at Saturday Night Live, The Late Show With Stephen Colbert, and Jimmy Kimmel Live!, you’ve seen her ’65. And you’ve also seen, over the years, that part of the soundhole’s top has been scraped away by her aggressive strumming. It’s experienced worse wear from an airline, though. After one unfortunate flight, Price found her guitar practically in splinters inside a badly crushed case. “It was like somebody would have had to drive over this case with a truck,” she relates. Luckily, Dave Johnson from Nashville’s Scale Model Guitars was able to put Humpty Dumpty back together again.
After that, an alternative guitar for the road seemed like a requirement. “Having a signature model was something I had dreamed about,” Price says. Friends in her songwriting circle, including Lukas Nelson and Nathaniel Rateliff, already had them. Four years ago, a tweet asking which women they thought should have signature models appeared, and one of her fans wrote “Margo Price.” Smartly, Price tagged Gibson and retweeted. Codey Allen in Gibson entertainment relations spotted the tweet and agreed.
The double pickguard was chosen for Price’s J-45 because of its symmetry, as a nod to the Hummingbird, and due to her heavy strumming hand.
Photo courtesy of Gibson
“The neck is not quite as small as my J-45, but it is just a bit smaller than many J-45s fives, and very playable no matter what size hands you have.”
“And so we began our journey of building this guitar,” Price says. “I debated whether it should be the LG-3, which I still have hanging on my wall, or the J-45. I went to Montana and visited their [acoustic] factory and sat down with Robi Johns [director of sales and marketing at Gibson acoustic], and we ultimately decided that the J-45 was my guitar. Then we started talking about the specs. We did pull from the LG-3 in that the body of this signature guitar is a bit smaller. It still has a really loud, clear sound that rings through. The neck is not quite as small as my 1965 J-45, but it is just a bit smaller than many J-45s, and very playable no matter what size hands that you have.”
The pickup that Price selected is a L.R. Baggs VTC Element with a preamp, and she took a prototype of the guitar on the road opening for the Tedeschi Trucks Band. “I am used to playing with a really loud band, with drums and sometimes a couple electric guitars, and I wanted to make sure that this guitar just cut through,” she says. “It was really important to me that it be loud, and it cut beautifully. It’s got a mahogany body and scalloped bracing, which makes it very sturdy. This guitar is a workhorse, just like me.”
The Margo Price J-45’s most arresting characteristic, in addition to its warm sunburst finish, is its double-sided pickguard with an etching of a quartet of red-tailed hawks in flight. It’s practical for her strumming style, but it’s also got a deeper significance.
“We talked about all sorts of things that we could put on the pickguard, and I’ve always been a big fan of the Hummingbird, so what we did is a bit of a nod to that,” Price continues. “I’ve always been drawn to red-tailed hawks. They are supposed to be divine messengers, and they have such strength. They symbolize vision and protection. I would always count them along the highway as I’d be driving home to see my family in Illinois.”
Birds of a feather: “I’ve always been drawn to red-tailed hawks,” says Price. “They are supposed to be divine messengers, and they have such strength. They symbolize vision and protection.”
Photo courtesy of Gibson
With its comfortable neck, slightly thinner body, and serious projection, Price notes, “I wanted my guitar to be something that young girls can pick up and feel comfortable in their hands and inspire songs, but I didn’t want it to be so small that it felt like a toy, and that it didn’t have the volume. This guitar has all of those things.” To get her heavy sound, Price uses D’Addario Phosphor Bronze (.012–.053) strings.
Price says she and her signature J-45, which is street priced at $3,999, have been in the studio a lot lately, “and I have a whole bunch of things I’m excited about.” In mid March, she debuted her new band—which includes Logan Ledger and Sean Thompson on guitars, bassist Alec Newman, Libby Weitnauer on fiddle, and Chris Gelb on drums—in a coming out party for the Margo Price Signature Gibson J-45 at the Gibson Garage in Nashville. “I’ve been with my previous band, the Price Tags, for more than 10 years, and it’s definitely emotional when a band reaches the end of its life cycle,” she says. “But it’s also really exciting, because now, having a fiddle in the band and incredible harmony singers … it’s a completely different vibe. I’ve got a whole bunch of festivals coming up this year. We’re playing Jazz Fest in New Orleans, and I’m so excited for everyone to hear this new iteration of what we’re doing.”
With its heritage cherry sunburst finish and other appointments, the Margo Price Signature Gibson J-45 balances classic and modern guitar design.
Photo courtesy of Gibson
Get premium spring reverb tones in a compact and practical format with the Carl Martin HeadRoom Mini. Featuring two independent reverb channels, mono and stereo I/O, and durable metal construction, this pedal is perfect for musicians on the go.
The Carl Martin HeadRoom Mini is a digital emulation of the beloved HeadRoom spring reverb pedal, offering the same warm, natural tone—plus a little extra—in a more compact and practical format. It delivers everything from subtle room ambiance to deep, cathedral-like reverberation, making it a versatile addition to any setup.
With two independent reverb channels, each featuring dedicated tone and level controls, you can easily switch between two different reverb settings - for example, rhythm and lead. The two footswitches allow seamless toggling between channels or full bypass.
Unlike the original HeadRoom, the Mini also includes both mono and stereo inputs and outputs, providing greater flexibility for stereo rigs. Built to withstand the rigors of live performance, it features a durable metal enclosure, buffered bypass for signal integrity, and a remote jack for external channel switching.
Key features
- Two independent reverb channels with individual tone and level controls
- Mono and stereo I/O for versatile routing options
- Buffered bypass ensures a strong, clear signal
- Rugged metal construction for durability
- Remote jack for external channel switching
- Compact and pedalboard-friendly design
HeadRoom Mini brings premium spring reverb tones in a flexible and space-savingformat—perfect for any musician looking for high-quality, studio-grade reverb on the go.
You can purchase HeadRoom Mini for $279 directly from carlmartin.com and, of course, also from leading music retailers worldwide.
For more information, please visit carlmartin.com.
Together with Nathaniel, we’re decoding our favorite eras of the Edge’s tones—from his early Memory Man days through his expanding delay rack rig, into his 1990s Achtung Baby sounds, and all the way through to his Sphere rig. How does he get those amazing delay tones? And what are those cool picks he uses?
There’s a good chance that if you’re a guitar fan, you’ve seen Nathaniel Murphy’s gear demos—either on his Instagram account, where he goes by @zeppelinbarnatra, or on the Chicago Music Exchange page. His solo arrangements of classic tunes display his next-level technique and knack for clever arranging, and he makes our jaws drop every time he posts. When we learned that the Irish guitarist is a huge fan of U2’s The Edge, we knew he had to be our expert for this episode.
Together with Nathaniel, we’re decoding our favorite eras of the Edge’s tones—from his early Memory Man days through his expanding delay rack rig, into his 1990s Achtung Baby sounds, and all the way through to his Sphere rig. How does he get those amazing delay tones? And what are those cool picks he uses?