A magnetic soundhole pickup makes a nice alternative to installing an under-saddle pickup in your acoustic guitar. Today’s soundhole pickups perform and sound much better than in decades past, so if you’ve written them off based on their old rep, it’s worth keeping an open mind and doing some research on modern options.
One of my clients wanted a pickup installed in his 2004 Martin D-28 that would not acoustically change its tone. Since under-saddle pickups can and do affect a guitar’s acoustic properties, I suggested a soundhole pickup.
After discussing different models, we decided on a L.R. Baggs M1 Active pickup (Fig. 1). Because the M1 has a built-in preamp, you can plug your guitar directly into a P.A. or acoustic amp and control your level with an onboard volume dial. Powered by a lithium watch battery, the M1 Active is a dual-coil humbucker designed so that one coil senses the strings and the other responds to the guitar’s physical resonance. Six adjustable pole pieces let you balance the output of each string—a handy feature that’s lacking in many older soundhole pickups.
Tip: Before you purchase a pickup, measure your guitar’s soundhole and check the manufacturer’s specs to confirm that the pickup fits your guitar. Soundholes are typically 4" in diameter, but they can vary.
My client wanted to use an endpin jack. To install it, I knew I’d first need to bore out the endpin hole. This operation has to be done carefully, so let’s look at each step. (While these instructions specifically reference the Baggs pickup, the procedure for installing other soundhole pickups is essentially the same.)
Removing the endpin.
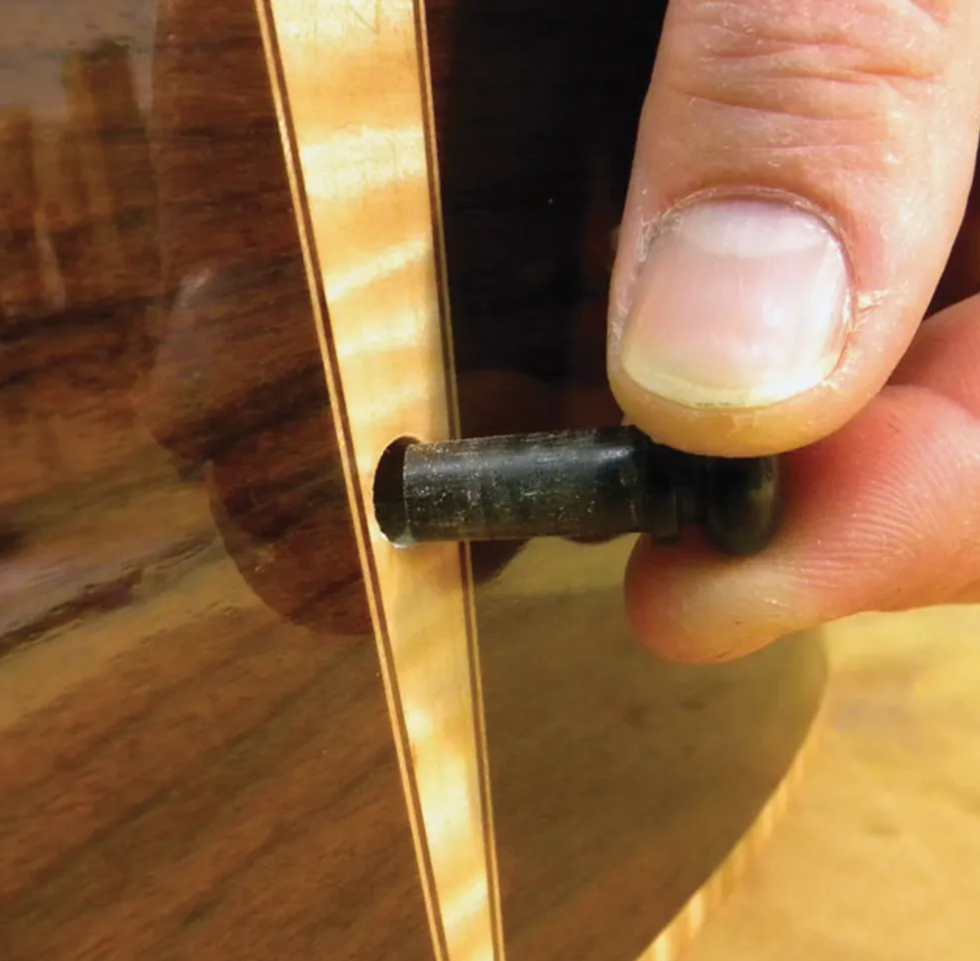
Fig. 2
Because this D-28 had its original endpin, I began by removing it from the body. In most cases, you can simply twist the endpin out with your fingers (Fig. 2). But if the endpin is glued in, you may have to carefully use a pair of pliers to remove it. In extreme cases, you might have to cut off the endpin flush to the body and use a drill bit to remove the remaining section. Luckily, the endpin on this D-28 came out easily, so I didn’t have to use pliers or a drill.
Reaming the endpin hole.
Now I was ready to bore out the hole to accommodate the endpin jack that comes prewired to the M1 Active harness. I used an endpin jack reamer from Stewart-MacDonald (stewmac.com). This tapered tool attaches to a drill and has a stepped ream configuration that provides a very clean, precise bore. It will bore a hole from 15/32" up to 1/2" in diameter.
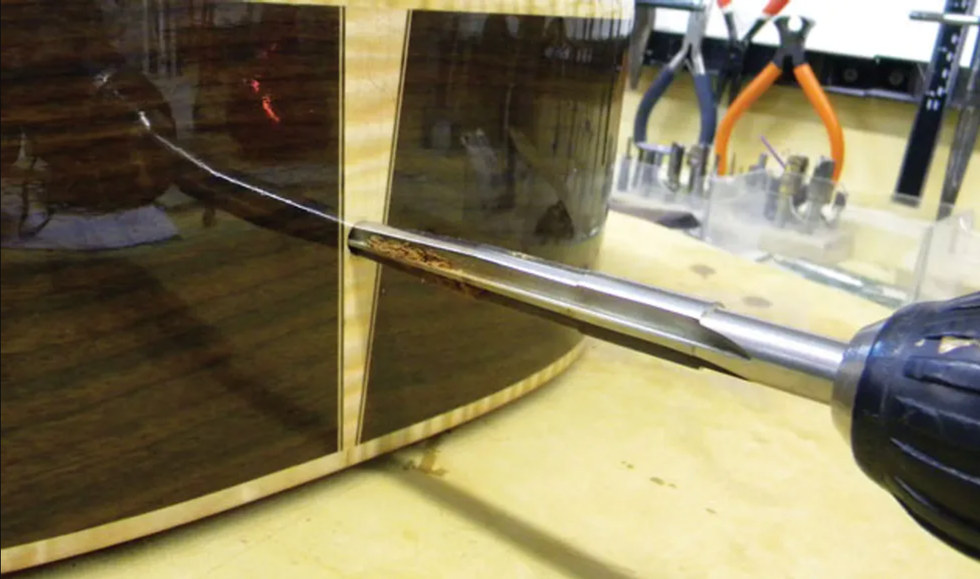
Fig. 3 — Using an endpin jack reamer from Stewart-MacDonald (stewmac.com) to enlarge the endpin hole.
In the past, guitar techs would use a spade bit and hope the hole was symmetrical and didn’t tear up the finish. Spade bits can slip and cause damage, and it’s difficult to keep them perfectly straight as you drill, so the endpin hole can end up crooked. With this reamer, you don’t have to worry about damaging the finish or tearing up wood around the hole. Also it’s easy to keep the reamer straight as you slowly drill (Fig. 3), so the hole ends up clean and accurate. This is the best tool I’ve found for this type of project.
After reaming the endpin hole, vacuum out any sawdust and debris from inside the guitar. It’s always good to keep the guitar’s interior clean.
Installing the endpin jack.
Before you install an endpin jack like this one, be sure to test the hole to be sure the jack fits correctly. The jack should be snug, but not so tight that you have to force it into the hole. If the hole feels too small, ream it out a bit more. Be patient and go slowly—never be in a hurry when drilling holes into a guitar!
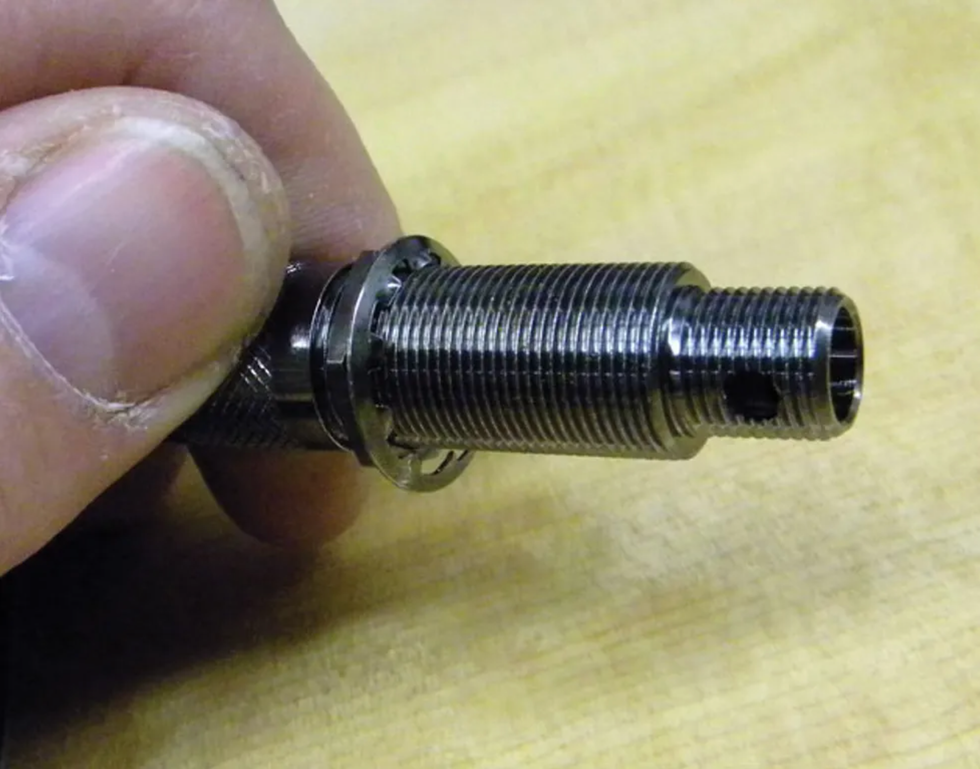
Fig. 4 — Install the rear nut and lock washer before mounting the jack from inside the body.
The next step is to install the rear nut and lock washer (Fig. 4) before mounting the jack into the hole from inside the body. To help with this tricky operation, insert a Phillip’s head screwdriver through the hole from the outside to help guide the jack into place. Slide the jack along the screwdriver shank until you can grab the jack from the outside and pull it into place.
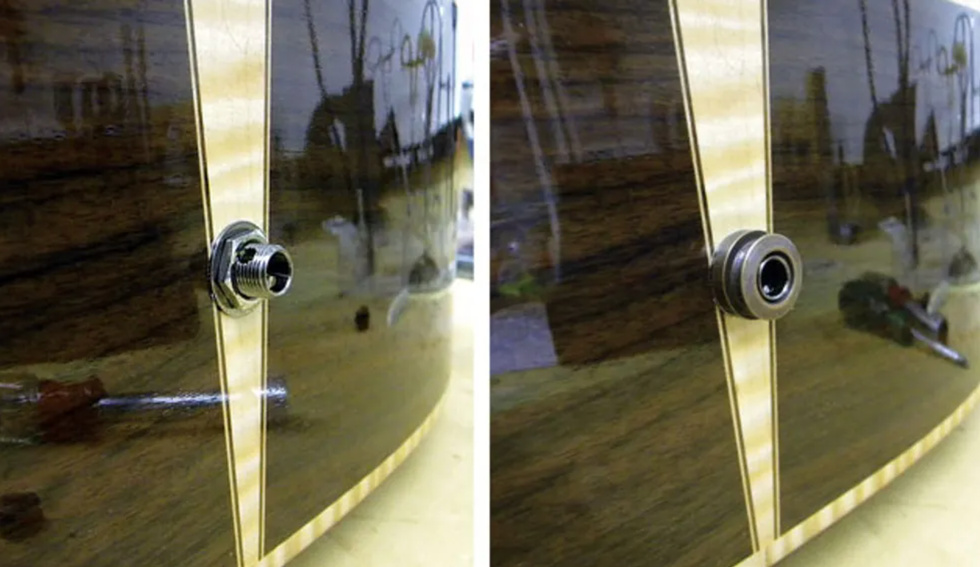
Fig. 5 — (left) After adding the external washer and nut, check the available threads as the jack protrudes out of the endpin hole. Will they accommodate the screw-on strap-button collar? Fig. 6. (right) The strap-button collar should be flush with the end of the jack.
Once it’s in place, check how much of the jack protrudes from the hole. Add the external washer and nut (Fig. 5), and then make sure there are enough accessible threads to grip the screw-on strap-button collar. It should be flush with the end of the jack (Fig. 6).
With the external washer, nut, and strap-button collar installed, the jack should be tight and not wiggle. If the jack is still loose, reach inside the guitar, remove the jack, and add a few turns to the interior nut and lock washer. Once the jack lines up correctly and is flush to the strap-button collar, remove the collar and tighten the outer nut. Finally, reinstall the collar.
I don’t recommend adding any glue or adhesive to the threads. This can cause a lot of damage and aggravation if you need to replace the endpin jack. This type of jack is designed to be tightened and loosened from the outside of the guitar. Adding adhesive interferes with the process and can cause problems down the road.
Installing the soundhole pickup.
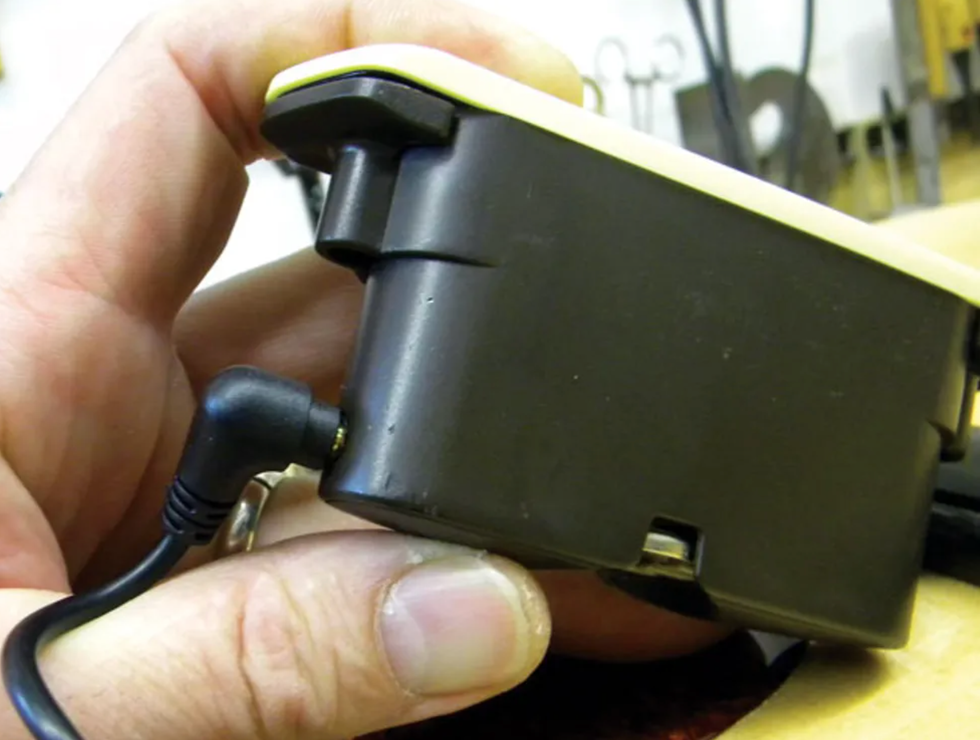
Fig. 7 — The endpin jack comes prewired to a harness that plugs into the M1-Active.
Before mounting the M1 Active, I inserted the 3.5mm plug at the other end of the endpin jack harness into the pickup’s output jack (Fig. 7).
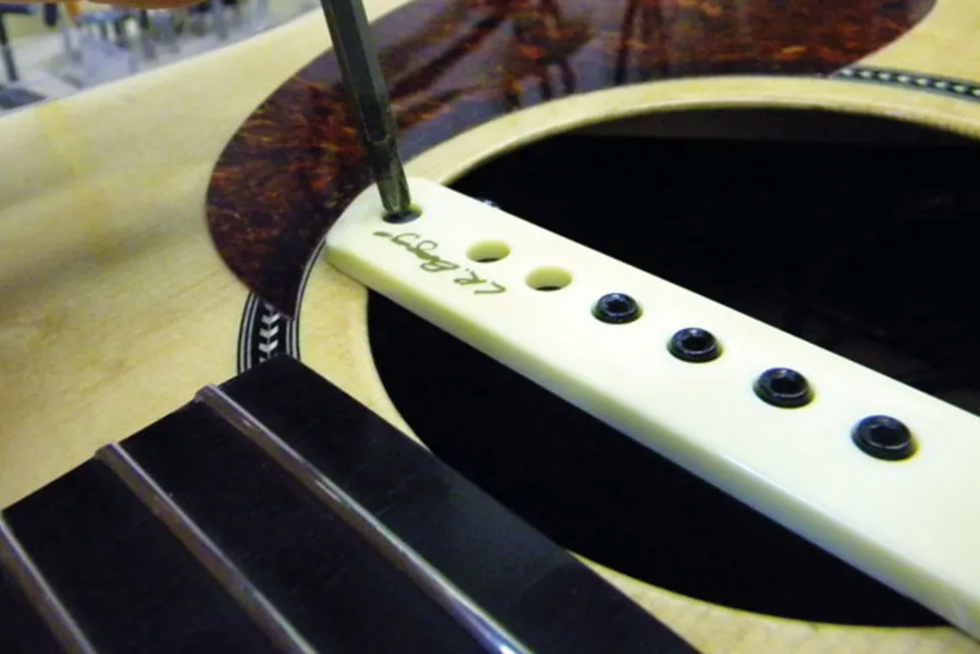
Fig. 8 — Gently tighten the pickup mounting brackets until they’re snug. Don’t overdo it!
Two brackets on either side of the pickup secure it in the soundhole. To make it easier to slide the pickup into the soundhole without damaging the finish, I loosened these brackets by turning their screws counterclockwise. After positioning the pickup in the soundhole—advanced slightly toward the neck—I gently tightened the brackets until they were snug (Fig. 8).
Tip: When you install a magnetic soundhole pickup, double-check that it’s truly secure. You don’t want it to fall into the body while you’re performing. That said, to avoid marring the finish or crushing the soundhole wood, don’t overtighten the mounting brackets.
Adjusting the pole pieces.
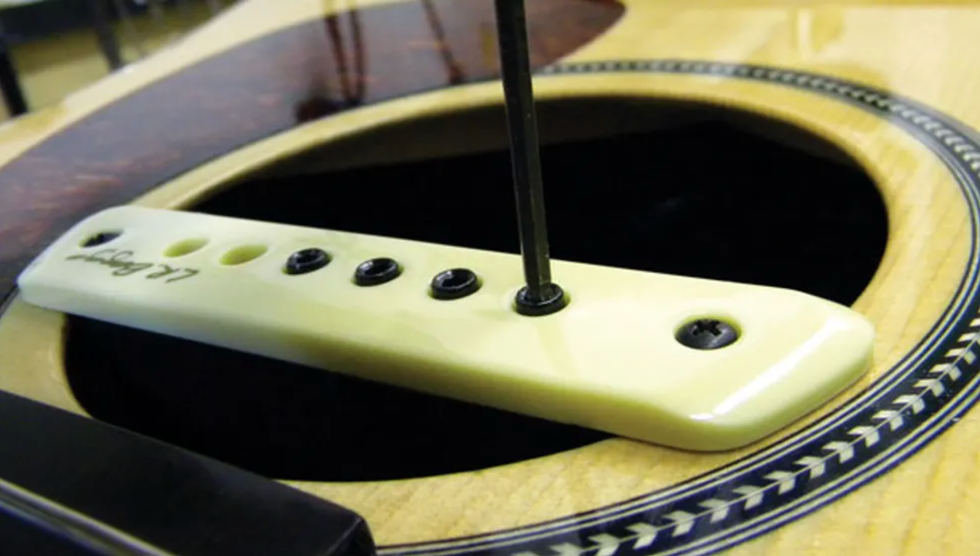
Fig. 9 — Adjusting the pole pieces with a hex wrench.
This is the last step, one that lets you tweak a modern mag pickup to your playing style—something you can’t really do with an under-saddle pickup.
The M1 Active typically ships with the 2nd-string pole piece removed, but included in the packaging. (This is because the B string tends to be much louder than the rest.) I recommend not installing it unless you really need it to balance the volume. The rest of the pole pieces are easy to adjust using the included 3/32" hex key.
First, make sure that the volume control is turned up all the way. To adjust the volume for each string, simply turn your hex key clockwise to lower the pole piece or turn your hex key counter-clockwise to raise it. Only raise the pole pieces a little at a time, and then test the volume by playing through an amplifier. It’s not necessary to raise them a lot—only about one full turn.
I usually lower the 6th-string pole piece flush to the top of the pickup, then adjust the rest of them to match sonically (not physically). You’ll probably find that the pole piece for the 3rd string is closest to the strings. Once all the strings have equal volume, you’re ready to perform or record with your new soundhole pickup.
[Updated 2/16/22]


