Fig. 1 -Strap buttons come in an amazing array of shapes and sizes.
Everything you need to know to easily secure your acoustic or electric.
For most performers, it's essential that a guitar has strap buttons (Fig. 1). Though many guitars come with strap buttons already installed, some don't. If you have a guitar without strap buttons and want to install them, the good news is it's a straightforward job—if you know the correct procedures.
There are two critical considerations: The first is to find the right location. If strap buttons are installed incorrectly, your guitar won't balance well when you play standing up. The second consideration is to be very careful when installing a button on the neck heel—you can crack it. So, using both an acoustic and an electric guitar to illustrate the process, let's find out how to do this right and avoid those potential problems.
Our instruments.
Recently, a client brought in two guitars: a Larrivée OM-03 Vintage Sunburst and a 2002 Gibson SG Supreme. The Larrivée already had an endpin, but it lacked a strap button. The owner wanted me to install one so he could stand when playing onstage. For the SG Supreme, he wanted me to replace the stock buttons with a set of locking devices, so he could safely rock out with his band. For the Larrivée, we decided on a standard nickel-plated strap button and felt washer from Allparts; for the SG Supreme, we chose Schaller Security Locks.
One caveat.
My client wondered if adding a strap button would devalue his acoustic. On most modern flattops, a correctly installed strap button won't devalue the instrument (two exceptions are high-end vintage guitars or classical guitars). A strap button is useful for working musicians, and most guitar manufacturers will offer to install one before the guitar leaves the factory. Another reason to add a strap button to an acoustic is that tying a strap around the headstock (the old-school approach) can damage the finish, and in some cases, add unnecessary pressure to the neck joint. There's a lot of debate about this. Most collectors would never want anything installed on a guitar that was not considered original, so if you have a vintage axe keep this in mind.
Selecting the location.
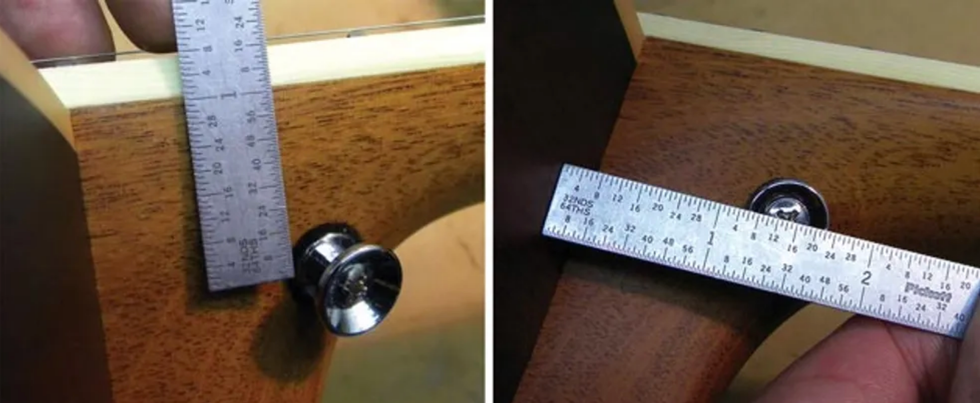
Fig. 2 (left) To install a strap button on the treble side of a flattop's neck heel, you need to take two measurements. One is the distance down from the fretboard. Fig. 3 (right) The second measurement is the distance away from the body.
Let's begin with the acoustic. The first step is to decide where to install the strap button. For the Larrivée, I determined that the best location was on the treble side of the neck heel about 1 1/4" below the top of the fretboard (Fig. 2) and about 1 1/2" out from the body (Fig. 3). I selected this spot for balance and structural integrity: This placement will keep the guitar from leaning away from you when you play, and this part of the neck heel is very stout, so you won't have to worry about cracking the heel—assuming the button is installed correctly, as we'll discuss in a moment.
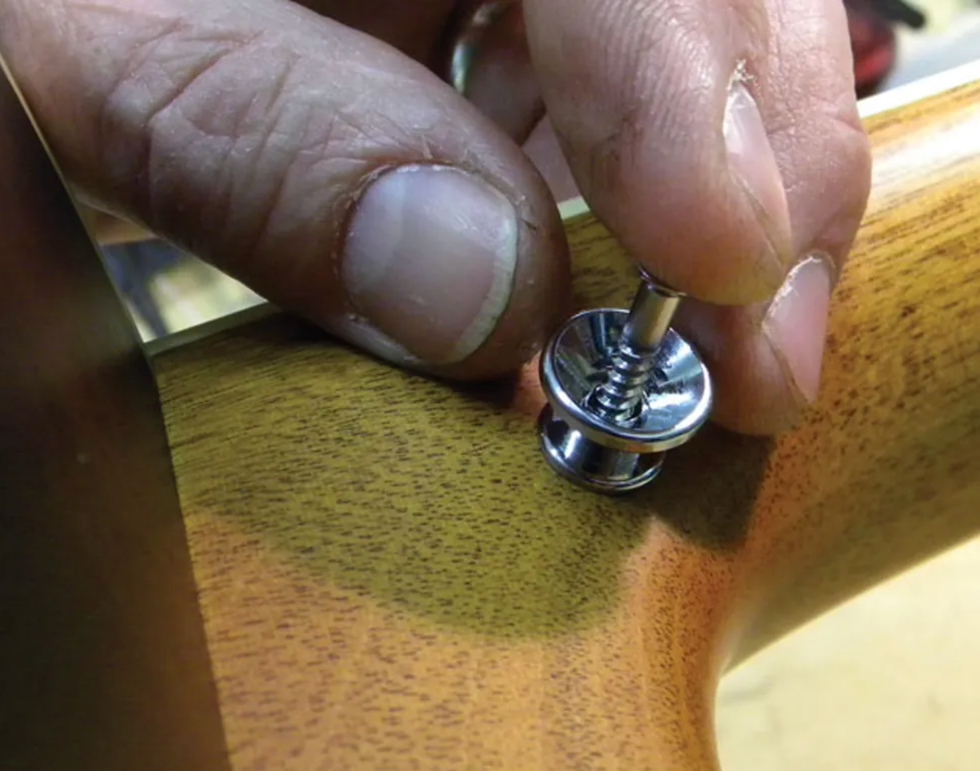
Fig. 4 - Mark the strap button's location by pressing the screw tip into the wood.
Once you've made these two measurements and located their intersection, mark it. You can mark the location using a pencil or gently press the strap button screw into the heel (Fig. 4).
Tip: If you use a screw to mark the drilling location, be careful not to slip—you could scratch the heel.
Selecting the drill bit.
The goal is to drill a hole that's slightly smaller than the outside diameter of the screw. If you use a drill bit that's too big, the screw will strip the wood and the button will not hold properly. Most strap button screws are relatively close in size, but they do vary depending on the manufacturer. Make sure you measure both the threads and the screw shaft so you know what size drill bit to use.
For example: The outside diameter (including threads) of my strap-button screw was 9/64", and the shaft (without threads) was about 7/64" in diameter. By choosing a 7/64" bit, I left enough wood for the screw to tap (or thread) itself into the heel without damaging it.
Gauging drill bit depth.
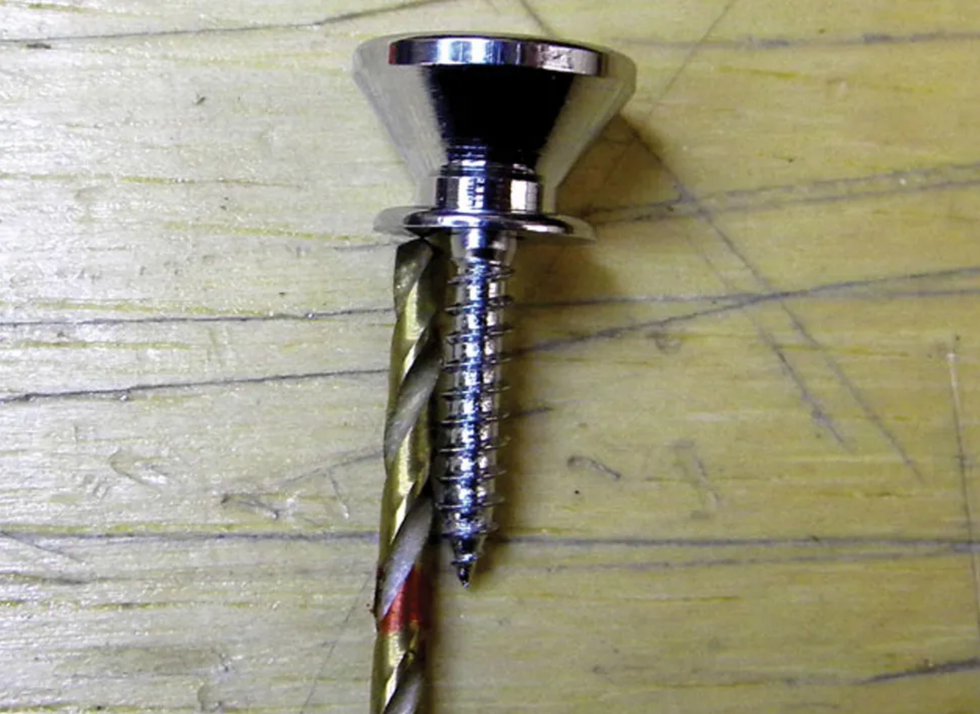
Fig. 5: Measure drill bit depth, then mark it with a red Sharpie.
With the screw inserted into the button, measure the depth needed for the screw and mark your selected drill bit with a red Sharpie (Fig. 5). This way, you'll know how deep to drill the hole. If you drill too far, you could hit the neck pocket. But if the hole is too shallow, you could crack the heel when you install the screw. Measure carefully and get it right.
Drilling the hole.
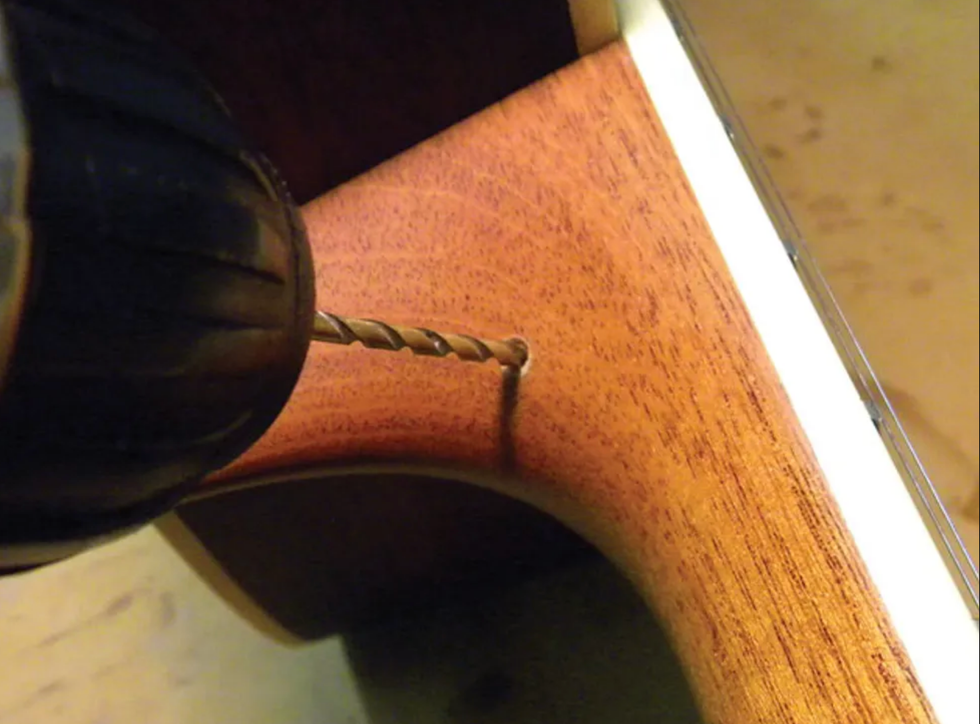
This is where all your measurements pay off. Remember, you don't have to push hard—let the drill and bit do the work. You simply control the process by keeping the bit aligned and watching the depth (Fig. 6).
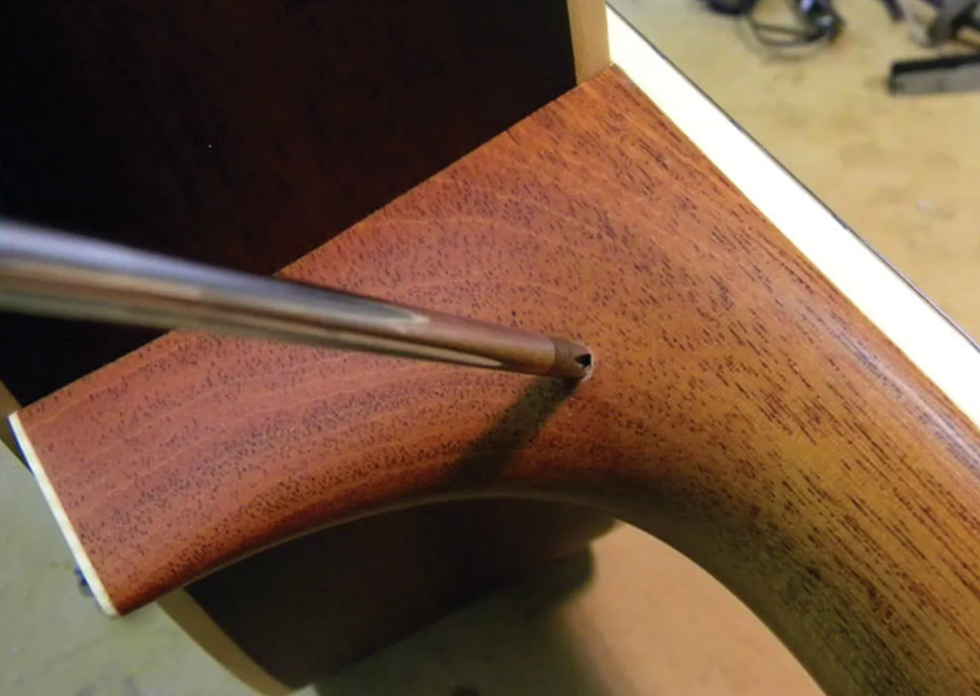
Fig. 7: Countersinking the hole with a Phillips screwdriver.
Before you insert the screw, use a medium-tip Phillips screwdriver to countersink the hole you just drilled (Fig. 7). This prevents the finish from chipping around the hole when you insert and tighten the strap-button screw. After countersinking the hole, install the strap button with a small felt washer between the wood and metal. The washer prevents the strap button from marring or denting the finish and wood, and it looks nice.
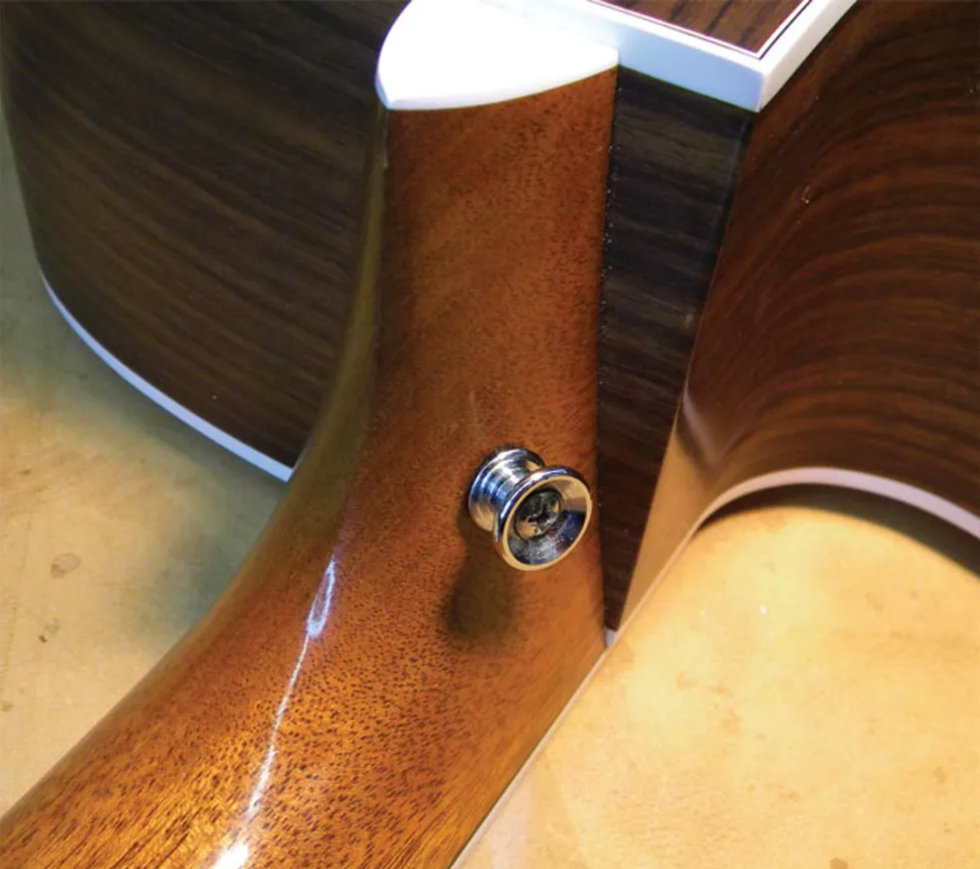
Fig. 8: Place a felt washer between the neck and button, then slowly tighten the screw until
the button is flush to the neck heel.
Voilà—a correctly installed strap button can add utility to a steel-string guitar (Fig. 8).
Strap-locking devices.
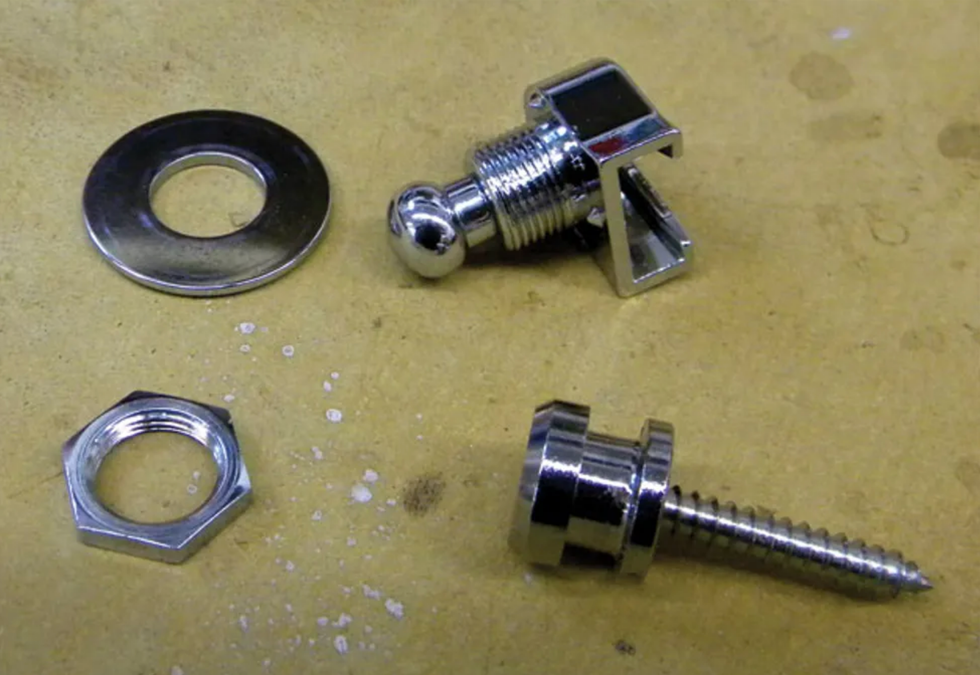
Fig. 9: Each Schaller Security Lock consists of an integrated screw and button, a locking mechanism that attaches to the guitar strap, and a washer and nut used to secure the locking device to the strap.
There are many different types and brands of locking devices on the market, but as I mentioned, my client wanted Schaller Security Locks (Fig. 9) for his SG. Once you've selected your locking hardware, it's crucial you measure the length of the included screws that go into the body and subsequently attach to the locking mechanism. In a moment, we'll see why.
The work begins.
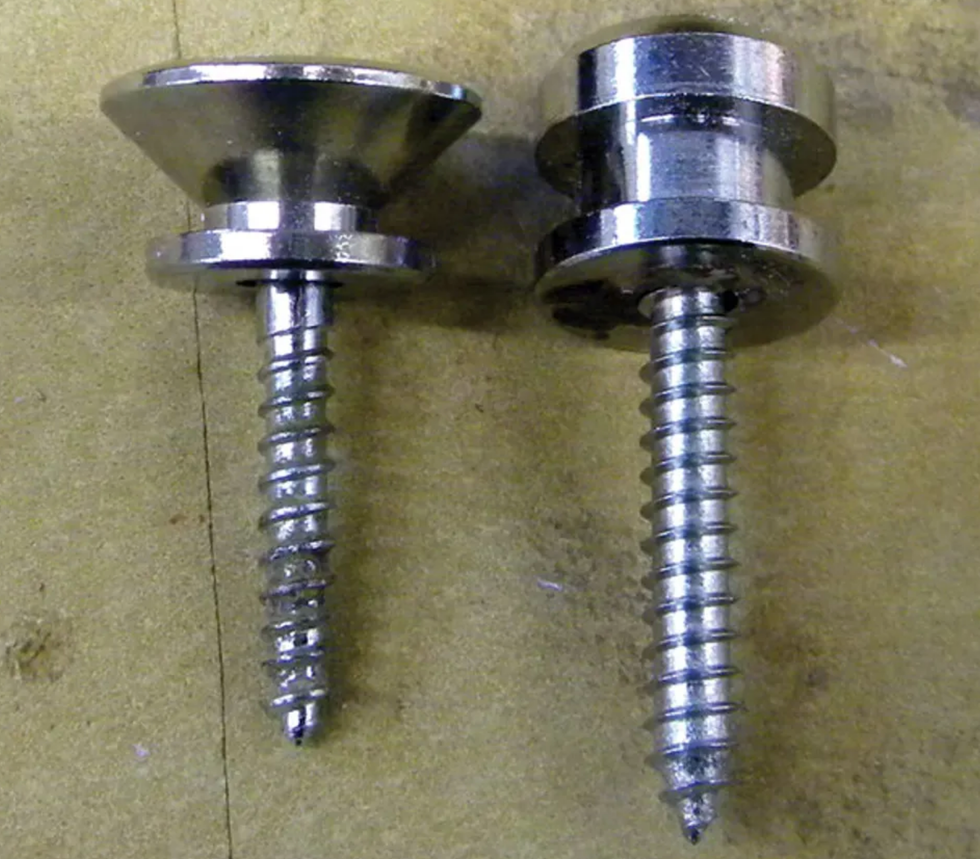
Fig. 10: Comparing the length of the stock SG screw and button (left) with the Schaller screw.
Installing the Schaller button on the SG's lower bout was easy because it was already pre-drilled for the original strap button I'd removed. Because the Schaller screws with their integrated buttons were longer than the original Gibson hardware (Fig. 10), I redrilled the hole to the proper depth using a 7/64" drill bit. So far, so good.
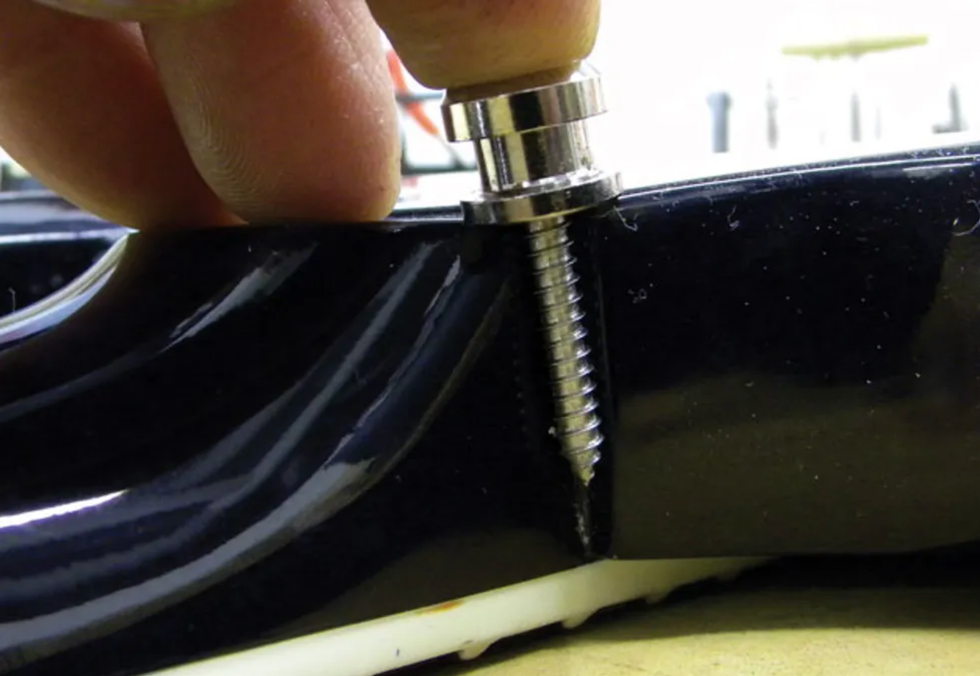
Fig. 11: The Schaller screw is too long for the SG's neck joint—it might hit the truss rod.
Ah, but the other strap button was a different story. On SGs, Gibson typically installs a strap button on the back of the guitar, right behind the neck joint. After I removed the stock button and measured the depth of the Schaller screw against the SG's neck joint (Fig. 11), I realized the screw would penetrate too far and possibly hit the truss rod. Yikes!
This left me with two choices: see if I could use the original hardware, or shorten the supplied Schaller screw and integrated button. Fortunately the Gibson button fit inside the Schaller locking mechanism, so I decided to reuse the original screw and button, rather than shorten and rethread the Schaller screw. Once again, I included a felt washer between the body and button.
Loading the strap.
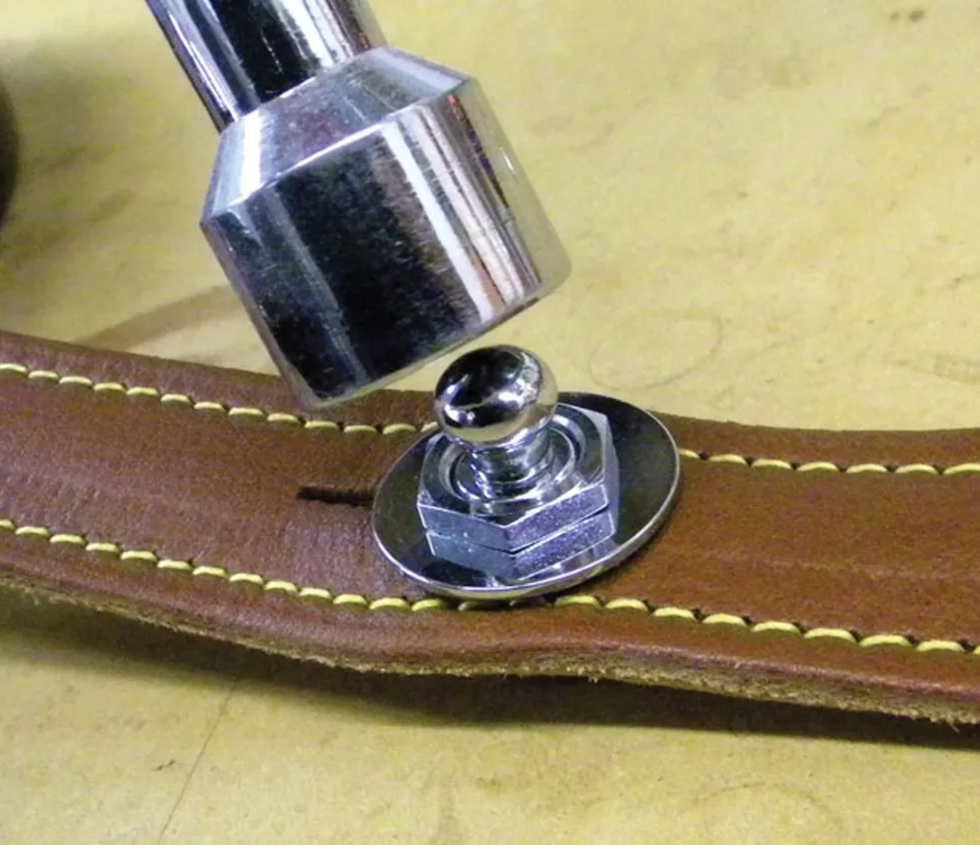
Fig. 12: Attaching the Schaller Security Lock to the strap.
One of the features that makes the Schaller system so secure is that the locking mechanisms attach to your strap. It's simple: Slip the strap-lock base into the strap's slit. Place the included washer over the device's shaft. Using a 9/16" deep-well nutdriver, tighten the nut over the washer (Fig. 12). This makes it nearly impossible for the locking mechanism to slip out of the strap. Rinse and repeat.
To mount the strap to the guitar, simply pull up on each lock's post, slip the lock onto its respective button, and release the post to lock it to the button.
[Updated 10/8/21]
- The ABCs of Output Jacks - Premier Guitar ›
- Guitar Shop 101: How to Install a Soundhole Pickup - Premier Guitar ›
- Tools for the Task: Strap Locks - Premier Guitar ›
- (Acoustic) Size Matters - Premier Guitar ›
- Guitar Shop 101: How to Install a Soundhole Pickup - Premier Guitar ›
Eminence Speaker launches the Karnivore guitar speaker, developed in collaboration with metal producer Kristian Kohle.
Eminence Speaker, renowned for its high-performance speakers in the heart of Kentucky, is launching the Karnivore, a groundbreaking guitar speaker developed in collaboration with world-class metal producer Kristian Kohle.
Following their successful partnership on the Eminence / Orange Bass Guitar Cabinet ImpulseResponse Pack and the Kristian Kohle DV-77 IR Pack, this new venture takes the Kohle/Eminence collaboration to new heights, bringing the ultimate high-gain solution to guitarists everywhere.
Available in 8 ohm and 16 ohm models, the 12” Karnivore is designed with a ceramic magnet to deliver everything heavy players need: a massive low end, a thick, vocal mid-range, and mid-range bite that effortlessly cuts through even the most demanding metal mixes — all without becoming harsh or brittle. Whether it's crushing rhythm tones or searing leads, the Karnivore provides the perfect balance of power and precision, making it a must-have for modern guitarists pushing the boundaries of tone.
Kristian Kohle, a renowned producer and engineer known for his work with legendary metal bands like Powerwolf, Aborted, and Electric Callboy, has been instrumental in shaping the Karnivore’s sonic profile. With years of expertise refining tones for metal artists, Kohle's influence can be heard in every aspect of the speaker's design, ensuring that the Karnivore is not only a technical marvel but also an artistic tool for achieving unparalleled high-gain tones.
Key features of the Karnivore:
- 12” speaker with ceramic magnet
- 8 and 16 ohm options available
The Karnivore carries a $159.99 street price.
For more information, please visit eminence.com.
Light and very comfortable to play. Creative tonal options. Excellent hardware.
P-90s may be too hot or bright for some. Middle pickup not as articulate as expected—and surprisingly difficult to activate on the fly.
$1,229
Vola Guitars JZ FRO
volaguitars.com
Pro hardware, unusual circuit tweaks, and killer playability lend new twists to the P-90 solidbody template.
For nearly 10 years, Vola Guitars' Japan-made instruments stood out for their somewhat unorthodox features, quality execution, visual vibes that walk the line between traditional and modern, and mid-level prices that rival industry heavyweights. In the company’s varied line of 6- and 7-string guitars (and 4- and 5-string basses), the JZ FRO is more on the traditional end. Yet it still stakes out its own territory in terms of style and performance.
Subtle Upgrades
Vola’s most distinctive aesthetic feature is undoubtedly the bodyline scoop/flourish near the rear strap button. On the JZ FRO, it lends a dash of elegance and sophistication to an outline that might otherwise seem too literally Jazzmaster-like, while the handsome roasted maple neck, swooped reverse headstock, and nonstandard pickup scheme help make it clear this isn’t your average offset. It’s a classy, understated look even in the model’s flashier aged-copper and shell-pink hues. But look closer and you’ll note appointments that a lot of seasoned guitarists will appreciate, including Luminlay position markers, stainless steel frets, and a direct-to-output circuit bypass switch situated between the volume and tone knobs.
Slicing and Then Some
It’s not often you see a solidbody outfitted with a pair of humbucker-sized P-90s anda Strat-style middle pickup. The P-90s are alnico 5 units measuring 9.5k and 10.5k ohms resistance. To avail you of this circuit’s numerous tones the JZ FRO incorporates a deceptively simple-looking control array. There’s a lone tone knob, a traditional 3-way selector, and a master volume that pulls up to bring the S-style middle pickup into the mix. In this mode, with the pickup selector down, you get the bridge and middle pickup, in the middle you get all three pickups, and in the up position you get the neck and middle pickups. (More on mid-pickup tones in a minute.)
The P-90s are pretty hot, with a lot of punch and zing. In fact, the bridge pickup’s leanness and the neck pickup’s gristliness sometimes evoke Gibson P-100s.
With the JZ FRO routed through a Celestion Ruby-outfitted 6973-powered combo set to a bit of grind, I loved the bridge pickup’s tough airiness. There’s a detailed, vintage-esque character, and it gets toothier as you pair it with a boost or dirt pedal to drive an amp hard. Compared to the vintage-spec Curtis Novak P-90s in my Les Paul Special, the Vola’s bridge pickup is a little less warm and brawny, but also probably a bit more malleable and adaptable to different genres, especially if you’ve got a lot of effects in your signal path. The neck pickup is similarly powerful, though its contrasts with a traditionally voiced P-90 feel less apparent.
How about that middle pickup? Paired with the bridge unit, it yields funky, Strat-like quack—a tone you’re not going to get with most dual P-90 guitars. Accent them with a wiggle of the super smooth-operating Gotoh trem, and the Strat allusion is even stronger. Mind you, all this tone variation is available beforeyou activate the tone-circuit bypass. It acts like a powerful onboard boost: Everything is louder, hotter, and leaner.The Verdict
Vola deserves big kudos for packing so many unique features into a guitar that feels and plays this nicely at such a reasonable price. The novel tone-circuit bypass could help you cut through a dense mix or boost your solo even when you’re away from your pedalboard. That said, in some positions I found it sounded a little strident or hi-fi, and the fact that the circuit-bypass mode renders the volume knob useless makes it something of an all-or-nothing proposition. The added middle pickup expands tonal possibilities beyond P-90 norms, but don’t expect the same type of added clarity you’d get from a Strat’s middle pickup. Even so, the JZ FRO’s exceptionally smooth performing hardware and excellent craftsmanship make playing a breeze and a pleasure, and its VFP90 pickups pack a mix of power, clarity, and flexibility that make it a great choice for biting rock and thick, bristling blues tones.
There’s no disputing the influence B.B. King has had on the history of electric guitar music. We’re talking about his sound, his best records, his guitars, his showmanship, and his collabs, from an all-star jam at the 2010 Crossroads festival to, yes, even his 1988 U2 collab, “When Love Comes to Town.”
There’s no disputing the influence B.B. King has had on the history of electric guitar music.
With Lucille in hand—as well as other guitars—he carved out his sound by developing a signature one-of-a-kind vibrato and pick attack. His note choice, phrasing, and feel have basically become the fundamental vocabulary of electric blues. Even more than any other of his blues peers, his playing shaped blues and rock guitar. And that’s not to mention his singing.
So, on this episode of 100 Guitarists, we’re celebrating the King. We’re talking about his sound, his best records, his guitars, his showmanship, and his collabs, from an all-star jam at the 2010 Crossroads festival to, yes, even his 1988 U2 collab, “When Love Comes to Town.”
In our current listening segment, we’re talking about Brian John McBrearty’s recent meditation-jazz release Remembering Repeating and Julian Lage’s latest, Apple Music Nashville Sessions.
This episode is sponsored by Gibson.
Tighten up your rhythm playing by focusing on how to get a great sound, balancing your wrist and elbow, and understanding how to subdivide rhythms.