
Photo 1 — courtesy of singlecoil.com
If you tinker with guitars, you'll encounter many types of wire inside the control cavities, as well as a wide selection of related tools. It really pays to understand the properties of different types of wire and how to work with each one of them—especially if you want the best results from your DIY efforts. We began our informal series on wire by discussing tools and exploring cloth-covered wire—the product that started it all in the '50s. (If you missed this, check out “Working with Wire.")
Now let's examine what's lurking inside most modern production instruments and amps: plastic-coated wire. Typically only vintage-flavored reissues use cloth and braided wire today, while boutique builders usually use high-grade audiophile products, such as Teflon-coated silver wire. Everything else features plastic-coated wire, with polyvinyl chloride (PVC) being the most common form of insulation. Why?
• It's cheap and available in a variety of types, diameters, and colors.
• It's easy and fast to strip, lay out, and work with.
• Modern PVC insulation is extremely stable and will last a very long time.
I suspect few companies consider resistance and capacitance—and therefore “tone'—when selecting wire for their products. A common argument is that a wire has no sonic influence in a guitar, and even if it theoretically did, the actual length of the wire used in an electric guitar is too short to make any noticeable difference.
Hmmm ... have you ever measured the total length of all wire inside a Stratocaster? I have several times, and it's almost three meters, or approximately 9.8 feet. And that's before you add in the wire leading from the three pickups. I don't consider this “too short" or a factor to ignore, but we'll take that up another time.
Plastic-coated wire has been available since the mid '60s. Gibson started using it for guitars in 1966, followed by Fender around 1968. The story goes that Fender had large quantities of cloth-wire spools on their shelves that they'd purchased at discount, so when CBS bought Fender in February 1965, the company elected to use up this supply before they switched to more modern plastic-coated wire.
Today, plastic-coated wire comes in seemingly limitless variations. Here's some background on the types you're likely to use in guitar projects, as well as their pros and cons.
Stranded wire. This is available in standard untinned or pre-tinned (aka “pre-bond") versions, and the strands are usually made of copper. Unlike cloth-covered wire, you can't simply assume the less strands it has, the more flexible and bendable it will be—or vice versa. Depending on the overall construction of the wire, it's possible that the more super-fine strands it has, the more flexible it is. This is something you have to experiment with until you find a type you like. You'll have to twist and pre-tin the ends of untinned wire before you can solder it, whereas pre-tinned wire is ready to solder. On a big project, the latter can save a lot of time.
Solid-core wire. This is also available in pre-tinned and untinned versions. One advantage of solid-core wire is that it stays exactly where you lay it. But its bending radius is not infinite, which means the wire can break if you bend it too much. Solid-core wire is ideal for using in small electronic compartments where space is a consideration.
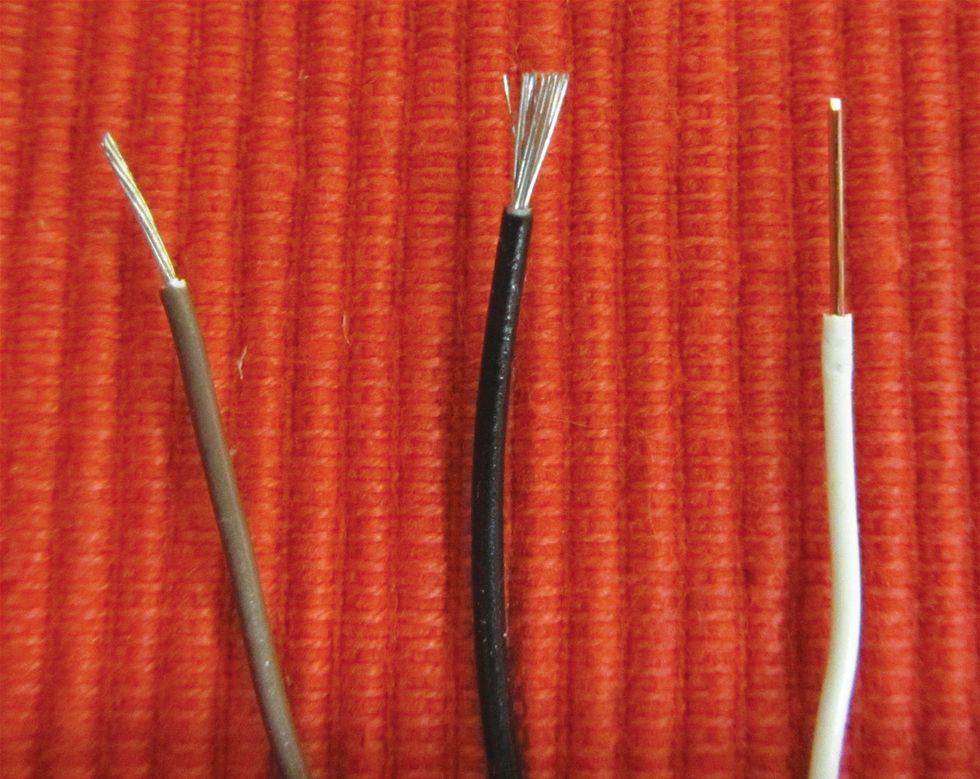
Photo 1 shows three types of wire (from left to right): tinned stranded, untinned stranded, and solid-core.
Diving into wire specs. Wire diameter is usually specified in AWG (American wire gauge), a spec that's widely used in the metric world today, as well. [Editor's note: In AWG spec, the larger the number, the smaller the diameter. For example, 22-gauge wire is considerably smaller than 12-gauge wire.] Stranded wire is usually included in the spec. For example, 22/7AWG or AWG22/7 means the wire has a diameter of 22AWG and there are seven individual strands inside. If a manufacturer is more specific in its description of a stranded wire, it can look like this: 22AWG 7/30. This means the wire has a diameter of 22AWG with seven individual 30AWG strands inside. If you only see AWG22 in the description, it usually means it's a solid-core wire, but it can also be a careless or incomplete description of a stranded wire, so be sure to confirm this.
Guitar companies typically use a stranded AWG22 wire. Generally, the wire's diameter isn't sonically significant inside a passive guitar (though it does have bearing inside an active circuit). Selecting wire diameter is more a matter of considering available space and taking into account how tricky the wiring might be. Heavier wires are usually easier to work with, but depending on their stiffness, they can be more difficult to route. So if you need to place a lot of wire inside a small Telecaster cavity, a thinner wire can make it much easier to complete your project without going insane.
It's always a good idea to have different gauges in different colors at hand, preferably in both stranded and solid-core versions. You can buy wire very inexpensively in small rings or in complete spools. Either way, you won't have to break the bank.
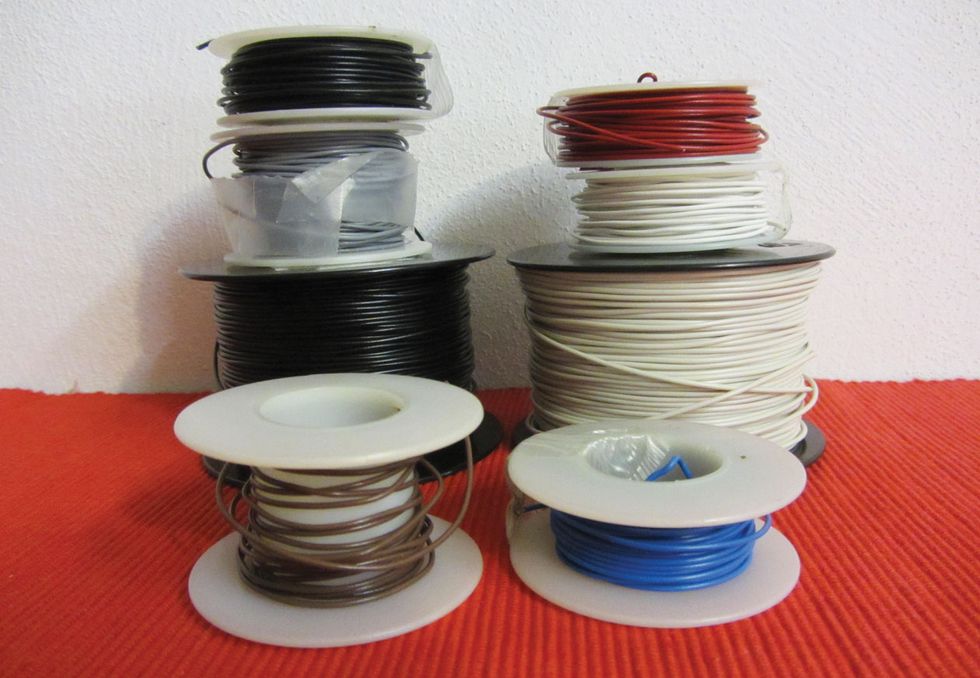
Photo 2 — courtesy of singlecoil.com
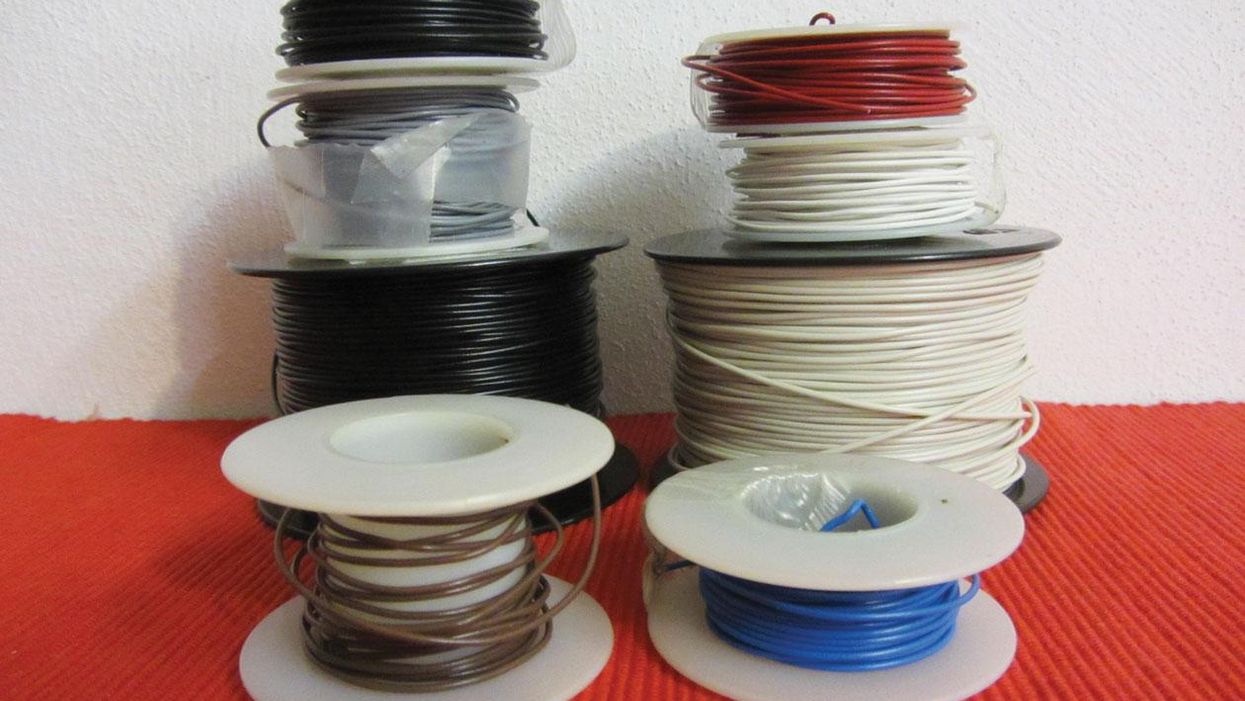
In our shop we use bigger spools of AWG22/16 stranded wire in black and vintage white, and smaller rings of the same wire in colors like red, blue, and green (Photo 2). We do the same with solid-core wire. For smaller compartments and control cavities, we also stock stranded and solid-core wire in AWG24/16. These are very useful gauges, and I recommend them for wiring guitars and basses.
There's a lot of discussion about what sounds best—stranded or solid-core wire. Many audiophiles swear that solid-core sounds superior. If you get bored, do a Google search for “skin effect," which is the typical audiophile argument. Then forget about what you read because the skin effect happens with stranded and solid wire. Besides, the power loss at the heart of this debate is too small to identify in a real-world audio system, and occurs at a frequency that's too high for humans to hear. Once you get down to frequencies within the range of human hearing, any power loss due to skin effect is virtually zero in common copper wire. But this debate still rages on in the audiophile world and probably always will.
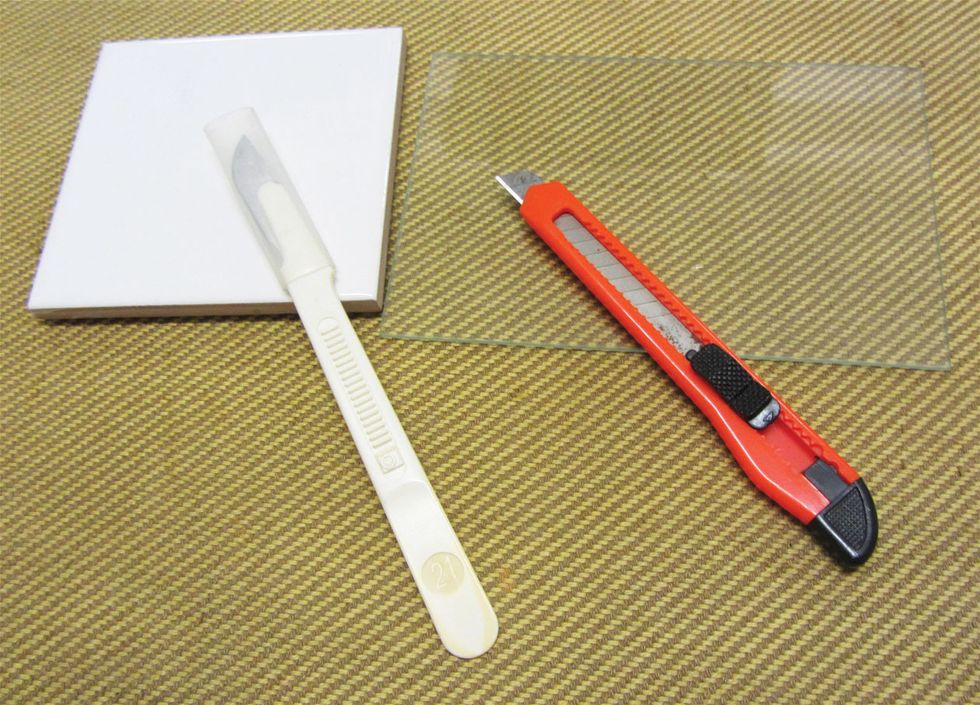
Photo 3 — courtesy of singlecoil.com
Tools for plastic-coated wire. If you only want the basics, you don't need much beyond the tools we mentioned in the previous column about cloth-covered wire. For stripping plastic-coated wire, I suggest getting a small snap blade utility knife from your local home improvement store or a scalpel on eBay. Personally, I prefer X-Acto's #18 blade shape, but many other blade shapes work well for removing the wire's insulation. You'll also need an underlay with a very smooth surface, such as a piece of glass, a tile, or a small mirror (Photo 3). I prefer a piece of glass or a smooth tile with rubber feet glued to the bottom.
That's basically all you need to strip plastic-coated wire, but if you want a dedicated device, there are both manual and self-adjusting stripping tools, special wire strippers for fine-gauged or solid-core wires, and much more. You can see some of these in Photo 4.
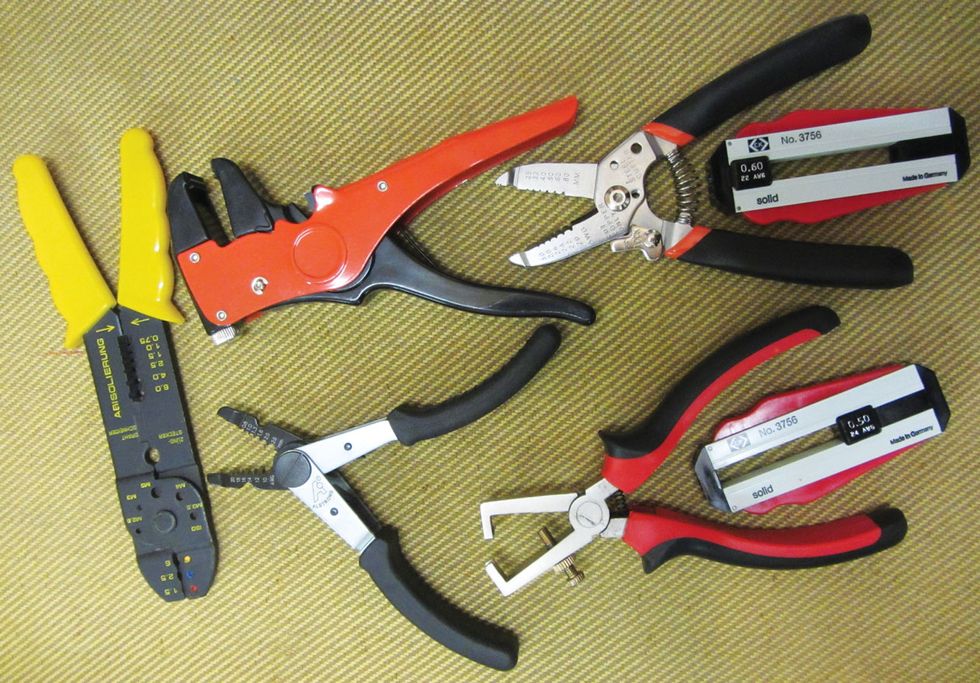
Photo 4 — courtesy of singlecoil.com
Roll with it! As far as stripping the wire manually with a blade, here's the basic procedure that works with all kinds of plastic-coated wire, whether it's stranded or solid-core, pre-tinned or not.
(1) Cut the wire to length and place it on your smooth underlay, holding it down with your index finger.
(2) Determine how much length of plastic insulation you want to remove from the end of the wire. With your utility knife or scalpel, carefully (!) cut into the insulation (Photo 5). You want to avoid cutting into the wire itself. This requires lots of practice. When you've cut through the exposed insulation, roll the wire toward you with your index finger to reveal fresh insulation and cut again. The underlay's smooth surface will help you to roll the wire.
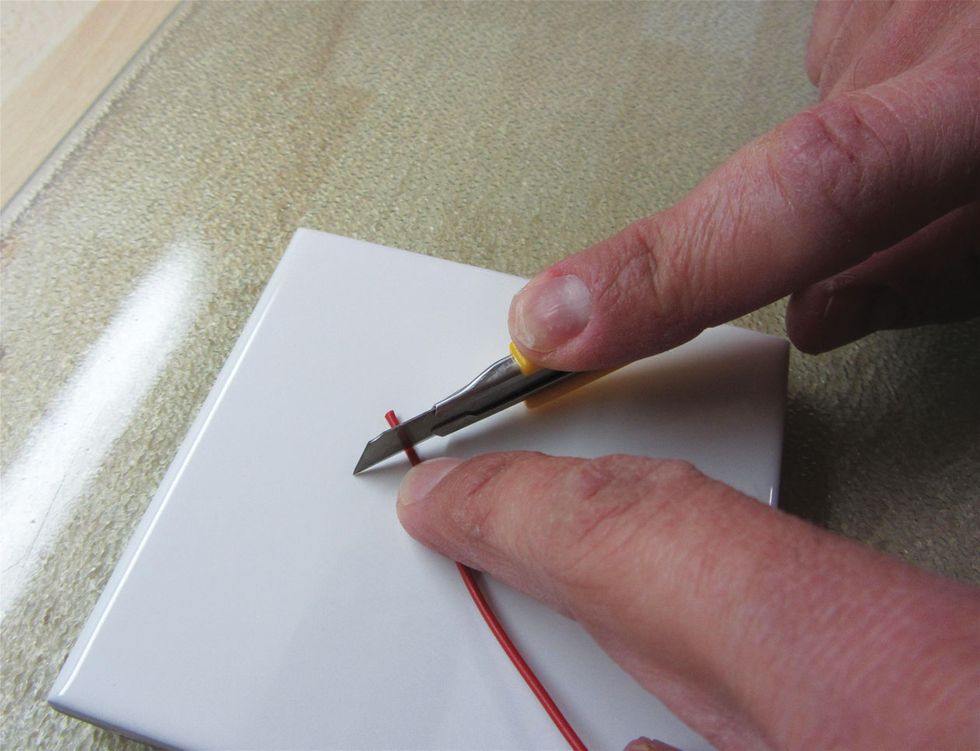
Photo 5 — courtesy of singlecoil.com
Repeat this process until you've scribed a complete circle through the insulation and you can pull this small “sleeve" away with your fingers. With practice, you can do this with a flowing motion and strip a wire in seconds.
(3) Now you'll need to prep the wire. Untinned stranded wire has to be twisted and pre-tinned; untinned solid-core wire only needs to be pre-tinned. You can skip this step when you use pre-tinned wires.
And that's it—you're ready to begin soldering.
More lore. A downside to the common PVC insulation used on plastic-coated wire is that it melts easily when you touch it with the soldering iron. It also stinks when you melt it! If the insulation is melted down to the strands or core—something I often see inside guitars—this can create accidental shorts or related issues. So, when wielding that soldering iron, work quickly and carefully. (We'll revisit this topic when we explore Teflon-insulated wire in a future column.)
To ensure long-term trouble-free operation, be sure to buy good quality wire. Avoid crappy, super-cheap plastic-coated wire. It typically has only three or four fragile strands that will easily break in a short time.
And stay away from new-old-stock (NOS) plastic-coated wire from the '60s. Yes, it's vintage, but that doesn't make it good. In the early days of plastic-coated wire, the chemical formula for the insulation was far from perfect. The plasticizers used back then (phthalates, mostly DEHP) evaporate over time, causing the wire to first get very stiff and then break, and UV light and high temperatures speed up this deterioration. I often see this problem inside vintage guitars from the '60s and early '70s.
We'll tackle another guitar project next time, so stay tuned. Until then ... keep on modding!