
For years, modders have emailed my shop inquiring about the kinds of wire you use inside a guitar or bass, and the tools and procedures we recommend for wiring up an electric instrument. So I figure it's time to start an occasional series on this subject.
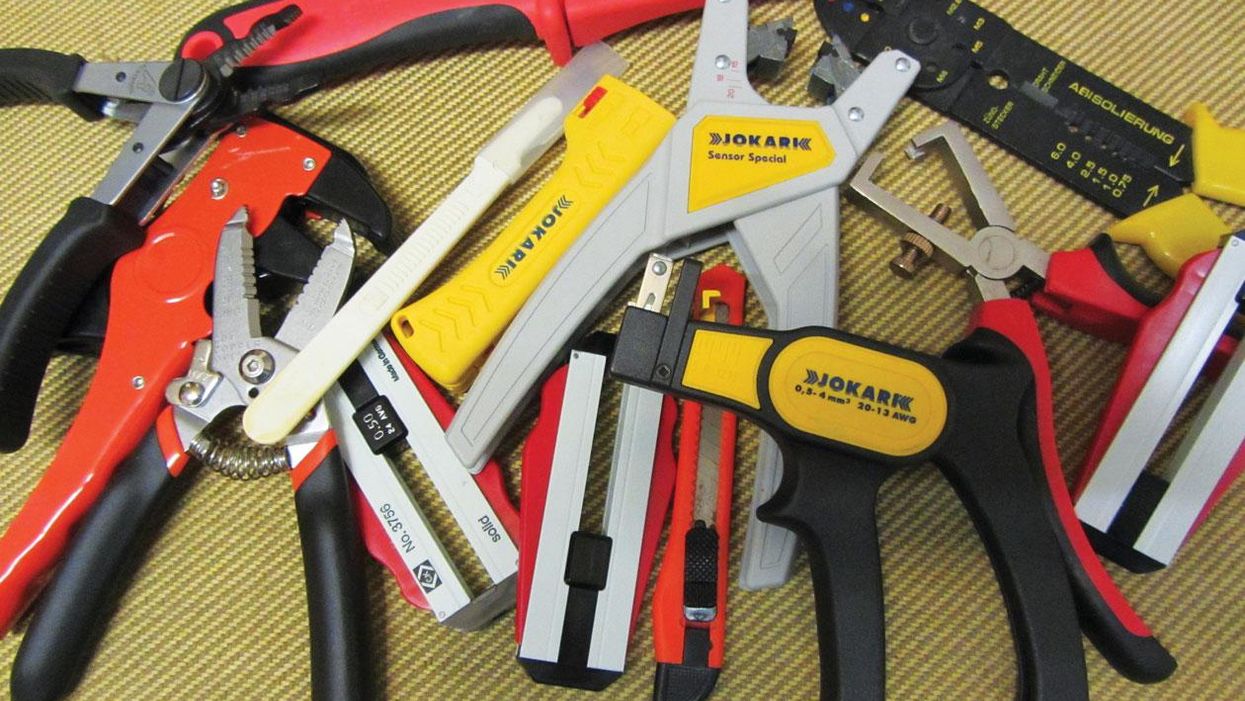
You can buy countless tools, gadgets, and gizmos for working with different types of wire (Photo 1). These include what you'll find at your local home-improvement store or on eBay, as well as the specialized tools sold by luthier suppliers. The price tags for wiring tools range from very cheap to almost insane. Don't get me wrong, I love good tools—it's a joy to work with them—but you need to be realistic.
There's a difference between doing this for a living every day and using a particular tool once a year. If you're a tool collector, lover, hoarder, or fetishist, I say go for it! Same if you are a luthier, or guitar or amp tech, who's working with different kinds of wires on a daily basis. But if you're on a budget or prefer to splurge on other things, you don't have to spend a lot to get the job done.
With that in mind, we'll discuss the different types and categories of wire used inside guitars and basses, and the tools pros use to work with these wires. But I'll also describe alternatives for your personal toolbox that won't break the bank.
Before we start exploring wire itself, let's look at what you need in the way of tools. Fortunately, it's not much (Photo 2). Chances are good you already have most of these items, if not all of them, but it's good to take a moment to review.
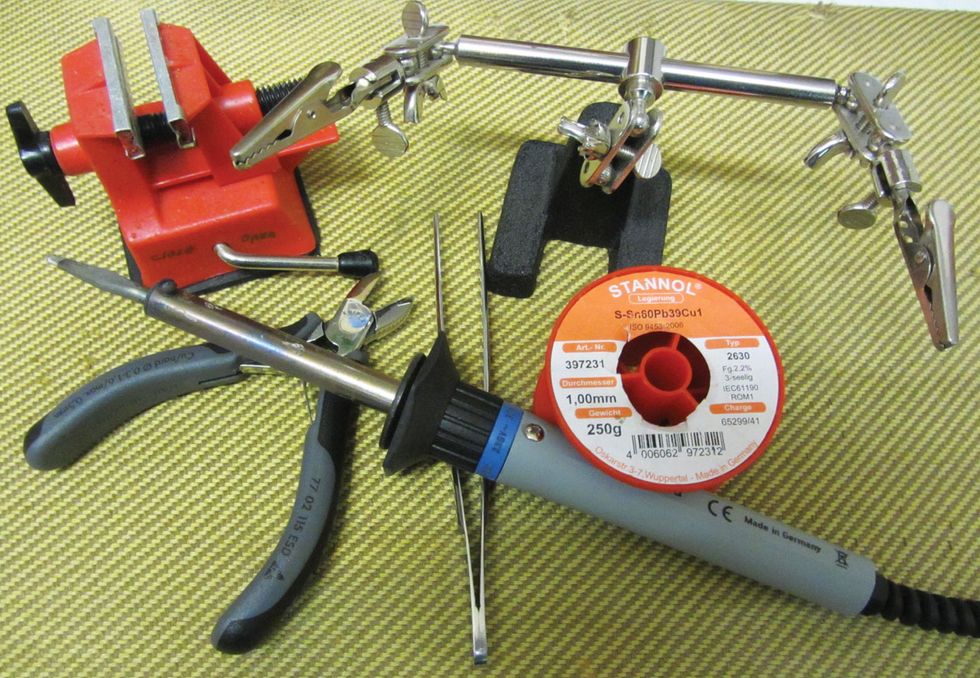
Photo 2
Soldering iron and solder. For working with guitar wiring, all you need is a 30-watt handheld soldering iron, preferably with a chisel tip. No high-tech digital soldering station required. Get some 60/40 (tin/lead) rosin core solder or the more modern lead-free electronic solder (which avoids the health hazards associated with lead), and you're ready to start. Stay away from plumbing or paste flux solder you might find in dad's garage. It has an acid core that will damage your wiring and guitar. If you want to go pro, get a soldering station with a temperature control and changeable tips.
“Third hand" or mini vise. These little tools are perfect for holding your wire absolutely still when soldering, and also help prevent you from burning your workbench or fingers. If you want the pro solution, so-called “octopus" tools are brilliant. They're available from various companies, and stewmac.com sells a guitar-specific version called the Solder Monster.
Wire cutter. For this task, any hobby-grade cutter will do, but if you want a super-sharp, high-tech model, your choices are almost unlimited.
Tweezers. You don't want to burn your fingers when holding a wire in place while soldering, right? You can buy great metal tweezers on eBay for cheap. Or, for more money, consider a high-quality, clamping hemostat designed for surgical purposes.
That's it! The list isn't too long, and you don't have to spend big bucks to get started. (For a tutorial on soldering basics, read “Soldering 101: A Step-by-Step Guide.")
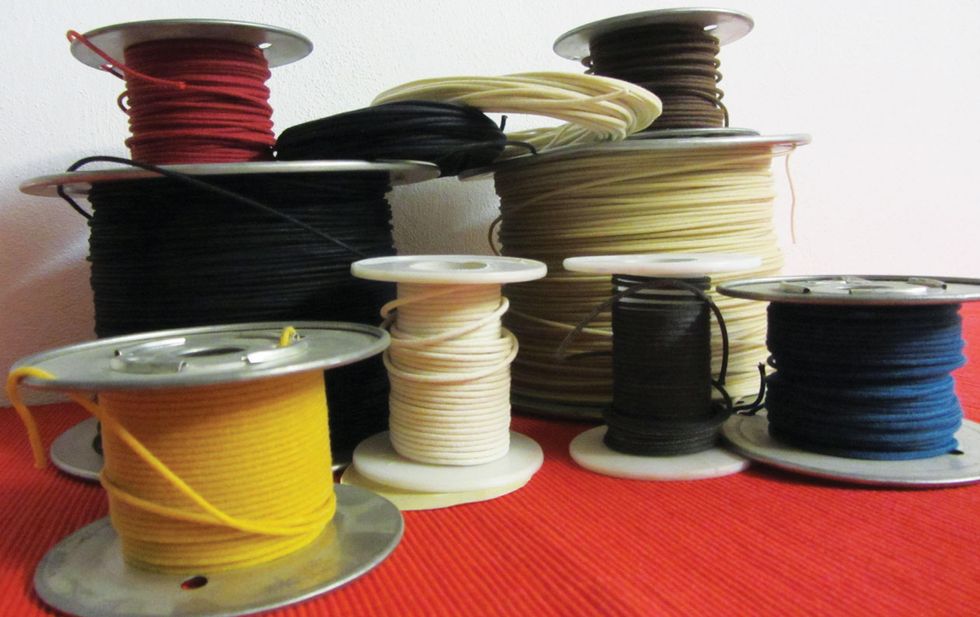
Photo 3
Cloth-Covered Wire. We'll begin with the wire that started it all in the '50s. It was used by Fender, Gibson, and everybody else until the late '60s, when manufacturers switched over to plastic-coated wire. This 22 AWG vintage wire consisted of seven individually tinned and twisted copper strands enclosed in a woven Celanese overwrap and then sheathed in a braided waxed-cotton jacket. This wire is still available from several companies and comes in many colors (Photo 3). In addition to the seven-strand version that's very close to the original wire, you can get wire with fewer or more strands, as well as a tinned, solid-core version (Photo 4). Also, you can buy cloth-covered wire with untinned strands. Each of these variants have their pros and cons, so let's break it down.
• Tinned strands. With this wire, which is like the original vintage wire, you don't have to pre-tin each end before you solder it. This is a time-saver.
• Untinned strands. You'll have to pre-tin each end before you can solder it to your connection. Some audiophiles say that untinned wire sounds better in comparison to the otherwise identical tinned version.
• The fewer strands the wire has, the more flexible and bendable it is, and vice versa.
• Tinned solid core. You don't have to pre-tin each end before you start soldering. Solid-core wire stays exactly where you position it—which makes it a perfect solution for small control cavities, such as in a Telecaster—but its bending radius isn't infinite and the wire can break.
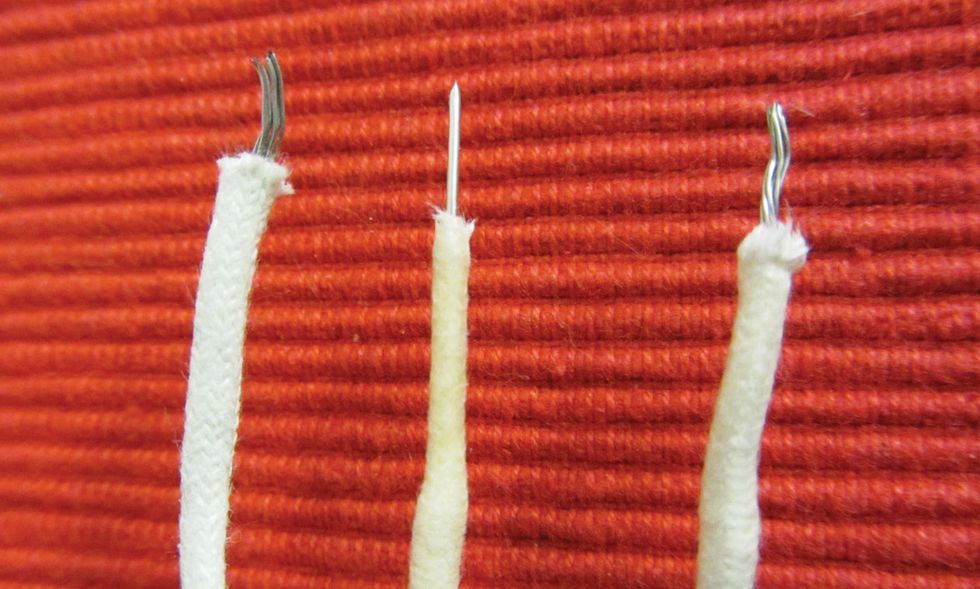
Photo 4
Because stranded and solid-core wire behave differently when you lay them out, it's a good idea to have both types on hand when you plan to use cloth-covered wire in a guitar project.
There's a lot of debate about which type sounds best. I always go with the “close to the original" version when a customer wants vintage-spec wiring. When space is an issue or I'm facing a challenging layout, I use solid-core wire. I save the untinned version for when customers actually request it. Wire is cheap, so why not try them all and see what you like best? Cloth-covered wire is available from almost any luthier or amp-building supplier and, of course, from antique radio stores. You can purchase it in 5' or 10' lengths, or if you want to buy a full spool, they typically come in small (50') or large (1,000') sizes.
And now the best thing about cloth-covered wire: Other than a cutter and soldering iron, you don't need any special tools to work with it. You can guess why this is also called “push-back" wire. Simply slide back the cloth cover at each end to expose the bare wire, and you're ready to start soldering. Isn't that easy? This helps explain the success and longevity of cloth-covered wire. No other wire is as easy to use.
Now, two more tidbits: If you want to make push-back wire look old—relic'd wire, it's a thing—it's easy to age the cloth cover with amber dye and ashes from the nearest fireplace. And if you want to add some shielding, gently twist two cloth wires together as they extend from point A to point B—for example, on the two wires leading to the output jack or from a pickup to a control. Note: This will also result in a slightly mellower tone.
In general, cloth-covered wire is not considered an audiophile product. Due to its construction and capacitance, it has an inherent tone that can be described as rich and detailed, but without excessive high end. This wire contributes to classic guitar tone, so if that's what you're after ... well, now you know what to get.
We'll soon return to the topic of wire, but next time, we'll dive into another guitar project, so stay tuned. Until then ... keep on modding!


![Rig Rundown: Russian Circles’ Mike Sullivan [2025]](https://www.premierguitar.com/media-library/youtube.jpg?id=62303631&width=1245&height=700&quality=70&coordinates=0%2C0%2C0%2C0)