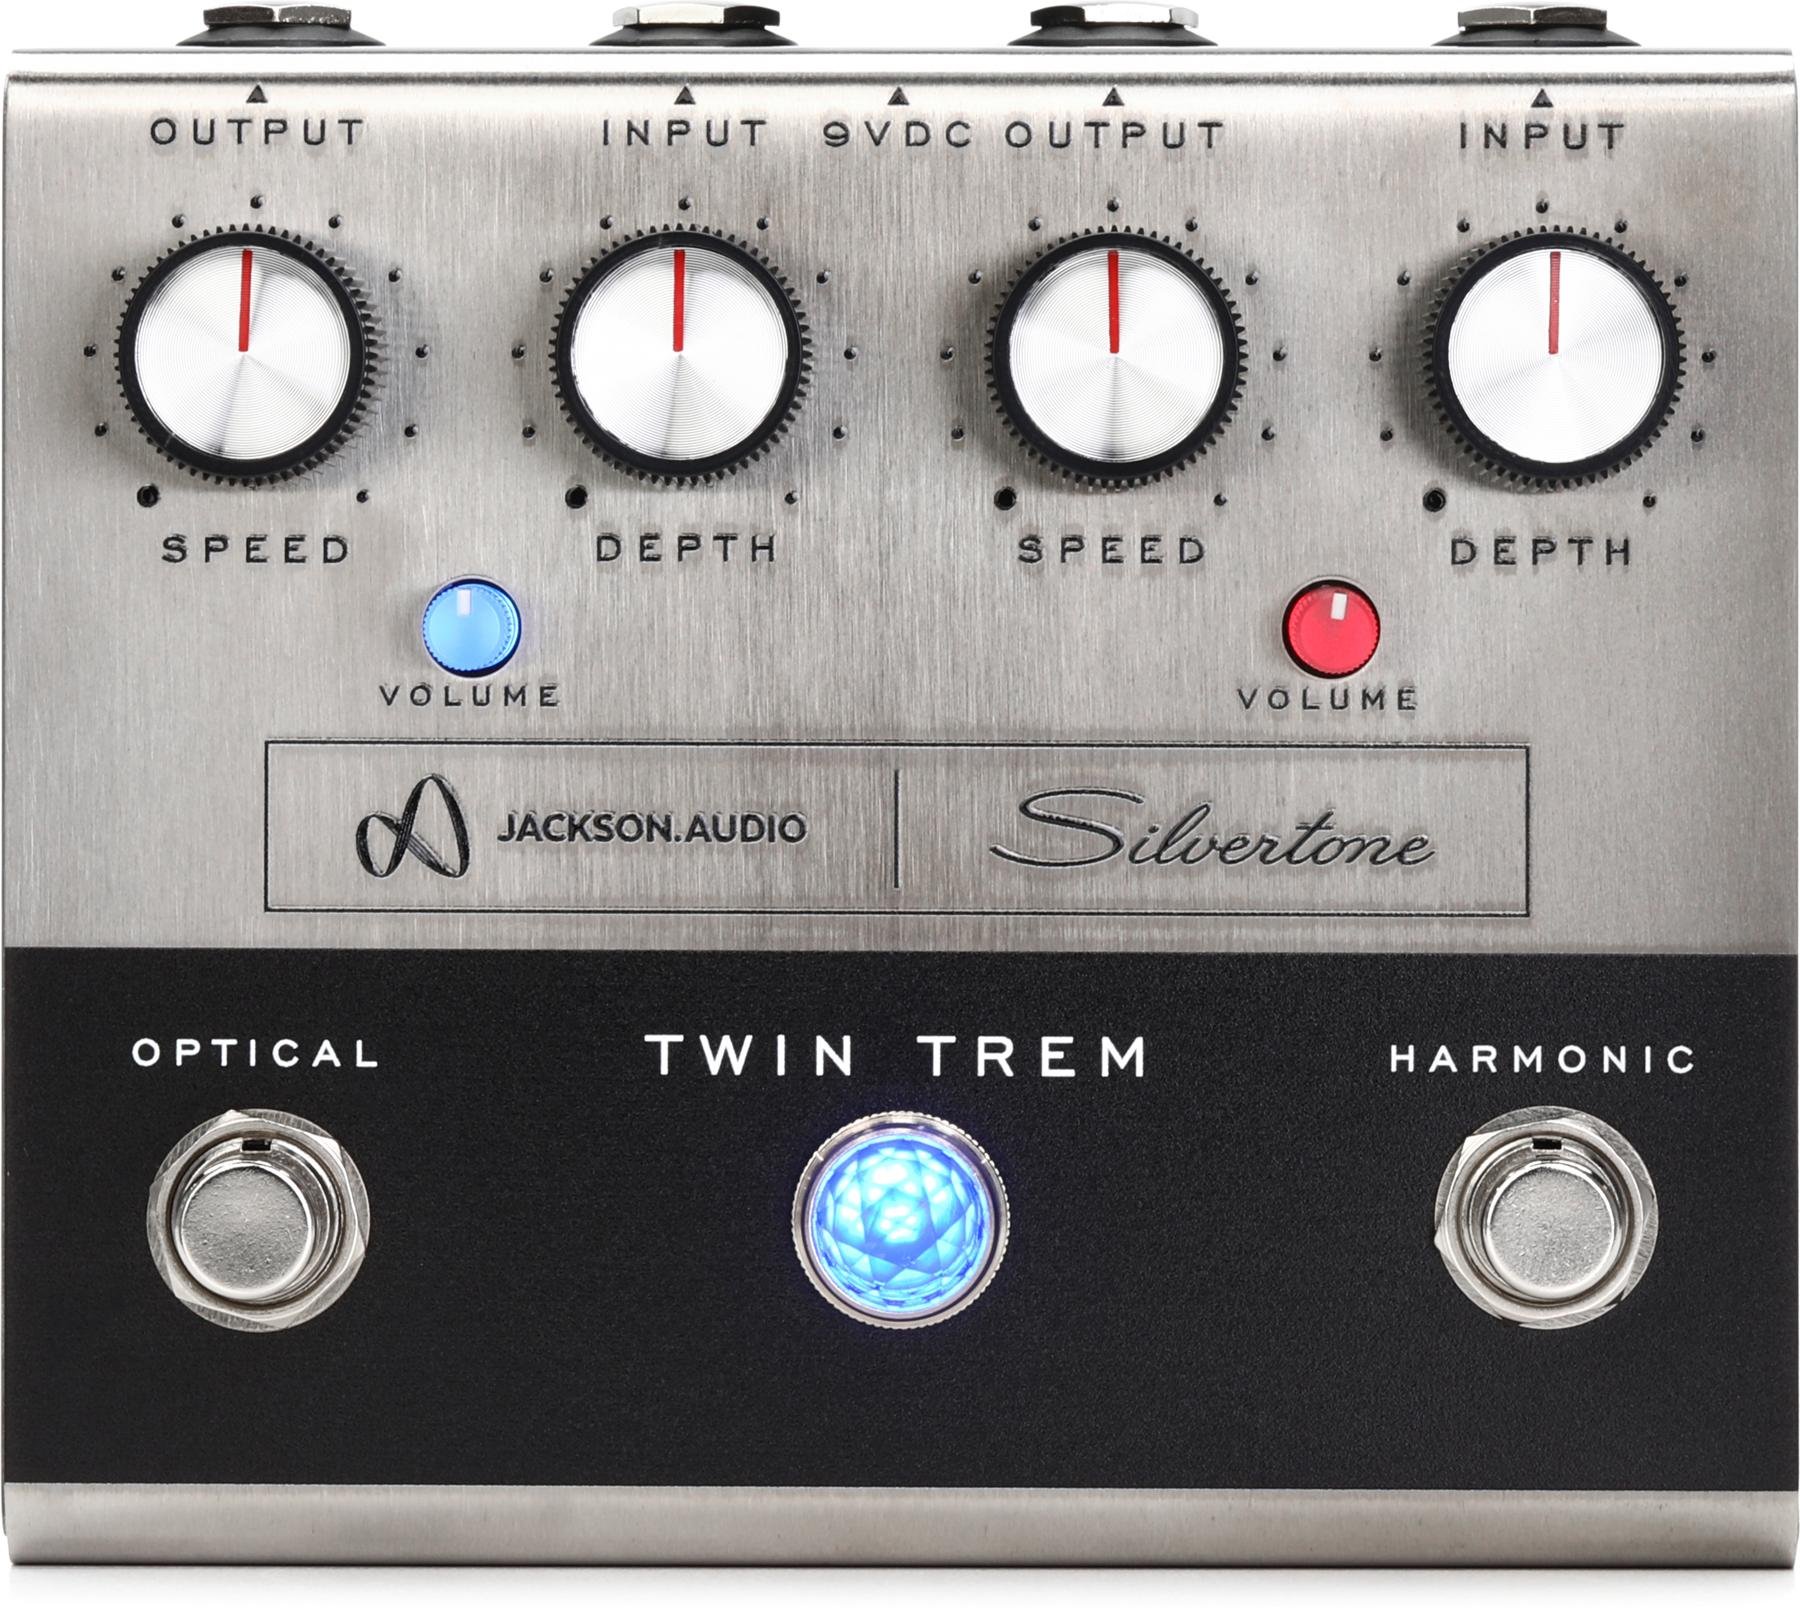
Excellent optical and harmonic tremolo circuits—and the ability to blend them to wild, woozy effect—distinguish this modulation collaboration.
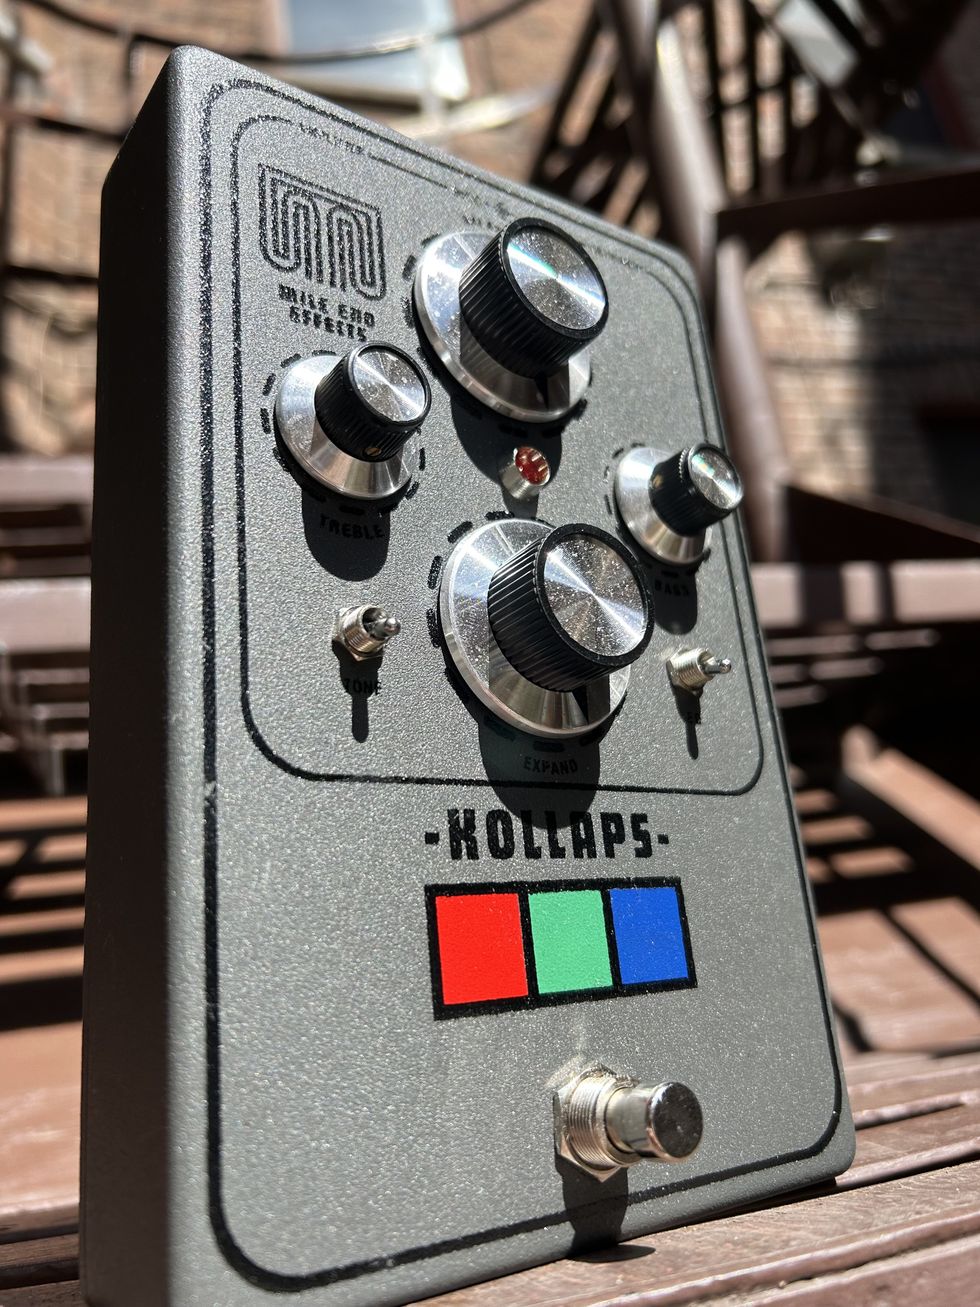
On the right, the Harmonic Trem (RED) delivers lush, swirling modulations, while the Optical Trem (BLUE) on the left provides smooth, traditional waves. Use them independently or combine them (MAGENTA) to create a layered, percussive sound that opens up new dimensions in your music. Both tremolos feature independent Speed, Depth, and Volume controls, giving you freedom to dial in each effect to your taste. Fully analog and crafted with precision, the Twin Trem blends history and innovation.
- Jackson Audio The Optimist Review ›
- Jackson Audio Broken Arrow Review ›
- Jackson Audio New Wave Review ›
EarthQuaker Devices introduces Gary, a versatile fuzz and overdrive pedal designed by Lee Kiernan of Idles.
Gary started as a simple request to create a compact version of the now discontinued Gray Channel, which was a mainstay on Lee’s board and a big part of his main drive tone. This was all fine and good, and sounded quite sick, but Gary was demanding that we look deeper and explore his dark side a little more, Gary after dark, Saturday night Gary. So, we sat him down and began the trek of figuring old Gare-Bear out once and for all. The result is a real exercise in light and dark; smooth to shredded and everything in between.
Gary’s right brain consists of a dynamic and destructive fuzz that is both domineering and interactive. It is a ripping fuzz tone with an envelope-controlled variable pulse width and enough volume to blow everything up. This nasty little fuzz turns the signal into a square wave and allows you to dynamically adjust the duty cycle with pick attack. Yes! Controls the sensitivity of the envelope. When this is all the way down you will get an unadulterated thick and heavy square wave fuzz tone that will sustain for days and go dead quiet when you stop playing. As you increase the Yes! control, the envelope becomes more interactive, and the pulse width narrows the harder you hit it. As the pulse width narrows, the tone becomes more nasal and biting until it gets so narrow that Gary goes to his dark place and disappears completely. In other words, with higher sensitivity settings, the sound will disappear entirely and come cruising back to Gary’s big guy tone. With proper playing dynamics, this creates a very cool effect that can sound like an exploding amp coming in and out of life, blown through a phase shifter.
This effect can also be controlled with an expression pedal for manual operation or for finding just the right pulse width to cut through the mix for a set-and-forget operation. When using an expression pedal, Yes! operates in conjunction with the expression pedal to set the peak of the sweep. Set Yes! to the desired stopping point and express yourself as you please without worry of taking Gary over the edge!
Oosh acts as the master volume for Gary’s nasty side. There is an insane amount of volume on tap so use this control wisely!
Gary’s left brain displays his softer side. This is a simple and natural sounding overdrive that keeps your tone lively and drives your amp crazy. This side is based on the green channel of our Gray Channel, which is our take on the classic little yellow overdrive that started it all for us. Lee used this pedal with the clipping switch permanently set to the middle position, which removes all the diodes from the circuit, producing a full-bodied, cutting opamp distortion with plenty of volume on tap. We have reproduced that tone here with exacting precision. Go sets the opamp drive and can range from a simple full-range clean boost all the way up to a smooth and natural distortion. In conjunction with That’s It, which is the master volume for the drive side, you can use Gary’s softer side as a clean boost to push your amp into overdrive or turn up Go and use all of Gary’s internal magic to create the finely tuned dirt you desire.
Gary’s signal path is fuzz into overdrive for total tonal integrity and cannot be changed. This is where Gary put his foot down, and we obliged.
Each and every Gary was softly brought to life by the delicate hands of EarthQuaker Devices in the elegantly unrefined canal-front city of Akron, Ohio USA.
USA MAP/List price: $199.00
Gary Automatic Pulse Width Modulation Fuzz and Dynamic Natural Overdrive - YouTube
Enjoy the videos and music you love, upload original content, and share it all with friends, family, and the world on YouTube.EarthQuaker Devices Gary Automatic Pulse Width Modulation Fuzz/Overdrive Pedal
Automatic Pulse Width Modulation Fuzz PedalA forward-thinking, inventive, high-quality electro-acoustic design yields balance, playability, and performance flexibility.
High-quality construction. Flexible, responsive, and detailed-sounding pickup/mic system. Lots of bass resonance without feedback or mud.
Handsome, understated design may still estrange traditionalists.
$1,599
L.R. Baggs AEG-1
lrbaggs.com
Though acoustic amplification has improved by leaps, bounds, and light years, the challenges of making a flattop loud remain … challenging. L.R. Baggs has played no small part in improving the state of acoustic amplification, primarily via ultra-reliable pickups like the Anthem, Lyric, andHiFi Duet microphone and microphone/under-saddle systems, the overachieving, inexpensive Element Active System, and theM1 andM80 magnetic soundhole pickups—all of which have become industry standards to one degree or another.
Lloyd Baggs got his start building guitars for the likes of Jackson Brown, Ry Cooder, Janis Ian, and Graham Nash. So he can tell you that building a good guitar from the ground up is no mean feat. Enter the AEG-1, L.R. Baggs’ first flattop—a unique thin-hollowbody design that leverages the company’s copious experience with transducers of every kind to create a successful, holistically functional instrument. In some ways, it feels like an instrument built to match a great pickup system—a cool way to consider guitar design if you think about it.
Gentle Deconstruction
Admittedly, I’m a flattop design traditionalist—that jerk that thinks any acoustic sketched out after 1962 looks a bit yucky. So, the AEG-1’s looks were a bit jarring out of the case. That didn’t last. Though it’s very shallow and soft curves sometimes evoked a swimming pool outline, that of a nice Scandinavian coffee table, and Gibson’s L6-S (these are highly positive associations in my opinion), the lovely body contours and shallow cutaway have a slimming effect and give the guitar a sense of forward lean at the aft end—almost like a sprinkle of Fender Jaguar. The more you stare at it, the more it looks like a very artful deconstruction of a dreadnought shape, and a very natural one at that.
The construction itself is unique, too. The sides are CDC-machined poplar ply, oriented so you see the laminate in cross-section. The top is a very pretty torrefied Sitka spruce, which is braced in a traditional scalloped X pattern. The sides are also braced with arms that radiate toward the waist and heel at 120 degrees from each other, reinforcing the soundhole and the substantial neck heel. The back is critical to the AEG-1’s tone makeup, too. Rather than a merely ornamental bit of plywood, it’s a lovely Indian rosewood that vibrates freely, enhancing resonance and the many organic facets of the AEG-1’s tone spectrum.
The 25.625"-scale mahogany neck is mated to the body by way of four substantial bolts and an equally substantial contoured heel and heel block. Sturdy, perhaps, undersells the secure feel of the neck/body union. In hand, the slim-C neck is lovely, too. The bound rosewood fretboard is beautiful, and the playability is fantastic as well. The action is snappy and fast, the 1.7" nut width is comfy and spacious. And, in general, the build quality of the Korea-made AEG-1 is excellent.
Resonant With Room To Roam
With the exception of country blues players—and guitarists like Blake Mills andMadison Cunningham, who dabble in rubber bridges to prioritize focus over breadth—most 6-stringers want a lot of resonance from their instruments. The AEG-1 resonates beautifully, particularly for a thin-bodied guitar. And the HiFi Duet, made up of the HiFi bridge plate pickup and the company’s Silo microphone, is deep and detailed, so the output is easily reshaped by the flexible volume, tone, and mic/pickup blend controls. But the balance of the constituent parts, and the deft way with which the design sacrifices a little body resonance for string detail, is smart and satisfying to interact with.
This is especially true when you use blend settings that favor the microphone. If you get the tone control on the AEG-1, and your amp, dialed in right (I used a mid-scoop and slight bump in the treble and bass from a Taylor Circa74), the extra bass resonance is warm but without being overbearing, adding mass to tones without slathering them in mud. But you don’t have to get too precious and precise about such settings to make the guitar sound great. Working together, the HiFi Duet’s pickup/mic blend and tone controls provide the range and variation to shift bass emphasis or put sparkle to the fore. This range is helped in no small part by the guitar’s basic feedback resistance. I spent a fair bit of this evaluation playing loud, plugged into the Circa74, which was tilted toward my head at a 30-degree angle. Only when I bent down to turn the amp off, situating the guitar about a foot-and-a-half from the speaker, did the AEG-1 start to feed back.
The Verdict
Inventive, attractive in form and function, playable, and above all forgiving, full-sounding, and balanced when amplified, the AEG-1 is an unexpected treat. The HiFi Duet pickup-and-microphone system is a star. But rather than feeling like an afterthought, it feels like an integral part of the whole. And it’s the cohesiveness of this design—and the wholeness of the many sounds it creates—that makes the AEG-1 different from many stage-oriented electro-acoustic guitars
Want the world to know about your pedalboard? Got a great story to tell about it? Fill out the form below for your shot at being in Premier Guitar's March issue! Not everyone will be used, so be sure to say why your pedalboard stands out. And be sure to include good hi-res photos of your board!
Submit your pedalboard below!
Here are a few tips to get you started on your way to becoming an old-school Fender amp tech.
Back in 1995, when my journey with vintage Fender amps started, I knew little about tube amps. Over 30 years, I’ve gradually learned the hard way how to acquire, play, service, and give advice. If tube amps are to become a hobby for you, I recommend learning some basic maintenance. You’ll be better off in terms of time and money, and even more important, the knowledge about how circuits and components affect tone will give you a wider array of sounds to play with. But where should you start?
Here’s my list of relevant topics that you should be able to master with a little patience and curiosity. My goal is to get you started on your journey to becoming a Fender amp handyman. The topics are sorted by gravity, and you’ll need in-depth studies from reliable sources on each topic. On my website, fenderguru.com, I’ve tried to explain things easily for musicians, but there are many other good Fender amp resources out there.
Safety. First and foremost: There are lethal voltages inside tube amps, much higher than in transistor amps—even after powering some of them off. Learn how to discharge DC voltages before opening an amp. In my website’s buyer’s guide to vintage Fender amps, I have laid out a procedure on how to safely power off and power up these amps by inserting tubes in a specific order.
Speakers. I strongly recommend learning impedance and wiring methods and experimenting with various internal speakers and cabinets. The mathematical formula 1/Rt = 1/R1 + 1/R2 calculates the total impedance for two speakers coupled in parallel; Rt is the total impedance, and R1 and R2 are the impedances of the two speakers. Remember that all Fender amps can tolerate an impedance mismatch from -50 percent up to +100 percent.
Pots and jacks. Fixing scratchy pots is a common task for all amp owners and is usually solved by a rotating exercise that freshens up the oxidized metal surfaces inside the pots. If it’s sticky, get yourself a contact cleaner like WD-40 and spray inside the pot.
“When you get more advanced, you can calculate specific bias currents based on measured plate voltages and a specific tube’s dissipation factor.”
Reverb tank. Reverb failure is common and often explained by bad phono cables or plugs. It is easy to learn the mechanics of the reverb tank by simply unplugging everything, changing cables, and opening the reverb tank to look for detached reverb springs and broken soldering joints.
Replacing power tubes and adjusting bias. A power tube requires a correct combination of plate voltage and bias current to operate safely and at full power levels. Since there are different tubes, component drift/variation in caps and resistors, and different voltages in houses and buildings, some tube amps come with an adjustable bias pot.
You need a bias-meter tool to measure bias currents or voltages when replacing power tubes, or diagnosing an amp that lacks clean headroom or has nasty distortion. When you get more advanced, you can calculate specific bias currents based on measured plate voltages and a specific tube’s dissipation factor. Until then, a general rule is to aim for 35 mA for 6L6 amps (except for the Vibrolux, which has a higher bias current at 38 mA) and 22 mA on 6V6 amps. Use your ears, too!
Caps. Old, dried-out electrolytic capacitors should be replaced for both tone and safety’s sake. With a soldering iron, it’s very easy to replace each of the 10 to 11 caps in a black- or silver-panel Fender amp, one by one. Be careful with the polarity, and make sure to drain out all DC voltages (see “Safety,” above).
Preamp tubes. Replacing preamp tubes is easy—no bias adjustment is required. Replacing preamp tubes systematically can solve your problem or help you narrow it down. You then need to learn the function of each preamp tube and which channel they serve. If you want to modify your amp, simple tube swaps can easily change the behavior of your amp, like altering the threshold where your preamp or power amp starts breaking up.
Transformers. I rarely come upon damaged transformers, but sometimes I swap them to get a bigger and firmer bass response, or if I want different speaker impedances. By looking at the soldering job, cutting of isolation, wire lengths, and layout, I can easily spot an amateur’s work. To prevent all kinds of safety, hum, and interference problems, a transformer replacement must be done cleanly and robustly. The risks are high.
Understanding the signal chain. If you have more complex problems that tube replacement doesn’t solve, you must learn how to inspect an amp and isolate problems to various circuit functions. This will require you to learn some circuit theory and schematics. The good news is that since Fender amps are all very similar, once you learn to work on one, you can easily learn to work on them all.