To mod or not to mod? Three experts tell us what we should and shouldn’t do to our ’70s-era Fender amplifiers.
Fender’s silver-panel amplifiers have a mixed reputation. Some people will happily bend your ear about how they can’t compare to their counterparts from the tweed, black-panel, or drip-edge eras, while others will tell you they simply sound great. And some are in between—admiring the silver-panel amps for exactly the reliable, powerful, and plentiful specimens they are.
Not too long ago, you could easily find low asking prices on silver-panels of all types, earning them a designation as vintage amps for working musicians (prices have gone up, but you can still find a deal with a little effort). Yet thanks to those more affordable tags and their reputations, the years haven’t always been kind. These amps have been put through the ringer and subjected to their share of mods: everything from tweaks to increase midrange to ill-advised attempts to turn them into Marshalls and Voxes. Still, so many have survived the test of time—a testament to their durability.
“What we see today is from 50, 60 years of things becoming the industry standard. Back in the ’50s or ’60s, everything was new. They were just throwing things out there.”—George Alessandro
If you own a silver-panel model, you know that there’s a lot of subjective information floating around between the internet and our local amp-repair shop. If you’re not a tech, and you just want an amp that works well and sounds good, it can be a lot to unpack—suggestions about mods, restorations, and other tweaks can really leave your head spinning. It might seem like the easiest path is to never change anything and just fix what’s broken when it’s time to service yours, but that’s not always possible. Vintage examples of these amps have been rocking for so long that many of them are likely to need quite a bit of maintenance or have received extensive servicing over the years, and possibly not at the highest level.
So, when it comes time to fix your amp, what’s the best way to proceed? Do you restore your amp to factory spec? And will you even like the way that sounds? Considering how much time has passed, there’s a good chance it could make for a dramatic difference. And are some modifications to the circuit in order?
I’m no tech. I’m just a player who has an appreciation for these amplifiers and has owned my share of ’em. So, with all these questions in mind, I hit up a couple experts who know their way around a Fender amp in order to set the record straight on how to proceed with servicing our silver-panel amps and getting the best, most reliable tones out of them.
What’s the Deal with Silver-Panel Amps?
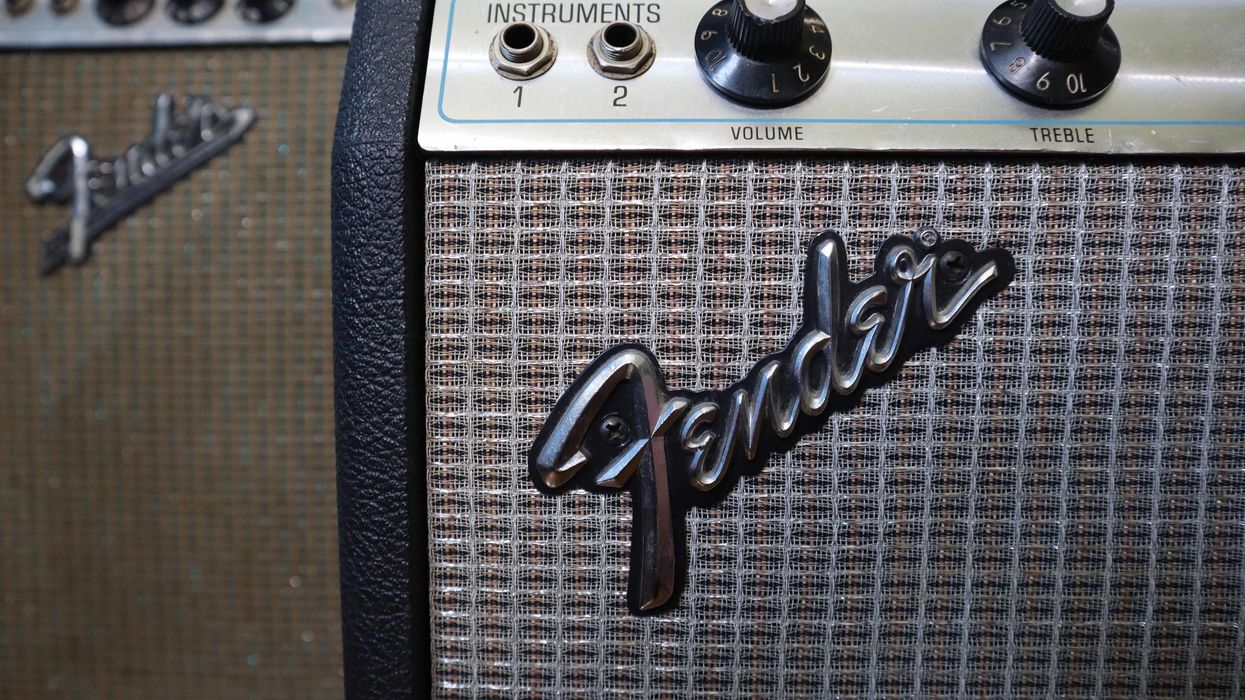
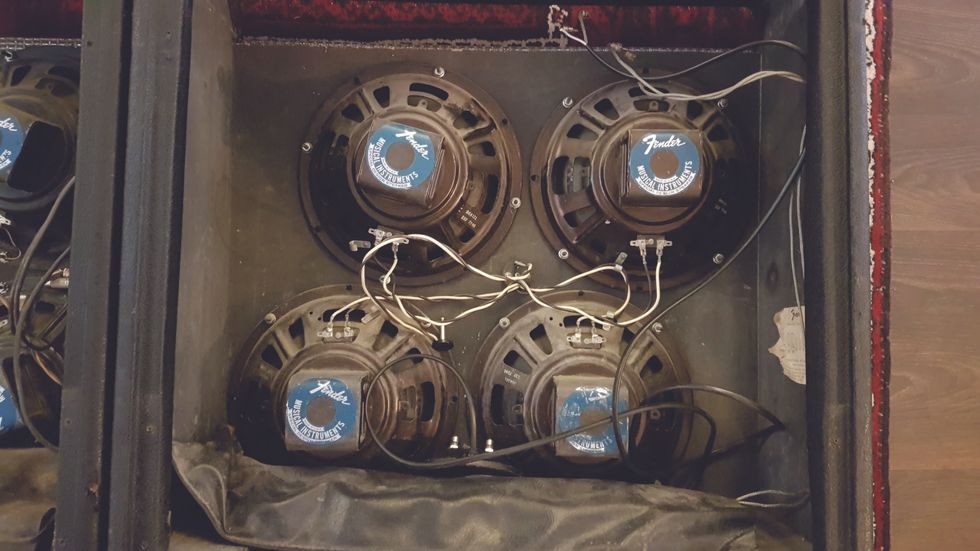
The author’s beloved 1971 Deluxe Reverb shows some wear after 51 years of heavy use. Except for a replaced speaker—now a Celestion Vintage 30—this amp is up to original spec.
Through 1965, Fender kicked out one iconic, revered amp design after another. After CBS took over, those circuits slowly changed over the course of the transitional late-’60s “drip-edge” era of amps. By the ’70s, the entire line had evolved into the silver-panels. This was Fender’s first era to really draw significant negative feedback from players. (When’s the last time you read a piece about modding a tweed Deluxe!?) One big point of criticism is that, during this phase, the company was looking for cheaper ways to build their amps—choices often blamed on the accounting department rather than their engineers—which affected everything from speaker quality to the type of wire used inside the circuits.
But there’s more to it than just skimping on parts. “They were just trying to keep up with the times,” explains George Alessandro of Alessandro High-End Products. In addition to his own amps, which are famously used by artists like Derek Trucks, Eric Clapton, and John Mayer, Alessandro also rebuilds plenty of vintage models for some of those same players. While some parts were of a lesser quality in the silver era, he points out that “Fender’s raw materials were still relatively good quality. By the ’70s, the caps were still good, the transformers were still authentic, the chassis were still right.”
“I find that the silver-panel amps, even if they are 10 years newer than the black-panel amps, are usually in much worse condition because they are stacked away in a moist basement or garage.”—Jens Mosbergvik
A big reason that silver-panel amps don’t live up to the reputation of their older siblings is that “their focus was more on getting output than tone.” Alessandro explains, “By the mid-60s, things were getting louder. PAs were just coming into play. Concerts were getting bigger. So, amplifiers had to get much larger and louder.” This eventually amounted to larger transformers in some models and other changes to boost power and bass response.
“At the time, there was no set rule,” he continues. “What we see today is from 50, 60 years of things becoming the industry standard. Back in the ’50s or ’60s, everything was new. They were just throwing things out there.”
But the lesser-than reputation of the silver-panel amps is often not exclusively about choices that Fender made back in the ’70s. It’s also about how these amps have been treated in subsequent decades. Once “pre-CBS” became a revered term, that solidified the reputation of anything Fender built before 1965, and those amps were often treated differently than the silver-panels. “The thing with silver-panel amps,” says Jens Mosbergvik, PG’s own Fender expert and author of our Silver and Black column, “is that they have been less looked after than black-panel amps because they were considered cheap amps. I find that the silver-panel amps, even if they are 10 years newer than the black-panel amps, are usually in a much worse condition because they are stacked away in a moist basement or garage.” With its lesser status, a silver-panel amp is also more likely to have been either serviced poorly or modified.
What’s in a Mod?
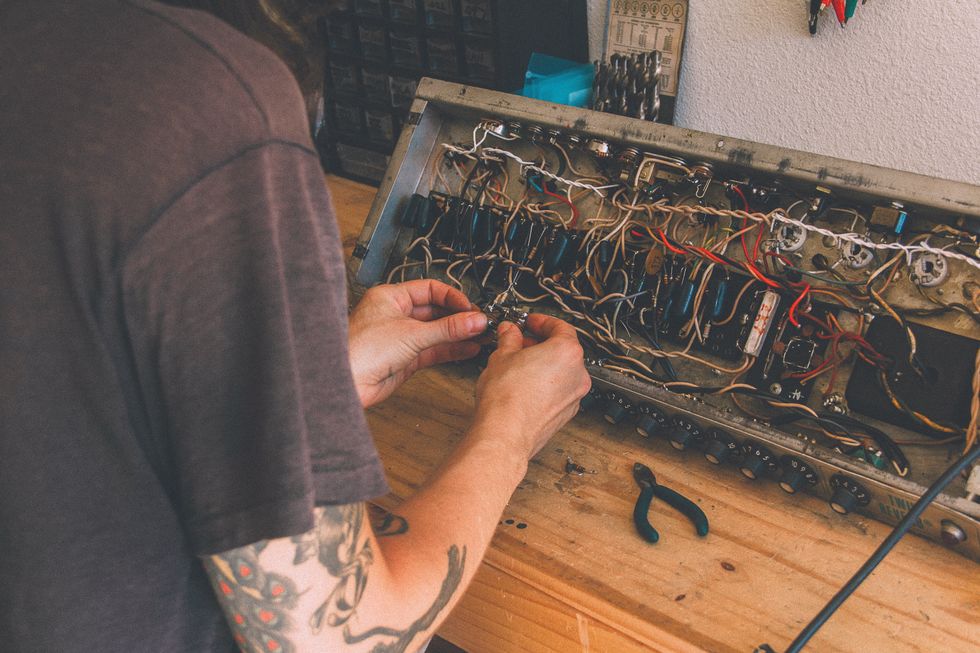
Colleen Fazio works on a silver-panel Twin Reverb. “Fender amps are so nice and so well designed,” she says, “it’s pretty easy to bring them back to stock if you want to.”
Photo courtesy of Colleen Fazio
Nowadays, plenty of players love silver-panel amps. They might not always deliver the hallowed tones of their pre-CBS siblings, but these models certainly hold their own when stacked against many modern amps that command similar prices. If you own one that hasn’t been restored, when you service it or take it to get serviced, you’ll have some decisions to make.
The most important thing to do is consider your expectations. Los Angeles guitar tech Colleen Fazio, who posts extensive and informative vintage amp repair and restoration videos to her YouTube channel, calls herself a “minimally invasive” tech and says, “I always tell people, ‘If you want your amp to sound like a different amp, you should probably just get a different amp.’ Because each amp is designed to do its own thing.”
Vintage Fender Deluxe Reverbs: 1965 Black-Panel Vs. 1974 Silver-Panel
Watch the author test out these two vintage gems.
“My philosophy with vintage amps is do no harm. I don’t like mods,” says Alessandro. “I’m really against mods, because almost 100 percent of the time it ruins what something is supposed to be.” He also warns against any sort of modification that will change an amp’s intended character. “I do more un-modding of vintage amps than you can imagine. A Deluxe Reverb is not going to be a tweed Deluxe. It’s not going to be a little Bluesbreaker. It’s gonna be a Deluxe Reverb. Try and make it the best it is supposed to be.”
Alessandro advocates looking at the changes made by Fender in the silver-panel era with perspective and hindsight. “That circuit from ’64, ’65 is right,” he says. “So, when Fender started changing it through the years, they were making it less right.” When it comes to restoring a silver-panel amp to black-panel specs, Alessandro doesn’t necessarily consider that to be a mod, but, rather, “restoring from what their engineers changed and making it what it’s supposed to be.” He adds, “It’s kind of like an old computer. What do you do when your new software doesn’t work? You revert back to the old one.”
“I always tell people, ‘If you want your amp to sound like a different amp, you should probably just get a different amp.’ Because each amp is designed to do its own thing.”—Colleen Fazio
Some Black-Panel Mods
Whatever you’re doing, whether it’s servicing or making changes to the circuit, Alessandro stresses using the correct components. “People go in there and replace all the parts,” he says, “because this resistor is supposed to be 100k, and it’s reading 112. But it’s not that it’s reading 112 that’s the problem. It’s when they replace it with a 100k resistor and it’s not the right type.”
To get the most from your amp, Mosbergvik says “there are only a few solid things you should do that will really improve the amp in terms of tone.” While different models and years will have their own idiosyncrasies—including the push-pull boosts, master volumes, and larger transformers found in models from the latter part of the decade—here are a few things you or your tech might consider.
Speakers
Mosbergvik’s favorites for amps with 10" speakers are Weber 10A100s ($114 street), which he says are “pretty close to the Jensen P10R or CTS alnicos in 1964 black-panel Super Reverbs,” or Weber 10A125s ($119 street) “for a tad more punch and bigger/cleaner bottom end.” For ceramic speakers, he likes Weber’s 10F125s ($108), which he says are “like the CTS ceramics in some ’65 Super Reverbs.”
For amps loaded with 12s, George Alessandro specially designed the GA-SC64 ($144 street) with Eminence to capture the black-panel-era sound.
Bias Circuits
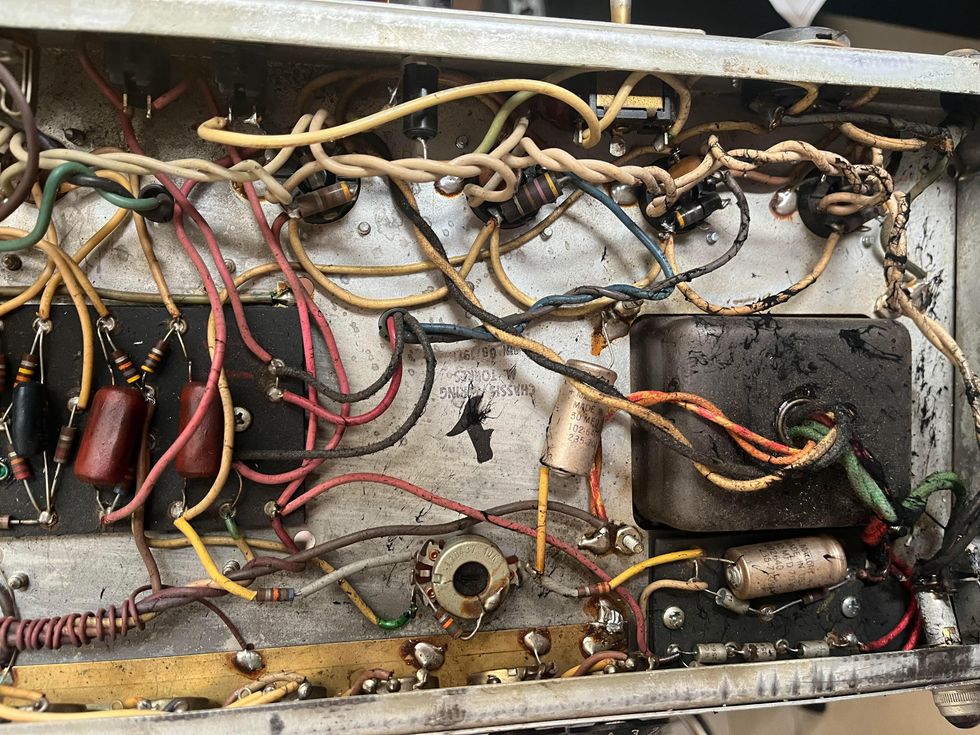
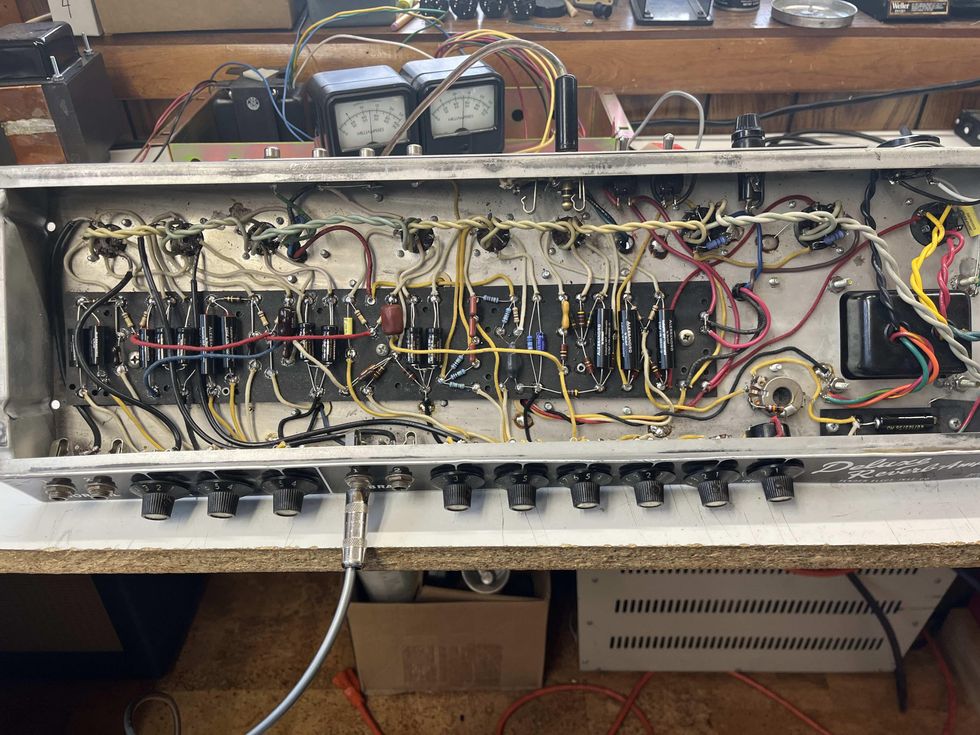
The gory guts of a pre-overhaul silver-panel Twin Reverb.
Photo by Colleen Fazio
By the ’70s, Fender switched all their fixed bias amps from a standard bias control, which allows users to raise or lower the bias on the power tubes but requires a matched pair, to a balance-style control, which accommodates non-matched power-tube pairs yet might not give those tubes the power they need. This creates bigger problems than simply purchasing a matched pair of power tubes and can have a negative effect on an amp’s tone.
“You can re-wire the control to be like the ’60s control, so you’re adjusting the bias,” says Fazio. “It’s a pretty simple re-wire. I would probably include that with a service. You’re not replacing any parts, you’re just re-wiring the configuration.”
Baffle Boards
Look at the sides to spot the differences. This Super Reverb has a screwed-in style baffle board.
This Super Reverb offers an example of a glued-in baffle board for speaker mounting.
“Try and make it the best it is supposed to be.”—George Alessandro
Early in the ’70s, Fender switched from using a screwed-in baffle to a glued-in baffle, so removing them can be tricky on the latter models. Mosbergvik says the glued-in design sounds “unbalanced” to his ears and points out that it is possible to switch back to the early screwed-in style if you’re already removing the baffle. “You’ll need to work to get it screwed in,” he explains. This includes adding supports to screw the baffle into. “It’s a lot of dirty work.”
If the baffle needs to be replaced, you’ll have to decide between a plywood baffle, a popular choice for many players who believe it changes the tone for the better, or stick with the original particle-board style, which is consistent with both silver- and black-panel models.
Phase Inverter Changes
All that is easy enough for us non-techs to wrap our heads around. But Fazio points out there are some finer differences to be found by looking at schematics.
The coupling capacitor is in the part of the circuit that connects the preamp signal to the output section. “A bigger value in the silver-panel amps increased the bass response. If you want tighter bass like the ’60s amps, you lower the value of that capacitor back to the ’60s specs, which is .001 µF, and a lot of the silver amps are .01. There are some exceptions, but those are common values to find.”
She also points out that the values of the plate resistors on the phase-inverter tube were lowered in the silver-panel amps to reduce gain, and those can be changed to original spec.
Good, Clean Work
This modern Deluxe Reverb has been hand re-wired to black-panel specs by George Alessandro, offering a great example of a clean, tidy circuit.
Photo courtesy of George Alessandro
It’s always good to remember that any change you make to your amp will affect the way it sounds and feels. If you have an amp you already like, you should especially keep that in mind and don’t feel any pressure to make changes that aren’t necessary. “If it has been modified and you like how it sounds, that’s cool. Silver-panel amps sound really good as they are, and I’ve heard really good modified ones, too,” says Fazio.
If you’re looking to purchase an amp that has been modified, it can be helpful to take a look at the circuit, when possible, even if you’re not a tech. Mosbergvik suggests inspecting to see “if it’s done tidy and properly, with twisted wires, and if the soldering work is done properly—the wires are cut to correct length, they are soldered with enough lead, etcetera.” This will at least help you decide the quality of work that has gone into the amp over the course of its decades of servicing.
One of the great things about these vintage specimens is that they’re easy enough to work on and it’s not hard to source parts. “Fender amps are so nice and so well designed,” says Fazio, “it’s pretty easy to bring them back to stock if you want to.” So, there’s a good chance you’ll be able to keep your amp in good working order for many years to come. And with some of these tips, you’ll be able to have it sounding better than ever.
1971 Fender Twin Reverb | Vintage Amp Repair | The Electric Lady
Watch as Colleen Fazio overhauls a 1971 Twin Reverb.
- Silver and Black: Tips for Buying Vintage Fender Amps - Premier ... ›
- Ask Amp Man: Beefing Up a Vintage Fender Vibrolux Reverb ... ›
- Wake Up Tired Amps with New Speakers - Premier Guitar ›
After eight years, New Orleans artist Benjamin Booker returns with a new album and a redefined relationship to the guitar.
It’s been eight years since the New Orleans-based artist released his last album. He’s back with a record that redefines his relationship to the guitar.
It is January 24, and Benjamin Booker’s third full-length album, LOWER, has just been released to the world. It’s been nearly eight years since his last record, 2017’s Witness, but Booker is unmoved by the new milestone. “I don’t really feel anything, I guess,” he says. “Maybe I’m in shock.”
That evening, Booker played a release celebration show at Euclid Records in New Orleans, which has become the musician’s adopted hometown. He spent a few years in Los Angeles, and then in Australia, where his partner gave birth to their child, but when he moved back to the U.S. in December 2023, it was the only place he could imagine coming back to. “I just like that the city has kind of a magic quality to it,” he says. “It just feels kind of like you’re walking around a movie set all the time.”
Witness was a ruminative, lonesome record, an interpretation of the writer James Baldwin’s concept of bearing witness to atrocity and injustice in the United States. Mavis Staples sang on the title track, which addressed the centuries-old crisis of police killings and brutality carried out against black Americans. It was a significant change from the twitchy, bluesy garage-rock of Booker’s self-titled 2014 debut, the sort of tunes that put him on the map as a scrappy guitar-slinging hero. But Booker never planned on heroism; he had no interest in becoming some neatly packaged industry archetype. After Witness, and years of touring, including supporting the likes of Jack White and Neil Young, Booker withdrew.
He was searching for a sound. “I was just trying to find the things that I liked,” he explains. L.A. was a good place for his hunt. He went cratedigging at Stellaremnant for electronic records, and at Artform Studio in Highland Park for obscure jazz releases. It took a long time to put together the music he was chasing. “For a while, I left guitar, and was just trying to figure out what I was going to do,” says Booker. “I just wasn’t interested in it anymore. I hadn’t heard really that much guitar stuff that had really spoke to me.”
“For a while, I left guitar, and was just trying to figure out what I was going to do. I just wasn’t interested in it anymore.”
LOWER is Booker’s most sensitive and challenging record yet.
Among the few exceptions were Tortoise’s Jeff Parker and Dave Harrington from Darkside, players who moved Booker to focus more on creating ambient and abstract textures instead of riffs. Other sources of inspiration came from Nicolas Jaar, Loveliescrushing, Kevin Shields, Sophie, and JPEGMAFIA. When it came to make LOWER (which released on Booker’s own Fire Next Time Records, another nod to Baldwin), he took the influences that he picked up and put them onto guitar—more atmosphere, less “noodly stuff”: “This album, I was working a lot more with images, trying to get images that could get to the emotion that I was trying to get to.”
The result is a scraping, aching, exploratory album that demonstrates that Booker’s creative analysis of the world is sharper and more potent than ever. Opener “Black Opps” is a throbbing, metallic, garage-electronic thrill, running back decades of state surveillance, murder, and sabotage against Black community organizing. “LWA in the Trailer Park” is brighter by a slim margin, but just as simultaneously discordant and groovy. The looped fingerpicking of “Pompeii Statues” sets a grounding for Booker to narrate scenes of the homelessness crisis in Los Angeles. Even the acoustic strums of “Heavy on the Mind” are warped and stretched into something deeply affecting; ditto the sunny, garbage-smeared ’60s pop of “Show and Tell.” But LOWER is also breathtakingly beautiful and moving. “Slow Dance in a Gay Bar” and “Hope for the Night Time” intermingle moments of joy and lightness amid desperation and loneliness.
Booker worked with L.A.-based hip-hop and electronic producer Kenny Segal, trading stems endlessly over email to build the record. While he was surrounded by vintage guitars and amps to create Witness, Booker didn’t use a single amplifier in the process of making LOWER: He recorded all his guitars direct through an interface to his DAW. “It’s just me plugging my old Epiphone Olympic into the computer and then using software plugins to manipulate the sounds,” says Booker. For him, working digitally and “in the box” is the new frontier of guitar music, no different than how Hendrix and Clapton used never-heard-before fuzz pedals to blow people’s minds. “When I look at guitar players who are my favorites, a lot of [their playing] is related to the technology at the time,” he adds.
“When I look at guitar players who are my favorites, a lot of [their playing] is related to the technology at the time.”
Benjamin Booker's Gear
Booker didn’t use any amps on LOWER. He recorded his old Epiphone Olympic direct into his DAW.
Photo by Trenity Thomas
Guitars
- 1960s Epiphone Olympic
Effects
- Soundtoys Little AlterBoy
- Soundtoys Decapitator
- Soundtoys Devil-Loc Deluxe
- Soundtoys Little Plate
“I guess I have a problem with anything being too sugary. I wanted a little bit of ugliness.”
Inspired by a black metal documentary in which an artist asks for the cheapest mic possible, Booker used only basic plugins by Soundtoys, like the Decapitator, Little AlterBoy, and Little Plate, but the Devil-Loc Deluxe was the key for he and Segal to unlock the distorted, “three-dimensional world” they were seeking. “Because I was listening to more electronic music where there’s more of a focus on mixing than I would say in rock music, I think that I felt more inspired to go in and be surgical about it,” says Booker.
Part of that precision meant capturing the chaos of our world in all its terror and splendor. When he was younger, Booker spent a lot of time going to the Library of Congress and listening to archival interviews. On LOWER, he carries out his own archival sound research. “I like the idea of being able to put things like that in the music, for people to just hear it,” says Booker. “Even if they don’t know what it is, they’re catching a glimpse of life that happened at that time.”
On “Slow Dance in a Gay Bar,” there are birds chirping that he captured while living in Australia. Closer “Hope for the Night Time” features sounds from Los Angeles’ Grand Central Market. “Same Kind of Lonely” features audio of Booker’s baby laughing just after a clip from a school shooting. “I guess I have a problem with anything being too sugary,” says Booker. “I wanted a little bit of ugliness. We all have our regular lives that are just kind of interrupted constantly by insane acts of violence.”
That dichotomy is often difficult to compute, but Booker has made peace with it. “You hear people talking about, ‘I don’t want to have kids because the world is falling apart,’” he says. “But I mean, I feel like it’s always falling apart and building itself back up. Nothing lasts forever, even bad times.”
YouTube It
To go along with the record, Booker produced a string of music videos influenced by the work of director Paul Schrader and his fascination with “a troubled character on the edge, reaching for transcendence.” That vision is present in the video for lead single “LWA in the Trailer Park.”
Note the cavity cover on the back, which houses the components of Andy Summers’ mid-boost system.
We’ve covered Andy’s iconic guitar and what makes it so special, so now we’ll get to building our own.
Hello and welcome back to Mod Garage for the second installment of the Andy Summers Telecaster wiring. We covered many of the details of this unique guitar last time, so now we’ll jump right in to assembling your own.
In general, you can use any Telecaster and convert it to Andy Summers’ specs. If you want to stay as close as possible to the original guitar, the way to go is an alder body—just like Andy’s, which is 2-piece—with a 3-tone sunburst finish and white double binding.
The neck should be quarter-sawn, 1-piece maple with a C profile, 21 vintage-style frets, and a 7.25" fretboard radius. Of course, you can choose your own specs here, too. The original guitar has a brass nut rather than bone or plastic, and it should be no problem to find a brass nut blank for a Telecaster. You will need different tools to work on it compared to bone, plastic, or graphite, so keep this in mind. If you do not have the right tools or don’t feel comfortable making nuts, you should leave this task to your local guitar tech. Summers’ guitar has Schaller M6 tuning machines, which are still available from the German Schaller company, and two chrome butterfly string trees. You may not really need two of them—usually one for the B and the high E string will do the trick, especially with a well-made nut.
The original has a heavy brass bridge plate with six individual brass saddles, which will increase overall weight significantly. You can still buy this type of brass bridge from several companies, but there are much lighter bridges on the market.
The stereo output jack is installed in a rectangular chrome plate, like on a Les Paul, which I think is superior to the typical Telecaster jack cup. Interestingly, the plate on Summers’ guitar is only held by two of four screws, but do yourself a favor and use all four to make this spot as strong as possible. You should attach the plate really tight, especially when you use an output jack with a tight grip for the plug.
“Electronically, there is nothing too specialized that you will need for the controls.”
The rest of the hardware is chrome and standard: two regular strap buttons, a standard Telecaster control plate, ’60s Telecaster flat-top knobs, a black ’60s-style top-hat switch knob on the 3-way pickup selector switch, and two flat-lever mini-toggle switches. You should have no problem getting all of these parts from any guitar shop. The pickguard is a 3-ply mint green pickguard with a standard humbucker routing for the neck pickup.
Electronically, there is nothing too specialized that you will need for the controls: a standard 3-way pickup selector switch, two 250k audio pots for master volume and master tone, a gain control pot for the booster, and two additional mini DPDT on-on toggle switches for switching the booster on and off and for the phase control of the bridge pickup. The resistance of the gain control pot depends on the booster you want to use: e.g. for the Fender Clapton mid-boost kit, a 500k type will work great.
For the bridge pickup, there is a standard early-’60s-style Telecaster single-coil pickup, and every pickup company will have something like this in their catalog. Because the bridge pickup is installed to an out-of-phase mini-toggle switch, your pickup will need three conductors, with the metal base plate separated from the pickup’s common ground, and a third wire that connects the bridge plate individually to ground. If you have a regular two-conductor model, you need to break this connection, soldering a third wire directly to the base plate.
Interestingly, the bridge pickup on Summers’ Tele is installed directly into the wood of the pickup’s cavity. I see no reason why you shouldn’t install it the regular way on your guitar.
Here’s a close-up of the bridge on Summers’ historic Tele.
Photo courtesy of Ten-Guitars (https://ten-guitars.de)
In the neck position, there is a ’59 PAF humbucker with a conventional two-conductor wiring installed directly into the pickguard in the standard way, with the open pole pieces facing towards the neck. The choice of late-’50s PAF copies has never been better than it is today. You can buy excellent versions from a lot of companies, just make sure to choose the correct string spacing, which is usually called “F-spacing” or something similar, and is usually 2.070" (52.6 mm). (Gibson spacing, or G-spacing, is 1.930" or 49 mm.)
You’ll need humbucker routing on your body to make it fit. If you don’t have a body with humbucker routing and don’t want to get your Tele body re-routed, you can consider one of the numerous stacked humbuckers that will fit into a standard Telecaster neck pickup cavity. My experience is that there is a noticeable difference in tone compared to a full-sized humbucker, and it will be a compromise.
Next is the active booster. Finding a good booster module and wiring it up is much easier than fitting it into the tight space of a Telecaster body. There are a wide range of available booster options. There are complete DIY sets available that include the PCB and all of the necessary parts to build your own, and there are also drop-in PCBs that are already populated, like the well-known Fender mid-boost circuit kit. You can also find mini-sized booster modules using high-quality SMD parts, which only require a fraction of space compared to the regular PCBs.
“Finding a good booster module and wiring it up is much easier than fitting it into the tight space of a Telecaster body.”
The available options include treble boosters, mid-boost circuits, full-range boosters, etc. Choose what you like best. The problem will be that you need to stuff it into a Telecaster body. As you know, there is not much space inside a Telecaster, and you need to add the booster itself, the 9V battery, an additional pot for controlling the booster, and two additional mini-toggle switches—one for turning the booster on and off, and the other to get the bridge pickup out of phase. This is a lot of stuff! On Summers’ guitar, this problem was solved by adding a large cavity on the back and closing it with a plastic back plate, as on a Gibson Les Paul.
A look inside the cavity for the mid-boost unit.
Photo courtesy of TeleManDon from Vancouver Island, BC (https://tdpri.com)
You can clearly see the two big routings for the booster’s PCB and the 9V battery, plus the additional pot to control the amount of boost as well as the mini-toggle switch to turn the booster on and off. If you are not afraid of routing two big chambers into your Telecaster’s body, this is a suitable way to go.
On a Telecaster, there are not many alternatives I can think of to fit all these parts. One possible way of saving space would be to use a stacked pot with two 250k pots for volume and tone, so you have the second hole in the control plate available for the gain control pot of the booster. Between the two pots, it should be no problem to place the two mini-toggle switches. Or you use a push-pull pot for the gain control to save one of the mini-toggle switches. The guitar will look much cleaner, at least from the front side. But you still have to put the booster PCB and the battery somewhere. A customer of mine did this by completely routing the area under the pickguard. But even with only a regular single-coil neck pickup, it was a really tight fit, so with a regular-sized humbucker, it will be close to impossible. So, you or your luthier will have to be creative, and I wouldn’t be surprised if a company offers Andy Summers Telecaster bodies with all chambers already routed.
Here we go for the wiring. Wherever possible, I tried to keep the diagram as clean as possible. The wiring of the booster is only an example and depends on the booster you want to use, but the basic wiring is always the same.
Here’s a helpful schmatic of the Andy Summers‘ Telecaster wiring.
Illustration courtesy of SINGLECOIL (www.singlecoil.com)
That’s it. Next month, we will take a deep look into guitar cables and wires, what really makes a difference, and how you can use this to reshape your guitar tone. So stay tuned!
Until then ... keep on modding!
PG’sJohn Bohlinger caught up with Moak at his Nashville studio known affectionately as the Smoakstack.
Grammy-nominated session guitarist, producer, mixer, and engineer Paul Moak stays busy on multiple fronts. Over the years he’s written, played, produced and more for TV sessions (Pretty Little Liars, One Tree Hill) and artists including Third Day, Leeland, and the Blind Boys of Alabama. But most recently he’s worked with Heart and Ann Wilson and Tripsitter.
Time Traveler
Moak is most loyal to a 1963 Stratocaster body that’s mated to a 1980s-vintage, 3-bolt, maple, bullet-truss-rod, 1969-style Fender Japan neck. The bridge has been swapped as many as four times and the bridge and neck pickups are Lindy Fralins.
Cool Cat
If there’s one guitar Moak would grab in a fire, it’s the Jaguar he’s had since age 20 and used in his band DC Talk. When Moak bought the guitar at Music Go Round in Minneapolis, the olympic white finish was almost perfect. He remains impressed with the breadth of tones. He likes the low-output single-coils for use with more expansive reverb effects.
Mystery Message Les Paul
Moak’s 1970 L.P. Custom has a number of 1969 parts. It was traded to Moak by the band Feel. Interestingly, the back is carved with the words “cheat” and “liar,” telling a tale we can only speculate about.
Dad Rocker
Almost equally near and dear to Moak’s heart is this 1968 Vox Folk Twelve that belonged to his father. It has the original magnetic pickup at the neck as well as a piezo installed by Moak.
Flexi Plexis
This rare and precious trio of plexis can be routed in mix-and-match fashion to any of Moak’s extensive selection of cabs—all of which are miked and ready to roll.
Vintage Voices
Moak’s amps skew British, but ’60s Fender tone is here in plentitude courtesy of a blonde-and-oxblood Bassman and 1965 Bandmaster as well as a 2x6L6 Slivertone 1484 Twin Twelve.
Guess What?
The H-Zog, which is the second version of Canadian amp builder Garnet’s Herzog tube-driven overdrive, can work as an overdrive or an amp head, but it’s probably most famous for Randy Bachman’s fuzzy-as-heck “American Woman” tone.
Stomp Staff
While the Eventide H90 that helps anchor Moak’s pedalboard can handle the job of many pedals, he may have more amp heads on hand than stompboxes. But essentials include a JHS Pulp ‘N’ Peel compressor/preamp, a DigiTech Whammy II, DigiTech FreqOut natural feedback generator, a Pete Cornish SS-3 drive, Klon Centaur, and Electro-Harmonix Deluxe Memory Man.
PG Contributor Tom Butwin dives into three standout baritone guitars, each with its own approach to low-end power and playability. From PRS, Reverend, and Airline, these guitars offer different scale lengths, pickup configurations, and unique tonal options. Which one fits your style best? Watch and find out!