
Hello and welcome back to Mod Garage. After writing the column about the Brent Mason Telecaster wiring in October 2021, I received a lot of requests from you about a more practical and non-invasive version of it. Well, you asked, and the Mod Garage delivers.
A lot of people don’t want to route an additional hole into their Telecasters to add a third pickup in the middle position, which is a massive task. I totally understand this, so let’s see what can be done instead, and let’s add some more tonal flexibility, which was another common request after that article.
The good news is a lot can be done. We touched on this multiple times in past columns: mimicking Stratocaster in-between tones with a Telecaster without having a middle pickup using half-out-of-phase wiring, for example. Some time ago we explored the Bill Lawrence way of doing this (“Mod Garage: The Bill Lawrence 5-Way Telecaster Circuit”) and the Jerry Donahue Telecaster wiring as well (“Decoding Jerry Donahue’s 5-Way Telecaster Wiring”). These two columns are great starting points to read about the basics of half-out-of-phase wiring and what it does.
In general, there’s nothing wrong with using these two wirings the way they are. But our goal is to get a little bit closer to the Brent Mason Telecaster wiring, plus add more tonal flexibility. Brent Mason’s wiring is straightforward—basically it’s a normal Telecaster wiring with an added middle pickup that has its own volume pot. Mason’s Telecaster is loaded with three humbucker pickups for trouble-free performance regarding hum and noise in both studio and live situations. But it doesn’t have any additional switching for splitting the individual humbuckers, so there are a lot more sounds under the hood to discover. If you need them or not ... well, it’s all up to you. The basic setup works well for Brent, and he can get his signature sounds in any given situation, but it’s not a crime to want more flexibility.
A lot of people don’t want to route an additional hole into their Telecasters to add a third pickup in the middle position, which is a massive task.
The basic plan for today looks like this:
1. Swap both pickups on your Telecaster for the correct Brent Mason models.
2. Add a triple-sound switch to each of the two pickups.
I will show you how to do this in a way you can integrate into any given Telecaster wiring, but to get the most out of it, I recommend combining it with the Jerry Donahue wiring. This way, you will receive an ultra-flexible Telecaster wiring that can also cover basic Stratocaster in-between tones.
Let’s start with the pickups. Brent uses Seymour Duncan pickups. If you want to get as close as possible you should use the following models:
- Bridge position: Vintage Stack Tele STK-T3b, which is a vintage-flavored, traditional-sounding humbucker with 4-conductor wiring.
- Neck position: Vintage Mini Humbucker, built-in 180 degrees flipped, so the open pole pieces are facing the bridge rather than the neck for more high-end and clarity in the tone. The pickup also sports a 4-conductor wiring.
If your Telecaster has the traditional vintage routing under the hood, the cavity for the neck pickup must be enlarged to make the mini humbucker fit, which can be a downside if you want to plug ’n’ play. If enlarging the routing is not an option for you, there are numerous humbuckers on the market that will fit into the routing, such as the Seymour Duncan Hot Rails and Vintage Stack Tele neck pickups. Almost every pickup manufacturer has such a pickup in its portfolio, so there are plenty of options.
Choosing a Stratocaster neck pickup will result in the same problem: They won’t fit into the standard vintage neck routing of a Telecaster.
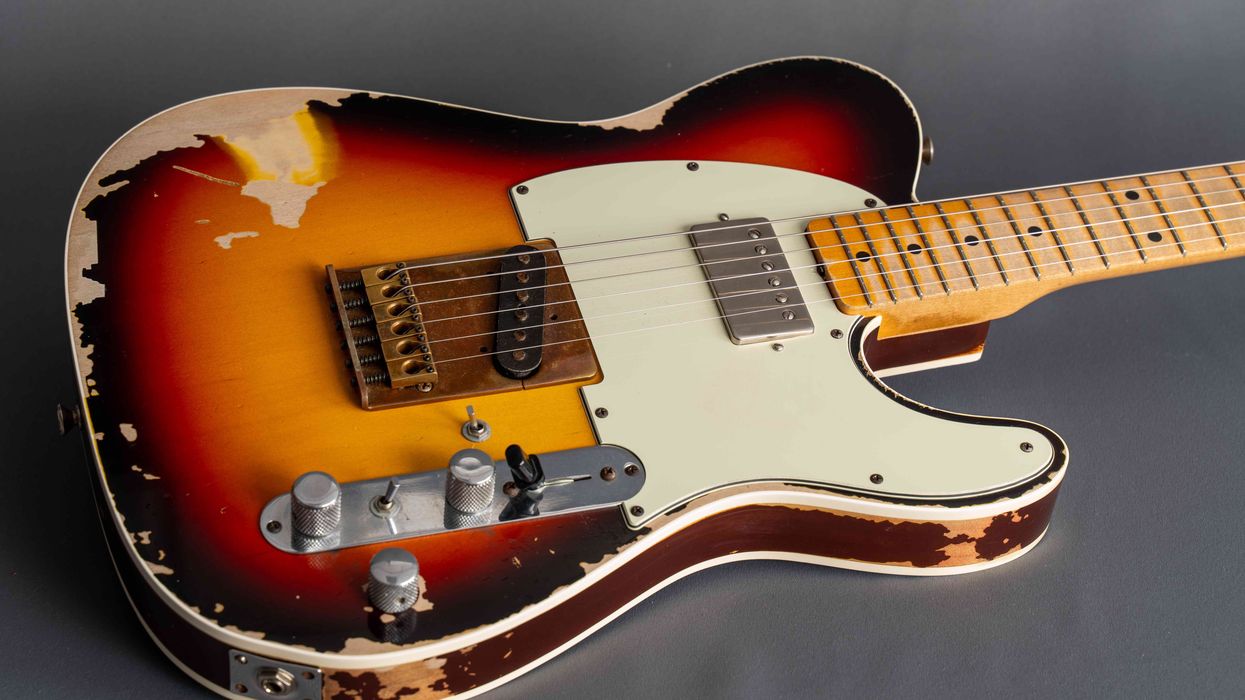
Rig Rundown: Brent Mason [2021]
It’s impossible to overstate Brent Mason’s impact on country and, arguably, even rock guitar. Over the course of his more-than-35-year career, Mason has perf...If you have a full humbucker routing under the hood, which you can find on a lot of newer Telecaster models, you’re good to go the easy way, but keep in mind that you’ll have to enlarge the hole in the pickguard as well. Don’t forget to build it in 180 degrees flipped, like on Brent’s Telecaster, to get closer to his trademark sounds.
Changing the bridge pickup should be a no-brainer: It’s an easy 1:1 swap.
For adding the two triple-sound switches, you’ll need two DPDT on-on-on mini toggle switches. You can’t use push-pull or push-push pots for this because they’re only available as on-on or on-off versions, so the third switching position is absent. But on common Telecaster control plates, it’s no problem to place two of these switches between the two pots and you don’t need Reiki hands to operate them. But again, two holes must be drilled, so it’s not an easy mod if you want to make it look good on the control plate, straight in one line.
With the switches, each of the pickups will have three operation modes and tones:
- Full humbucker (both coils in series)
- Real single-coil split (one coil shut down to ground)
- Single-coil-esque tone (both coils in parallel)
This, combined with the second pickup plus all the features of the Jerry Donahue wiring, results in a lot of different tones. While the humbucker and single-coil-esque tones are free of hum and noise, the real single-coil split mode will also behave like a real single-coil, picking up all kinds of hum and noises.
This switching was made popular by the DiMarzio company under the name “dual sound,” which I think is confusing because it’s a triple-sound switch, not a dual one.
The good thing is that this switching is placed directly after the pickup, so in layman’s terms this means: The four wires from the humbucker are connected to the switch but only two wires are going out of the switch (hot + ground), so it’s super easy to add this feature to any given wiring.
You simply solder the hot output of the switch to the spot where usually the hot wire of the pickup is connected and solder the ground coming from the switch where the ground wire of the pickup is usually connected, and you’re done. So, it’s absolutely independent from the wiring that’s coming after the switch, and you can transfer it to any given guitar.
You can’t use push-pull or push-push pots for this because they’re only available as on-on or on-off versions, so the third switching position is absent.
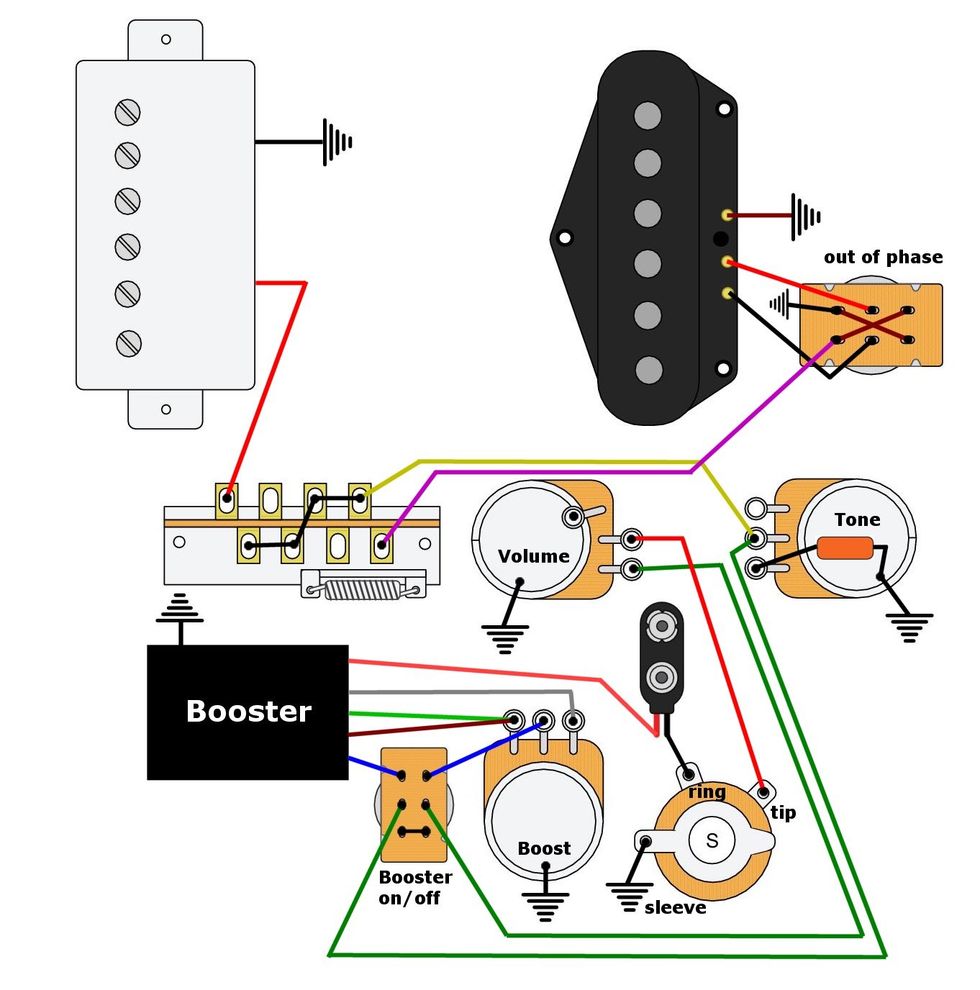
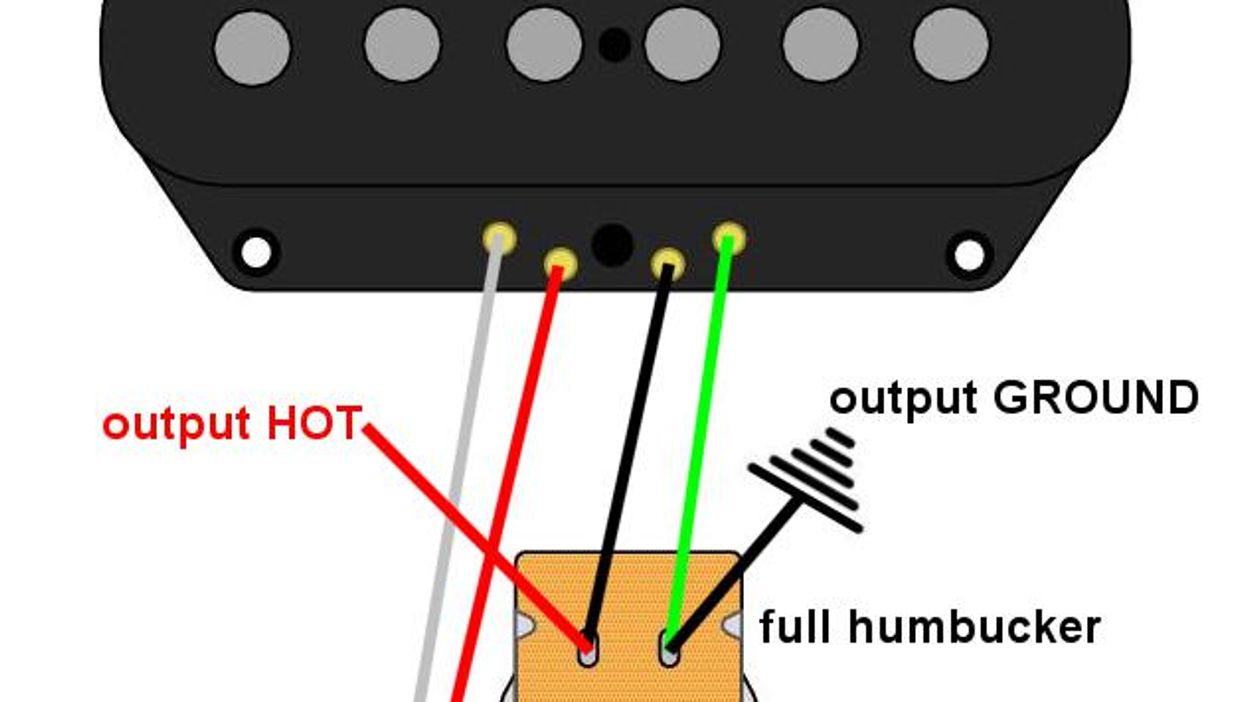
Now, let’s focus on the bridge pickup to demonstrate the wiring on the switch, as seen in Fig. 1. Please note the jumper wire on the switch and don’t forget to solder it. The middle position of the switch is the real single-coil split. With the toggle up, it’s full humbucker, and the toggle down is the hum-free single-coil-esque tone. I used the Seymour Duncan color code for this because we’re talking about Seymour Duncan pickups. If you want to use pickups from a different company, you’ll have to transfer the color code using one of the many transfer charts online.
The wiring of the neck humbucker is exactly the same: the bare ground wire of both pickups always goes to ground. After wiring both pickups to their mini toggle switches, you only have to connect four wires before you’re done. The hot output of the neck pickup switch goes to the spot where usually the hot wire of the neck pickup is connected to and the hot output of the bridge pickup switch to where the hot wire of the bridge pickup is connected to. Likewise, the ground output of the neck pickup switch goes to the spot where usually the ground wire of the neck pickup is connected, and the ground output of the bridge pickup switch goes where the ground wire of the bridge pickup is usually connected.
Congratulations, you’re done! This is a good alternative to the original Brent Mason wiring, and it adds many more possible tones and variations. Especially in tandem with the Jerry Donahue wiring, this is a serious tone weapon with an almost unlimited number of sounds.
That’s it for now. Next month we’ll continue with another guitar mod, so stay tuned. Until then ... keep on modding!